

This past Christmas, my brother gave me a Kindle Fire. Amazon is selling the Fire at a great price, and — paired with an Amazon Prime subscription — it’s the perfect companion for streaming movies and TV shows while on the go. What speaks against the Fire is the lack of apps and the aggressive Amazon ads on the lockscreen. But we’re about to fix that — without rooting the device!
 Fire, 7" Display, Wi-Fi, 8 GB, Black
Beautiful 7" IPS display (171 ppi / 1024 x 600) and fast 1.3 GHz quad-core processor. Rear and front-facing cameras.
Fire, 7" Display, Wi-Fi, 8 GB, Black
Beautiful 7" IPS display (171 ppi / 1024 x 600) and fast 1.3 GHz quad-core processor. Rear and front-facing cameras.This article demonstrates how to install the Google Play Store on a 5th generation Kindle Fire 7″ and remove the lockscreen ads, all without rooting and using a Windows PC.
While Amazon preps the Fire with its own Appstore and offers some otherwise paid apps for free via Amazon Underground, several Google apps, including Gmail, are not available on the Amazon Appstore. For some, that’s a deal breaker.
While rooting the Kindle Fire would allow you to install a standard Android version and thus the Google Play Store, you would lose the interface optimized for consuming Amazon Prime. More importantly, rooting can void your warranty and — in the worst case — brick your device.
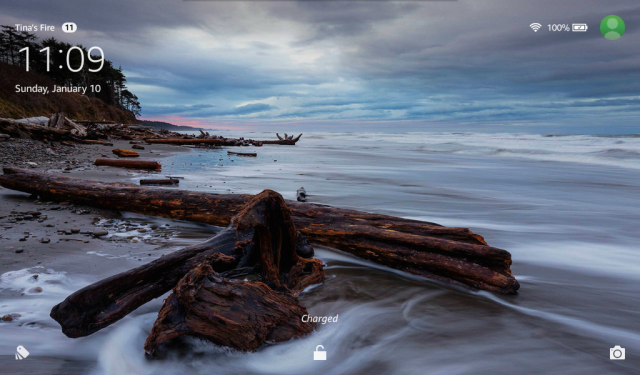
Fire OS, the operating system running on the Fire, is a custom version of Android. And with a few tweaks, you can install the Google Play Store and remove lockscreen ads — no root access required. When you’re done, your lockscreen will resemble the screenshot below; this looks so much better than a screen covered in Amazon ads!
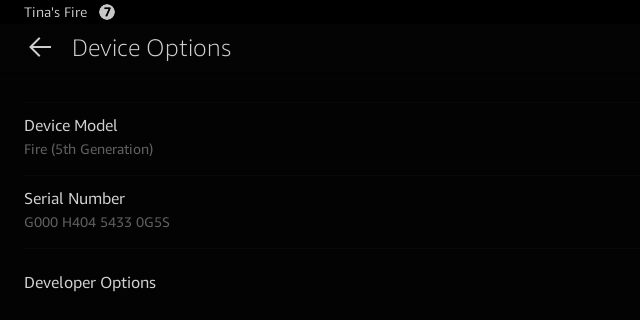
Before we start, you have to enable developer options on your Fire. Go to Settings > Device Options and scroll down to Serial Number. Then tap the serial number entry seven to ten times, until Developer Options show up underneath.
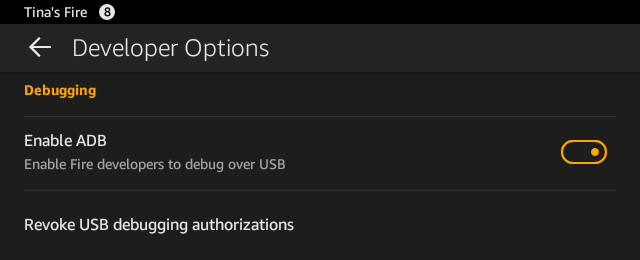
Now open Developer Options and under Debugging turn on Enable ADB.
To perform ADB (Android Debug Bridge) debugging on Windows, you’ll need to install the Google USB Driver. You can do this manually, or you can use RootJunky’s Amazon Fire 5th Gen SuperTool.
Before you proceed…
Meanwhile, you should have downloaded and unzipped RootJunky’s SuperTool. Time to connect your Fire to your computer. At this point, you might see a popup regarding ADB debugging mode — confirm and proceed. Make sure the Fire shows up under This PC.
Next, launch the first batch file in the SuperTool folder: 1-Amazon-Fire-5h-gen.bat
If everything works, you should see the following screen on your desktop.
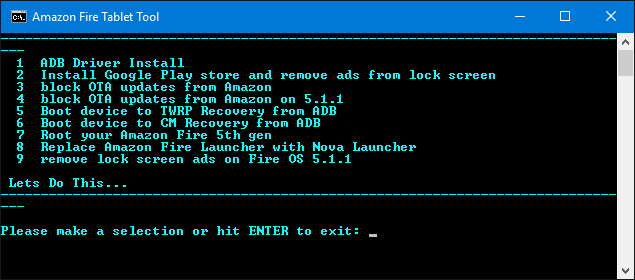
To install the ADB driver, press 1 and hit ENTER. You will see a second screen with two options.
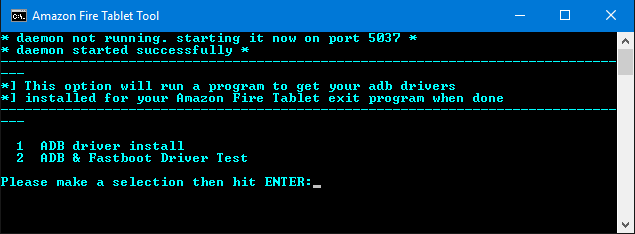
Again, press 1 and hit ENTER. Another screen will remind you which conditions must be met before you can proceed.

Press any key to continue and follow the instructions on the screen. At this point, you’ll have to do a few steps manually.
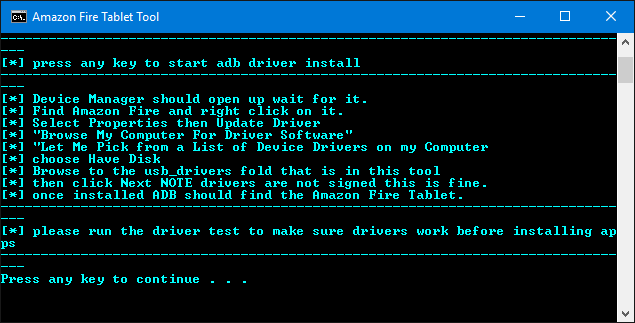
The Windows Device Manager will open automatically. Find the Fire under Universal Serial Bus devices, right-click and select Update Driver Software… From here, choose Browse my computer for driver software > Let me pick from a list of device drivers on my computer > Have Disk… and browse to the usb_drivers folder that came with the SuperTool, select the android_winusb.inf file, and click Open, followed by OK.
If you encounter an error message at this point, chances are you didn’t disable the driver signature enforcement in Windows 8 or 10 (see below).
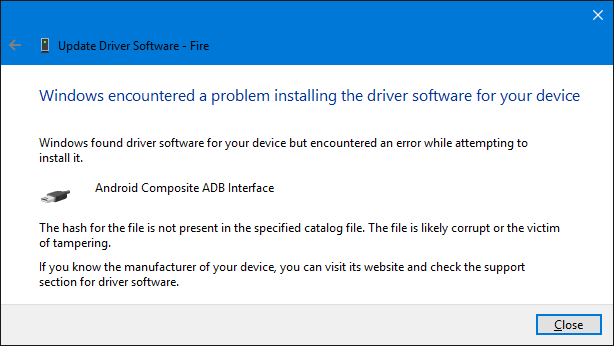
If you succeeded, return to the SuperTool and press any key to continue, followed by ENTER to return to the initial SuperTool menu. Now we’re ready to tweak Fire OS.
All the steps explained in this article are also demonstrated in the video below.
If you don’t already have it open, launch the 1-Amazon-Fire-5h-gen.bat SuperTool. To install the Google Play Store and remove lock screen ads, press 2 and hit ENTER, followed by any key to confirm the conditions. If all goes well, SuperTool will go through four installation stages.
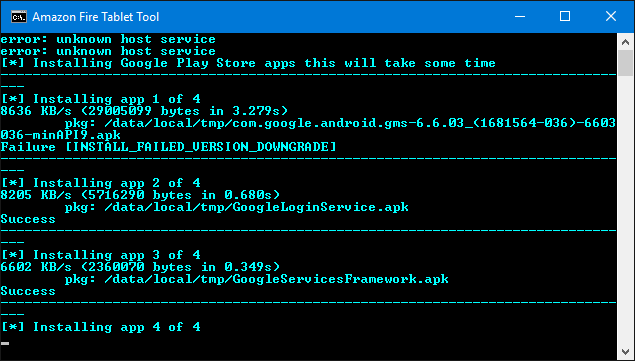
If you’re running into an emulator-related error at this point, open the Windows Task Manager and make sure any emulators you were running (hint: BlueStacks) are completely turned off.
To successfully follow the instructions above, Windows 8 and Windows 10 users will need to turn off the enforced driver signature.
Windows 8: Press the keyboard shortcut Windows key + C to open the Charms menu, then go to Settings > More PC Settings > General. The following steps are identical to Windows 10.
Windows 10: Press the keyboard shortcut Windows key + I to open the Settings menu, then go to Update and Security > Recovery.
Under Advanced Startup, click Restart Now.
On the reboot screen, choose Troubleshoot > Advanced options > Startup Settings > Restart.
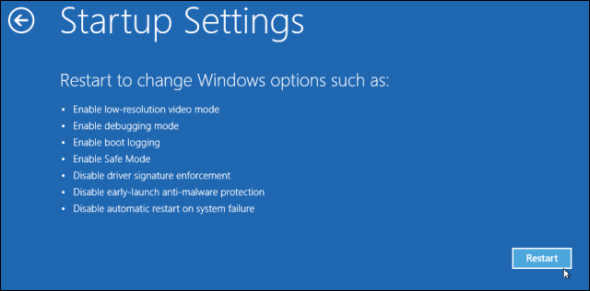
You’ll find yourself on the Startup Settings screen. Here, choose option number 7: Disabled driver signature enforcement.
After your computer booted, you will be able to install drivers that weren’t signed digitally. Once you restart again, the driver signature enforcement will be re-enabled.
The Amazon Fire isn’t the lightest, thinnest, or otherwise best device on the market, but it offers great bang for your buck. Once you successfully followed this guide, you can enjoy the best of both worlds: a user interface optimized for Amazon Prime and all of your favorite Android apps from the Google Play Store.
And now you. Which apps are you missing from Amazon’s Appstore? Have you found any other tweaks that don’t require rooting? Share your tips in the comments!


 Gran Turismo Sport Wiki – Everything you need to know about the game .
 10 most memorable Video Games inspired by Terminator - 2015
 A First Look at The Elder Scrolls Online
 The Fall of Halo 4: Addressing Halo 4s Declining Popularity
 Top 6 Ways To Earn Money Fast In Assassin's Creed Syndicate