If you’ve weighed the reasons to get a PS4 over an Xbox One and chose to go with Sony for your current-gen experience, you’ve made a great choice! Along with some awesome exclusive games, the PlayStation 4 allows users to swap out its hard disk drive (HDD) in just a few minutes. By comparison, the Xbox One relies on external hard drives for increased space, which the PS4 doesn’t support.
In this tutorial, we’ll completely step through how to upgrade the PS4’s HDD, along with some suggestions for what drive to purchase.
Before you go ahead and replace the stock PS4 hard drive, you’ll need a new one to replace it with. You have three main options:
IGN has put the three to a test if you’re into hard numbers, but the best choice depends on your needs. An SSD is the most expensive option, and frankly, the slight speed gain isn’t worth it.
Consider this: if you bought a new car for $20,000, would you pay $18,000 for an upgrade that gave it an extra five horsepower or another mile per gallon? That would be silly, and it’s virtually the same with a PS4. Your system cost $400, and paying $400 for a slightly faster terabyte drive isn’t cost-effective. It might be possible to find a better price with PriceZombie, but still wouldn’t be worth it.
The main point in deciding between a hybrid drive and a regular HDD is how much space you require. The stock PS4 drive is 500 GB (~407 GB free after initialization), so getting a terabyte drive doubles that space. If that’s enough for you, a 1 TB hybrid drive is your best bet; you’ll have approximately 861 GB free after installing the PS4 system software.
With PlayStation Plus free games and 40 GB+ installs even for games on a disc, you might find that 1 TB is not enough. Unfortunately, you’re not able to find a hybrid drive 1.5 TB or larger that will work in the PS4. If you’re going to go big, I recommend getting a 2 TB HDD. For around $40 more than a 1 TB, you can quadruple your current drive space, and shouldn’t have any worries about storage for a long time.
If you need a specific recommendation:
If you decide not to go with any of these choices, be sure that whatever drive you choose is 2.5 inches (a laptop drive), no thicker than 9.5 mm, larger than 160 GB (duh), and is Serial ATA (SATA) compatible. As a shortcut, read the reviews and answers sections on Amazon (search for “PS4″) to make sure others have successfully used them already.
Okay, now that you’ve selected an awesome new drive to put in your PS4, let’s walk through the procedure. You’ll need the new drive, a Phillips head screwdriver, and a flash drive that’s over 1 GB for the system software install.
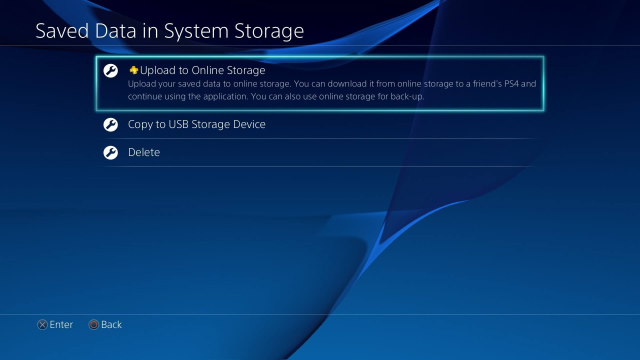
Just as it’s important to back up your computer in case of a drive failure, you need to back up your PS4’s data since you’re starting from a clean slate. This includes save game data and any screenshots or video clips you’ve captured. If you’re a PS+ subscriber, you can back up this data to the cloud by going to Settings > Application Save Data Management > Saved Data in System Storage > Upload to Online Storage. From here, simply choose each game you have, and upload all of its save data to your PS+ cloud storage.
If you’re not a PS+ subscriber, you can offload your saves to a USB device. Go to the same menu as above, but choose Copy to USB Storage Device and follow the same steps to copy your saves to a flash drive.
To save any captures you don’t want to lose, go to Settings > System Storage Management > Capture Gallery, which will allow you to see everything you’ve recorded. You can press Options and then Copy to USB Storage Device, or click the Share button to upload pictures to Facebook for safekeeping. For videos, use the same USB method, or upload them to Facebook or YouTube. Don’t worry about backing up your games; you’ll have to reinstall those after the swap.

Once you’ve done this, you’ve backed up everything you can. Make sure you know your PSN account login information, and then proceed!
First, shut down your PS4 completely. Make sure that the light on the system is off; if it’s orange, then Rest Mode is on and you need to start it up so you can shut it down properly. Once it’s fully shut down, remove all cords and USB devices from it. You should have the system totally isolated.
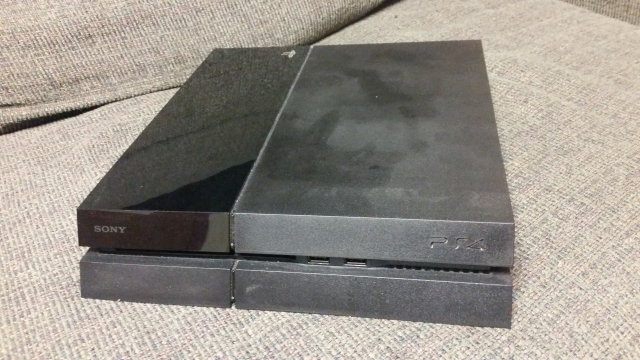
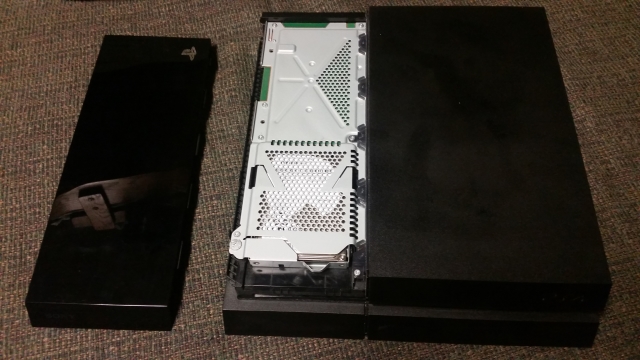
The PS4 has two sections on the top: one has a matte finish and the other is glossy. While facing front, slide the glossy part left, away from the center of the system; it should come off without any struggle.
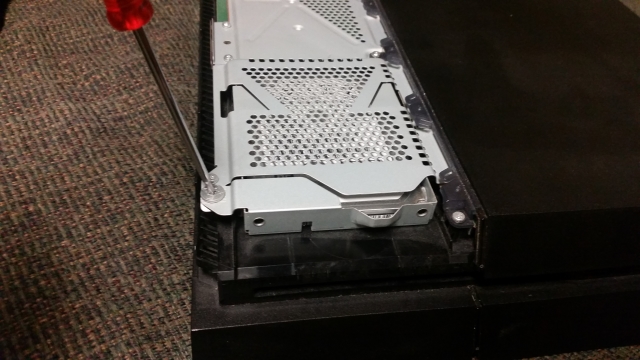
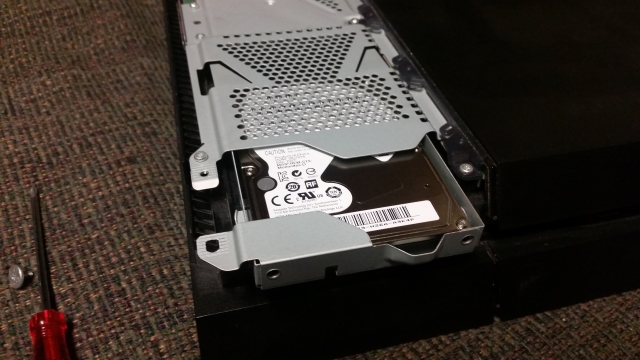
Next, you’ll see a single screw holding the HDD in place. It’s silver and has the PlayStation symbols on it. You’ll need a tiny Phillips head screwdriver for this; I used the smallest one in the kit. As a reminder, turn the screw left to loosen. Be gentle and take care not to strip it. Once it’s out, set it in a safe place since you’ll need to replace it in a moment.
Now that the screw is free, pull the HDD enclosure out towards you. You’ll notice that it’s held securely in place in its bracketing.
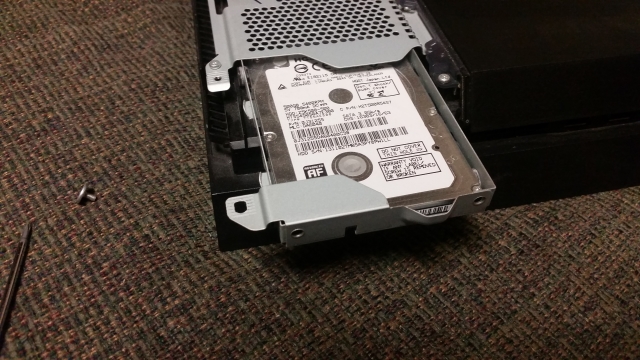
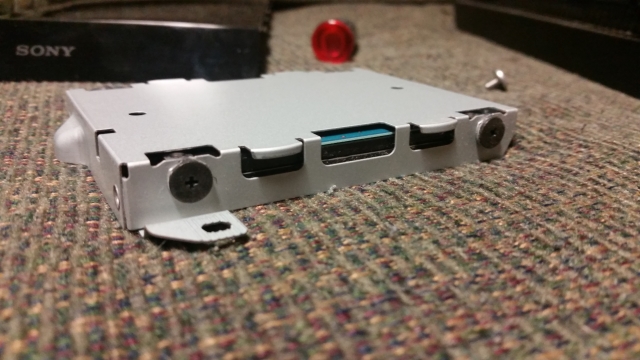
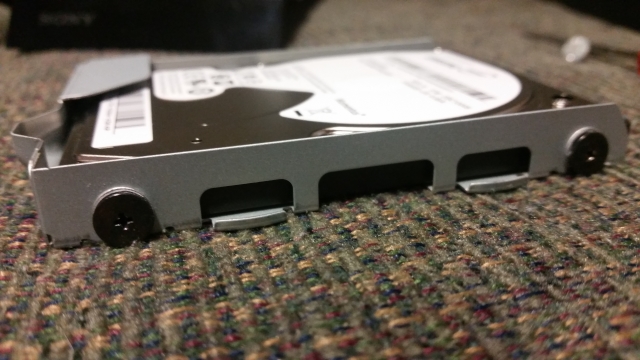
Around the enclosure, you’ll see four screws (one is kind of hidden under the “handle”) that you need to remove to free the actual drive. Again, don’t be too rough on them and make sure you don’t lose them once they’re free. One of these screws gave me some trouble coming out; if this happens to you try using the next larger size screwdriver, which should bring it out easily. As you remove screws the drive will want to slide around, so watch out.

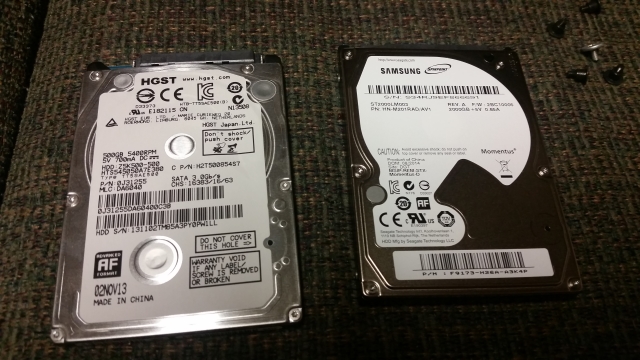
Now the old HDD is free and you can remove it. Set it aside, but don’t throw it out! Place your new drive in the same way the old one was facing; it should fit in perfectly.
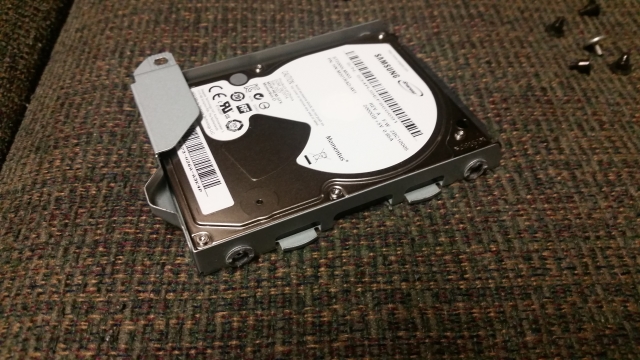
From this point on, you’re working in reverse. Now you need to replace the four screws that hold the drive in tight. Remember: lefty loosey, righty tighty, and don’t tighten them beyond a reasonable amount.
The bracket is whole again, so just slide it back into the system where it was before. The little “handle” should be facing out. Grab the PlayStation screw and screw it back in — not too tight! Once it’s in, you can snap the plastic part back on the way it came.
Now the new HD is installed; congratulations! You’re not quite done, however. Now, you need to reinstall the PS4 system software. Sony has full instructions if you need them, but as a summary:
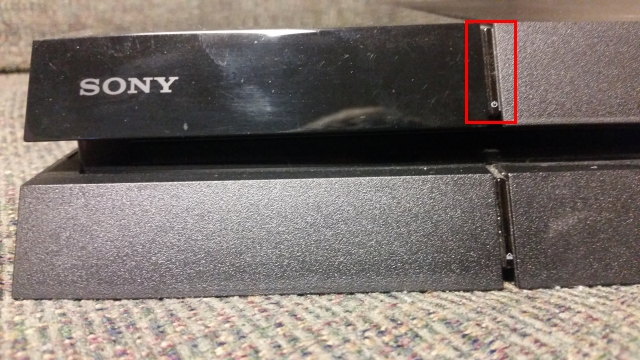
On your flash drive, make a folder called “PS4″ (no quotes, all caps) at its root. In the PS4 folder, make another folder called “UPDATE”. Then download the system software update from Sony and place it in the UPDATE folder. Assuming your PS4 is turned off, press and hold the power button for several seconds until you hear two beeps. The power button is concealed, so if you forgot where it is, here’s a reference.
You’ll be in Safe Mode, where you can choose Option 7: Initialize and Reinstall System Software. Click through the prompts and the PS4 will take a few minutes to ready itself. Grab a drink while you wait.
After the PS4 returns control to you, it will be as if you’re beginning from a fresh install. You’ll need to sign in with your PSN account, then you can fix your settings, re-download your games from the PlayStation Store, and restore your saves by reversing the above process: Settings > Application Save Data Management and then either Saved Data In Online Storage or Saved Data on USB Storage. Note that you need to “own” a game before you restore its save, so you need to put the Battlefield 4 disc in and let it install before you restore its save data, for instance.
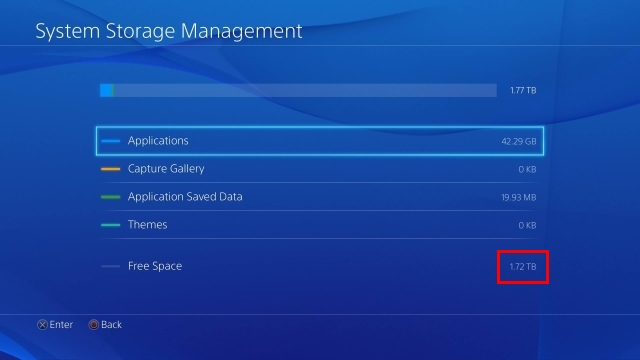
Other than that, you should be good to go. As mentioned above, digital games are linked with your account so you won’t have any issues there, and you backed up your saves so everything is as it was. After all was done, I had a beautiful 1.7 TB free!
Now you have plenty of space, a slight speed boost, or both added to your PS4 – and it took less than an hour. It’s admirable that Sony made upgrading the HDD so easy, ensuring that gamers will never run out of space. As an added bonus, if you have a PS3, you can put the old 500 GB hard drive in there so you get two upgrades for the price of one. See the full guide to upgrading the PS3 HDD from James if you have a PS3. If not, hold onto that old drive, as it will likely come in handy someday.
Looking for some new games to put on that fresh drive? Check out our review of The Evil Within, or look ahead to 5 fantastic games coming in 2015.
Will you be upgrading your PS4’s hard drive? Which option are you thinking about and why? Start a discussion in the comments!
Image Credits: Cartoon serviceman Via Shutterstock