Twitch may be the center of the universe when it comes to streaming live gameplay, but setting up a stream there can be a little intimidating. You need to download and setup streaming software, decide how to arrange your broadcasting windows, and more.
If you’ve been afraid to start streaming gameplay, Broadcasting might be the useful Steam feature you’ve been waiting for. Read on to see how you can find streams, and setup your own!
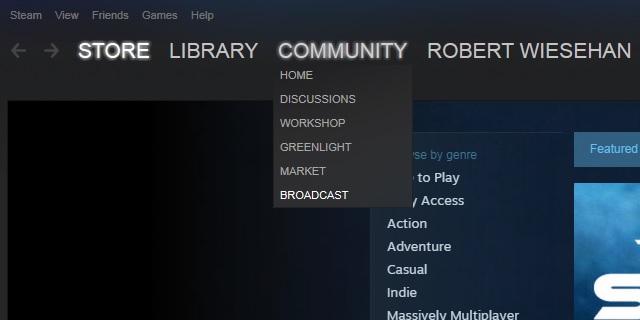
If you’re just looking for all of the streams currently live on Steam, all you need to do is click the Broadcasting link under the Community drop down menu at the top of window.
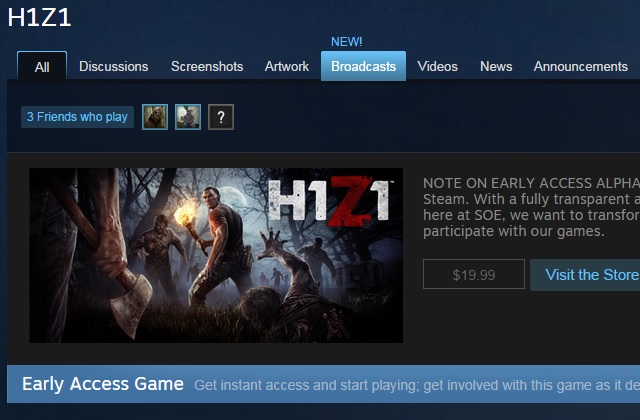
If you’d like to only see streams for a specific game, you’ll want to travel to that game’s Community Hub. You can reach any game’s Hub from its Store page, or from its entry in your Library if you own it. Once you get there, the Broadcasts button will be near the top of the page.
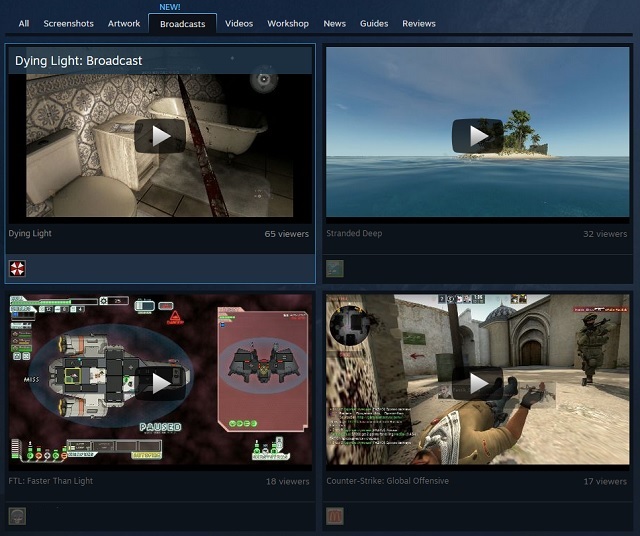
Live broadcasts are arranged so that the most popular ones are listed first. Take a look through your options and see if anything appeals to you, or search for a specific game or Steam user at the top of the page.
Unfortunately, the system doesn’t have any tags to note the broadcaster’s native language yet, so for now, you may stumble into a stream or two in a language you don’t understand.
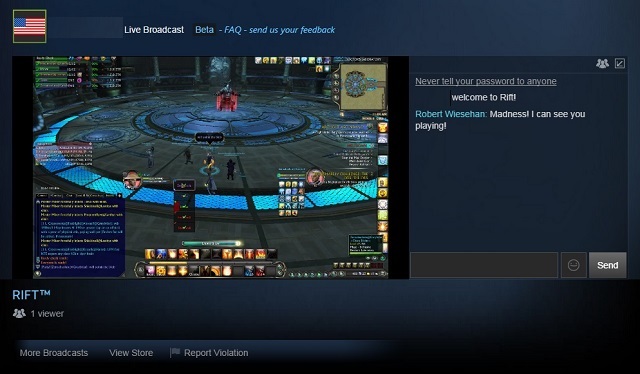
Once you select a stream, you’ll find a layout that’ll be very familiar if you’ve ever viewed streams on Twitch or a similar service. The chat box on the right lets you chat with the broadcaster and other viewers.
In my experience, the delay between sending a message, and hearing the notification arrive on the broadcaster’s end was somewhere around 10-12 seconds, but that may differ based on a host of variables like connection speeds and traffic. Note that this isn’t due to the messages taking longer to arrive, but rather due to the delay in the broadcast reaching you, the viewer.
If you think you’d like to take the plunge into broadcasting, make sure you tweak the settings before you go live so that you don’t run into any surprises. The path to your broadcast settings is as follows:
Steam > Settings > Broadcasting
Here’s a quick tour of what you can customize.
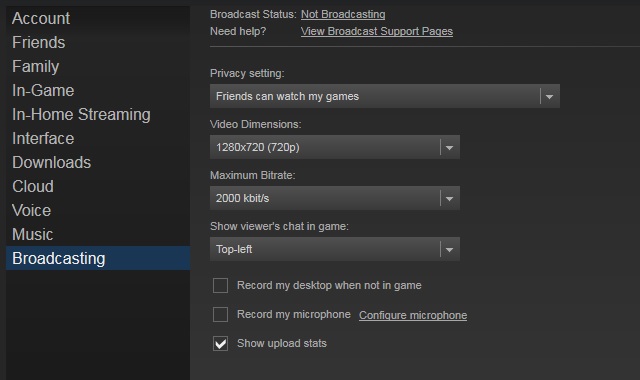
Privacy Setting – Decide if you want to lock out broadcasting entirely, approve viewing requests individually, open your gameplay to all friends, or broadcast to the public. Keep in mind that if you choose either of the latter two, people may drop in on anything you launch through Steam, though you will be notified when they arrive.
Video Dimensions – The resolution of your outbound broadcast. The higher you set it, the sharper the picture will be, but mind the next option.
Maximum Bitrate – Bitrate can refer to a number of things, depending on the context. Here, it determines the maximum speed at which your broadcast will upload. If you set it too low for the resolution you chose above, your viewers may see dropped frames and other interruptions. Your Internet service provider may also enforce a maximum upload rate on your service.
If you’re not sure what to choose, try to meet these rates at absolute minimum. If you can exceed them by a step or two, that much the better.
1080p – 3000 kbit/s
720p – 1500 kbit/s
480p – 1000 kbit/s
360p – 750 kbit/s
Show Viewer’s Chat – This determines which corner of your screen will show messages from your viewers, assuming you don’t deactivate the feature entirely. The messages only appear briefly, so if you miss them, you’ll have to catch up in your Steam overlay. The overlay is bound to (Shift + Tab) by default.
Record Desktop – If checked, Steam will broadcast your desktop if you tab out of fullscreen or minimize your game. If unchecked, Steam will display a placeholder image, keeping your desktop private.

Record My Microphone – If this is checked, you’ll be able to talk directly to your viewers rather than typing back to them. A small microphone icon by the LIVE status indicator will remind you that people can hear you. Mind the delay mentioned above.
See Upload Stats – Like it says, this lets you see your upload stats. This information can help you troubleshoot your broadcast.
Always Show Live Status – This option only appears if you make your broadcasts public to all users. Leaving it checked displays a LIVE reminder in the corner of your screen at all times.
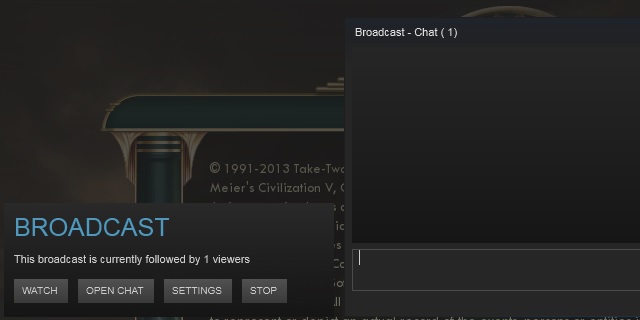
Once you start playing, you’ll broadcast as soon as a user chooses to watch your stream. If you’d like to specifically invite friends to watch, you can do so from their names on your Friend List. Remember to answer their chat messages in your Steam Overlay if you’re not using a mic.
If you want to stop broadcasting without closing your game, just go to the Stop button in your Overlay as shown above.
Would you like our community to watch you play? Leave your Steam name and what you’ll be playing publicly in the comments so they can find you!


 Dragon Fin Soup Wiki – Everything you need to know about the game .
 Destiny Guide: How To Jump Crota's Bridge With Every Class
 Star Wars: Battlefront How to Find All 5 Collectibles in Survival Tatooine
 Fallout 4: How to Throw Grenades Better
 Titanfall level unlocks and XP requirements