

Virtual Reality is taking off in a big way – Valve, HTC, Samsung, and Facebook are all shipping high-end virtual reality hardware in the near future. On the software side, dozens of major studios are developing for the new hardware, and all of them freely admit they have no idea what they’re doing.
It’s like the early days of DOOM and Wolfenstein all over again. Nobody knows what a good VR game looks like, and the field is open for indie studios to become major players. If you want to make videogames, this may be the best opportunity you’ll ever have to make a name for yourself.
So, let’s say you want to get involved. The tools are more user-friendly than ever, and they’re almost all free. But where do you start? This guide will provide you with all the tools and info you need to get started – entirely for free.
Ready? Let’s get to it.
Get Started Making Virtual Reality Games in Unity 5 for Free
To get started making VR games, you only need three things:
Aside from that, everything else you need is free. In terms of software, we’ll be using:
First, let’s start by getting everything installed. Download and run the installers for Unity and GIMP. This should be pretty self-explanatory. When you open up Unity for the first time, it’ll prompt you to create an account: do so, and be sure to remember your username and password.
Inside Unity, create a new project (be sure to create a “3D” project — not “2D”). Set the project directory to My Documents / My Project.
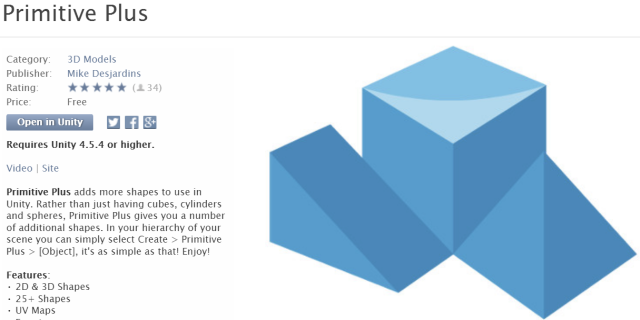
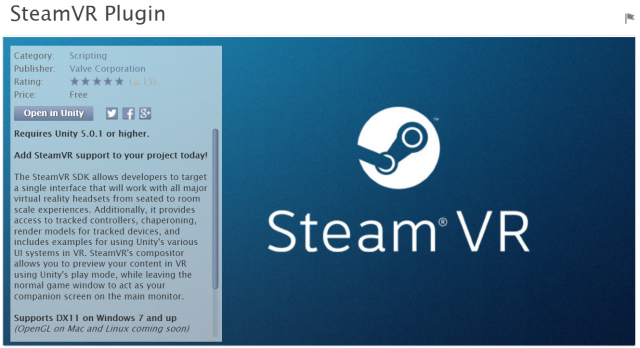
Now, use your browser to go the the Unity Asset Store, and log in using the same credentials. This will give you access to developer tools and resources. Use the Primitive Plus and SteamVR links above, locate the packages, and click the ‘Open in Unity’ button in the upper left hand corner. Because these are free assets, you won’t need to pay for them – others may not be free, so be careful. Follow the prompts that come up, and import these packages into Unity. You should see new folders under the ‘Project’ sub-menu. It may take a minute for them to download, so be patient and don’t close Unity until they finish.
Unity is extremely easy to use if you’ve ever programmed before. If you aren’t familiar with C#, spend some time familiarizing yourself with the syntax (try this excellent interactive tutorial). If you’ve never done any programming before at all, do this step as well, and then spend some time working your way through the puzzles on Project Euler. This will help you to familiarize yourself with the kinds of problems you’ll tackle in programming, and the kind of problem solving skills you need.
Once you feel comfortable solving problems with C#, I recommend spending some time exploring Unity using their excellent beginner tutorials. You can also use our very own crash course to Unity. I’ll be providing short explanations of all the components I use, but there’s a lot of valuable information there that will serve you well as you attempt larger projects.
To use a Unity script, you first need an object to attach it to. Inside the editor, you can create 3D objects in one of three ways.
If you import them, or drag them into the assets folder, they’ll show up in the ‘Project’ sub-window. You can put them in the game by selecting the ‘Scene’ tab and dragging them onto it. You should then see them appear in the world. The control toggles in the upper left hand corner will allow you to scale, rotate, and position them to your liking. Objects can be ‘parented’ to one another (causing them to rotate and move together) by dragging their names onto each other in the ‘Hierarchy’ tab.
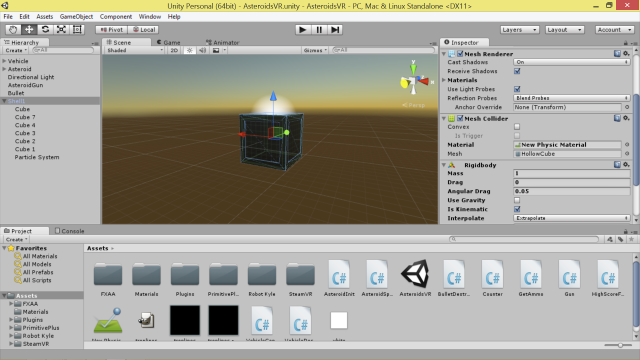
Once an object is in the scene, you can attach one or more scripts to it. These scripts make the object come to life. They make guns fire, bullets move, and characters walk and talk.
To add a script, select the object you want to control in the ‘Scene’ or ‘Hierarchy’ tabs. The ‘Inspector’ tab will change to show all the components attached to the object in question. A typical object will look something like this, and contain a few elements:
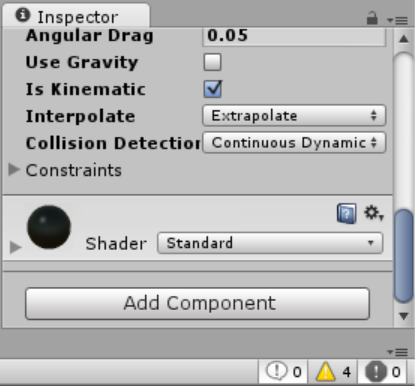
From the inspector tab you can add a new script using the ‘Add Component’ button at the bottom. From here, you can either add a script you’ve already created, or you can make a new one. Change the language to ‘C#,’ enter the name you want, and hit ‘create.’ This will add a new (blank) script to the object. Double-clicking on the name of the script in the Inspector tab will open the script in MonoDevelop, Unity’s code editor.
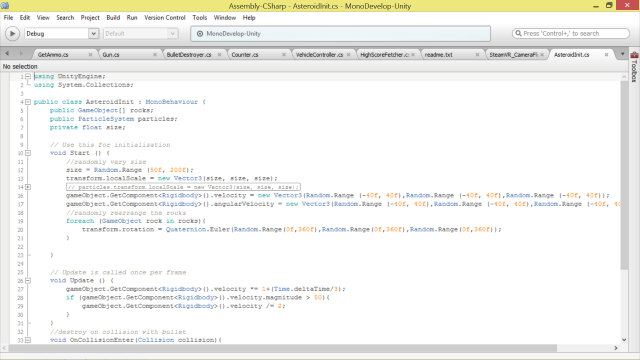
Inside your new file, you’ll see a ‘Start’ and ‘Update’ function. ‘Start’ runs when the object is first created. Do any setup you need there. ‘Update’ runs every frame, and is where most of the logic should go.
To access the components of the object, you can type ‘gameObject.Renderer,’ ‘gameObject.rigidbody,’ etc., depending on what element you want to control. Public variables declared before the ‘start’ function will be visible in the editor, making it easier to tweak them. For more information on how to interact with various system elements, check out the Unity manual.
This is a simple script I created that causes an object to rhythmically expand and contract, based on a sine wave. Create a cube in Unity, add a script, and copy the script into the ‘Update’ method. After you save it and press the ‘play’ button in the editor, you should see the cube expanding and contracting. Make sure the ‘Camera’ object is positioned so that it can see the object!
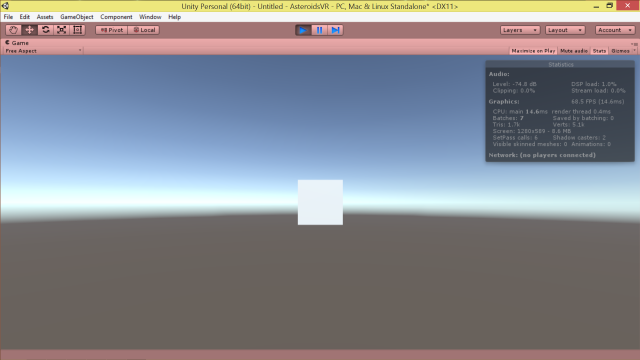
Now that we’ve set up a basic Unity scene, let’s get it to display on your VR headset. We’ll be using the SteamVR plugin, which will render to both the Oculus Rift, and the HTC Vive when it’s eventually released. It’s an easy way to develop for both.
In the ‘Project’ tab, go to the SteamVR folder, and open the ‘prefab’ sub-folder. You’ll see several entities ready for you to use. Drag the ‘CameraRig’ and ‘SteamVR’ prefabs into the scene. These are already set up with everything you need. Move them into your scene (positioned at the same point). Move them so that they can see the cube. Now, delete the original (non-VR) camera objects – having more than one active camera in a scene will trigger an error, since Unity won’t know which one you want to use.
Now, if you haven’t already, install the Oculus Windows Runtime, and connect your DK2.
Reboot your computer. In the system tray, you’ll see the Oculus eye logo. If you click on it, you’ll get the option to open the ‘Display Mode’ selector, and the configuration utility. Set the display mode to ‘Direct.’ Then, open the Oculus Configuration utility. Verify that you can see the demo scene. If you can’t, debug this before continuing.
r/Oculus is a good resource for this sort of thing. The demo scene should run smoothly, and track the rotation and position of your head, with no jerkiness or double-images.
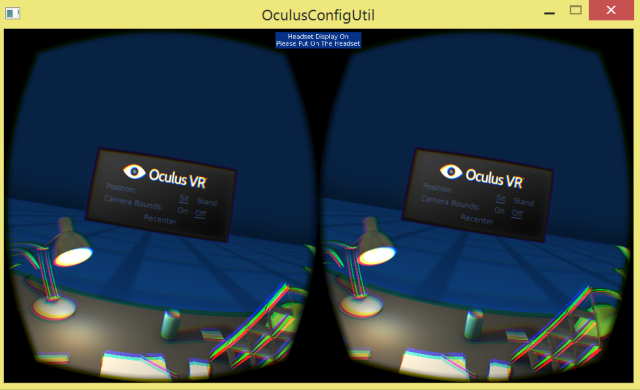
If it doesn’t work properly, check that your camera can see you, and is correctly plugged in. Also verify that your video card is sufficiently powerful, and that you don’t have intensive applications running in the background.
Once you’ve verified that your VR headset is working correctly, open Unity and press the play button. The simple scene we’ve set up should display to your VR headset! Congratulations: you’ve just made your first VR demo!
So far, so simple – but this isn’t a particularly impressive demo. To give you a taste of what it’s like to make a more involved project, I’m going to talk you through the process of making a full VR arcade game that I’ve already completed, entitled AsteroidVR.
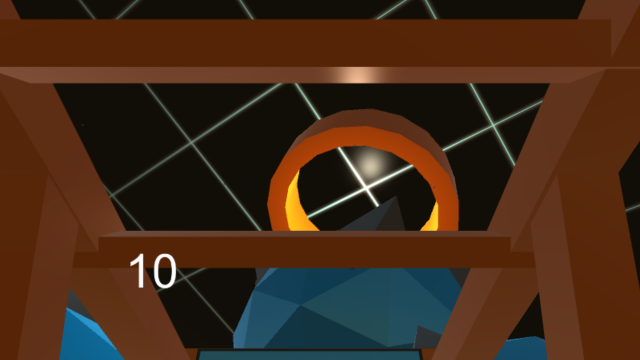
This isn’t Skyrim, but it is a full game that you can play, with working graphics and a complete set of mechanics. It took a few days to make, and is about on the level of the proof-of-concept demos you’ll be making a lot of as you experiment with different styles of games.
The game is simple enough: you will pilot a ship which is trapped inside a large room. The craft will move at a constant speed. You will be able to steer and shoot, but not stop. The room will slowly fill with randomly sized “asteroids,” which will bounce aimlessly around the room. Your job is to avoid bumping into these asteroids, or the walls, for as long as you can. You’ll be able to shoot asteroids, but your ammunition will recharge slowly if you run out.
That’s the basic idea. Let’s get started. Because this is just a demo, we’ll be making our assets out of simple primitives like cubes and spheres (using the Primitive Plus asset).
Here’s the ship I created.
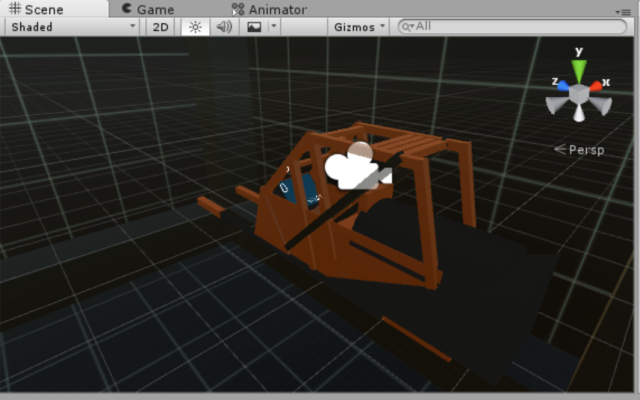
I’ll admit, it does look a lot like a forklift, but it’ll do for this demo.
When building the cockpit, be sure to put some obvious structures in the user’s field of view, especially in the periphery. This helps to avoid motion sickness by giving the user some fixed elements, reducing the sensation that they’re moving. That makes it easier for their brains to deal with the lack of movement being reported by their inner ears.
I had to experiment with several cockpit configurations before I found one that didn’t make me sick. When in doubt, add more struts, and move the camera back. Be careful of scale! One unit in Unity is one meter in VR, so keep an eye on the size of the elements you’re creating. It’s easy to make objects that are ridiculously large or ridiculously tiny in VR, and the results can be unsettling.
When you’ve finished building your ship, create a cube that surrounds it, and parent all of the ship’s primitives to it. This will provide its collision box and center of motion. Add a “rigidbody” to the outside cube, and disable the renderer (by unchecking it in the inspector). Make sure the rigidbody is set so that ‘kinematic’ and ‘use gravity’ are both disabled. Add other rigidbodies to each of the ship primitives, this time setting them as “kinematic,” but turning off “use gravity.”
Move the ‘CameraRig’ and ‘SteamVR’ objects into the cockpit and position them where the user’s head should be inside the ship. I’ve used another free Unity asset (a humanoid robot) to make sure the position lines up correctly. Parent them to the outside cube – this will cause them to move with the object.
Now to script the ship! Here are the two scripts I’ve created – Vehicle Controller and Vehicle Destroyer. The first one reads input from the user, and provides thrusts to the ship, making it move. The second one detects when the ship collides with something tagged ‘rock,’ and ends the game. As a fun little extra, it also breaks the ship apart into its components, letting you see them fly away during a collision. The script will create an array of objects that you’ll need to fill out with all of the primitives in the ship, inside the editor.
The script also displays some instructions that’ll pop up when you die. Create a TextMesh GameObject, and set it to say “You died! Shoot to restart!” Position this TextMesh inside the cockpit, parent it to the ship, and disable its renderer component. Then, drag it onto the “instruction” variable of the VehicleDestroy script in the inspector. This text will be invisible normally, but re-appear when you die.
Next, we’re going to create our asteroids. Here’s the asteroid I ended up with, made out of a few primitives stuck together, and the standard shader. Nothing too complicated, but it looks pretty nice.
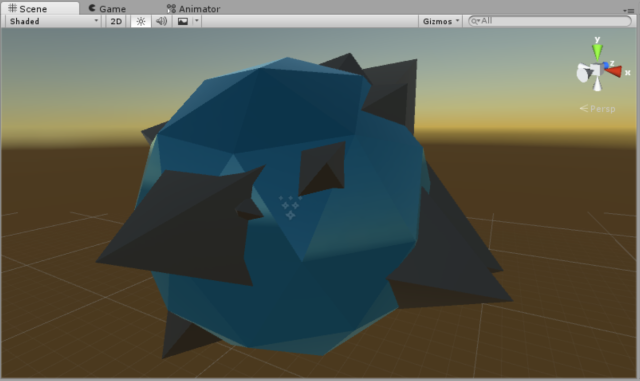
I’ve added a rigidbody, and tagged it as a “rock.” If you’re unfamiliar with the unity tag system, check out the relevant manual page. Basically, tags let you assign special properties to objects, which can be detected during collisions, letting scripts know what they’re interacting with. In this case, the tag will cause the ship object to detect that it’s been hit by something dangerous.
Now to script the asteroid. The script here is “AsteroidInit,” which does two things.
Great! The two basic elements of the game are present. Next up, the arena. It can be any shape you want, but make sure that it’s big. Turning in small circles tends to make people sick. Flying straight ahead is relatively inoffensive. Tag all of the walls ‘rock,’ to make sure the ship is destroyed if it flies into them. Here’s the arena I ended up with:
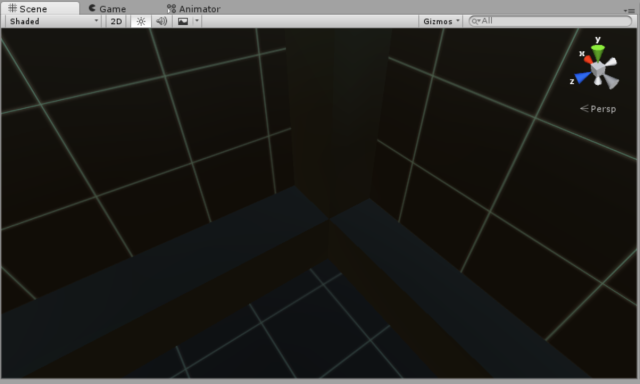
You’ll notice that the walls have a simple placeholder texture that I made in the GIMP. For the most part, I designed the game with a textureless aesthetic for simplicity. However, I found that I had a hard time telling when I was getting close to crashing into a wall, so they get textures for gameplay purposes. I also added a particle emitter to the arena, filling it with dim, long-lived, static particles. This makes it easier to tell how you’re moving when you aren’t near an object. Luckily, the arena is pretty passive, so it doesn’t need any scripting itself.
Finally, create a primitive (I used a hollow cylinder) and place it against one wall.
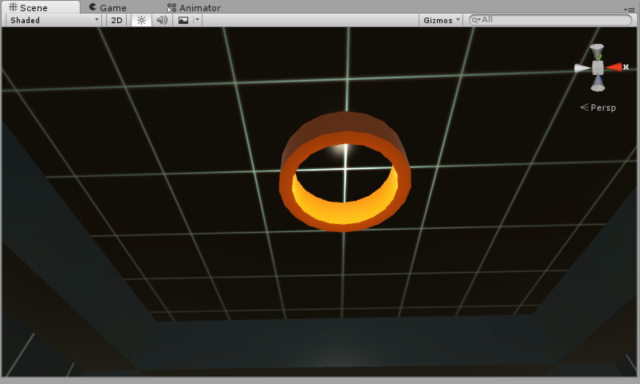
This will be your asteroid spawner. Attach this script to it. You’ll notice that this script declares an “Asteroid” GameObject variable, which should be visible in the editor. Drag your asteroid object onto it in the editor. This will allow it to spawn an unlimited number of asteroids, at a rate of one-per-second, giving the game a slowly escalating difficulty curve. Place your original asteroid very far away, to avoid it accidentally getting destroyed or causing problems.
At this point, the most basic form of the game is essentially playable. Now, we’ll add some secondary features that give it a bit more depth. This script, attached to a “TextMesh,” will keep track of how long you’ve been alive. A second script will talk to a file to determine your high score, which is written to the file by the vehicle handler when you restart. Now, you have a simple scoreboard system, giving the player a goal. Anchor these meshes inside the cockpit where they’re easily visible.
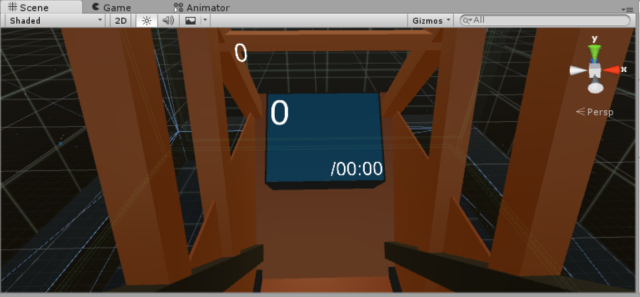
Finally, we need to implement the user’s guns. Add a “gun” object to the ship (it doesn’t need to be complicated), and drag this script onto it. You’ll need to link a bullet object, which can be any object with a rigidbody and the ‘bullet’ tag. Make it brightly colored, so it’s visible. Again, position it far away, so it doesn’t interact. Finally, you’ll need to make an ammo display. Add this script to another text mesh, and anchor it inside the cockpit where it’s easy to see.
That’s pretty much it! At this point, all the basic elements of the game are finished. Now it’s time to test. You can change the size range for the asteroids, the shape and size of the arena, the speed of the ship, the amount of ammo, the recharge rate, and the cooldown. You can experiment with the way the ship handles. If you want to, and have some 3D modelling skill, you can even replace my programmer art with real assets and make a polished game out of it. The important thing is to experiment a lot and find out what feels good to you and is comfortable for testers (preferably testers who are new to VR and haven’t developed iron stomachs yet).
If you want to see the whole Unity project and mess around with it, you can download it here. If you just want to play my version of the final game, you can download it here.
If you follow along with your own tutorial, and dig into the docs when you find something you don’t understand, you’ll wind up with a pretty good handle of basic VR game creation in Unity. When you want to go further, you’ll be well-equipped to do so.
That being said, VR game development is very different from traditional game development, so I’m going to give some general advice for designing VR experiences that will be comfortable and take full advantage of the medium.
First and most crucially, respect the user’s head motion. Don’t scale it, warp it, change the field of view, or otherwise mess with the basics. Oculus and Valve have gone to a lot of trouble to fine-tune this stuff not to make people sick. Unless you have some perceptual psychologists on hand, you are not qualified to tamper with it. Don’t! Also be careful never to turn it off. Don’t create menus that don’t have head tracking. Nothing makes you sick faster than having a huge object stuck to your head for ten seconds or more!
In the same vein, be careful with motion. The primary factor that makes people sick is when their eyes perceive motion that their inner ear doesn’t. In general, keep motion slow and steady. Accelerations should be instantaneous, and rotation should be minimized. When rotation has to happen, provide the user with fixed points of reference in their peripheral vision. If you can, build games that take place with no motion at all. There’s a LOT of cool stuff you can do in a single room, or using tiny objects (think Real Time Strategy games on the scale of plastic army men), and it’ll be a lot easier to make these experiences comfortable and pleasant.
A lot of people, when they start developing VR content, automatically want to attach stuff to the user’s head, like military Heads Up Displays. Unfortunately, this turns out not to work very well. When your eyes are focused on anything far away in the world, objects close to your head will become an out of focus mess of pixels. Plus, focusing on very nearby objects causes eyestrain.
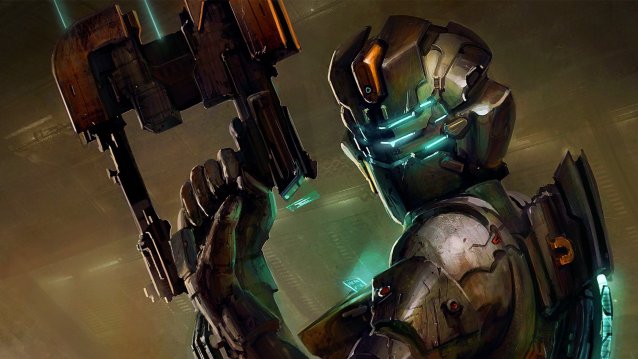
To avoid this, try to put your UI into the world as much as possible. Look at games like Dead Space for inspiration. You’ll notice that in AsteroidsVR, the cemo above, all of the UI is anchored to the cockpit. Because it’s in space around you, all of the UI makes sense and is comfortable to look at.
On a related note, be careful about text. Current VR headsets are pretty low resolution, especially when you account for how much of your visual field they cover. That means that text can be pretty hard to read. Try to rely on it as little as possible. The text that you do have should be big enough to be very readable under normal viewing conditions. Remember that some of your players may be elderly or visually impaired! Err on the side of too big.
Remember that VR is very intensive. The DK2 needs to run at 1080p, in 3D, at 75 fps. Both the consumer Rift and the HTC Vive will run at even higher resolutions and framerates. Failure to hit these frame-rates will result in flickering double vision. It’s extremely upsetting, and a one-way ticket to disorientation and eye strain.
As a result, you’ll need to be much more careful about performance than you normally would. That means keeping poly-counts down, and minimizing expensive graphical effects. Use simple models, keep the number of lights to a minimum, disable dynamic shadows, and try to have as many objects as possible use the same material. You should also mark any objects that don’t change or move as “static” in the inspector. That makes it easier for Unity to batch them together and save performance. When you can, make these limitations part of your game design, by picking a cartoony aesthetic for your game. In general, if you can eliminate a visual effect without hurting the game, do it.
The one exception to this rule of thumb is anti-aliasing. Aliasing (a jagged artifact caused by the discrete nature of computer graphics) occurs differently in each eye, leading to an unpleasant breakdown of the 3D effect, which can cause eye strain. Use as much anti-aliasing as you can afford (I recommend MSAA), and try to avoid textures with high-frequency visual detail (like foliage, fine gratings or complex textures positioned far away).
Some visual effects are also bad fits for VR in general, even if you can afford them.
Keep all of this in mind when you’re creating art assets, and it’ll save you a lot of pain down the line.
If you find that, after turning off all of these graphical effects your game looks a little drab, try using light maps and fake ambient occlusion. Light maps bake lighting directly into a texture layer on the map, which looks great for anything that doesn’t move, and can add a lot of depth and solidity to your world. For dynamic objects (like characters), consider using “shadow blob” textures to create ambient occlusion. It isn’t totally realistic, but it does do a lot to ground them in the world, and it’s extremely graphically cheap!
As time goes on, these sorts of hacks will be less necessary, but for now you’ll need to take advantage of as many of them as you can to save performance.
The most important piece of advice I have is to let go of your preconceptions. VR is not exactly what we all thought it was going to be in the 90’s. The reality has proven to have many advantages and limitations that nobody could have foreseen. What sounds awesome on paper (like VR Halo) turns out to be a disorienting, nauseating mess in practice. Some of the best-received VR experiences have been really weird stuff like Job Simulator, a sandbox game set in a kitchen.
VR is a totally new medium, and nobody totally understands the rules yet. In traditional videogames, we pretty much know how to make an FPS, an RPG, and a cover shooter. These basic genres are nailed down. There are best-practices. Any new game made is an incremental improvement, but it’s usually not a new genre. In VR, there are nothing BUT new genres. The basics of the medium haven’t even been invented yet. Nobody knows what they’re doing.
This is incredibly exciting, but it does mean you have to be flexible. If you have an awesome idea, then do it! Immediately! Get a prototype finished as fast as you can, and see if it works. But, be willing to let the experiment fail. If your idea isn’t fun or it makes your testers sick, throw it out and try something new.
Make a new game every week, or even every day, until you strike gold. The more failed prototypes you make, the higher your odds of inventing something really cool. Make weird games. Make really weird games. Nobody knows what’s going to work and what isn’t, so cast a wide net. You might be surprised by what turns out to be awesome.
So get out there, make some games – and, above all, have fun!

 Yoshis Woolly World: All amiibo designs in pictures
 6 Games to Waste Time at the Office
 The Core of the Matter: Gaming is About Games
 Crysis 3 Wiki .
 Zero Assassin Head Locations – Borderlands 2