

To pursue this collection of quests within a quest, head to the Memory Den in Goodneighbor. When you enter the main room, head to the door on the right, where you'll find a Ghoul named Kent Connolly. Previously a man from your time, Kent has a strong fondness for a comic book hero named The Silver Shroud, and he'd love to cosplay as the once-famous vigilante. That's where you come in.
After agreeing to hunt down a Silver Shroud costume, leave Goodneighbor and travel to Hubris Comics, which is a couple of blocks west of The Freedom Trail in the financial district. Once inside, work your way up the building, fending off Ghouls along the way. You'll find the costume on the top floor. Once you have it, escape using the ladder in the same room, and return to Kent.
Considering the talent it took to get him that costume, Kent now feels that you're more suited to take on the persona of the The Silver Shroud. Agree to this, and you'll move on to the next phase of the quest. Note that putting on the costume is optional, so you're welcome to stick with your current apparel if the stats are better.
Using your Pip-Boy radio dial, tune into to the Silver Shroud Station, and listen for radio drama-styled updates from Kent.
The first mission will be to kill Wayne Delancy, a murderer who you can find in one of the alleys within Goodneighbor. Once he's dead, hover over him so that the loot window appears. Use the calling card option to leave a Silver Shroud-branded card.
Next, look for AJ in another Goodneighbor alley. Kill him and his bodyguards and leave another calling card.
Tracking down your third target, an assassin named Kendra, will require an additional step. You'll have to visit The Third Rail bar in Goodneighbor for intel on her location. Speak with the bartender to reveal it. You'll need to exit Goodneighbor to reach Kendra's hideout.
Follow the quest waypoint to Water Street Apartments. Take out Kendra's henchmen as you ascend the interior of the building. You'll eventually reach Kendra. Take her out promptly, leave a calling card, and return to Goodneighbor while still listening to the Silver Shroud radio station. You should also put on The Silver Shroud costume to trigger the next objective.
KILLING GANGSTERS
Proceeding with the second half of the quest is a little tricky. Upon returning to Goodneighbor, you'll find the quest marker hovering over a Ghoul named Hancock. Hancock is tied to The Big Dig quest. If you completed that mission, he will ask you to resolve a loose end with the quest giver, Bobbi. Take care of Hancock's request however you see fit before resuming The Silver Shroud quest.
The key to moving on to the next step is to put on The Silver Shroud when you speak to Hancock. Note that this won't work if you put on the costume while in you're in the same building or area as Hancock. In other words, you need a loading screen separating you and Hancock when you put on the costume. There's also the possibility that, through events unrelated to this quest, Hancock will be available as a companion. This won't prevent you from completing the sections of this quest that are related to him. You simply need to be wearing the costume when you talk to him, regardless if he's your current partner or not.
Talking to him will trigger the next quest objective, and you'll need to take out two gangsters, Smiling Kate and Northy. They're located in separate areas of The Commonwealth. Smiling Kate is in the Charleston district near Bunker Hill. Northy is south of Waltz Consumer Electronics in the Cambridge district.
Northy will be a slightly more challenging kill than Kate, given that Northy will try to run when you're spotted. Use VATS to take him out. Be sure to leave calling cards on both of their corpses. Lastly, search Northy's body for a clue, then return to Kent.
When you return to the Memory Den, you'll learn of an unexpected development: Kent's been kidnapped by Shinjin, the leader of the gangsters you just killed.
Travel to Milton General Hospital at the south side of Greater Boston. Make your way through all of the rooms and hallways in the hospital, taking out the Raiders in your way. Note that you'll also need to ride multiple elevators to reach Kent and Shinjin.
Take special note of a small windowed hallway that overlooks the hospital lobby. Shinjin and Kent are very close by, and Shinjin will not hesitate to put a bullet in Kent's head if he knows you're near. In fact, we encountered a problem where he'd kill Kent even before we boarded the final elevator leading to the two of them. After multiple attempts, we learned that it was best to not kill enemies in the room with the elevator doors. Instead, lead those enemies away from that room and deal with them in the adjacent hallway, including the Protectron that might be in the elevator. If done correctly, you should be able to ride down the elevator without Shinjin killing Kent.
It's another matter when you've reached the final room, and you've come face to face with Shinjin, who is just seconds away from killing Kent. Using VATS or Jet is invaluable because it will slow down time, giving you a head start to kill Shinjin and his henchmen.
Pick your long range weapon of choice, and kill Shinjin and then the goon to the right of him. Quickly dispatch the remaining Raiders before talking to Kent. Conclude this quest by speaking with Hancock.



 Crysis 3 Review
 Persona 5 Wiki – Everything you need to know about the game .
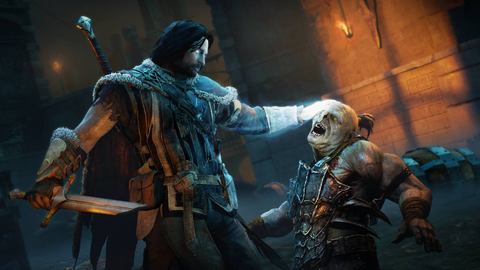 How to get Middle Earth: Shadow of Mordor A New Master Trophy, Achievement for PlayStation, Xbox and PC
 Top 5 Reasons Youll Need to Sell a Kidney this Fall
 Planning The Big Score GTA 5