Steel Battalion: Heavy Armor Walkthrough
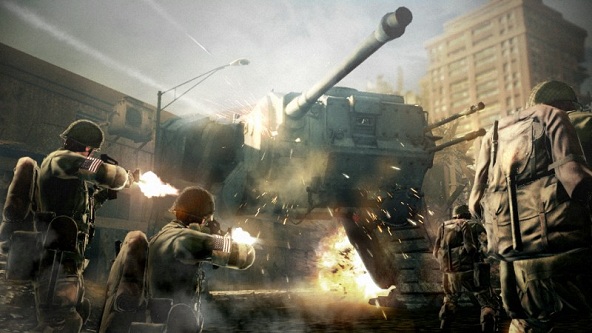
Steel: Battalion: Heavy Armor has landed and we’ve got the walkthrough you need to survive this deadly Kinect walking-armor simulator. Combining the controller and the Kinect on X-box 360, From Software has stepped forward to create a unique experience for gamers looking to really sink their teeth into a game. Instead of the vague high-tech giant robots we’re all used to from Japan, Heavy Armor looks into an alternate future that looks a lot like World War 2.
Replacing treads, tanks now use legs. But, Heavy Armor isn’t just a simple action title. You can look around your VT (Vertical Tank) cockpit and interact with your team. Using voice or hand gestures, you can manipulate the onscreen controls of the tank, order around your AI team, and use your controller for steering. It’s an overwhelming experience that’s more simulator than arcade. Try to survive the campaign with us, we’ll walk you through each mission.
For extra information on Steel Battalion: Heavy Armor, report to the achievements or cheats pages for more intel.
Intro and Controls
Reach across and pull the level to start the engine of the vehicle.
Once inside the slit view, use your controller to move up and down. You can also use the controller to fire.
Pull the slit up above your head in order to access the parescope. This is very useful in long range combat.
Once you go through the hatch, raise your binoculars to look around. Move forward once you do so.
Follow the tutorial for equipping your heavy weapons. This should give you a much better feel for the game before jumping in.
Mission 1: Triumphant Return
Mission 2: Bridge Watch
The explosives have been planted by the bridge. You will have to proceed to the bridge and set these explosives off. After the introductory cutscene, of course.
Proceed forward in your tank towards the bridge. Once you find yourself on the ground, you will have to climb forward towards the detonator. Make sure you do not move until the enemy stops firing- your allies will get them off your back. Once you have the opening, crawl forward and detonate the explosives to finish off this extremely short mission. Hey, the battle cut scenes were pretty worth it.
Mission 3: Urban Warfare
For this mission, you will need to find the enemy’s antennae farm and eliminate all the strays as you go along.
Move down the main avenue through the rubble and watch for the enemies to your right and around the corner to start the mission.
Make your way around the perimeter of the city. Dispose of the enemies before aiming for the antennae. This way, you won’t turn yourself into a sitting duck while you’re trying t accomplish your objective. There are 12 antennaes in total.
To Rainer and Parker’s surprise, destroying the 12th Antennae will assure completion of the mission and unlock you the New Toy Achievement.
Mission 4: The Straggler
In this mission, you will have two big threats to worry about: land mines and concealed infantry.
In order to avoid the two major pitfalls of this level, you will have to actively use your mine detector and HEAT in order to avoid stepping into mines or being ambushed by an enemy trap.
Do not fire on the infantry with armor piercing rounds in this level. Upon beginning of the mission, the enemy will abandon the front lines for the most part. Your job is to take out the stragglers and avoid any sneak attacks from the back.
Give Rainer the signal once you sight your target.
Once you have the binoculars, look around and shift your view to the bottom right.
Once you find the target, try not too make too much noise. Sneak around and follow the target until your unit engages it. You will suffer a few losses but complete the mission.
Mission 5: Old York City
The opening to this mission will be the first time you’re introduced to the enemy via cutscene. I like the change of pace. They sound pretty ruthless, don’t they?
One of your VTs has gone missing for this mission. Your job is to infiltrate, locate the missing veet, and gather some intel while you’re at it.
Move down the bridge and expect to take some pretty heavy fire.
The enemy will pop open the latch to the tank and throw a grenade in there. You will have to toss it back out quickly! Just wait until you are prompted to do so by your allies.
Once you approach the corner of the scene of carnage, wait for the quick dialogue and look immediately to the left of the intersection to find the enemy.
You will locate the missing VT here, but it is too late for your comrade. You will get the mission complete and unlock the Repatriation achievement regardless.
Mission 6: By Land Or Under It
Mission 7: Munition Demolition
Upon the start of this mission, your task will be to destroy an enemy munition stash.
The enemy has deployed a sizable number of infantry and armored vehicles, all which have to be contended with in this mission.
Head through the tunnel and go to the right. You will be bombarded pretty quickly. Straw will tell you to approach the target from the west. Turn the corner and do so.
Continue to proceed towards the Target Area. Be most careful when you turn corners in this mission- there are vehicles waiting to fire around almost every bend.
Mission 8: Waterside Warehouse
The name of the game in this mission is to secure another supply line along the east coast.
There are a number of marine ships that have docked in the area . Once the mission begins, the size of the enemy force is still up in the air.
Take out the battleship that begins to attack your recovery squadron. They are sitting ducks, and if you are not able to protect them quickly, the mission is over. And I don’t mean in a good way.
For the remainder of the mission, you will simply need to keep engaging the enemy in an all out attack. Once you take your area back, the mission is complete.
Mission 9: The Pickup
As opposed to the last level, the numbers in this mission are much smaller. You will need to protect Amigo, who has gathered some useful intel for you.
You will be forced to wait on standby at the beginning of this mission. Enjoy the ensuing cutscenes.
Once all hell breaks lose, it is time to recover the microfilm. You will basically need to drive into the territory head on.
The microfilm is within the hands of the fallen soldier you come across. You will have to take it from him (morbid.. I know) to complete the mission.
Mission 10: The New Battleship
Make your way down to the wharf. Your job is to locate the new battleship and destroy it.
Once you reach the wharf, you will find out that you had received false intel. This means that the battleship is not located by the wharf. Scope out the rest of the naval area to locate it.
Fire at the top of the battleship as soon as you locate it. Your sarge will give you the cue once you have cleared the necessary amount of enemies.
The battleship can be located by circling around the level from your starting point. The map for this mission is noticeably bigger than the others, so you will have to cover a larger surface area in this seek and destroy type of mission.
Mission 11: Canyon Crossing
New York is being heavily bombarded from the air by UNCLE. The objective of this mission is to seize the enemy’s air station, NORAD.
Secure a route through the canyon. Wait until you see the covering fire from your allies, and cross the bridge once you do.
Wind and crank the level to start the engine and head carefully down along the path once your tank is mobile.
As you move down the path, take extra care not to get caught in your own artillery’s cover fire.
In case you need to change ammo throughout this mission, which you most likely will, you can do so by removing the empty mag from the bottom, taking a mag from the top and finally putting it on the bottom to replace the empty one. They don’t cover this in the tutorial, and if you haven’t had to do this yourself up until this point, you certainly will now.





 F1 2014 Wiki – Everything You Need To Know About The Game .
 Bloodborne: Weapons, Armor, Gestures and Key Locations
 Rocksmith 2014: The 60 Day Challenge Part 1 - Learning the Basics
 Samurai Warriors 4-II: How to Get All Rare Weapons
 Mortal Kombat X Guide: How to Play Reptile