Borderlands 2: Captain Scarlett Walkthrough
Looking for more Borderlands 2 tips and tricks like this? Check out every easter egg, cheat and guide on Game Front’s comprehensive video walkthrough apps.
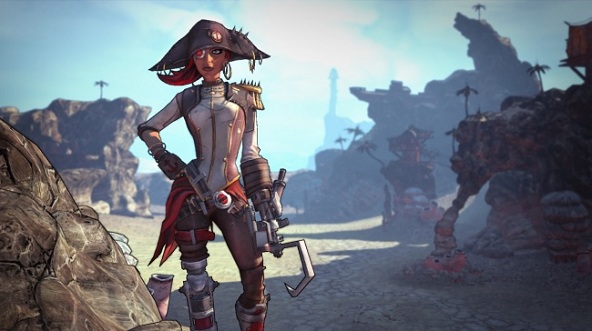
Welcome to the Borderlands 2 DLC walkthrough, where we’ll cover “Captain Scarlett and Her Pirate’s Booty” and take you through the sea of sand in search for treasure. The first major content addition after the Mechromancer character, Captain Scarlett takes you to a new area, with all new weapons, a new town, heads for every character, a slew of deadly enemies, and a Sand Skiff to get you around the burning sands. We’ll show you how to navigate these deadly waters and uncover Captain Blade’s Lost Treasure.
There’s more to Borderlands 2 on Game Front. Find our full guide for the regular campaign on the Borderlands 2 walkthrough. Get secret references on our Borderlands 2 Easter Eggs, or find every special article with our Borderlands 2 cheats.
Looking for more Borderlands 2 tips and tricks like this? Check out every easter egg, cheat and guide on Game Front’s comprehensive video walkthrough apps.
A Warm Welcome
Travel to the city of Oasis and use a sniper rifle to clear out the enemies guarding the front entrance, then continue using a rifle or grenades to fight your way down the street that leads to the center of town.
Move in a circle around the area at the center of town and take out the surrounding enemies with acid-equipped or explosive weaponry, then finish clearing the city of pirates and use your map to locate an enemy known as No-Beard.
Use the circular broken structure at the center of town as cover and open fire on No-Beard with well-aimed head shots or grenades, the use your special ability and an acid-equipped weapon to finish this enemy off.
Move out onto the Oasis Docks, then approach the next diamond-shaped map marker to find Shade and Turn In to complete this mission.
Return to the Main Walkthrough Page
My Life for a Sandskiff
Make a left across the docks to reach the last boathouse ahead and enter the sand skiff within, then try driving it to activate a malfunction explosion and continue forward out into the desert on foot.
Approach the nearest diamond map marker ahead to find the dead Lionel fishing off a metal ledge that overlooks the canyon below and speak with him, then drop to ground below and approach the capacitor having from the line.
After the sand worm eats the capacitor off Lionel’s fishing line, move to a safe distance and wait for one of the creatures to emerge from the ground before destroying it.
Sprint across the canyon towards the next closest diamond map marker to find the Sand Worm Queen, then open fire on it from a distance with your sniper rifle and jump sideways to avoid the projectiles the creature spits.
Defeat the Sand Worm Queen to collect the capacitor from its corpse and return to the city of Oasis, then use the map marker to find Mrs. Blayvis beneath the red awning at the center of town and collect the coolant disperser across from her in the car shell.
Move across the plaza from Mrs. Blayvis’ location to speak with Jocko beside the bulletin board and move to the right around the building to find the ramp in the back, then use it to reach the rooftop above and climb the metal ladder in the corner ahead.
Make a left around the back of the rooftop to collect supplies from the chest and jump over the barricade beside it to reach the other side of the building, then drop onto the awning below to find the pressure regulator.
Drop back to the ground below and approach the next map marker to speak with Jennifer, then pick up the magnetic over thruster beneath the bed she’s laying on and make your way back to the previous sand skiff.
Move around the sand skiff to install the various parts you’ve collected and move to the left side of the boat house’s entrance to activate the scanner, then return to Shade’s shop and Turn In with him to complete the mission.
Return to the Main Walkthrough Page
A Study in Scarlett
Move back to the left across the dock and approach the indicated Catch-A-Ride console to spawn a hovercraft, then teleport into the vehicle and drive it out into the desert ahead.
Drive the hovercraft through the canyons and deserts in the direction of the next map marker to the north, then travel to Wurmwater Passage and move into the flats below.
Use your map to navigate the circular trails of the canyon and enter the caves beneath this area to reach The Buccaneer’s Bacchanal, then approach the Pirate Queen’s ship ahead and open fire on the raider skiffs that start appearing.
Move in a continuous circle around the cave area to destroy the enemy skiffs and run over the sand worms, while avoiding damage yourself.
Clear the area of all remaining enemies, then approach the back of the Queen’s Ship to exit your hovercraft and walk over to the ladder that’s been lowered for you.
Climb the ladder to enter the ship above and search the rooms ahead for supplies, then make your way up the staircase in the corner reach the last outside landing at the top and jump over the railing on the right.
Land on the deck below to use the inclined walls by the doorways and climb up to the area above on the left to activate the next cut scene with Captain Scarlett, then Turn In with her to complete this mission.
Return to the Main Walkthrough Page
Two Easy Pieces
Make your way in the direction of the next map marker to return to Oasis, then use a scoped rifle with explosive rounds to clear the enemies out of the shanty town surrounding the entrance to Hayter’s Folly and search the walkways above for supplies.
Travel to Hayter’s Folly and move through the cave on the left to reach Aquanexus, then drop into the spring below to enter the next cavern in the corner on your right.
Use your special ability to clear out the various enemies that appear in the next area and continue towards the map marker to reach the next open cavern, then eliminate the crystalisks that emerge from the pool of water by targeting their legs.
Equip a scoped weapon to eliminate the enemies perched on the rock ledges above and climb the wooden staircase in the corner, then collect supplies from the vending machines and weapons cases near the top.
Continue towards the map marker to discover Hot Spring Hideout and make your way around the wooden balcony that surrounds this area, then use a scoped weapon with explosive ammunition to open fire on the enemies below.
Move slowly across the wooden platforms below to anticipate the pirates that come charging around corner and snipe them from a distance with incendiary ammo, then aim towards the bandit turret across from you to destroy it as quickly as possible.
Head continuously to the right around the wooden walkway that surrounds the hideout to clear out the remaining pirates and collect additional supplies, then move behind the waterfall at the end to receive a message from Sandman and enter the next cave tunnel on the right.
Follow the river uphill to reach the next open area above and snipe the enemies that appear on the zip-lines or rock ledges above, then throw grenades to remove the larger groups of pirates in the distance and fight your way forward in the direction of the map marker ahead.
Continue using a scoped rifle to take out the enemies perched on the ledges above and climb the ladder in the corner to reach the area they previously occupied, then search the balcony for supplies and flip the indicated switch to open the gate below.
Drop back to the water below and move through the gateway that was just opened to activate a cut scene in which you encounter Sandman, then use your scoped rifle to score multiple headshots on The Big Sleep behind cover in the distance ahead.
Hit The Big Sleep repeatedly with acidic or incendiary rounds in his head to defeat this larger enemy before he can reach you, then use the nearby crates as cover to eliminate the other pirates that appear next.
Use your special ability to clear a path through the enemies ahead and sprint up onto the wooden structure in front of you, then locate Sandman and eliminate him easily with a few shots to the face.
Approach the indicated chest to collect the second piece of the compass and travel back to Wurmwater to re-enter a hovercraft, then drive towards the next map marker to locate the caravan full of loaders.
Use your hovercraft’s weapons to destroy the caravan of loaders, then drive back to the Queen’s Ship and Turn In with Captain Scarlett to complete this mission.
Return to the Main Walkthrough Page
The Hermit
After speaking with Captain Scarlett, turn left to pick up Herbert’s gift off the chair in the corner and use a hovercraft to drive towards the next map marker.
Continue driving until you discover the Rustyard Corridor and exit the vehicle to move up the nearby staircase on foot, then head across the rusted walkway at the top to receive the next two objects and take out the turret enemy above.
Take cover behind the surrounding crates to continue eliminating the ground enemies and the turrets above with your scoped rifle loaded with incendiary rounds, then pull the indicated lever in the corner ahead to open the gate and turn left to take out the Badass Cannoneer who emerges next.
Move through the gate you just opened to travel to the Rustyards and collect supplies from the vending machines ahead, then drop back to the ground below and enter the shanty town on your left.
Use a scoped rifle, rocket launcher, grenades and your special ability to fight through the rusted shanty town ahead, then enter the next enclosure on the left to take out the Anchorman with headshots and discover the Rusty Cog Settlement above.
Climb to the uppermost balcony that overlooks the settlement and use your sniper rifle to pick off the patrolling pirates on the ledges below, then drop to the ground floor of this area and move across to the opposite end.
Make your way up the ladder on the opposite side of the settlement to move through the next building in front of you and snipe the enemies below by first detonating the corrosive barrel.
Continue forward to reach the next settlement ahead and snipe the enemies that occupy those balconies, then drop to the sandy ground below and turn right to approach the map marker’s location.
Cross the rope bridge ahead to reach the other side of the canyon and make a left towards the next map marker, then eliminate the spider that emerge from the sand and step onto the circular platform ahead to raise the elevator by pulling the indicated lever.
Step off the elevator when it reaches the top of its ascent and eliminate the spider that emerge from the sandy ground ahead, then make a right towards the shack suspended over the cliff and discover Herbert’s Hideout.
Knock on the front door of Herbert’s Hideout to activate a cut scene, then Turn In with the hermit to complete this mission.
Return to the Main Walkthrough Page
Crazy About You
After speaking with Herbert, exit the cabin to make a left across the sandy ground and approach the metal wall ahead in the corner.
Move up the hill to the right side of the metal wall to successfully jump over this barricade and continue moving towards the shipwreck ahead in the distance.
Make your way to the right around the rock ledge and drop all the way down to the dirt trail you see below, then cross the next bridge ahead on the left and eliminate the surrounding enemies.
Continue moving around the trail to your left and jump across the broken metal platform to reach the inclined ship deck, then head towards the top to receive the locations of the four love tapes and turn back around.
Move back across the broken metal platform and cross the next bridge ahead on the right, then make a left on the other side to eliminate the surrounding spiders and pick up the first love tape.
Turn around to follow the dirt trail forward along the side of the mountain and discover Coobie Gorge on the other end of the next bridge, then continue down the trail to reach another longer bridge ahead on the right.
Climb the stairs on the other end of the bridge to reach the next shanty town built into the mountainside above and make your way up through the buildings on the right, then fight past the enemies to reach the top of the structure and collect the second the love tape.
Cross the next bridge on your left to discover the Dreg Scrapyard and take out the spiders on the other side, then climb the scrap heap ahead on the right to collect the third love tape.
Drop back to the ground below and continue fighting your way through the wave of spiders in the direction of the next map marker, then take out the turret on the ship deck above to the left and move around to the back of the hill on the right.
Move up the incline around the back of the hill to continue towards the map marker and collect the fourth love tape, then return to Herbert’s Hideout to speak with him and shoot the lock off the chest behind you before Turning In to complete this mission.
Return to the Main Walkthrough Page
Whoops
Make your way towards the next map marker to cross the canyon on the cable car and travel back to Wurmwater, then continue in the direction of the diamond-shaped icon to discover the The Washburne Fen.
Eliminate the enemies guarding this area to pull the indicated lever and lower the platform above, then ride it up to the next ledge and travel to the Washburne Refinery.
Climb the steps in front of you to collect supplies from the vending machines on the left and enter the factory room ahead, then turn left to eliminate the surrounding enemies and move through the next open doorway.
Move forward into the purple-tinted room and take a right to eliminate the robot guarding the steps, then climb these stairs to reach C3n50r807′s Cubicle above and collect the poly-kryten off the work table.
Make your way up the steps around the corner to turn left at the top and eliminate any loaders you encounter, then take a left into the next purple-lit corridor to discover The Arm and continue moving forward through it to reach the area on the other side.
Turn right to fight your way past the loaders below and enter the Workforce Fabrication Center, then continue eliminating the enemies in the surrounding red-lit windows above by using a sniper rifle and grenades.
Eliminate the last Badass Loader that emerges and exit the room through the doorway that has opened in the upper left corner, then move forward into the Forge Array and collect the second poly-kryten off the shelf.
Drop into the pink-lit area below and move right around the area to climb the steps at the end, then make your way up up the staircase against the far wall and navigate through the next corridor at the top to collect the third poly-kryten.
Make your way up the incline beside you to collect from the vending machines and pull the nearby lever, then turn around to enter the next open corridor ahead and discover the Lair of the Lecher-Bot.
Continue moving through the open doorways and up the various staircases across the next series of rooms, then exit the refinery to reach the outside area and use a rocket launcher to clear out the surrounding loaders.
Following the next cut scene in which you encounter the heavily-armored loader named H3RL-E, move to a safe distance and open fire on this enemy with your rocket launcher.
Sprint or jump sideways as quickly as possible when H3RL-E tosses a barrel your way and continue blasting this enemy with your rocket launcher to eventually destroy it, then approach the next map marker’s location to re-enter the refinery.
Make your way down into the next room below to collect the final poly-kryten and find the refinery’s exit to return to Wurmwater, then continue heading in the direction of the map marker to travel back to The Rustyard.
Return to Herbert’s Hideout on the cliff’s above and give him the poly-kryten to acquire the compass piece, then place the gift from Scarlett at the hermit’s feet and walk away to avoid the explosion.
Travel back to the Queen’s Ship in Wurmwater and Turn In with Captain Scarlett to complete this mission.
Return to the Main Walkthrough Page
Let There Be Light
Take the piece from Scarlett and use it to assemble the entire compass on the table beside her, then pick up the completed artifact and return to your hovercraft waiting below.
Drive towards the next map marker to discover Riptide Reef and park your hovercraft in front of the pirate flag hung on the clothesline, then move through the barricade poles to eliminate the coup of enemies ahead and turn right past the next anchor in the sand.
Fight through the wave of enemies ahead using your special ability and explosive weaponry, then climb the next ladder on the left to move forward across the balcony above and pull the lever at the end.
Drop to the ground below and move beneath you just raised to travel to Magnys lighthouse, then approach the supply building and collect the necessary equipment from the vending machine.
Move to your right across the bridge and discover Spire Town Docks on the other side, then use a sniper rifle or rocket launcher to pick off the pirates patrolling the buildings above.
Make your way towards the right side of the docks above to continue climbing the series of steps around the corner and follow the mine tracks at the top to enter the next cove ahead, then jump off the end of the inclined track and turn left to climb the hill beside you.
Look for the sections of mine tracks found around the docks and follow them towards the next map marker to reach another cave above, then make another left to drop into the area below and approach the neon arrow sign ahead to activate the lift.
Use your sniper rifle or rocket launcher to fight off the approaching enemies that appear in the area below, then move back and forth continuously across the wooden landing to avoid taking damage.
Step on the lift after it lowers beside you to pull the lever and ride it upward to discover the Magnys Lighthouse, then enter the building through the door at its base and pull another lever to ascend again.
Exit the elevator at the top of the lighthouse to climb the nearby ladder and activate the indicated beacon to complete this mission.
Return to the Main Walkthrough Page
X Marks the Spot
Drop back to the ground below and use your sniper rifle to eliminate Scarlett’s henchmen approaching from ahead, then equip a rocket launcher or use your special ability to pick off the two lieutenants that appear next.
Head towards the next map marker to enter the structure at the edge of the island and use the Fast Travel device to return to Wurmwater, then commandeer a hovercraft and continue driving in the direction of the beacon.
Approach the next map marker to activate a cut scene in which you are eaten by the Leviathan, then enter the monster’s lair and collect supplies from the surrounding area.
Continue moving forward to drop down further into the Leviathan’s throat and activate another cut scene, then use your highest powered shotgun (preferably the Conference Call) to open fire on Roscoe and move in a circle around the area to avoid taking damage.
Avoid stepping into the orange acid pool and continue unloading rounds into Roscoe until the creature falls over dead, then grab Scarlett’s pistol after she disappears and approach the next map marker.
Make your way up the incline to exit the room through the corridor above and jump over the acid pools in the ground to avoid taking damage, then reach the end of the tunnel to activate a cut scene in which you enter the Leviathan’s Lair.
Use the same shotgun from before to target the vulnerable blue spots on the sides of the Leviathan’s head, over its heart and inside the creature’s mouth then destroy each of them to defeat this boss and take out the surrounding sand worms that emerge from the ground next.
Throw grenades at the surrounding sand worms to clear them out more quickly and jump down onto the Leviathan’s corpse, then cross it to reach the other side of the lair and move through the doorway that opens beside you to complete this DLC.
Return to the Main Walkthrough Page



 Whispering Willows: All chapters complete Walkthrough, Characters details and System Requirements
 Top 15 Best Medieval Games
 GTA 5 Online Heist: Humane Labs Raid Walkthrough Guide
 Bioshock Infinite: Beast of America — What You Missed
 The Worst Security & Malware Threats for Online Gamers