The Zombie Mode in Call Of Duty: Black Ops 2 can be considered a game by itself, featuring some peculiar play modes like TranZit mode which make the experience pretty unique compared to the standard single player mode or the many multiplayer modes in the game. With some special features, weapons, power ups and enemies available only in Zombie Mode, you may need a big help in conquering the Zombie Mode and surviving the hordes of zombies longing for a bite.
Before we go in deeper with some spot on strategies for all the maps available, we’re going to go over some basic but useful tips which will be a big help in your zombie killing: these small strategies don’t even require much skill to pull off, as long as you got the basics of the game down.
Use the knife whenever you can
Using the knife the right way will help you quite a lot, especially in the first rounds: as you may already know you’re going to face more zombies with each new round. During the first rounds zombies are few in numbers and not even so aggressive: this is when the knife will be useful the most. Since you’ll need to save as much ammo as you can for more delicate situations, you can kill the zombies in the first rounds by only using the knife: it’s an effective method because a knife kill will also make you earn more points which can be used to buy new weapons and extra ammo. You can also combine firearms with the knife: shoot the zombies a few times and then finish them with the knife, you’ll be getting a lot of points per kill this way.
Aim for the head at all times
If you’re aiming for the best points possible in the most safe way, you can kill zombies with a single headshot: you clearly will need a bit of practice and you may not always be in the best situation to take aim, but headshots will also make you save ammo. In later rounds headshots become a necessity since zombies will take too much bullets to kill if shot elsewhere.
Always think things through
Rushing will never do you good in Zombie Mode. To make an example, if you see a power up on the ground, like the Nuke, you may want to wait for more zombies to appear since it will clear all of them or if you see a max ammo power up it’s better to use up all your current bullets before grabbing it. As a general rule, once you find a power up, wait until it starts flashing and then pick it up before it disappears.
Make zombies crawl
A good way to slow the horde down is to make the zombies crawl by shooting their legs or use a well placed grenade. It’s a good move to catch your breath during hectic moments and also to have more time to explore your surroundings: just let a single zombie live at the end of a wave and crawl on the ground and you’ll be able to search the map for ammos and power ups without having to worry about getting away from him.
Take care of barricades
Rebuilding barricades is a good way to earn some extra points, especially in the first rounds where zombies are few. When things get hectic, you probably will be too busy trying to survive to even think about the barricades. Still, it’s a good way to build your points when zombies are few.

Now that the most basic strategies have been covered, let’s go over to the available weapons in Zombie Mode: most of the weapons available in the main game are usable in this mode as well, together with some weapons coming straight for the first Black Ops game. There are only two ways to get weapons during Zombie mode: use points to buy them off walls or try your luck with the Mystery Box. If you require extra ammo for the weapons you bought, you can also use points to buy it by going to the white chalk outline where you first got the weapon.
Using the mystery box is like taking a gamble since you won’t know which weapon you’ll get until you get it: to use it you’ll have to spend 950 points and pray for the best. If you’re lucky you can get one of the weapons only available through the box, like the Ray Gun. The box will move from one spot to another after being used a random number of times: once these times are up, you’ll see a Teddy Bear pop out of the box, refunding you the 950 points and warping to a different location. To know the location of a Mystery Box, look in the sky and search for a small pillar of light. If you want to know the spawning points of the box, look for Teddy Bears covered in rubble or by boxes.
Here’s the full list of available weapons and their stats, in alphabetical order
Weapon Upgrads
As we already said, the more you go on, the more the zombies will be tougher and harder to kill: that’s where the upgraded weapons come in. The upgraded weapons come with special attachments, improved stats and different designs. To upgrade weapons, you’ll have to locate the Pack-A-Punch machine, pay the price and get your new weapon. If you’ll need more ammo for that weapon, just go back to where you bought the original one and pay 4500 points, the standard ammo price for all upgraded weapons. If the original weapon came from the Mystery Box, the only way to get more ammo is grabbing the Max Ammo power up .More power come at a price though: all kills with upgraded weapons will only net you 50 points. Here’s the full list of upgraded weapons available:
AK74fu2
Upgraded from the AK74u – Holds 40/280 rounds with an extra Reflex Sight.
B34R
Upgraded from the B23R – Holds 20/180 rounds and becomes a full automatic weapon.
Chicom Cataclismic Quadruple Burst
Upgraded from the Chicom CQB – Holds 40/200 rounds firing 4 round bursts.
Cobra
Upgraded from the Python – Holds 12/96 rounds and comes with the Speed Reloader.
Dead Specimen reactor 5000
Upgraded from the DSR 50 – Holds 8/96 rounds and comes with the Variable Zoom.
Dystopic Demolisher
Upgraded from the War Machine – Holds 6/48 rounds and grenades detonate on impact.
EPC WN
Upgraded from the FAL – Holds 30/360 rounds and fires 3 round bursts. Comes with an extra Reflex Sight.
FSIRT
Upgraded from the LSAT – Holds 100/600 rounds and comes with the Target Finder.
Hades
Upgraded from the Olympia – Holds 2/60 rounds and fires Dragonbreath shots.
Karmic Atomic Perforator 4000
Upgraded from the KAP40 – Holds 15/180 rounds. No other improvement available.
Lemantation
Upgraded from the Galil – Holds 35/490 rounds and comes with the Reflex Sight.
Macro Annihilator
Upgraded from the Barret M82A1 – Holds 7/42 rounds and comes with the Variable Zoom.
Malevolent Toxonomic Anodized Redeemer
Upgraded from the MTAR – Holds 30/360 rounds and comes with the Reflex Sight.
Mesmerizer
Upgraded from the M1216 – Holds 24/72 rounds and now fires 6 shots before reloading
Micro Aerator
Upgraded from the M8A1 – Holds 42/336 rounds and comes with the Reflex Sight.
Mnesia
Upgraded from the M14 – Holds 16/192 rounds and comes with the Fore Grip.
Mp115 Kollider
Upgraded from the MP5 – Holds 40/200 rounds. No more improvements available.
Mustand and Sally
Upgraded from the M1911 – Holds 6&6/50 rounds and comes with the Dual Wield perk and now fires explosives.
Porter’s X2 Ray Gun
Upgraded from the Ray Gun – Holds 40/200 rounds. No more improvements available.
Refitted-870 Mechanical Cranium Sequencer
Upgraded from the R870 MCS – Holds 10/70 rounds. No more improvements available.
Relativistic Punishment Device
Upgraded from the RPD – Holds 125/750 rounds. No more improvements available.
Rocket Propelled Grievance
Upgraded from the RPG – Holds 8/40 rounds. Fires 8 rockets before reloading
Skull Crusher
Upgraded from the M16A1 – Holds 30/270 rounds and 9 grenades. Full automatic weapon with the Grenade Launcher attachment
SLDG HAMR
Upgraded from the HAMR – Holds 125/265 rounds. No more improvements available.
SM1I3R
Upgraded from the SMR – Holds 30/390 rounds and comes with the Hybrid Optic.
Strain 25
Updated from the Type 25 – Holds 30/270 rounds and comes with the Reflex Sight.
Synthetic Dozen
Upgraded from the S12 – Holds 10/50 rounds and comes with the Fast Mag.
The Krause Refribrillator
Upgraded from the Ballistic Knife – Holds 1/9 rounds and it can revive dead allies.
Ultra
Upgraded from the Five-Seven – Holds 20/200 rounds. No more improvements available.
Ultra and Violet
Upgraded from the Five Seven Dual Wield . Holds 20&20/295 rounds. No more improvements available.
Voice of Justice
Upgraded from the Executioner – Holds 5/100 rounds. No more improvements available.
Zombie Mode Power Ups
The magical Power Ups will give you beneficial effects and coupled with the upgraded weapons, they may be able to give you a real advantage against zombies. Power Ups appear randomly after defeating a Zombie or a Hellhound: you’ll instantly notice them with their green glow. Once you get them, the effect will be available. Please note that Power Ups are always available in all Zombie game modes, except for custom games where magic has been disabled. Some Power Ups may be specific to a single map.
Carpenter
The Carpenter power up will instantly rebuild all barricades in the current map. Once used all team members will be awarded 200 points. The Carpenter will become really useful once Zombies increase in number and power in later rounds and barricades will be destroyed more easily: you may be keep the zombies at bay for a little longer after using this power up.
Double Points
The Double Points power up does exactly what you expect it to do: double all points earned. Get it as soon and you can and start killing zombie: aim for the head or kill them with melee weapons to earn the most points per single kill.
Insta-Kill
Another self-explanatory power up: you’ll be able to kill all enemies with a single shot. Since melee kills give the most points and are the most risky during regular play, use this power up to get the most points per kill through melee.
Max-Ammo
Just like the name implies, this power up gives max ammo for all team members for the weapon they’re currently holding: dead players won’t get any ammo while downed players will get them for the weapon they currently have out. To make the best out of this power up all the team has to reload before picking it up.
Nuke
The Nuke power up will kill all the zombies currently in the map: just like a nuke explosion the zombies closer to the power up will die first with all the zombies to follow. Don’t worry about any zombie surviving because there’s no way for them to avoid the Nuke. Once the Nuke is used all team members will get 400 points, no matter how many zombies are killed. If you’re after a good score, this power up is not too useful: just use it if there’s too many zombies on the map or if you just want to clear a few remaining one without having to go after them yourself.
Zombie Mode Perk-A-Colas
The perks are an important gameplay aspect in Black Ops 2: they’re available in Zombie mode too, but obtained in a different way for obvious reasons. To acquire a perk during Zombie Mode you’ll have to locate a vending machine and use points to get your perk. Please note that a single vending machine sells a single type of Perk-A-Cola; also, some of the machines have set locations, others will randomly appear on the map. The Perk-A-Cola effects will be active until the player is downed: to activate it again you’ll have to go to the vending machine and buy it again.
Here’s the full list of available Perk-A-Colas
Deadshot Daiquiri
This perk can be bought for 1500 points, granting several effects: all crosshairs will be smaller, if auto aim is on the weapon will auto-snap to the head of your enemies and while aiming with sniper rifles you will have no sway at all. This perk can bought only on Nuketown from a randomly located vending machine.
Double Tap Root Beer
The Double Tap Root Beer can be bought for 2000 points: it will increase every weapon’s fire rate, making automatic weapons fire even faster and making the shotguns’ pump action quicker between shots. No effect for semi-automatic weapons. You can buy this perk in the Farm’s Barn, in Town across the street from the burning building and in Nuketown from randomly placed vending machines.
Jugger-Nog
The Jugger Nog Perk-A-Cola costs 2500 point and it’s used to increase you health by three, making you harder to down. This perk can be bought in Town on the second floor of the burning building, on the second floor of the house in the Farm and from randomly placed machines in Nuketown.
Mule Kick
A Mule Kick Perk-A-Cola will cost you 4000 points: thanks to this perk you’ll be able to carry three weapons at once; the third weapon must be bought on the map, either from taking it from a wall of from the Mystery Box. Once you get down, you’ll loose both the perk and the weapon. This perk is only available from randomly placed vending machines on the Nuketown map.
PhD Flopper
Costing 2000 points, this Perk-A-Cola will prevent any damage from falling or explosive. As an added bonus you’ll make a small explosion from falling from a certain height. This perk is only available from the randomly placed vending machines on the Nuketown map.
Quick Revive
This perk has a different cost and effect whether you’re playing solo on with at least another player: when playing solo it’ll cost 500 points and it’ll revive you once when you’re downed and, as an added effect, it’ll give you the upgraded weapon Mustang and Sally. Be careful that you can only use it three times. If you’re playing with someone else, Quick Revive will recover a downed team mate quicker for the cost of 1500 points. Quick Revive can be bought on Bus Depot lobby during a Green Run game, on the 2nd floor of the bar in the Town, in the barn’s entrance in the farm and from random vending machine in Nuketown.
Speed Cola
The Speed Cola perk will allow you to reload your weapons in half the usual time for the price of 3000 points. It can be bought in the diner and rest stop during a Green Run game, in the bank in Town, in the house in the Barn and from random machines in Nuketown.
Stamin-Up
The Stamin-Up Perk-A-Cola will grant you faster running speed for the price of 2000 points. It’s actually more effective when holding a heavy weapon since it’ll be like holding a lighter weapon. It can be bought in the bar in Town during a Green Run game, outside the bar in Town and from the random vending machines in Nuketown.
Tombstone Soda
The Tombstone Soda will only appear if you’re playing with someone else. For 2000 points it will drop a tombstone where you die, preserving all weapons, both ranged and melee, and perks. It can be bought in the Power Lab during a Green Run game, across the street from the burning building in Town and from random machines in Nuketown.
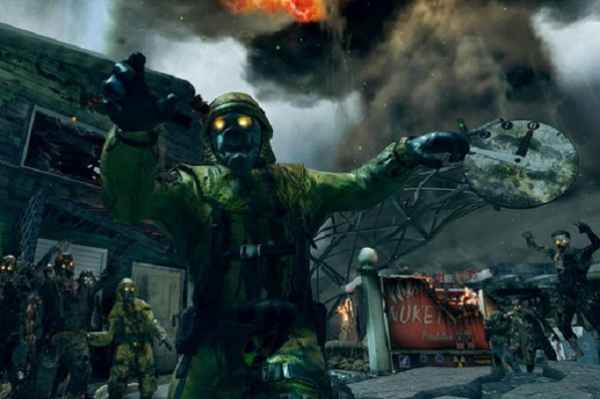
Call Of Duty Zombie Enemies
Zombies are going to be a lot, but they’re not going to be the only creatures you’ll have to kill in Zombie Mode: depending on the choosen play mode, you’ll have to face different evil creatures.
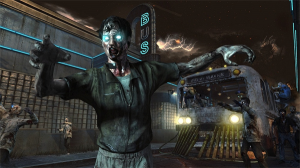
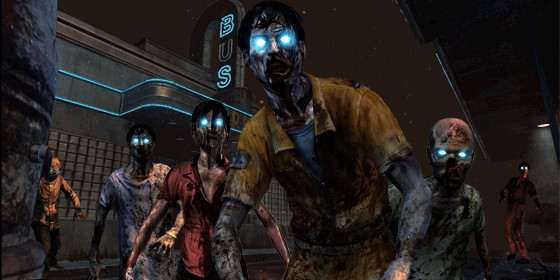
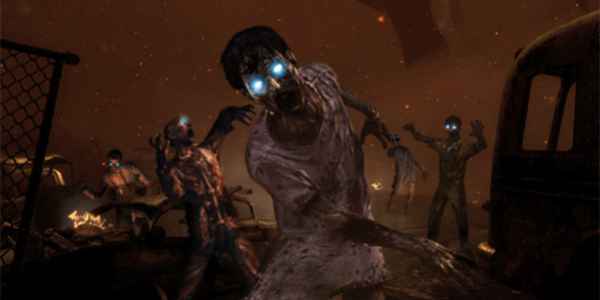
Zombies
Zombies are the most common enemies, taking two hits to down you, five if the Jugger Nog Perk-A-Cola is active. The total number of Zombies per wave varies greatly on the number of players: the less players, the less the zombies. Also, there’s a set number of zombies for each round: you can use this to your advantage by making the last zombies in a wave crawlers and explore the area fully to find weapons, upgrade them and buy perks without being interrupted.
Hellhounds
Hellhounds are faster but weaker than regular zombies. You’ll go down after three Hellhounds’ hits, and after around six hits if the Jugger Nog Perk-A-Cola is active. They appear less than zombies, every five rounds in the Bus Depot, Town and Plant maps. Just be careful as they just get warped into the map when they spawn. As an added bonus, however, they’ll drop a Max Ammo power up once all of them have been defeated.
Denizens
Denizens are small zombie-fied creatures only found on the Green Run maps: you’ll find them in the mist when traveling from map to map and they’ll attack you by getting on your face until you take them out by using the knife, by hitting them twice with the Galvaknuckles or by making a team member shoot them. They’re not too dangerous since you can easily avoid them by using the Bus to move from map to map but if many of them are around they can easily take you down, combining their attacks with assaults from regular zombies. Denizens will also teleport if they’re hit by the green spotlights found all over the maps: you can even take advantage of this by jumping into the hole they make to teleport, making you travel from one green spotlight to another. The first time you do this you’ll also unlock a Trophy/Achievement.
Avogrado
Avogrado is the only boss-class creature in Zombie mode and you’ll only have to face him on the during TranZit mode. He’ll appear after you turn the power on the Plant map, causing a storm with the monster where it’s centered. To make him disappear temporarily you’ll have to use the EMP Grenade and by doing this you’ll also get a Trophy/Achievement; to kill him permanently you’ll have to build the Thrustodyne Aeronautics buildable item and use it to suck him in, completely removing the creature from the map.
Zombie Survival Mode
Survival Mode was originally intented as the only available mode in Zombie Mode but eventually became a selectable play mode for all the maps of Zombie Mode. Most of the strategies and tips for Survival Mode will be useful for the other play modes.
Basics
In Survival Mode, a team of up to four players will fight endless waves of Zombies until all the players have been killed. The more rounds you survive, the more zombies will increase. As we already said, it’s better to melee zombies whenever you can especially in the first rounds, making you earn more points. All players will begin the mode with the M1911 Handgun and 500 points.
Points
Earning as much points as you can is fundamental in Survival Mode: more powerful weapons are a necessity when zombies start becoming tougher. The way you shoot and defeat Zombies is what determines how many points are you going to get.
Points aren’t used just to buy weapons: you can use them to open doors, clear debris, activate traps, upgrade weapons with the Pack-A-Punch Machine, buy perks from the Perk-A-Cola machine and get weapons from the Mystery Box.
Downed Players
If a player is hit twice by a zombie or three times by a HellHound, he’ll be knocked down: after 30 seconds of downed state, the player will die if he’s not revived by a team mate, retaining all weapons but loosing all activated Perk-A-Colas. In case the player dies, he’ll be revived in the following round, with the starting weapons and points.
Doors
Like I mentioned before, you can use points to open up doors and get access to more areas within the map, often containing better weapons and perks.
Crawlers and Zombie trains
Making the Zombies “Crawlers” is probably the best way to keep a large number of them at bay and avoid being interrupted when using the Perk-A-Cola and the Pack-A-Punch machine. It’s really simple to do: destroy the zombie legs with well placed shots or use explosives to blow off their legs. Crawlers move very slowly and won’t be able to bother you easily and, as long as they are alive, they’ll prevent spawning more Zombies. Be careful though, a Crawler may die even without you attacking it, and a new zombie will spawn in it’s place. Another excellent strategy which will make you earn good points, save ammo and not taking too much risks is making a “Zombie Train”: try to have a group of Zombies follow you and then move fast around the map; once you have a good distance between you and the enemies, start aiming at their heads and shoot. Headshots give good points and if you’re good, you can take more than a zombie out with a single shot.

Grief Mode is a peculiar spin on the standard Survival Mode. Two teams will play on a single map and the last surviving team wins. The Quick Revive Perk-A-Cola will give you a great advantage over the opponents. Other than that, you can apply the basic Survival Mode strategies. In Grief Mode you can also use your knife to prevent opponents from reviving team mates.
TranZit mode is a new Zombie game mode introduced in Call Of Duty: Black Ops2: it’s the closest thing you’ll get to a Zombie story mode. This mode is similar to the Survival mode since you’ll have to fight waves of Zombies but while trying to survive you’ll have to complete some specific objectives in order to keep on going. To aid you in this quest there are some features unavailable in the Survival mode.
Buildable Items
Buildable Items are mostly used to slow down zombies giving you a slight advantage. You need to bring the required parts at the work bench to create your items: some parts will be randomly spawned on the map, others have set location. Be careful that you can only carry a single item so you need to get to the bench, leave the item and then search another one.
Each workbench is used to create a single item and it will only accept parts for that item: if you’re at the bench designed to craft the Turbine you can only leave the parts for the turbine there. Once you brought all parts the item can be picked up by anyone on your team. Once the item is destroyed by zombies it can be picked up again from the bench. Here’s the full list of buildable items.
Electric Trap
The Electric Trap needs a Turbine to work and will knock down anyone in the vicinity, players included. Battery, Rod and Base parts are required to build the trap: The rod is by the windows up the stairs from the bench. The battery can be found on some barrels during the map and the base will be near the Tombstone Soda.
Navigational Table
The Navigational Table is part of the Easter Egg: you’ll need the Table, NavCard, Card Reader, Meteor and Radio. The workbench to create the item is located under the radio tower with the red blinking lights in the corn field. You’ll find the table in the tunnel, randomly spawning in a couple of locations or in the lower level of the power room. The NavCard, together with the Meteor, can be found in the Bus Depot: the Nav Card behind the Depot and the Meteor in a hole in the wall. The Card Reader will spawn in either the dumpster or the box at the farm house left of the refrigerator in the Town. And finally, the Radio can be found either in the diner’s garage or at the Nacht Der Untoten, to the right of the building, near the fallen bookshelf.
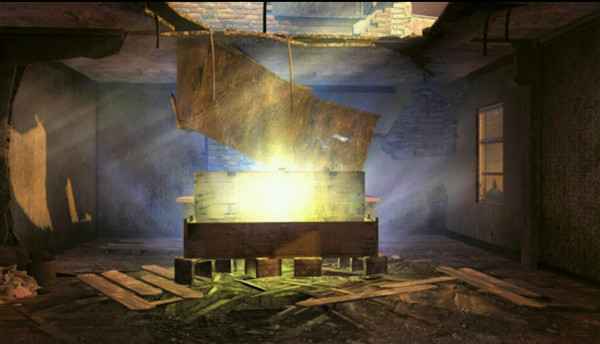
Pack-A-Punch Machine
The Pack-A-Punch needs the Battery and the Head Piece Parts which can be found below the bank in the Green Run Town. This item allows weapons to be upgraded, changing their names, granting attachments and also changing their designs.
Power Switch
The Power switch requires the Power Box and the Arm to be built: all the parts can be found inside the power house. The Power Switch simply turns on the power, powering up other items.
Thrustodyne Aeronautics Model 23 – Air Cannon
To build the Air Cannon requires the Jet Engine, the Handle, Headlight and Wires. The jet engine can be found between Bus Stop 1 and 2; the wires are located near the parts for the Electric Trap, the headlight is in the cabin between Bus Stop 4 and 5; the handle is located at the World at War section on the right stop of the road between Bus Stop 3 and 4. The Air Cannon blows wind on the zombies: it has limited durability and its pressure can be adjusted before it reaches the maximum value, making the cannon explode. Unlike other buildable items, the Air Cannon can only be held by a single player.
Turret
To build the Turret you need the RPD, the Lawn Mower and the Ammo Pouch: all these items are located in the House or in the Farm. The Turret is a good offensive weapon that shoots at zombies once they are within range. Also note that the turbine is needed to make the Turret work.
Zombie Shield
Dolly and Car Door are the required parts: the Dolly will be found in the diner while the Car Door in the garage. The Shield can be used to bash zombies: it has limited durability and you won’t earn points by using it. Still, it’s a good defensive tool since zombies won’t be able to attack you.
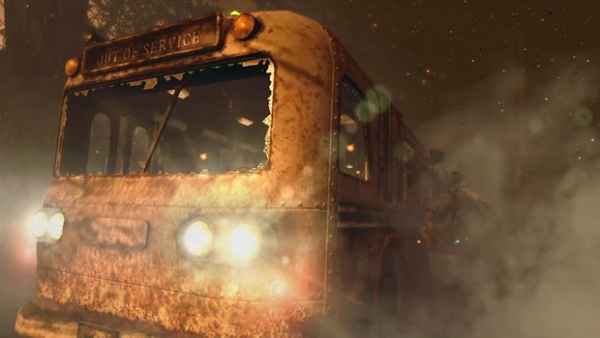
Travel
During TranZit mode you’ll be able to ride a robot driven bus, going from area to area. The bus will wait at a stop for a while before moving to the next area: the bus will honk its horn once it’s almost ready to leave. Using the bus is the only safe way to move from one area to another: if you attempt to leave the area and walk through the mist you’ll have to fight zombies and other enemies, with a good chance of being killed without being able to reach your destination. While riding the bus you’ll be attacked by zombies: once the barricades on the windows are destroyed, they’ll start attacking you. The best thing to do here is getting on the back of the bus while killing zombies since, if they drop power ups, they’ll get to the back of the bus by themselves. The bus can also be upgraded with parts hidden behind doors that require power to be opened: the Train Grill will stop zombies from entering through the front window; the Ladder allows players to climb to the roof of the bus from outside and the Hatchdoor will open the roof to let players enter or leave through the roof itself.

Once the bus arrives in an area, it’ll wait for some time before leaving again: it’s up to you if you want to fully explore an area or prefer moving around quickly, avoiding getting overwhelmed by a zombie wave. If you miss the bus don’t start killing all zombies while waiting for it to come back: try to slow them down or make crawlers out of them to save ammo. If the bus stops in an area you don’t want to explore, simply get off and then on again and make sure to close the doors to make it leave as soon as possible.

During Zombie mode, only three maps, Bus Depot, Town and Farm , can be played on all play mode. In TranZit mode they’ll be bigger and feature more items, weapons but also more enemies than Survival and Grief modes.
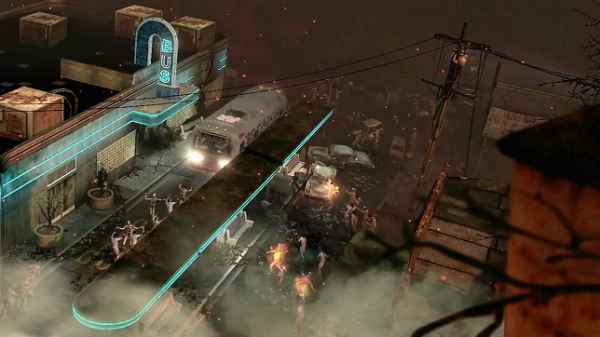
Bus Depot
The Bus Depot is the first area you’ll visit during TranZit mode: players will start in the lobby of the Bus Depot and they’ll be able to buy two weapons inside it: the M14 for 500 points and the Olympia for 500 points as well. To get to the outside of the station you’ll have to pay 750 points to open the door. Be careful around the map: there’s gonna be fire and lava on the ground and it’ll damage you if you get too close. Fire will also have an effect on zombies: they’ll be lit on fire and may explode once defeated. While outside you can buy another 2 weapons: the MP5 for 1000 points and the Remington 870 MCS for 1500, located in the building opposite to the Depot.
The map is especially though in Survival Mode since it lacks Perk-a-Colas and Pack-A-Punch Machines: the fact that it’s not too large also makes surviving hard. You can try abusing the Zombie Train strategy but it’s gonna require you a lot of skills to pull it off successfully: not being able to use the Jugger-Nog means that you’ll die easily at the first mistake and makes it even harder doing it solo. A basic effective strategy is to run around the pumps avoiding zombies and killing only the ones that get in your way: once the train has been created start crushing some zombies’ skull! The real problem lies in being able to avoid their attacks: zombie respawning can give you quite some problems since most of the times they’ll respawn on the ground or in the mist. You’ll also need to have a high damaging weapon to dispose of the zombies directly in your way and another with a lot of ammo to kill the zombies that are following you. Don’t bother with this strategy during the first rounds: use that time to save bullets and melee them to get the most points.
Town
Most of the town is covered in lava and just like in the Bus Depot, it can damage you and set zombies on fire: there’s a chance they’ll explode after being killed. This map features some more weapons than the Bus Depot and you’ll be able to get some Perk-A-Colas. The Pack-A-Punch machine is also available even though you can’t reach it without activating the Jugger-Nog Perk-A-Cola first.
In the center of the town you’ll find the Pack-A-Punch machine; however it’s surrounded by lava so you’ll need the Jugger-Nog to be able to survive the damage from the lava. On one of the sides of the map is the Double Tap Root Beer Perk-A-Cola and the mystery box: they’re in an alcove just outside a small building. Across the mystery box’s location you’ll be able to buy the Olympia gun for 500 points. To the left of the Olympia there’s a wall location for Semtex Grenades. To the other side of the town you’ll be able to enter the Bar and the Bank: before entering the Bar you can by the Stamin Up Perk-A-Cola, to the side of the Bank you’ll be able to buy the M14 for 500 points. Entering the bank will actually cost you 1000 points and it could be worth it since you can buy the Speed Cola Perk-A-Cola inside. The Bar is also opened by spending points, 750 to be precise: inside you’ll find the Galvaknuckles on the first floor while the Quick Revive and the Mystery Box are available on the second. The last notewhorty location of the Town Map is the burning building: to enter it you must walk up a set of stairs across the street from the bank and spend 750 points to open the door. Inside you’ll find the MP5, which can be bought for 1000 points and the Juggle Nog Perk-A-Cola: now you can get to the Pack-A-Punch machine if you need to use it.
M14 – 500 points
Olympia – 500 points
Semtex – 250 points
Galvaknuckles – 6000 points
Mp 5 – 1000 points
Quick Revive – 500 points solo/1500 points with other players
Jugger-Nog – 2500 points
Speed Cola – 3000 points
Double Tap Root Beer – 2000 points
Stamin-up – 2000 points
Tombstone – 2000 points – Only available when playing with other players.
Farm
The Farm is one of the smallest maps for all game modes in Call Of Duty: Black Ops 2. Just like the Bus Depot and the Town, you’ll find lava all around the stage so watch out, you don’t want to get burned to death do you? Better make a zombie get on fire and explode, that’s for sure. The Farm map can also be played by itself on the Survival and Grief modes, featuring less items than the TranZit mode version.
The map has only 3 buildings placed close to each other: the Barn, the Shed and the House.
The Barn has two floors and a single entrance: near the entrance you can get the Quick Revive Perk-A-Cola. On the first floor of the Barn you’ll be able to buy the Olympia weapon and on the top floor another Perk-A-Cola vending machine awaits you, selling the Double Tap Root Beer.
The Shack is located directly to the right of the Barn: if you’re playing the Survival or Grief mode there won’t be any weapon or perk inside; if you’re in TranZit mode you’ll be able to buy the Galvaknuckles.
The last building is the House: to open its door you’ll have to spend 750 points. Directly inside you’ll be able to buy the Speed Cola Perk-A-Cola from its vending machine. Climb up to the second floor to find the MP5 Gun and the Jugger Nog Perk-A-Cola vending machine. If you want to try your luck you can buy a random weapon from the Mystery Box located on the balcony.
Only available in TranZit mode are the Lawn Mower, Bus Cow Tipper and Machine Gun items, used to build the Lawn Mower Turret Gun. If you want to store a weapon for the next game, you can use the Fridge in the house: each player can store one weapon. Also, you can reach the Nacht Der Untoten map by going inside the Corn Field: be careful though, Denizens will attack you in the mist and the map has only got an extra weapon, the Remington 870 Shotgun, probably not worth the risks.
M14 – 500 points
Olympia – 500 points
Galvaknuckles – 6000 points – TranZit mode only
MP5 – 1000 points
Quick Revive – 500/1500 points for solo/multiplayer playing
Double Tap Root Beer – 2000 points
Speed Cola – 3000 points
Jugger-Nog – 2500 points
Plant
The Plant map is one of the maps exclusive to TranZit mode: rather than a map, I’d call it a location, since it can’t be played in Survival or Grief modes. Activating the electrical power is fundamental to activate the Pack-A-Punch machine available in Town and get parts to build special objects which may required even later, like the Power Switch and the Electric Barrier. Once off the bus you’ll see a door that can be opened for 750 points, leading inside the nuclear reactor: to the side of the door you’ll be able to buy the Ak-74u if you need it. Once inside the reactor you’ll need to turn on the power to be able to open another locked door and to do this, you’ll need to build a Turbine to power up another buildable item, the Power Switch: the parts for the Power Switch can be found near the reactor as well as the working bench needed to actually craft the item. Once the Turbine has been activated you’ll also be able to operate the Pack-A-Punch Machine in the Bank’s Vault in the Town, if you already built it. Once you power up the Turbine and turn on the power, lightning will come from the central room, killing any zombie present in the room: a glass cylinder will come out together with the Avogadro, who’s know going to be spawn for the rest of the match until he’s defeated for good. After the Avogrado flies in the sky, you’ll finally be able to go inside the actual power plant through the previously locked door. Be careful when activating the power for the first time: the room with the reactor will be locked down for some time and players may end up separated during this time frame: it’s not a problem for the player inside the room since all zombies are going to get killed by the lightning but it could be bad for any player outside the reactor room.
Ak-74u – 1200 points
Board with Pole
Cables/Wires
Car Battery
Electrical Board
Old TV Screen
Zombie Hand
Electric Barrier
Power Switch
Turbine
Tunnel
During TranZit mode, you can travel between the Bus Depot and the Rest Stop through a Tunnel. Not much can be said about the tunnel: you’ll be able to buy a weapon and find the jet engine part.
M16A1 – 1200 points

Rest Stop
The Rest Stop is right after the Tunnel: the Diner, the Gas Station and the Shed can be explored.
To enter the Diner you must use 750 points and you’ll find a Speed Cola Perk-A-Cola vending machine and the Mp5 Weapon. Find the hatchdoor and use it to reach the Galvaknunckles. Finally, grab the dolly behind the counter and head outside
To enter the Gas Station, you’ll have to pay 750 points. Most of the times you’ll find the Mystery Box here. In the back is a workbench: leave the dolly you picked up in the Diner here. In the garage you’ll be able to find a car door: use it on the workbench to creat the Zombie Shield. By using the Turbine, you can open the shed close to the Gas Station to obtain a Bus part.
Corn Maze
Between the Farm and the Plant is a misty Corn Maze. The only reason to go into the corn maze is to get an extra weapon and a part for building an item from a demolished building. The only way to reach this demolished building is walking in the mist, full of Denizens: it’s not really worth it.
Cabin
The Cabin is located between the Plant and the Town: it can be reached with the bus. The only things available in the Cabin are the Bowie Knife which can be bought for 5000 points and an item part, required to craft the Headlight buildable item.
Nuketown Zombies
The Nuketown zombie map is the “zombie” version of the Nuketown Map available in the first Black Ops and can only be played in Survival Mode: many of the areas of the map will be blocked by rubble, clearable by spending points.
A free, but random, power up will be waiting for you inside one of the houses which requires you to pay 3000 to unlock it’s back door. The whole map has slightly different mechanics than usual regarding Perk-A-Colas: after killing 100 zombies, a random vending machine will be placed in one of ten possible spawn points: you’ll know that a machine is on the map by hearing a clock sound. The machine will sell one of the nine Perk-A-Colas or it could be the Pack-A-Punch Machine: as you can see the Nuketown relies heavily on some random elements and there’s not much of a strategy available. There are a lot of buyable weapons inside the truck so if you have points to spend you may want to head there and buy some of them: be careful that you’ll need to clear the debris paying 3000 points to get access to the bus. Other weapons will be available in the Grey and Yellow house, with an Olympia located on the back of the Bus, just like in the other Zombie Maps: to enter the two houses you’ll have to pay 750 to open the locked doors. Finally, there’s a mystery box in the map as well, under the overhang of the yellow house garage. Something you should be aware of while playing this map is the way zombies spawn: since there are no windows zombies will spawn from the ground and climb over fences. A fun touch is the population sign at the beginning of the map: it shows the number of killed zombies, getting back to 00 after 100 have been killed so that you’ll know when the vending machines are going to be available on the map.
Ak74u – 1200 points
B23R – 1000 points
Bowie Knife – 3000 points
Claymore – 1000 points
Galvaknuckles – 6000 points
M14 – 500 points
M16A1 – 1200 points
MP5 – 1000 points
Olympia – 500 points
Remington 870 MCS – 1500 points
Semtex – 250 points

Easter Egg
In true Call Of Duty fashion, Zombie mode has also a small easter egg available: the Musical Teddy Bears. It can be found in the Nuketown Zombies Map and in TranZit mode: you’ll have to activate three teddy bears scattered all over the place and once you’ll do, you’ll be able to keep killing zombies while listening to a song by Skrillex called Try It Out. In TranZit mode finding all the teddy bears may be more difficult so here are the precise locations: the first one can be found on the bench in the Bus Station, close to the starting point: the second is in the Farm, on the second floor; the third one is in Town, located near a pool table inside one of the building.


 Counter-Strike: Global Offensive - How to Cooldown Timer Work
 4 Ways to Save Money When Buying a UPS
 6 Awesome Places To Find Free InDesign Templates
 Diablo III Crafting Guide
 Building the Ultimate MMO Society