Welcome to the first in a series of guides for Halo: The Master Chief Collection! These guides will cover every game in the collection individually, and will help you with getting the Par Times and Par Scores for every level in Halo: The Master Chief Collection. Because we’re nice. Now, without further ado, your guide to beating the Par Times and Scores of every single level of Halo: Combat Evolved!
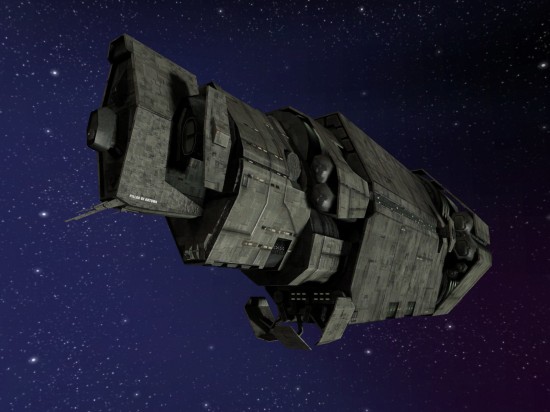
Ah, the beginning of something special. Here’s how we’re going to do this – there’s going to be separate pieces of advice for Par Time and Par Score, as some things that help one do not necessarily help the other. Like, for example, this mission and its 15 minute long tutorial. The temptation is to, when going for Par Time, play on a higher difficulty to skip the tutorial and gain a little time. However, in order to skip the tutorial, you must play on Heroic difficulty or higher – which will make a speed run exceedingly difficult.
Also, it is worth mentioning that it is recommended you beat each of the single player campaigns at least a couple of times before attempting these runs. It will help with knowing the areas of the levels I’m talking about and mapping them out in your head ahead of time.
The handy thing about this level is that a lot of the tactics count for both Time and Score runs. Both getting the highest score and the fastest time require mastering a handy set of skills. You have to get a handle on the magnum, first off; this thing is a handheld Death Star if you know how to use it. Make use of Halo’s judicious auto-aim to peg headshots on Grunts, both to chain up multipliers and clean up the easy enemies quickly. Thankfully, this first level is only Grunts and Elites, the two simplest enemies in the game. The problem is, Elites are still dangerous. And no matter if you’re gunning for Time or Score, you have to combine the magnum with another weapon; the plasma pistol. The infamous “noob combo”; hold down the fire button with the plasma pistol to charge up a shot, then let it loose at an Elite to drain their shields, and finish the party with one headshot. Honestly, skip the assault rifle you can pick up in the mess hall at the beginning – just keep this combo for the whole mission.
There’s one area that requires a different strategy depending on which achievement you’re trying to get. There will be an area where the Covenant are on a landing above you, with a staircase in the center of the room. If you’re going for time? Blitz it, ignore the enemies, and keep on trucking (you also should do this at the mission’s end – ignore the enemies and just run for the lifepod). For score, however, you need to slowly cap as many of the Grunts with magnum headshots from the ground as you can before heading upstairs. Then, try and crowd as many enemies into groups as you can to pick up point multipliers and medals. Don’t be afraid to jump down (beware fall damage!) to dodge grenades – Heroic Grunts friggin’ love those things.
That said, this level is simple. Play it on Heroic for Score, Normal for Time, and keep your head down, there’s two of us in here now, remember?

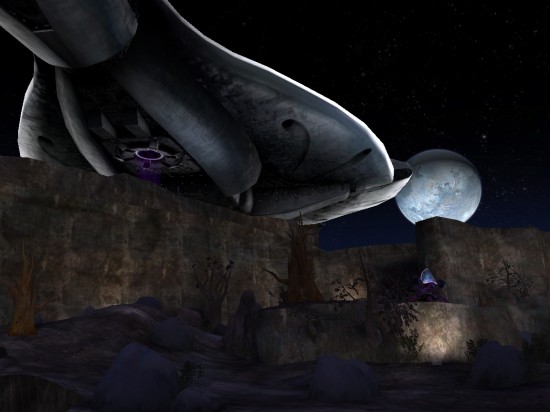
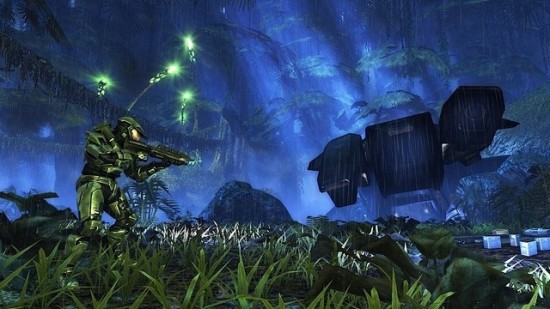
And out into the wild green yonder we go. Halo is a far more complex level for Time and Score runs than Autumn. This level can be divided into four sections; the opening and the three rescue areas. And keep it like the last one (Time: Normal, Score: Heroic).
The Opening: If you’re going for Time, the moment you get out of the lifepod, run left and along the hillside into the next area. If you’re going for score, get over to the hills on the left and pull out your magnum. Take out those two Banshees flying around and the Covenant that pop out of the dropship by the lifepod. Then, run back and grab a plasma pistol off of one of the Grunts or Jackals.
By the way, nice thing about Jackals? They carry more plasma pistols, which means don’t be afraid to be liberal with the charged shot. Also, aim for the notch in the shields to stagger, then one shot to the head will do it.
As you move into the area with Sgt. Johnson and first Marine survivors, strategy for Time and Score are the same. You need to stay mobile and memorize the locations of the incoming dropships, and use grenades and the noob combo judiciously to kill as many in quick succession as possible. Once you get the Warthog, let two Marines get in and then get going through the tunnels.
There are then three areas, the Rock Slide, the River Head, and the Cliff Edge.
Rock Slide: A lot of rocks, Marines are up high, Covenant down low. Strategy for Time and Score is the same; get in the Warthog and drive around the bottom, taking out the Covenant quickly. If you’re going for speed, get angry with the bumper of the Warthog to minimize turret kills – it is a one hit kill. And take advantage of the Warthog’s fishtailing to hit dodging Elites and Jackals.
River Head: Second verse, same as the first. Memorize the locations of the dropships as they land around the structure, and try and take them out before they get into the structure at the bottom of the hill. That maximizes your Warthog’s effectiveness.
Cliff Edge: This is the most difficult one. The cliff minimizes the effectiveness of the Warthog, so it’s best to park it on the outside and let the turret take care of stragglers. No dropships land here, so it’s just a game of clearing out the structure’s exterior and interior. For Time, memorize the structure’s little nooks and crannies where enemies can hide and move through them quickly. Once you get into the structure, make judicious use of the noob combo to clean up Elites and Jackals quickly.
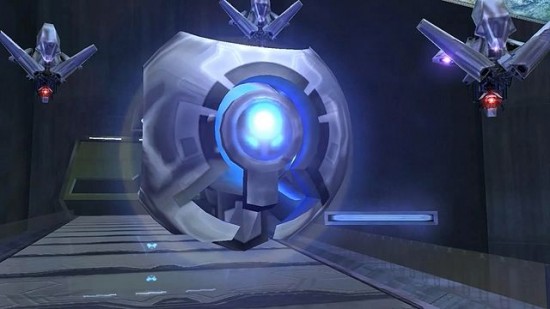
Now, onto one of the most beloved levels in Halo history.
Lesson number one for this mission; learn the sniper rifle. It is your friend. Lesson number two: forget whenever Cortana tells you to wait. Normally this is a stealth raid on the Covenant carrier – here, go loud and proud.
This mission is very simple, and probably makes for one of the easiest guides here. Truth and Reconciliation comes down to you knowing the level back and forward to make the quickest path through the level if you’re on a Time run. The opening sequences in the canyon are unique, in that if you’re good, you can just blitz past all the enemies and leave them to your Marine friends. And make sure you pick up a magnum from one of the Marine corpses you find along the way in exchange for your assault rifle.
This level does introduce two new kinds of enemies. First up are the Invisible Elites, encountered once you first enter the ship and in Captain Keyes’ prison chamber. They usually carry either plasma rifles or, more dangerously, energy swords that kill in one hit. But, they don’t have shields, so one or two solid headshots from the magnum or sniper rifle will do it. Second are the Hunters, giant, armored, nigh-invincible worms with fuel rod cannons and impervious shields. They are the most fearsome enemies in all of Halo: Combat Evolved Luckily, they have a weak-spot; get up close to a Hunter and trigger its charge attack, then swing left to dodge the shield and look at his back. The open orange bit is super vulnerable; one pistol shot in the back will kill a Hunter. Beware, though – when you kill one, the second Hunter will become enraged and charge you. Do the same to the poor, angry fool.
This mission really is a matter of not getting lost on a Time run, and mastering the sniper rifle for both Time and Score. If you run out of ammo with the sniper/don’t feel confident with it, invest in the needler. A homing, explosive needle-machine gun, it works wonders on Elites and, when the needles explode, can make quite a combo machine for a Score run in the tight ship corridors. Know that after you rescue Keyes and make it to the hanger, you can, if you’re careful, run straight past all the enemies and trigger the level end switch. Be brave, my Master Chief Collection friends.
Now, onto the most loved level in Halo: Combat Evolved.
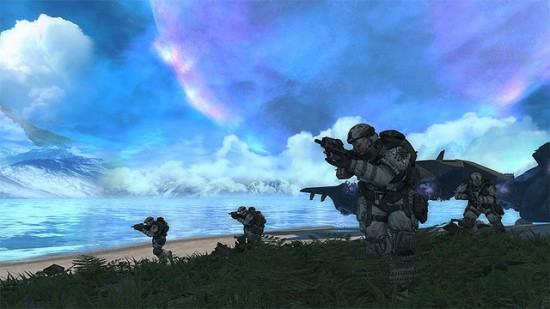
The greatest level in any shooter ever made, not just Halo: Combat Evolved. This is the second open world level in the game, after Halo. It allows you to go two different ways around the island. And which way you go first, after clearing the opening beach and getting the Warthog, depends on which run you’re doing. Also, grab a plasma pistol for the noob combo.
Time: Turn right the hell around, and drive the opposite way. Short cut the intermission with the locked door in the Cartographer by heading straight to the Security Station. Noob combo any and all elites that get in your way, and prepare yourself for a Hunter fight in an open area ahead. Grab one of the Overshields by a box and haul your ass into the structure. Bolt past the Hunters inside and back out to the surface, but slide down the rock face carefully to the crashed Pelican.
Eliminate the jackals and swap your plasma pistol for a rocket launcher. Grab the Warthog and drive back to your other Warthog you left to enter the Station. Get in that, and drive to the Cartographer. Save the rockets until you get inside, and run past as many enemies as you can, only knocking out the Hunters with pistol shots. On the way back out, use the rocket launcher with extreme prejudice, but save one rocket for the gold Zealot Elite with a Sword at the mission’s end.
Score: Play the level normally, take your time, and chain together combos. Make sure you head to the Cartographer first, that way the enemies respawn for more points. Make judicious use of the needler in the tight passageways and rock paths. Use the Warthog to paint the ground in the blood of the Covenant.
And now, my favorite level in Halo history.
Welcome to the largest and most complicated level in Halo: Combat Evolved! Ironically, this is also the shortest guide. The introduction to big vehicular combat presents a lot of problems for the Time runs, not the least because it begins with a big foot segment in the Forerunner interiors. The nice thing about a lot of this opening section is you can just bolt past the enemies.
Hell, for Time runs, that’s pretty much what you have to do for this mission. Forget the Scorpion tank – find a Warthog or Ghost and RUN. Every vehicle segment in this game is murderous towards Time runs. When you reach the ending assault on the Control Room itself, try and get that vehicle as far up the structure as you can, then run once more. Thankfully, this level is a mostly linear level that is very difficult to get lost in.
For Score runs, the stealth sections are your friend. Kill the Grunts while they sleep and hit as many Elites in the back as you can. The bridges are ripe for grenades. The Scorpion tank is masterful at crowd control. Beware the underground bits, as Hunters can put on a clinic in tight quarters, so try and take them out from afar. Otherwise, once again, the noob combo is paramount, and use rockets on Hunters and clumps of enemies only.
And now…the part where the Master Chief Collection gets really difficult.
Earlier I mentioned that the saving grace of Truth and Reconciliation was memorization. Ensuring that you do not get lost in the corridors of the Covenant carrier. I’ve also pretty much always told you to throw away the assault rifle in favor of the noob combo.
The first one just became paramount, and the second should be ignored now at all costs. Guilty Spark is the moment where Halo: Combat Evolved becomes a radically different game. The first half is a traditional Halo level, and you can pretty much take the advice from the last few missions and copy paste here, with one exception. This level contains no Elites, so the noob combo is unnecessary. Here’s where the divide is.
If you’re doing a Time run, pack a shotgun and a magnum. For Score runs, pack a shotgun and a magnum up until the room where the Flood appear, then switch the magnum for an assault rifle.
That’s because during a Time run, the entire second half of this level is you sprinting back out of the building from the Flood. Just ignore them as much as you can, and memorize this labyrinth of a structure. Getting lost in this place is very, very easy. And even when you leave the structure, just keep going out into the swamp until you see a tall structure. Simply hold off the Flood here for a few seconds and the mission ends.
For Score runs, the assault rifle is key in the second half. This is because of the Infection Forms, tiny turkey-shaped creatures that die in one hit but come in droves. The assault rifle is excellent at killing tons of them in a short time span, as opposed to the normally preferred shotgun. Also keep in mind that collections of Grunts and Jackals will appear in this second half, and normally packed together. A grenade or two will help with that. Once outside, try and steal as many kills from the Marines and Sentinels as possible, and don’t be afraid to hang around and let the Flood come for extra points.
Now…the most infamous level in Halo history, and the most hated in the entire Master Chief Collection.

Oh, boy. This level is torturous as it stands, and carries the reputation of being the worst level in Halo: Combat Evolved. The Library is a Flood gauntlet level – it is long, dark, monotonous, and only filled with the Flood. There is no Covenant, no Marines, only the Sentinels and the chatty 343 Guilty Spark in the background. Which makes for difficult guide making.
I take back what I said about Assault on the Control Room – this will be the shortest guide.
Time: Run. The only times you have to fight are when you reach the locked doors, enemies get onto the elevators, or are faced with a Flood combat form with a rocket launcher. When you see those – kill the one with the rocket launcher and take it. Treat it like the nuclear option, only when it is absolutely necessary. Also, take advantage of the new Flood type in this level, the Carrier forms. Shoot them a couple times, and they explode, spewing out infection forms but also launching all enemies in various directions. Keep an eye on the doors during the stand your ground segments; the moment it opens, get through and throw a grenade behind you to deter chasers. Otherwise, run.
Score: Fight everything. Hang back at all the doors for a bit, kill the remaining Flood spawning in. Make sure to keep a shotgun handy at all times, wait for moments where the Flood funnel together where you can kill two per shot. Plasma rifles make an excellent substitute for shotguns if you run out of ammo. Keep an eye out for packs of enemies behind you to toss grenades. Make stands in corners where enemies come from one side in waves but you have an escape route. And at the end, spend a little time clearing the path to the Index. It’s the last big bundle of enemies, and it is useful for sending your score over the top.
Now, the actual worst level in Halo: The Master Chief Collection…plus something else.
Gah, this fucking thing. Welcome to the last act of Halo: Combat Evolved, which is entirely consisting of backtracking. In this case, these two levels are retreads of Assault on the Control Room/Truth and Reconciliation, respectively. Though there are two major gameplay hooks to the levels on this second trip through.
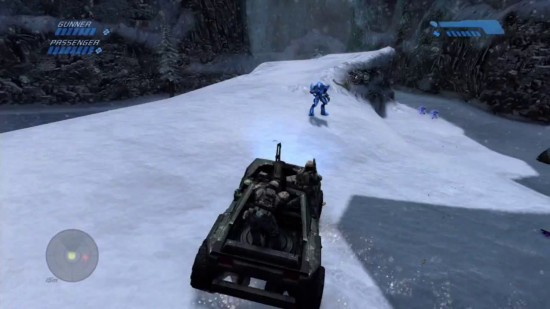
Two Betrayals (I hate this level) finally gives you access to the Covenant flyer, the Banshee. Airborne combat is now a go. How you should use this flying purple death machine is depending on the run you’re doing. For Time runs, well, repeat the methodology of Control Room and run. In this case, fly. It’s worth playing through this level a few times to memorize the Banshee locations, because you will be forced to ground in between each generator. When on the ground, run still. The bridges will be your biggest problem, but they are skippable.
For Score runs, take your time when in the Banshee and engage all of the ground battles from the safety of the skies. When on the ground…well, this gets difficult. You’ll be fighting a mix of every single enemy in the game; Sentinels, the whole Covenant range, and the Flood. Plasma weapons are great against Sentinels, and the noob combo is as effective as always against the Covenant, but the Flood are a problem. You have to get creative with them; plasma rifles will suffice in the absence of a shotgun, and grenades work well against packs.
Keyes has you running through a wrecked version of the Covenant carrier Truth and Reconciliation. It also has a lot more canyon based segments, and introduces a new class of Covenant soldier. The black-armored Spec Ops Elites and Grunts are far tougher than their standard counterparts. The small corridors make it difficult to run past them, and the prevalence of Flood makes the noob combo impractical. This is the level where the needler shines, for both Score and Time runs. The explosion from a needler’s needles is a lifesaver in close quarters.
Really, the tactics from Two Betrayals carry over here for both. Score runs should take their time, particularly at the fluid jump moment. You can rack up some serious points there. Time runs should just jump immediately, ignoring Cortana’s warnings. They should also do a rare thing and stand their ground at the gravity lift back into the ship – falling down will only really slow you down with the amount of Flood coming that way.
And now, Halo: Combat Evolved‘s homecoming party….

…is a real shit party. No music? No cake? No drunk fathers? Man, Cortana is right. You leave home for a few days and everything just falls apart.
The Maw is another level in which memorization is key. Back in The Pillar of Autumn, there were handy lights of green and red to tell you which doors worked and arrows on the floor to guide you. The latter remains, but the former are long gone. And it’s not enough to simply follow the arrows backwards through the level; when time comes to cause a Wildcat destabilization in this popsicle stand, memorization of the multiple floored areas of the engine room is necessary.
This may be the only level in the game where a Score run is harder than a Time run. The Maw can be divided into three sections; The Bridge, The Engine Room, and The Maw.
The Bridge: This opening jaunt presents no real problems for either Time or Score runs. Keep a shotgun ready and, as per normal, keep moving if you’re going for Time. Time runs should also memorize the different scripted events in the area; how long they take to open, how many enemies come out of them. Score runs should take advantage of the three way war happening in these tiny corridors between the Covenant, the Flood, and the Sentinels to score big multipliers. You’ll need the point bonus for later. Also worth noting once you reach the bridge are the Spec Ops Grunts with fuel rod cannons – once you kill them, the guns will self destruct a few seconds later. Get clear of the blast, or take advantage of it to kill multiple enemies at once.
The Engine Room: Welcome to one of the most difficult encounters in the entire game. Time runs require absolute mastery of this area; where every ramp is, the layout of each floor of the engine room, perfect timing on detonating the engines, and being out of this room before Cortana can even tell you to run. Whether or not you use rockets or grenades is irrelevant; what matters is precision. I recommend a mix of the two – use the rockets on the engines where you need to take them out quickly and grenades to those you have a little time to aim. But you cannot afford to miss. A trip back to the armory is a massive setback to time.
Score runs should squeeze every last bit of juice out of this room they can. Enemies will keep coming forever, so take your time and stay mobile. And as always, watch your step – the fall from the engine vents will kill you. This is the last big area for Score runs in the level, because…
The Maw: The trench run to end all trench runs. Once more, memorization is key for Time runs, as well as mastery of the Warthog. The fishtailing you took advantage of in previous levels is now working against you, so you need to minimize the amount of movement when driving at speed. Keep an eye out for the two narrow shortcut paths about a third of the way and three quarters of the way through the ship. And just skip Foehammer’s death scene and keep on driving. The universe depends on you!
Score runs…well, this is why the last two areas were so important. You’re now operating on a time limit, which means you have to keep moving. Keep an eye out for enemies running away from you in the tunnels and run them down, and get liberal with grenades on the final jog to the Longsword. Otherwise, this is pretty much a game of using the Engine Room to pad your score out as much as possible.
And that is it! Thanks for reading part one of our Halo: Master Chief Collection guide, and stay tuned for our guides on Halo 2, Halo 3, and Halo 4.


 What Would Deadpool's Resume Look Like?
 How to get LEGO Batman 3: Beyond Gotham Achievements for Xbox 360 and Xbox One, Achievements Guide
 Wildstar Reloaded: All Emotes (funny animated)
 How to find Dying Light 9mm Pistol for Completing Gunslinger Side Quest
 Dirt 3 Review Round-up