Twilight Princess is an epic journey that takes Link from one side of Hyrule to the other and back again many times, while meeting some very interesting characters along the way. It is a long excursion where not everything is as open and shut as it may at first seem, and that is where we come in. We have put together this campaign walkthrough to help you get from the very beginning to the very end without so much as a hiccup, so that if at any time during your play through you happen to get stuck, you can just look up the area that you are in and see what needs to be done without spoiling too much more of what’s ahead. With that said, get your sword sharpened, your shield shined, and let’s get to it!
Ordon Village
The Twilight Prison
Forest Temple
Twilight Kakariko Village
Lakebed Temple
Death Mountain and Goron Mines
Hylian River
The Sacred Grove
Gerudo Desert
Arbiter Grounds
Mirror Chamber
Snow Peak Ruins
The Temple of Time
Ilia’s Memories and Statues
City in the Sky
Palace of Twilight
Hyrule Castle

After the first introduction with Rusl, walk to the entrance to the north to find Epona in the pond with Ilia. Talk to her and then pick up the grass to blow on it and play a song. Once you are ready, hop on Epona and head west and then south to the village. Talk to the villagers and speak to Colin and Rusl about the fishing rod. He will tell you that it will be available tomorrow, so continue on south to the Ordon Ranch and talk to Fado who will ask you to herd the goats in to the barn for him. Stay in front of them and press A to shoo them towards the barn until they all enter. Once they do, you can then practice jumping the fences in the pasture by dashing towards them. Once you are done goofing about, hop the fence to the pasture and you will be given the chance to save on your way back to town.

Now that the next day has come, climb the ladders to get down to the main floor of your house and head outside. Talk to Beth to learn the shop has a new slingshot and Colin to learn that his mother has the fishing rod. When in the village, talk to the folks including Sera’s husband who will tell you about a bee’s nest above his house that he is trying to knock down, and Ula holding a baby near the river looking for a cradle. Go to the west of the area to talk to Jaggle – atop a vine covered column and he will ask you to climb up. Do so and hop across the stones to pick some grass there. Blow it for a hawk to land on your arm, which you can now aim and use to hit objects. Aim it at the bee hive directly across from you to knock it down. Now you can head over to where the bee hive was and climb up the vines and tree to get some rupees on the branch.

Head back down, and enter Sera’s store to the west. Talk to her and she will tell you that she is depressed because she scolded her cat for eating the fish and now she doesn’t want to sell anything. Hop back up the vined column outside and hop across the rock platform again. This time continue across to the roof and again to the next platform. Here, pick up the grass and blow it to bring another hawk. Aim to the northwest and you will see a monkey dancing with the cradle there. Let the hawk go towards it and it will bring the cradle back for you. Bring it to Ula at the river and she will take you to the house to get the fishing rod. Once you have the rod, go to the dock behind the water mill and cast it off into the deep water where the fish are swimming. When you see your bobber go down, pull back on the Wii-mote to pull up a fish. If you don’t get it the first time, keep trying and you eventually will. When you catch a fish, choose to let it go and Sera’s cat will grab it and take it back to the shop.

Head over there and talk to Sera who will now be in a better mood and ready to sell things. Buy the sling shot for 30 Rupees and then make your way back to your house. When you get to the area, Rusl will tell you that he left a present for you inside. You can talk to Beth and the kids now for some target practice as well as head inside to grab the wooden sword inside the chest. Once you have it, show off your mad skills to the kids and then they will go chasing off after a monkey. Follow them north to the Faron Woods with Epona so that you can hop over the fence that blocks the way.


Now that you are back at the ranch, use the grass on the ground after talking to Fado and use Epona to herd the goats into the barn again. Once done there, leave the ranch and make your way to the Mayors house by hoping over the fence and leaving the ranch. Once you do, a scene will play and Ilia will take Epona to the springs for a refresher. Make your way there and talk to Colin in front of your house. He will ask that you take you to the spring to see Ilia but that Talo and Malo always stop him. Talk to the two kids and give them your sword and then continue on. Once you reach the spring, it will be blocked and you will have to use the tunnel to the south to enter it. Crawl through and a scene will play, taking you to the next area.

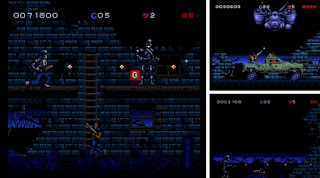
Once you are back in control, your little friend will tell you to break out of your cell. To get out, you will need to dash at the crate in the corner to break it. It may take many tries before it eventually smashes, but keep at it till it does. Once it’s broken, dig at the opening in the bars and then you will be free. Enter the next cell through the door and pull the chain down. Enter the new opening and follow the corridor to the end. Here you’ll learn how to use your senses on the glowing flames and to see what ghosts are saying. Continue to the end of the corridor and make a left and continue going south. Pull on the chain rings as you come across them and some will open alcoves for you to enter and find skulls and boxes to break, while the far chain will raise the water level allowing you to get over the spikes on the north side.
Continue north to the flames and listen to it. Make your way to the corridor going east and west and when you go west, your friend will hop off and tell you to figure it out. Go to the east and there will be two chains to pull. Pull both and the water level will lower and a door will open.

Kill the black enemies that appear and then make your way back to the bars that your friend went through. At the bottom of them, there will be an opening on the left side that you can squeeze through. Once you go through the small tunnel, exit out and your friend will hop back on. Head to the end of the corridor where there will be a spiral staircase going up. When you get to the first jump, it will collapse and you’ll need to use your friend to jump across. Whenever he laughs, Z target him and then press A to jump. Simply keep making your way to the top by running up and targeting him when you need to. Once you reach the top, stand to the side of the room where the broken blocks are and your friend will pop up above. Use him to jump a few times and exit out through the door at the top. Once outside, make your way across the bridge and some black birds will attack. Use the Z targeting and jump attack to take them down quickly. Continue across and eventually you will come to a large slanted roof. Go to the far right side and at the top of it there will be an opening to enter. Once inside, make your way up the stairs and a long scene will play.

Now that you are back at the village, make your way through and you will learn that Midna wants a sword and shield and that you can talk to the animals of the forest. Head down to the far edge of the village and you will find the Mayor talking about having a shield inside the water mill. Leave when they notice you and make your way to the middle of the village and Sera’s husband will sic the hawk on you.
Go to the Sera’s shop and use Midna to jump on the roof. Once on it, go to the left and jump over to the platform that he is on to scare him off. From here you can now use Midna to get over to the water mill and onto the roof to enter the open window.

Once inside, hop on the table in the center of the room and then have Midna jump you up to the upper ledge. Once up there, dash against the wall to make the shield hanging on it fall down. Grab it and then jump out of the window. Now that you are back outside, head to Rusl’s house where he and his wife are and a scene will tell you that the sword is inside their house. Go to the right side of the house and use your sense to see the dig spot against the house. Dig there and you will enter the house and then be able to grab the sword off the couch. Now that you have the sword and shield, head back out through the dig hole and run through the forest to the spring. When you get there, a shadow being will attack and you will need to defeat it by holding Z and some good old fashioned waggling. Once the creature is down, another long cut scene will play. Once it is over, head north and enter the Faron Woods across the bridge.

Continue forward through the forest and you will get surrounded by some more shadow beings. Take them out in a group and continue to the waterfall. Once you reach it, you will told to gather the tears and will be given the Vessel of Light to collect them. You will also be shown their locations on the map. Head to the west and then north to find the first two. Use your senses to find the two insects and kill them to catch the tears. The next two can be found by going to the west just before the wooden fence and up the path. Once you reach the open area, enter the shack by jumping through the window. Talk to the spirit inside and the two insects will appear. Take them out and then head back outside to find another on the rear of the shack. Head back to the south and east, to the wooden fence, and dig beside it to get to the other side. Collect the two next tears by taking out the insects located just to the left.

The rest of the area will be covered in a purple fog that you can’t enter, so go along the left side until Midna giggles. When she does, jump across and then climb to the top of the cliff. Jump across again to the center area and kill the three insects there. Continue up the tree and across several jumps with the help of Midna to get to the bank on the other side. Dig at the shadows of the insects to reveal them and finish them off. Now with only two more tears to go, follow the path in front of you and it will lead you to a couple more shadow beings and the path the Forest temple. Follow it up to the entrance and the final insects will be there to fill the Vessel. Once it is full, a long scene will play and you will be back in human form.

After talking to Coro to get the key to enter the Forest Temple, go through the gate and you will come back to the foggy area. Walk to the edge of the dock and the monkey you saved will appear and steal your lantern. Follow him into the fog and he will clear a path for you to the Forest temple entrance. Be sure to stick with him though as you’ll need to save him periodically from attacks and get your lantern back once you reach the far side. Follow the passage and just before you reach the temple entrance, you will meet a wolf who teaches you the Ending Blow maneuver to finish off enemies. Once you have learned it, burn the spider web to enter the Forest Temple and proceed forward to meet up with the monkey again. Let him out of the cage and climb up the vines to enter a room with a large spider in the center. Light the 4 pedestals with your lantern to raise the steps at the far end and finish off the spider. Open the chest to the left of the door to the north to find the dungeon map.

Go through the door and a scene will play with a boomerang throwing creature will destroy the bridge, causing you to go back to the previous room. The monkey will climb on a rope to the west side, so run and jump towards him and swing across to the door there. Enter the passage way and make your way to the right to find a Bombling. Hit it and it will blow a hole in the wall revealing some pots. Smash them and you will find the seriously creepy looking Ooccoo who can teleport you in and out of the dungeon whenever you please. Turn around and follow the passage through the spider web at the other end and hop cross the platforms to reach the north side. Here there will be a door with a couple of more platforms leading to the left.

For now, go through the door ahead of you and run across the wind-swept bridge to the next door. Go through and you will find a chest to the right. Grab the key out of it and head back to the room with the platforms leading to the left and to the locked door. Use the key on it and you will enter a room with another monkey in a cage. Run across the collapsing bridge and then go to the center of the room with the other monkey. Roll into the center pillar three times to knock the cage down, and you will now have two monkey’s following you. Make your way back to the main room of the temple where you fought the large spider and you the monkey’s will now swing you over to the east side doorway. Burn the spider web on it and then enter.

When you enter, take out the few plants and go up the stairs. Follow them around to a Bombling near an opening with a large plant underneath it. The goal is to hit the Bombling and then pick it up, tossing it into the large plant below so that it eats it as it explodes. It can be a little tricky and will take a few tries, but when you get it, a scene will play showing you did it. Hop over the gap where the larger plant was and go to the right to find a wall of vines. Climb up and you will come to a door. Go through and you will find a third monkey in a cage as well as a huge plant that swallows a key.

To defeat the large plant, simply sidestep its lunge with its head and then slash at it. Once you have hit it enough, the head will disappear. Once it does that, grab one of the Bomblings at the rear of the room and toss it into the remaining plants opening. Once the bomb goes off, you’ll get the key and can then free the monkey. Go back into the previous room now and toss a Bombling off the walkway to the left and it will get eaten by a plant guarding a chest. Across from that gap, there is also a large stone that you need to destroy with a Bombling to reveal a door to the adjacent room. Once the large plant below is destroyed, use a bomb to toss in front of the wall to break it and go through to find the fourth monkey at the far end.

Make your way down the stairs on the left or right and roll into the two pillars to drop a chest and a pot. Grab the key out of the chest and then you will need to cross a bridge with creatures under the platforms. To get across, just run to avoid the moving blocks. Using Z targeting seemed to help the most, but sometimes they would just appear underneath you anyways. Once you get to the far side, light the two pedestals to raise two platforms that will allow you to reach the cage. Climb up once you have and then kill the large spider in the way. Use the key once it is dead and free the monkey. On your way back out of the room, climb the vines on the south side of the room to find a chest the holds a red rupee.

Now make your way back to the main room and then go to the north where you found the boomerang throwing, red-assed creature previously. Use your monkey army to swing across the large gap and then enter the door at the far end. Once inside, you will need to face off against the baboon as he tosses his boomerang around. Wait for him to throw it and then roll into the pillar that he is standing on. When the boomerang returns, it will knock him down giving you a chance to hit him. Do so three times and he will run away leaving you with the Gale Boomerang. To exit the room, use the boomerang on the fan above the door three times and the bars will finally lift. Once outside, go to the left and use the boomerang on the fans atop the bridges. Cross over to reach another monkey in a cage and use the boomerang to free it.

Now head back to the central room and use the boomerang on the chest that is hanging from the ceiling. When you open it, you will get the compass that shows where the rest of the chests and monkeys are for the Forest Temple. To complete the dungeon, you don’t necessarily need all the remaining chests, but you do need all the remaining monkeys. The one chest that you do need however is in the room the west of the main central room, with the gates in the corner. To get to this chest, you will need to turn the fans atop the pillars with the boomerang in a certain order to open the gates. The order is northwest, southwest, northeast, southeast. Once you hit them in that order, the gates will open and you will receive “The Big Key.”

For the three remaining monkeys, you’ll need to head to the northern part of the Forest Temple. Enter the cross shaped room and spin the bridge so that it is facing east and west. Go through the door on the east and there will be a few large spiders in there will some webs on the floor. Burn the web covering the hole to the left of the open hole with vines and drop down it. You’ll land next to a monkey cage down below. Smash it open and set the poor little guy free. The next is located north and east of the cross shaped room. Once you enter the room, you’ll see that you still need two more monkeys. Make your way to the right of the room and turn the two bridges to get over there. Once there, pluck the spiders off the vines and climb up and over to reach the top.

Go through the door at the top and then clear out the plants. To the right side will be a large plant that you need to drop a bomb into, so use the boomerang on the Bombling on the light side to grab it and then toss it at the large plant so that it gets gobbled up. Hop across to the chest and you will receive a small key that you can use to open the locked door in the cross-shaped room. Before leaving for it however, grab another bomb and then toss it at the boulder above the vines. Once it breaks—and it make take a few tries—climb up and then grab another bomb to use on the boulder at the far wall. Once it blows, another monkey will run free and you can head to the locked door in the cross-shaped room. Once inside, make your way to the right side of the room and go through the tunnel in the rear. Kill the spiders and climb the vines to reach the top. Use the boomerang on the fans atop the pillars to open the gates and the last monkey will be free. Now head back to the monkeys gathering room and they will line up to let you cross the large chasm. When you enter the next room using the Big Key, you will then have to face off against the first real boss.

To defeat this boss, you will need to use your Boomerang to first target the Bombling and then target the large Baba head. Do it to each and when they submerge, a larger third head will appear. Now the baboon who you received the boomerang from will appear and swing back and forth with bombs. Target his bombs as he goes and then target the main head so that the bomb travels from baboon to head. When the bomb goes off, the head will come crashing down in front of you. Strike the eye ball when it does and it will retreat again. Repeat the process again and you will finally defeat it.

Once you are back at the spring, you can return to the village if you like and talk to the townsfolk who will ask you to find and rescue the lost children. Go to the north, towards the forest temple, but go to the west towards Coro’s shop when you reach the large gate. Continue past it and you will come out to Hyrule Field. Make your way north and then west to get to The Eldin Province and you will get stopped by the Postman along the way. Read his ever so interesting letter and continue on the road until you reach the twilight blocking the path. Enter the twilight and you will be back in your wolf form. Continue up the path to find a sword stuck in the ground and then sniff it. Once you do, you will have the children’s scent and can see their path by using your senses.

Continue forward to the open range and you will get attacked by three shadow beings. Defeat them and you will be told how to you the portals that they leave behind. Now you will need to teleport to North Faron Woods to get the bridge that is missing. Select it and when you arrive, look to the right to see the bridge. Warp with it back to Kakariko Gorge and then continue across to the large gate blocking the way. Dig under it on the left side to get past, and continue following the trail to another group of three Shadow Beings. Once you take them down, you will get another portal and another scene will play at the waterfall. Take the Vessel of Light for Eldin and you will now need to collect the tears in the area like you did previously.

Once you have the tears marked on your map, the three closest are just to the east of the area inside a hut. Go around the hut until Midna jumps up and then use him to climb to the top. Fall through the opening and then a long scene will play with the children and the cellar. Once it is over, grab the stick on the ground and use the flame to light each end. Run up the stairs and hop across each gap to light the flames. When all the candles are lit, the statue will move and you can enter the cellar. Follow the corridor to the first room and inside will be the three insects to defeat for the tears. Do so and continue down the tunnel to the scaffolding and hop out to the Graveyard. In the graveyard there will be another insect crawling around, but you will need to dig it out of the ground to get it first. Do so and then head to the east down the path and head for the building directly ahead of you. To get on its roof, go to the left of it and climb up the small ramp and continue upwards until you reach the hole in the roof you can fall through.

Once inside, push the box out of the way and the insect will start to scurry about. Kill it for the fifth tear and Midna will let you jump out of the house to exit. Go to the house to the right of the one you just exited and it will be Barnes Bomb Shop. Climb the small roof to the right and then jump and dash to crash through the window to enter. Once inside, climb up the stairs and then dash against the dresser to knock it over, revealing the insect behind it. Kill it for the sixth tear and then exit via the open doorway to the right. Go up the stairs that are at the rear of the Bomb Shop and make your way to the left. Here you will find a small shack with a warning sign in front of it. Enter the small opening to the right of it and pick up the stick from the fireplace. Use the flames in the corner on it and then set the fireplace alight. When you do, the insects will go crazy and start lighting the shack on fire. If you like, you can wait around and collect some rupees that appear, but if you wait too long before exiting the building, it will blow up and you will die. Exit the shack and grab the tears that are now floating where the building was.

Go back towards the slope leading up the mountain and follow it to a shack. Look to the left side of it, and you will have a dig spot to enter through. Once inside, smash the pots in the corner to find the insect and then head back outside and back down to the village for the final few tears. Make your way to the General Store which will be on the south east side of the town. Go to the right side of it, and there will be a tunnel that leads inside the house. Simply climb through to enter the store and find the insect creeping around. For the final two insects, go to the slope on the southeast part of town that has a sign in front of it that reads “dead end.” Make your way up it and it will take you to another sign that says “do not jump.”

So go ahead and jump and enter the Inn through the open doorway there. Grab the stick from in front of the fireplace and again you’ll need to light the fireplace ablaze to get the insect to come out. Hop on the table to the left of the torch and run off to catch the wood on fire. Drop it in the fireplace and then get your tear. Next head through the doorway and you will find a few enemies on your way up the stairs to find the last insect in the village. Once you get it, make your way back to the fireplace room and hop up the boxes and ledges to get out through the doorway. Now you will need to head all the way north and go through the entrance towards Death Mountain. Once you get to the fence blocking the path, Midna will allow you to jump up and continue on. Follow the path all the way up to the area with steam geysers and the insect here will need to be dug up. Once you get it, continue following the geyser filled path until the end where you will find Death Mountain. Continue to the open area and you will have to face off against 4 Shadow Beings at once.

Once the four of them are defeated, use your sense to find the insect on the far wall and take it out to get the next tear. Once you have it, climb the step to the left of the fence and Midna will let you jump up to the top ledge. Follow it along to the right and there will be a slope along the edge of it at the far end. Carefully walk up it and then use Midna to jump atop the ledge. Once up, follow the path and then jump off to the right to the large open area below with the green fog. Here you will find the final insect and get the final tear.

After the long cutscene, make your way up to Death Mountain again and climb the large fence when you reach it. The Goron above will knock you down and not let you pass. Head back to the town and Renado will stop you and tell you to go back to Ordon to talk to Bo, the mayor, as he will have a way for you to pass the Gorons. Make your way south in the village and Epona will show up. To get ahold of him, you will need to move the controls back and forth and press A to finally seize it. Once you do, now you can head back to much Ordon faster. Race back through the Hyrule Fields to Ordon village and speak to the Mayor at his house. Next there will be a long scene with the Mayor explaining his fight with the Gorons and you will then need to sumo wrestle with him. You can do it easily learn it by pressing A quickly and waggling when told to do so. Once you push the Mayor out of the ring twice, he will give you the Iron Boots and you will need to head back to Death Mountain.


When you enter the temple, there will be two chests in the main room; one with arrows and one with bombs. A little foreshadowing for what’s in the next room. Go up the stairs and pull on the handle hanging to open the doors and enter the next chamber. Combine your bombs and arrows and shoot the columns hanging from the ceiling. When all of the large ones are down, walk down the ramp and go through the next door. At the end of the bridge will be a Lizalfo to take down, so give it a few swipes and continue through the next door and follow the stairs down. Go to the right all the way and on the right side will be an opening where you can grab a gold handle and turn the stairs. Make your way up and go to the left to find a pot that has Ooccoo in it. Let him out and then head back to the right side. You’ll come to another opening where you can pull the gold handle again, so do so and then drop and follow the stairs down. Before going through the door ahead, go to the right to find a chest with the dungeon map in it.

Now go through the door at the bottom of the stairs. When you enter, go through the tunnel on the right and combine the bombs with arrows and shoot the stalactite above and cross to the center. Grab the vines and climb to the right and repeat again on the next stalactite. Wait for it to be even with you and then hop across to the chest. Grab the small key and head back across and enter the large chamber with the staircase again. Go up and head to the left to find the locked door and go through. At the end of the bridge, enter the next room and go to the right to find a chest of bombs. Go to the right now and shoot the stalactite above and climb up to the vines. Once up on the ledge, grab the gold handle and jump down and enter the door there. Go across the gear floor and enter the next door and make your way left to find another small key. Head out of the room and across the gears and through the door. Go to the left and blow up the boulder there and enter the next door. Shoot an arrow at the bubble creature and then use the key on the door to the left. Go through and hop down the large drop to find some pots. Climb up the vines on the far side and then make your way around the circular path leading up.

Once at the top, grab the bombs from the chest and then climb up the ladder on either side of the bridge arch. Pull the gold handle there and the water will start to flow. Jump in it to ride it down and then go to the center platform and grab the second handle there. It will open another flood gate in the next room, so make your way there and then enter the gear room that will now be turning. To make things faster, drop through the opening in the gear floor room and then make your way to the top of it to get on the now rotating platforms. Hop off on the first ledge, to the north and grab the key out of the chest and then make your way out to the rotating platforms again and get off at the west platform. Drop down in the water with your iron boots and blow up the stone at the far end. Continue through and when you exit the water, kill the few fish and then look at the ceiling.

When the large fish drops down, kill all its children and roll out of the way when it launches into the air. When it lands, then slash at its tongue. Repeat that a few times and eventually it will explode and leave a chest behind giving you the clawshot. Use the claw on the gold plate above the door and go through to the main staircase room. Now you can use the clawshot to get on top of the glass structure in the center to find a piece of heart. Make your way down to the platforms around the edge and use the clawshot on the gold plate on the ceiling to pull down a switch. It will then turn the stairs again and allow the water to flow down them. Go through the door at the bottom of the stairs and through the water mill to enter the next room with round platforms. Clawshot over to the left and drop down on the platform blow to get some bombs out of the chest there. Continue to clawshot across to the vines and enter the door at the far side. In the next room, shoot down the stalactite and hop across when it raises. Clawshot up to the gold plate on the other side to open the gate and again to the next door above the short wall and enter to find two bubble creatures. Grapple up to the vines above the opening on the left and enter the next room with the circular path leading upwards.

When you reach the top, like the previous chamber with the same set up, climb the ladder to find a handle. This time however, you can grapple over to the chest and receive the compass within. Slide down the water and again when at the bottom pull the gold handle in the center. Now exit the chamber and go to the left doorway and through the water mill. Enter the room with the spinning gears and go below them to enter the door with the overhang above it. Once inside, jump in the water with the iron boots on and blow up the boulder in the far corner to open a passage. Swim through and up and you will come to a room with an opening in the floor and a gold plate above it. Clawshot the gold plate and then lower yourself down through the opening. Open the chest there to get the Big Key and then you will need to make your way back to the main chamber with the staircase. When you reach it, you will now be able to reach the large door with the big lock. Go through it and there will be an opening in the center of the chamber. Drop through and then equip the iron boots for another long drop. Once you finally hit the bottom, the boss battle will begin.

Once you finally get to the boss, you will see an eyeball floating through the tentacles. Hover near the ground and use Z-targeting on it. When it is in range, grapple it to pull it towards you and then hack at it with your sword before it rolls away. Repeat this three times and then the creature will swim out of its hole and around cavern. Simply swim up and wait for the beast to come to you. When it gets close, again target the eyeball above its mouth and grapple it. You will get drawn towards it and then be able to slash at it. Again, repeat this three times and the might fish will fall for good.

Make your way up the path as you did earlier, but this time there will be Gorons to stop you. Climb up the first fence and when the Goron rolls at you put on the Iron Boots and press A to hold your ground. Take off the boots so you can move and continue up the path, repeating the same maneuver for the next few Gorons that come rolling at you. When you reach the large area where you were previously with the rocks falling from the sky, there will be a few Gorons around the sides of the area. Walk up to one and block its hit with your shield and then use the Boomerang to knock it over and ball up. Jump on top of it and wait for it to launch you into the air, and onto the ledge above. Keep going up the ledges, and when you come to a geyser that won’t let you pass, use the Iron Boots to walk through. Once you get to the top, enter the cave and talk to the Goron Elder, Gor Coron. Here you will need to challenge him to a sumo match and defeat him to pass. Don the Iron Boots and use your slaps and grabs to push him off the mat. Once you do, you will be allowed to enter the Goron Mines.

As you enter, hop over the platforms, avoiding the lava jets, to enter the fenced corridor on the far side by slashing through the wooden beams. To the left there will be a pressure plate you can stand on with your iron boots to make it go down. Once you do, the flame jets will go out and you can proceed. Go quickly to the next button and then at the end of the corridor, make a u-turn to the right and make your way to the ladder there. Climb up and continue along the path and hop over to the left to the stone slab to get to the far side. GO to the right to find another pressure plate and then once pressed, make your way to the far end and to the right to get past the jet that turned off. Once past it, hop across to the large switch and use the boots to lower it and open the gate. Hop down and go through the large round door.

Now make your way to the left, down the catwalk, and there will be a chest which holds a key. Snag it and make your way back up to the start and to the right of where you entered. Hop across the flipping platforms to reach the locked door at the end. Go through with the key and go to the right to come to a Dodongo. Hack at its tail and then continue across the stone platforms to come to another. Defeat it and you will see another to the left of the cavern and a large stone wall to the right. Go kill the Dodongo and there will be a chain on the ground that you can pull. Equip the iron boots and pull the wall back. Now you will need to make a run across the stone platforms and through the open wall before it closes. When you slip past, you will enter the next chamber that is full of water. Jump in the water and put on the iron boots to sink. Walk through the opening in the fence and step on the pressure plate to get tossed in the air onto the magnetized rock above. Walk along it to the top and then enter the door to find an elder Goron and his piece of key. Once you have it, open the chest behind him and grab the dungeon map for the mines.

Climb up the ladder and then go to the right to find Ooccoo in another pot there. Grab him and when head out through the door to the previous chamber. Now equip the iron boots and climb along the walls to reach the door on the other side. Go through once you get to it and enter the next chamber. At the end of the walkway through the door, there will be a pressure plate that will take you to the ceiling again. Ride up and walk along the ceiling, first to the northwest corner to find a chest with a heart piece, then to the center of the west side, to drop down on the platform with two torches. Enter the door there and then go down the catwalk to the left to find a group of enemies and a pressure plate. Step on it to move a magnet above back and forth. Make you way to the circular platform on the west side and when the magnet is overhead, equip the boots. Let it take you to the next platform and then drop off and repeat the process with the pressure plate there.

After you reach the next platform, go through the door and you will come to a room with a few Tektites in it. Kill them and then swim to the northwest corner and sink to find a chest with a small key inside. Swim back up and then go to the southeast side and drop down in the water to push a block. Swim up and out of the water to activate a pressure plate that will take you to the ceiling. Walk to the platform below and there will be another pressure plate that will activate a magnet on the far wall. Walk off the metal catwalk with the iron boots on and fall into the magnet beam. Walk along the wall to the right and drop down to the ledge will the blue crystal. Strike it and the gates will open, allowing you to enter the next room with another blue crystal to the right, just inside the door. Hit it and then climb up the magnetic wall to the right and follow the path up and to the right to find a chest with a piece of heart. Once you have it, continue across the magnet wall to the other side and you will come to some ropes. Slash them and they will drop the bridge below, allowing you to cross and go through the door there.

When you enter the next large room, slash through the wood barrier and then make your way forward across the catwalk until you can go right. Enter the small area here and there will be a Beamos and a chest. Grab the silver key out of the chest and then run back to the catwalk and go to the far side where the locked door is. Enter the chamber and hop across the first flipping platform and go to the right. Now there will be an even larger flipping platform that you will need to use your iron boots on. Run to the first square and turn them on and wait for the platform to flip. Continue the same thing for the next two squares and hop off when you get to the far side. Head through the door thereto find the next Goron Elder and speak with him to get the second key piece. Climb up the ladder behind him and follow the walkway to the right and exit the door. Walk along the magnet wall to the right and drop down when over the ledge below to enter the doorway there.

This door will take you to the guard that the elder was speaking of, but first you have to defeat him. Equip the iron boots and then stand with your back to the edge of the platform. Let the guard come to you and then slash at him when he raises an arm. He will roll into a ball after a couple hits, allow you to pick him up and toss him into to the lava. Do this three times and he will give up and allow you to pass into the next chamber. Enter and open the chest to find the Hero’s Bow. Yay! Now use it to hit the ropes on the far wall that are holding up the bridge. Run across the bridge and you will enter a room with 7 Beamos in it. Strike at each of their eyes with the arrows to knock them out and to allow you to push and pull them out of the way. In the alcove to the east, there will be a chest with a compass and in the alcove to the west there will be a doorway to another chamber which leads to the final Goron Elder to complete the Big Key. Head back out of the chamber and head south through the door behind the Beamo and you will come a to a large lava filled canyon. Roll against the fence to the right and then hop across the platforms to the pressure plate in the corner and use the iron boots on it. Once on the ceiling, walk to the cave opening and hit the crystal with an arrow which will open the door below.

Drop down and go through the now opened door and enter the next chamber. Once inside, go to the right for a purple rupee and to the left to find a pressure plate. Use it with the boots and let the magnet take you to the north side. Drop down and go through the door there and continue making your way north through the next three chambers until you come to the chamber where you earlier received the silver key from the chest in the area to the right with the Beamo. Shoot the Beamo eye to stop it and then pull it to reveal a door. Go through and follow the path up to a pressure plate. Step on it to operate a magnet and hop forward off the ledge. Let the magnet take you over to the other side and use the bow to shoot the rope to lower the bridge. When it is down, drop onto it and enter to face the boss.

To defeat this behemoth, it takes three different tasks, done three times. First off you will need to use your bow to hit the glowing crystal on its forehead. Once you have hit it, the beast will stagger about dragging its chains. When it is, run up behind it and equip the iron boots. Roll to catch up to it if you need to, but then grab one of the chains dragging behind it. Pull it away from the direction the beast is going and it will fall over. Once it is on the ground, take off the boots, drop the chain, and quickly run over to the head that is now at your height. Target it and slash away at it until a short scene plays. Do that twice more and you will defeat it allowing you to collect your rewards.

Now that you are back in Kakariko Village, speak to the folks there and visit Malo and Barnes’ shops to grab the bomb bag and the Hylian Shield. Once you have those two items, head northeast out of the village and head to the long bridge to the northwest where you previous jousted. At the far end of the bridge, bomb the boulders blocking the path and then you will be able to enter the twilight there. Now that you are back in wolf form, continue up the path to find Ilia’s purse on the ground. Give it a sniff to learn her scent and you will then be shown a trail when using your senses. Simply follow the trail all the way into the castle town and continue to follow the path to Telma’s Bar. Enter it and use your senses to listen to the conversation about the Zora boy that was found. Once they have talked, look at the map on the table to the right of the soldiers and then start your journey south to the red point on the map.

Make your way out of the bar and back out of the town, but now go to the east and continue to go east until you come to the Great Hylian Bridge. Start to cross it and a scene will play with an archer. Push the crate on the bridge to the side and then hop on it and over the edge to land in the water below. When you land, go over to the large building and listen to the owner talk of his troubles. He will then see the archer appear, so make your way over to it and fight it. Since it will have some help now, wait for it to swoop down and then attack it. Once you have defeated it, Midna will hop on it and you will now be able to control it through the gorge. Fly above and around the rocks as needed—it’s not a long or difficult path—and always dash to make the arrows always miss their mark. Once you reach the end, fly through the opening and you will be back on solid ground.

When you are back in control, go north—to the left of the boat rental cabin—and follow path down to river bed. Continue to follow it along to the end and walk up the ramp at the bottom of the ice pillars. Use Midna to jump up the platforms to the top and enter gates. Once there, you will need to defeat 3 shadow beings, one being behind a fence that you need to go around to get first. Once they are defeated, Midna will make you look below ice and will tell you to come back later. Now use Midna to teleport to Death Mountain and look at the large fiery stone that fell into the middle of the area earlier. Talk to Midna and listen to his blabbing and then teleport back to the Zora’s Domain and it will come along for the ride. When you arrive, you will free the Zora’s and release the water. Go to leave and Rutela will stop you and ask you to look for Ralis in Hyrule castle. For now, leave the area and jump off the waterfall where you will awake in cave. Go forward to speak to Spirit of Lanayru and get the vessel of light.

Now—once again—you will need to track down the tears in the area that the insects have taken. For the first 3 tears, you can find them easily enough right around the area where you exit speaking to Rutela. The first will scurry across the bridge, the second will be behind the boat rental shop in the southeast area of the lake and the third will be to the south across grassy platforms you need to jump over. Once on the other side, you will need to dig for the insect in the ground. The next three you can find by flying on the large shadow bird that you flew on earlier. On the small island near the boat rental place, you can find some grass that will let you howl in the same tone of the tune the grass makes. When the bird arrives, there will be three insects along the voyage that you will need to hit. Simply target them with Z and then dash into them. For the other six insects, you will need to teleport to Zora’s Domain all the way north. When you arrive, there will be one insect in the chamber you arrive in, that you will need to dash into the wall for it to fall down.

Get it and then leave and go over the waterfall again. When you reach the bottom, there will be two flying around the leaves in the water. Climb up them and jump to hit each with Z-targeting and pressing A. There will then be two others—one to the east and west. To get both, go to the shore with the two spirits and then go east. Look for the ledges to use Midna to jump up and continue around until you can go under the waterfall for the first insect. For the second, climb the ledge under the water fall and go the opposite way. Follow the ledges around and you will come to a large tunnel where the insect will be. Now for the final three insects, make your way out of the large cavern through the cave opening to the south. Once you enter the next area, there will be one insect to the west side at the cabin.

Break the boxes and listen to the spirit and the insect will appear on the ground. Kill it and then swim through the small opening to the southeast to reach Hylia Field. Head to the castle and face off against three shadow beasts and then enter through the gates. Find the next insect behind the tavern and then use Midna to teleport back down to Lake Hylia. When you arrive, you will get a scene showing the center of the lake. Go to the floating wood pieces there and use your senses to see a giant insect flying around. To defeat it, you will need to attack it twice to make it go belly up in the water. Once it does, get on it and press B to expand your attack and then strike its legs to finish it off. Once you do, you will receive the final tear. Now that you have returned all the tears, you will return to human form and will need to rescue Ralis to enter the Lake Temple.

Make your way to the building in the center of the lake and talk to the clown there to use the cannon. It will fire you up to the top of the cliff and allow you to grab some grass to call Epona and head to Hyrule Castle Town. Once inside the town, make your way to the tavern again and you’ll have a long scene with Telma about the Zora. Now you’ll need to escort a wagon with Ilia, Telma, and the Zora to Kakariko Village. The path is marked on the map with a purple line and the only time the wagon will diverge is when a bird drops a bomb in the road. Make sure to hit all the birds before they can drop them, or else the wagon will go in a huge circle before getting back on track. There will also be archers on mounts that will shoot fire-arrows at the wagon. If and when the wagon catches fire, use your boomerang to put the flames out. The whole ride is very straight forward except for the first encounter on the bridge where you will need to ride at the mounted enemy with your bow drawn and shoot him when you get close. Tag him twice to knock him off and to start the ride. When you do knock him down, you will also receive a gate key. There are only two times through the whole ride that you’ll need to stop to dismount and open a gate to proceed through.

Once you reach Kakariko Village, another long scene will play and you’ll eventually be outside the Inn. Rutela will appear in the sky and you will need to follow her to the graveyard. Crawl through the tunnel that opens and you will receive the Zora Armor that will allow you to swim and breathe underwater. There are also some boulders below the water in the chamber that can be blown up with the water bombs that are now available at Barnes’ Shop. Grab some water bombs and head back to the chamber where you got the armor and equip the iron boots. Walk to the right side and place a water bomb in front of the stones and enter the tunnel after it blows. This will take you all the way back to Hylia Lake and allow you to reach the entrance of the LakeBed Temple. Walk/swim to the purple marker on the map and go to the left side of the pit. On the ground there will be an air jet shooting upwards. Equip the iron boots and place a bomb on it and it will raise up to blow up the stone blocking the entrance to the temple. Once it explodes, swim up and enter.

After the long scene is over, make your way back to Hyrule castle town and go to Telma’s Bar. When you try to enter, you will get tossed out but Louise the cat will stop you and show you a way to the passage. Push the crate at the side over to the rest of the boxes and climb up and enter the window. Once inside, make your way across the top of the bar without upsetting any of the pots. When you get to the left side, you will need to pick one up and move it out of the way to pass unnoticed. Once you make it through, you will come to a room with a Poe’s Soul and Jovani. He will ask you to find 20 Poe’s Souls so that he can return to normal, but they are spread out across Hyrule and not a necessity right now since you will find many of them along the way to the end. Enter the chest and you will come to a passage below. Pick up the stick on the ground and light the torches so that you can then use them to light your stick again to burn through the spider web on the left side.

Hop through and continue to the dead end round room and dig in the center to pass. Now you will need to make your way up the circular stair case as before, but this time without Midna’s help, you will need to cross the ropes. Once you reach the top, make your way across the rooftops as before, but this time when you reach the bridge, you will need to cross it when the wind blows, raising it. Enter the window atop the slanted roof and make your way up the stairs to talk to Zelda there. Once the next scene is over, you will need to make your way to Faron Woods, so teleport to the Northern section. Go north and you will get a scene with a monkey getting attacked. Save it and it will tell of a path on the other side of the cliff. Go up the ramp on the right and have Midna let you jump across and across again until you come to a bridge. Cross it and wait for it to turn and then cross two ropes while avoiding the swinging hammers. Once on the far side, enter the cave opening.

Once inside, go to the stone with the tri-force marking and mirror the howling that you hear. Once you do, the far door will open and some enemies will appear. Keep following the main enemy with the hat and the horn into each area- known as the Skull Kid. When you find him –easy to do so with his horn sound and his lantern lighting the path he is on—attack him and he will open a new passage and appear in another area. Simply keep finding him three times until he appears atop a cliff beside a water fall. Go through the waterfall and up the tree and hit him. Chase him into the next room where you need to attack him three times. You can use the B button to cover him in darkness and attack quickly, but you can atop hit him easily enough when he is occupied with blowing his horn. Once you have hit him three times, he will open the next passage.

When you enter, you will come to two statues that will then make you solve a block puzzle. What you need to do is move in specific directions to get the two statues back on their original platforms. To solve it, move in this order from the start: Left, down, right, right, up, left, up, up, left, down, down, right, up. Once you have, the statues will be on their original spots and the next door will open. Enter and you will receive the Master Sword for your troubles. Now with the bad ass sword in hand, teleport to Lake Hylia and swim towards the platform near the cannon building. Go to the right and hop over the platforms to reach the ladder against the cliff. Climb up and continue up the path to reach the large tower. Climb the ladder there to reach the top of it and talk to Auru. He will tell you of the Cursed Mirror and give you a memo. Head back down and go to the cannon building to talk to Frya. He will grudgingly launch you to the desert to start you on your search.

Once you have arrived at the desert, turn into wolf form since you have some distance to cover, and head to the east. When you have gone far enough, you will see a large grey block atop a platform. Turn back to human and grapple up to the flying enemy above and let it take you over the platform. Drop down and fight the three shadow beings there to open another portal. Now you will need to teleport to the Bridge of Eldin and bring the grey block with you. If you don’t have that teleport open yet on the map, go to Castle town and run over to the bridge and fight the shadow beings there to open it.

Once you have brought the bridge piece to the Eldin Bridge, teleport back to Gerudo Mesa and head to the north until a scene plays and two boars attack. Use the bow to take down the riders and then commandeer one of the boars to ride. Go towards the gates and use dash to crash through them. Enter the next area and clear out the huge swarm of enemies inside. Continue to the Northwest corner where there is a roast and find the silver key there. Go through the gate you passed on your way and you will now need to fight a rather large enemy with an even larger hammer. Wait for him to swing and dodge and then attack him with slashes. Once you have hit him enough, he will run away and set the building on fire. Hop on the boar and crash through the gate and you will then reach the entrance to the Arbiter Grounds.

Once inside, make your way forward and see the large whirlpool of sand. Grapple to the grate on the upper right and then hop across the platforms to the door at the far side. To get through the door, you need to go around fence on the left side and grapple the chain towards you and then pull it. Once the door is open, go through and enter the door on the right to find a key in a chest and the alcove on the left to get some lantern oil—which you will need later on if you don’t have any. Use the key on the door and enter the dark room with your lantern equipped. Kill the many skeletons in here and then light the two torches on either side of the door with your lantern. Go in to the next chamber and some Poe’s Souls will fly around. Turn into a wolf and take out the one the remains and it will leave a scent behind while lighting one of the four torches. Go the left and right of the large stair case to find chests that have the Dungeon map as well as a piece of heart.

To the west side of the chamber, dig at the sand patch to reveal a chain. Pull it and a staircase will open going down below. Make your way down in to the next chamber and push the tab on the center pillar to open the door to the north. Grab the key out of the chest there and then turn human. While in the door way, look up through the opening in the ceiling and grapple to the grate there. Enter the next room and turn back to the wolf and take down the Poe’s Soul to light another torch. Now head back down through the hole in the floor and push the tab to get back in the first main room. Enter the door above the stairs you revealed using the key and the next chamber will have a sand trapped-filled floor. Make your way to the right side and up the stairs. Pull the large fenced box back and to the right and then go up the next set of smaller stairs. At the top, there will be a chain to pull. Do so across the box you moved and then let go once it is all the way back and run under the circular platform you raised. Go up the stairs and into the next room which has a statue.

In the chamber behind the statue, you can find a chest which has the compass inside it. Go to the pedestal in front of the statue and push it to open the doors on the left and right. Go to the right side room to find a chest which holds the key to open the door in the left side room. Continue through and you will come to a hallway with a ton of little skeletons and two large ones. Once they are defeated, turn into a wolf and use the senses to see a dig spot on the northwest corner on the hallway to reveal a chain. Pull it and a door will open to reveal another Poe’s Soul. Defeat it and then continue down the hallway to another room with a locked door straight ahead. Grab the key out the chest on the right and then turn into a wolf and use your senses for a little surprise. Kill the rats and use B to shake off those on you. Hop across the circular platform, but be careful, for if you fall, you’ll have to go through everything from the main room again. Enter the next room and take the stairs on the left down. Push the fenced block there until it drops and climb on top. Pull the chain to the left to raise the platform and then stand under it. As the platform lowers, the opening in it will let you not get mushed.

When it comes down, climb on top of it and then hop across to the next door. Enter the next chamber and a skeleton with a shield will come alive. Use bombs to blow it up and if you don’t have any, there will be some in the chest and pots in the room. Go through the door that unlocks and head up the stairs to the large room with the golden statue. In this room, in front of the statue will be a row of torches with one in front, to the center. Light the center front one first and then light to far right one to reveal a door. Go through the door and use your senses to find the Poe there. He will turn into four, but as he attacks, he will glow. Attack the glowing one and get the soul. Once it is down, go through the north door and turn human to use the grapple on the grate to the far left. Drop down and go through the door to be back in the main first room where the door at the top of the stairs will now open that the four torches have been lit.

Once you enter the second half of the dungeon, use your grapple to get down to the bottom of the large shaft and then turn the tab in the center to raise and lower the platform. Grab the key out of the chest near the top by going through a side corridor and then enter the locked door. Continue through to the next large room and there will be a chain on the far right side that will open a door. Before you try to make it through the door though, kill all the rats that will appear and slow you down. Once they are dead, then you will be able to make it through the closing door. In the next chamber, there will be two spinning blades on the side of the corridor that you need to use the wolf form to cross the sand pits as. Shake off the bugs by using B when they slow you down. When you reach the far side, go to the right to find Ooccoo and then continue to the right, running past the spinning spike log. When you reach the next chamber, there will be three shielded skeletons to defeat, so drop some bombs on their feet and the large tri-force door will open in the previous room. Make your way back there and go through the new passage in wolf form. Shake off the bugs when you can and then jump across the gap at the far side to reach a door on the left.

Go through and you will come to a room with a large sword in the center of the floor. Hack at the ropes and then a scene will play with a not-so-nice fellow appearing. Turn into a wolf and then attack him when he starts to glow. Once he turns solid, turn back to human and target him with the bow. Hit him and he will come close to the ground. Slash at him multiple times and he will go up and fly around again. Hit him once again with the bow to bring him down and keep repeating until he is defeated. Once he is, the door to the north will open and you will receive the Spinner for your troubles. Exit through the door at the south side and then use the spinner on the rail to the left. Go through the next door and use it again in the room with the large statue to cross the sand to the railing leading upwards to the left. Grab the piece of heart out of the chest there and then ride across to the right side via the rails, past the spinning log and across the gap, over the spiked fence.

Continue to ride the rails and let it drop you off on the far side through an opening. Ride the rail up the slope to the right then and walk up the next ramp to a set of rails in the center of the room with spinning blades on them. Ride across, jumping from rail to rail to avoid the spikes until you get to the far side. It may take a couple tries, but once you get across, go through the door to open the chest and receive the Big Key. Ride the rails across the gap to the open chamber and then sit on the spinner in the opening in the floor. Press B repeatedly to spin the wall and then head through the opening once it appears. Hop on the rail to the left side and ride it upwards until you are across from the long ledge on the center platform. Jump across and use the spinner on the center hole and repeatedly press B to raise more rails. Ride them to the next chamber and you will then face off against the boss.

To defeat this huge boss, you will need to ride the rail along the edge of the area and try to get beside the spine of the skeleton. When you are, press B and go towards it. Dodge the skeletons that pop up and when you hit the spine, it will crumble a little. Do that two more times and then use the spinner in the center of the area. It will raise a set of rails and the creatures head will start to come alive. Ride the rail upwards and the head will come floating in front of you. As it starts to shoot a fireball at you, jump to the other side and repeat until the head comes down beside you. When it does, jump into it and it will fly away. Repeat this another two times and you will finally defeat it for good.

After you defeat the boss, go through the door and make your way to the right. Ahead of you will be a statue and as you approach, 5 shadow beings will appear. Kill them and then ride the rail to the top of the statue. Once you arrive at the top, a scene will play explaining the mirror of twilight. Now that you know the location of the mirror pieces, make your way to Zora’s Domain and hop off the waterfall at the cave entrance. When you land below, go through the cave to the left to enter the Snowpeak. As soon as you enter, transform to human form and talk to the person standing in front you. She will introduce herself as Ashei and give you a sketch. Open a warp to Kakariko Village and go to the graveyard where you received the armor earlier. Crawl through the opening in human form to find Ralis. Talk to him and then show him the sketch and he will give you his coral earring. He will tell you that you will need a reekfish and that they can be found in Zora’s Domain, at the base of the waterwall, near the mother-child rocks. Warp back to Zora’s Domain and drop off the waterfall and go to the shore opposite the Snowpeak entrance. Fish there and snag a reekfish and then turn into a wolf to sniff it and get the scent.

Continue to follow the trail across the ice floes and up the slopes. When it comes to a cliff face, go right and around up a ramp. Continue to another dead end and dash into the wall to drop the snow to reveal another slope. Keep following the trail to another dead end and dig to enter a tunnel. Follow the tunnel up the ladder, up the ledges, and up the vines to a door. Exit outside and continue following the trail to find 3 shadow beings. Defeat them and then transform to human and find the yeti on the cliff. Talk to him and he will tell you to follow him. Roll into the tree to drop a piece of ice and then slide down the hill to the ruins.

Once you enter the mansion, turn human and go forward through the door. Enter the room and you will find the yeti’s wife there by the fire. Talk to her and she will tell you that they locked the mirror in the bedroom on the third floor and give you the mansion map. Go through the door to the right and enter the kitchen to find the yeti cooking. Use an empty bottle to scoop up some simple soup and then look behind the shelves to find Ooccoo in a pot there. Go through the door to the north and there will be an icy floor and a couple blocks to move around. First, push the southernmost block west. Next push the other block east, south, west, east, and then south to have it rest on the switch and open the door. Enter the next corridor and then turn into a wolf and use your senses to see a dig spot at the crack in the wall. Go through there to outside and see where the lock is that you need to get to. Go to the right and you will see the top of a chest in the snow. Dig there to uncover it and open it to find a key.

Transform and hop through the window to the right of the hole you came through and go to the locked door at the end to use the key. Once inside, kill the three enemies and enter the door to the north. In here, you will need to kill two enemies that guard the next door, so do so and enter the room that contains the chest. When you open it, instead of the key, you will find a pumpkin. Make your way back to the wife via the door to the south and she will tell you to talk to her husband. Refill your health in the kitchen after giving him the pumpkin and then take some good soup with you in your bottle. Go back and talk to the wife and she will mark another location on your map and open another door. Go through and you will be outside in a courtyard with a cannon. Go to the Northeast corner and hop through the window to enter the mansion again. Enter the next door and grab the cannonball on the ground ahead of you. Snake your way through the corridors to the cannon on the far side and drop the ball inside it.

Turn the cannon to face south and then drop a bomb in the same opening the cannonball went it. It will blow a hole through the ice wall and reveal a door. Go through to enter a large room with wooden beams across the floor. Go south on the left side of the room and take out the bats as they come to you. Let the ice creatures hit you, as they will bounce off and fall once they do. Make your way forward to just before the second ice creature and then go right. Hop over the gap and continue to the far side to open the chest there and receive the compass. Grapple back to the door you entered through and then make your way back out to the courtyard as a wolf. As you jump through the window, look to the left to find a half buried chest in the snow. Dig it up and use the key inside to open the locked door to the left. Now you will need to pull the lever down beside the door and then pick up a cannonball and place it in the scoop. Go back outside and pull the lever down here, and then pick up the cannonball out of the scoop and carry it over to the cannon. Turn the cannon 180 degrees and place the ball in the cannon. Place a bomb in the cannon afterwards and it will fire into the ice face that was covering the door.

Enter the clear door now and you will face off against a large enemy with a ball and chain. To defeat him, all you need to do is grapple past him and then wait for him to toss his ball at you. When he does this, run behind him and slash at his tail. Simply repeat that a few times and he will fall, leaving you with the ball and chain as a reward. Enter the next room and use the ball and chain on the ice walls to find the chest behind them. Open it to find some goat cheese instead of the key. Return to the wife and then the husband for some supreme soup. Return to the wife one more time and she will mark another location and open another door. Go through the door she opens and head up the ramp, taking out the large ice creatures on the way up. When you reach the top, go through the door to the left and hit the platform in the center with the ball and chain to make it swing back and forth. Hop on it and off to the other side to grab the small key out of the chest there. Make your way back across and then out the door and straight to the next room. Go right to the locked door and smash the ice to the right on the wall to reveal a grapple point in case you fall.

Hit the platform in the center and jump across and go through the next door. Again, make your way to the far side and enter the door there and enter the room. Go to the left side and knock the box there down to the lower level so you can use it to get back up in a minute. Drop down to the lower level and you will now be at the same block puzzle as earlier, but now smash the ice around the box in the corner as well as the ice around the switch in the center. Next move the box on the original switch; leave the box beside it alone this time—north. Next move the box you broke free, south, west, and then north. Now move the box right beside it east, south, west, north, and it will land on the switch, opening the door upstairs. Climb up the boxes to the second story and follow the door on the east side outside. Hop over to the top of the wall to the left and take out the three ice enemies there. Grapple over the wall and then go through the door on the left.

Use the ball and chain to swing the two platforms and hop across to find a small key in the chest on the far side. Go through the door behind the chest and then make your way through the box puzzle room and into the ice floor room with the many ice ball enemies and the locked door on the left. Go through the door and you will find two large ice creatures inside. Take down both and then push the two blocks in the east wall out to that you can access the ramp from earlier. Go through the new opening and follow the ramp down to the left all the way to the bottom. Go through the door and push the box on the other side. Grab a cannonball there and bring it back to the wall scoop. Go through the door and grab the cannonball and carry it all the way up the ramp to the cannon that was behind the wall of ice.
Turn the cannon towards the two blocks you pushed to make the opening and then drop in the ball and a bomb.

The cannonball will launch into the room and you will need to go over there and take the ball into the room to the north. Load it into the cannon and point it to the corner with the large beast standing there. Drop the bomb to fire it and then hop down and go through the door. Climb the ladder and enter the room to the right. Now you will need to fight a swarm of ice creatures with your ball and chain. Once they are all dead, then you can enter the room to the north and grab the bedroom key from the chest. Exit out of the room and go back outside and you will find the wife there. Go to the right and follow the path up to the bedroom door and the boss battle will begin.

When the battle begins with Yeta, all you need to do is simply swing the ball and chain at her to hit her large ice form. She will just bounce back and forth as you hit her, eventually getting smaller and smaller producing Freezlings as you do. Ignore them and keep hitting her until she flies into the air. Now she will attack with icicles that fall from the air. Run around the area in circles to avoid them and when she drops a circle of them at a time, turn and smash as many as you can. She will then drop to the ground herself giving you time to turn and whack her provided you rolled out of the way. The more icicles you break, the better the chance you have of getting out of the way when she comes crashing down. Hit her three times and she will regain her normal form and the battle will be over. Grab the mirror piece and the heart container and teleport to northern Faron woods.

When you arrive at the Northern Faron woods, go north a bit and talk to Rusl. He will tell you about the sacred grove and over to help with his golden chicken. Jump forward from where you were talking to him and glide to the platform ahead of you. Jump again to the next platform and once again to the right. Walk forward to the bridge and use the boomerang to turn it. Grab the chicken to get over to the bridge and turn it once again. Again grab the chicken and glide past the swinging hammers to the other side and enter the Sacred Grove. Now, just like previously, you will need to track down the Skull Kid in the grove and hit him three times so that he retreats to the circular area. Simply follow the torch light in the tunnel entrances to know you are going the right way and then pop him with an arrow when you see him. He likes to be out of reach this time, so direct attacks don’t always work.

Once you have tracked him down to the circular area, again hit him with three arrows and the door to where you earlier got the Master Sword will open once again. Make your way there, past the statues, up the stairs, and into the chamber where you received the sword. Hit the stone and the statue in the previous room will disappear revealing the entrance to the Temple of Time. Make your way out to it, although first you will need to defeat 5 shadow beings to create a warp. Once they are defeated, enter the doorway and make your way forward to the stone again. Hit it once more to make a staircase appear and walk forward up the stairs. Make your way to the rear of the next chamber and Midna will tell you to look at the statues with your senses.

Once you have done that, go back to human form and grab the helmet-like statue across from the large statue and place it on the gold square to the left of where it was. This will raise a platform beside where you entered allowing you to jump up to the stairs there. Make your way there and when you reach the middle, you will find Ooccoo. Pick her up and head down the opposite stairs to find two torches. Light them ablaze and a chest will appear, granting you a small key for the door that was up the stairs behind where Ooccoo was. Go through there and you will enter a room with a switch in the center of the floor and two gold gates. Pick up a pot and place it on the switch to open the first two gates. Grab the chest first and then make your way west. Once you pass the first open gate, shoot the pot on the switch and the second gate will open.

Enter the next chamber that has three Lizalfo’s in it and a statue that will come to life after they are defeated. To destroy it, hit the green crystal on its back and once it is defeated, a chest will appear with the dungeon map inside it. Next grab the two small statues next to the small chest in the alcove and place them on the gold switches next to the gate. Once they are both in place, go through the gate to enter the next chamber that has an electrified pen in the center of it. Go around the room that is filled with Lizalfos to the far side where there is a staircase. Climb up to the break and then use the spinner to go the rest of the way. Make your way to the right and push the tab on the center column clockwise to make the platform lower. Walk off the platform to find a small statue and then pick it up and bring it to the platform. Turn counter-clockwise to go back up and then carry the statue along the path that the spinning spikes are on, to the far side.

Place the statue on a gold switch there and then make your way along the spike path a little more to find another small statue. Bring it back to the second switch and place it while hopping onto the block that rises. Go through the door atop the stairs and in the next chamber will be two more statues that come to life. One can easily be defeated by slashing at the crystal on its backside before it starts moving. Once they are both down, a chest will appear and will have a small key inside it. Head back across the room and across the previous chamber to the locked door atop the stairs. Enter the next room and there will be a green crystal to the left. Strike it and the walls in the room will move. Go around the first wall to the round circle on the floor and then shoot an arrow at the now red crystal.

When the walls move again, go around the walls to the open alcove which houses a chest. Grab the compass from it and then stand in the circle in the floor and shoot another arrow at the crystal. When the walls move this time, a doorway will be open to the north, allowing you to go up the stairs there. Kill the Lizalfos along the way and then enter the chamber to the east. Shoot the crystal high above to move some walls and then kill the next couple of enemies. Shoot the crystal again and continue south. You will need to do this two more times to get to the far side of the room and to exit to the next chamber. When you reach it, take the stairs on the right up and you will come to a large set of gold scales. Hop on the first and pick up the small statue and toss it up and onto the next. Run across and enter the door on the far side to find a load of spinning spikes and a Beamo in the center.

Plug an arrow into the Beamo’s eye and then make your way west to a corridor which leads to a room with a few Lizalfos and some traps. Open the chest for a small key and then make your way to the west side to pick up a small statue. Carry it to the other side of the fence and place it on the gold switch in the floor to make the passage safe from electricity. Continue up the stairs and kill the spiders and two statues in the next room. Once they are all dead, the gate to the east will open and there will be a locked door at the far side. Use the small key to enter and then you will face off against a large knight named Darknut. For the first part of the fight, simply run in counter-clockwise circles around him and strike after he swings. Y9ou will chip away at his armor until he tosses away his sword. Once he does, simply circle strafe him and wait for his attack. When it comes, hop to the side and slash away at him. Get three good group of shots in on him and the chest at the far end will appear.

Open the chest to find the Dominion Statue and use it on the statue above. Make the statue walk to the far end of the room and have it stand on the green lines on the floor under the bell. The main goal now is to use the Dominion Rod and the bells to get the statue back to the main room you started in. Go through the door and hit the statue again and make it walk towards the gold gate. Press B to make it smash the gate down and then proceed to the next room. Have the statue smash the two statues that come to life and then place a pot on the gold switch in the center of the room. Walk the statue to the platform to the left and then break the pot to lift the platform. Continue down the corridor and have the statue step on the gold switch on the other side of the electrical fence. When the power goes down, run through and then have the statue break all the traps in the room to pass freely. In the next room, smash the spinning spikes and the Beamo in the center to reveal a switch in the floor.

Make the statue walk onto the white platform in front of the bell and then use the rod on one of the small statues on either side. When it hops down, pick it up and place it on the switch, allowing the statue to rise up. Walk in into the bell and it will teleport to the next room. Go through the door to the north and you will come to the room with the two gold scales. Although you need to get across them to proceed, there is another chamber to get to above that holds the Big Key. Have the statue stand on the opposite scale from you and then, as you are on the higher scale, grapple to the gold plate above. Drop to the platform and then use the spinner to go around to the ledge on the far side. Enter the door there and there will be two enemies that you can pull the shells off of. Do so and kill them and the statues and then grapple to the upper level. Use the shells on the gold switches, as well as the small statues and then open the chest to get the Big Key. Make your way back out and down to the scales again. Walk the statue on to the first and then toss some small statues onto the other to lower it.

Walk the statue across and repeat the same to walk the statue to the next platform. Walk the statue down the stairs, smashing the spiders, to the bell in the center of the room. Exit via the door to the east and meet the statue on the next room behind the gold gate. Hit it with the rod and move it to the left. Shoot the green crystal with the bow to move the walls and then move the statue onto the floor switch to take down the electrical fence. Go through to the left and find the chest there that has a piece of heart inside of it. Now bring the statue west and shoot the crystal again. Continue out of the room, up the ramp and shoot the crystal again, to open the door in the next room. Use the statue to smash the Beamo to the right and then shoot the crystal through the opening in the walls to move them. Walk the statue to the bell in the middle of the room and then make your way out to the next. Now you will need to raise the middle platform to the top to get the statue and walk him to the center. Lower the platform with him on it to the ground and then walk it through the electricity. Take the platform up one level and walk off the edge to get to where the statue is. Now you can use it to smash through the gold gate blocking the bell and let it enter.

Go through the door to the west and grapple over the gate. Activate the statue and walk it down the corridor and into the next bell. Go through the door on the left and you will now finally be back in the main room with the statue. Walk it to the platform to the right of the similar statue and the large door will open. Enter the next room and shoot out the Beamo’s eye and hop across the gaps and past the traps. Once you get to the far side, grab the small statue and toss it back over the gap. Hop over and place it on the switch and then jump back and go through the first open gate. Turn and use the rod on the small statue and walk it off the switch to open the next gate. Make your way down the steps to the final door to face the boss.

Unlike most of the bosses so far, this one is extremely easy to defeat and takes no time at all. When the spider is crawling along the ceiling, shoot it in its eyeball to make it fall. When it falls on the ground, use the rod on the statue closest to it and then bash the spider. It will then get back on the ceiling and plop out a ton of little spiders. Hack and slash at them and then repeat with shooting the large spider in the eye again. Repeat the process a third time and then a scene will play. Afterwards, simply shoot the eye ball three times with an arrow and it will be defeated for good.

Go to Telma’s bar and talk to Telma and look at the map in the back to learn of Shad at kakariko Village. Head there and talk to Renado and take his letter. Head make to Telma’s bar and show her the letter. Take the invoice to the doctor and then go to rear of shop and push crate to expose green puddle. Sniff and then follow trail to Telma’s bar again. Talk to the cat and she will say to go to the south exit at night to find skeletal dogs that took the statue. Go there and defeat all the dogs that show up and the statue will come flying out for you. Grab it and head back Kakariko Village and show the statue to Ilia and she will remember a little bit. The Elder Goron will take over and say that north of Eldin Bridge is the next spot to go and you should be Darbus there.

Go to the Bridge of Eldin and just as you cross it going north, there will be a cave on the right. Enter it to find Darbus pounding away on a rock. When he is done, he will tell you there are 20 enemies in the town. Simply take them all out and then a door will open and the tiny Impaz will come out. Take ilias charm from her and back to Kakariko village to give it to Ilia. Drop in the basement to talk to Shad and he will talk about the statue there. Go back to the hidden village to talk to Impaz and show her the Dominion Rod. She will then give you the Ancient Sky Book. Again, head back to Kakariko village and give the book to Shad in the cellar and he will say that there are other statues around Hyrule and marks your map of their locations. The Dominion Rod will also regain its power and will need to be used on each statue. For the first, warp to Kakariko Gorge and head north to the statue. Use the rod on it and move it out of the way. Step on the platform it was on and start to make your way to the next statue at Eldin Bridge.

After that, the next you can go to is just south of the Hyrule Castle town marker and then move the statue between its platform and the stone steps to hop on the platform. Next up, go up the east path to the next statue and walk it off the cliff ledge it is resting. Grapple to the vines above and drop down onto the statue and then hop over to the platform to get the sky character. Next go to Gerudo Mesa and take a short trip west to find the statue among the pillars there. Hop on top of the short block behind the column and then hop across to the statue to the platform. Next go to north Faron Woods and to Coro’s shop where you get oil. Bomb the boulder to the east to open a passage and find the statue inside. Now warp back to Kakariko Village and talk to Shad in the cellar and give him the book that you filled. He will leave in frustration and when he does, use the rod on the statue and move it out of the way. Go through the passage and then warp with the large cannon to Lake Hylia. Talk to Frya and have him repair the cannon for 300 rupees. Once it is fixed, grapple the back of it and it will launch you into the sky.

Make your way forward to the north and shoot the crystal above the doorway to open the gate. Once it’s open, go through the door and grab the Ooccoo on the ground. Glide to the next platform below and then grapple to the vine covered pillar. Grab the next Ooccoo and again glide across to the next ledge. Once there, climb up the step and go through the door. In the next chamber, grapple up to the window on the right and go through it to reach outside. Once there, drop down and use the spinner to extend the bridge. Go to the far end of the platform you are on and then grapple over the broken edge to the vines directly across. Climb up and then cross the bridge and enter the next door. Hop over the gap on the left side and then grapple to the grate on the ceiling above the chest. Drop down and open it to receive the small key. Drop down to the ledge below and then grapple up to the vines. Make your way back out the door to the bridge and cross to the far side. As you reach it, a scene will play showing a little dragon take out the middle section of the bridge.

Enter the door and grapple over to the vine covered pillar and drop down. Run to the west side door and go through to go back outside again. Go to the left side and past the deku plants will be another hole to place the spinner is. Spin it quickly and another bridge will extend to the far building. Run across the bridge and use the key on the door to enter. Go to the left when you enter and there will be a red crystal to the right near the center of the room. Hit it with the grapple or an arrow and then grapple over to the far pillar with vies. Drop down and then go through the door to the west to find a chest with the dungeon map. Make your way back to the previous room and go south over the blue blocks to the door there. When you enter, go forward and then make your way to the right over the gap. Watch out for the wind gusts between blocks when you jump.

Continue across, taking out the bats and the tile creatures with your boomerang. Continue to the right and then left, over to the next door. When you enter the next room, take out the Lizalfos in there and then the gates at the top will open. Grapple to the patch of vines and then grapple to the ball in the center of the room above. When it comes down, it will activate an air gust. Grab the Ooccoo and hop off the edge when the air gust shoots up to make your glide over to the other side successful. Enter the next door and repeat the same process with the air gusts in here, but float through the opening on the left wall. When you go through, go to the right and land on the platform there. Grapple the ball above to create another air gust and then hop off with the Ooccoo and float through the small opening at the far end.

When you enter this large room, grab the Ooccoo and float down to the platform below with the Baba Deku plant on it. Clear the enemies and then grab another Ooccoo and float to the platform directly across the wide gap. Once on there, kill the nearby bats and then grab the Ooccoo again and float across once more to the golden door on the bottom platform. Go through and there will be a ball above a spinning fan. Grapple to the ball and then equip your iron boots. This will stop the fan and when you drop off, you will fall through to the chamber below. Now you will have to face off against a flying Lizalfo. When he appears, wait for it to face its shield towards you and then grapple it and pull him towards you. Slash at him when she is close and simply repeat that a couple times. Next he will fly through the openings in the wall and attack quickly, so keep you back to the wall without an opening and watch for him. Grapple him three times again and the gates above will open to reveal a chest. Open the chest and you will be the proud owner of the double clawshot.

Now grapple to the far side of the room using the gold plates on the ceiling so that you can see the vines in the center where the fan is. Climb up and head through the door to enter the large room again. Grapple upwards and you will see a ball that you can grapple to. Once on it, hang from it and lower down until you are across from the gate that opened. Grapple into the doorway and then head through the door. In the next room, grapple to the gold plates on the pillars before they slide down. Use Z-targeting to make it easier and then drop down to open the chest and find the compass. Continue through the door there and then look up under the bridge and shoot an arrow at the baba deku plants. Grapple across using the grating at the top to the vines on the right and then climb up and enter the door. Go to the far side of the room and enter the door there and grapple across the Peahats to get across the broken bridge.

Enter the door there and then make your way through the room using the grates on the wall and make your way downwards through the room. When you reach the next set of baba deku plants, take them out and continue along the right side. Shoot the crystal in the left side and then lower yourself to see the grapple plate through the opening in the wall. Zip over to it and then make your way up to the ledge above and go through the door to enter a round room with a large deku plant. Hack at its head and then toss a bomb in its body. Once it is down, grapple up to the center of the ceiling and then drop down to the ledge below it. Run through the door there to come outside to fight a few more plants. Continue to grapple across using the peahats and you will see a tree on the left side where you can get a purple rupee out of a chest and a poe’s soul. Grapple to the peahat again and then to the next and hang from it so that you can fit through openings in the two walls. Drop down when you reach the ledge on the far side and head through the door.

Now grapple across the bunch of peahats and enter the door on the far side to come to a courtyard with a couple armored Lizalfos. When they are down, climb up the vine wall to the platform above and pick off the birds around the area. Turn into a wolf to cross the ropes to the center area and then go to the right and cross more ropes to get back to the center area again. Go through the door and grapple to the metal ball on the other side of the large spinning wall. Put on the iron boots and it will stop the fan in the room below. Drop down and open the chest to get the Big Key and then go to the opening in the floor on the left side. Drop down to the fan and then grapple to the grating above the still fan. Lower yourself into the main room below and the grapple the metal ball in the ceiling above the door at the top of the stairs. Equip the iron boots to pull it down and the large fan will start up.

Exit through the door beneath the fan and then grapple across the large open space by hooking onto the slow spinning fans in the center. After you get across the series of them, enter the door on the far side and you will need to fight two of the flying Lizalfos that you fought earlier. Once they are defeated, climb to the fan in the center above and hit the crystal above the door to start the fan up. Grapple to the left side of the spinning fans as you make your way up and when you finally reach the upper most stationary fan, grapple another crystal to make it start spinning. When you are facing the boss door, grapple to the grating above it and drop down. Enter the boss door and now you will face off against the boss.

Once you reach the platform with the dragon, let him swoop in to attack and dodge. When the dragon hovers over the area, target its tail with your grapple and then you will hang from it. Equip the iron boots and you will pull the dragon down to the ground, smashing the armor on it. Repeat this two more times and then the armor-less dragon will have a new attack where he breathes fire. Grapple up the pillars along the side, one to the other to get to the top. Once at the top, grapple to the peahats flying above and zip from one to the other when the dragon starts his fire attack. When you get to the rear of the dragon, grapple over to its back and then slash away at it. You will then bring it down to the ground and it will fly up again. Proceed to repeat the same thing another two times and the dragon will be defeated once and for all.

Once you have left the City in the Sky you will find yourself back in Lake Hylia. Swim over to Frya’s cannon and take a ride to the Oasis. When you land in the Gerudo Desert, warp to the mirror chamber and a scene will play as you put together the pieces of the mirror. Walk across the light bridge to enter the Twilight Palace and then make your way to the east and go through the door. Destroy the enemies inside, and when you take down the large had, a chest will appear with a small key inside. Grapple up to the far ledge using the grates on the will and drop down to go through the locked door. Enter the fog in wolf form and take down another large head and two chests will appear; one with a small key and one with a compass. Grapple up to the north ledge and go up the stairs and through the locked door. When you enter, there will be a hand at the far end grasping a ball. When you approach it, a ghost version of Zant will appear. Attack it when it is close and continue to do so even as it conjures other enemies to fight you.

When you have hit the ghost enough times, it will vanish and put a cloud in the center of the room. Hit the hand and then use the clawshot to grab the Sol from it. Now you will need to bring it all the way back outside to the starting area. Carry it to the center of the room and place it on the ground in the circle. Run up the stairs that formed and then grapple the Sol when you reach the top. The hand will continuously be trying to return the Sol, so keep it out of its hand and keep moving. In the next room, do the same thing, although the staircase will be a bit larger. In the third room, just avoid the enemies and then return to the starting area and place the Sol in one of the two circles. Step on the green square that appears and ride it to the west side of the area. Go through the next door and then grapple to the wall and then to the ceiling. Drop down on the floating platform and then hop across the next few.

Once you get to the far side, take out the large head and grab the small key that appears in the chest. Go through the locked door to enter another chamber that is filled will black fog and take out another head. Once that head is defeated, a few more will show up. Destroy them all and then go to the north and grapple to the wall and then to the ceiling to get across the room. When you reach the south side, there will be two chests to the east and west. One will contain the dungeon map and the other a small key. Grab both and hen grapple back to the north side and go through the locked door. Now you will have to fight against ghost Zant again, and just like last time, let him come to you and then attack him. Once he is down, grab the Sol from the hand and return it. In the first room, simply run up the steps and grapple the Sol from the center. In the second room, place the Sol in the center and then quickly jump on the platform to the west before it rises.

Once it does, grab the Sol and then run through the door. In the third room, drop off the edge going forward and there will be a light sphere below. Stand beside it to have a platform rise. Let it take you up and then hop across the three platforms already there. At the next sphere, another platform will appear. Use it to get to the far side and get outside. Now take the Sol to the resting place in the center of the main area and you will get a fancy new sword that you can use to clear away the black for by doing a spin attack (shaking the nunchuck.) Walk up the ramp in the center of the area and clear the fog and hop over the gap to enter the doorway. When in the next room, clear the fog and then grab the two Sol’s and place them in the circles on the floor. Head up the stairs and then strike the spheres to create a platform that will take you to the other side. Take out the few heads that appear, and when they are down, a chest will appear, giving you a small key.

Once you have it, stand between the three spheres and spin to hit all three at once. Ride the platform across to the other side and go through the locked door. Now that you are outside, go to the west side and spin through the black fog there and grapple up the walls to reach the ledge at the very top. Here you will find the chest which contains the Big Key. Make your way back down to the bottom; and go to the east side. Hit the spheres there to create a platform and ride it over to fight another head. Once it is down, make another platform to return to where you started and to fight a whole slew of heads. When they are finally defeated, a chest will appear giving you the small key to use on the door to the left. Enter the next chamber and spin through the fog and spin to hit the 4 spheres. Let the platform lift you and then hop on the one platform that is going up. Once it reaches the top, jump to the left platform and continue to go up. When you reach the ledge, grapple to the wall and then defeat the heads that appear. Continue to the other side of the room by grappling to the ceiling and then lowering onto the platform in the center.

Take out the rest of the heads that appear on the far side and then grab the small key out of the chest. Hop on the platform in the center and it will take you over to the locked door to go through. In the next chamber, clear out the black fog and then a few waves of shadow beings will drop in. They are cake to defeat now with your flashy sword and a couple spin attacks is all it takes to put them down. Go through the large door at the end of the room and you will face off against the boss.

Tis battle with Zant will take place in 6 different locations that you have been to throughout the game and each one will require a different approach to being able to hit him. For the first, use the boomerang to hit him while he is floating above the water. When you hit him, he will come down to the ground allowing you to slash at him. Repeat a second time and you will now face him on the tilting platform where you fought the goron. Equip the Iron boots so that when the platform tilts, you don’t fall off. When Zant stops jumping, run up to him and hit him. Again, do this twice to move on to the next location. Now you will be under water in the Lakebed Temple and there will be 4 large heads that are at the ground. Use the iron boots to sink and then wait for one of the heads to open.

When you see where Zant is, grab him with the grapple and slash at him. Repeat again and you will be transported to the Forest Temple. When he is on top of the pillar shooting at you, roll into it to dizzy him. Then toss your boomerang at him to knock him to the ground. Run over and give him some quick hits and repeat a second time. Next stop: the Snowpeak ruins where you earlier fought Blizzeta. Look in the reflection of the ice to see when he is above you and then roll out of the way for when he comes stomping down. When he does, toss the ball and chain at one of his feet and he will hop around while shrinking. Try to get over to him as quickly as you can and slash away at him. Again, repeat a second time and then you will finally be at the final battle with him. For the final round, Zant will really only have one attack that you need to look out for and that’s his spinning attack. When he does it, keep hopping out of the way and eventually he will be out of breath and stop. When he does, go nuts on him. Repeat one more time and a scene will play to end the battle.

Once you leave the twilight palace, warp over to the Hyrule castle town and go to the castle north of the fountain. Grab the doors to push them open after the scene and then make your way to the east side of the courtyard. Defeat the swarm of enemies there and go through the door. Fight another swarm of enemies and then find the chain to the north, beside the gate. Pull it and enter the next area for a one on one battle with the enemy from earlier in the game with the large hammer. Use the same attacks as before and just avoid his swing. Once you defeat him, you will receive the silver key. Make your way back out to the main courtyard and head to the west. Enter the door there and make your way to the far north side. There you will find two boars that you can ride. Hop on one and ride through the wooden gates and towers.

When you reach the northern part of the yard, there will be 6 pillars with fans atop them that you need to use the boomerang on. To get the pattern of which you need to hit, clear the leaves on the ground in front of the gate to the east side. When facing the gate, the pattern is closest middle, right, left, farthest pillar. Go through the gate once you hit them and you will get the dungeon map from the chest inside. Make your way back to the main courtyard and enter the front door of the castle using the small key. Once you enter, you will have to fight a few waves of enemies. Once they are down, go up the stairs and then grapple to the chandelier above. Drop down onto the balcony and open the chest to get the compass. Grapple across two more chandeliers and drop to the next balcony. Enter the door here and you will square off against another large knight. Defeat him again by running circles around him and then go the north side of the room and stand on the white platform against the wall. Use the boomerang to put out the flame on the east wall and the platform will rise.

Follow the corridor to the west and then shoot the painting down halfway through the hall to see a drawing. Light the 4 torches in this hallway in the order of southeast, northwest, northeast, southwest. Keep in mind that you are facing south looking at the end of the corridor, so plan the route according. Also if you run out of oil, you can fill up in the room where you just fought the knight. Go through the door now that it is open and in the next room will be two armored Lizalfos. To make things easier, if you have bombs and arrows, just take them out before they even get close to you. Once they are dead, head through the door to the west and follow the long pathway west to find a chest at the end with a small key. Make your way back east and then head up the ramp to the east and follow the long pathway to the far east, down the ramp. At the end, a gate will open and the chest for the Big Key will appear. Grab the key and then head back up the ramp and enter the locked door in the middle.

In this room there will be blocks that make up the floor and if you step on the wrong one, they will fall. To get across safely, simply turn to the wolf form and use your senses. There will be spirits there that will point in the direction that you need to go to cross safely. Once on the other side, climb the stairs to the right, hopping over the gaps. When you reach the second staircase, grapple to the grates covering the flames along the corridor. For the third set of stairs, use the spinner and jump across, back and forth when the spikes come towards you. When you reach the top, you will square off against another large knight. Use the same techniques as previously and when it drops, go through the large door with the Big Key to for the final boss fight.

After the long scene, you will have to face off against Ganon in his various different forms. The first form he takes is, taking over Zelda’s body and using her as a puppet. Watch Zelda as she floats around the area and wait for her to attack you with a glowing ball. When she tosses it at you, strike at it with your sword to deflect it back at her. Sometimes it will hit her and sometimes she will deflect it back at you again. Continue to whack it until it hits Zelda and repeat three times to make her crash down. Zelda will have two other attacks to watch out for—a dive attack and an attack by causing the floor to burn. The second form Ganon will take is that of a large beast much like your wolf form. When Ganon charges at you dodge and wait for it to disappear. Go to the far side of the room and wait for some red portals to appear across from you. Ganon will come charging out of one of the portals, as indicated by the portal turning a purple-blue-ish color. When it charges at you, shoot an arrow at its forehead and then start slashing at the beasts belly. Continue to do this until your arrow shots make him disappear. When he vanishes into thin air, turn into a wolf and let Ganon charge towards to you. Press A when he gets close and then press left or right to toss Ganon over. Once he is on his side, slash away at his belly again to defeat this form.

For the next stage, you will now be chasing Ganon across Hyrule Field on horseback with Zelda. Ride up behind Ganon while you have him targeted. When you have him in your sights long enough, Zelda will fire an arrow at him to stun him. Once he is stunned, ride up to him and slash at him. Simply repeat the pattern another two times and you will enter the final showdown with Ganon on foot in a one on one battle. As the battle starts, circle around Ganon just like you were fighting against one of the knights earlier. Wait for Ganon to strike and then target him and slash away at him. It will take a lot more than three times to take him down, but eventually Ganon will stagger from your hits. Continue hitting him and finally he will collapse on the ground. When he does, use your finishing move on him by pressing A to finish the fight once and for all. Sit back and watch the ending cut scene and pat yourself on the back for finishing an epic journey.