

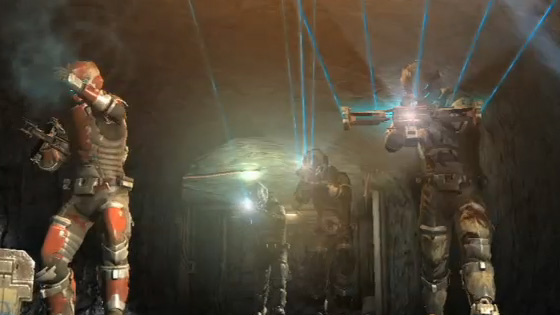
Dead Space 2‘s online component occupies the humans vs. monsters vein of quality multiplayer offerings like Left 4 Dead, and it can be just as tough and team-intensive. It also has two wildly different teams — the humans, who spend each round fighting off swarms of monstrous enemies as they try to complete objectives, and the Necromorphs, which play defense in an attempt to stop the humans from completing their goals. DS2 multiplayer isn’t about kills, despite players having control of some serious death-dealing implements. It’s about strategy, teamwork, and strategically disemboweling enemies.
We’ve spent some time in Dead Space 2, gotten torn limb-from-limb a few times, and picked up a few tricks and tips for you newbs taking you first steps into the darkened and bloodied halls of the Sprawl. We’ve broken things up into the two separate camps — Humans and Necromorphs — each with their own summaries and spiffy little tricks to help you claw your way to victory.

The human teams always have it rough. Whether they’re working on the Solar Power Array or just trying to escape the docked Ishimura with their lives, they’re constantly in a tough spot. When it comes to playing with the human team, your Objective Indicator is your video game god. Objectives are always marked on your heads-up display, and each map requires you to complete five objectives in order to secure victory.
In addition to fighting the Necromorphs bent on your destruction, you’re also racing the clock. You only have a few minutes to complete each objective — finishing them results in more time added to the clock, so it’s in your best interest to try to get through the first few objectives, which are usually the easiest, as quickly as possible.
There are no major changes in controls between single and multiplayer modes for the humans. One of the key features held over from the campaign mode is the Objective Indicator, which presents you with a path through the halls of the Sprawl to your current objective. Click in R3 and hold it to see where you need to go next; the information could save you time and deaths, especially late in matches.
Weapons
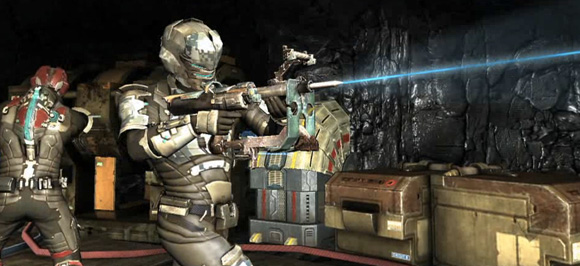
You start each level with the Pulse Rifle, your primary weapon. It has two modes of fire — straight machine-gun mode, fired with RT or R2, and a grenade-launcher mode, which you can use with the alt-fire button (RB or R1). Lots of players are unaware they’re carrying a grenade launcher when they first start the game — handy when Necromorphs are bunched up or when you want to hammer an object with damage.
As you level up by earning experience points dolled out for kills, attaining objectives and winning matches, you’ll unlock new secondary weapons. Your first weapon is the Plasma Cutter, and it’s not extremely powerful. It’s also a difficult weapon to use accurately, since player-controlled Necromorphs are quick on their feet and dodge quite a bit. Use your secondary weapons when you get in tough situations, or when you need to shoot and destroy objectives, so you can conserve ammo in your machine gun.
Melee
Your option of last resort is to swing violently with your weapon as a bludgeoning instrument, just like in single player. Don’t expect either the melee strike (RT or R2 without aiming) or the stomp (RB or R1 without your weapon up) to help you much, but both are effective if you’re backed into a corner and can’t aim, or are fighting off small enemies like The Pack or Lurkers. Neither is going to save your life, though.
Stasis
The Stasis ability from single player makes it into multiplayer, and it’s key to saving your life and completing objectives. You get two shots at the start of the game, and using them on enemies will allow you to quickly dispatch them, or just blow by them as you run to complete an objective. Stasis can save you time and health, and you’ll want to use it as often as you can manage.
Healing
You start with a quick-use medpack, mapped to the B or Circle button when you don’t have your gun raised. The cool thing about this, in addition to it being a one-time life-saving item, is that the use of your medpack will heal any allies in your immediate vicinity. You also get a 20-EXP boost for each ally you heal in this way, so save your medpacks for when you can maximize their effectiveness.
Pickups
Lots of Necromorphs drop items — specifically, more medpacks and ammo — when they die. Keep your eyes open and snag everything you can, whenever you can. Keeping yourself in ammo and healing can make your team a hard force to put down.
If you find yourself alone, chances are good you’re already dead. In addition to spawning human-controlled Necromorphs, DS2 will fill out its multiplayer maps with standard, computer-controlled Slashers, which just exist to get in the way. The best, and only, way of completing objectives is to move as a four-player unit, concentrating your fire and watching your backs. Trying to go alone is never a good idea.
Saving Your Friends
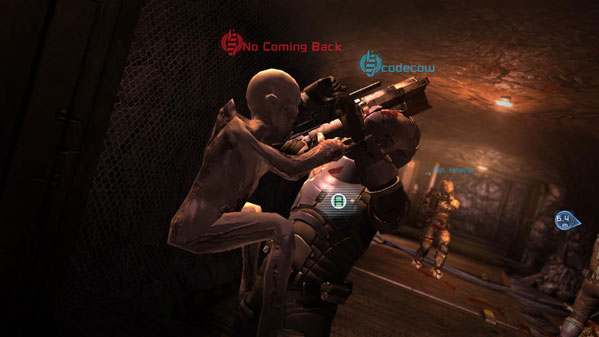
One of the key Necromorph moves is to try to “Execute” human players by jumping on and attacking them. During these attacks, the human player can only fight off the Necromorph by pressing A or X and can’t fight in any other way. Watch for Executions against your teammates and carefully blast the Necromorphs attacking them for an EXP bonus and to help them significantly.
Friendly Fire
Avoid shooting one another at all costs. You can do serious damage to a teammate by accidentally capping him. Novice players will often kill their teammates while trying to save them from Executions by continuing to shoot at them long after the Necromorph is dead. Check your fire as much as possible if you want to have any hope of winning.
Direct to Objectives
When you respawn in DS2, you’ll often have to truck it a bit to get back into the action. Do your best to get there fast and avoid confrontation if possible. Getting back to your team to back them up is key, and Necromorphs in between you and your goal are largely just trying to slow you down or injure you while you’re vulnerable.
When it comes to actually killing things, do what you do in the single-player campaign — go for the limbs. You’ll also need to keep an eye out for which kind of Necro you’re dealing with: Lurkers, the babies with the tentacles, and the child-sized Pack are much easier to kill than Spitters and Pukers, the two big classes.
Often you’ll find an objective guarded by Lurkers hiding on the ceilings and around corners. If you don’t deal with them, they’ll hammer away at you while you attempt to accomplish other things. Stand guard with a teammate or two while your fourth accomplishes the objective, and make sure to wipe out any distant enemies.
Spitters, too, can be seriously detrimental to your defenses. Spitters can charge up a shot of acidic goo, and if it hits you dead-on, it does serious damage. If you’ve got a distant Spitter, take it out as quickly as possible — Stasis helps immensely.
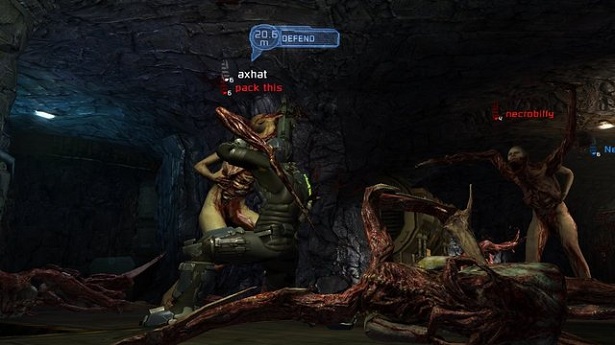
Killing stuff — this might seem like your job as a Necromorph, but that’s only your function at its most basic. Your actual role is to kill stuff intelligently. Just as the humans strategically dismember your limbs from your body, so too must you strategically dismember the human team to keep it from being successful.
On your Necromorph heads-up display, you’ll always have an idea of where the humans are and where their next objective is. Conveniently, the game also marks what you need to do with these objectives: either “Guard,” “Defend” or “Kill.” Guarding and defending refer to locations the humans need to reach and activate or destroy; your basic job when that happens is to get in their way and distract and murder them. When your objective is to “kill,” it means a specific human is carrying an object that has to be brought to another location, and that you should stop him.
It’s not enough to just blindly pick a Necromorph: you’ll want to know their strenghts and weaknesses. The smaller Necromorphs go down more quickly, the larger Necromorphs can absorb more damage. Conversely, the smaller you are, the more versatile you are — Lurkers can climb and the Pack are extremely fast, while Pukers and Spitters are much slower.
More than anything, your goal is to guard objectives and belabor the humans, not to kill any easy target. A human who’s alone, running to catch up with his team at an objective, should be slowed by a single Necromorph — if that. Killing a guy who’s not in the main fight makes no difference, since your goal isn’t total annihilation, it’s actually to run out the clock like it’s the fourth quarter of the Super Bowl and you’re ahead by two.
Defense, that’s what you’re playing. Always keep in mind the Objective marked on your screen, and try to stay near it. Necromorphs can spawn out of any vent, and they can also reenter vents to quickly travel to new areas and respawn. Use this to your advantage: you have the capability to almost instantly be anywhere, so don’t bother running around trying to find humans when you could get in front of them. Always get to the objective and do what you’re told by your HUD: guard it, defend it or destroy it. If it’s alive, kill it. But if you intend to win, you need to use your head.
Get good with a specific Necromorph: one that you can rely upon to be your class when the going gets tough. If you’re a front-line fighter, practice on the Pack and Pukers. If you like to stay back and damage from a distance, try the Lurkers and Spitters. It’s good to be versatile with all Necromorphs, but having a class you go to regularly will help you fill a role on your team.
Teamwork is very important for the Necros, since they die so easily. If you’re not playing DS2 with a headset and lots of strategy talk, you’re doing it wrong. Coordinate your classes so you can make sure the bases are covered in different situations — a team filled with Pukers is going to fail. A team filled with the Pack will also fail. Balance is key, as is knowing your role on the team.
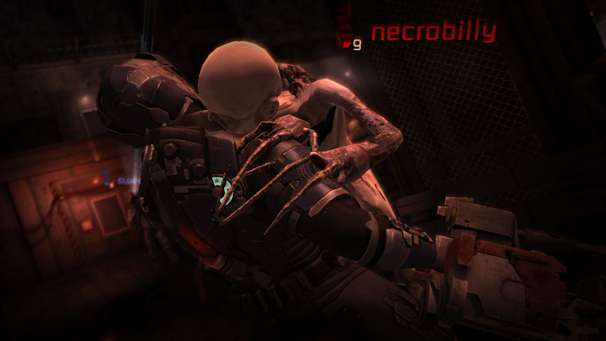
Distraction
Another key item is to make sure you’re good at getting an Execution on the fly, whenever you need one. You can do this by hitting or holding A or X to get your character either running or jumping (little Necros jump, big ones run). While you’re running or jumping, hit the attack button (RT or R2) and you’ll latch onto your prey and start an Execution move that will seriously injure and slow your opponent. You might not kill the human with one strike, but you’ll occupy him for a good long time. More than anything, clutch Executions used at crucial moments are key to victory.
The Pack
Your primary soldiers in every fight, the Pack are quick melee troops who can fling themselves quickly into battle and do massive up-close damage. They die fast, though, so ambushes are absolutely key. Primarily the Pack’s role is distracting and slowing the enemy. If you do your job well as the Pack, you can drain a lot of time from the clock with key, quick sacrifice attacks.
By holding R1 or RB, you can sprint as the Pack. A or X jumps, and if you jump while sprinting, you can really heave yourself through the air. This can help you get to higher or lower levels quickly, or cross big distances fast.
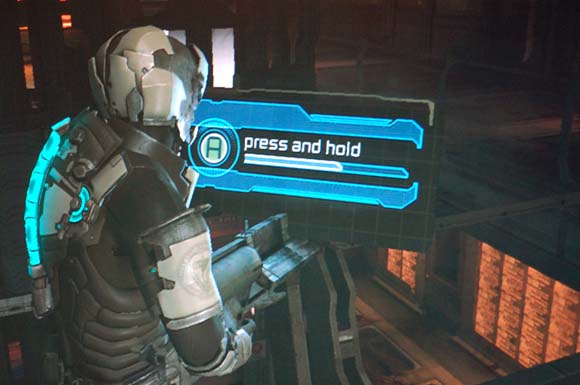
Executions for the Pack take place in the air, and are the Pack’s bread and butter. In fact, the Pack’s primary function is to throw themselves at key members of the human team and distract them with Executions. If you see a human hitting a button on a console (which have to be held for several seconds), for example, a fast Execution can stop him from completing the action, forcing him to start over. You’ll damage him, and if he’s hurt already, you may kill him.
The Pack are most effective in groups of two (or three, though this gets risky) when one can Execute while the others slash away at the enemy and bring him down quickly. Pack are really fast and can be hard to hit — make sure you strafe sideways as you slash at your enemies in order to dodge fire and melee strikes. Also, if you attack a group of humans to slow it down, try to stay between them to encourage friendly fire.
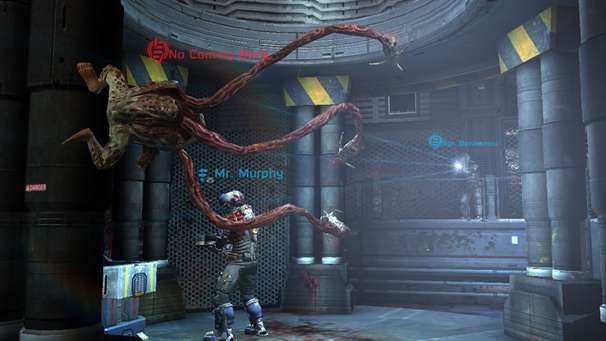
Lurkers
The Lurker isn’t formidable on its own, although it can still Execute in a pinch. Much more effective, however, is the Lurker’s climbing ability. Park yourself above an objective on the ceiling and shoot down at distracted enemies to help butter them up for the kill. As a Lurker, you want to stay out of the line of fire, and even hide yourself when possible.
In order to fire ranged attacks with Necromorphs, you need to hold LT or L2, just as you do with the humans. Lurkers’ attacks are spread out either horizontally from three tentacles, and are most effective if you can nail the enemy with all three flying barbs at once. To do that, try positioning yourself on walls to get a vertical attack, which might be more likely to connect all three barbs in a single target. If you end up close to a human, you still have close-range melee attacks.
Pukers
Pukers have something of a confusing role. They’re not so much a ranged unit, although they do have their puke attack, but the distance it can cover is limited. You’ll want to use a Puker more as a mid-range fighter, best for those moments when you can get a decent ambush on an enemy from around a corner, or while he’s dealing with the Pack.
Fire Pukers’ puke the same way as Lurker barbs, by holding the Weapon button. Again, this isn’t great from a distance, but if you can get in fairly close, it’s quite powerful. But the Puker’s greatest strength is as a melee fighter.
Pukers take more damage to kill than Lurkers and Pack, and up close, they can be devastating. Their melee attacks are very, very fast, and they have the ability to move relatively quickly while constantly attacking. If you can close the gap on a human, slash at him as you strafe around him and he’ll have an extremely hard time putting you down.
Spitters
The powerhouse unit, Spitters take the longest time to spawn because they’re the strongest and hardest to kill. They also move really slowly, but if you can get in close to a human with a Spitter, you can slice him up effectively in just a few hits. The Spitter’s Execute attack, conversely, is somewhat less effective, it seems.
Spitters obviously are also great ranged units. Like Lurkers, they can fire from across a room — unlike Lurkers, holding down the attack button can actually charge a Spitter’s ranged attack to make it more powerful. From a distance (and especially in high, dark corners), Spitters can be devastating and especially difficult to dispatch.
The only downfall is getting a Spitter into a fight, or catching up with humans while you wait to spawn, so positioning with a Spitter is key. Down the hall from the humans’ destination (especially if it’s down a ramp from you) can often be great, because you can duck around corners to avoid fire. Up close, try to position yourself around corners in front of humans to catch them as they run by you.
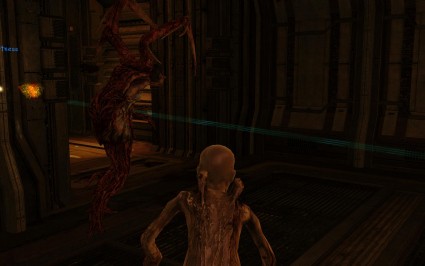
Necromorphs are virtually useless one-on-one. Humans have better weapons and armor, and will almost always win a fight against any Necromorph, unless they are injured or you get an Execution — and even then, no kill is guaranteed.
Instead, plan your attacks with the specific intention of what you need to accomplish, which is almost never a straight kill. One-on-one can be useful if you’re trying to prevent a lone human on a breakaway from completing an objective. If that’s the case, an Execution can give your teammates time to spawn nearby. If you have a teammate nearby, one of you should Execute while the other slashes away at the human. In this way, you can usually get a kill straight away.
Getting in close, strafing around and laying down regular melee damage is also an effective strategy, especially with quicker units like the Pack and close-range Pukers. If you’re just trying to damage or distract a human, you can often do more damage with regular attacks than an Execution that’s likely to get you killed.
But be smart about which members of your team you commit, and where. Just because a human is alone doesn’t mean he’s worth busying two or three Necromorphs to bring down — ignore the straggler (unless you can divert him from rejoining his team) and focus on the guys who are completing objectives. They’re the real threat, and a kill is worth a lot less experience than a victory.
Stagger Kills
Just because you have the opportunity to kill a bunch of humans once doesn’t necessarily mean you want to. You might have three or four humans pinned down, Executed, and being torn up by Necromorphs. But hold off on finishing them if you can — because four dead humans will respawn into four fully alive, fully outfitted humans all at once.
When humans respawn, they get their ammo refilled, their health restored, and a fresh medpack to take into battle. They’ll spawn at a distance from the objective, but not too far away.
Killing a human is great because it’s a setback for the whole team, but only because the team is temporarily shorthanded against additional attacks. Often Necromorph teams, finding themselves in a winning situation, will quickly slaughter a whole human team, only to lose an objective as the whole team respawns.
Instead, kill one or two humans, and give them a second to respawn and start running toward the objective to rejoin their teammates before you slaughter the other two. This can be tough to coordinate — it’ll require a smart team and trust that you won’t get murdered yourself — but if you can do it, you can set the human team perpetually coming back to the objective with only one or two guys, while you attack them with a full Necro team. That means you’ll get more kills and stop the humans from completing objectives more often. Humans are best when they’re in a big group, so if you can keep them struggling to regroup, victory will be easy.


 10 Incredible Steam Games You Can Buy For Under $10
 Living Failures Boss guide - Bloodborne The Old Hunters
 PES 2016: create cool Bundesliga jerseys / logos with edit mode
 How to Connect with People & Stop Feeling Lonely
 Lego Jurassic World (PC) walkthrough