
The awesomepocalypse is here to stay in Sunset Overdrive, and if you’re looking for tips to help blast through every challenging mission you’ve come to the right place. Grab an energy drink and get to grinding across Sunset City, because it’s up to you and a band of colorful survivals to take down the new mutant population.
Get a load of the fall’s most colorful shooter with our screenshot-infused walkthrough below. For more articles, guides, and extras wall-run over to our compendium of Sunset Overdrive cheats where we list and link everything available on GameFront related to Insomniac’s Xbox One exclusive. See how it all turned out with our Sunset Overdrive review and see if it’s as awesome as it looks.

Mission 1: Horror Night

After the opening cut-scene on the train, sprint towards the objective marker ahead to execute a dodge roll that slips you past the oncoming enemy and continue moving forward without stopping by sticking to the right-side wall as a means of avoiding the creatures that emerge from the left.
Vault over the indicated wall in the corner to approach the floating white arrow on the right and jump onto the fans to launch yourself up onto the ledge above, then bounce over the next gap ahead to reach the skylight and proceed towards the fiery rooftop below on the right to jump down on top of it.
Drop over the back of the rooftop to bounce off the next set of fans below and launch yourself off the purple umbrella on the opposite side of the street beneath you to climb up the awnings on the left, then jump across the line of car roofs ahead to proceed in the direction of the current objective marker.

Land on top of opposite green-lit building to grind along the adjacent phone wire towards Regrets Malt Liquor and approach the upper left corner of the roof to grind the edge of the collapsed metal tower, then use the wire on the right side of the next rooftop to encounter the monster waiting for you at the end of the line and reverse directions to escape.
Reverse directions for a second time when the monster drops down to block your path again and approach the indicated door on the next green-lit rooftop to activate a cut scene, then execute an undergrind to retreat from the giant creature and flip to a regular grind to avoid the hanging bodies blocking the route ahead.
Quickly execute a second undergrind to slide beneath another barrier of hanging bodies and reach the green-lit rooftop at the end to activate a cut-scene, then grind the wire in the upper left corner to open fire on the enemies that occupy the next ledge and transfer along the edge of the cement railing to reach the adjacent wire on the right.

Following the next cut-scene, grind on the green cement railing that encircles the rooftop to retreat from the monsters that surround you while firing back at them and continue riding the ledge to transfer to drop into the street below at the end.
Travel east down the road you landed on to aim up at the giant monster prowling the left-side rooftops above and open fire on this creature while running to antagonize it, then bounce off the indicated taxi cab parked in the middle of the street and grind the wire directly overhead in the opposite direction of the enormous mutant’s current location.
Turn around upon reaching the southern rooftop to stand in front of the previous telephone wire and wait for the giant mutant to descend onto the street area directly beneath you, then grind the wire again to pass above the monster and fire down into his head without stopping to inflict further damage.

Change direction each time you reach the end of the wire to ricochet back and forth directly above the giant mutant with guns blazing until the next cut scene is activated, then bounce and grind off the series of obstacles in your path that have been marked by floating white arrow icons to reach the apartment building rooftop without having to touch the ground.
Following the next extended cut-scene, pick up the crowbar in front of you to encounter the Od and use melee combination attacks to eliminate these enemies one-at-a-time by knocking them backwards off the rooftop.
Clear the area before descending to the adjacent rooftop below in the east and grind the yellow telephone wire in the corner to drop onto the basketball court across the street as soon as it’s beneath you, then break open the wooden crate at half-court to switch to your new gun and watch Walter vault over the surrounding fence a few seconds after.

Stand beneath the basketball rim at the west end of the court to watch an orange puddle of ooze leak from barrel Walter chucks in your direction and turn directly to the right to bounce off the mailbox against the chain-link, then grind the surrounding fence to encircle the blacktop and open fire on the enemies you see approaching from below.
Fire your new gun at the walls behind and beside the enemies on the ground below as a means of bouncing each round off the surrounding walls, then fire repeatedly into cramped alleyways or corners to cause a consistent storm of ricocheting projectiles and take out multiple hostiles at once more efficiently.
Move back and forth in alternating directions around the top of the fence until the area below is clear, then follow Walter to the next location to meet up with Two Hat Jack for an arms purchase and complete this mission.
Mission 2: One Man’s Trash

Visit Floyd to activate a cut scene and receive a new objective, then head towards the current waypoint icon located at street level by grinding the green wire that’s attached to the right corner of the roof you’re on and ride it forward as far as you can until the armed gunmen are visible in the parking lot below.
Transfer to the pink telephone wire that runs closest to the white delivery truck on the right side of the parking lot and grind forward along it to glide directly above the gunmen’s heads in the area beneath you, then open fire on these armed hostiles by shooting down into their bodies and turn around as pass by to continue inflicting damage without stopping.
Try to use a different weapon whenever you go for the kill on a new gunmen in the area below and cycle through them in a repeated order so that each gun will level up equally with one another.

Continue riding the pink wire to ascend over the yellow Brewery sign its attached to around the next corner in the cables and fire your weapon down towards the cars bunched together in the middle of the area to hit the gunmen hiding behind the vehicles, then change directions repeatedly to circle around the entire parking lot until its clear of hostiles.
Transfer to the wooden railing in the southwest corner of of the parking lot to finish off any hostiles who found refuge behind the white delivery truck and drop to the pavement below to proceed in the direction of the next objective marker, then undergrind the web of green wires above you in the open area ahead to return to Floyd’s and receive a new objective.
Proceed in the direction of the next objective marker that appears to reach the Crown Blades Factory and bounce across the yellow wire that passes above the indicated orange puddle on the train tracks to eliminate the enemies swimming in the goop, continue shooting at the creatures from this same elevated position until they are no more.

Drop beside the rear of the overturned blue truck to collect the first Vat Part highlighted in blue flames and move south down the adjacent railroad tracks to acquire the other four pieces you need, then grind your way towards the next objective marker that appears and transfer to the yellow wires on the right side of the rails to ascend towards the overpass above.
Launch off the inclined yellow wires to land in the 4-way stop below and proceed forward alongside the train rails in front of you by grinding the top of the covered fence on the right side of the tracks.
Slow your speed down upon exiting the shadow of the overpass to target the red barrels in the distance ahead and detonate them with a single shot to remove surrounding enemies with devastating explosions.

Proceed past the train cars that have come to a stop on the tracks ahead to activate a cut scene, then stand your ground as the Popper enemy comes charging straight towards you to wait until it is just about to make contact and press the indicated button to execute a melee strike that will burst the creature into several pieces like a balloon at the last second.
Approach the indicated crash site to eliminate the surrounding creatures with a powerful close-range gun or with severe crowbar beatings, then search around the nearest sidewalks and stalled vehicles to collect all 5 Vat Parts highlighted in blue flames and return to Floyd’s to complete this mission.
Mission 3: Amp it Up

Talk with Floyd to start the mission and turn left towards the closest of the three objective markers currently on your map to pop the first Fizzie Balloon, then grind the the adjacent silver pipeline that extends out towards the east to approach the second one.
Jump down off the left-side of the pipe to land on top of the triangular pink umbrella below and bounce vertically to collect another Fizzie Balloon, then grind the string of Christmas lights to ascend to the uppermost level of the next building’s roof ahead and collect the third Fizzie before returning to Floyd’s location to finish the amp.
Bring up your menu to equip a new Hero Amp under the Character tab and amplify one of your guns under the Weapons tab by following the on-screen instructions that appear, then enter the parking lot that’s currently contaminated with multiple orange ooze puddles.

Approach the groups of creatures currently feasting on the slime at close-range and eliminate them with the Damage Dodge Roll ability by crashing through these tightly-clustered feeding circles all at once as if they were bowling pins, then execute a connecting series of grinds, undergrinds and transfers between the wires hanging above to reach Style Level 2 and use the new amped weapon that becomes available to stun the required number of mutants at ground-level.
Finish clearing the area with either or both of the new abilities you just took on to learn about your combo and style meter, then return to Floyd’s to complete this mission.
<
Mission 4: Amptastic

Turn the indicated valve wheel in front of Floyd’s shop to activate a cut-scene and start the Overcharge Protection Game, then grind forward along the green wire in front of you to the left and switch to the Dirty Harry weapon upon reaching the web of red-colored cables at the end.
Bounce back and forth across the northernmost of the two green wires that extend out from the square of interlocking red cables at diagonal angles and remain here to goad the enemies beneath you into moving closer to your position, then open fire on the mutants below to clear out as many as possible and drop to the ground to take out the poppers with well-timed melee strikes.
Use the overhead wire system to travel quickly towards any of the exclamation point map icons that suddenly appear during the battle and clear out these areas as well with the help of your Damage Dodge Roll ability to break apart the larger enemy clusters, then defeat the surrounding hostiles until the Overcharge is safe again and prepare for the next wave to arrive by collecting the supplies that have been dropped in the vicinity as soon as you see the mini-timer start counting down.

Grind the interlocking section of red wires in this area to stay above the Herker that arrives and pass over the monster repeatedly from both sides of its body to keep the mutant confused while you rain down rapid gunfire, then quickly retreat towards the first exclamation point icon that appears to save the Overcharge as quickly as possible.
Eliminate the lesser enemies that attack the overcharge with the help of your dodge roll attack to make the job quicker and return to grinding the overhead wire system before the Herker can arrive on the scene, then travel back towards the monster’s location to inflict further damage from above and try to lead it further away from the objects that need protecting.
Travel along the green wire that traces the perimeter of this entire area to circle around and get a visual on every enemy’s current movements, then change directions whenever necessary to eliminate any mutants that you see heading towards the Overcharges and pick them off from above before damage can be caused.

Continue encircling and assassinating the mutants on the ground below that currently pose a possible threat to any of your overcharges, then keep all of them safe by cutting off attempted attack routes until time expires to activate a cut scene and complete this mission.
Mission 5: A Way Out

Travel towards the current objective marker to meet up with Walter at the indicated overpass and ascend to the skylight overhang that sits on top of it to find your companion shooting down at enemies in the road beneath him.
Approach the enemies taking cover from Walter’s gunfire by the blinking cop car on top of the overpass and rush towards these hostiles at full speed to clear them from the road with a powerful close-range weapon that will send them sailing backwards.
Use the highway’s cement divider as cover to remain somewhat protected from retaliation as you continue clearing the area and execute dodge roll attacks at very close-range to remove any remaining hostiles currently obscured from your gunfire.

Stand with your back to the skylight that Walter currently stands atop to beat back the oncoming enemy wave from street-level and watch for hostiles in front of you that choose to leap vertically into the air as a means of ambushing your teammate.
Before chasing after the vertically leaping enemies, approach the taxicab that blocks the on-ramp to detonate the red barrel located behind the vehicle as a means of wiping the area with a massive explosion and join Walter on the skylight above to provide any help he needs.
Drop down towards the next wave of enemies coming from the southwest ramp to bounce across the line of car rooftops that block the road and continue vaulting between the vehicles while firing down on the hostiles invasion to evade any possibility of being cornered.
Return to the skylight’s location as the clock starts counting down from 10 to protect your teammate at close-range until the timer inevitably expires and finish clearing the overpass before speaking to Walter at street-level, then watch the next cut-scene unfold and return to the Brewery to complete this mission.
Mission 6: A New Friend

After talking with Floyd, travel to the Crown Blades factory to pass through the stone archway at its base and activate a cut-scene in which you spot a mysterious stranger crawling onto a balcony.
Grind the inclined yellow wire on your right to reach the ledge above and dive off the opposite end of the railing to land in the water below, then swim towards the current objective marker to climb onto the indicated pier and approach the two yellow life boats beneath the top right corner of the dock.
Bounce off the pair of life boats to grab the flag poles extending out from the tops of the buoys ahead and swing forward between them to reach the indicated pier on the other side, then use dodge roll attacks to knock the surrounding mutants over the edge of the dock and grind the yellow wire attached at the upper right corner to return to shore.
Proceed towards the southwest end of the shipping yard to enter the alley under construction around the corner and grind the wooden railing above on the right to drop off at the end in front of the indicated red shutter below, then back away from this area quickly to open fire into the backs of the mutant swarm that descends on your previous location.
Continue retreating backwards to keep a safe-distance from the oncoming mutants and fire repeatedly without stopping to mow down every last one, then open the red lockers on the right to break open the crates inside and grab the remaining shutter on the left to activate a cut-scene.
Afterwards, roll sideways to avoid the Blower’s incoming acid spit and immediately run back out into the open to start shooting the Od at long-range.

Eliminate the Blower to continue forward through the alleyway under construction and keep your gun trained towards the ledges and tops of staircases in the surrounding area, then step sideways to avoid any incoming acid spit and target the source of this projectile before it can be launched again.
Wait for Sam to take cover behind the first cement column you reach upon returning to the crane area, then target the stack of shipping containers across the yard to pick off the blowers in the distance before they do much damage and run or grind in their direction to improve accuracy.
Finish clearing the area to set Sam in motion again and follow him to reach the windowed corridor on the level above, then walk backwards while firing repeatedly down the hall to remove any remaining threats and jump over the balcony railing at the end to land on the wooden pier below.

Look up towards the steps on your left to target the next wave of enemies above and shoot the explosive red barrel first to cover the area in massive fireballs, then proceed forward through the flames to pick off the blowers on the surrounding ledges and ascend onto the nearby rooftops for better accuracy.
After clearing the area and speaking with Sam, keep your back to him as you open fire repeatedly on the enemies that emerge from the northeast section of buildings and return to the train at the shipping yard to check the indicated blue cargo trunk for supplies.
Use your new TNTeddy gun to rush the bottom of the metal staircase ahead and blow up the wave of mutants that starts descending from above, then turn towards the stack of shipping containers in the east to incinerate another enemy swarm as soon as they try touching the ground.

Grind in a circular route around the available yellow railing to continue blowing up the enemies while in motion and turn back towards the previous metal staircase to eliminate a third wave of oncoming mutants with the TNTeddy, then jump to one of the ledges or shipping containers above you when faced with a stampede of Poppers and allow them to implode on their own after your escape to cause more damage.
Finish clearing the area to stand on top of the train’s lead engine as it breaks through the chain link fence and point the TNTeddy down towards the rails in front of you to incinerate any mutants that pose a threat to your safety, then blow up the giant monster blocking the tracks before impact to continue the journey unscathed.
Ride the train to the end of the line to drop down off the roof and follow Sam to the Pizzeria to complete this mission.
Mission 7: Bora Bora Water

Travel to the Bora Bora Water Facility by grinding along elevated ledges or telephone wires to avoid the ground below whenever possible, then spin the indicated valve wheel to activate the Flush Sequence and raise a new pipeline from the murky depths located behind you.
Grind up the inclined section of the new pipeline that has risen out of the water and watch for red valve wheels in your path along the way to break them open with well-timed spinning melee strikes, then remove all three valves before ascending on the fans at the end of the line to reach the top of the enormous toxic waste container.
Jump onto the circular glass pressure meter on top of the toxic waste containment tank to cause a massive eruption that sends you straight up into the air, then ride the previous pipeline back down towards the current objective marker to activate another Flush Sequence on the platform at the very bottom.

Grind the yellow pipeline directly in front of you to proceed towards the southwest line of buildings in the distance ahead and break the first red valve wheel on your right before vaulting up onto the bridge at the end, then bounce off the roof of the beige car to land on another yellow pipeline attached to the right side of the nearest brick structure.
Break the next valve wheel above before turning left at the fork in the pipe and destroy a third red valve located at the corner ahead, then ascend on the fans at the end of the line to land on top of the toxic waste containment tank and jump onto the glass pressure meter to cause another eruption.
Descend to the next indicated platform to approach the third Flush Sequence valve and use your map to anticipate the arrival of a wave of invading Ods, then take them out with the TNTeddy to squash this threat quickly and enter the alleyway they keep emerging from to activate a cut-scene.

Open fire on the Spawner with a powerful close-range weapon to start draining the monster’s health and back up consistently to maintain a safe distance at all times, then retreat around the car behind you to the left to keep an obstacle between you and the creature and continue unloading rounds while circling the vehicle until it’s final destroyed by the enormous mutant.
Ascend to the interlocking series of yellow wires that hang over the rooftops to circle around the battle zone below and fire down at the Spawner each time you pass over him until the giant monster is dead, then finish clearing the streets to activate the third Flush Sequence safely and grind the now-available pipeline floating in the water beneath your feet that points east.
Destroy the first valve on your left before transferring to the next pipeline ahead on the right so as not to drop into the water and destroy a second red wheel near the top of the incline, then jump to the adjacent yellow staircase railing to continue forward and bounce off the roof of the red truck at the end.

Land on the back of the white delivery truck to reach the wooden balcony above it and head towards the right by grinding the adjacent blue railing to jump off at the first bend, then ascend onto the next yellow pipeline across the gap to destroy another valve at the top of the incline and change directions to activate the third toxic waste eruption.
Descend towards the indicated turquoise terminal on the ground far below to pick up the water bottles from behind the shutter that opens and carry them towards Oxford’s base by weaving around or bouncing over any mutant that blocks your path, then grind as often as possible to reach the destination safely and complete this mission.
Mission 8: Boo-Boo Overdrive

Travel to the dog park in Little Tokyo to undergrind the yellow cables that encircle the spherical metal sculpture at the area’s center and open fire on the enemies below as you zip over them, then change directions frequently to follow up on your assaults and transfer to the adjacent skylight nearby when necessary to eliminate the more-meddlesome threats positioned on top of it at close-range.
Continue using the web of yellow cables to drain the giant mutant’s health from above once he arrives on the scene and jump when you see the monster’s arms come down to avoid being knocked off the wire, then use dodge roll attacks to escape from situations in which enemies have you completely surrounded and hit the larger groups that have clustered together with the TNTeddy for maximum destruction.
Defeat the enormous monster to clear the entire dog park and call Boo-Boo over to you repeatedly until it’s time to call Sam, then head to the indicated toy store to activate a cut-scene and hit the gunmen out front afterwards with a round from your TNTeddy while sprinting straight at them in preparation for close-range combat.

Use the red awnings out front to yourself up onto the roof of the toy store and quickly knock the snipers nearby off the edge with melee strikes if possible, then look down towards the entrance to open fire on the enemies taking cover in the courtyard below and finish clearing the area to collect the Cutie Kitty on the bench against the corner staircase.
Return to Boo-Boo’s location to lure the robot pet out of the doghouse and activate a cut-scene in which the Kitty Cannon is added to your arsenal, this fire this new weapon at the surrounding yellow and blue tabletop play structures to get Boo-Boo to perform three different tricks.
Proceed north down the bordering city street by first firing a projectile from the Kitty Cannon a few feet ahead to get Boo-Boo to follow and enter the circular white outline it creates until the symbol disappears a few seconds later, then continue using this weapon to push the robot dog towards the current objective marker and watch the animal maul any mutant unlucky enough to be standing within the highlighted area.

Cross to the opposite side of the north bridge by firing the Kitty Cannon over the gap at its center and wait for Boo-Boo to clear the separation as well a few seconds later, then proceed in the direction of the current waypoint icon to lure the robot dog into the marked intersection below and continue using your new weapon to sic the animal on surrounding enemies.
Continue fighting your way towards the current objective marker with the help of Boo-Boo’s vicious attacks and watch the ledges above you at all times to avoid being sniped, then grind as often as possible to escape these battles with greater speed and eventually reach Sasquatch’s place again.
Ascend to the yellow telephone wires that hang high above the neighbors streets to grind back the way you came and open fire on the giant mutants that have appeared below to eliminate them using Boo-Boo, then bounce repeatedly between the connecting cables to evade incoming projectiles and finish clearing the area before entering the Pizzeria to complete this mission.
Mission 9: Max’s Parents

Travel in the direction of the current objective marker to reach the Tower, then clear the scab fort adjacent to the structure’s base by rushing towards the enemies with a powerful close-range weapon or by picking off the ones behind the railing on the level above from a safe-distance.
Cross to the eastern wall of the courtyard to climb up the collapsing roof and take out the enemies above to use the indicated harpoon behind the hotel sign, then fire at the sparkling white spot on the building opposite from you to create a rope bridge and grind forward on it to reach the balcony at the end.
Use the fans beside you to reach the next overhead ledge and bounce off the top of the orange tent to swing forward across the pair of red poles protruding from the wall, then drop to the balcony on the other side to man another harpoon and create a second rope bridge by firing at the stack of explosive barrels on your left twice.

Grind over to the next balcony on the building across from you to bounce upward off the fans against the wall and land on the overhead ledge to pillage the surrounding crate supply, then return to the previous harpoon to create a rope bridge to the explosive barrels on the right.
Travel back across the gap to reach a new balcony area and grind the pole on your left to ascend to the harpoon turret on the next ledge above, then target the enemies patrolling the right side of the building in front of you to fire at the explosive barrel in their vicinity.
Swing the turret over towards the left side of the building to detonate another stack of explosive barrels and hit the sparkling wooden target that appears to create a new rope bridge, then grind over to the opposite landing to finish clearing the area en route.

Grind across the beam on the left to continue around the outside of the Tower and smash the crates against the graffiti wall before manning the next harpoon turret, then transfer between buildings again to ride the adjacent flag poles over to the opposite landing around the corner.
Swing forward on the flagpole at the end of the walkway to grind on the long series of interconnecting yellow wires ahead and alternate between undergrinding whenever you see electrified red obstacles blocking your current route.
Transfer to the second line of yellow cables that suddenly appears on your right to cross the gap between towers again and continue dodging the electrified red obstacles on the sections of wire ahead by using rapid repetition to change grinding styles.

Jump off at the end of the line to ride another yellow cable located directly beneath you and vault forward over the electrified portion of the wire ahead to bounce upward off the fan behind it, then transfer to the next grind above to continue circling the tower and dodging obstacles in your way.
Drop onto the wooden landing around the corner to swing forward on the overhead pole extending out from the wall in the background and let go to reach the area surrounded by barbed fences below, then bounce upward to access another to yellow cable route.
Alternate between swinging and bouncing off the next series of flagpoles and fan units that create a gap in the yellow cable route to reach the other side without falling, then continue grinding as before to drop onto a new landing around the corner and shoot at the explosive barrels on both levels in front of you to incapacitate the occupying hostiles.

Man the nearby turret to hit the sparkly indicator across from you on the right with a harpoon and grind the next rope bridge to commandeer a new turret on the opposite landing, then create another bridge to travel back over the dividing chasm and clear the area with combination melee strikes if possible.
Fire the next harpoon at the uppermost balcony across from you to travel over towards it and jump up onto the roof of the tower just before the rope ends to activate a cut-scene, then equip the Flaming Compensator to torch the oncoming Scab Rushers as soon as they are within point-blank range and back away slowly to continue the assault without losing accuracy.
You can grind back and forth on top of the tennis net to remain in constant motion as a defensive measure, but it will affect your accuracy and the Rushers may be able to get a clear shot off at close-range from the right angle.

Grind the yellow cable on top of the wooden shack that’s adjacent to the tennis court to reach the next level above, then continue circling the tower’s roof by transferring between the various ledges, pipes and laundry lines that interconnect to form a ring around this area.
Change directions frequently to stay on your targets at all times and save your Flame Compensator ammunition for when it’s safe to get up close again, but until then try to stick to automatic or semi-automatic weaponry while firing down from above.
Be wary of the Rushers who will climb onto the roof of the largest building and launch surprise attacks as you come grinding around from the other side of the billboard, but these enemies can be batted away with well-timed melee strikes as you glide by at close-range.

Defeat the Rushers with the Flaming Compensator’s last rounds and bounce off the indicated shrub at the edge of the roof to grind the yellow cable currently ascending up towards opposite tower’s top right corner, then undergrind just before the end to dodge any incoming gunfire and launch yourself towards the pink umbrella ahead.
Bounce vertically into the air a few times off the pink umbrella to get a clear view of the enemies that currently occupy this area and shoot at them as much as possible in the process, then transfer onto the blue railing that surrounds the largest rooftop nearby and grind in a constant circle to defeat Scabs by firing down from above or with melee strikes while in motion.
Clear the area to open the panic room and activate the next cut-scene in which a massive explosion throws you into free fall, then aim for the blue umbrella top far below or execute a dodge roll attack at the last moment before impact to land safely on the ground and pick up the voice recorder floating across from the semi circle of orange tents nearby.
Return to the Oxford’s base to activate a cut-scene and complete this mission.
Mission 10: Buck National vs. The Apocalypse

Proceed towards the current objective marker to reach a roadway with a red bull wearing a tuxedo painted on one of the walls, then jump on top of the fan bus without rear doors to swing on the nearby lamp post and land in front of the billboard that reads: Old Factory Sweat by bouncing off the purple awning beneath it.
Use the nearby fan units to levitate onto the blue rooftop above and proceed towards the current objective marker by grinding the yellow cable at the end of the eave, then enter the Duck Blind through the opening in one of the second floor walls to activate a cut scene with Buck.
Afterwards, drop to the red cable directly beneath you to grind forward on it and continue moving in the direction of the current waypoint icon to reach the green flare that activates Episode 1 of Buck’s challenges.

As soon as the timer starts, bounce repeatedly off the car and umbrella top ahead to open fire on the mutants below with the TNTeddy gun and ensure certain death by making contact with the creatures themselves or with ground somewhere near their feet.
Ride the yellow cable above the car to the left to encircle the majority of the area below and continue raining teddy bears down to take multiple hostiles out at once, then watch for mutants to start appearing on the upper level ledges around you and wait until you’re close enough to drop beside them for quick melee kills.
Take out the blowers from a distance with the TNTeddy gun while grinding towards their locations on the yellow cable system and drop back to the ground to approach the indicated rail switch by the train tracks, then wait until a decent number of enemies have swarmed around you before striking the switch repeatedly to cause an electrical reaction and watch the runaway locomotive run them down seconds later.

Use the tactics listed above to fulfill the required number of kills for each challenge and complete all of them before time expires to proceed towards the next objective marker, then collect the processor from Buck back at his duck blind and return to Sam’s location to complete this mission.
Mission 11: Midnight Brew

Collect 5 Fizzie balloons before talking with Floyd to start the main mission, then undergrind the green cable directly above the nearby valve wheel to drop down into the brick floor area at the end of the line and place a Slay Trap at the crossroads in front of the cement steps.
Place traps at all entry points into any given section of the entire surrounding area and specifically within or in front of narrow openings that create bottleneck situations effect for maximum damage infliction. These include: stairways with hand rails, corridor entrances, gaps between parked cars, etc.
Once all your traps are in place, turn the indicated valve wheel back at Floyd’s to activate a cut-scene and start the Protect the Overcharge challenge.

Equip an automatic weapon to patrol the green wire system that runs in a circle around the perimeter of this area and clear out the mutants below until the next threat arises as indicated by the map, then grind towards the exclamation point icon that appears to protect the charger under attack with the TNTeddy gun.
Immediately target the Blowers that arrive on the scene to keep them from spitting acid projectiles for as long as possible and consistently patrol the area in front of the brick archways by grinding across the red wire system when an invasion occurs.
Jump forward repeatedly as you grind to stay ahead of incoming acid spray and and fire back at the source with the TNTeddy gun to eliminate it quickly in one shot, then drop down beside the traps you set earlier to lure mutants into them when the swarm starts to increase to claustrophobic-sized numbers.

Continue luring the enemy waves into the traps on the ground and firing down on them from the wire system above to keep the chargers protected as frequently as possible, then eliminate the large crowds that travel through the narrow alleyways beneath you by launching ammunition that bounces repeatedly off the surrounding walls below.
Place one of the additional traps you receive around the outside of the cars in the parking lot and wait for the cut-scene with the Gunker to start playing, then ascend back up to the green wire system to grind towards this new enemy and incinerate them quickly with the Flaming Compensator.
With one minute remaining on the clock, continue patrolling the green wire system with the help of explosive ammunition to blow apart the larger sections of the never-ending mutant invasion and focus fire on the Herker that appears next to keep him momentarily distracted.
Protect the chargers until time expires to complete this mission.
Mission 12: Up in the Air

Travel in the direction of the current objective marker to locate the indicated music stage by the shore and open fire on it from a distance with the TNTeddy to eliminate the performers in a single blow, then grind one of the yellow wires attached to concert structure and collect the glide wheel highlighted in blue flames below.
Escape on the same yellow cables above to proceed in the direction of the next waypoint icon and return to base to receive a new objective, then enter the section of the map that has been highlighted in orange to locate the Scab ambush and remain on the rooftops or wire systems that look down on this threat to thin it out with explosive ammo.
Use your TNTeddy while undergrinding repeatedly along one of the yellow wires that borders the overpass and hit enemies that climb onto the glass skylight with melee strikes to knock them off the edge, then pick off the snipers that position themselves on the surrounding rooftops before falling back to the glider with Walter and watch the cut-scene that introduces the Fizzco Riflebot.

Vault over the first riflebot as it comes charging towards you to bounce up onto the glass skylight and grind one of the adjacent yellow cables to proceed north, then hit the enemies below on the right with acid rounds before changing directions.
Look down over the edge of the skylight to target the first riflebot you encountered and knock him backwards with a well-placed explosive round, then grind the previous yellow cable on the left to reach the red rooftop at the end and transfer to the adjacent wire on the right.
Eliminate the enemies below as you cross the overpass via the yellow cable that bisects it and drop onto the rooftop lined with turquoise ledges to hit the occupying rifle-bots at close-range by grinding around them in a circle, then retreat from these mechanized threats after squeezing off a few shots each time to avoid the returning fire.

Use the wires and rooftop ledges to travel repeatedly between all the locations that the riflebots currently occupy, then use a hit-and-run style of combat to inflict damage on these hostiles without sticking around long enough to suffer their retaliation.
Finish clearing the area before returning to the glider to activate a cut-scene with Walter and take command of this plane to start navigating it through the air ahead, then ascend above the rooftops blocking your current route to reach the green balloons that act as a sort of fuel for staying afloat.
Pop the next balloon above on your left before returning to the brewery and begin pursuit of the Fizzco patrol craft that suddenly ascends to chase it back towards the overpass, then aim the glider’s red targeting circle at the enemy vehicles below to lock onto them and launch a volley of rockets while rolling sideways to evade damage.

Continue pursuit of the patrol craft as it begins to scatter a cloud of explosive obstacles across your path and fly to the left side of the minefield while firing rockets directly in front of you to proceed safely.
Any time the enemy blimp turns a corner to obscure itself behind one of the surrounding skyscrapers, ascend up and over whichever rooftop currently blocks your line of sight to continue the chase.
Use the glider’s red targeting circles to locate green balloons in the near vicinity whenever the power bar becomes depleted, then remain behind the patrol craft at all times to follow it over the city’s main waterway and ascend to a higher elevation to drift above the next oncoming minefield.

Open fire on the Fizzco blimp as soon as you see its blue forcefield deactivate and try to launch your projectiles around the left side of the next minefield that appears to continue damaging the craft without wasting any rockets in the process.
Hammer the enemy zeppelin with repeated rocket volleys to eventually blow it out of the sky and fly towards the next objective marker that appears to arrive at the power plant, then proceed past the smoke stacks on the left to navigate your craft through the indicated steam geyser and complete this mission.
Mission 1: Big Trouble in Little Tokyo

Travel to the Japanese Heritage Museum to pull on the locked door out front and bounce off one of the green pup tents on the ground behind you to land on the building’s roof.
Walk along the lowest of the protruding shingle levels wrapped around the museum’s exterior and locate the window that’s been replaced with blue paper, then use this structural weak spot to sneak inside like a ninja and complete the mission.
Mission 2: It’s Me! Fizzie!

Travel towards the current objective marker to reach the radio tower and activate a cut-scene with the Fizzco Blade Bot, then bounce off the car that explodes to vault over the first of these new mechanized enemies and grind the next circular yellow rail ahead.
Transfer to the next yellow pipeline that appears ahead on the right to launch yourself up over the wall on the left, then destroy the first transmitter at close-range and bounce across the series of circular platforms directly above you to reach the triangular catwalk at the top.
Ascend the next series of bright blue circular platforms by bouncing across them and undergrind the yellow pipeline directly overhead to reach the metal catwalk above, then climb the steps to approach the current objective marker and open fire on the enemies that occupy the roof top.

Find the second transmitter’s location on the triangular structure above and face the yellow railing that borders the rooftop’s edge across from it to grind towards the left, then jump off at the end to super bounce across all three of the circular blue platforms ahead and reverse directions after successfully slamming down on the last one in line.
Head back across the three platforms you just deactivated to vault over the railing from earlier and land safely on the rooftop to sprint away from the surrounding mutants, then approach the single blue platform located to the west of the transmitter to hit it with a super bounce and push off towards the left to transfer onto the nearby line of yellow cables.
Jump off at the end of the line to deactivate a fifth blue platform and grind the yellow railing in front of you again to travel in parallel with the second transmitter, then open fire on the indicated device now that’s unprotected to destroy it.

Bounce up the circular blue platforms that appear above to reach the walkway at the top and activate the next cut-scene to start the boss battle with Fizzie, then immediately jump to the platform on your right to launch off of it vertically and grind the yellow railing overhead to retreat from Fizzie.
Jump across the next series of blue platforms above on your right to deactivate all three in quick succession and watch as every other circular platform in the area starts to suddenly flash with bright green light.
Launch yourself vertically into the air to touch down on the uppermost section of the spiraling yellow pipeline and grind in the opposite direction of Fizzie’s current location to continue circling the area in this way.

As soon as the pipeline starts leading you back towards Fizzie’s location, decrease the speed of your grind to allow the orange laser blasts that fire from the boss’ eyes to hit somewhere on the path ahead and vault over the beams to continue riding forward safely.
Jump up the next three circular platforms above to the right to bounce in place repeatedly on the last one at the top and wait for the glowing blue energy to return to these surfaces before descending on them in reverse order so that everything turns green again.
Grind towards the stunned Fizzie’s current position to pass directly in front of him on the yellow pipeline and fire into the red targeting circle that appears on the boss’ green-glowing eye to start inflicting actual damage.

Reverse grinding directions at the next bend in the line to continue firing at the center of the boss’ left eyeball without stopping until it no longer glows green, then retreat from Fizzie’s location to circle around the uppermost yellow pipe route again and vault over the orange laser blasts that strike in front of you for a second time.
Activate the same three circular platforms nearby to put Fizzie in a stunned trance again and continue your assault on his left eye until both pupils explode into flames, then return to riding the rails in a cyclical motion and reverse directions on a dime whenever the boss fires his laser blasts across your path.
Repeat the previous steps to stun the boss for a third time without letting the swarm of red balloons he releases come anywhere near you, then open fire on the opposite eyeball until his entire face burns away and hop quickly across the yellow pipeline to dodge incoming projectiles.

Light up the same three platforms a final time to target the flaming wreckage that used to be Fizzie’s face and grind alongside him at close-range no matter which direction he turns, then continue the assault by standing your ground even when the boss’ large red targeting circle appears and defeat this opponent before a rocket can even be launched to complete this mission.
Mission 3: Hot Dog!

Go to the hot dog factory to activate a cut-scene with the Scab tosser and equip the Freeze Bomb from your arsenal if possible to prepare for the battle to come, then approach the north corner of the surrounding security wall in front of you to climb over the barricade and onto the next rooftop above.
Aim your freeze gun weapon to point it at the factory on the opposite side of the property and target the turquoise rooftop of the small brick enclosure that sits directly to the left of the two delivery trucks parked out front, then launch a single arcing projectile from your gun so that it lands on the intended surface and turns anyone nearby into solid ice.
As soon as the Freeze Bomb hits its target, sprint towards the factory without stopping to jump up onto the turquoise rooftop you just assaulted and use melee strikes to shatter your frozen victims into a million pieces upon impact.

Climb to the next area above to eliminate the nearby enemies at close-range with another melee assault and head south across the front of the factory to grind the yellow wire at the opposite end of the rooftop in the corner, then bounce back and forth along this one cable to maintain an elevated position while clearing out the next oncoming wave of mutants with a weapon that fires automatic or explosive ammunition.
Once you have a quiet moment to yourself again, return to the hot dog factory’s surrounding parking lot area on the ground below to smash the surrounding crates for additional supplies and check the map for any remaining stragglers to pick off at close-range.
Collect the three pieces of evidence highlighted in blue flame at the following locations: behind the exposed bed of the delivery truck parked in front of the first rooftop you attacked, at the south wall of the main building on a small set of adjacent steps towards the back and outside of the structure located in the southwest corner of entire property.

Clear the threats protecting the last piece of evidence listed in the previous by first transferring onto the roof of the building behind it, then use melee strikes against the nearest occupying hostiles to take their lives or just knock them completely off the side of the structure.
After collecting all the evidence, approach the factory’s east-side wall to climb up to the skeleton dressed in a pink cheerleading outfit that’s been painted onto the bricks and stop to examine this strange piece of graffiti before interacting with the next blue door on your left.
Launch yourself off the fan units at the opposite end of the rooftop you’re on to land in the next area above that’s populated with an unusually high-number of skylights, then approach the upper right corner to grind forward across the yellow crane arm ahead.

Drop down to the square turquoise floor panel located beneath the opposite side of the crane arm and inspect the indicated control box to read the note left behind by your lover, then travel to the picnic set up in the park and search it to activate a short cut-scene that starts an impromptu battle with the squadron of the enemies that fall from above.
Stay at the top of steps that currently look down towards the group of hostiles that just appeared and launch multiple Freeze Bomb at the ground around their feet to trap the majority of the enemies in blocks of ice.
Fire a single explosive round to shatter all of the frozen enemies at once and continue alternating between these two weapons in this manner to survive the battles to come, then use your map to track down the remaining hostiles in this area and eliminate them quickly before the larger monsters arrive.

Grind the surfaces that currently surround the enormous mutant and remain in constant motion while riding across or between the adjacent cables and ledges to avoid taking significant damage.
Hit the giant monster with a Freeze Bomb before launching an explosive round from your TNTeddy shortly afterwards, then change grinding directions repeatedly to stay within striking-distance of the beast at all times without becoming an easy target in the process.
Continue freezing and incinerating the enormous monster in rapid succession from the safety of your grinding route until the mutant is finally defeated, then pick up the keys it drops on the floor to now operate the crane you previously examined at the hot dog factory.
Send the wrecking ball forward along the arm of the crane until the green targeting circle is lined up with the blue container on the ground beneath it, then press the indicated button to smash down through the wooden crates and unleash a lake’s worth of the orange slime that was stowed inside.
Continue shifting the wrecking ball position above the orange pool you’ve created and bring it down hard on each mutants that tries to drink a mouthful of the spreading goo, then use this method of crane operation to easily prevent the smaller enemies from reaching your current location until a much larger creature climbs up out of the pavement.
Wait for the giant mutant to start wading into the lake of orange slime before squashing him under the wrecking ball in the exact same way you used earlier for removing the much smaller creatures, then finish clearing the area from behind the safety of the crane controls and walk through the hole created in the factory wall to finally enter the building.
Fight your way up the metal staircase on the right to collect the journal entry located at the top of the steps and wait patiently for the mission to eventually reach its conclusion.
Mission 4: Find 4Kim!

Arrive at the Hepcat’s 50s diner to bounce forward off the roof of the white van blocking the entrance and aim for the left side of the enormous Chihuahua statue that sits atop the restaurant’s roof to land on the salsa dish that’s been raised up with one paw, then speak with Sam to receive a new objective that now sends you in the direction of the train station.
Approach any one of the obstructed rectangular doorways that currently line the train station’s front entrance to call unwanted attention to yourself almost immediately and back away from the row of partially-blocked entry points as soon as you see enemies coming towards you from somewhere within the building.
Equip the Roman Candle if possible to open fire on the guards that begin to emerge from the front entrance and run backwards using reverse motion to keep you faced towards your target with the trigger firmly held down until a somewhat safe distance can be met.

Stay on the move to mow down the next enemy wave quickly and jump over the barricades to now enter the train station for real this time, then ascend to the level above to fight your way through a series of close-ranged conflicts and approach the ferris wheel to bounce upward onto the next revolving carriage hanging overhead.
Land on each new blue carriage that descends from above to bounce vertically off their roofs and grind the yellow wire at the very top of this amusement ride to travel upward in a northeastern direction, then enter the train station in the sky at the end of the line to watch a short cut-scene play out.
Drop down behind the departing train to chase after it and grind along the pair of blue-lit bordering rails that make up the bulk of the track, then maintain pursuit by watching for obstructions to suddenly appear on the path ahead and either shoot these explosive threats or transfer to the opposite railing beside you before impact can occur to proceed unscathed.

When you see the rails ahead explode in a giant ball of fire, transfer to the right-side rail to pass through the smoke and jump towards the pinkish-colored building ahead to grind on the yellow cable that’s attached to the front of this structure.
Jump the gap in the yellow cable as you ascend towards the ledge above to continue grinding on the other side, then drop down as soon as you see the blue train rails appear again in the area below on the left.
Continue pursuit of the train to start firing on the rear thrusters with the Roman Candle and transfer to the opposite rail when you see the red mines drop down onto the track ahead, then aim your weapon towards the grey platforms that appear on either side of the somewhat-enclosed red bridge structures and mow down the mutants you see occupying them to prevent attacks.

Destroy as much of the train’s rear thrusters as you can and keep an eye on the right side of the tracks for the next building ledge to become available, then continue shooting down the mutants trying to attack from the rooftops or platforms while making transfers and return to the blue railings below as soon as possible.
Transfer to the left-side railing to bounce across the blue awing within the next gap in the tracks and continue assaulting the train’s rear thrusters until the path in front of you is destroyed again, then jump to the yellow cable that leads towards the rooftop of the Pressed Memories building on the right.
Quickly climb to the uppermost rooftop of the Pressured Memories building to launch yourself forward off the fan unit and land back on the blue rails below on the other side to regain pursuit of the train, then continue destroying the rear thrusters and look for red circle symbols that appear on the tracks to dodge them before incoming missiles can land.
Destroy the last thruster to activate a cut scene and complete this mission.
Mission 5: Hepcat’s Late-Night Special

Set up your traps at the tops of ramps that have already been blocked off at the bottom and in front of the wooden barricades that lead directly to the amps.
Turn the valve to activate a cut-scene that starts the challenge, then grind one of the pink cables on either side of you to patrol the area from high above while on the move and use your map to locate the first wave of oncoming enemies.
Grind head-on into the first horde of mutants approaching from the south to open fire on them from above and bounce between the cable closest to barricade they area currently trying to get past, then return to the amps that fall under attack and target the Blowers immediately to prevent critical damage.

Start setting off your traps as more mutants begin climbing up onto the second level of this area and continue encircling the enemies from above by grinding the pink cables to mow them down with the Roman Candle.
Switch to a weapon with explosively-charged ammo to eliminate the giant mutant that eventually arrives and stay directly overhead this creature for as long as possible to inflict damage at close-range, then wait for the next break in the enemy invasion to reset your traps and return to the system of pink cables above.
Equip an automatic weapon such as the Roman Candle to quickly cut down the clusters of mutants below as you grind by en route to the next amp under assault, then switch to explosive ammunition to clear out the attackers-in-question at once.
Continue firing down on the enemies from the cables above or try dropping down beside the amps to place traps right in front of large oncoming waves of mutants, then protect the Overcharge until time expires to complete this mission.
Mission 6: Bryllcream

Pick up Sam’s package from the Hepcat statue to start the mission, then travel towards the current objective marker to reach the Tower and equip Freeze Bombs to assault the robot guards protecting the indicated yellow balcony area.
Use melee strikes to shatter the mechanized threats on the first balcony level before aiming your weapon towards the ledge above and freeze whatever hostiles you see looming overhead, then bounce vertically off the canopy of the nearby cart to land beside these enemies and shatter them as you did with the others.
Climb the adjacent staircase to wall run across the black view screen at the top and land on the opposite balcony to bounce off the next orange umbrella nearby, then launch yourself in the direction of the second view screen available above to execute another wall run and drop to the yellow ledge below on the other side.

Swing yourself forward on the flagpole in front of you to wall run across the window above and land on the balcony at the end, then execute a long series of unbroken wall runs around three different corners of the building and grab another flagpole at the end to swing onto the next yellow ledge at the fourth corner.
Complete another wall run to swing off the last flag pole and reach the satellite on the rooftop above, then use the indicated control box to hack the dish and move the targeting crosshairs directly over the current objective marker in the distance below.
Leave your targeting circle pointed at the current objective marker to listen to the Troop Master’s conversation, then pan the satellite back and forth across the city skyline to point the device’s gauge at the red bar on the right until you hear Bryllcream’s voice.

Exit the dish to grind across various rooftops in the direction of the current objective marker and equip Freeze Bombs to clear out the robots blocking your path, then destroy the indicated jammer with the TNTeddy and travel towards the next waypoint icon to reach the second satellite.
Hack the second dish to locate Bryllcream’s voice again and travel towards the next objective marker that appears to activate a cut scene with the Scab Shooters, then rush towards each enemy in the vicinity at close-range to blow them away without stopping and hit the last missile launcher at the top with your TNTeddy.
Use melee combinations to clear out the remaining enemies stationed around the garbage truck at the top of the parking structure and pull the indicated compactor lever to activate a cut-scene, then toss three of the indicated Overcharge kegs into the truck to put out the fire and equip a shotgun to push back the surrounding wave of mutants.

Follow the garbage truck as it rolls towards the next area below and continue taking out mutants at close-range with your shotgun, then stay above the vehicle when it hits the actual city streets by grinding along the overhead yellow cables.
Clear the area around where the truck ultimately comes to a stop by standing in front of it and firing explosive ammo into the surrounding mutant waves, then finish the job to activate a cut-scene and complete this mission.
Mission 7: The Fall of Emperor Norton

Grind in the direction of the Norton Dragon to start pursuing this monster across the city and stay on the overhanging cables to avoid the carpets of fire this creature leaves in its path, then way for the boss to travel down a city street and grind the yellow telephone cables in this area to stay above it.
Stay behind the boss as it travels down the city streets by grinding the telephone cables that border these roads, then open fire on the dragon’s tail and broadside with your Roman Candle weapon to slow it down until you can look down directly on the monster from above.
Jump down on top of the Norton Dragon to grind the center row of red scales that run straight up its back and travel in the direction of the monster’s head to execute a Dragonstrike, then watch the cut-scene that follows and continue pursuit of the boss to attack him again as soon as possible in the same manner as before.

Ignore the scabs that appear to continue pursuit of the Norton Dragon by grinding the up to the highest points possible in any given area and avoid the sheets of fire thrown in your path by changing directions instead of stopping.
Repeat the Dragonstrike attack for a third time to defeat the Norton Dragon and complete this mission.
Mission 1: To Fargathia!/The King’s Feast

After speaking to Chandler in the House of Fargarthia, follow him outside to start traveling in the directions of the forest and stay close to the group or grind on the cables above them to help fight off the clusters of mutants that occasionally appear to block the path.
Continue following Chandler to destroy the larger enemies with the help of your TNTeddy and clear out the lesser enemies at close-range with an automatic weapon such as the Roman Candle, then approach the entrance to the legendary Forest of Fargarthia with the rest of the team and walk with them while the Bark Hunt is explained.
Following the next cut-scene in which mutants arrive to invade the forest, then activate the catapult once these enemies cross through the indicated area and watch circular targeting symbols turn from green to red as explosions rain down to clear out the threats.

Turn in a circle from an area adjacent to where the role-players are currently located and watch the map to anticipate the direction from which the next enemy wave will come, then focus on the battle station closest to their position and wait for the mutants to cross through the green targeting field before launching the catapult assault.
Listen to the player’s voice commands to known which location is currently under the greatest threat and move closer to the building in question to bring up the catapult attack command, then wait for the mutants at the front of the wave to reach the last possible red targeting circle on the grid and fire your defenses at this point so that as much of the enemy horde is consumed as possible.
Look for the single red dots on the map that represent lone surviving enemies of your catapult assaults and eliminate these singular mutants from a safe-distance with the Roman Candle weapon, then remain as close to the team of role-players as possible throughout these battles to protect them from danger.

Equip the TNTeddy for disposing of multiple hostiles at once and for firing down on the larger monsters that appear as you grind across the system of cables overhead.
You can also handle the larger monsters that appear by approaching these giant mutants at ground-level so that they chase you in a direction opposite of the role-players’ location, then fire backwards at this enemy while running and navigating between obstacles to slow it down for an easier kill or lead it into one of the nearby catapult zones.
Continue using the catapults to hold back the larger chunks of the mutant invasion and grind across the overhead cables to target the larger enemies’ from above without having to retreat from them to remain safe, then finish protecting the role-players until their quest is finished and join them outside the forest to complete this mission.
Mission 2: Tastes Like Chicken

After traveling to the farmer’s market to start the quest, equip your Flaming Compensator weapon before bouncing up to the yellow system of cables above and grind towards the first pigeon trap above to drop down towards it.
Land directly on top of the circular pad lined with green lightbulbs to set off the trap and burn the surrounding flock of pigeons to start filling your Squab meter, then grind in the opposite direction to set off the second trap behind the ambulance below.
Continue traveling between the different cross sections of the cable system above to set off the green-lit traps within the yellow circle that appears on your map and make sure you’re only hitting them when you see a flock of pigeons descend within that specific area.

Repeat this pattern to fill the Squab meter to capacity before time expires and grind forward along the left-side guardrail to chase after your team, then jump off when you see the first wave of enemies attack from ahead to approach them on foot and mow these hostiles down with a close-range weapon.
Continue grinding alongside your team to take out the enemies guarding the raised bridge at the end of the street from the yellow cables above, then cross the waterway to encounter a giant mutant at the next ambush and destroy it from the ground while running backwards with the TNTeddy weapon.
Fight your way into Castle Fargarthia by clearing out the last group of scabs from the overhead system of yellow cables, then enter the building through the front doors to activate a cut scene and complete this mission.
Mission 3: Bad Medicine

Travel towards the current objective marker to reach the Fizzco Pharmaceutical Shipyard and approach the closest of the indicated trucks nearby to activate a cut scene in which you encounter the Bomb Bot, then open fire on this new enemy with a rocket launcher-type weapon if possible.
Maintain a safe distance from the Bomb Bot while attacking this enemy and roll backwards to avoid the red targeting circles that signify an incoming explosive barrage, then continue following the hostile robot around the shipyard by tracking his movements across the surrounding rooftops and balconies above.
When the other enemy robots appear, jump to the circular railing that borders the yellow cranes that they are all drawn to this single area and eliminate the hostiles with an automatic weapon while repeatedly flying by at high-speeds.

Lead the Bomb Bot onto the teal platform where the yellow crane sits to trap it within the circular railing and unload with with explosive ammunition from a safe-distance to finally destroy it, then finish clearing the area using the previously listed methods to search the three trucks and find the medicine you need.
Travel towards the next objective marker that appears to meet Wendy at Leech Pond and enter the restrooms to strip off your clothes, then enter the three indicated ponds to walk around in the water and use melee strikes to splash around as a means of baiting the leeches.
Collect the required amount of leeches to activate a cut scene, then follow Wendy until the screen turns white to start chasing after the crazy hallucination that appears in front of you.

Continue grinding and bouncing towards Fizzie without falling into the lava below and defeat the skeleton enemies that appear using combination melee strikes, then launch yourself off the soda bottle balloons to proceed in the direction of the current objective marker.
After picking up the gun that Fizzie leaves for you, shoot down the balloon enemies that appear above while moving sideways in a continual back and forth pattern to avoid incoming rockets.
Battle the other Fizzies until the next flash of white light activates a cut scene to complete this mission.
Mission 4: Ferry to Nowhere

Place traps at the ends of the ramps or bridges that connect the ferry to the surrounding docking areas and move through the blue-colored pathway at the front of the boat to drop two more traps at the wooden barricades in both corners.
Position traps directly against the amps before turning the valve wheel to start the challenge, then move repeatedly between the barricades currently under attack by mutants and continue on immediately to the next one in rotation after firing a few blasts from your Flaming Compensator into the crowd.
Grind in a circle around the outer railing of the ferry and eliminate the enemies that slip through the barricades at close-range while staying in constant motion to avoid taking damage, then defeat the first wave to quickly reset your traps and retreat backwards from the giant mutant that appears next while firing into it with explosive ammo until the monster is dead.

Trigger the traps placed against your amps when they have been either been surrounded by multiple smaller mutants or approached by one of the larger monsters, then spend the last 30 seconds of this challenge standing on the bridge that faces the next oncoming wave of enemies and hold them off with an automatic weapon, such as the Roman Candle.
Protect the amps on the ferry until time expires to complete this mission.
Mission 5: The Siege of Wondertown Land

Proceed towards the current objective marker to reach the brontosaurus hedge sculpture and examine the smeared blood on the sidewalk to follow it south, then speak with Lawrence on the wooden stage at the end of the red trail to activate a cut scene in which you encounter the mugger mutant.
Afterwards, use your turret copter weapons if possible to shoot down the mugger clinging to walls in front of you and proceed forward into the yellow-lit area on the map to eliminate the next of mutants by grinding over them on the cables above.
Bounce back and forth between the cables to shoot the muggers on the surrounding rooftops each time they land after jumping high into the air, then continue clearing the area with the help of explosive ammunition until the Minotaur and destroy it with the Roman Candle from a safe distance to collect the figurehead.

Take the figurehead back to Ignatius’ location to activate a cut-scene and charge forward into Wondertown Land to start attacking the enemies within, then grind the cables that link the surrounding booths to open fire on the hostiles guarding the spaceship and maintain constant motion in this way to avoid damage.
Rush towards the ferris wheel to eliminate the next wave of enemies by standing your ground with high-powered close-range weapon, then bounce off the nearby balloons to stay above the battle when necessary and unleash the turret copters if possible to help clear the area around the Comet Ride.
Speak with Ignatius to activate a cut scene and equip a weapon loaded with a high-numbered amount of rounds per clip, then walk in front of the battering ram being pushed by your team to shoot down the incoming fireballs as they fly through the air above.

Lead the battering ram to the outer wall to bounce on the back of it until the wooden barricade has been knocked down, then continue forward with your team to shoot down the next volley of incoming fireballs and the enemies that emerge from behind the last row of ticket booths.
Knock down the next wooden barricade with the battering ram to continue forward by protecting your team from further hellfire assaults, then use rolling maneuvers and melee attacks to help take out another wave of foot soldiers and break apart the last castle wall to activate a cut scene.
Afterwards, grind the roller coaster tracks to encircle the spiral towers at either end of the ride and use an automatic weapon to shoot the indicated fireworks bundles, then switch rails and directions constantly as a means of dodging the dragons cars.

Destroy all 6 fireworks bundles and grind behind each of the Dragon Knights to shoot them in the back while in pursuit, then destroy 3 of the cars in this manner to activate another cut-scene and start the boss battle with King Scab.
Grind behind King Scab’s train to destroy each of the rear cars with a high-powered weapon and jump-dash forward over each of the fireballs that the boss leaves on the rails, then collect the figurehead from the indicated platform as you ride around the tracks and use it to smash through the mutants that try to block your path.
Jump to a section of track that passes above the boss as his train races by on a different set of rails below and drop down onto the enemy while wearing the figurehead to complete this mission.
Mission 6: Floating Garbage

Pick up the green-lit trash container on the dock across from you to carry it back to the flagship and toss it into the “dragon’s mouth” to set the vessel in motion, then move to the front of the boat to start shooting the enemies attacking from shore and use an automatic weapon for quick eliminations.
You can either move back and forth across the front of the ship to fire on the enemies that occupy the surrounding buildings or jump towards these hostile locations to eliminate the threats at close-range.
Continue traveling on or alongside the flagship as it travels through the channel until the boat is covered in flames and extremely low on health, then search the shore for additional green-lit trash receptacles to toss into the dragon’s mouth and send the vessel further upriver.

Board the flagship to fire on the enemies that appear on the rooftops and balconies above, then smash the indicated control box with a melee strike to raise the bridge before the vessel reaches it and continue refueling it with trash containers to keep the boat moving at all times.
Smash the next two control boxes ahead to raise another drawbridge without straying too far from the boat’s current location and protect it from a distance until you can return to the deck again, then eliminate the Winger that appears by shooting the creature out of the sky as it flies head-on towards the flagship.
Blow the Wingers to pieces with the Flaming Compensator before they can get close enough to the flagship to cause sufficient damage and jump into the water if necessary to draw the enemy away from the boat, then continue collecting trash receptacles in between attacks to keep the vessel moving and use your map to ambush the mutants on shore at close-range before they can attack.

Continue protecting the flagship by alternating between firing from the deck of the vessel to knock down enemies from above and approaching groups of mutants or the much larger-sized ones at close-range to inflict damage with explosive ammunition, then guide the boat safely to its final destination to activate a cut scene and complete this mission.
Mission 7: A Hero’s Duty

Travel towards the current objective marker to talk with 4Kim at the museum and grind across the top of the red asian-style archway to open fire on the Fizzco security bots that appear below with Freeze Bombs, then move in at close-range with an automatic weapon to shatter the frozen enemies.
Grind across the system of telephone wires that looks down on the museum’s street corner and jump between rooftops to eliminate the next few waves of security bots with the help of the TNTeddy weapon, then travel to the Oxfords’ base to eliminate the enemies attacking the front door by hitting them with a Freeze Bomb and activate the next cut scene.
Bounce off the electrified traps in the streets or parking lot and grind the bordering handrails to fire while in motion as a means of clearing the next two waves of bots, then travel across the blue-lit train rails above the base to destroy the enemies on the opposite rooftops and activate a cut-scene to encounter the Fizzco Tank Bot.

Circle around the Tank Bot at close-range to incapacitate it with your Freeze Bombs and shatter this frozen enemy with the TNTeddy or any of the nearby Electric Barrels to inflict substantial damage, then lure the robot towards the various traps in the area to drain its health even further and bounce repeatedly while attacking to stay out of danger throughout the battle.
Defeat the Tank Bot to complete this mission.
Mission 1: Las Catrinas/Awesomesmithing
Travel towards the current objective marker to reach the downtown hospital and activate a cut-scene in which you encounter Las Catrinas, then start the Awesomesmithing quest to proceed in the direction of the next waypoint icon that appears.
Approach Fizzco’s corporate courtyard to activate a cut-scene in which you survey the targeted high-rise where the sword is being held, then destroy the first group of bots that drop down onto the parking lot by bouncing repeatedly off one of the nearby cars and firing down on them with an automatic weapon.
Launch yourself up onto the bridge that connects the two buildings above to funnel enemies towards you at close-range and destroy them, then bounce vertically off the red awnings and trees that encircle the targeted high-rise to reach the rooftop adorned with stereotypically asian decorations.

Stand your ground on the asian rooftop by defeating the bots at close-range with melee combinations and firing over the the side of the building to hit the ones below or across the street in the distance, then finish clearing the area to listen to the indicated voicemail and talk to Wendy afterwards.
Examine the business award trophies on the ledge surrounding the pond to pick them up and proceed towards the next objective that appears to reach the nuclear power plant, then undergrind in a circle around the concrete chamber inside the second story of the building to ambush the Ods at close-range with a high-powered weapon and clear them from the area to place the metal on the indicated steam vent.
Equip an automatic weapon to approach each of the three objective markers that appear next and mow down the enemies blocking your path before shooting the indicated control box from a safe-distance, then grind the yellow rail around the cooling tower to reach the top and continue riding in a circle to kill the wingers while remaining in motion.

Switch between the outer and inner circular railings on top of the cooling tower to dodge the flames spat in front of you by the wingers, then finish clearing the area to drop into the indicated tower and pound down on the pad below repeatedly to forge the sword.
Travel to the water treatment plant to cut down the next wave of enemies with your new sword and finish clearing the area to douse the weapon at the indicated pool, then return to the hospital to defeat 99 robots using just the sword and its magical powers before the misson is complete.
Mission 2: Getting the Band Back Together

Travel to the marina to man the turret and point it at the current objective marker to fire a harpoon into Wendy’s barge, then cross the waterway to launch a second harpoon from the indicated dock and watch the next cut-scene play.
Use the Flaming Compensator to blast through the oncoming wave of Od and reach the third harpoon to continue pulling Wendy’s barge into the marina, then approach the green on-screen skull icons that come under attack to protect the harpoon launchers connected to the boat with the help of close-range melee strikes.
Equip a high-powered weapon to shoot down the oncoming wingers and reattach any harpoons that become disconnected by first clearing the area around it with the help of explosive ammunition, then continue using the docks and ledges that run alongside the boat you’ve put in motion to keep up with it.

Launch the three new harpoons positioned at the end of the waterway to continue pulling the barge until it comes to a stop, then clear the surrounding docks with the help of explosive ammunition and activate the next cut scene.
Travel to the concert hall to talk to 4Kim on the rooftop and approach the indicated trucks below to activate another cut-scene, then bounce off both drums in the parking lot to arm them and dive bomb onto these instruments afterwards to send out the sonic blast.
Bounce across the10 drums that lead up the left side of the nearby building without touching the ground and also use the fans in the vicinity as means of travel, then arm all of the instruments to set off the sonic blasts and examine the the Rock Fest poster on the exterior wall of the concert hall.
Travel to Club Fortississimo to speak with King Buzzo and complete this mission.
Mission 3: Concertpocalpyse

Place traps on the pathway that leads out from the orange arched entry at the southeast corner of the area, both directly in front of it and between the two wooden barricades shortly up the road from this entrance, then drop a few additional traps at the steps leading up to the fuze boxes you’ll need to protect later.
Drop whatever traps you have leftover at the bottoms of ramp ways and in the middle of narrow pathways that will bottle neck multiple enemies through it at once, then turn the indicated valve wheel to activate a cut-scene and start the challenge.
Approach the first wave of enemies that appears on your map to fire around behind the wooden barricade and start clearing these mutants out with an automatic weapon, then cross to the opposite side of the concert area to reach the orange archway in the southeast corner and unload your Flaming Compensator into the next hostile crowd at close-range.

Lead the enemies down the path you’ve line with traps to continue clearing them out and head back towards the area where you previously turned the valve to open fire on another wave of mutants, then protect the fuse boxes from the surrounding hostiles until time expires.
After the concert starts, then equip a weapon with explosive ammo to travel between all three fuse boxes in a constant rotating pattern and fight back the mutant invasion until time expires again to complete this mission.
Mission 4: This Ends Here

Travel to the Fizzco campus to encounter the security bots and grind the overhead blue train rail to fire down on them from above with an automatic weapon, then turn towards the station’s second floor landing that runs alongside the tracks to start attacking the next skirmish that appears.
Jump off the rails to locate the enemies in the current skirmish using your map and start ambushing them at close-range with melee strikes until Bryllcream arrives on the scene, then equip the Freeze Bombs and remote helicopters weapons to continue clearing the wave and finish off the rest of the group with the help of the TNTeddy.
Grind the circular railings and bounce repeatedly off the shrubbery in the fountain area to start clearing out the third skirmish with one of your automatic weapons, then equip explosive ammunition when the mechs appear to open fire on them at close-range and immediately roll backwards every time they come charging towards you to keep shooting without taking damage.

Fire a harpoon from the indicated rooftop to hit the red target on the building across from you and grind up onto it to continue traveling along the next set of wires on the left, then bounce yourself across the row of soda geysers below to reach the grass ledge on the other side and jump to launch vertically off the fan directly overhead.
Land on the rooftop above to hit the enormous soda bottle with a series of melee strikes until the next cut scene is activated and start the boss battle, then head towards the Building to reach its position at the marina and drop down in front of the blue-lit arm causing a fire on one of the ducks to grind straight up it.
Jump towards the right when the arm comes to an end to bounce upward across the line of blue platforms that encircle the Building, then climb the row of three railings at the top by grinding or undergrinding to transfer between them and open fire on the beam of bright light erupting from the roof until a cut scene is activated.

Afterwards, travel to the Building’s new location to climb onto the green asian-style rooftop beside directly beside the boss and jump onto the bouncy blue platforms that encircle it to attack the power core again by waiting for the electricity to pass in front of you or to disappear before making each grind.
Following the cut scene, approach the Building’s next location by grinding the tracks that pass right alongside it and bounce off the floating blue platforms again to start climbing upward around the boss.
Grind and bounce your way to the top of Building for a third time to destroy the power core and complete the game.


 Might & Magic 3 Heroes - HD Edition (PC) review
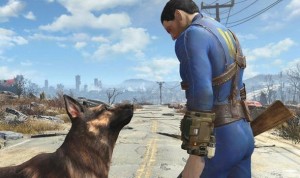 The Fallout 4 Rumor Dog
 Review: Master & Dynamic MH40 Headphones
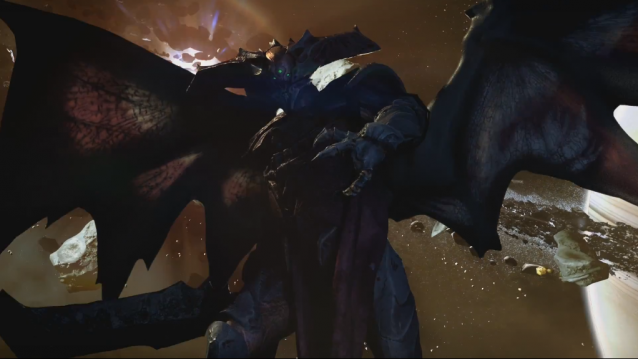 Destiny: The Taken King Guide - How to do Kings Fall Raid in Animated GIFs
 Dark Souls 2 Best Early Weapon, Armour, and Shield