Join us in the final stand in MASS EFFECT 3, this here’s the complete and comprehensive walkthrough for the game….
To become a Legend, a Master and Commander and the shaker of worlds, walk with
us and achieve the ultimate, it's time to save the worlds from the Reapers...
                                TABLE OF CONTENTS

THINGS TO KNOW

Game Ratings
Importing Save File or New Character
Combat Tips
Each Type of Enemy, Their Weaknesses and Your Tactics
Weapons and Workbench
Classes and Powers
Galaxy Map and Scanning

WALKTHROUGH

Earth: Vancouver
Priority: Mars

Priority: The Citadel
Dream Sequence: Strange Park
Normandy
Exploration: Skepsis of Sigurd's Cradel
Exploration: Decoris of Sigurd's Cradel

N7: Cerberus Lab

Priority: Rescue Turian Primarch
Exploration: Trebia of Apien Crest
The Citadel
Citadel: Alien Medigel Formula
Citadel: Improved Power Grid
Shriek Abyssal: Prothean Obelisk
Aria:Blood Pack
Aria:Blue Suns
Aria:Eclipse
Apien Crest: Banner of the First Regiment
Kite's Nest: Pillar of Strength
Irune: Book of Plenix
Citadel: Barla Von
Citadel: Heating Unit Stabilizers
Citadel: Biotic Amp Interfaces
Ismar Frontier: Prototype Components
Benning: Evidence
Citadel: Hanar Diplomat

EXPLORATION: Exodus Cluster
EXPLORATION: Shrike Abyssal
EXPLORATION: Minos Wasteland
EXPLORATION: Ismar Frontier
EXPLORATION: Hades Gamma
EXPLORATION: Kite's Nest

Grisson Academy: Investigation

Priority: Sur'Kesh
EXPLORATION: Krogan DMZ
EXPLORATION: Ninmah Cluster
EXPLORATION: Gemini Sigma

N7: Cerberus Attack

Tuchanka: Turian Platoon
EXPLORATION: Arcturus Stream

N7: Cerberus Abductions

Tuchanka: Bomb

Attican Traverse: The Rachni
Citadel: Krogan Dying Message

Priority: Tuchanka

EXPLORATION: Aethon Cluster
EXPLORATION: Attican Beta

Priority: Citadel
Citadel: GX12 Thermal Pipe
Citadel: Cerberus Ciphers
Citadel: Reaper Code Fragments
Valhallan Threshold: Prothean Data Drives
Silean Nebula: Rings of Alune
Citadel: Chemical Treatment
Citadel: Cerberus Turian Poison
Dekuuna: Code of the Ancients
Nimbus Cluster: Library of Asha
Citadel: Inspirational Stories
Hades Nexus: Prothean Sphere
Citadel: Medigel Sabotage
Athena Nebula: Hesperia-Period Statue
Citadel: Wounded Batarian
Citadel: Kalkiosaur Fossil
Citadel: Cerberus Automatic Turret Schematics
Citadel: Cerberus Retribution
Citadel: Batarian Codes
Hades Nexus: Obelisk of Karza
Citadel: Target Jamming Technology
Citadel: Volus Ambassador
Citadel: Medical Supplies

N7: Cerberus Fighter Base

EXPLORATION: Athena Nebula
EXPLORATION: Nimbus Cluster
EXPLORATION: Valhallan Threshold
EXPLORATION: Far Rim

Arrae: Ex-Cerberus Scientists

Kallini: Ardat-Yakshi Monastery
Citadel: Asari Widow

Priority: Perseus Veil
Priority: Geth Dreadnaught

EXPLORATION: Silean Nebula
EXPLORATION: Argos Rho

N7: Fuel Reactors

Rannoch: Admiral Koris

Rannoch: Geth Fighter Squadrons

Priority: Rannoch

EXPLORATION: Hades Nexus
Dekkuna: Elcor Extraction

Priority: The Citadel
Priority: Thessia

N7: Communications Hub

Priority: Horizon

Priority: Cerberus Headquarters

Priority: Earth
-------------------------------------------------------------------------------
NOTE: The game was played and the guide was written on "INSANITY"
-------------------------------------------------------------------------------

GAME RATINGs :
(out of 10)

Graphics: 10
The game may not have the greatest graphics ever made but it works hell of a
lot better than most even on mid-range graphic cards, so it is optimised
well. The Unreal Engine works pretty good... you can get a frame rate of 45-55
even on mid-range gaming systems / GPU.

Sound: 10
The score cannot get any better.... I can still hear the Reapers in my head.

Gameplay: 10
For those who played all three games in the franchise ME3 was the cherry on
the cake. Bioware has been improving on the gameplay according to player
feedback for each game and ME3 has got it all. The use of powers, the shooting
the cover system, the new scanning in the galaxy map and everything else is
flawlwss and also, not even one major bug has been reported (a minor bug which
made the heads of the NPC's and sometimes even Shepard roll around has been
seen though.)

Enemy AI: 10
Some games like Crysis 2 had everything but when it came down to Ai, it blowed
but ME3 has an AI improved ffrom ME2 and it just gets better, especially on
higher difficulties, you can just feel the Tension when half a dozen Brutes
jump at you.

Story: 10
Hey, this is one of the best stories ever written for a Video Game, very few
other games compare to this.

Motion Capture: 8
This has been a problem since the beginning. The motion capture in battle is
good enough but while strolling around or in coversations, it's just awkward
the way Shepard runs and things like that.

Multiplayer: 10
A lot of people were skeptical of Bioware's first entry into multiplayer, but
they pulled off with real panache. Instead of me telling you, you should just
play it yourself.

Replay Value: 10
I am going to play the game atleast 3 times consecutively and I don't know how
many times after that but I will never get tired.

Bang for the Buck: 10
Although Bioware seems to be intent on making money, the campaign and
multiplayer still pay off, unlike some games with only 6.5 hrs of playtime
which still demand full price. EA's policy to pipe down the price in some
underdeveloped countries where their offices are present is also very welcome.

Overall Normalized: 9.8
In short, if you miss this, then you better stop playing games all the same.
-------------------------------------------------------------------------------

IMPORTING SAVE FILE or NEW CHARACTER

After selecting New Game, you will be give three options, to choose a Male,
Female or Import ME2 character. Your character level along with all the points
to level up your character in the beginning of the game itself will be
available after a successful import.

The following are the parameters which were brought in from my ME2 save file -

Character -

JOHN SHEPARD - Male, Earthborn, Sole Survivor and class Vanguard

- Saved the Rachni Queen
- Rescued Alenko on VIrmire
- Saved Council
- Saved Maelon's data
- Kept Wrex alive on Virmire
- Reworte Geth heretics
- Destroyed Collector Base
- Survived suicide mission with 8 squadmates
- Romanced Liara before ME2
- No romances in ME2

So, remember that you can import your own Shepard from your ME2 into ME3 and
according to your choices, a few situations in the game will vary. I will write
the guide for the above choices primarily but will also include other
alternatives later... You can choose a new class for Shepard now and look into
the classes section of the walkthrough for more info on these.

If you create a new game then you can make a new character and choose a new
class for your Shepard and all the quirks which would have been brought in from
a saved game will be reset to default Mass Effect 3 values.
------------------------------------------------------------------------------

COMBAT TIPS

1) Choose Wisely: One of the biggest debates in the Mass Effect universe is
                  that which class is the best. Everyone agreed later that
                  Soldier was the weakest (playing as soldier is most fun
                  though) but everything else depends on how you play. So,
                  take a look at the powers of each class before choosing. If
                  you want my input then I say that Engineers have the easiest
                  time but I even like Vanguards for their daredevil stunts.

2) Gang Bang: No this is not a pun. You should choose such a team so that you
              and your team take the on the enemies effortlessly. Make sure you
              have a good mix of different and complementary powers.

3) Run, Forrest, Run: Who would have thought? sometimes running is the best
                      tactic, but not running away, running around cover. When
                      a Banshee or Brute is coming real close to you then you
                      ought to run like hell to the next place of cover - this
                      can be very critical in some areas of the game.

4) Combined Arms: There's actually an Achievement on ME3 which asks you to do
                  any 50 mixed, biotic or Tech attacks. If you intend to play
                  on INSANITY then you better learn how to do this. For example
                  you can just overload a shielded enemy and then put Stasis on
                  him and throw him or hit him with any Biotic ability.

5) Heeeeeer's Johnny: "All work and no play makes Johnny a dull boy"
                      Make sure you speak to your squad mates after every major
                      mission because that can unlock their abilities for you
                      to use. You can choose between different abilities from
                      the Med-Bay in Normandy. Talking is the only way to
                      evolve with the characters. Also, look around for better
                      guns to buy and improved mods and armor. Scan planets
                      for War Assets too.

6) Encumbered: A very very important fact is that the more weapons you carry
               and the heavier they are, the more will be the recharge time
               of your powers. So if you only carry an SMG or a pistol your
               powers recahrge faster but you do need weapons, so optimally
               choose two weapons if you are heavily dependant on powers or
               else choose 3 but anything more is just waste. You can select
               your weapons from any workbench or even when you start a mission

-------------------------------------------------------------------------------

Each Type of Enemy, Their Weaknesses and Your Tactics

It's a mouthful, but it is that important. I just wanted it to catch you
attention. The following are the enemies in the order they appear thru the game

The worst enemies are - Shield Pylon and Barrier Engine. Whenever you see one
of these, destory it because they give shields and barriers to enemies around
them. The Shield Pylon also works on you too but just explode it or you will
waste ammo on enemies whose shields keep regenerating and it's all the more
worse with the Barrier Engine.

CERBERUS FORCES

Assault Trooper:

                 Basic Cerberus units, use assault rifles. Kill them using any
                 method at your disposal.

Centurion:

           First thing you need to do is take their shields out with Overload
           or a similar ability and then they are just like a basic Trooper.

Engineer:

          These guys are a pain. They keep setting up Turrets all over the
          place and then even repair the turrets if they take damage. So, the
          moment you see one, overload their shields and take them out ASAP.

Nemesis:

         These things have a barrier around them and they can get close or
         mostly use a Sniper from a distance but they can kill you quickly
         again use Overload or similar ability and hold them in a place with
         stasis and shoot their heads.

Phantom:

         Again a barrier but the phantoms prefer to fight close, they come in
         from behind or beside you and can slit your throat if you get too
         close. Take down their barriers and hold them in a place and kill them
         before they start moving again.

Atlas:

       Big Brother of all Cerberus Troops. They have powerful shields on first
       then an armor behind the shields. You better get into hiding when you
       see one or their missiles can blow you away. Take down their shields
       first then use abilities like Incenerate or Cryo Blast along with
       incendiary ammo to kill them quickly. The fire and cold is when their
       shields are down and their armor is open for you to fire. They say that
       you can highjack one of these but I just found two Atlas to use in the
       game so if someone finds out how to highjack these then do mail me at
       [email protected]

                              ------------------

REAPER FORCES

Husks:

       The most Basic of the Reaper forces, then always come in a large number
       to ambush you. They are only melee fighter and if they get on top of
       you, keep hitting F to throw them down. The moment you see a Husk, take
       out your shotgun or killing before it gets too close. Powers like
       incenerate, warp, cryo blast work effectively. Sometimes with Marauders
       nearby, the Husks develop armor which makes ther health higher.

Cannibals:

           They are like the Assault Troopers of Reapers. They have no shields
           unless they are near a shield pylon. You can take these out with
           one head shot even if they have red armor around them. Just put them
           in stasis and blow their brains.

Marauder:

          They are like Centurions, take down their shields and kill them
          quick or they can power up Husks and Cannibals near them.

Ravager:

         Remove their sacs which are below and around them, I found this makes
         them more vulnerable but bugs can come out of the sacs which you need
         to kill before they get too close. Warp, Incenerate, Cryo Blast with
         incendiary or cryo ammo work here.

Brute:

       These are only melee fighters and cannot attack you if you are behind
       an obstacle - not in cover, just stad behind something so that they
       don't run at you. It's best if you stay away from these things and take
       then down from a distance. Incenerate, Cryo Blast with incendiary or
       cryo ammo work here.

Harvester:

           Get into cover the momnet you see one or their blasts can cause real
           trouble. Incenerate, Cryo Blast with incendiary or cryo ammo work
           here.

Banshee:

         These are the worst in the game. They can only attack you when you are
         close to them with their exploding powers so stay far away and when
         you see them teleporting to your location, you better run away to
         another place far and wait for these to stop teleporting. When they do
         then take down their barriers with overload and alike and then their
         armor with Incenerate, Cryo Blast with Incendiary or Cryo Ammo. They
         have a lot of health and later in the game, they come in two's or with
         a Brute. If they get close then they lift you up and chew your head.
-------------------------------------------------------------------------------

Weapons and Workbench

Another very important part of the game - Weapons and modding them and how
to use the workbench.

Interact with a workbench and you will see five slots for different weapons.
Sniper, Assault Riftle, SMG, Shotgun and Pistol. In each slot, if you click
on the slot you will see all the different weapons you collected and also
each weapon has two slots for two mods. Choose to modify your weapon to
assign mods to each weapon.

Each weapon and mod have five levels, you can buy them from a store or from the
Procurement Terminal in the Shuttle Bay of Normandy. Choosing a weapon depends
on you but remember that just because you have five slots does not mean you
should take five weapons to a combat. If you are havy on power usage then take
only two weapons, if you are heavy on weapon usage then take three because you
still need to use your powers and the lesser weapons you have an their total
weight, the lesser time your powers take to recharge.
-------------------------------------------------------------------------------

Classes and Powers

I cannot tell you which class is the best or what to choose. It depends on you
to make the choice and you will feel better when you make your own choice on
this. But throught the game two powers stand out more than anything else -

Overload - for shields and barriers. This is a must have if you don't want to
           waste time and ammo on shielded enemies, just take down their
           shields and then assault them.

Incenerate - for Armor. This can be very critical when you are against monsters
             Most of the higher enemies have armor - heck all of them have
             armor, be it from an Atlas or Ravager to Brutes, Banshee,
             Harvesters. Those are the things that kill you quickly and on top
             of that you can even burn unprotected opponents. This is also
             very useful.

optional: Stasis - Hold and enemy still while you use a Sniper to blow their
                   head - one shot kill but the enemy should not have any
                   shields and the enemy must be of the lower kind. You can't
                   expect to kill a Brute with a headshot. But it's the lower
                   enemies that come at you in big numbers and you'll want to
                   wipe each one out quickly. It only works on smaller
                   opponents.

The only class which has both Overload and Incenerate is Engineer. But you can
actually choose any class you want and choose the squadmates who have the
above powers. EDI has bothe Overload and Incenerate and Liara has Stasis. And
yes, when I played as Vanguard I used these people for most of the critical
missions.

But hey, it's your choice...
-------------------------------------------------------------------------------

Galaxy Map and Scanning

The only way you can get War Assets is by scanning the Galaxy Map.

Different systems open up on the Galaxy Map as you play thru the game after
each priority mission. So keep checking the map for new systems.

Inside a solar system, you can scan by hitting right click. This disperses a
Radar like scan around the Normandy to some distance. To scan a whole solar
system, it can take a few minutes if you are slow. But, thanks to me, I have
written down all the right places to scan in the EXPLORATION parts of this
guide. Also, while you scan, the Reapers notice your signal and come after you
if you scan too much. When the meter to the left bottom of your screen is full
they come at you on the map, just get out of the system to evade them or go
into a Mass Relay. The meter does not empty till you do a full mission - not
the tasks on Citadel - I mean mission like N7, or Priority and some others
which require you to battle enemies.
To Top
 -------------------------------------------------------------------------------
//////////////////////////////////////////////////////////////////////////////
\\\\\\\\\\\\\\\\\\\\\\\\\\\\\\\\\\\\\\\\\\\\\\\\\\\\\\\\\\\\\\\\\\\\\\\\\\\\\\
------------------------------------------------------------------------------

WALKTHROUGH

The Beginning of the Invasion

Earth: Vancouver

Quote: "Hell, you spoke to one, and then blew it up...."

Objective: Follow Anderson
You are brought up to speed with the happenings, make your choices of initial
dialogue (yes you get paragon or renegade points from now itself) until...

After you get your M-3 Predator 1, move out with Hackett and keep going till
you spot your first enemies, some Husks (yes they have been upgraded) climbing
up the wall ahead of you, shoot the four there and go down the ladder ahead to
the right and you will fight a load more, you will most certainly be out of
ammo here, so just walk in close and use your melee (F), hold the melee button
for a charged hit for one hit kills on the husks.

After the reaper beam blows up the room ahead of you, go in and thru and you
will come to a locked door, kill the Husk and use SPACEBAR near the door to
go thru (a cutscene).

After the cutscene, you'll come to a corridor with ammo on the ground, pick up
the heat sinks. Keep going behind Anderson till you get to friendlies and more
enemies, time to get into action. There are three Cannibals ahead with guns.

Objective: Get to the Gunship
Kill them and move onto the gunship. Go straight and then left from the junk
to get to more enemies (did you see that flying thing a while back?).

Incendinary ammo works well with these things but if you did import your
character from ME2 then you would have levelled up other stuff too and you can
use all of them but still be careful if you are playing on Insanity, going
inot the middle of them without cover can be a problem if you are not quick
enough.

Move to where they came from and go right till you get to the ship and in the
end, jump down to the right and activate the Radio. You get your assault rifle
and more enemies to deal with. Keep killing them and after some time, our
favourite spaceship comes for us with our favourite crew (still not assembled
yet!)


To Top
-------------------------------------------------------------------------------

Priority: Mars

It seems that someone found a way to hit the Reapers so naturally we need to
get to the Mars Archives ASAP. We finally get into some proper armor so lets
explore the Archives.

If you imported your character then be sure to distribute the points to your
mates from the Squad menu.

You can see a wonderful view of a Dust Storm to your right and the facility is
directly ahead of you. Go ahead and jump down from the broken part of the
fence to the right. There's a Mantis beside a dead Alliance soldier to the
right, check out the soldier and move on. When you get to some cover hit V to
see some Assaulters (Cerberus?). If you took the Mantis, use it on them, head
shots are a bonus. On higher difficulties, they throw frags at you so just
roll laterally (direction and space) to avoid getting blown to bits. Use
your squad's powers also. You can hold shift to pause the game and get the
menu up and then hold right click and move the crosshair to aim at the enemy
then click on a power. There a lot of them, so make sure you wiped them out
before moving ahead.

Go on and you'll see some Mako vehicles. there are a few more troopers here.
After killing them, you can run into the Mars base to the right (you really
can't miss it).

After going inside, hit the elevator button. After you come up we get to a very
old friend. Be sure to level her up after you get control. Use singularity to
lift them up. There's a medkit to the right of where you are taking cover. Go
a bit to the left and turn back to see a vehicle lift control panel.

Hit it -
lift the vehicle and then move to the left of the vehicle up the platform and
climb up and jump ahead to get to the upper level. Open the door ahead and run
in to take cover. Move to the right and hit F when you see the fist icon near
the enemy to quick kill him. There is another guy ahead of you and two more on
the platform to the right. But it's better to run back ouside and take cover
behind the door where Liara and your other mate are standing.

Go in and move left to get into a control room. Here you can pick up ammo and
gaunlets from the rack ahead and move in to see a medkit and pick up the SMG
and hit the control panel. After that, go thru the opened door to the far right
in the area ahead.

Objective: Get to the Trams
You'll come outside again. Go down by the ladder to the left and after seeing
the tram, move to the left and go up the ladder and jump across and go thru
the airlock into the chamber. Keep going and you'll activate the torch
automatically and then see dead people all over the place. When you get to the
end you'll need to go right, pick up the datapad here.

Keep going and Shepard and the guys shut the lights and the shutter ahead opens
to reveal some troopers behind a breakable glass. Hit them and take cover by
the glass and kill them and jump inside. There's a control room to the right.
Hit the button to see the culprit. After the door is opened, go thru and when
inside, look to the right to see a workbench. To the left at the debris in the
center of the room is a weapon modifier. It's an SMG weight modifier. Read the
weapons section of this guide for more info.

As soon as you open the door, duck behind cover and use every power at your
disposal. After killing the guys here, move ahead and you will come to a room
full of enemies and there are a lot. So be very careful in dealing with them
and chances are that you will run out of ammo in more than a couple of weapons
shooting these guys here. There's also a centurion and a guardian. The best
way to kill a guardian is to use a sniper and hit his feet or arm when he's
moving. The Centurion might throw a smoke grenade but since there's only one
we won't have problems.

After killing all of them, jump across the cover and move out. You'll come to
a locked room to the left and there's a switch to the right of the door which
shifts the shields inside the room (look inside). Just hit the switch for a
second time when the shields are far apart. You need to go thru the door which
is to the right so make sure the fields are far apart. Go in and grab the
Shotgun High Caliber barrel and look at the datapad and take the medkit and
also the Sniper extended barrel. You can go back to the bench to upgrade your
stuff or move ahead and do it later.

Inside, an auto turret is ready to kill us. Just take cover behind the door
first and hold the forward button and sprint button at the same time to run
ahead, across diagonally to the next cover and keep repeating till you get to
the smaller cover. Keep rolling to your left all the way, even if you screw up
your shields should protect you but remember to take cover immediately. After
you go all the way, open the door and be prepared to fight a centurion and some
troopers. There's ammo here so pick all of it up and to the left of the right
window in the center of the room is another sniper upgrade. Look at the datapad
and switch off the turrets.

After the cutscene, position your team mates according to your liking. If you
stay here itself then you can easily pick out a few troopers with your sniper
as soon as they come in (lower level middle part to the left is the Tram door).
Kill them all and get in the tram and activate it.

Objective: Get to the Archives
After you stop, another Tram with enemies comes at you and stops right across
you. Beware that enemies can jump into your tram. Use grenades if you have and
also watch out for enemy grenades. Powers that do splash damage or multiple
damage should be used a lot here. After you kill them, jump into their Tram
activate it and move on.

Another group of enemies come at you. Be very careful if you decide to fight
from inside the Tram since a lot of grenades will come at you. Go to the back
of the Tram or go outside and take cover and start picking them one by one.
Start off inside the Tram first and then head out after you see their numbers
go down. After you kill the first wave, another wave with Centurions and some
Guardians come in, You need to be very very careful and pick out the
Guardians as soon as you see them with your sniper. Another things you can do
is to stay in the left or right side of the room and then position your squad
on the other side and when the guardians look towards them, blow their already
half fried(husk) heads. There going to be a lot of enemies so do not hesitate
to fall back a bit and go into the Tram again if you are not able to kill the
guardians early. Remember to use your class powers properly and efficiently.
Always remember that Singularity works wonders against the Guardians and it
lifts them up without their shields.

This area however, can get a bit difficult if you are playing on insanity. The
enemies keep pushing forward all the time and if you don't watch it, you'll
soon be surrounded by a dozen enemies even before you know it. During the last
wave the enemies start moving in faster and when they get too close to you,
especially inside the Tram, it's time to make a run for it. Run like hell to
the other end (extreme end) and you can take cover behind the walls of the room
which has the med station inside. You will need to use your meds here during
the fight and since we have a station here, there's no need to worry about
running out of meds later. If they again approach too close to you at this end,
run back to the Tram. Also, look at your powers and see how they can help you
here. Shockwave can push aside some enemies to make way for you to run and
like that, think about how to use your powers. After a presumably long fight,
they all die. Pick up the two weapon mods (I think one of them is a weapon not
a mod) in the shelfs to the left and right of the door to the next area and
refill your Medigel supply and interact with the door.

After the long talk you need to chase Dr.Eva just do not fall back and you will
be fine if you are a Vanguard then you can occasionally charge at her with
your powers. Just keep running behind her and after all the drama, when she's
running towards you in slow-mo, do not do anything but shoot at her and then
more drama ensues...

To Top
 -------------------------------------------------------------------------------

Priority: The Citadel

Hit M to view the Map...

You can speak to Diane Aller (a reporter) in the Passanger Lounge to the left..

Avina is also here to the right of the Lounge to help you...

Go back to thru the screening fields and into the elevetor, you can choose to
go to the Hospital or to the Embassy. You can meet Dr.Chakwas who's to the left
of the door on the other side. You can ask her to come back to the Normandy.

You can also speak to Dr.Michel, if you don't remember her, then she was the
one you rescued in Mass Effect 1 from Fist's thugs. She's the physician here
and you can ask about Alenko's condition.

Go into the next area and you can see Alenko in the first room to the right.
After saying a few words, go back to the elevator and you can purchase a
Medigel upgradee from Sirta Supplies which is behind Avina. Get to the
Embassies next.

Commander Bailey is in the C-Sec office to the left after you climb the steps
and you can speak to him for a while. You can also visit the Specter's place
which is opposite to Udina's office. Inside, you should visit a terminal and
buy the armor. You can also go inside the shooting range for some practise and
use the Workbench here behind you in the shooting range.

Go to Udina after you are done here and after all the talk you are free to
move about and the Turian Councellor gives us a heads up on a very important
person. Go back towards the elevator and to the right is James, speak to him
and you would have seen the reporter here who keeps calling you. If you are a
bad boy (or girl) you can B**** slap her (just hit left click when the
renegade buttons show twice). If you are a paragon then wait for the renegade
to go and the paragon clicker to come. After all that, go back to the Normandy

To Top
 ------------------------------------------------------------------------------

Dream Sequence: Strange Park...

you are inside a strange park and can hear a distant sound of a boy. Keep
running ahead till you see two benches, look behind the bench to the right and
you will find the boy who runs away after something flashes in the backdrop.
Run behind the boy and look to the left after he disappears and go near him...
------------------------------------------------------------------------------

Normandy

You are inside the Normandy for the first time now and the ship has be renewed
by Alliance command. Everything is basically the same with a few new features.

You will find the War Terminal as you exit the comms room. This terminal
contains data on all our resources and Fleet strengths and conditions and all
other stuff. You can increase the fleet and resources thru the course of the
game and see them here in the War Terminal. Read the secion on War Terminal
in this guide for more info.

Specialist Trayner is to the right of the Galaxy Map and Joker is at the helm
and you can have some interesting conversations with them. Check you mail from
your private terminal to the left of the galaxy map, you can also view some
tutorials here.

The first deck is your cabin with your fish tank, private terminal and most
importantly your armor modifier. If you purchase new upgrades to your armor
then this is where you need to change your old armor and choose the new
upgrades, here is a pic of the armor locker -

The third level is the Crew Quarters. You should see all the rooms here which
will accomodate all our friends soom. The Med Lab is at the same place it
used to be and inside is Chakwas. To the right here are two terminals which
will reset your powers and bonuses. You can also visit Liara's office and
speak to her and Glyph the info drone from the Shadow Broker's Lair (DLC in
ME2).

On the Engineering Deck you can meet Diane Allers(if you approved her) in the cargo hold to the
right as you exit the elevator. Also, inside near the Core, we meet with our
old engineer from ME1.

In the last area of the ship, we can buy upgrades, procure other stuff, modify
armor and work the workbench and other stuff. You can speak to Cortez and
James. You can also dance with James and go Paragon or Renegade on his a**.
After that you will unlock the Fortification bonus which you can purchase on
the reassign bonuses terminal in the Medbay. Go to the CIC and meddle with the
Galaxy map and let's start the show.

As soon as you open the map you will see that the whole map was changed at bit
please look at the Galaxy Map and scanning section of the walkthrough for more
info on how the galaxy is divided and how to scan for resources and other
useful stuff. It is very important that you scan the whole place since
whatever you find will go towards your War Assets which can be seen in the War
Terminal, also unlike the last time, there are no fuel stations in each
galaxy, the Reapers destroyed all of them. So you have no other option but to
scan for fuel in each system to atleast move from one solar system to the next
within a star system (which requires fuel). Also, unlike the last time where
we used to roam carelessly between solar systems and buy fuel and probes both
of which were cheap, we have to conserve every bit of fuel we can and the
probes however are thankfully unlimited. But we don't have to probe each
planet a million times to deplete it's resources, we just have to scan the
solar systems by hitting the right mouse button to spot for stuff (yes the
developers heard our cries). But also remember that the fuel wreckages will
appear in the orbit in empty space whereas all other stuff


To Top
------------------------------------------------------------------------------

EXPLORATION: SKEPSIS of SIGURD's CRADEL

Area: Terminus System

This is the system where the cerberus lab (actually it's in Decorus which is
beside this system, this place has the Mass Relay) is which Hackett asks us to
investigate. Since I already stressed the importance of scanning, let's start.
But remember that if Reapers come in (which will be shown by a Reaper ship
and an alertness indicator bar) just move out of the system into the next
system or make a Relay Jump. They take a long time to go away but you can
return and look around till the scanner reaches nearly full but after that you
need to go away and complete a mission before coming back.

You will find 200 fuel a bit up and left of the mass relay (in the last second
orbit).
------------------------------------------------------------------------------

EXPLORATION: DECORIS of SIGURD's CRADEL

In the planet Laena you will find 20000 Credits after scanning (read the
Galaxy Map and scanning section of this guide for more info on scanning). You
will see a white needle as soon as you hold te scan button, follow the needle
till you see a white spot and hit it with a probe while holding the scan
button to get whatever is there.

If you scan beside Sanctum, you will also find 350 fuel. Go to sanctum after
you are done scanning.
------------------------------------------------------------------------------

N7: Cerberus Lab

So, let's head to Sanctum, which is a planet in Decorus solar system (fly out
of Skepsis which has the Relay) of Sigurd's Cradel Star System which has been
taken by the reapers - which should be glowing (purple) after you receive word
from the Admiral to investigate the base at Sanctum.

Land on the planet and Joker gives us the Nav Point of the Reaper Tech. There
is an Ammo Crate to the right behind you here where you land and when you go
to the area to the right, you can pick up 3000 credits from the system. Go to
the left but go down the stairs to your right and you will see a black thing
that glows blue, this is what we are after but we can't take this on yet since
the game has to trigger it. We can take only the one the game is showing, you
can see that one by holding V. Go back to the stairs and move up and you will
come to a room to the right, go in and you will see a failed Medi-Gel
experiment (this is a quest you need to get back to the Citadel to complete it
 - not too long), pick it up and move towards the artifact. Go up towards the
artifact and you will see Troopers here along with a Centurion, nothing too
much. Just kill all of them and Grab the Artifact and that's it for this
mission. However go out from the right here (not the path you took to get
here) and in the last room after which you will get to the shuttle, there's a
Sniper scope mod. If you can't get there, then just go left from you shuttle
up the stairs and look left when you enter the room. There is also a 3000
credit chit nearby. You will also find two journal entries in this area of a
scientist who was to be integrated into Cerberus. You can see by the entries
that Cerberus is converting these people and brainwashing them (if they have a
brain after conversion to half husks). You should explore this place before
going to the shuttle since you cannot do it later. Also remember that there
are several ammo crates around this area and all of them refill after about
half a minute or so. So you can keep taking ammo from the same box (just like
the multiplayer).

After you get back to the Shuttle, interact with it and Joker gives you the
next location, hold V to see the location. But after you pick up the artifact
you will be ambushed from all sides by Engineers, Troopers and Centurions and
a few Turrets even. Do not stay at one place for too long or you will get
surrounded. Kill fast and move to the next area, if you are being shot at then
run away to the next cover because chances are that the enemies are behind you
too. You will have a very long fight before Cortez comes back so be prepared
and also use up your Medigels if you have to, you need to pool your attacks
together and most importantly, keep changing locations all the time. Cortez
will come down soon but there are still a lot of guys to kill so kill them
all before going to the extract point, but if you are playing on INSANITY then
you better just make a sprint for the shuttle and interact with it because
there will be an endless barrage of enemies (I think they don't end but you
can verify it yourself if you don;t believe me). You don't even get experience
for each guy you kill so there is no point in killing everyone you see unless
you want practice.

To Top
 ------------------------------------------------------------------------------

Citadel: Alien Medigel Formula

The next time you see yourself on Citadel
------------------------------------------------------------------------------

Priority: Rescue Turian Primarch

Get to the planet and land. The Landing Zone is swarming with husks so start
clearing the place as soon as you land. Get onto the place where you see some
soldiers in the lookout and continues forward till they recognise you can open
the doors.

There's a medpack to the left as soon as you enter here. Keep going and you
will see some things to pick up at the crates in the center of the place,
the General is in the lookout to the right (the first ones are empty). After
talking to him, move to the right from here and look inside the last lookout
to the right. Then move straight from here and look around in the lookouts to
finds more medkits and head towards the barrier (straight from the general's
place and left at the end). But before going thru, look to the left there
and you will find two weapon mods.

Move out and keep going, there are a lot of husks here. I love that you can
Melee and shotgun them (fast way) but what you do is your wish. After killing
all of them keep going to where they are coming from all the way and you will
get to the tower. Save the game before interacting with the tower panel.

Make you choice on who to fight with here and start killing the Husks, after
a while of brain bashing, the toweer gets fixed and you will need to fight
till the General asks you to come back to meet him. Run back to the General
but there are still husks around here so be careful. You can see that they are
falling out of the sky right, well if they fall on you then your shields go
out in an instant so run and try not to stand at one place while going back.

Objective: Defend Airbase
After speaking with the General those flying things are back and if you
actually remember, you fought these in ME2 and believe me they were hard to
kill. Go back outside and as soon as you cross the opened gate, pick up the
assault rifle mod which is to the right on the ground and start killing things

Two Marauders come out of nowhere here and you need to kill them first no
matter what because if you are busy killing Husks, you will be blown by their
fire. You can avoid the husks by moving around and when you move around the
two Marauders fire at you. If you have grenades unlocked for you or one of
you squadmates then you can keep thrwing grenades continuously without a pause
which but even then deoending on the damage the grenades do you will have to
get your own hands dirty because they have a lot of health. You should
concentrate on one at a time, use all your squads powers on one guy and after
it dies, concentrate on the next Marauder, but watchout for the Husks and the
crossfire from the other Marauder. Dispose the Husks after that but there'll
be more Marauders coming so make sure you are not too far from cover. Infact,
you should just take them out from cover unless you are a Vanguard, then you
need to kick a** in closeup. Infact, The best thing to do for Vanguards is to
kill one Marauder first and then use your close range powers and Melle to get
rid of the next quickly and then run back to cover. The following is the pic
of the place where you should take cover...

Keep getting rid of the Husks and the Marauders and you will be done soon
enough. You will receive a comm from the General who asks you to get to the
main barricade.

Objective: Defend Barricade
Go to the Barricade and mount the gun. Start killing all the Husks that come
here but be sure to kill the ones scaling the walls because they get behind
you and that might get bad. Keep killing them for a long time and after that
a Brute shows up...

Mini Boss: Brute
Okay, what can you say here? The Brute does not do ranged attack (if it did
then we would have to stop playing the game). But it can run at you really
really fast and smashed into you, this is what's called the Charge of a Brute,
you unlock an achievement if you kill it while it's charging (not aas hard as
it sounds...). To avoid getting hit by the Brute, You need to keep cricling
this area, constantly moving if not sprinting. You just need to use your
powers here. I am a Vanguard and if you are one too then you can take out the
Brute easily with Biotic Charge and immediately follow up with Nova, after the
two hits, run back and keep sprinting in circles until your Biotic Charge is
ready again.

If you are a new player and did not import your character then you might have
some other problems. The worst case scenario is that all you squadmates are
dead and you can't use their powers too and you have to get rid of the Brute
by yourself with your guns. Now, if you did import a save and the levelled up
your Shepard then you can kill the Brute by sprinting and using your powers
on it and then wait till your powers recharge and keep repeasting, this works
for most classes and not for Soldiers. So, if you are a soldier who did not
import the save files and your squad is dead then that's the real taste of
fear. Just keep running around with an eye on the brute at all times and when
it charges and stops hit it with your sniper (assuming it does the most
damage) and then run around again occassionally killing husks if they get in
your way. This may take a while but hey, enjoy the game. Ther's plenty of ammo
scattered around so you really need not worry about ammo. Anyway, after a
long fight (for newbies - no offence) we need to get the general on foot -
typical Turians - they just don't know how to pick up a phone in the middle of
a galactic war.

Objective: Get to General Victus / Defend Camp
Keep running towards his location and you will come across some Husks. Kill
then, jump and keep moving till you get to some Turians, there's a mod and
medkit here so pick them up before continuing to the General's location.

Just as you enter the camp, after killing the Cannibals, run right across the
entrance to the other side to pick up some mods.

When you get to the camp, you will first see some Cannibals. Stay at the
entrance of this palce where you can see some good cover and kill them all and
shortly after that a Brute comes in with more Cannibals, it is advised to kill
the Cannibals first with all your squad powers combined before taking on the
Brute. You will see that after your experience with the last one, this one is
not so hard since you must have figured out a way to take them on.

After killing this Brute, just go ahead and you will finds another Brute with
Marauders - yep, bigger trouble. Now, you just need to kill the Marauders
first and in a hurry before destroying the Brute. There's ample cover all
around the place and you can always run back if you are overnumered and take
a breather and go back, oh wait, did I say one Brute? I actually meant two...
Still they are not that difficult if you manage to kill all the things that
shoot at you. But frankly, this can get a bit difficult on INSANITY. So you
might just have to play it a few times and always revive your squadmates when
both of them are dead so that they can atleast be punching bags and your
combined strengths can take out the Marauders quickly (you'll fight a total of
four Marauders here - I think, they just seem a lot more if you don't take one
out after dropping it's shields).

After all that go speak to the general and you'll be back in the Normandy soon
and after the cutscene, you can turn back and interact with the Vid comm to
speak to Hackett.

p.s: You can now visit two Wards Sections in The Citadel (they did not appear
in the elevator menu earlier in the game).

To Top
 ------------------------------------------------------------------------------


EXPLORATION: Trebia of Apien Crest

There is nothing in this area except the Fuel Depot, let's check the
neighbouring systems... even though this whole star system is shown as Reaper
invaded, this particular system aloows us to scan at our pleasure and the
Reapers will not disturb us but since there is nothing to scan, it's not very
useful. The Turians presumably are keeping the Reapers busy in this solar
system.
------------------------------------------------------------------------------

The Citadel

As you move around the Citadel you can meet various people who give us
missions and other stuff like that. After the Turian Primarch priority mission
only there are new levels and various new characters added for us to interact
throughout the Citadel.

I did not mention the Citadel earlier since some of the Wards locations are
locked in the beginning of the game. You should visit the main Docking area
and just as you enter to the right you will see a officer and a soldier
quarrelling. If you support the soldier then you will gain an asset in the
war. Also, in Cargo hold A of this level you will see your VI. Speak to the
sales clerk next to it to unlock it and keep interacting with it for some
funny one liners.

You'll meet Kelly from ME2 in Cargo Hold B of the Docking Holding area, you
can do a Paragon action with her so look out. Also, she gives us our fish back
(you did buy fish in ME2 didn't you?). Also, there are a lot of quests you can
get in various sections of the Citadel, below are all the mission from the
Citadel.

In the Commons area, go to the left and you will see a human male and female
talking, support the human male for Paragon points. Also, speak to Avina
on this level and ask about the promotion. Go right from Avian and you will
see a Salarian & Turian talking, warn them for asstes. Across Narl's room in
the commons is a movie poster, activate it for some funny dialogue (if you
think you heard that kind of speech then it's from ME2 and the Hanar speak
that way.

You'll meet Thane, an old friend from ME2 in the hospital to the left as you
enter. You can also meet Alenko who is concious now and also take some drink
from Sirta Supplies in the hospital area.

In the Embassies, visit the Sepcter Terminal and check your mail and you can
authorize the re-instating of two crew members from ME2.
------------------------------------------------------------------------------

Citadel: Alien Medigel Formula

The next time you see yourself on Citadel go to the Hospital area and just as
you enter, look left and you'll see Dr. Ravin. If you already did the
N7: Cerberus Lab mission then you can give her the Medigel. If you did not
then just refer to that mission for the location of the formula.
------------------------------------------------------------------------------

Citadel: Improved Power Grid

To the right of the entrance to Purgatory, you'll find a human female on phone
approcah her to get this quest.

You can get the schematics as a part of the N7: Cerberus Attack quest later in
the game, go to that mission for further info. After getting the schematics,
go back to the engineer outside Purgatory and deliver them.

 ------------------------------------------------------------------------------

Shriek Abyssal: Prothean Obelisk

In the Embassies section a Volus dignitary is rather vocal about is problems,
approach the Volus who is at the end of the place from the left of the
elevator (Office Suite on your map).

After getting the quest, go to the Shriek Abyssal star system and then the
Urla Rast solar system in it and scan the planet Talis Fa (or Ra?) to get
the obelisk. Look up the Exploration of Shrike Abyssal from the table of
contents and jump to that topic for more info. Anyway, just get back to the
Citadel after you get the Obelisk and talk to the Volus to gain 20k credits.
------------------------------------------------------------------------------

Aria:Blood Pack

You'll meet Aria in Purgatory club in the Citadel and she gives you these
three mission with a promise of help in fighting the Reapers.

Narl is in the Commons area. Just look into your map to get to him. Also,
trust him and you don't have to do anything and this mission ends without any
events and with reward. Go back to Aria if you completed all three missions.
------------------------------------------------------------------------------

Aria:Blue Suns

You'll meet Aria in Purgatory club in the Citadel and she gives you these
three mission with a promise of help in fighting the Reapers.

Darner Vosque is in the Docking holding area near Cargo Hold A (look at your
map in the Holding area). Speak to him and you can actually tell him that
you will not kill the General and still work things out with the Blue Suns
so don't think you will lose them if you are a Paragon.

The Turian General is in the Commons area (you can see him on your map). Speak
to him and tell him that you will get the arms. If you don't want to, then
just place a kill order on him. If you do want to get his arms then go to the
rightmost area of the commons area in the Meridian Place Market and speak to
Kannik and tell him you'll get his artifacts.

You can find the artifacts on planet Vana of the Vular system in Kite's Nest.
Go back and first speak to Kannik and then to the General. Go back to Aria
if you completed all three missions.
------------------------------------------------------------------------------

Aria:Eclipse

You'll meet Aria in Purgatory club in the Citadel and she gives you these
three mission with a promise of help in fighting the Reapers.

Speak to Bailey who is in the C-Sec office in the Embassies. If you are good
to him (or just can just be Renegade ans ask him to release her) he will grant
access to her. You need to go to the C-Sec outpost on Persidium Commons. Just
look into your map after you get to the commons area for the exact location.

After speaking to her, you can decide to let her out or find another solution.
If you want to find another solution then you can go to the Docks and
speak to her Lieutenant Sayn who's in the Holding area (look into your map for
the location). Walk out of the Docks area to hear the good news. Go back to
Aria if you completed all three missions.
------------------------------------------------------------------------------

Apien Crest: Banner of the First Regiment

After entering the Purgatory, go left to the open bar and from the bar walk
down to the right and you can see three Turians talking, approach them to get
this quest.

Go to the Castellus solar system in the Apien Crest star system and look for
the planet Digeris and scan it and you'll find the Banner. Refer to the
Exploration of Castellus for more info.
------------------------------------------------------------------------------

Kite's Nest: Pillar of Strength

You'll get this when you approach the Batarians in Cargo hold C of the Docking
holding area in the Citadel. You can also buy some nice armor from the
Batarians here itself.

Go to Kite's Nest and Harsha system. You'll find the pillar after you scan the
planet Khar'Shan. Go back to the Batarian Preacher for 15k credits and their
fleet.
------------------------------------------------------------------------------

Irune: Book of Plenix

After you enter the commons area of the Persidium in the Citadel, walk left
and you will see a Volus and Salarian. Approach them to get his quest.

The star system Aethon Cluster shows on the Galaxy Map after the quest
Priority: Tuchanka. Go to it and look for the planet Irune in Aru in Aethon
Cluster and scan it to get the book and take it back to the Volus in Citadel.

To Top
 ------------------------------------------------------------------------------

Citadel: Barla Von

Speak to Barla Von to the left from the entrance of the commons and he gives
us a mission.

You can do this after the Krogan DMZ shows up on the Galaxy Map which is after
the main quest Priority: Sur'Kesh. Go into the DMZ and find the planet Rothla
in the system Dranek. Scan the planet from the outside and again from the
inside to get the asset. Go back to Barla Von and speak to him.
------------------------------------------------------------------------------

Citadel: Heating Unit Stabilizers

Just Outside the C-sec office in the commons area, you can see a Salarian on
phone, approach him to get this.

I must have missed it buy you can still buy this from the Procurement
Interface in the Normandy's Shuttle Bay after the mission
Arrae: Ex-Cerberus Scientists or maybe even before it, just keep looking at
the interface.
------------------------------------------------------------------------------

Citadel: Biotic Amp Interfaces

Enter the Inpatient Wing in the Hospital on CItadel (look into your map) and
just as you enter, move to the right to approach an Asari on phone.

You will find these while doing the quest in Grisson Academy later on. If you
do not find these in the academy then just go down to the shuttel bay in
Normandy (this many show up later in the game so go down there after a
mission). Use the Procurement Interface and open the Specter Requisitions
and buy the biotic interface from there and take it back to the Asari.
------------------------------------------------------------------------------

Ismar Frontier: Prototype Components

Opposite to Kaidan's room you'll see a Salarian on phone, appraoch him and
listen to get this.

Go to Ismar Frontier, Planet Metaponto in Aquila system has what you need,
just scan the planet from the outside then the inside to get this done and go
back to the Salarian to finish this quest.
------------------------------------------------------------------------------

Benning: Evidence

You can speak to Ambassidor Osaba to the left from the elevator to the
Embassies section in the Citadel. You need to find his son for him.

The place where Benning is present is the Euler System from Arcturus Stream.
It shows on the galaxy map only after you complete Tuchanka: Turian Platoon
side quest, or about any four side/quests from now. But you will not find what
you are looking for on the planet. Afteree the planet shows and you complete
the mission N7: Cerberus Abductions (or maybe even before) visit the shuttle
bay in Normandy and go to the Procurement Interface here and open it and open
the Specter Requisitions and buy the data on Osaba for 1100 credits and there
you have it, go back and report to Osaba after this.
------------------------------------------------------------------------------

Citadel: Hanar Diplomat

Jondum Bau is beside the C-Sec office in the Embassies. Speak to him to get
this and also we get to meet an old friend.

Head straight from where you are standing to the Specter terminal and you
will see two new mail, activate one and authorize the other.

Get to the office suites here (look at your map). and interact with the
Terminal. After that you need to go the the Docks holding area. After that
get yourself to Bay E28 which is at the end of this place and then back to the
security checkpoint again. You finally have the location. Get back to the
embassies and go left-straight from the elevator to meet Bau. You need not do
anything else, just watch the fun.

At the end of that mission you have Kasumi Goto and The Specter Unit as assets
I say - none to shabby...
------------------------------------------------------------------------------

EXPLORATION: Exodus Cluster

Utopia

The large planet to the left Zion has Prothean Data Files and you'll find fuel
a bit to the right half way thru the orbit from this planet.

Asgard

This place has five collectibles, So expect trouble the moment you scan. Just
scan and go away and then return to collect stuff and leave and do a mission
and come back to do the next scan.

The first one is on the planet Terra Nova.
The second on the planet Loki.
You'll find remains of Reaper Destroyer on Borr.
A War Asset on Tyr.
Scan above Tyr for 200 fuel.
------------------------------------------------------------------------------

EXPLORATION: Shrike Abyssal

Xe Cha

Scan near the sun and you will uncover the two collectibles here, the planet
has 10k credits and the other is a fuel dump.

Urla Rast

Scan the planet Talis Ra (or Fa?) to gain a Prothean Obelisk. This is for
another mission which you get on the Citadel so look up Prothean Obelisk in
the table of contents and go to that quest.

A fuel dump is about 15 degress or nearly 2 O'Clock to of the sun (a bit north
east).
------------------------------------------------------------------------------

EXPLORATION: Minos Wasteland

Fortis

Scan the planet Pietas for credits.

A fuel dump of 200 units is directly below the Mass Relay.
------------------------------------------------------------------------------

EXPLORATION: Ismar Frontier

Aquila

The planet Metaponto has the advanced Biotic implants - which you need to do
the quest Ismar Frontier: Prototype Components which you get from the Citadel
look the quest up from the table of contents for more info.
------------------------------------------------------------------------------

EXPLORATION: Hades Gamma

Antaeus

The planet Trebin has credits for you.
300 units of fuel below the Mass Relay.

Plutus

The Planet Nonuel has a great War Asset for us.

Dis

A bit North-East of Nearrum is a fuel wreakage.
10000 Credits on planet Klensal.

Farinata

Planet Juntauma has a War Asset.
200 Fuel north-west of the Sun.

Cacus

Planet Chohe has credits.
400 units of fuel to the right of the arrow that points to the Dis Solar
System.
------------------------------------------------------------------------------

EXPLORATION: Kite's Nest

Harsa

Take the ship near the planet Verush and scan. You'll find intel on the planet
which will get you an upgrade when you visit the bot at Liara's in Normandy.
And a fuel dump next to the planet.

Khar'Shan has the Pillar of strength which you need for the quest Kite's Nest
Pillar of Strength from The Citadel. Look up that quest for more info.

Untrel

Scan near the planet Adek to reveal both the collectibles in this system. One
is in the planet (10k credits) and the other is a fuel dump.

Vular

In the planet Vana you'll find black market artifacts which you can give to
Kannik as a part of Aria: Blue Suns quest. Note that if you had the general
killed in that quest, still go back and talk to Kannik.

There's a 150 unit fuel dump north west of the sun here near the last orbit.

------------------------------------------------------------------------------

Grisson Academy: Investigation

NOTE: Pick your squad so that you will have someone with a high level overload
power, if there is no one then go into the medibay and reset your squad's
powers and then do it. Ideally, I would choose Liara and EDI since you can
back off an overload with a warp attack and then shoot the target to death.

Speak to Traynor after rescuing the Primarch and she tells us of a possible
Cerberus ship headed to Grissom Academy (you ought to remember this place if
you played ME2). You can offer to help her out with the investigation.

Go to the Petra Nebula star system which just showed up on the galactic map
and dock in the Academy.

After you are on foot, time to take back some genius students.

Go straight and prepare for three troopers the moment you open the doors. Just
take cover to the left or the right. Go in and the door ahead is locked so
just go to the room to the right and after speaking to head here, go back to
the door that was locked and go thru. You'll see some troopers dragging off a
student, you can't get them so just move on and after you go thru the door,
look to the right and you can jump over the cover and take the assault rifle
mod which is on the stairs here.

Move into the next room and you should see two troopers bullying a biotic.
Kill them and speak to the kid. In the end of the lane to the right of this
biotic is a credit chit. Go to the room to the left of the Biotic and there
are two datapad for you to read, one to the left and the other to the right.
Keep going till you enter thru a door and see a student being shot. As you
move in, you will face a lot more resistance from troopers and other shielded
opponents but nothing you cannot handle. After killing all of them, go to the
room to the left to find a nice Shotgun - Eviserator. Go to the next area and
go straight and left to meet with the sister of the guy you saved a little
while ago. Nearby are mods to the left of the middle of the this lane and an
assault rifle on some chairs in the middle of the central room (don't miss it)
go left from these chairs and you should see an unlocked door ahead. Move into
the next room and you will meet the most unlikely person from ME2.

Now you need to save the students from the Atlas (wow!). So, a few pointers to
take out the atlas are to use whatever ranged powers you have which are good
with shields first and then armor. Use your most powerful gun against it and
yes - it means to use your sniper. Just stay behind cover and make it quick
since the Biotic barrier protecting the students is fading with every second.

Just stay a bit away from the Atlas under cover, if it get too close move to
the next secure cover location around it but be wary of the soldier (who
keep shooting at the students most of the time). After you take out the Atlas
you'll face three more enemies, a couple Centurions in them. And after all
that you talk to your old friend.

Objective: Find the Laptop
The shuttle is a no go so we need to another way out. If you go to where the
students are then you can pick up ammo and a rifle mod. The laptop is
in the right corner of this room on a chair, hit it.

Objective: Find Manual Override
The override switch is where the students are on the top level, hit it and
go thru the door which is straight from where Jack is standing.

Okay, this place needs some tactical approach (especially on INSANITY). I urge
you to change your squad power usage to off from the gameplay menu. This way
all their powers will be at your disposal when you need them. Otherwise,
they'll just keep using them on anyone around and you won't have them when you
need it. The following pic is where you need to take cover at most of the time

First thing is that, as soon as you go out, move to the right and take cover
behind the railing. This long place is for you to take cover and you can move
around freely in this upper area. Do not go down, no matter what. Also, you
need to learn the enemie's approach. Firstly, enemies start coming in from the
left door straight ahead. There are shields on almost everyone and if you do
not have a powerful overload power user with you then you will have a tough
time. All thru this area, you must use Overload, followed up with a Warp and
any of your powers (overload from EDI possibly and Warp from Liara) and shoot
the bugger to death. With this, you can take out one enemy at a time within
a few seconds if you are fast enough. Apart from shielded guys, you will see
Guardians, use singularity to lift them and then follow it up with anything of
your wish, just make sure you kill them really friggin fast. There is an Atlas
in the distance but you don't need to worry about it since you'll be in cover
most of the time. Also, leave the Atlas for the last and kill everyone else
first. Remember that if you are taking cover at the place I asked you to then
some troops will come from your right. So be carful and wary of your right
side. A couple of guardians and a few Centurions from this place.

The last wave has a lot of engineers and they put up turrets. After this, it
does not end. Go down to the lowest area where you can see grass and look
around for a door. Remember this door now. Go thru it and go right and look at
the datapad and go left and pick up ammo and take the credits and move out
thru the next door and more centurions and engineers will come at you. Now,
run back out the door which you used to get here and go back to the first door
and then go straight from the door and when you cannot go any further (you
will be overlooking some water), take cover to the right end so that you can
look over to the other side. Here's pics on how to get there -


                          Kill everyone from here and don't go to the other
side till you are sure everyone is dead (hold shift and a mini map with red
dots shows, when there are no reds then you are clear.

Go back to the other side and thru the door which is to the right of this area
and proceed till you get to another group of students harrased by two troopers
from behind a barrier. After speaking to another old friend (you do remember
him don't you) go into the armory and take the two things that are here. Go
back on the main path and thru the next door and kill the engineer and get
into the Atlas (Bada** alert!)

Leftclick for normal explosives and right for heavy missile. Go on ahead and
when you come to a large hall, you'll have to start fighting again. But with
the Atlas on our side, this probably is the easiest battle in the whole game.
Just aim properly and always keep moving. In the end another Atlas comes in
but no porblem we can take it out easy, try to stay behind some cover though.
Get out of the Atlas and go out the door to end this mission (sigh of relief)

Back on the Normandy, when you move by Traynor, she asks us to go see Cortez
for a bit, do that.

NOTE: You receive a mail from Alenko and Miranda. Alenko is in the same
place and Miranda is in the Normamdy docking area straight from the elevator,
just look into your map for the exact location. Both of them give cues for
possible future missions.
------------------------------------------------------------------------------

Priority: Sur'Kesh

After the meeting is conducted, you'll land on Sur'Kesh. Handle the situations
any way you want to and after the drama, the Salarian asks you to meet him
nearby.

Speak to Wrex and Major Kirrahae (he's the guy you fought with on Virmire and
had to decide whether to kill Ashley or Alenko during that mission).

Go to Padok Wiks near the door in the far end next to the Major when you are
ready for some realy heavy duty action - Krogan Style. I really love this
mission and that's only due to the morality in it and ofcourse Wrex is also
here althrough I miss Solus (The Salarian who was on our ship in ME2).

Get to the point and after the blast go backwards towards the door but listen
to the research log and take the mod from your left side as you go along.

NOTE: You say the large creature right? if you played the shadow broker DLC on
ME2 and forgot, that large thing was the Shadow Broker and it was very very
tough.

Objective: Get to the first Checkpoint
Outside, Keep going till you see Troopers, compared to what you have been
through this is nothing. Just kill all of them and there's a research log on
one of the terminals in the middle of the room to the right. At the other end
you'll go thru a door and see the ex-shadow broker running amock. Go from
the left, jump across and keep going on the main path and you'll come to more
troops. This time a couple of Centurions are accompanying the kids - no biggie
so destroy them and do it soon so that the Pod Integrity does not fall too low
you can clear this place in very little time so do it as fast as possible.
After you quarantine the chekpoint more cerberus come at you.

Objective: Get to the next Checkpoint
So, keep going ang killing everyone you see, there's a nice mod for the pistol
in the middle of this area to the left in some racks, give it to one of your
squad mates later (probably Liara). Go thru the door here and you'll come to
the General and you will also see combat engineers come into battle now. Just
follow the routine, concentrate the powers of all three members of you squad
on one enemy at a time and take them out quickly. Kill the enemy closest to
you first and keep doing that. I hope you brought a good overloader with you,
I think EDI is the only one now.

Kill the Engineers first and the turret last since they can repair the shields
on the turrets. You still shoul not have any problems yet. Get to the other
end and interact with the panel (there's some spares you can salvage for
credits to the right of the middle part of this area where you fought) to open
the door and go thru collecting the ammo here.

After you open the door head up top using the stairs to the right and kill
everyone here, beware that two Guardians will come at you from behind (they
climb the stairs if you are on the upper level). Go back to the lower level
and go to the farthest end and turn left to grab a few things and go back up
and open the door.

Objective: Protect the pod
Keep hitting the Cerberus guys here before the integrity gets too low and then
you'll need to activate a power terminal which is to the far left of this
place. Nearby is a medstation and the cool gun the General used earlier. As
you go back more Cerberus come at you so be wary, just kill the guys and
a couple of guardians decide to come into the party, dispose them and then
again, go to the pod and clear the checkpoint. As soon as that is done, more
goons roll in.

Objective: Get to the Final Checkpoint
Kill the guys infront of you first and go to where they came from, go right
and after you climb the ladder you'll come to the rooftop.

This area can be a bit tricky in the sense that if you concentrate on troops
who are infront of you as you come to this area, some other enemies keep
shooting and throwing grenades at the pod which is really bad. So, just kill
a few guys to clear the way and move to a spot where you can take out the guys
who shoot at the pod. You cannot stay in one location here, always keep
looking around to avoid any enemy taking you by surprise. There isnt much to
tell here except the fact that after you authorise the final checkpoint, an
Atlas falls from the sky and you have more trouble on you hands.

Just stay a good distance from the Atlas but also make sure that you are
concentrating enough fire on it to distract it from shooting at the pod. Once
you have it's attention, then it will keep following you around so keep moving
and to add to this scenario, more troopers come in so you have to watchout
for them too. Try to take out the Troopers first while occassionally shooting
the Atlas. If you move around enough, you will not have any problems here.

After everything is done, you'll extract the Female Successfully. Back on the
Normandy, you will get two new missions personally from the Turian Primarch
and Wrex. Also, the Salarian who just accompanied us Padok Wiks is along with
Eve (the Krogan female) in the med bay of your ship. Walk around your ship
checking the e-mails and speaking to everyone, get to Liara and customize your
armor and what not.

------------------------------------------------------------------------------
EXPLORATION: Krogan DMZ

Aralakh

There's nothing here but the missions you need to do on Tuchanka.

Dranek

A bit to the south east of the sun is a fuel dump. And check out the planet
Rothla (east of the sun) for a War Asset - this is linked to the
Citadel: Barla Von mission.

Nith

To the East of the Sun is fuel dump.
------------------------------------------------------------------------------

EXPLORATION: Ninmah Cluster

Maskim Xul

I could not find anything here and there is probably nothing to find but if
you keep scanning the Reapers do attack you.

Mullah Xul

This place is deviod of anything, no collectibles and no Reapers even if you
scan.
------------------------------------------------------------------------------

EXPLORATION: Gemini Sigma

Han

There's a fuel dump below the Mass Effect Relay.
10k credits on the planet Mavigon.

Ming

Planet Parag has a War Asset and a fuel dump is a little bit to the south east
of the Sun.
------------------------------------------------------------------------------

N7: Cerberus Attack

You'll get this after Sur'Kesh. Open Tuchanka and left click on the spot
showing the Cerberus presence and you'll land there.

Objective: Secure Control Center
From where you are standing, go right not straight and you will see Cerberus
personnel. Start taking them out from here and just keep an eye out to your
left occassionally. After clearing this area move in and go to the right, the
extreme right and go up the ramp which lead up to a room.

                                                    NOTE:You'll find some
Krogan schematics here which are needed to complete the Citadel: Improved
Powergrid Schematics mission and also the control console. There's a medkit
nearby too but you might need it later, I just took it for the XP anyway.

After you hit the controls, the power goes offline and you'll have to activate
two seperate grids to restore it.

Objective: Restore Power
                                        From where you are go behind you down
another ramp and you'll come to ammo and some Gaunlets. But now the dilemma is
where you fight from. It will seem like the enemies are coming from everywhere
and they have a nimble Nemesis with them, take her out first the moment you
lay eyes on her. You'll need to move out into the open so you may  face fire
from unexpected places. Just keep an eye around you constanly to avoid being
surprised. This isn't too hard. Go back to where you orginally landed in this
place at the start and look around for these -

ou can also hit V for a pointer on the screen. The power modules are held by
latches so aim at the latches (it's a kinf of lock) and shoot them to open the
module and activate the two modules here and head back to the console.

Objective: Re-enable the control console
There are going to be a lot more enemies around. But you don't need to worry,
just hold the shift button to bring up the powers menu and the mini map which
shows the enemies so you'll know their locations properly. After that, it's
just a matter of clearing them out one by one. There are a lot of enemies
stacked up in the control center so try not to rush in, just slow down and
take them out from cover. Hit the control console again and the Krogan Cannons
now work for the Alliance.

NOTE: Speak to Liara after this and if you are nice to her, you'll unlock the
Warp Ammo power. You can reset the special powers by going to the medibay and
using the terminal there, also deliver the Krogan Schematics to the lady
outside Purgatory in The Citadel.
------------------------------------------------------------------------------

Tuchanka: Turian Platoon

Land in Tuchanka and move ahead. After a little walk, you'll come to three
Husks and your squadmates advice you to take them out quickly to avoid any
reinforcements. Kill them and pick up the Salvage Parts here and climb up the
stairs ahead.

Keep going till you cross a blown escape pod and then come to the enemies
fighting Turians. Take cover behind them and there are two cannibals to the
left and one on the right in the beginning. This is where I love being a
Vanguard, you can just jump in and kill everyone with those wonderful powers.
There'll be about five Cannibals, but they are easy picks provided you kill
quickly. After them comes a Harvester.

It just has armor so most of the powers work very well and also I am a bit
Disappointed as to the difficulty of the harvesters. In ME2 they were a pretty
big deal but here - nah...all powers like warp, incenerate and others even
incediary ammo work very well. After the Harvester escapes, look to the right
from where you are and you'll spot stairs, climb them and continue forward.
As you move on, keep collecting the mods and ammo till you see the next group
of enemies.

There are a few cannibals and soon comes another Harvester with Husks, this is
where it gets tricky, if you stand about meleeing the husks the Harvester can
take you out easy, so if the husks come in too fast for you, fall back to
a spot where the harvester cannot get you, kill the husks and then go back to
the Harvester. After that, move ahead and go to the right and follow the path.

Pick up the things on your way and when you get to the enemies, start killing
and moving ahead. After this batch move down and keep going, pick up the mod
which comes to your left and keep going.

The next place you come to will be the last, so expect some trouble. As soon
as you start killing a few enemies a Brute drops in. Now, it is very important
here that you kill the Brute first and the best place for cover from the
other enemies is to stay at the very beginning of the place. Take out the
Brute ASAP and then fight the tons of others who keep getting dropped. Finally
a Harvester comes to the right, but if you are taking cover at the beginning
of this area then it cannot harm you, just kill it and go forward to meet the
9th platoon.

Back on the ship we are ravaged by missions and problems, we now have to save
one of Tuchanka's populated cities and then cure the Genophage. Anderson is
on the vid comm, speak to him. When you see your private terminal, Liara wants
to chat with you (it may depend on what you said earlier in the game). Go to
your cabin and interact with the comm terminal here to call her.
------------------------------------------------------------------------------

EXPLORATION: Arcturus Stream

Arcturus

To the left of the planet on the right of the sun is a fuel dump and the
Arcturus station which is shown by the shite pointers also has a collectible.

Euler

There's a fuel dump to the right of the green arrow that points to Arcturus.
------------------------------------------------------------------------------

N7: Cerberus Abductions

Land on the planet Benning to start this off. We all know Cerberus is up to
no good anyway so let's go guns blazing or crudely - let's go Conan on their
A**es.

Objective: Secure Upper Streets
If you played the Multiplayer first then you will without doubt know most of
the Cerberus fights by now (this one's even in the demo). But if you still
want to know, the best place to fight is to go right from where you land and
keep going in thru the offices till you get to the end take cover in the last
office and start shooting, here's a pic of wher you should be -

After that move ahead to the pointer (hold V for pointer to show). Kill the
few guys here and move ahead and speak to the civilians.

Objective: Defend Civilians
Troops will come from straight ahead and from the left. Some of them throw
grenades dangerously close to you so be very careful. Run back if you need a
breather. Hold shift and look into your minimap to know the locations of the
enemies. After you kill everyone (it will take a considerable time) you can
get back to the drop off location and go back.
------------------------------------------------------------------------------

Tuchanka: Bomb

Head to Tuchanka and click on the place where you see this quest on the planet
it's right into the middle of a battle the moment you set foot on the ground
so run to your right immediately and start hitting them. There's a lot of
mortar explosion around here and the enemies just keep coming and coming. If
you you are patient and thin their numbers down before running ahead you'll be
fine. After killing all of them just move to the far end and gol left from
there and look to your left to pick up an Incisor sniper and move ahead and
when you are on top, go straight to pick up a very useful shotgun blade
attachment mod. Move to the right and take cover immediately because more
enemies come at you. You should shift covers between the two rocks here, pic -

You'll be under grenade fire too so just dodge between those two rocks, you
cannot directly dodge between them, you have to move out of cover and run to
the next cover. You can kill everyone from here and after the area is clear
move ahead and look in the area to the right for gaunlets. Move to the far
left towards the next place, pick up all the ammo you can see too.

Move up and take cover immediately, kill the few guys here and move ahead and
shortly, you'll see Cerberus personnel leaving in a shuttel - not good, the
countdown must be getting low. Anyway, go down there, get the ammo and look
to the left and take cover behind the shields and start shooting. Move ahead
and up the ramp to see the bomb -

Go up the stairs to the right and keep moving, if you see any troops then they
are leaving here but one of the engineers puts up a turret, kill it and pick
up the medipack and the turret schematics, you'll need it to complete the
Citadel: Automated Turret Schematics mission. Continue ahead till you see
Victus.

Objective: Defend Lieutenant Victus
From where you start enemies start coming in. Go to the left side and take
cover, here are some pics -
Okay then, start killing them. Hold shift occassionally to see the locations
of the enemies, after a little while they start coming in from the left so
move tot he cover on the right and so on. Remember to be wary of their
location and do not let the enemy get up to Victus. Keep killing all the
people but while doing so, move to the area right of this place to find a
560 misslile launcher, take it but do not change the weapon yet, here is where
the launcher is -

Take it back to cover and change you weapon so that the launcher is dropped
at a place you can easily take it from. After a little more fighting, an Atlas
is Dropped. Now for a few second no troops are around if you killed everyone
here before. If you have powerful Overload users in your squad use it on the
Atlas to drop the shields first, do this as much as possible, the Atlas can
target Victus from a distance so you just need to take it out soon. If you
drop the shields to a low level then use the launcher on the Atlas and kill it
but if you are not fast enough then you'll haev trouble since more troops are
dropped here. Atlas should be your first priority here and you have to move
around. You should kill the Atlas even before it can get near to where you are
Also, it is wise to switch off squad powers so that you can use them when you
want to at your discretion. Keep wary of the soldiers and after everyone dies
watch the cutscene.

NOTE:  The next time you see yourself on the Citadel, visit the commons area
and go to Appolo Cafe which is near Liara's location. Speak to the new
bartender there.
------------------------------------------------------------------------------

Attican Traverse: The Rachni

You may get this quest if you saved or killed the Queen Rachni in ME2, I saved
her so depending on your call, you may get this or not, I'm not sure.

Anyway, you will run into a former crew member from ME2 so I think you get
this no matter what you did to the Rachni.

Walk into the room to the left and pick up everything you see, we get a great
shotgun here - the Claymore, it was my favourite even on ME2. Run ahead till
you get to the Krogans again. Go into the place to the left here for a mod
ans some salvage. Speak to our Krogan friend (I am avoiding spoilers) to start
the fight.

I like this mission so much that I did all the other ones before this, you
know save the best for the last...but still, if you've got a Krogan in a
mission it's going to be a big bang. Move ahead and see what happens...

Objective: Explore Tunnels
Go in and pick up the M451 Firestorm from the scout. This gun throws flame
balls upto a certain range, just click once to shoot one fire ball at a time,
they are like bullets - only slower but more powerful. Shoot the webbing and
move in. Keep going and you'll come to some pods. Shoot the pods from a
distance and move ahead and you will come to another set of pods, destroy them
and there's another firestorm here. Move to the right and keep going till
you come to enemies. Remember that the firestorm is a mid range weapon and
will not work if you try to shoot long range, it's almost like a shotgun.
Husks come in very close so be prepared for them. A modified Rachni is
shooting missiles at you all the while so be careful. After destroying the
things here go up tp where the Rachni was and you'll find another scout with
a Firestorm. Move ahead and keep destroying the spores and webbing till you
get to a barrier, fire at the webbing to your right and kill the node here and
move ahead till you fall down again (this reminds me of the Rachni mission in
ME2).

Objective: Get to the Central Chamber
Move ahead and keep destroying the webbings, you will find Reaper Tech behind
a webbing to the left, keep going and ahead are more pods and webbings and
behind another webbing to the left is a Krogan, interact with the body and
you'll see that his lasst message was to be delivered to an Asari on The
Citadel - more on this later. The Asari is in the Meridian Place Market in
the commons area.

                                  Keep going and after getting to lower ground
you will face more enemies and another Ravager. Be prepared for the small bugs
caller Swarmers because they get dangerously close and inflict a ton of damage
move on after killing everything here but remember that whenever a Ravager is
against you, there will be a barrier engine nearby. Destroy the engine first
to avoid the Ravager rebuilding it's barriers all the time. Move ahead and
again Raveger and come bugs, always destroy the ravager first and then kill
the Cannibals. If you did not notice yet, the Cannibal feed on their dead and
get superpowers or something like that, atleast they start getting barriers.

Move ahead and to the right and below and you will start seeing Gestation Pods
which may have Swarmers inside them so be ready to fire at them. You will
come across a ton of pods, do not screw woth the pods since they are toxic too
and they give you bleeding damage. Keep going and you will jump two legdes
and after that you will hear some guns and the Krogans are in front of us, you
can't get to them so just go left and kill the barrier and they will come to
you soon.

Objective: Locate Central Chamber
Keep going and kill the pods slowly, to the left is a narrow passage, interact
to go thru and you will come to the central chamber.

After getting shielded, you'll need to find the Reaper Node and hit it to
disable the shields. The Reaper Node is above the Krogan's body here. Hit it
and the shield to your left opens up and more enemies come at you from that
side. Just keep doing what you do best and after killing here move to the left
and hit the node that is here and go back and kill the enemies that show up.
After them, move ahead and more enemies here too, man they never end...the
cannibals can get problematic if you do not kill them before they feed. Their
health increases insanely if they feed so watchout. Kill the node there
and turn back for two Ravagers and more Cannibals and Husks come in close from
the left but if you do not take cover the Ravager kill you real fast. The
Ravagers come in close to you from the right of this cover area -

Since they have armor and armor is weak against fire, in this close range, the
firestorm is the best weapon and also, if anyone has incenerate, it's time
to abuse it. The little bugs can get really really close to you and detonate
toxic, so be wary of their presence too. If you spend too much time, the
Cannibals keep feeding. After killing the two Ravagers and the rest of the
things here a cutscene will start. Depending on your choice in ME2 you may
face the Queen Rachni (I saved her on ME2). After everything, you will again
need to decide whether to save here or let her stay in the cave here. If you
choose to save her then your military assets will include the Rachni workers
and Grunt's company will not die and even they will be included, no matter
what you do, the same cutscene starts and then same thing happens, just that
the Rachni workers are added to the assets if you save the Queen here. But
what will happen of the Queen? that's for you to find out later...
------------------------------------------------------------------------------
Citadel: Krogan Dying Message

You'll meet the Asari mentioned in the previous mission in the Meridian Place
Market in the Commons Area in the Citadel.
------------------------------------------------------------------------------

Priority: Tuchanka

NOTE: Keep your eyes open and make sure no one disturbs you while the course
of this mission because the visuals in this are totally awesome and just too
good to miss, if you do miss even a single moment of the cutscenes then it is
worth to play the mission again from the beginning just to watch the beauty.

After you start the mission, you'll get a message from th Salarian Consul who
give us a difficult choice - a very very difficult choice to make. Depending
on what you choose to say, you may get different dialogues in the future but
telling you that will just be a spoiler so you should make your own choice and
see what happens, that is what the game is about after all.

NOTE: If you do not want to cure the Genopahge then stay silent whenever the
dialogue shows.

You will land nearby the Shroud area shortly and there's a lot of Husks
hanging around here. Kill all the husks to let the Krogan and then some drama
and after sometime, you will move out and see yourself outside before the
shroud. There are a ton of upgrades to pick up behind you near the vehicles
so pick up everything you see (I really do not know why there are two medkits
here - maybe only for the XP). After the Krogan move ahead, look behind you
and jump across and keep going till you see yourself inside the place.

Objective: Escape the Catacombs
You are in the City of the Ancients and you need to find a way out and devise
a new plan to divert the Reaper from the Shroud before the Salarian fixes it
and then disperse the cure - a lot to do really.

What kind of enemies would we face in the catacombs of an ancient city? let's
find out. First move to the left or go straight, you will end up in the same
place. Then you will come to two tunnels, the left on is actually a room which
has a Krogan artifact you can salvage for 8500 credits. You go to the next
place by going thru the right tunnel down the stairs and after a large tremor
you will hear about the Mother of all Thresher Maw. If you remember it, you
aided Grunt in killing a Maw in the last round of his acceptance in ME2. Well,
that was not an easy fight and in ME1 you could kill a Maw from only inside a
vehicle so you know what to expect. Move to the left to see a carving of the
Maw and interact with it for more credits.

                                          There's another set of stairs from
the right of this place so go there and look at the artifact on the right
again (25K credits in total is not bad at all - by now you should have enough
money to buy one of the premier Specter guns even if you spent money earlier).
The last artifact suggest that Krogan were like animals first moving on all
four limbs in ancient times and as you move out, you will come to the upper
ruins.

Objective: Regroup with the Krogan
Keep moving ahead and soon you'll fight a couple of ravagers and a few
Cannibals. If you want really good cover then move to the right side of this
place.

Go front and then right and keep going till you see more enemies, after the
first group a Brute comes out with a lot of Husks from the distance. Remember
that you can go back and even jump over the gap you used to cross but they
will still get to you, the point is that you have a lot of space to move
around and with Husks and the Brute at your butt, you will need to move about
a lot too. After killing them, pick up all the ammo lying aroung and go thru
from where the Brute came from and more cannibals to face here and after that
a group of husks and two Ravagers. Kill them all and collect ammo and move out
to where you saw the Ravagers come from and you'll take your first look a the
Mother Maw. Move ahead and keep going straight and right at the end and you
will come to the Dunes.

-

-

Objective: Get to the Hammers
Okay the Krogan Lady has an insane plan, but we can't do better so let's go.
As soon as the cutscene ends, you need to run for cover infront of you, and I
mean in less than a second coz enemies keep falling from the sky and start
shooting you in an instant.

Kill everything infront of you and thats a lot of Cannibals and go up the
stairs to the far left and keep going and at the top, look left for a nice
pistol - You can change the loadout of your more nimble squadmates who use
the pistols. Keep going and soon you'll be directly infront of the Reaper.

Objective: Activate the Hammers

As soon as you take control of Shepard move in front and take cover. There are
two hammers, to the left and right infront of you, just keep going and going
till you see enemies (you have to see what they throw at you by yourself -
really pushes insanity). The enemies here infront of you are - well, you'll
see. I suggest avoiding them entirely and running to the left and the right
hammer without shooting a bullet, just run like hell and activate the hammers
and you'll be done here with this mission.

If you want to cure the genophage you can skip any one of the Renegade
dialogues and the cure will be spread. However, if you decided to help the
Salarian Counsellor then you need to choose Renegade dialogues all thru here
and then hit the LMB when you see the Renegade icon flashing to the left of
your screen. Paragons get a paragon option too so be ready to click.

NOTE: A lot of tension is brewing around the galaxy and you are stuck with the
same dream, just follow the kid around the park you will be done here.

After the dream, you'll talk to Liara and after that you can speak to Hackett
and ask him about everything that is going on with all the different races.
Also, visit the War Terminal and you will see that you are way over the
minimum line after helping out the Krogan, I had about 1443 effective strength
after the 50% readiness cut, you should have the same if you followed this
wallthrough - it's just important that you are past the minimum line. If you
decided to help the Salarians by killing the cure then you will have 1480, not
much of a difference.

NOTE: Two new star systems to explore and go talk to engineer Adams for a
little task. Also, the Salarian Councillor wants to speak to us about a
possible corruption scandal involving Udina.

-
------------------------------------------------------------------------------

EXPLORATION: Aethon Cluster

Aru

The planet Cherk Sab has a War Asset of the Volus. The planet Irune has the
Book of Plenix which is needed for the CItadel: Book of Plenix quest, look at
that quest for more info. Theres also a fuel dump to the left of Irune.

Nura

The planet Oma Ker has Intel which can upgrade you from Liara's computer and a
fuel dump is a bit to the right of this planet.

Esori

The planet Solu Paoli has a war asset and there's a fuel dump below Kailo.

Satu Arrd

The planet Nalisin has a War Asset and below it is a fuel dump.
------------------------------------------------------------------------------

EXPLORATION: Attican Beta

Hercules

Elatania has a war asset. Fuel dump a bit south west of the sun (5 O'Clock)

Theseus

Feros has a war asset. A fuel Dump just to the right of Feros.
------------------------------------------------------------------------------

Priority: Citadel

Wow, Cerberus has just achieved a new high!

Objective: Help Bailey
Take cover to the right and start taking them out, they are mostly in the
far right in the beginning and come from front later. Move according to the
position of the enemy. Go to Bailey who is sitting beside the door. When the
cutscene plays, you will start to know who might be responsible for Cerberus
to attack CItadel.

Objective: Find the Executor
Move to the next area and take cover behind the couch and take them out, a
couple of Guardians follow. Move to the area to the left and more fall in from
the exploded roof. Go thru the door ahead into the Executor's office and get
rid of the pest here too. The door to the left is the washroom, go in to find
a new Assault Rifle. From the main room, go straight and you should see a
Combat Engineer working on a Latch. Kill him and activate the elevator. And go
into the elevator. In this area, the rooms to the left have goodies, the rooms
to the right have some too. Go to the far right room and thru the door to the
left and kill the two guys.

Move ahead and there are two medstations in this area. Kill all of them before
collecting stuff, a mod to the far right of the room. Keep going and Shepard
says that you are getting closer.

Objective: Save the Council
After you are out of the car, move ahead and you will see a Phantom. This next
area is filled with Phantoms and Nemesis. They are extremely powerful in the
multiplayer and not so much so in the campaign. But move straight ahead and
keep killing the enemies. Try to take the girly enemies out really fast and
don't let them flank you.

Keep going and you'll be locked out, go from the right here along the side of
the building and keep going till you get to the next commons area. This place
has an Atlas and since there is no space for you to run it can get crampy if
you don't kill the Atlas quickly. Remove the rest of the enemies here and go
up the stairs to the left from the middle of this area.

Objective: Stop the Council Elevator
So, when you see the power conduits beneath the eleevator (you are going to
come across more than one elevator thru this area) just shoot them. Also, keep
your ear open and look around for the enemy by hearing them. They can come
from behind you or infront of you. You can take cover behind the cable holders
on the elevator. When you see the Counsil's elevator, jump across on top of it

You'll come out of the elevator and to the Counsil. Now, you need to make the
Paragon and Renegade icon choices but no matter what you do Udina will end up
dead. After you look around the Citadel when you go back to Normandy you will
meet Alenko. Depending on what you did earlier and what you are saying now,
you can have him join you back in the Normandy's Crew and as a part of the
team. When you are on Normandy the next time, read all your E-Mails and talk
to everyone again. Treynor has a new mission for you. And when on the Citadel
remember to buy as many medigel upgrades as possible from Sirta SUpplies in
the Hospital, just keep checking there time and again to buy them.

NOTE: Use the Specter Terminal and authorize everything there. Also, if you
spoke to Cortez earlier in the game and asked him to take a shore leave, then
he is at the viewing deck on the Normandy Dock. Thane is now near the room
where Kaidan used to be in the hospital, you should talk to the attending
doctor outside. Also, look into your map in each area and meet everyone shown
in the points of interest for new dalogue.

Also, I will list all the tasks you get on the Citadel next below, you should
take all of them and after that visit the Specter Terminal and Authorize
everything. There are new groups of people speaking to each other around the
Citadel, just go near them and hear their argument and support one or the
other for paragon or renegade points.

-

------------------------------------------------------------------------------

Citadel: GX12 Thermal Pipe

If you met Engineer Adams before tha last mission he asks us to look for this
in the Citadel. If you did not talk to him yet then you better go now.

You can buy the equipment from the Bank area of the Commons area in the
citadel. It has a different name but you will know it when you see it. If you
do not see it with the merchants near the bank area then just visit the stores
around but I am 99% sure that it's with the bank merchants.

When you go back, speak to Adams and one of the male engineers is getting the
thing replaced and they say that it would take a while. The next time you
start the game or something, you will know that Adams wants to talk to you and
that they invented Optimized Eezo Capacitors which adds to the War Assets.
------------------------------------------------------------------------------

Citadel: Cerberus Ciphers

You'll see a Turian past Bailey's Office, approach him to get this.

You can buy Cerberus Encryption Codes from the Specter Requisition in
the Procuremet Terminal in Normandy's Shuttle Bay after you complete the
mission N7: Communications Hub later in the game.
------------------------------------------------------------------------------

Citadel: Reaper Code Fragments

Near the Embassy Offices you'll find an Asari, approach her for this.

The Reaper Code fragment is available for sale after the mission
Rannoch: Geth Fighter Squadrons later in the game. You can buy it from the
Specter Requisitions of the Procurement Terminal in the Shuttle Bay of the
Normandy. Get back to the Asari after you have it.
------------------------------------------------------------------------------

Valhallan Threshold: Prothean Data Drives

This guy is near the exit from Citadel to Normandy on the Normandy Dock.

Go to the Valhallan Treshold and into the Paz system, look for a planet Garvug
and scan it in and out for the data drives. Get back to the guy on Citadel
after that.
------------------------------------------------------------------------------

Silean Nebula: Rings of Alune

This Asari is to the right as you enter the main corridor of the Hospital.

Teyolia system, Nevos planet has the rings. Get back after getting them.
------------------------------------------------------------------------------

Citadel: Chemical Treatment

After you enter the Inpatient Wing, enter the room to the left (the door is to
the left just as you enter the Inpatient wing, not the patient rooms).

You will find the datapad in the mission N7: Fuel Reactors later in the game.
Look into that mission for more details. You can grab the datapad in the
beginning of the mission itself by walking to the left of Nyrek and move ahead
and you will see the datapad named "detailed medical plan" go back to the
hospital to deliver it.
------------------------------------------------------------------------------

Citadel: Cerberus Turian Poison

This Salarian is in the room opposite to where Kaidan was in the inpatient
wing.

You will come across the poison in the mission Arrae: Ex-Cerberus Scientists,
so look at that mission details for more info, if you somehow missed it in
that mission then it may be on sale in the specter requisitions which you can
look at from the Procurement Terminal in Normandy's SHuttle Bay.
------------------------------------------------------------------------------

Dekuuna: Code of the Ancients

An Elcor is just outside the elevator in the Purgatory area, go to him.

Go to the Silean Nebula and to the Phontes System. Dekuuna is a planet so just
scan it to gain the code then return to the Elcor.
------------------------------------------------------------------------------

Nimbus Cluster: Library of Asha

You should see an Asari by the stairs leading to the dance floor in the
Purgatory.

Go to the Nimbus cluster and into Agaiou System and look for the planet
Carcosa and scan it to get the artifact.
------------------------------------------------------------------------------

Citadel: Inspirational Stories

You should meet Solik, a Salarian to the left as you enter the Docks area.
Talk to him. All you need to do is go around the docks and you will see
and interact icon on the screen, just interact with them to take the pics.
------------------------------------------------------------------------------

Hades Nexus: Prothean Sphere

At the end of Bay E28 is a human with problems, go near him for this.

After the mission Priority: Rannoch, the Hades Nexus shows up on the Galaxy
Map beside the Far Rim. Go in and to the system Sheiol and scan the planet
Gei Hinnom for the sphere, return to the human to give him the sphere.
------------------------------------------------------------------------------

Citadel: Medigel Sabotage

In cargo hold:B you can meet a doctor. Talk to him to get this.

The first dispencer is in Cargo Hold: C
The Second and Third are near Cargo Hold: A

Go back to the Human Doctor after that.
------------------------------------------------------------------------------

Athena Nebula: Hesperia-Period Statue

There's an Asari to the left of where you enter the Commons area sitting on
the chairs to the right.

Go to the Athena Nebula and into the system Vernio, look for the planet
Polissa, scan it out and in to gain the artifact.
------------------------------------------------------------------------------

Citadel: Wounded Batarian

You'll see a Turian talking to a Human female as you go right from the
elevator near the steps that lead to the rooms to the right.

Go to the Docks area and to Cargo Hold: C. Talk to the Turian Nurse here and
make your choices.
------------------------------------------------------------------------------

Citadel: Kalkiosaur Fossil

You'll see a Salarian in the right Apartments area.

After you do the mission Priority: Geth Dreadnaught, Arghos Rho system shows
up on the galaxy map. Go to the solar system Phoenix in it and look for the
planet Intai'Sei, scan it in and out for the Artifact. Then go back to the
Citadel.
------------------------------------------------------------------------------

Citadel: Cerberus Automatic Turret Schematics

You'll see a C-Sec officer on the stairs above the courtyard. You should have
grabbed the schematics in the mission Tuchanka: Bomb, look at that mission for
more info.
------------------------------------------------------------------------------

Citadel: Cerberus Retribution

Two citizens are to the right of the stairs above the courtyard, speak to them
to start this and then go to the C-Sec office and interact with the Captain to
the left and deal with the situation according to your wish.
------------------------------------------------------------------------------

Citadel: Batarian Codes

You'll see Officer Noles to the left of the C-Sec office in commons area,
speak to her to start this.

Go to the Specter Office and use the Terminal and Authorize this. Then go to
the hospital and the Lab Services inside, you should see the console and
you walk by.

The next console is in the Normandy Dock in the Passenger Lounge.

Bay E28 of the Docks: Holding Area has the last console.
------------------------------------------------------------------------------

Hades Nexus: Obelisk of Karza

A human is sitting on a bench to the right from Appolo's Cafe.

After the mission Priority: Rannoch the Hades Nexus shows up on the Galaxy
Map to the right of the Far Rim. Go to the system Hoplos and scan the moon
Kopis which is to the right of the Sun to find the Artifact, take it back for
the reward.
------------------------------------------------------------------------------

Citadel: Target Jamming Technology

A Turian is to the left of Appolo's Cafe in the Commons Area.

It's available to buy in the Specter Procurement in the Rquisition Terminal
in the Shuttle Bay of Normandy after Rannoch: Admiral Koris mission later.
Maybe you  can pick it up during the mission but I must have missed it.
------------------------------------------------------------------------------

Citadel: Volus Ambassador

You will get this after you read your messages on your private terminal on
Normandy.

You then need to go to the Specter Terimal in the Embassies area of the
Citadel and Authorize the tracking of the Ambassidor. Then you should talk
to the Guard outside the Embassy Offices and inside, listen to all three
tracks and pick up the bug which is to the left corner of the room. You will
come to the Commons and have to search for the Volus. Then go to the
Apartments in the commons area and try the left most room and you'll reach him
finally. If you are paragon or renegade enough you can get him to tell you
the name and let the Volus Support come along to as War Assets. Now, we have
the colony's name - Aethis, but what do we do with it?
------------------------------------------------------------------------------

Citadel: Medical Supplies

Speak to Chakwas when you are back on the Normandy and she tells us that we
can increase the effectiveness of Medi-Gel by swapping the Normandy's medical
supplies with those of the ones with the refugees in the Citadels Docks.

Speak to Tactus in Cargo Hold B, if you are paragon enough you can persuade
him to make the exchange. When you are back on Normandy, speak to Dr.Chakwas
to end this and get a boost in Medigel effectiveness, also check with Glyph
for a new upgrade.
------------------------------------------------------------------------------

N7: Cerberus Fighter Base

Head to Noveria and land there. This is one of the maps from the demo too.
Take cover as soon as you are dropped and take care of the Centurion to your
left and then the guys ahead. Move straight from here and go down the stairs
to the far right and you will come to a medigel dispencer.

If you go down the stairs to the left you will come to a room full of bad guys
so watch it. Kill them and go to the room to the right and you will reach the
control panel. In the area to the left here outside, you will find a medipack.
Hit the deactivate button when you are ready and haul a** to cover. You can
take cover behind the person who you assigned to the panel but there will be a
lot of grenades so you will constantly need to move in and out of cover here
to avoid grenade fire. After you descease all of them go to the next panel to
syncronize the deactivation sequence.

After that a lot of troops come at your from the LZ but you can stay here just
outside the room here behind cover, here's a pic -

Kill everything that moves and after you take these guys out an Atlas is
dropped here to make things worse but by now, killing an Atlas should be
routine crap.

NOTE: After that mission you should be called by Chakwas to the Med Bay and
then you will receive two E-Mails, one from Liara and another from Miranda.
Both ask you to meet them the next time you are on The Citadel.
------------------------------------------------------------------------------

EXPLORATION: Athena Nebula

Parnitha

You will find a war asset on the planet Tevura.

Orisoni

On the planet Egalic is a War Asset. You will also find a fuel dump south-east
of the sun to the inbetween the last and the penultimate orbits.

Tomaros

Planet Pronoia has a war asset and a fuel dump below Niagolon.

Vernio

Polissa has the Hesperia period artifact which is needed to complete the
mission Athena Nebula: Hesperia-Period Statue, look at that mission for more
details. About 2 O'Colock (nearly west) to the sun is a fuel dump.

Ialessa

Again 2 O'Clock to the Sun is a very small planet Trikalon where you'll find
a War Asset and then below it is a fuel dump.
------------------------------------------------------------------------------

EXPLORATION: Nimbus Cluster

Pelion

Fuel dump below planet Aitis. Trategos has intel which you can check out with
Glyph for an Upgrade later and right next to Trategos is another fuel dump.
Another fuel dump above Sthenia.

Agaiou

Carcosa has the Library of Asha which is needed for the mission
Nimbus Cluster: Library of Asha.

Kallini

Below the left most planet is a fuel dump.

Missana

Nothing...
------------------------------------------------------------------------------

EXPLORATION: Valhallan Threshold

Raheel-Leyya

Fuel Dump to the right of the sun.

Paz

Planet Garvug and Prothean Data Drives. Fuel Dump south-east of the Sun.

Micah

Planet Elohi has war assets and there's a asteroid Farlas which has a War
Asset and nearby is a fuel dump.
------------------------------------------------------------------------------

EXPLORATION: Far Rim

nothing...
------------------------------------------------------------------------------

Arrae: Ex-Cerberus Scientists

Head to the planet andn drop down and in the initial cutscene itself we see
another old buddy (spoiler free)...

Anyway, move to the right and go on top of the stairs here -

Kill who you see and move ahead on the path keeping an eye on your left. As
you go you will see Cerberus fighting against the scientists to your left.
Take cover here and take out all the Troopers and move in.

Objective: Locate Scientists
Speak to Jacob near the doors and then after you go in, speak to the scientist
to your right and go up the stairs and speak to Dr.Archer (you should remember
him). There are two datapads to the right of Archer, use them and get into the
room. You can walk around this place speaking to all kinds of people and
picking up different stuff. Eventually you will come to an only open door, if
you did not see Jacob again while being treated then go to him and also there
a medigel dispencer in that room (to the right of the openable exit door).
If you walk to left of the exit door to the roof you will find Turian Toxin
Data which is needed for the mission, Citadel: Cerberus Turian Poison, if you
can't see it then just pick it up later.

Objective: Fix the AA Guns
Go thru the door and climb up the ladder and you'll come to the topside. Keep
moving and you will come out of the place and see troops infront of you. Kill
everyone and move in close and fight the remaining guys and you will come to
a override panel, hit it and turn back. Take cover behind one of the shields
to the left or the right and kill the guys who keep coming ahead, there will
be a lot of them so be patient. Keep moving in closer each time to get a
better shot at the targets. If one of them mounts a turret which is on top to
the far right then do not target the turret, you will just waste your time,
kill everyone else from cover and move closer to the Turret and the guy
mounting it will come off.

Get to the other side and climb to the left and go right and activate the
first gun and be prepared for a heeluva fight. Phantoms and Centurions will
not make life earier and you do not have a lot of space to move around too.
The phantoms get real close so watchout for them and kill them ASAP, if you
mees around with the phantoms for too long then you will surely take fire from
the other troopers. Just keep killing and killing till you see the place is
deserted again. Then activate the two guns and you will be back with the
scientists, when Jacob asks, do not start the evacuation because we need to
pick something up. Go back to the door that leads to the roof, you'll see that
it's shut tight, walk left and look to the right on some crates and you will
see Turian Toxin Data, take it, it is used to complete the mission
Citadel: Cerberus Turian Poison, look that mission up from the Table of
Contents for more on that.

Look around to see if you are missed anything and only then hit the evacuate.
Go down the stairs here and thru to the next room, kill the troopers here and
when the main door opens up, be prepared for another big fight. Just take
cover in the beginning of the place and start shooting everything that moves.
You will face a lot of enemies and at last a Phantom and an Atlas but nothing
you cannot handle.

NOTE: You can buy heating Stabilizers from the Specter Requisitions from the
Procurement Interface in the Normandy's shuttle bay now, this is used to
complete the mission Citadel: Heating Unit Stabilizers.

Also, go to the Specter Office in the Citadel and you should see a message
board to the left of the Specter Terminal, use it and you will speak to
Miranda.
------------------------------------------------------------------------------

Kallini: Ardat-Yakshi Monastery

Earlier in the game, Liara asks you to investigate a distress signal being
sent from an Asari Colony, just get to the colony and lan there and you will
start this quest.

There's a rifle stability dampner to the left near the wall before you enter
the door. Go thru the door, jump across and climb the ladders and you will get
into the monsatery. It's lights out here, but just look around and you'll find
mods in a room to the left and the exit is to the right and there's a room
to the right before the exit. Also, a couple of datapads and an Intel item
here.

Examine the Asari corpse as you exit this place. You'll come to an illuminated
corridor and after you exit here, look to the right to find another Asari
Corpse, read the PDA to get the Citadel: Asari WIdow quest. Go thru the next
door and you'll come outside. Go down all the way and walk towards the inside
and you will see your first Banshee of the game. These are very very tough
creatures and bullets are nearly ineffective against them so keep using all
your powers. If they get close then make sure to use cover or they keep
exploring their barriers to cause an explosion which can hurt pretty bad.

After you take it out, some cannibals come off from the distance. Kill them
and go inside. Check to the extreme left before going to the right exit. Keep
going and you'll come a Marauder and more Cannibals, kill the Marauder first
to avoid  powering up the Cannibals, move to the room to the right and pick
things up and then keep going and you'll come to the stairs which lead down to
the great hall, but run past the stairs to the right side and you'll see
another room, collect things from here too before going down.

Downstairs you will face another bunch of Cannibals and a Bansheen. Kill the
Cannibals first, there are a lot of them and more come in so kill them
first and just keep moving, you should take out the Cannibals with one
headshot with a sniper so that you can use any and all powers on the Bansheen
remeber to keep moving away from the Bansheen. Keep using your powers and you
should always use either cryo ammo or incendiary ammo against the bansheen
when it comes to it's armor or else, like I said earlier bullets are almost
ineffective - unless they are incendiary or cryo.

You'll come to an elevator which takes you to the bomb, there are two medigel
dispencers to the left and right behind pillars in the beginning and another
set of medigel near the bomb, do not take them right now. You will have one
helluva fight in a moment, interact with the bomb and you'll see two Bansheen
with a group of Husks come at you.

Objective: Protect the Bomb
This can get ugly, take your shotgun out and kill an husk that gets close,
first kill the husks and then those two things at last. The main thing to do
here is to keep running every moment and keep and eye on your minimap to know
the locations of the two bansheen all the time. Do not get too close to them
or they can kill you in one blow (they actually lift you and suck your life
out). So, keep moving, and your squadmates keep dying all the time so keep
reviving them too so that you can atleast take some clear shots while the
Bansheen are on to them. Again, keep moving all the time and do not hesitate
to use the medigels to revive your mates, concentrate on killing one at a time
and you'll be done soon enough and keep your distance, always stay behind some
cover because the Bansheen can be very erratic at times. You will still not
use all the medigel you have so you can get some nice XP by taking the others
around here. Get back to the bomb after that.
------------------------------------------------------------------------------

Citadel: Asari Widow

You get this when you speak to on of the dying Asari Commandos in the above
mission. You can find the Widow as you go from Appolo's Cafe and take a
left which leads you to Meridian Market Place, the Widow is below the stairs
near the railing.
------------------------------------------------------------------------------
Priority: Perseus Veil

This is just a cutscene.... you'll need to get to Perseus Veil Star System
after this to continue helping the Quarians...

NOTE: For the next mission try to take EDI with you if possible since he gives
us a lot of insight into the Synthetics and their functions.

Priority: Geth Dreadnaught

You are outside in 0G. Walk sideways to get to a part of the ship that is not
broken and then move forward and keep doing that till you are in gravity
again on the other side.

-

-

-
Objective: Locate Secondary Airlock
You need to get to the other side. Just go straight and right when the path
ahead is not present, there is a mod to the left of this area, go to the right
area where you see come computers and then climb up again and head to the
ladder and you will come to a door. Go thru it and straight and you'll see a
ladder to the right which leads to the controls. Hit it and later pick up the
Arc Pistol (note that from here forth whenever you are against synthetics or
shields then this is the best pistol).

Objective: Get to the Controls
Pick up the Guardian Battery and the mod here and go on till you see the
bridge controls, hit it and the Geth start coming. After destroying them,
keep moving and go down the ladder, kill the Geth here and move in. In the
next area, you should see some interact icons on consoles and also a Visor to
pick up, take them and go thru the door ahead. Pick up the pulse rifle to the
right near the exit door andd go thru the door.

You will fight Hunter here and they can be pretty bad. They just cloak
themselves and come in really close with their shotguns so be ready for them.
After this, go to the console and hit it and more Hunters and Geth pour in.
Again, be very careful fighting the Hunters since they have a tendancy to come
in very very close. Try to keep your squad together since you will need to
keep reviving them and why waste a medigel? Be ready to haul a** when you see
a Hunter get close to you, Vanguards have it easy and infiltrators can just
cloak themselves but the other classes may face a bit of difficulty with the
Hunters. Take care of all the Geth here and move out thru the door which is
to the far left of the room and keep going.

Objective: Get to the Main Battery
Move to the other end of the walkway and go down the ladder and keep repeating
this until you get to a door on the lowest level. Go thru and keep going till
you see a shockwave and more Geth. The shockwave keeps coming at you so it's
just better if you stay in cover. More Hunters are on way, you should have
noticed by now that you cannot use powers on a Hunter while it is cloaked so
if you see on then just shoot it and it's cloak disrupts for a second, use
shift to pause the game and then click on the powers during this period. After
you take down two waves of Geth, you should move ahead and go thru the
corridor to the right of this place and just as you come out you will come to
the main gun deactivation panel, hit it and you will be inside the barrel of
the main gun.

Run ahead and you will be in the second barrel. Do the same thing, more
Hunters and more troopers. Keep moving forward and hitting the synthetics and
also move left at the end and you will come to a Door, keep going and after
your elevator is bombed, run towards your squad on the platform. You'll
come to the central chamber. The controls can be accessed via the ladder to
the left, just run towards the other way on top and hit the button.

Objective: Escape Dreadnaught
Okay, now the big guns are coming in, yes you will face a Geth Prime and a
lot of Hunters and a ton of Troopers. Take cover and start picking them out
one by one. Kill the easiest ones first then gradually make your way to the
Prime, fortunately the Prime does not push base, it just keep still in one
location so you can spend an eternity taking it down. After the Geth are
dead, make your way down to the objective (hit V). there's a ladder nearby so
search for it.

Run out of the doors and keep running and running and running....

NOTE: There's a Distress Call in a terminal to the left of Admiral Raan, hit
it and then warn Raan of the signal.
------------------------------------------------------------------------------

EXPLORATION: Silean Nebula

Kypladon

The planet Hanalei has a War Asset.

Loropi

West of the Sun past the wreakage is a fuel dump. Yasilium (the small planet
north of Sun has a War Asset.

Nahuala

Planet Hyetiana has a War Asset. Fuel Dump south-west of the Sun.

Phontes

Oltan has a War Asset. Dekuuna has code of the Ancients which is needed for
Dekuuna: Code of the Ancients quest. Fuel South East of the Sun.

Teyolia

Nevos has the Rings of Alune needed for the quest
Silean Nebula: Rings of Alune.  Fuel Dump, South-East of the Sun.
Quirezia has credits.
------------------------------------------------------------------------------

EXPLORATION: Argos Rho

Hydra

The Planet Canrum has a War Asset. Fuel dump 5 O'Clock to the Sun (South East)

Phoenix

Pinnacle Station (shown by the white pointers) has a war asset. The planet
Intai'Sei has the artifact Kalkiosaur Remains which are needed to do the
quest Citadel: Kalkiosaur Fossil. There's a Fuel Dump to the right here beside
the planet.

Gorgon

The planet Cameron has a War Asset.
------------------------------------------------------------------------------

N7: Fuel Reactors

Treynor informs you of this mission after the above priority mission.

Get to the place and land and go from the left of Nyrek and you will see a
datapad ahead, past the datapad is a Radiation leaked area, you will die if
you fall into it. Check the Datapad to get a detailed medical plan, it's used
to complete the Citadel: Chemical Treatment mission, here's a pic of where to
go -

Riley is in the place to the left if you turn around from this area. Speak to
her and after the box behind her is moved, go in and turn right and you will
come to the crane controls.

First, move the crane to the right.
Hit center button, then left, center again and then right.

The area to the right is now open, go there and use the Venting controls to
take out the radiation. The fuel rods are now accessible, go down there and
hit it and you'll be amushed by several Husks and a Marauder. Time to put the
shotgun to good use here. After taking them out you will have to seal two
tanks. Kill the Barrier engine first while dealing with them, the engine is
floating in the air over the stairs they come down from.

Objective: Seal Tanks
Go back up the stairs and to the fuel tanks (hold V for direction). Activate
them and restart the reactor using the panel to the right of the second tank
and more enemies come from behind you. You should take cover in the area below
the reactor control panel you just used

                                         and kill the barrier engine again
first, there are going to be a lot of Marauders and Husks so be prepared for
a bad fight. If you are down where I showed then look out since enemies can
get to you here so keep an eye on the map. After you take these guys out a
Brute comes in with two Marauder, you have a lot of place to move around so
keep moving and take out the Marauders before getting to the brute. After
killing them, go towards where the Brute came in from and activate the final
console here and go towards the extraction point.
------------------------------------------------------------------------------

Rannoch: Admiral Koris

Land at the location and you will have come to the homeworld of the Quarians
for the first time in the series. So, move along the path till you see Geth.
Ther's a Pyro here so do not let it get too close. Keep moving ahead and you
will come to more Geth, kill all of them and move ahead and you should come
to their base shortly. Start taking them out one by one and there are more
than a few. Move in after than and if you go to the extreme left ahead you
will come to Medi-Gel and a mod, you can save the Medi-Gel for later.

                                    There's also a Geth Spit-Fire nearby the
console, take it. Hit the console to start the show, a Prime along with
several Troopers and a couple of Rocket Troopers come in, start kicking them.
The Prime can get really close so just move from cover to cover if you want to
After the gun is activated, more Hunters with Troopers come at you.

Objective: Disable remaining AA Guns
Head out and if you did not pick up the Medi-Gel earlier then do it now and
keep going till you meet a Quarian. After than move on and you will come to
the Geth Base that leads to the tower, you need to disable the two AA guns
here. You can go either to the left or the right, I chose right and killed the
Geth here, there's a Pyro here to the right, you can take out Pyro's when
their shields are down (I think you can take them out even with shields on) by
shooting at their Gas Tank, use a sniper for this, try to Cryo Blast them if
possible - I'm not a 100% sure on this, just try it anyway.

           Geth may man the Turrets but you can still aim at the top of their
heads if you have a Sniper with you. After killing them go to the control
panel of the AA Gun and hit it and quickly run to the Turret and man it. A
Prime comes ahead with more Troopers, they can be taken out in a few seconds
with the Turret. After this, the door to the right of the turret opens and
another Pyro comes out with a few Troopers, kill them and this door leads to
the next AA Cannon. Repeat the same stuff, mount the turret for faster kills
and then you'll be out of here.

Objective: Defend Admiral Koris
On your way back, you can persuade the Admiral to let you help him and when
you get there, for this first time again, Shepard draws out a bada** turret
in the Shuttle itself so you'll be making airstrikes. Just shoot at sight
listen to Shepard to know where the Geth are coming from and hit there.

NOTE: Back on the Normandy the next priority mission is ready but I advise
that you destroy the Geth first - do the side mission first before going to
the priority. Also, buy the Geth Jamming thingy from the specter requisitions
it's needed for the quest Citadel: Target Jamming Technology.
------------------------------------------------------------------------------

Rannoch: Geth Fighter Squadrons

NOTE: Brace yourself for another nice mission....don't let anyone
disturb you - I almost bit my friend....

You are now inside, go down the stairs. Keep going along the path and as you
come to a blockade, shoot it and move ahead. Also note that you need to shoot
the ones glowing orange and then the ones next to it are vulnerable. You
amy need to shoot down entire chains to unblock the path. You'll be taken to
another area soon.

Soon you will come to a Data Cluster (a large box), you need to shoot out
all the branches that connect to it to move ahead so move back and forth to
shoot the branches and every part that glows on the box around it till the box
is completely destroyed (Hold V to see where the box is). Then you can
continue ahead and keep going and going.

After three clusters you'll come to another area. Here the chain grows back
as soon as you shoot it. To go past, shoot the area glowing above your head,
this is the closes glowing area to the one directly before you then shoot the
one before you an you'll come to the cluster. You'll need to shoot the
infections in the chain before you take out the one joining the cluster. If
you are unable to hit the infection then you need to get closer to the edge of
where you are standing. The last connection can be destroyed only after
killing tow other before it in it's chain. Destory the cluster and keep moving
ahead and do this stuff throughout the level - only remember that you need to
shoot at all places that glow but which one to shoot first is what you need
to find out, which is not difficult at all.

AAAAHHHHH, attack of the Prime run for your wives..... Oh wait, what?

NOTE: Reaper Code Fragment is now available for sale in the Specter
Requisitions of the Procurement Terminal in the Shuttle Bay of the Normandy.
It is used to complete the mission Citadel: Reaper Code Fragments.
------------------------------------------------------------------------------

Priority: Rannoch

So, after the not so emotional cutscene, move ahead and you'll see Geth, big
surprise. Keep killing as many as they come and move ahead and as you reach
the end, the doors will be shut. But you can climb onto some pipes and go up
from the right of the sealed door, here's a pic -

Climb up and kill the Geth to the right, go up the ladder to the far left and
keep going and kill the Geth who are so very persistent - they just keep
coming like flies. Anyway, after killing all of them, move to the other end
and go right thru the door here. More fighting as usual, when you kill the
ones nearby, more come in from the far left. Move across this area killing
Geth and when you get to the other side, go thru the door and pick the stuff
here and inside.

Keep moving down this place, kill the two to the right and move ahead and
kill everything else and look to your left and you'll see the same interfact
terminal which you got into in the previous mission, to it's left is the door
override console, hit it and now a shitstorm comes upon us, nothing we can't
handle though. Keep your distance and killing everything and move to the
override and kill the Prime and more Troopers which come after that and climb
onto the elevator. Hold V to highlight all of these.

When you get to the top you will know what pain is.

There are three Geth Prime coming at you from three ways and you need to kill
all of them before you can do anything. I suggest going right first and avoid
the fire. The Prime here moves to the left of the ledge. Cover here and start
shooting like a mad-man, use everything you got because this here needs
everything you got. Always stay in cover and keep using any and all powers at
your disposal, you will need to get this by the breath of your hair but still
it's not too hard and you and do this with a couple of tries even on INSANE.
If you think this battle is too hard thne you better drop your difficulty thru
the rest of the game - believe me.

After killing the Primes, go to the ledge and when you are in control hold the
left click to paint the target.

Shortly you will see yourself fighting the Old Machines. This part is very
very tricky. You need to time your targeting so that the laser does not hit
you or it's a one hit kill. Firstly, to miss the laser, you need to sprint in
one direction, so start of to the left or right of this canyon and outrun the
first laser and the targetting appears, when the targetting appears,
immediately hold the click to start targetting and that thing moves a step
closer to you. Again, repeat the same thing, run or target but you need to
check out what's working for you. Also, you need to start targetting the very
second the laser goes past you. So, keep doing this and you'll get it.

After that we need to make a very very very very tough decision - this is the
worst decision in the entire game.

NOTE: Speak to Hackett after that. We got a lot going on but just speak to
everyone in the crew again. We resuced Turians, Krogans, Quarians/Geth, Rachni
the Hanar and Volus and Batarians are already out of their worlds and also
the Elcor joined them in the Citadel. We also helped the Asari a bit but it's
their time now, am I missing anything?
------------------------------------------------------------------------------
EXPLORATION: Hades Nexus

Hekate

On the planet Asteria is a War Asset. 4 O'Clock to the Sun, we have a fuel
dump.

Sheiol

Gei Hinnom the only planet south of the Sun has the Prothean Sphere which is
needed for Hades Nexus: Prothean Sphere mission.

Pamyat

Dobrovolski has a War Asset. Fuel Wreakage directly to the south of the Sun.

Hoplos

The moon Kopis (directly east of the sun) has the artifact Obelisk of Karza
which is needed for the mission Hades Nexus: Obelisk of Karza. Fuel Wreakage
8 O'Clock to the Sun.
------------------------------------------------------------------------------

Dekkuna: Elcor Extraction

In the Embassy Offices area of the Citadel Embassies you should see an Elcor,
speak to him to get this mission.

I didn't really do this mission, all I did was scna Dekuuna for the mission
Dekuuna: Code of The Ancients and went back and spoke to this Elcor as I was
passing him and the quest got completed - huh!
------------------------------------------------------------------------------

Priority: The Citadel

Go to the Human Embassy office in the Citadel where the Asari Councellor is
waiting for you. Speak to her and now, we go to Thessia - the homeworld of
the most advanced species in the galaxy.

Priority: Thessia

Objective: Find Route to Asari Temple
If you expected Thessia to be anything more than a pile of rubble after the
Rapers attackm then you are with me on that, I hoped to see marvels, well
we can't do anything about it now can we...

Go down and pick up the stuff which is to the right and speak to Lieutenant
Kurin, then run to the mounted gun to the right of the barrier and start
shooting everything in range. You will see enemies come from upfront but you
should turn left because Husks come out from the sides of the road so just
aim at the barrier and kill everything that reaches here.

Objective: Reach Outpost Tykis
Keep going straight and you'll come to a broken part of the road, take cover
here -

and start killing the Cannibals and Marauders. Keep going straight thru the
rubble at the end and you'll come to more enemies, start taking them out one
by one, Marauders first though. More keep coming and this level has a lot of
enemies, and believe me when I say lot. You'll need to kill dozens before
getting thru an area so be patient and vigilant. There's a medkit to the right
of this area in the middle. You'll keep facing Marauders till the end and when
you reach the end a Banshee will pop out of the door - remember to maintain
your distance against these things. Go thru the place the Banshee came from
into the next area.

Objective: Reach Asari Snipers
You'll come to an area below the reaper and you should see Cannibal ahead of
you feeding on Asari. You will also see snipers in the distance. Get near them
and go up to them from the left of the Debris and kill everything below you.
You can get down from the left here and have to go out thru an opening in the
far right.

You'll come across some steps like construction. Climb past these and go to
the other end and now more enemies. There's a Hydra Missile Launcher to the
left of where you are -

You can run back and take cover behind the steps which you used to get here -

After killing the Banshee and the several other enemies here move ahead, climb
and go on. Upside, as soon as you walk a bit two Harvesters and a lot of
Marauders, Ravagers and Cannibals come at you. The key to win here is to
destroy the barrier engine -

Do that before targeting anything and always stay within cover because the
Haarvesters can cause a lot of pain, but be persistent and look out for the
enemies on the mini map and you'll do fine. Fall back if you have to but only
after destroying the barrier engine first. After killing one Harvester, the
other flies away (CHICKEN)... I hope you have noticed by now that Ravagers can
be killed quicker if you destroy the red sacs under them first. So, after
taking care of things, move ahead.

Objective: Investigate Artifacts
After you go inside the temple go straight to the end and interact with the
Artifact. You'll need to find other artifacts which connect to the beacon,
they are around here -

-

-

-

-

-
Go back to the Beacon after activating all of them and interact again.

Boss: The Slippery Bast***
He has a lot of good powers but none of them work if you have proper cover.
Just stay in cover and use as many shield diminishing powers as possible to
lower his shields. Don;t let him get too close and if you squad is down,
revive them so that he can target them. He goes to recharge occassionally but
you should still be able to fire at him thru the gunship's fire.

----no spoilers----

NOTE: Anderson is on the Vid Comm. We have a lot of crap to take care of. You
also have a mail from the "Asari High Command"
------------------------------------------------------------------------------

N7: Communications Hub

So, let's hit the galaxy to the new system that shows up after you get this
from Traynor. Take cover to the left as soon as you land and take Cerberus
out. They are to your right and left. After you kill the guys here, go to the
right and up the ramp and you'll come to a medstation soon. Go to where you
saw the Cerberus guys come from the left and you'll see a medipack.

Go straight from here and you'll come to the Hacking Console. Disable it.

Go towards the next device but this time you'll face a few nemesis with
Centurions and Troopers so be careful, and you will face enemies from all
sides so keep looking into your mini map for the locations of you enemies.
They will get the better of you if you do not keep an eye on where they are.
Get to the next place and disable it too (hold V and a pointer shows on the
screen).

Persuade her to give you the last Nav Point and after she does, move towards
it but be prepared all the while. It's same old same old so just get the
device deavtivated after you totall clear the base.

NOTE: You can buy Cerberus Encryption Codes from the Specter Requisition in
the Procuremet Terminal in Normandy's Shuttle Bay now. It's used to complete
the mission Citadel: Cerberus Ciphers. That should take case of all the
miscellaneous quests you get from the Citadel to this point.
------------------------------------------------------------------------------

QUOTE: "About time they started killing each other..."

Priority: Horizon

Time to make the first stike, let's show em'

Move up front and you'll immediately deal with a couple of Phantom and a
Nemesis is on top ahead of you with a sniper - not nice.

Move ahead to the gates and go in -

Objective: Explore Sanctuary
There's a med station to the right after you enter. There are a few logs
around this area. Read all of them the go to the far right and down the stairs
kill the three Troopers here and move to the far left and go in and activate
the console you see. Hmm, Miranda's Father is in control, hmmm....hmmm.....

Hit the water pump controls, go down the ladder and straight thru all the
doors. The console is in the central area, hit it - yes I crapped my pants too
Go thru the door to the right and be prepared for a lot of Husks.

Keep going and read logs in your way, activate consoles and soon you'll come
to a Banshee, Ravager and some Marauders. Better kill the Banshee fast. After
you kill them all, go into the area to the far left and thru the door here.

Objective: Search the Perimeter
Hit the console here and it's time to go to the tower. Climb up the stairs
here and you will come to a lot of cannibals and Marauders. The first thing
you need to do is kill the barrier engines which are to the top right and the
top left within the rooms -

-

-

After you kill the barrier engines, everything else should be routine. Go in
the far left and activate the console.

Objective: Access the Tower
Go up the ladder and be prepared for another crap grinder. You'll fight
Marauders and a lot of Cannibals but more importantly - more than a couple of
Ravagers. Take out the Barrier Engines first -

-

-
              After killing all of them, go straight and listen to the log to
the left in the end and go right and jump onto the tram and shoot the power
node at the end of the Tram and activate it. Jump left at the end and be ready
for what I call Mexican Chilli up your you know what. In fact, things will get
so interesting that I will not even mention what you are up against. Just
remember that the large ones cannot get to you if there is an obtacle between
you and it. And you can put a lot of obstacles between, just keep running like
hell and use everything at your disposal, but wait, after the two, there's
more. To avoid getting screwed herem you still need to run like Forrest Gump.
Only start shooting after the Bansheen stops teleporting, till then only
powers, if it gets close to you, then it's a one hit kill (it actually sucks
your life out). Kill the Bansheen first before you deal with the Brute though.
Till then, run Forrest run...

The exit is where you saw these things come at you from.
------------------------------------------------------------------------------
NOTE: Before you start this misson, make sure you did all the side-quests and
tasks on Citadel, in short - complete everything now... nuff' said

Priority: Cerberus Headquarters

NOTE: The real deal starts from now and you need to be prepared. Make your
choice of guns, armor and squadmates and do it with thought because like I
said, the real stuff is just beginning. You may want to amp up your Overload
skill....

When you are ready to go, tell that to Hackett and after a few cutscenes
you'll get into the HQ. Take cover and start taking out the Troopers. Note
that while you are here, Cerberus keeps launching fighters out. When they pass
you, your shields will blow up so be careful when you hear a fighter, get into
cover and stay till your shields regenerate. You'll need to kill a Nemesis and
an Atlas too. After that, go up the ladder to the mid left of this area and
into the next room and hit the console.

Enemies start coming from the room ahead so go to cover and clean them up.
Move ahead to more enemies. Then go into the next room and hit the rotation
controls. Go straight and you'll come to a ladder which can take you down
again. Go down and activate the clamp release to your right. And soon an Atlas
comes in from the front. Note that all this while, two troopers will enter
this place and run towards two more empty Atlas which are to the left and
right of this area a bit ahead, you should see these troopers on the map. I
advise you to kill one of them and enter their Atlas and destroy the remaining
Atlas. Otherwise, you'll have to fight two more after the one.

Get out of the Atlas and run towards the Debris and turn left and open the
door. Go thru and down the ladder, take cover soon and take out the several
Troopers, Centurions and a Nemesis here, move around cover to get a better
look at those guys. After all of them are down, move ahead and you'll come to
a ladder. Past this ladder to the left is a med station. Go up the ladder and
take a look at the console. Go thru the next door and thru the debris and
you'll come to more Cerberus and this time, like EDI earlier said, the
Engineers keep putting up turrets and the moment you see an Engineer, kill him
before he fixes or puts up another turret. Take cover carefully and do not be
hasty. The corners here and the space to move around is small so be carefull
not to get into a turret's line of fire. After you kill the guys in this place
you need to move ahead to get a look at the next group of enemies, kill them
and keep going till you are out of this place. You'll need to pass three
groups of enemies who are blocking your path so they will not come to you, you
need to go to them and do your thing. The last group has a lot of Engineers so
be very careful and if you find good cover, try not to go anywhere else. After
the last group, climb the ladder and look at the logs. There's a med station
in this room to the left.

Move thru the next door and look to your left as you move and you will see a
broken area of the wall. You need to go thru here to get to the next place
(hold V to point it). You can go straight and pick up the medi packs there and
some other stuff too. Just go down the broken section after that -

Go up the ramp and as soon as you get to the top a Phantom will attack you so
be very ready for it. If you look to your right you will see a ladder, you
will get there as you move on this ramp but also, enemies attack you from
there so keep an eye out -

Another Phantom and a couple of Nemesis attack you so watch out for them too.
Destroy the Shield Pylons or generators to avoid their sheilds getting
recharged as you shoot them.

Go to the other side and climb up the ladder and upstairs is another Phantom
with two more Nemesis and several Troopers, kill the special units first
before going for the Troopers. Also, destroy the Pylon as soon as you get
there. Then go up the ladder and walk all the way to the door and go in.

BOSS: Kai Leng

In the beginning, keep tapping F to avoid being killed....

Your main concern is to get his shields down so use powers like overload which
work great on shields. Also, he keeps busting up the ground and whenever he
does that Cerberus enemies come out of the sky and into the battle. I can't
say anything but use your powers wisely and it's better to kill his support
first and then go after him. He'll bust up the floor three times and the
enemies who come at you just get stronger with two Phantoms in the last wave.
This fight is a bit difficult on INSANITY but nothing you can't beat, you just
have to make sure you use your powers very very carefully. Other than that,
there is no strategy, it's all skill in combat - which I like, take cover
behind the pipes while hitting Cerberus personnel, the Phantoms get real close
so be ready for them.

After the fight you just gotta choose Paragon or Renegade a couple of times
and that's it.

NOTE: Speak to everyone and buy anything you want to.....do your thing
------------------------------------------------------------------------------

Look Mommy, Pretty lights...

Taking Back Earth...

Priority: Earth

Objective: Destroy the Cannon
After the great cutscenes, you'll land in London. Take cover and start the
destruction. There's going to be a ton of shit being thrown at you and believe
me when I say ton. You'll have to kill dozens of enemies before you walk ten
meters from nw on and that's no exaggeration. Take cover and start killing the
Cannibal and Marauders, the Cannibals come down to you so you better be quick.
I used Liara's stasis and my fully upgraded Black Widow V to kill the
cannibals in one shot (head shot). Then EDI's overload with Liara's stasis and
again, my black widow to take out the Marauders in one hit. Killing with
little ammo and quickly is going to be very very important from now on.

After you reach the top, two Brutes come at you one after the other from the
right, you'll have to deal with Cannibals and Marauders all the same. When
the Brutes come you need to go back to the beginning (back down) and take them
out from there, that way you don't need to be under fire from the other
enemies.

Then move up, there's a fallen shuttle to the right after you are on the road,
it has ammo and medigel with it but as soon as you go there another large
group of Cannibals attack. Kill them and head to the top killing anything in
your way, then after another long fight you'll come to the Shuttle which has
the Cain missile launcher. Just use it on the Reaper Cannon which has been
hindering with our shooting from the beginning and watch it burn to the ground
Now, I seriously advice running back to the left all the way, do not stay here
or you will be overwhelmed, run back as far aas you can.

Objective: Survive
A Banshee and a couple of dozen Cannibals come at you, kill the Banshee as
soon as possible, which is obviously easier asid than done then take out the
Cannibals. When the shuttle shows up, you can kill the rest of the Cannibal
of just make a run for the shuttle depending on what powers you have and how
you can run the distance without taking fire. If you each the shuttle, you can
board without being killed.
                       ----------------------------

Earth: London
NOTE: this area has many friends and others and depending on your choices thru
the the three games, you may see a person or not or see an entirely different
person.

Go down the ladder and speak to James who's nearby ahead of you. Then move
right and go all the way to the end and you'll see a door to the right, go
thru and you can talk to most of your friends thru vid comm. After you are
done talking to everyone, go back outside, you can also speak to another of
your team member here. Then go right from this area and go up the debris to
the right in the end. You can also meet Victus by the next door, as you go
outside, some Husks come by, just shoot them and continue your walk towards
Anderson. You'll probable meet with your romantic involvement next, or not.
Just keep going and talking to everyone you see. As you go out again, you
would see Wrex who's giving a speech. Go into the next place and speak with
everyone and after another cutscene, you are back in hell...

NOTE: Incenerate, Overload help a lot....
                       ----------------------------

Objective: Cross No Man's Land
The bad thing here is not that this place has no people, it's that it has
reaper forces crawling like ants out of an anthill. Kill the two Cannibals
ahead and move out. Kill everyhitng else here and jump down at the end and
you'll see a vehicle come from the right, keep killing those enemies and after
you are done here, you can go from the far right ahead of you and you'll come
to a Harvester. Take cover behind something and start hitting it with
everything you got -

Immediately after the Harvester comes a Banshee with Marauders and Cannibals,
you better fall back at this point, run back to a safe distance away from the
fire of the enemy and take the Banshee out as it comes close. Then kill the
remaining things and go to the end and turn left and go thru the door here.
Husks will start attacking you down here in the garage so get your shotgun out
- if you brought one. After the Husks are gone a couple of Brutes come in at
the same time. You need to work from cover here and never stay directly in
front of the brute unless you are behind cover. Let the biotic powers do the
damage here, you need to deal with a few Husks that come your way. Do what you
can and go up the ladder and debris to the far left.
                       ----------------------------

Objective: Clear out Reaper Strongpoint & get to the Battery
As soon as I came in here I thought the allies were on the mounted turrets -
huh. Clear out this place, hit the ravager first though. There are two medkits
in this area - one here and another in the bathroom. Go out the door after you
restock your ammo.

Start killing everything you see outside, soon you will see a Ravager on top
of a car, take it out first and then the others. Go to the far right and
inside, more Cannibals come at you, burst them and go thru thru the left. Take
cover immediately and take out the enemies and move in close to the building
ahead and empty it, and go thru the door there. Kill everything here and go
further in the room and after you take out most of these things, a Brute comes
in from afar, you can kill it even before it can get close and make it's first
attack. After that, jump out and go straight and at the end, be ready to run
back.

Go back and thru the door and you should come out. Go near the missiles and
look left and go into the house ahead and take cover -

Kill everything here but also note that there's a Hydra Missile Launcher
behind the counter and a medkit too, save them for later -

you'll need them, believe me. Go deactivate
the missiles and get back to cover enemies start coming in from the left side
but the problem is the Banshee that comes too. There's another Banshee waiting
after this one so use your launcher on one of the two. After taking everything
down, the missiles are ready to be launched.

Well, that must be a billion dollar fireworks show gone fizz right there. We
get warned by Anderson that more enemies are on their way here so go back
inside and wait for them to come. You are going to crap right thru your pants
after this one, even though it may not be that difficult, you will feel your
spine tingling (play it on INSANITY for all the more fun...). The only thing I
can say is that there's a medstation in the house directly opposite to this
one and you need to move, run from cover to cover every few seconds to avoid
being made into pulp, so running is your best bet here.

After the first wave of the large ones, a couple of indoctrinated Yakshi come
in and more follow. If you stick around long enough while taking their health
down then soon someone will tell you that the missiles are ready. At this
point, staying and fighting is jsut going to get you crazy, run for the
controls of te next launchers and avoid being shot by the Marauders while you
are at it, put out a decoy or stasis whatever is in your way, just get to
the launcher and hit it and woof...
                       ----------------------------

Objective: Reach the Conduit

And I thought it was going to be easy. Just run boy run...... When you are
against Husks, shoot them in the head for faster kills and again same with the
Marauder.
                       ----------------------------

Objective: ---
Keep moving ahead and do what you want to do... it's your choice

Go up the right platform to destory...
Go up the left plaftform to control...
Go straight for mumbo-jumbo...

NOTE: if you want to exprerience the best endings out of what are present
then make sure that you
start the game once with the collector base destroyed (this is default and you
do not need to import save file from ME2) and play multiplayer and get your
galactic readiness higher and play the singleplayer thoroughly and gain all
war assets in the game (just follow this guide and you'll do it) and make sure
that you have effective srength more than 5000 (play everything in multiplayer
so that your readiness is atleast 85%). If you did not collect all war assets
then just take your multiplayer higher, remember that you need 5000 in the end
Also, repeat the game with collector base not destroyed (you have to import a
ME2 save which has the collector base intact).
------------------------------------------------------------------------------


The end...
To Top


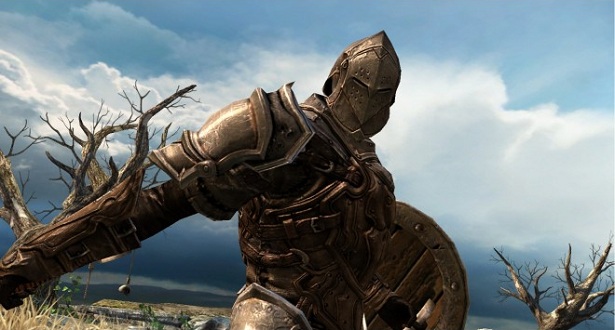

 Dishonored Walkthrough
 Mortal Kombat X Guide: How to Unlock All Alternate Costumes
 The Outside Perspective
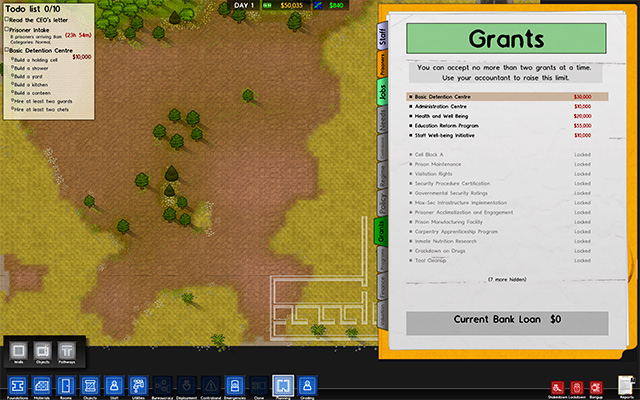 5 Tips To Improve Your Prison in Prison Architect
 Do You Still Own a CD Player? [Poll]