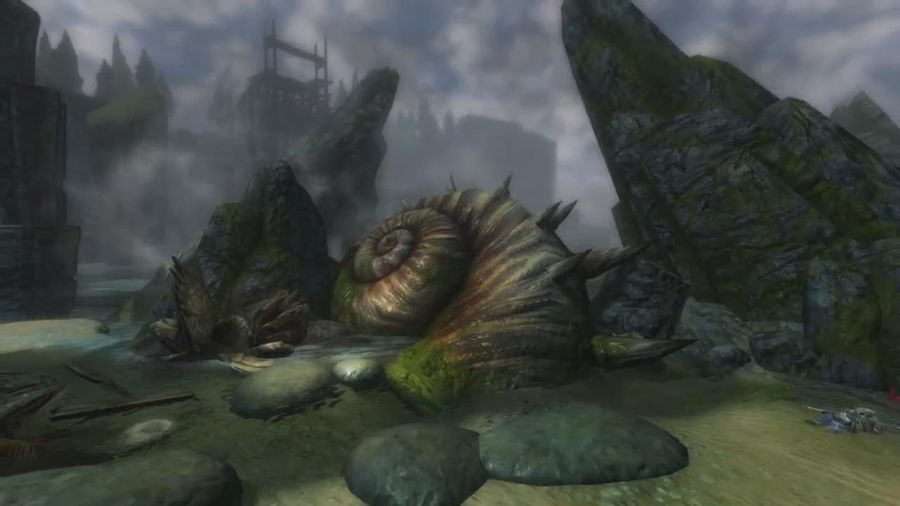
Kingdoms of Amalur has several factions you can join, this Kingdoms of Amalur Faction Quest Walthrough Guide will list all the available quests and sub-quests for the Warsworn faction.
Starting Quest Faction Quest
You need to head inside the Inn at Gorhart and speak with Ost Ordura to begin this quest. He asks you to kill the Krast brothers and bring you their legion daggers as proof of their demise. The first brother is close by, head East out of the Northern entrance until you reach the wall. Head North and shortly there will be a path leading East, take that, he’s down there way to the North East. Head west out there and then North, you’ll reach a camp, the second of the brothers can be found just across the river practicing his archery. This unlocks follow on quest Road Patrol
Road Patrol
Head South East from Gorhart to Shieldring Keep. Once there, enter through the main gate and go inside. Speak with Tine Delfric to get your first real quest for the Warsworn. You can also begin the quests on the contract board. We have a full contract board guide listed at the bottom of this article. Once you’ve spoken with Delfric leave the keep and head East towards Didenhil. Once you reach the town, swim across to the other side of the lake and enter from that side. Head inside the healer building and speak with Wyl Rendig. Once you’ve done talking, head out and go East towards Lorca-Rane, once you enter the Lorca-Rane area, just continue following the path until you arrive at the bridge. Speak to the group and then simply walk along the road collecting the clues, once you reach the ruins the action starts. A Niskaru will attack, nothing major, flinches easy so you should be able to take it out without any issues. The woman will die regardless of your actions. After you’ve killed him follow Ost, you’ll come across a bear or two, let Ost get the attention and then just cut them down. Eventually you’ll reach Brigand Hall Caverns and be attacked by two more Niskaru, same as before, they don’t pose much of a threat. Be wary of the Spike Traps after you go through the door, they don’t do much damage but they’re easily avoidable so save your pots. Carry on through the dungeon, watching for the swinging axes and trip wires, again, all can be disarmed and left harmless.
Continue through dodging the traps, there’s a hidden door if you have the skill to use it. At the end you’ll have to fight several mages. No real fight here, target the Archmage’s first, when you kill one a cut-scene occurs. Not going to spoil it but it sucks. After you finish, head through, the traps change to mines now so be wary. The next room features the same, if you can sneak and kill the closest guy, the Niskaru turns on the other 2. Kill them and move on, careful when searching the room as there are mines near the chests. Once you enter the final room a Niskaru Tyrant will be summoned. Another simple fight, use dodge to avoid the range fireballs and dodge just as he pounces to avoid his jump attack. Kill it, grab the artifact and leave. Take the exit out and fast travel back to the keep. You get a nice helmet and 6,000 gold for a reward.
Lock and Key
There’s a pretty long journey ahead so stock up on potions and anything else you may need. Fast travel to Wardens Bridge and head East from there, through The Wolds to Tala-Rane. Make sure to get close enough to dungeons and towns along the way, can help with future quests to have places to quick travel to. Once inside, speak with Grain. He will tell you to visit the vault, simply head South West out of the keep to the alternate entrance to The Wolds. Once you’ve gone South West and said “This place is pretty cool” a dozen times, you will meet Gwyn, speak with her to continue. Enter the Vault and you’ll find a few mages, you can dispatch of them via stealth if you want to avoid a large fight. Once done, you can fast travel back to the keep. It’s worth exploring the vault, it’s not big and there’s a few items worth some coin in there, as well as a secret door. Once you’ve spoken with Grain, he will inform you that Gwyn has been arrested but that she didn’t mention the key, go to the cells at the back and speak with Gwyn. Go back and speak with Grian before leaving the Keep. Another long journey now, to the North East to Galador. The journey isn’t perilous, no new enemies or anything that will get in your way. Once you reach Tirins Rest head to the Locksmith’s house. Head into the lab, approach the next room with caution as there’s 3-4 mages in there that can cause serious damage, you can take 2-3 out if you stealth through. If you struggle, you can return to the door and hide behind the pillars at the side.
Once you’ve killed all the enemies, the Locksmith will come out of the door, speak to him to continue (there’s a chest inside the room). Once he exposes the truth, you can exit the Locksmiths house and return to the keep, I would suggest using quick travel. Speak to Grian once you arrive. After Livia is arrested, head back to the cells to question her. Once she tells you who asked her to copy the key, return to Grian.
The House of No Doors
Leave the keep and fast travel to Tirin’s Rest, then head East into Tywiu Coast. Make sure to stock up on pots before you head out. There’s nothing really challenging on the way, just a few wolves. Once you reach Elbin, speak to him to start the next part of the quest. Elbin and his soldiers will attack you, just focus on him, once you get him to 20% HP, he will surrender and tell you what you need to know. You walked past Rathir on the way, fast travel back for the next part of the quest. Once you’re inside Rathir, head West into the Customs House. Continue to the North East room and speak to the grill, continue to use Persuade until it works. Enter and walk through until you reach the end room, nothing that dangerous in here and easy stealth kill options if you choose. The final room can be a tough fight, I actually had my first death here at level 8 :(. Inside you’ll find a mage, 2 melee’s and the boss, as well as rats hidden behind boxes. Use your Reckoning and get the boss down asap, then the mage, leave the melee if you have to. Once you’ve killed him, leave and head South West to meet Gwyn
The Isle of Eamonn
—
Shieldring Keep Contract Board Guide
A Brutal Contract
Head South from the keep and then East once you reach the next area. Keep heading East and go over the bridge, then go East through the narrow path. Speak to the guy and he asks you to kill all the Mountain Trolls. Head South East into the forest. There’s a Mountain Troll on the way that’s good for the bonus experience, he can also drop an experience potion. Kill him first, then South East again to the next one and then again for the third one. Then just head North East to the next two, none of these fights are hard so you shouldn’t have a problem. Fast travel back to the Ballads Library then head South to speak with him again. You get 600+ gold and a greater fire hilt as a reward.
Rallying Cry
Head South West to Ettinmere, you’ll get ambushed by a bunch of spiders on the way, kill the venom spitters and then turn your attention to the big ones. Once done, head on and continue through Ettinmere. You can swim through a lot of this area to avoid unwanted conflict. Head to the far Western side of the map and you’ll come across a camp with Giants, head up the path and eventually you’ll get ambushed by a two headed giant, the Ettin Brute. Simple fight, wait for him to pounce and then do the damage, he shouldn’t hit you at all if you do it right. Head on and you will see a corpse, search it for the next stage of the quest. You’re tasked with killing 4 Ettin Shamans. For the first one, follow the path North out of the camp and over the bridge. Continue to follow the path over the next bridge and keep going, eventually you’ll come to a hollow log bridge, head past that to find the first Shaman. These are great things to use your exp abilities on as they can yield over 600 each. The first one is lightning, simply dodge his big lightning attack and then hit a few times, then dodge until he does it again. It takes a while but is an easy technique.
After you’ve killed it swim way to the East towards the next one. You will get ambushed by a few Ettin Warpriests on the way, stay in close range and dodge their swipe, continue to damage and it’s not a tough fight. Continue North East to the next Shaman, same tactic as before, remember to dodge at the last second when he uses his Lightning ability. Head South East to the jumping platform and you can see the next one from there, jump down and head over. Same tactic as before, nothing different here. Once you’ve killed him head North along the river, you can swim practically the whole way, as before, same tactic. Once you’ve killed him return for you reward, don’t forget you can fast travel. You get a mere 424 gold for completing this quest.
Ungentle Beasts
For this quest you need to find a valuable book. Head out of the keep and then West as far as you can go, the entrance is just to the South West. Head inside, there’s nothing really dangerous in here just Barghests and a few Kobolds. The last room has 5 enemies in close range so is a good place to rake in experience using the Fae ability. The book is on a rock at the back of the final room, simply pick it up and then leave. You get 600+ gold as a reward.
Read on to find out where to go to get all our latest guides and info. Feel free to leave any feedback or suggestions in a comment below.
Looking for more guides? Check out our Kingdoms of Amalur Walkthrough Guide Collection for links to all our Kingdoms of Amalur guides and articles.
Follow us on Twitter!
Like this Game Guide? Follow Us On Facebook and keep up to date with all our Kingdoms of Amalur: Reckoning Guides!! Subscribe to our Youtube channel to be the first to see our future Game Guide videos.


 Star Wars: The Old Republic Review
 LEGO Marvel Super Heroes - Achievements & Trophies Guide
 ArcheAge war drum crafting guide for the pumped up dance buff
 . Plays November 6, 2011
 DmC Devil May Cry Copper, Gold, Ivory, and Argent keys and Secret Doors Locations Guide