Game Guides > pc game > all pc >  

The Walking Dead: Starved For Help Walkthrough Guide

The Walking Dead: Starved For Help Walkthrough Guide

The Walking Dead Season 1 Guides
Telltale Games have finally released the second episode of their highly anticipated horror title, The Walking Dead: Starved for Help. This The Walking Dead: Starved For Help Walkthrough Guide will guide you through the various aspects of episode 2, giving you advanced warning on conversation choices as well as other guides for the more difficult aspects of the game. Please be aware, although I’ve done everything possible to avoid any serious spoilers, there’s probably a few giveaway points.

As the game has so many possible paths and choices, some of these won’t be relevant to you depending on what choices you made in Chapter 1. However, a lot of it is similar just with different people. Please feel free to leave a comment if you have information regarding an alternative path.

Conversation Guide
The Walking Dead Season 1 Chapter 1

Chapter 1

  • When Mark asks about how much food is left, your response does not impact the story
  • Mark tells you Kenny may look to go out with his family if he gets his RV running. Your answer has an impact as Mark will remember
  • When you get to answer with “He thinks I’m dangerous” Mark will remember
  • When Mark takes aim at the bird, your answer will not have any impact
  • The college kids talk about their camp being raided, your answer has no impact
  • Choosing to save the teacher has no impact on your relationship with the others but the next choice does
  • If you choose to save the teacher, it is recorded.


  • Chapter 2
    The Walking Dead Season 1 Chapter 2

    Chapter 2

  • When you’re questioned about bringing more survivors back, your answer has no impact
  • When you can select who you decide to side with, the entire group is made aware of your decision
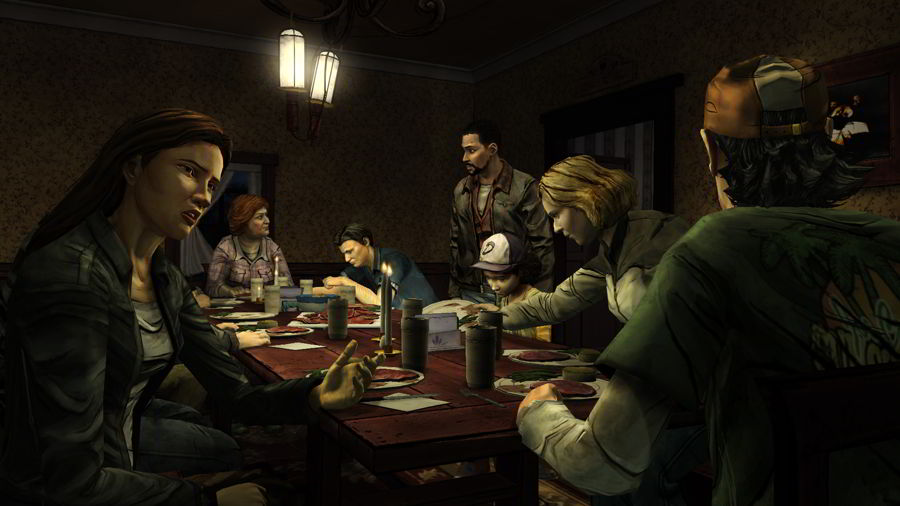
  • After these selections you’re given four pieces of food and 10 people to feed. Tough decisions await. Firstly I’ll cover the basic conversation choices with each person, nobody really has any effect on the story apart from your choice with Kenny

  • Helping the injured guy in the truck has no impact
  • Helping Mark and Larry fix the fence, including handing your axe to either has no impact. Although Mark will mention your thoughts on Larry from your answer in Chapter 1
  • Approaching the children, Clementine will ask you to find her hat, refer to the quest section below (Cannot complete until Chapter 3)
  • Speaking with Clementine has no impact
  • Speaking with Ben has no impact
  • Speaking with Duck has no impact
  • Speaking with Carley, or the guy in her place, has no impact
  • Speaking with Kenny about his decision to leave has an impact
  • Speaking to Lilly has no impact
  • After you’ve spoken with everyone, it’s time to make your decision regarding the food. Personally, I chose the most needy and useful first. Helping any of them is sure to make an impact but I’ve listed the ones I checked below. If you make other choices, please leave a comment and I’ll add it to the post.

  • Giving Duck an Apple, him and his family appreciate it (Influencing 3 people)
  • Giving Beef Jerky to Clementine, registers as you taking care of her. (Influencing 1 person)
  • Give Crackers and Chees to Larry registers as making a tough choice
  • Giving Crackers and Cheese to Mark makes an impact
  • The conversation with the woman helping the teacher has no impact.
  • This marks the end of Chapter 2 in Starved for Help.

    Chapter 3
    The Walking Dead Season 1 Chapter 3

    Chapter 3

  • The conversation choices during the cut-scene where Ben explains something has no impact on any of your fellow survivors.
  • Your choice with the two men on the trade has an impact
  • If you follow the two men, conversation choices with Carley during the cut-scene have no effect.
  • When you’re asked about your hometown, it will have an effect on Andy
  • When you tell them who’s running the place, your decision effects the opinion of both of the St. John Brothers
  • The following decision, about how many of you are at the Motor Inn, also has an effect. I chose to let them know “We have enough to defend ourselves”
  • Inquiring about the Electric Fence at the St John’s farm has no effect
  • When asked if you have anyone with survival experience, it has no effect if you choose the same answer you gave the St. John Brothers
  • The rest of the answers during this cut-scene have no effect
  • After the above conversation choices you’re given free roam again. Check below for information on the conversations you can have, as well as any quests or missions

  • Walking away from Mark leads to the broken swing, which you can choose to fix. Check the Quest & Mission section below
  • Speaking with Mark before searching the Farm has no effect
  • When commenting on Andy’s comment about the amount of weapons you have, your choice will have an effect
  • The second conversation choice with Andy regarding Survivors also has an effect
  • After heading off to fix the fence, your conversation with Mark about his comments to Larry have no effect.
  • When inspecting The Walker, taking the arrow or talking about his previous life has no effect
  • After clearing the first Walker, you response in regards to the security has an effect on Mark
  • Your opinion on the St. John brothers also effects Mark
  • After clearing the next Walker Mark will make a comment on your choice regarding the food rations. The next choice with him has no effect
  • Once the Bandits arrive, you’ll hide behind a Tractor. In order to advance to the next area you must first detach the blades at the rear, highlight the lever next to the blades by looking to your right. After you’ve done this, look to the far left and remove the Chock blocking the wheel. You’ll then follow the Tractor as it begins to move. After a short distance it will hit a body, simply move The Walker and continue. After removing the next Walker, in a much cooler fashion, continue to follow the Tractor. This can seem a bit more dire as you’ve got company but just keep your shadow in line with the Tractor’s and you’ll be fine.

    When you’ve escaped the Bandit Ambush, you retreat back to the Dairy farm.

  • When you return to the dairy farm, your choice once you enter the gate has no effect.
  • Your reply to Larry during the ongoing conversation has no effect.
  • After this short cut-scene you’re given free roam of the Dairy Farm again.

  • Heading out through the gate past the generator to Carly and her Dad result in no changes to personal opinions.
  • Walking over to the swing and playing with Clementine has an effect. Choosing “Yes” shares hope with Clementine.
  • Speaking with Kenny has no effect, although he will mention something that happened with Doc back in Makon in Episode 1
  • When you head out and discover the Bandit Camp, sneaking and your choice to the brother has no effect.
  • When searching the camp, there’s nothing near the chair, in the tent or on the tables next to the chair. Search the tables near the Shopping Cart and you’ll move some boxes to discover a camera, pick it up. After you’ve picked up the Camera, head back and search the tent. There’s a teddy on the left and a sleeping bag on the right. CAUTION – I’m not certain you get time to check both, or if the cut-scene activates after you inspect one item, just encase make sure you check the right sleeping bag first, and you’ll find Clementines hat.

  • During the cut-scene with the slightly crazy women, deciding to shoot her or not does have an effect
  • This marks the end of Chapter 3.

    Chapter 4
    Chapter 4

    Chapter 4

  • Speaking with Brenda when you return from the Bandit Camp has no effect.
  • You’re then given a free roam choice again. There’s the kids in the barn, Larry and his daughter out by the Gazebo and a few others walking about. Read below to find out if any effect the story

  • Returning through the gate to speak with Brenda has no effect
  • Talking to Danny about his gun can have an effect depending on your answer
  • Speaking with Lilly at the Gazebo has no effect
  • Speaking to Duck has no effect
  • Speaking to Clementine has no effect on the story, nor does returning her hat. Other than the fact she wears it.
  • When you inspect the rear barn door, your conversation with Andrew can have an effect. Check the Quest & Mission section if you get stuck getting into the door
  • After the door cut-scene, speaking with Danny provides a choice that can have an effect, arousing his suspicion.
  • After you’ve done the open the barn door quest, the conversations continue

  • After you open the barn door, your first choice asking what it is has no effect
  • Once you’ve spoken with Andrew about the Barn Door, you enter the house. You get a chance to roam around in here. Head upstairs. If you’re not sure what to do, check the Quests & Mission section about finding the hidden room.

  • After you’ve found the hidden room and go downstairs, stopping Clementine from eating the food has a big impact.
  • When speaking with Larry about the meal, it has no effect
  • The next choice regarding what they’re eating has no effect. Although it may do if you let Larry eat the food.
  • The next choice also has no effect
  • When you ask them to let you leave, or you outnumber them, it has an effect. I chose “You’re all sick in the head” That registers as Lee being direct
  • The next choice, regarding asking someone to do something, may have an effect. Asking Kenny to grab his gun has no effect.
  • Your next choice has no effect, I chose “Everyone will be okay”
  • The next choice after he grabs Clementine has no effect
  • This marks the end of Chapter 4

    Chapter 5
    The Walking Dead Season 1 Chapter 5

    Chapter 5

    After you’ve been knocked out at the dinner table, you find yourself locked in a Meat Locker. Your conversations at the start have no effect, then you’re given free roam to look around and try to escape

  • Your conversation with Clementine has no effect
  • Your conversation with Larry has no effect
  • Your conversation with Lilly has no effect
  • Speak with Kenny has no effect
  • After Larry collapses, your decision has no effect. I chose “Lilly can still save him”
  • Your next choice, on who to side with, has quite a large effect. I chose to attempt to help Larry, this has a negative impact with Kenny but the outcome remains the same.
  • This marks the end of Chapter 5 in Starved for Help

    Chapter 6
    The Walking Dead Season 1 Chapter 6

    Chapter 6

  • Speaking with Clementine has no effect. I chose to mention her Walkie-Talkie
  • Your conversation with Kenny has no effect
  • Speaking with Lilly about her father has no effect
  • After speaking with everyone it’s time to escape. It’s pretty straightforward but I’ve added the guide to the Quests & Missions section to avoid spoilers here. Refer to “Escaping the Meat Locker” for more information

  • Once you’ve removed the Air Conditioning Unit, the conversation with Kenny has no effect.
  • The conversation with Clementine has no effect, I chose “I know you’re brave enough”
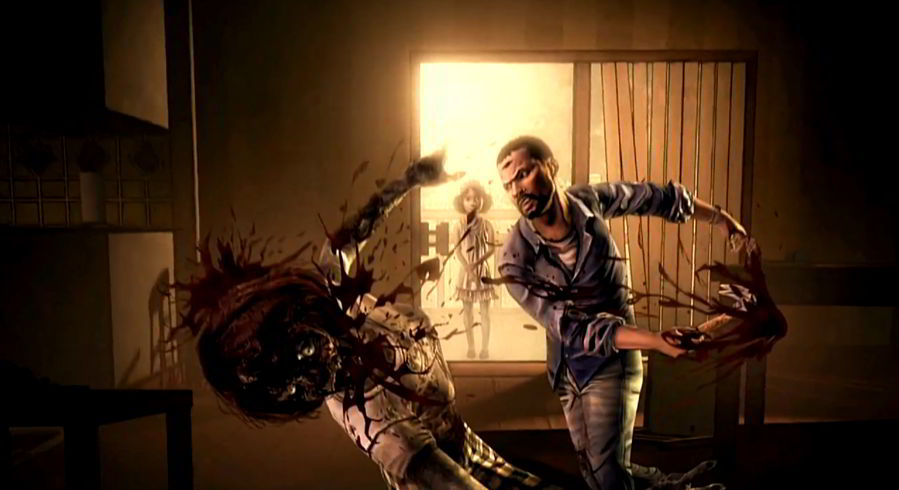
  • After you escape the Meat Locker you enter the slaughter room. There’s a few weapons in here but you’re only able to carry one. I chose to take the Mini Cattle Prod, I figured if it’s enough to put down a Cow, it’s got to hurt a bit. The weapon of choice matters little, who you help earlier does. Pick Kenny, and he will finish Danny off with your weapon of choice, pick Lilly, and she will either shoot him or finish him off in a similar manner.

  • Your conversation with Kenny in the stable has no effect. I chose “Wait for my signal”
  • After checking a few times, you’ll lose where he went. Checking the next time initiates a cut-scene. You have to be VERY QUICK to survive it so be sure to keep your wits about you when you open the Stable Door again. Note: The Cattle Prod was not enough to survive without Lilly’s help

  • After the shooting, your conversation with Danny has no effect. Even if you mention the shooting in the woods after hiding it from Lilly.
  • Your next choice has a big impact. Choosing to kill him or not, Clementine will witness your decision
  • This marks the end of Chapter 6 in Starving for Help

    Chapter 7
    The Walking Dead Season 1 Chapter 7

    Chapter 7

  • After leaving the barn, your conversation with Carly, or whoever is in her place, has no effect.
  • When you approach the house, your choice has an effect. I chose to try to lie to Brenda with “Yeah, it’s me”. She sees through the lie
  • Your first conversation choice with Brenda is crucial, I chose “It doesn’t have to end like this” and Lee survived. Choosing the second option Brenda will actually shoot Lee after he calls her a bitch (Thanks to Heisenberg)
  • Be cautious when approaching Brenda, if you continue to move forward after she points her gun at you and tells you to stop, she may fire.

  • The next choice with Brenda has no effect, I chose the less violent one
  • The rest of the conversation with Brenda has no effect, until she takes one too many steps up the stairs…
  • Your conversation with Andy has no effect
  • After Carley shoots Andy, you tumble down the hill and through the fence. The next cut-scene features more button tapping than a 500m race in International Track and Field. However, you don’t have to “Win” the power struggle. Let Danny push your face into the fence and Lilly will come and save you.

  • After the fighting scene, your conversation with Andy has no effect
  • Your next choice has a big impact, whether or not you kill Danny or leave with the others.
  • This marks the end of Chapter 7 in Starved for Help

    Chapter 8
    The Walking Dead Season 1 Chapter 8

    Chapter 8

  • Your conversation with Carley on the way back to the Motor Inn has no effect
  • Depending on your decision involving Larry in the Meat Locker, your discussion with Kenny can have a negative effect on your relationship
  • When Clementine asks about why you killed those men, it does have an effect, depending on whether she witnessed you killing Danny. I chose “I had to”, it reassure Clementine.
  • Your choice when approaching the car has no effect
  • When choosing to take the food from the car or not, it does have a big impact
  • When asking Clementine to take the Hoodie, it does have an effect. I chose “We’re not like the Bandits” and it convinced her to take the Hoodie
  • This marks the end of The Walking Dead: Starved For Help Walkthrough Conversation Guide. After a short cut-scene, you’ve completed Chapter 2: Starved For Help and now have an agonizing wait for Chapter 3 next month. We’ll be covering that as well so be sure to come back for more Walking Dead guides. If you have any questions or suggestions, please let a comment and I’ll get back to you as soon as possible


    Quests & Missions

    The Walking Dead Starved For Help Quests And Missions

    Quests & Missions

    Finding Clementines Hat
    Approaching the children in the Motel, when you first return from the forest with the survivors, will begin a mission where Clementine asks you to locate her hat. You can’t get this for a while so progress through the game until you reach the Dairy Farm owned by the St. John brothers. Eventually you’ll be asked to leave and search for a camp, once you reach the camp you need to find the Camera located in a lot of boxes near a shopping cart. Then you search the tent, the hat is located in the sleeping bag on the right. This all takes place in Chapter 3.

    Fixing The Swing
    Walk the opposite way from the Swing, past Mark and the generator. You’ll find a large plank of Wood and a Saw to cut it down to size. You’re then tasked with finding a rope. The rope can be found by going to the front door of the house then tuning left. The rope is in a small black box like thing to the far left. When you return, Andy will say you fixed it, earning you praise from Clementine.

    Entering The Barn Door
    During Chapter 4 when you inspect the rear barn door, a cut-scene will begin. To enter the barn you’ll need to grab the Multi-Tool from the toolbox outside on the table, near where you found the Saw and Wood for the Swing. Once you have the Multi-Tool head back inside the barn and tell Andrew that Danny needed him for something. When you try to open the door Andrew will return. Speak to Kenny and he’ll tell you to turn off the Generator, again this isn’t enough and Andrew returns to the barn. You need to open the bottom case of the Generator by inspecting it and using your Multi-Tool. After you’ve open it, turn off the Generator at the power switch and then cut the belt with the Multi-Tool. Then head back to the barn and open the door using your Multi-Tool.

    Finding The Hidden Room
    Not really a Quest par say but I put it here to avoid spoilers. Once you go upstairs in the house, you’ll need to search the small cupboard and connect the power cords. This turns on a light in a hidden room. Head into the main bedroom and you now have the option to move the bookcase.

    Escaping the Meat Locker
    Once you’ve been locked inside in Chapter 6, after being knocked out at dinner, you’re tasked with escaping from the Meat Locker. It’s pretty simple. There’s an Air Conditioning Unit in the upper right of the room, next to the door. Once you’ve inspected the Air Conditioning Unit, you need to find something to detach it from the wall. Speaking to anyone else here has no effect so speak with Lilly and then search Larry’s right pocket for some coins. Then use the coins with the Air Conditioning Unit to remove it from the wall.

    If you know of a way to improve this The Walking Dead: Starved For Help Walkthrough Guide, or you’ve taken a different route and can provide more information, please leave us a comment below, you will be credited for any information you put forward.

    Next Episode: The Walking Dead Long Road Ahead Guide

    Thanks to:
    MatijaB

    Follow us on Facebook for the latest The Walking Dead Guides and Walkthroughs