In order to build new weapons in Dead Space 3 you need to find the weapon parts scattered throughout the game. Without new guns beating the game will become much more difficult. This guide will help you find the weapon parts as you go. So let’s get started!
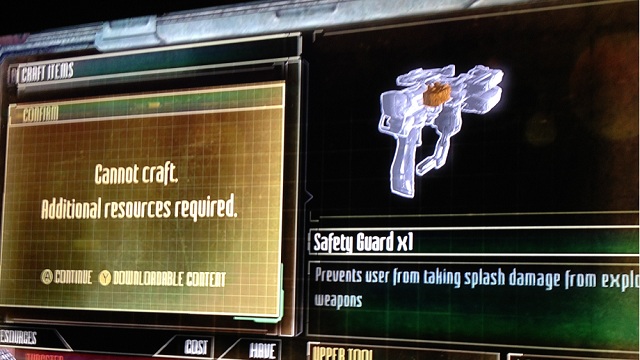
Spare Parts Boxes are rare items that contain a selection of moderate to rare pieces for constructing your weapons. They can be found in a variety of locations, below are the ones we’ve currently found. If you’ve found ones we’ve missed, please leave a comment and we’ll update the guide and credit your name.
Tesla Core:
This weapon part is also in chapter two and happens after you regroup with your guys. Just follow the way point and once you get to the next door it is on the floor below it.
Plasma Core
At the start of chapter 3 look to the right and check behind the cardboard boxes for the part.
Spare Parts Box
Once you gain access to the mining craft that lets you travel between the ships head to the CMS Brusilov. Once you leave the mining vessel and look ahead to your left you’ll notice a large organism to the far left of the docking entrance to the Brusilov. As you approach an enemy will emerge, firing little projectiles at you. They don’t do that much damage so ignore them and just concentrate your fire on the main enemy.
Compact Standard Frame:
Once you arrive on the Greely, go over to the right corner of the main lobby and below the space helmet you can get the part.
Electric Charge:
While on the Greely you will have to clear out an electrical field by removing a panel from a generator. After the stairs become clear go down them then check in the middle of the computer console for the part.
Telemetry Spike:
After you unlock the room on the Greely with the Tungston bar you can get this part right on the table inside.
Military Engine:
After you arrive on the Terra Nova you will have to go from the exterior to the interior. In the room where you regain your oxygen you can find this part.
Hydraulic Engine:
After you take the ladder down at the end of the bloody hallway you will be at a cargo area. When you have the option to go left or right pick right and get the part from the ground.
Conic Dispersal:
When the train arrives choose to travel to the mid station. Go up the stairs and do the engineer puzzle and head inside the door, once inside check the desk for the weapon part.
Rotator Cuff Module:
After you take the train to Mid station you will eventually run into a part where gravity panels stop you from getting any further. Take the ladder near there down and head into the next room to find a tungsten key door. Open that door and inside is the part.
Compressor:
After you hear Elli over the radio and take the elevator down to the broken ship hull keep going forward. The ship hull will break and you will fall back to the surface of the planet. From there turn around and head back towards going under neath it until you reach some red walls. Follow those to the door and open it up to find the weapon part.
Canister Recovery Module:
Once you meet up with Carver you will need to activate a generator to use the elevator. The generator room has the Module inside.
Compact Standard Frame:
There will be a point where you enter a kitchen, and inside a necromoprh runs away from you. Look to the right of where you entered for the part.
Tesla Core:
Once you get to the way station follow the way point beam to the security check point. At the checkpoint you can find the tesla core.
 Pneumatic Torch:
After you get the cut scene with you finding the rest of your team, go into the room on the left that had an audio log in it. You can see the door that requires a tungsten bar to open. Inside that door if the part.
Directed Suspension Field:
This one is actually kind of hard to miss. Once you make it to the room with a suit kiosk and a work bench, look next to the kiosk for the weapon part.
Hammond’s Heavy Frame:
This is a very good piece so you don’t want to miss it! After you enter the excavation site, and clear it out you will need to take a ladder down to progress. At the bottom of that ladder turn around and use telekensis to get it.
Telemetry Spike:
Towards the end of the level you will need to activate another generator. Before you do that though, look at the table near the generator for the part.
Repeater
Once you enter the Barracks you will notice a door that requires a tungsten bar. You need to get in there in order to get the weapon part.
The next pieces for this chapter are in the optional mission called Armory.
Acid Bath:
Once you make it to the Tram area you should see a stash box, open it up and grab the part. This could be a random part I’m not entirely sure.
Stasis Support:
In the same box as the Acid bath part.
Compact Standard Frame/Wells Compact Frame:
After you enter the, cave you will run into a tent with two tunnels to the left and right of you. Heading down the left tunnel will net you the Standard frame, and the right tunnel gets you the Compact Frame.
Ammo Support:
Once you start traveling up the cliff side around the mountain, keep an eye out for a cave that goes into said mountain. It will be near one of the red flags and inside is the ammo support mod among other things to loot.
Ripper Core:
After you make it to what looks like a broken lift on the side of the cliff, the objective marker will want you to go left instead of right. If you go right you will run into a bench, and if you go past that you will get the ripper core.
This is being done as we go so check back soon for updates!
Did you find this Game Guide helpful? Follow us on Facebook for all our latest Game Guides, Game Reviews, Games News and our Suck My Controller Game Podcasts. You can also follow us on Twitter, Raptr, Youtube and Freeglance.