The Riddler makes his return in Batman Arkham Knight. You will have to solve all his riddles to defeat him yet again. This guide will help you will figure out his riddles and challenges. Check out this Batman Arkham Knight Riddler’s Revenge Guide!
You will get this mission pretty early on. I actually didn’t start until I got to Miagani Island. When you are on Miagani Island you will actually meet up with the Riddler and Catwoman. You need to do a bunch of challenges and riddles in order to save Catwoman from him.
First off head to the Orphanage and fight with her against the Robots. After you win you will get a challenge on Bleake Island, head over there with the Batmobile. This one is a 3 lap race, if you fail you will have to start over. Use circle to move the red or green walls, or floors, so you can go around the course. On the second lap you will get infinite turbo so use that. The biggest issue with the race is how the Batmobile handles. It might take you a couple of tries just because of that. After you finish it, walk onto the pressure pad and you will switch to Catwoman.
Catwoman will have to select the right key or else she blows up. The best way to figure it out is to find the back row and go from there. Basically where the row is completely filled up, that is the back. Follow that down until you get the one with the key. Once you do that key you will get a second challenge in China Town.
The next challenge us more of a puzzle than a race. Head inside and go on the ramp on the left side. I honestly used combat mode in here for more precise controlling. Keep going up until you hit a teeter totter ramp. Go to the bottom of it and use it to get up to the red platform. Put the Batmobile on the red platform and jump down to the green ? with Batman. This will make the middle platform go out so you can travel across with the Batmobile remotely.
Go from the red platform, to the middle platform, then use the platform switch button to go onto the green platform and get to the other side. Batman does NOT need to be in the Batmobile at this point. Go to the next teeter totter ramp and use the platform switch button again to make it into a ramp. Stay at the bottom and keep switching the platforms until it goes all the way up, you need to jump the gap here. Go all the way to the bottom, off the ramp a bit so you can get some more speed, and jump the game with your booster on. Don’t forget to have the green platform out when you do this!
Follow the path around and then use the Rev Engine Winch point to unlock the next key part. Head over to the pressure platform then switch to Catwoman. This one is a bit more trick because it looks the same on either side. The best way to do this is to make sure the three extra key slots are on Catwoman’s LEFT when picking a key.
This will unlock the first door in the Orphanage. when you get back to the Orphanage you will get the riddle, “What kind of question can only be asked upon reflection?”. Use your batarang on the question marks on the door to turn the floor pieces around. You want to make a Question mark without the dot. Once you do that, line the green light up on the mirror with the question mark and then scan it. Once you do that go into the room you unlocked with Catwoman.
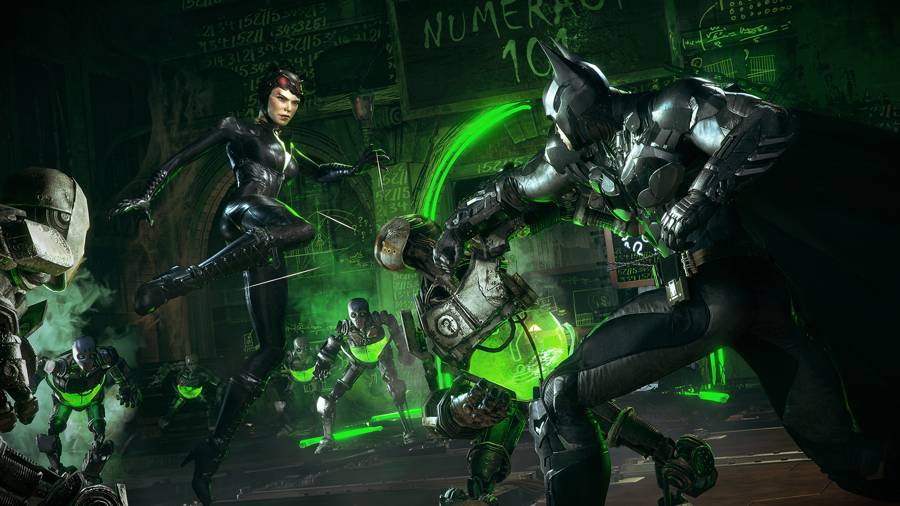
Inside here you will need to step on a switch with Batman and Catwoman. You need to hit the Question Marks in the right order, 31452 for Batman and 13524 for Catwoman. Once you open the gate you will have to deal with some robots. Grab the key with Catwoman and you will move on to the next riddle.
Head to the next way point and enter with the Batmobile. This is another race. I had my turbo upgraded fully at this point so I didn’t have any trouble with the race. Just remember that the ceiling will never fall on the same spot twice, when it goes up you can travel down that route. If you get smashed a couple times don’t worry about it. Go to the switch and then switch to Catwoman. The line of keys should be going towards the exit of the Orphanage. Grab the second on from the right in the back row.
Head to the next way point and enter. You need to eject of out the Batmobile down here and hit the pressure pad while gliding. Go all the way back to the entrance and use the boost to get max speed for your jump, be sure to jump before you hit the edge. It took me about 5 tries to get used to the gliding. You will have to do the same thing to in order to get to the next two pads as well. This part is all about glide control. This one was actually pretty hard, just try not to over think it. Go to the pad and get your next key. As Catwoman, make it so the keys make a backwards E or 3 and grab the second bottom one from the right.
Head back to the Orphanage and go into the next door. You need to go on the pressure pads up above. Put Batman on the first pad and Catwoman on the second pad and hit the question mark on the wall to start it. Once it goes into the second tube, put both Batman and Catwoman on the third pad. Once it goes past the third tube marker, keep Catwoman on the third pad and put Batman on the second pad. When the charge goes through the third point a second time take Catwoman to the first pad. Wait for it to go through the second line and then take Batman off the second pad and place him on the first as well.
Place someone on the pad and then go for the key. Robots will spawn and you need to kill them. Blue robots die to Batman and red robots die to Catwoman, don’t worry you can switch and the floor doesn’t electrocute you. Once you deal with them, grab the key and head on out.
His next challenge in on Founder’s Island. This mission has you trying to lower the Batmobile through a bunch of obstacles. Take Batman out and use the Batmobile winch point to lower yourself towards the water. You need to get the Batmobile to the reserved spot by spinning the wheels on the Batmobile. When you get there you can access the room on the other side with Batman. When you are in there jump on the switch with Batman.
Next you will have to bring the Batmobile over the to second winch and drop down again. Drop down two squares and spin to the left to get to the next reserved spot. When in that spot, use the cannon to destroy the wall of the second room. Head to the next room and the next switch with Batman, watch out for the electric floor.
Now before you move to the next winch point you will have to move the floor again. Bring the Reserved spot all the way to the other side, this makes the path for you clear on the next winch point. Drop down at Winch point 3 with the Batmobile and move it to the right. Glide down to the next room and hit the switch. Use the Batmobile to take out the turrets blocking the exit on your way back out. The switch on the bottom will gain you access to the Catwoman key.
Look at it with Catwoman as if it was a upside down capital A, the key is the fourth one in the middle line. This will gain you access to the next door in the Orphanage.
In the next room hit the switch with Batman and use Catwoman to scale the ceiling. Drop her down and hit the next switch, this will activate the electric panels. Use the ? mark on the other side to figure out which panels aren’t electric. The one on Catwoman’s side are for the Batman side and vice versa. Halfway through the ? mark will start to spin, just wait for it to make its way around to figure out the path.
After that you will have to face some Robots, red for Catwoman, blue for Batman. Collect the key and head out.
Also the Riddle “It doesn’t take much to tame a cat” is Catwoman’s collar, scan it.
The last race is super annoying. It isn’t so much the track but just how bad the Batmobile handles at top speeds. You can expect to try this a couple times before getting it. Once you finally beat the track you will gain access to the next Catwoman key. With Catwoman look at the puzzle as if it were a Z with an extra dot at the top of it. The key is where the top part of the zig starts in the Z. This unlocks a final Riddle Room.
Go into the last door and then go through the door on the other side. This last puzzle is a bit confusing. Have Catwoman jump down into the ? mark area, she can use the ceiling and Batman can’t. You will need to use the remote electrical charge gadget at this part.
Batman should be looking at the glowing green key one the wall for this part. There are five generators on the other side you can shoot. Starting at the left it will go 1,2,3,4,5 for this part of the guide. If I say shoot 5, you shot the right most generator under the green key. 6-10 are under the green writing on the wall, the basically go in a line. Generators 1-5 under the key, 6-10 under the green writing. You don’t need to leave you position as Batman to get a clear shot on all generators.
First off we are going to shoot generator 5 to move the blocks towards us. Once that happens switch to Catwoman. Have her go on the cube where generator 1 and 8 cross paths(block 1 in the third row). With her there have Batman shoot generator 2 to move the lone block towards generator 1. Next have Batman shoot generator 7(second one under the green writing wall). For some reason I had to take Catwoman completely off the blocks for this section to actually move. Next put Catwoman on the block where generator 3 and 7 cross (3 block in row 2, right next to the laser). Have Batman shoot generator 7 and this will move the block out of the way of the laser.
After you do that, Nigma will send some spikes towards Catwoman. Just crouch with her in the middle row of blocks and they will go right over here. Now you will have two lasers to figure out. Batman should still be in the same position as before.
Shoot generator 7(second under the green writing wall) to make it a double gap near the first laser. Now place Catwoman where generator 1 and 7 cross(first block of row 2). Shoot generator 7 again to put a gap near the second laser. Now place Catwoman where generator 2 and 9 cross(second block of row 4). Shoot generator 2 and you will have both lasers going down.
Now Catwoman will have to actually move around because the blade switch position. Since they do switch around, my puzzle will be different from yours. Just remember to stay crouched and to move every time it hits the other wall. I actually tried to move towards the middle when it passed me so I could get to either side quickly. You do NOT have to stay on the blocks for this part.
First you will want to shoot generator 2(second under the green key wall) to make a gap between the lasers. After that hit generator 10 (last under the green writing wall) and you will have one laser set. Next target generator 5(last under the green key wall) so you have a second gap near the second laser. Place Catwoman on the block between the lasers and shoot generator 10 again. Once you do that you will have to dodge again. At this point just use the ceiling to get out with Catwoman. Now you can try to leave.
When you do that Riddler will bust the door down in his new robot suit. He will spawn a robot army that you need to deal with, blue is Batman and red is Catwoman. He can also switch their colors when he picks them up. After you beat the Robot army he will disappear and you will need to figure out the rest of his riddles to fight him.
 Posted June 23, 2015 by Johnny Hurricane
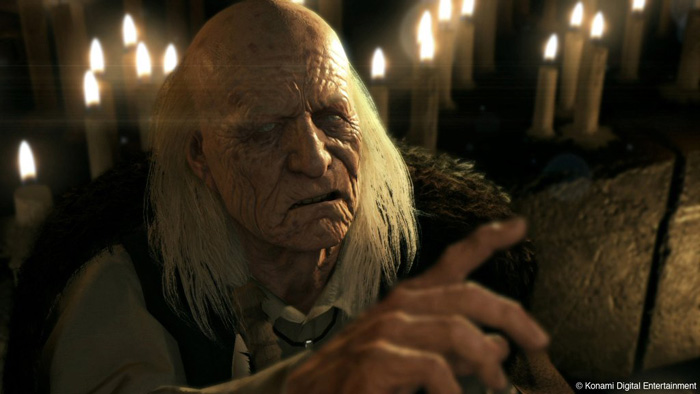
During your hunt for Scarecrow you will eventually come up to a puzzle you have to pass. The question is simple enough, the right or the left Scarecrow? Check out this guide to find out which you
 Posted June 23, 2015 by Johnny Hurricane
This is another side quest you get once you arrive on Miagani Island in Batman Arkham Knight. There is an arsonist on the loose and you need to find out who it is and stop them. This Batman Arkham
 Posted June 24, 2015 by Johnny Hurricane
Once you make it to Miagani Island you will get new side quests to do. Heir to the Cowl is one of the side quests you will want to do wile you are here. This guide will help you finish up Heir to the
 Posted June 24, 2015 by Johnny Hurricane
Sooner or later you will have to make weapon choices for you Batmobile in Batman Arkham Knight. There are normally two choices and you will have to pick one of them. This Batman Arkham Knight
 Posted June 23, 2015 by Johnny Hurricane
Early on in Batman Arkham knight you will get a side quest called The Perfect Crime. You will have to find several clues to find a crime that was committed in Gotham