Drop down into the graveyard and go back up the stairs and through the gate at the top. Continue up the next flight of stairs and through the narrow opening to the right. Climb up the ladder in the far right corner of the next room. There's a note on the table if you wish to read it. Otherwise, open the chest in the far left corner to find a Blood Gem Workshop Tool (adds Blood Gem weapon fortification to the Hunter's Dream workshop). Head up the stairs next to the chest and open the door at the end to trigger a cut-scene and enter the Cathedral Ward.
Activate the Cathedral Ward lamp ahead, then speak to the woman behind you on the floor twice to get through all of her dialogue. Go back to Hunter's Dream and head to the Central Yharnam lamp. Remember, all of the previous enemies have now respawned.
Make your way through the gate to the left and down the next two flights of stairs. Continue down the stairs to the left to the area with two Brick Brutes. Go up the stairs in the far right corner, then left to go down another set of stairs. Kill the Hounds here and go down the stairs to the left. Cross the bridge and knock on the door to the left by the red lantern. Tell the woman inside about the Oedon Chapel. Go back to the chapel and speak to the woman on the floor again to receive Triumph (gesture).
Head beyond the lamp down the stairs into the next room. Go through the doorway to the left (next to the old woman you just saved). There are Gravekeepers in the graveyard below. They have more health than most of the normal enemies you've been fighting up until now, and they don't stun from your normal attacks, so be ready to dodge if they reach back to swing at you.
Search to the right to find a corpse behind a tree that holds a Top Hat (head attire), Hunter Garb (chest attire), Hunter Gloves (arm attire) and Hunter Trousers (leg attire). If you haven't picked up new gear at all, change into this. However, the gear that you can buy at Hunter's Dream is generally better than this set. Grab the gear as quickly as you can or else a portal opens that you don't want any part of.
Across the graveyard to the left is a corpse. Search the body to find six Blood Vials, then head down the path to the left. If you didn't take out two Gravekeepers in the graveyard, the second one is just ahead. You should be able to sneak up on him for a Charge Attack into a critical strike.
Continue down the stairs to the left to find several Henchmen and a Hound below. Take them out, then look to the far right side of the area to find two dead bodies. Search the corpses to obtain a Coldblood Dew (2) and four Molotov Cocktails.
Head up the stairs on the far left side but beware of the two Hounds and rifle-holding Henchman at the top. The Hounds will most likely attack before you get anywhere near the top, so be ready. When you reach the top, open the door to the right, then head through the doorway to the right to find a lever. Activate the lever to move an object in the area below.
Search the body to the left of the lever to obtain another Madman's Knowledge, then head back into the previous room and through the doorway to the right. Go down the stairs to the right and speak to Alfred kneeling at the altar ahead. If you cooperate with him you'll receive three Fire Papers (apply fire to weapons) and Pray (gesture).
Go back up the stairs and into the room at the top, then proceed straight ahead through the doorway across the room. Head back down the stairs to the left and through the doorway at the top of the stairs in the middle of the area ahead. This leads to the room below the lever you just pulled. There's a staircase that the object you just moved was covering, but before you head down, kill the Henchman near the back of the room and collect the Madman's Knowledge on the nearby body.
Head down the newly revealed stairs and collect the Tempering Blood Gemstone (1) to the left. Go through the doorway and down the stairs to the right of the item to find a Nether Beast in the room below. Take down the beast, then head down the next set of stairs to find a ladder at the bottom. Climb down the ladder, then head up the stairs at the bottom to find four Antidotes (cures poison) at the top.
Go back down the stairs, then continue down the next flight and into the room below. Activate the Old Yharnam lamp ahead and then move into the room to the right. Break the pots near the entrance to the room to find three Pungent Blood Cocktails on the right. Go back into the room with the lamp and head in the opposite direction to reach a large door.
Inspect the note on the door to find that you're not welcome, then go ahead and open the door. Not like you've been welcomed anywhere else up to this point. Old Yharnam lies beyond the door.
Head down the stairs, ignore the audible warning to leave and continue to the left. Avoid the fire and watch out for the Walking Beast that crosses the bridge ahead as you make your way to the far left corner. Here you'll find a body that holds six Blood Vials.
The standard issue beasts in this area are on par with the Henchmen you've been fighting up until now. The main difference is that the beasts are a bit more agile and will run toward you and leap away from your attacks. If you have the stamina, continue to pursue them in an effort to score a kill. If you lack stamina, back away to replenish it, then move in again.
Make your way across the bridge and take out the three Walking Beasts on the other side (or two if one crossed the bridge earlier). To the far left is a Hooded Beast that generally moves a bit slower than the Walking Beasts, but is otherwise the same. Behind the Hooded Beast you'll find a body in the corner that holds a Coldblood Dew (2).
Move over to the opposite side of the area, but do not head down the stairs yet. Look to the left of the stairs to see another Walking Beast sitting on the wall. Take it out, then head to the left of the stairs and around the corner to find another dead body at the end of the path. Search the body to obtain two more Blood Stone Shards. Watch out for more Walking Beasts spotting you from the area below that run up to give you a proper greeting.
Head back to the stairs and this time continue down to the lower area to hear the voice of warning again. There are several Walking and Hooded Beasts here, so be careful and try not to fight too many at once. Continue moving forward until you reach the bulky statue in the middle. At this point you'll hear the voice saying you're a skilled hunter. Dodge immediately behind the statue to avoid a volley of gunfire that rains down upon you.
When the gunfire pauses, move down the stairs to the right and onto the balcony at the bottom. There's an opening that leads into the building on your left, with a Hooded Demon inside. This is basically the larger version of the Hooded Beast, but they fight very similar. You must move quickly as the gunfire will resume, but you can take cover on the balcony and once you're inside the building.
Once inside, look to the left to find a body that holds three Antidotes. Move through the doorway to the left and onto the balcony outside to find another body that holds a Blood Stone Shard. Head back inside and slowly move through the doorway in the left corner. Two Walking Beasts are in the area ahead, but the gunfire can reach you here. If that weren't enough, many of the pots on the ground are filled with oil and explode if the gunfire hits them.
Use a Pebble to draw the closest Walking Beast into the room you're currently in. Throw a Molotov at the first set of oil pots to get them out of the way and hopefully attract the second Walking Beast. If that didn't get its attention, have a Molotov ready and move closer, throw it at the remaining pots and move back into the cover of the room as quickly as possible.
Once both Walking Beasts are down, make a break for the corner of the balcony where a dead body resides. Search the body to find three Antidotes, then run through the opening to the left, across the makeshift wooden bridge and into the alcove on the far left side where a gaggle of Crazed Crows await. Quickly take down the Crows, then search the dead body here to find two Blood Stone Shards.
Turn around and quickly move down the path into the building ahead. You're safe from the gunfire for the time being, but two Walking Beasts and a Hooded Demon will attack you here. Take them out, then search the dead body in the corner to find another Antidote. Move into the small room to the right to find another body that contains a Bloodtinge Gemstone (1) weapon upgrade.
Head back into the previous room and through the door by the other dead body. Be careful, as you'll be within range of the gun when you leave the room. Move straight ahead and stop when you're adjacent to the trees. They will provide cover while you fight off the three Walking Beasts and one Hooded Beast that attack. If you get overwhelmed, move back into the previous room and fight there.
Move straight ahead again to find another Hooded Beast and a Walking Beast sitting on the wall. Take them out, then look to the right to see a large statue with a dead body (item) under it. Right next to the statue is a Hooded Beast with two more Walking Beasts close by. Make a break for the statue and take cover behind it, fighting the beasts from there.
With the enemies down, quickly search the body to find a Coldblood Dew (3). From behind the statue while facing the direction of the gunfire, run straight ahead and down the stairs to the right to engage the Hunter below.
The Hunter will traverse the series of steps here in an effort to draw you out into the open. Stay in the lower area between the two sets of stairs to avoid gunfire. Even if the other Hunter heals himself, do not move into the upper area or you will take gunfire. It may take some patience, but the Hunter will continue to engage you in the lower area allowing you to finish him off. Search his body to find six Bone Marrow Ash (strengths bullets).
There's nothing of significance if you go up the stairs where the Hunter was moving to and from. Instead, move down the stairs here to find a ladder to the left. Now, if you climb up the series of ladders here you'll reach the Hunter who has been bombarding you with gunfire through the majority of this area. In general, it's not recommended you fight him yet.
The Hunter is not a boss, but he's a formidable enemy, so do not take him lightly. He has all of the weapons you do, including a Molotov Cocktail that he won't hesitate to throw, and he'll heal himself regularly. He also uses a powerful gun that will stun you and has a wide attack range. If you come back to the area through the back way once you've defeated the Blood-starved Beast boss and it's night (dark), not only will you be able to start the fight with a Charge Attack and critical strike, but you'll be able to level up again before the battle.
Hold off on fighting him right now unless you're really looking for a challenge, but once you beat him you'll obtain a Powder Keg Hunter Badge (key item). Instead, head up the small wooden stairs directly ahead and throw a Pebble at the Hooded Beast on the beam above. Ignore the doorway to the right and clear out the Hooded Beast and Hooded Demon on the far end of the room.
Collect the three Antidotes on the body in the far right corner, then head down the stairs to the left. Go into the first doorway on the right and quickly take down the Hooded Beast on the balcony beyond. Stay on the balcony facing the doorway, because there's a very good chance Walking Beasts and Hooded Demons are going to flood in. If not, they'll wait for you down the next flight of stairs.
Clear the enemies, then search the body on the far side of the balcony to find two Blood Stone Shards. Head back out the doorway and down the stairs to the right. If the balcony wasn't flooded with enemies, the bottom floor will be. Even if the enemies did flood the balcony, there will still be several Hooded Beasts on the bottom level.
Take out the ones you can see clearly, then look in the alcove to the right to find a Hooded Demon. Kill it and search the body inside the alcove to obtain a Madman's Knowledge. With the enemies cleared, head back up the stairs to that doorway you ignored before. Move out onto the wooden catwalk and to the far left side. Drop down to the catwalk below and then drop down again to the next catwalk. Turn around to see a dead body that holds a Coldblood Dew (2).
Run to the far side of the catwalk and drop down to the bottom floor again. Move to the altar to the left and pick up the two Ritual Blood (1) Holy Chalice items.
Head into the corridor behind the altar and head down the stairs to the left. There are a number of Crazed Crows along the balcony here. Take them out, then pick up the two Blood Stone Shards at the end. Go back up the stairs and head in the opposite direction. At the end of the walkway is a corpse that holds six Blood Vials.
Go into the room to the right of the corpse and climb up the ladder. Open the gate at the top to unlock a shortcut that leads back to the area where the Hunter with the gun resides (unless you killed him already). Head back down the ladder and then into the hallway to the left.
In the room ahead are three Walking Beasts that can be difficult to see. If you slowly move down the far side of the room, you'll hear when the beasts are approaching and you can backpedal to the entrance and fight them there. In the far right corner of the room is an Imp. Imps don't attack you, but they don't stick around very long either. You must be quick if you wish to kill one. However, if you do manage to kill an Imp in this area it drops three Blood Stone Shards.
Head down the stairs on the far left side of the room. There are two Nether Beasts in this area. Take them out, then look in the corner to the left just as you come down the stairs to find a corpse that contains two Pungent Blood Cocktails.
Continue down the path in the far right corner to find another body at the end that holds two Blood Stone Shards. The door here doesn't open from this side, so head back to the area with the Nether Beasts and go down the path to the right.
Cross the bridge and head to the left. At the end of the path there's another Nether Beast waiting. It may cling to the building above, or it may be on the same path as you. If you don't see it, head around the corner and pick up the six Beast Blood Pellets (grants beasthood) on the dead body, then you'll find the Nether Beast waiting for you when you head back around.
Head back to the bridge and continue down the path to the left. As you near the next building on the right, a Nether Beast bursts out of the door and attacks. Kill the beast, then head inside the broken doorway if you wish to get some out of the way items. If you don't care about the items, skip the next three paragraphs.
Pick up the Antidote on the dead body and continue into the building. A Walking Beast waits on the stairs to the left and will attack as soon as you are visible. Take out the Walking Beast, then head up the stairs. When you reach the doorway on the left, head inside the room to find another Walking Beast waiting just inside to the right. Kill it, then search the body in the corner to find two Blood Stone Shards.
Continue up the stairs, passing the next door to the left for now. At the top of the stairs you'll find two Fire Papers on a corpse. Pick them up, then head down the stairs and into the door on the right you just passed. Head left and around the corner and up the old wooden stairs. Climb the ladder at the end to find a corpse that holds a Coldblood Dew (2). Drop down to the right to find yourself back at the start of the area with an Imp on the rooftop. Quickly kill the Imp, then drop down, move to the far side and look down and to the right to see a corpse on the walkway below. Drop down to the walkway and search the body to find a Blood Stone Shard.
Drop down onto the roof below, then head left and drop down again and then again. Circle around to the left to find two Hooded Beasts. On the far left side of the area there's another body that holds a Hunter's Torch (better version of your torch). On the side of the balcony near where you originally dropped down, the railing is broken. Drop down here, then drop again to find yourself back at the exit where you last left the stairwell. Go back inside and head down the stairs and out of the building.
Head down the path to the right. If you look to your immediate left you'll see a narrow walkway shrouded in smoke. A Hooded Demon waits just beyond the smoke, but before you engage, look around the corner to the left. A Nether Beast patrols the walkway and may interrupt your fight with the Hooded Demon.
Take down the Hooded Demon and Nether Beast, then head around the corner to find another corpse to the right of the ramp ahead. Search the body to obtain 10 Quicksilver Bullets, then head up the ramp. Look down the stairs to the left to see an Imp trying to get away. Kill it and then go back to the top and search the body opposite the stairs to find two Bold Hunter's Marks, then head back down the stairs.
Immediately move to the far right side of the area and move along the fence here. As you move toward the item on the corpse ahead, a Hooded Beast stands up from the tall grass. Kill it and pick up the Coldblood Dew (3) on the body. Another Hooded Beast hides beyond the next tree on your left.
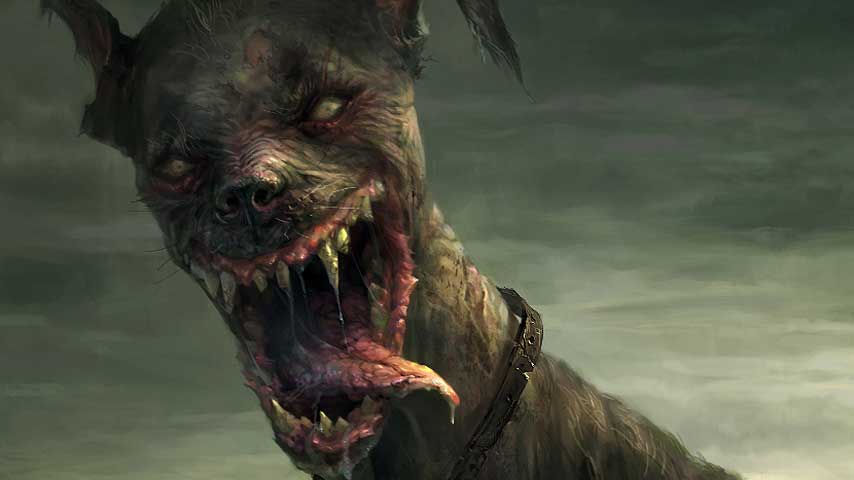
Circle back around to the stairs you just came down, then move over to the far left side around the fire. Behind the first large boulder is another corpse that holds a Coldblood Dew (3). The last Hooded Beast hides next to the dead tree just ahead and to the left. With the enemies down and the items collected, head up the stairs at the end to engage the Blood-starved Beast.
The Blood-starved Beast seems like a fairly simple battle at first, but before you go into the fight, make sure you have a full stock of Antidotes. Unfortunately, you can only have 10 Antidotes on you at a time, so make sure you're fully stocked with Blood Vials as well. It's also a good idea to switch your weapon to the long-form because the Blood-starved Beast is very agile, leaps long distances and moves around quite a bit. With your weapon in long-form you'll be able to hit it easier.
For the first part of the battle, run up to the Blood-starved Beast and wait for it to initiate an attack. As soon as you see one of its arms move, get ready to dodge behind it or to the left or right. In most cases you'll only need to dodge once, especially if you can get behind it. The Blood-starved Beast moves so far with each attack that you'll be well out of its attack range with a single dodge more often than not. This also causes a slight problem because you may not be close enough to attack.
The Blood-starved Beast attacks with a few different patterns. If you stand directly in front of it, the beast may grab you and bite your character. This poisons your character and inflicts a considerable amount of damage. You want to avoid this attack at all costs.
From a moderate distance the Blood-starved Beast will leap toward you with a bevy of rapid slashing attacks. You may want to dodge a couple of times to make sure you're clear of all of these attacks. The Blood-starved Beast also uses one or two swiping attacks that are fairly easy to dodge, and leaves you close enough to follow with an attack.
When the Blood-starved Beast uses it's far-reaching leap attack, if you can time your dodge well enough you can land a Charge Attack to its back and then follow with a critical strike. The timing on this is moderately strict, but the real challenge is lining up so you're still behind the Blood-starved Beast when your Charge Attack executes. It moves around so much this can be difficult to pull off. With that said, you shouldn't be too worried about a critical strike because a three-hit combo will inflict almost as much damage.
To sum it up, during the first half of the battle stay close to the Blood-starved Beast and dodge its attacks while you counter with one or two hits from your long-form weapon, or a well-placed and well-timed Charge Attack into a critical strike.
When the Blood-starved Beast is down to below 50 percent health, it pauses for a moment, then stands on its hind legs. When you see this, move away as quickly as you can. The Blood-starved Beast follows this position with a burst of poison that emits from its body. If you're too close it will knock you away and potentially poison you as well. After this point the fight becomes considerably more difficult.
You may have noticed that fluid is steadily squirting out of the Blood-starved Beast. This is poison and it's now leaking out even faster than before. Anytime you're close to the Blood-starved Beast, your character will be slowly poisoned. This is indicated by a bar above your character's head. The larger the bar, the closer you are to being fully poisoned and the faster your life depletes. When the bar is full you're completely poisoned and your life will drain rapidly.
Whenever you see the bar appear, if you have a decent amount of health, try not to use an Antidote. You only have 10, and you're going to need one if that bar gets full. Unfortunately you can't inflict much damage to the Blood-starved Beast without getting close, which means you're going to eat that poison quite a bit. Use Blood Vials as much as you can to keep your health up because you have twice as many of them as you do Antidotes. If the poison gauge gets more than 50 percent full, use an Antidote. You'll also find three Antidotes behind the statue on the far side of the room. If you run out, use these as a last resort.
Anytime you see the bar during the second half of this battle, it's a good idea to back away from the Blood-starved Beast and either heal, use an Antidote or just slowly let the bar go down. Unfortunately, the Blood-starved Beast is far more aggressive at this point, which means it can be difficult to stay away from it. Always keep a lock-on so you know where the beast is at, and keep your distance with multiple dodges in rapid succession if you need to.
You want to inflict damage to finish it off, but at this point it's better to stay alive than risk getting poisoned and dying. Move in, attack once or twice, then quickly move away to deal with the poison if need be. While it's still possible to land a Charge Attack into a critical strike, it's far more difficult due to how much the Blood-starved Beast moves around. You will have to dodge quite a bit here and use your Antidotes and Blood Vials wisely to ensure you stay alive long enough to finish off the Blood-starved Beast.
Once you've defeated the beast, light the Church of the Good Chalice lamp at the end of the room, then circle around the back side of the statue to pick up the three Antidotes if you haven't already.
If you're ready for more punishment, head back to the best Bloodborne walkthrough and boss guide in the Internet. If you'd like to jump right in and continue the journey, we can show you how to find the Healing Church Workshop and defeat Vicar Amelia