There is only one landing zone that you can start from, so have your helicopter drop you off and get ready for a long trip down a winding road. There are quite a lot of enemy positions along the way, but for the most part you can bypass them without compromising your primary objective.
Ride forward until you spot an outpost just ahead of where the helicopter dropped you off. You can take this if you want, but you can also bypass it by using the off-road path that runs to the right of the outpost itself. This path will actually connect you back to the main road, so you might as well save some time and take the shortcut. Of course, if you need some materials for Mother Base, feel free to assault and loot this location as you see fit.
The next major obstacle in your path will be the Mountain Relay Base, but you should be able to ride forward for quite some time before that appears. When it does, dismount your horse and spend some time scoping it out using your binoculars. The base itself is spread out across quite a bit of land, and you’ll know you’re in the right place if there is some scaffolding in the ravine below.
How you proceed here is up to you, but no matter what you choose the difficulty level is quite low. You can sneak past this location without harming any of the enemy soldiers, or you can take them all out as you move along, looting the place for the materials. We opted to sneak past, doing so by sticking to the left side of the road at all times. We silently took out the occasional soldier that was in our way, but for the most part we left things as they were.
When you are past the Mountain Relay Base, there will be two additional outposts before you can sneak into the base that holds your primary objective. The first is occupied by three soldiers, and again you can just sneak past if it suits you. You can also just walk up and shoot these fools, as they are secluded enough that nobody will be able to hear the gunfire. Just be sure not to allow any of them to get on the radio.
As you progress forward you will reach yet another outpost, this one located on top of a hill with the road running up to it. You’ll find this outpost just after Ocelot tells you about the enemy gunship in the area, which is a good marker to know that you’re on the same page as us.
Don’t follow the road up to the outpost, instead choosing to take the path that shoots out to the left at the base of the hill. This should see you crawling northwest, and to the north (consult your iDROID) you will see two rock structures. The one on the right is quite a bit larger than the one on the left. You want to move between those structures, taking you back to the road.
While you’re doing this you will have to mind the helicopter and searchlight overhead. The best way to move is by traveling when the chopper is away, and going prone and entering stealth mode when it gets close to your position. Of course, taking cover in bushes is beneficial, but for the most part evading the chopper is a piece of cake.
After you pass through the two rock structures and hit the road, turn right and follow it until you see a path off to the left. If you consult your iDROID again, this path will show that it leads to Da Smasei Laman. Follow it until you arrive at a cliff that overlooks the outside of the base. From here you will want to take a few moments to scout the area, marking any and all enemies that you can. Pay special attention to the area to your left, as this is where the prisoner is located that will lead you to the Honey Bee weapon.
Before you try moving through the area, use your suppressed weapon to kill the soldier in the guard tower. He shouldn’t be spotted by anyone else, and this makes sneaking around the area much easier. When you’re ready, drop down the left side of the cliff, and then move left along the wall. You’ll reach an area with some materials, as well as some Rough Diamonds. Snatch them up, and then start sneaking toward the prisoner and the three guards that are with him.
As you get close the prisoner will begin leading the soldiers into the fort. You need to stick with them if you want to find the weapon, so start sneaking forward while keeping to their left. They’ll pass a lone guard, and if you want to get rid of him your tranquilizer dart is the best bet. Just be aware that if you take too long to complete the mission, that soldier will wake up again.
Continue to follow the soldiers all the way to the Honey Bee weapon hidden deep within the fort. You’ll have to avoid some additional patrols, but don’t be afraid to let the prisoner and soldiers walk a little ways ahead. Use your tranquilizer dart as often as possible, and be sure that you don’t let anyone sound an alarm for call for help.
You’ll know you’re in the right place when you reach an open area with a body of water in front of you. There will be a large stone on the left side, just in case you needed another landmark to help guide you. While you’re looking at this area, head to the left and you’ll you see a series of rooms. The last room will have a short stone corridor that leads to a back room, and next to a box and some bottles will be the Honey Bee weapon. Snag it, and then do as you’re told and call in your helicopter to get a ride home.
It’s about this time that the Skulls show up, and after a short cut scene you’ll have to use the Honey Bee weapons to take out your adversaries. You should be able to equip it from your primary weapons list, and it works the same as every other gun. Aim it, allow it to lock on, and then obliterate the Skulls until the coast is clear. From here you can grab the nearby jeep and head to the extraction zone to complete the mission.
Continue to Metal Gear Solid 5: Red Brass, or return to the Metal Gear Solid 5 Walkthrough and Guide.


 Call Of Duty Modern Warfare 3 Goalpost Intel Guide
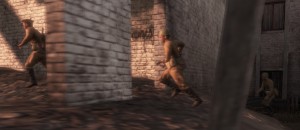 The Red Orchestra 2: Heroes of Stalingrad Guide to the Classes. The Officers and Tanks.
 Saints Row 3 Guardian Angel Walkthrough
 Watch Dogs: Breakable Things – Racine’s office code
 The Settlers Game Evolution