
Venus! Keep an eye out for the Spirit Blooms and chest scattered across its colourful landscape.
Follow the radar to a city choked with the jungle reclaiming it. In the streets you’ll meet Fallen – they’re level 10 now, and worthy foes.
After deploying your Ghost at the outpost, take a good look at the cars right in front of it; one of them has a Dead Ghost in the back seat.
It’s a pale coloured hatchback with red doors. The driver’s door and the kitty-corner rear passenger door are missing. The Ghost is visible from the platform the outpost stands on.
Poke around the pillars in this tunnel; it’s not hard to find once you know it’s there.
You can reach the third level of bookshelves by climbing the stairs to the second, jumping onto the statue’s head, then double jumping again. There may be other routes up, and those with fully upgraded mobility abilities will have an easier time.
Admire the view as you proceed to your goal, killing a few bands of Fallen. You’ll have to deploy your Ghost at some Vex sensors before you can move on, which ironically involves backtracking a little.
You’ll soon be passing through an underground area, which traces a U shape. Just before you reach the first right hand turn, stop and look back the way you came; you should spot a Gold Chest.
If you can handle breaking the dramatic tension, avoid deploying your Ghost at the Objective and chase down a Dead Ghost instead; it’s on the highest balcony, on the left side of the room as you face inwards from the entrance, and tucked away in a bookshelf.
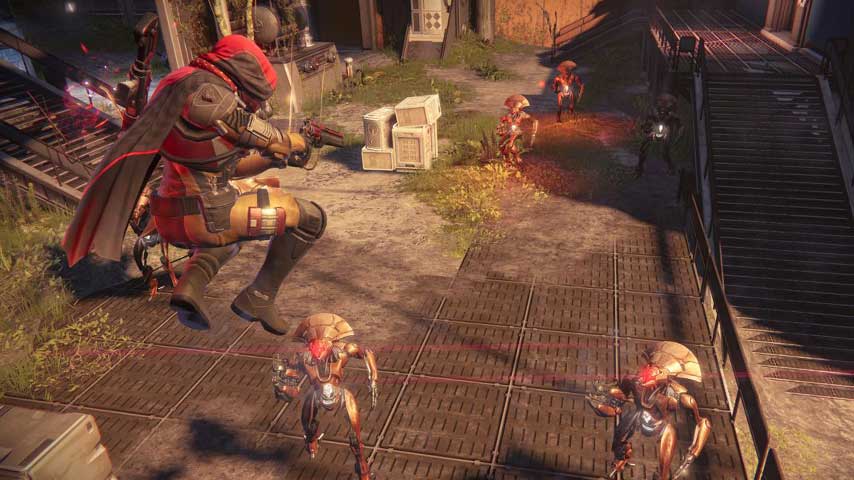
Once you do deploy, you’ll meet the Vex. Turns out they’re not friendly. There are three kinds of units you’ll meet here, and all of them are pains.
Goblins are the grunt level unit. Their weak spot is in their waist – the white canister of robo-blood – and if you shoot off their heads they start firing wildly and charging you. Unfortunately, when threatened they sometimes lower their head to shield their weak point, so you’ll have to be careful.
Hobgoblins are quite similar, but with significantly more powerful weapons, including a cannon variant. They will sometimes crouch and shield themselves, becoming immune to all damage, which is annoying. Both Goblins and Hobgoblins will sometimes kneel and then vanish, either reappearing some distance away – or right on top of you. Be cautious.
The real threat here is the Minotaurs. They’re not so bad on an even level but if you’re underpowered they’ll eat you alive. They have a rapid, multi-use teleport that’ll have them in your face in moments, and they take quite a beating even when you have lowered their shields. Their waist is not a weak spot, but again, shooting their heads off will send them into a rage.
The mission ends with the battle, after which you’ll be guided to visit the Reef. Here, you’ll watch a cinematic, after which you’ll be able to access the next few Venus missions.
From your starting point, you’re facing a group of three small pools of water. Turn left, away from the objective marker, and travel a short way to another pool, where you’ll find a Dead Ghost
The Ghost is nestled on an outcropping of – coral, or whatever that is – surrounded by water on all sides. It’s on the far side of the outcropping, if you’re approaching it from the starting point.
Once that’s done, follow your radar – you’ve been this way before. tTe glorious view, remember? You won’t be taking the tunnel to the Academy, though.
Head on down the twisting path, fighting off the Fallen – and the Vex. Your radar should lead you into a new area: the Ishtar Cliffs.
You can collect a Dead Ghost immediately when the path opens up again at the Ishtar Cliffs. As soon as you’ve got a view out over the area rather than canyon walls, stop and jump climb the rocky wall to your left. The Ghost is nestled up here with a good view of the Fallen below.
A tall tree trunk rises out of the swamp, pointing towards the overhang above. The Dead Ghost is almost directly behind it, on the rocky shelf. The trunk blocks your view of the Ghost from some angles.
This Ghost is easiest to retrieve by finding the pathway to the Citadel, then backtracking; you can avoid the Minotaur more easily that way.
An objective stands between you and the next area: you’ll have to take down a Cyclops. This is a hell of a thing. You can lob rockets into it if you want a quick verdict, or save your heavy ammo and snipe its eye from a distance. In either case, beware the Goblins that march slowly – but steadily – towards you. Also watch out for the Cyclops’s nasty projectiles, which have a large area of effect; thankfully, they’re very slow.
Once the Cyclops is down – well done! – follow your radar through the Waking Ruins. There are lots of Vex here, including a souped-up Minotaur which you should avoid for now.
There’s another Dead Ghost in this area. As soon as you enter the Waking Ruins scan the landscape for a ruined gate. It looks like a shattered circle, standing upright; not the big circle on the wall, but a free-standing structure, very rusty. This area is where you’re headed; the Ghost is on the highest cement platform here.
There’s nothing else to find in these two areas, and the spawns are never-ending, so once you’ve got your fill of Spirit Blooms, chests and killing just pass through on your way to Campus 9.
When you cross into Campus 9, stop and eyeball the scene: there’s a yellow-ish building on the far side of the arena from you, with a communications tower in front. Keep it in mind for after the coming fight; there’s a Gold Chest round the back.
The building you want is just past the one with the Satellite dish. If you stand on the roof of the building with the satellite dish and look towards the waterfall and cliff edge, the correct building is to your left. The chest is right round the back, tucked behind a wall; you’ll see it when you reach the end of the little balcony and turn around to return.
This fight is against successive waves of Fallen, which seem almost friendly compared to the Vex forces you just passed. Take out the Dregs and Vandals and head around the arena in an anti-clockwise direction until you reach the Captain. Once he’s down, mop up the remainder; wasn’t that easy?
Deploy your Ghost at the objective marker. Shortly thereafter, the Vex come in force. The first wave is a couple of Harpies, which are easily dispatched by shooting their glowing eyes.
Next you’ll get Goblins in large swarms; snipe them or use attacks with splash damage, like grenades, to clear them quickly.
Save some Supers and heavy weapon ammo, though, because the final wave is three Minotaurs and attendant Harpies. Stay on the move, using the whole arena, and pick them off one at a time. This will be much easier while they’re split up, so be aggressive when the first one spawns, before the others converge on you.
The mission ends when you are victorious.
Next: The Archive and Scourge of Winter.
Jump to: Page 1 Page 2 Page 3