While Rising Storm is still in Beta (at the time of finishing this Guide it was fully released) I decided to take the opportunity and write about the different classes and weapons present in Rising Storm. In case you are not familiar with Rising Storm, it’s a game set in the Pacific Theater during World War 2. It was created by Tripwire Interactive, the same Developer who made Red Orchestra 1 and 2. As you might expect, a lot of the mechanics from Red Orchestra 2 are present in Rising Storm. A few weapons are different, and a bit of fluff was added here and there but if you played Red Orchestra then you know, more or less, what to expect from this title.
In this Guide we will focus on the Infantry Classes, as there are no tanks to speak of. While you might be used to highly similar “Classes” in Red Orchestra 2, Rising Storm has a few surprises up its sleeve.
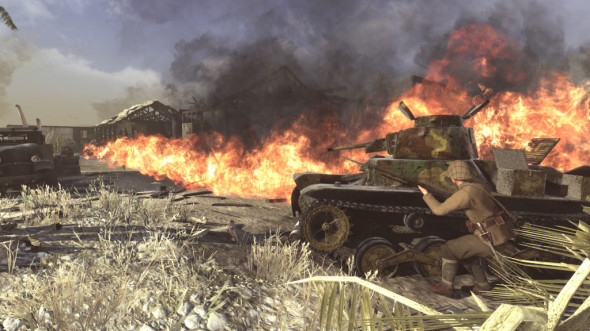
The Flamethrower can have a surprisingly long range so use solid cover to protect yourself from a fiery death.
On the side of the Allies you play as the Americans. Among them you have the standard Rifleman, Automatic Rifleman, Sniper, Machine gunner, Engineer, Flamethrower, Commander and Squad Leaders. The new addition to the Allies is the Flamethrower Class. Unlike the Japanese, the US troops do not start with Bayonets, putting them at a clear disadvantage against the Japanese up close. However, the Americans have access to a number of highly dangerous weapons, like the M1 Garand (for the Rifleman) and of course the Flamethrower. These two weapons make any Banzai charge very dangerous, for the Japanese.
The Rifleman uses the Springfield (bolt action rifle) and the M1 Garand. You have two Grenades… And you can later unlock a Pistol. It is pretty much the same class as in Red Orchestra 2, except in the Pacific. Note your lack of bayonet that you unlock further on. Also, remember that while your M1 Garand is far more versatile than the Springfield whenever it runs out of ammo it will produce a clear “ping” sound, so a Jap nearby could get the drop on you, while you are out of ammo.
Automatic Rifleman. The Allies have the BAR. It is a half-decent Gun, which in my mind acts as an LMG, with a smaller ammo capacity, but similar lethality. Only the Allies have an Automatic Rifleman Class, and one could argue that compared to the Soviet/German Automatic Rifleman classes his use is similar to the Machine Gunner, rather than an accurate rifleman. That is, until you unlock the M1 Carbine.
Machine Gunners can use the LMG. It has INCREDIBLE ammo capacity and damage. Just like the MG-34 the American LMG can overheat, forcing you to change the barrel (by pressing 6). It’s ammo capacity is the most surprising feature, and you can keep a stream of constant fire for a long while (though this will quickly overheat the barrel).
Flamethrowers are the bane of infantry. A good Flamethrower can clear out a fortress in an instant. A Flamethrower, when used, creates a rather big “cone” that covers an entire area. Any infantry (friend or foe) that is so much as touched by this cone will immediately die. Ground that is on fire will still damage anybody standing on it, but it is not nearly as deadly as a direct flame. The Flamethrower is especially effective against bunkers but even in the open a single tongue of flame can take out an entire trench. That said, Flamethrowers have very limited fuel. Their range, while mildly impressive, still calls for you to approach the enemy dangerously close. Unlike rifles and machine guns a Flamethrower can effectively stop a Banzai Charge, since anybody charging into the ball of flame will die soon after.
The Engineer is a limited usefulness class. He lacks grenades and uses Satchel Charges instead. Even then, he carries only a single Satchel Charge. While this is enough to clear a trench or bunker you need a bit of practice throwing and timing it. The Engineer has two surprisingly good weapons however, the Trench Gun and M1 Carbine. The Trench Gun, I found, is an insane weapon. It can kill, almost instantly, enemies even at a far range. The more exposed they are the more likely the instant kill effect. Up close it is just as deadly, so you can work alongside Assault troopers to clear bunkers, since your shotgun will shred the enemy to bits.
Snipers are self explanatory. You have a Bolt Action rifle with a scope. While extremely accurate you have to use your surroundings to your advantage. Hide in shadows, in a corner, away from enemy eyes. Take into account whether the death cam will give away your position or not. Prioritize enemy Special Infantry and Officers. Without them the enemy will be penalized.
Squad Leaders/Commanders are exactly the same as in Red Orchestra 2. Squad Leaders can provide Smoke Screen and mark targets for the Commander, who can use the Radio to perform a number of call-ins (Recon, Reinforcement Wave and three variants of Artillery). Cooperation between the Squad Leaders and the Commander is crucial if a stalled advance is to progress.
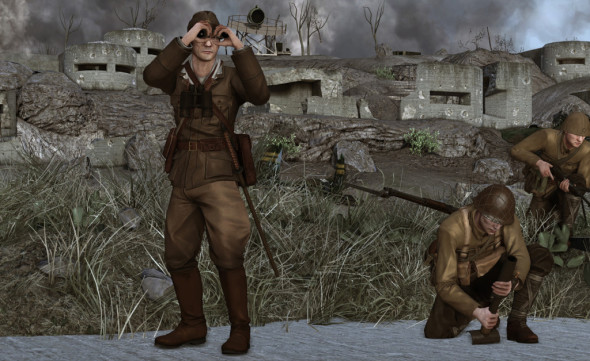
A Commander or Squad Leader spotting for a Light Mortar. While the Mortar focuses on adjusting its firing arc the Officer can help direct the fire correctly.
The Japanese are very dangerous, for a number of reasons. First of all they have the Banzai charge. When you hold down the Melee Button and Sprint (Middle Mouse Button + Shift) your character will begin screaming, as you charge forward. The more players join your charge the more “buffs” you will get. The exact effects of these Buffs are unknown to me, but on a number of occasions I seemed to have better wound resistance, allowing me to kill enemy soldiers even when close to death.
Another new element is the Suicide Grenade. If you died with your greande cocked and you manage to kill any American player you will: 1) Not Suffer Any Team Kill Penalties and 2) Your Death will not count as a “death”. In other words, if the Allies are holding a Trench or Bunker you could take out your grenade, prime it, then charge straight into their midst. I have observed that a lot of people do not use this tactic however, just like the Banzai charge. The reason is that it calls for practice and a different mentality to your typical FPS. Nobody sane would use a suicide grenade to take out the enemy, or charge with a Katana/Bayonet at an enemy machine gun. Well, eventually people will learn, since these highly dangerous tactics might just work! In order to cook your grenade press the middle mouse button, that will remove the pin. Normaly you should only do this when preparing to throw a grenade (in other words, hold down left mouse button, click the middle mouse button, then release).
On top of your Suicide grenade you can also deploy booby traps. You deploy a grenade on soft ground (mud or sand for example) and anybody walking into the grenade will explode. It is an extremely deadly weapon, but one which can target both the enemy and friendlies. You can use it to protect your flank, whether inside a bunker or trench, to stop American troops from advancing too quick. Take note, you can have only too Booby Traps deployed at a time, but any class with grenades can deploy them. You deploy a Booby Trap by picking you grenade (button 3), looking down at soft ground and pressing the right mouse button.
The Japanese Rifleman is similar to his Allied counterpart, with the sole difference of having a bayonet mounted from the start. This makes a Japanese Rifleman far deadlier in close combat, especially with a Banzai Charge. I do not know what is the different between the two bolt-action rifles available, as even visually they look exactly the same.
The Assault Class for the Japanese uses the Type 100. It is similar to the Thompson, which means you will need a number of shots to take out anybody, unless you score head shots. While you can perform the Banzai charge you lack a proper close combat weapon. However, if the going gets bad, you could run into a bunker with a grenade ready, or your machine gun. I imagine that’s the idea behind this class.
The Japanese Machine Gunner is similar to the American one, with the exception that they do not have a light, portable Machine Gun, like the BAR. You are limited to two deployable Machine Guns. They are not “bad” per se, but far more difficult to use while standing, and I could not spot any distinct differences between them.
The Light Mortar is the unique addition to the Japanese. It can fire directly, like a Grenade Launcher, but it can also be deployed to fire over obstacles at the enemy. I highly recommend practicing with the Light Mortar on a Bot-Filled server, where you will not suffer the full wrath of friendly fire. It is difficult to get used to the Light Mortar but it is a very dangerous weapon, in the right hands. You could try asking a friend to guide your mortar shots, especially if you are firing from behind cover and you do not know where the shots are landing.
The Japanese Engineer does not have access to an equivalent of the M1 Carbine or Shotgun, but the Shotgun can be unlocked on higher levels, making the Japanese Engineer just as lethal as the American one.
The Japanese Sniper is just like the Allied Sniper. Nothing to see here I am afraid! Use the same tactics, but take into account your lighter uniform.
Squad Leaders/Commanders are very similar to your Allied variations, with just one exception, the Katana. The Katana might not have as long a reach as a bayonet (or so it seems) but if you need a proper close combat weapon while performing a Banzai charge, this might be it.
In Rising Storm both the Allies and the Axis have their unique methods of warfare. The Japanese weapons are better suited on the defensive, but in the attack a Banzai charge supported by LMGs and Mortar can do the trick. The Allies have very powerful weapons to stop the Japanese, or assault their positions. Is either side overly powerful? The Allies have easier weapons to use (the flamethrower is much easier than the Mortar) and they have access to the M1 Garand, which makes them better in medium and closer proximity fights (except for close combat).
Practice with each of the classes a bit and soon you will find your match. You can very efficiently level up on Bot Filled servers, so gaining the necessary unlocks or levels will be much quicker than against normal players.


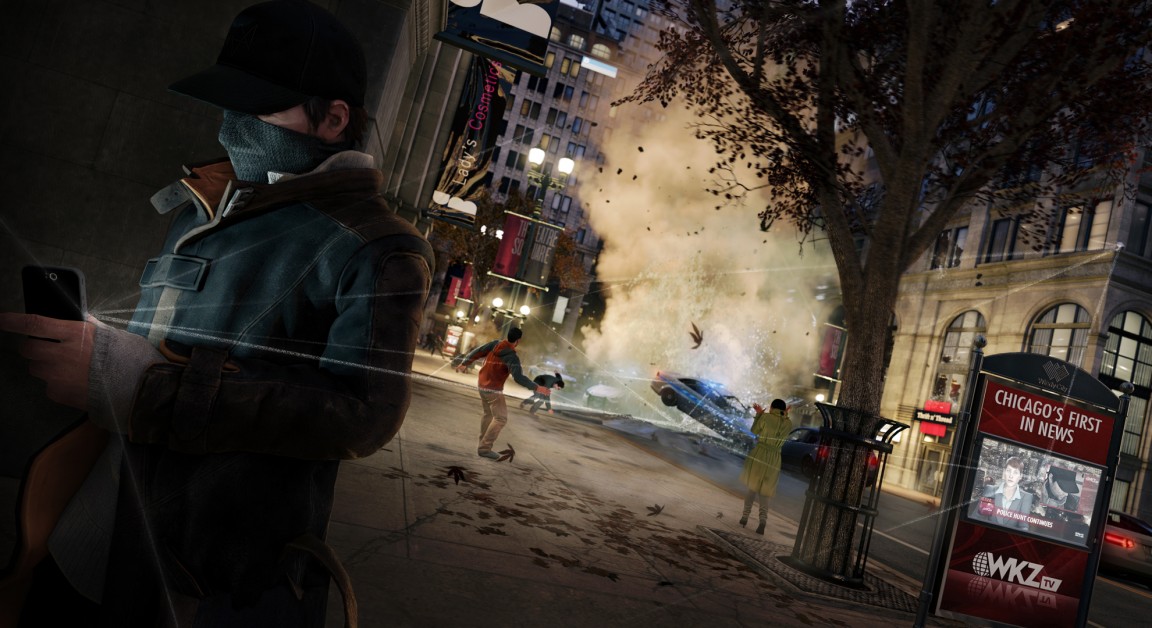 Watch Dogs: A Wrench in the Works – Angelo Tucci, track the prison vehicle
 Just Cause 3
 F1 2013 Hands
 The Games Of The Generation: Chris Choice
 Batman Arkham City Ra's Al Ghul Guide