We are at an end of the road here. The final (for now) part of the Men of War Guide will explore some ideas behind organising an effective Attack and Defense. The situation is rarely in your favour, and as a commander you should always remain sceptical of any success you have. Although you could defeat an enemy attack there is no guarantee of victory, untill the battle ends. Although I will provide two examples from my own battles I cannot give you a simple formula for “winning”. You will have to perfect that yourself, but use the ideas given here to inspire you.

Attack or Defense? Whichever the case, be prepared.
Attacking an enemy might be a necessity, when you are losing the battle, or an optional task, to gain some more ground. Whichever the case, you have to prepare yourself for such an undertaking. Each nation has its own special units, but you cannot always deploy all of them, being restricted to a handful of units you managed to buy or save over the course of the game. In order to succeed in an attack take the following elements into account:
Once you have all the knowledge you need to attack consider how many points you have to spend. Most of the time you will be tempted to buy Elite infantry and the heaviest possible tanks. In practice, you could invest in cheaper units, in order to “mob” the enemy with firepower. The question of quantity over quality is never an easy one. SMG infantry is good on the attack, but using Elite infantry could pay off more, even though you will have much less of them. I usually go for the “Better Tanks, cheaper infantry” approach. Infantry, unlike tanks, tends to die much more quickly. A single squad of Sturmtroopers could die from an artillery shell, but if you had two squads of Riflemen, some of them are bound to survive. Meanwhile a strong tank will provide the much-needed “punch” to your attack.

As an example I will describe a Frontline game I had. 2 vs 2, Germany vs the Soviet Union. I was playing on the side of the Soviet Union and my teammate suggested we focused on KV-1s as our tank choices, as well as BT-7as for support. We did just that, and I used SMG infantry to attack the trenches and fortifications. A KV-1 is not at all a powerful tank, but initially its frontal armor is incredibly tough against most enemy anti-tank guns, and during a frontline game, almost indestructible. The BT-7a is a lightly armored medium tank, with a good 75mm gun, but only against infantry (it does not use AP shells). On the other end the toughest foes we would face were Pak 40s and Panzer IV Gs, which could with ease destroy the KV-1 if they fired up close and from the flank. During the initial approach I was worried about Anti-tank and anti-personnel mines, but to my luck they were employed scarcely. My KV-1 was unaffected by said mines, and the best the enemy could do against it is de-track it with their Paks. As my KV-1 advanced, later to be joined by another KV-1, I steam-rolled through the enemy front, my infantry protecting the armored behemoths.
Although this strategy worked in a frontline game, during a battle zone round you do not have the comfort of a weaker foes with limited supplies. The KV-1 can be outflanked or ambushed, and although a powerful tank both in the attack and defense it does become obsolete. This translates into any Attack you could perform. Pay close attention to your own weaknesses and advantages. There is no such thing as an unstoppable force. You have to play your cards properly in order to win.

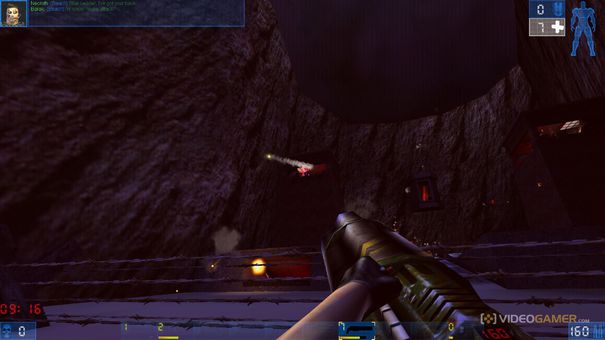
Rarely, if ever, will your attack look like this. In all likelihood you would lose all your tanks and infantry before they reached the sandbags.
One of your trump-cards is artillery. Often miss-used to damage enemy Super-Heavy tanks, artillery is a highly effective method of weakening the enemy’s defences. Be it stationary guns, SPGs or rocket artillery, a secure infantry position becomes a smothering ruin. As suggested in another of my articles, you should attack while your bombardment is being performed. If your tanks reach the enemy front the moment your barrage ends you will have complete surprise. Enemy guns could be destroyed or de-crewed, enemy tanks immobile and infantry dead. You walk into a deadland with little opposition. If you attack a few moments after the bombardment finished you could find yourself forcing into a re-manned defense.
You cannot always remain on the attack. Eventually you will gain too much ground, or you will end up in the enemy spawn. Building a solid defensive line comes in a number of “sub-types”, depending on your needs at the time:
As a defender you usually do not know what to expect, in terms of an attack. You will often try to prepare yourself for any eventuality, which in practice is simply not possible. Let’s look over your possibilities as a Defender.

Any player has access to Mines and “Engineering Tools”. You can call in special engineers who come equipped with a certain number of mines, or you can call in a truck and use whatever is stored on it to deploy. You have access to anti-personnel and anti-tank mines. AP mines are highly effective against infantry, but against tanks they can at best de-track. Anti-tank mines should be capable of taking out most tanks, but in practice Heavy tanks have a decent survival rate against them. Creating a multi-layered minefield will stop any bold advance. The enemy can counter such an obstacle using Infantry Deminers or armored Deminers. Armored Deminers are essentially armored vehicles with a plow of some sort at the front, to detonate mines they encounter. Although effective they can accidentally de-track. The cheaper and safer solution are infantry deminers, who use their mine detectors to “switch off” mines (they do not only mark them, but also neutralise them).
Barbed Wire and Anti-Tank obstacles are your second tool of obstruction and limiting enemy movement. Even the heaviest tanks will be at least slowed down by tank obstacles, while barbed wire will stop infantry entirely. Using explosives or finding an opening in your defense are the only effective methods of getting past these defences. Smaller vehicles can still get around tank obstacles, but these defenses should be one of the elements of your wall, not the only one.
When you are employing mine fields a good addition to any “kill zone” is a mortar. Deminers will have a hard time working when bombed constantly, and any damaged tanks or vehicles will have a hard time performing any repairs while under fire. Mortars are also a good idea to remind the enemy that even thought they took a zone you can still taunt them. Holding your own heavier guns (artillery) allows you to respond to the enemy’s own barrage, by destroying their equipment. A costly artillery emplacement or rocket artillery truck will be damaged or destroyed from a single accurate shot, costing the enemy a lot of resources. Artillery can also in some cases be used to stall an enemy advance, but it is often difficult to do so, unless you have enough firepower.
Using anti-tank guns, HMGs or other emplacements gives you the benefit of using up fewer points, while still having some sort of defense. A well placed Pak 40 or Zis-3 will cost the enemy dearly in tanks and vehicles, while a HMG will stop a quick enemy advance with infantry. The problem with most Anti-Tank guns is that they are not powerful enough to damage enemy heavy tanks, unless they perform a successful ambush. When deploying such guns you should always try to deploy them on your distant flank. While the enemy advances directly at your point your guns will have a clear view of their flank, increasing their chance of penetrating hits.
One example of an extremely well-played defense was another frontline game I had. A 2 vs 2, Germany vs USA round. Having played as the Germans much more often I knew the abilities of my units, and the weakness of the US tanks. I deployed a PAK 40, fortified it with sandbags and then camouflaged it. Some distance behind it was a carefully angled Panzer IV G, in case the enemy tried to drive through my defences. On the right flank I had my infantry squad, riflemen, hidden behind a wall, and some distance behind that was a mortar, hidden behind a house. The finishing touch was an officer, observing the approach, hidden behind cover with the PAK40. Before the round began I ordered the Mortar and PAK 40 to hold fire.
I waited for the enemy to advance and at first I saw a number of tanks. A Sherman M4, M3 Lee and a halftrack. I immediately took control of the PAK 40 and waited for them to be within effective range. I fired off at the Sherman first, knocking it out. The M3 Lee did not manage to return fire before I took it out with a second accurate shot. While the opposing player finally realised what was happening he tried to force his halftrack forward, only for it to get disabled by the next PAK round. I then quickly selected my Mortar and ordered a ground bombardment of what I now called as the “Kill Zone”. The enemy crew which left their tanks and the now dismounted infantry squad were quickly dealt with, thanks to the barrage. What followed was a sad image of fresh tanks being taken out in the exact same method, over and over again. An attempted attack on the right flank was also stopped by my PAK, while the riflemen shot down any survivors.
Trenches offer cover, but they are not reliable. An accurate HE shot landing inside the trench will wipe out all nearby infantry.
The clear problem here was that the enemy tried the same tactic over and over again, despite the constant loss in tanks and infantry. I was aware that my right flank was weaker, but from the enemy’s perspective there was nowhere safe from my PAK.
When you cannot fortify yourself your best option is a mobile defense. This is often the case when you do not have enough troops to cover an entire area, especially on bigger maps. Having a token force at the front, to observe for enemy movement, provides you with an indication of where the enemy will come from. Meanwhile in your rear you have a number of fast-moving vehicles to quickly counter the enemy’s attack. Tank Destroyers are perfect for such a role, since a lot of the time their plating and guns permit them to withstand enemy fire, and answer with their own threatening barrage. Ordinary tanks are also good at countering enemy units, especially lighter and quicker tanks or vehicles. Using halftracks for your squads allows you to quickly reinforce the front, in case you ever need infantry. If you employ a token frontline force you have the advantage of enemy barrages being wasted on a handful of troops, while your actual force is waiting in the rear. The moment you sustain heavy bombardment in an area you know where to send your forces.
Using houses or ruins as strongpoints is not a bad idea, but they are often death-traps for your infantry, during a barrage. More often than not I bomb any building that could be housing enemy infantry, as well as any other type of cover the enemy could be using. On the other hand, if the enemy lacks artillery or HE shells, using buildings gives you a solid advantage.
In Men of War, knowing is half the battle. The other half is quick and decisive planning. Like in any Strategy game you have to keep attacking your foe, one way or another. If you hold the initiative you should do anything you can to keep pushing him back. When you are defending you have to limit his movement, force the foe into the defensive so that you can start pushing him back. It might not be as climatic as the Siege of Moscow, or as “dark” as Stalingrad, but it will always be a challenge. Learn from your mistakes, and if the enemy is more experienced than you, learn from his actions.
See you on the battlefield.


 Deus Ex The Human Revolution Detroit Side Quest Guide
 Pikmin 3 Guide - Scornet Maestro Boss Guide - GamersHeroes
 Fire Emblem: Awakening Guide – Chapter 10: Renewal Guide - GamersHeroes
 Risen 3 Guide: Calador Side Quest Guide
 How to Branch Mine in Minecraft