Be it Dinosaur or Human, there are things that you have to learn about your respective classes, strategies and a few tips and tricks to cope better both in groups and alone. The aim of this Guide is to provide some basic information on Primal Carnage, its classes and all the other tid-bits that you might be interested in. While I will not tell you how to “win” (there is never a formula for that) I hope that you will gain something new from this guide, or if you are new to Primal Carnage some basic, yet crucial, information. Let us begin by jumping into the basic controls. Jump ahead for into on different classes or to the far end for some Hints and Tips.
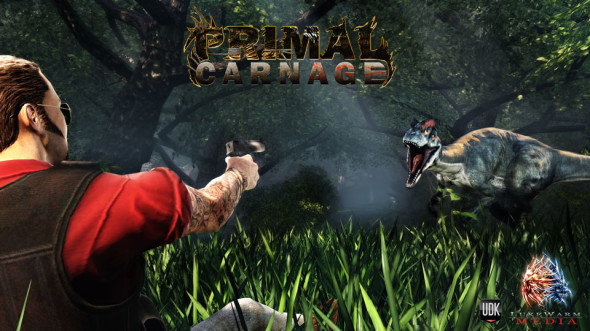
Are you the Hunter or the Prey?
Primal Carnage has mildly simple controls. You move around with the AWSD buttons, sprint with shift, jump with the space bar crouch with Ctrl. You use your primary attack with the left mouse button and your alternate fire with the right mouse button. You then press Q to use your Dinosaur roar, and E to Eat or Use a Med Kit or Ammo Crate. Your reload by pressing R, but if your weapon ever becomes empty and you try to fire the empty gun again you will reload your weapon. With the Machine gun for the Commando you have to press the right mouse button to reload your grenade launcher when it is empty. You will know when it’s empty because none of the three grenades will be highlighted. The Pathefinder’s Flares are thrown with the Right Mouse Button. Some classes have more than one weapon, namely the Pyro, Scientist and Trapper. You can swap your weapons around by pressing 1 or 2. Sometimes depending on how hard you press the Space Bar certain dinosaurs will jump higher or lower (this is especially the case with the Raptor). Every Human class has a Melee attack that they can use by pressing F. The Pyro has two melee weapons, the chainsaw (when he has fuel via Right Mouse Button) and he may also use his whole contraption to bash dinosaurs, when out of fuel (F Button).
There are currently two game modes in Primal Carnage. Deathmatch and Get to the Chopper. Deathmatch is more precisely Team Deathmatch, where Survivors fight against Dinosaurs, and whichever teams gets the needed or the most points wins. Get to the Chopper is an objective game Mode for survivors. As the Humans you have to reach certain areas and wait in a zone denoted by visible markers. Once the zone is “Captured” that objective is complete. Some Objectives progress your Spawn Zone, while others are only objectives that have to be completed. When a Zone captured by humans is cleared (by dinosaurs) before it can be fully captured the capture bar will empty after a few seconds, unless a human enters the capture zone again.
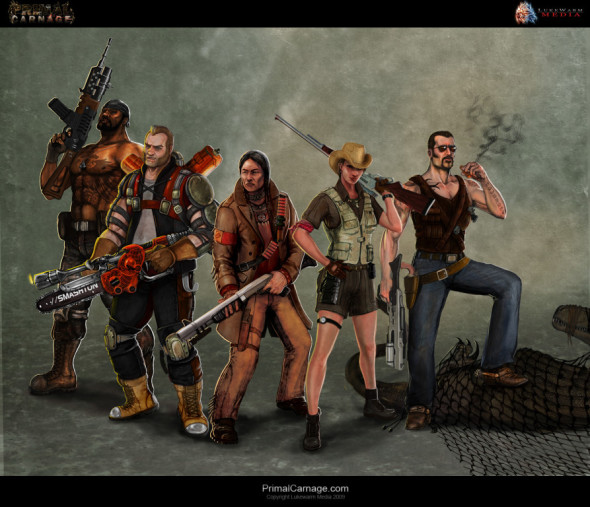
Ready to die? (From Left to Right: Commando, Pyro, Pathfinder, Scientist and Trapper)
The Humans are all equally squishy. Some might appear to be less or more squishy but in the end they are all equally squishy, be it when trampled by a T-Rex, or shredded to bits by a Raptor. Each class differs in its weapons and abilities, and while you may all be easy prey to organised dinosaurs knowing what is at your disposal is crucial for survival.
The Commando carries a heavy machine gun with a grenade launcher. His melee attack is a simple strike with his very own rifle butt. The Commando’s weapon has a number of strengths and weaknesses. The primary strengths are a fast rate of fire and the grenades themselves. A direct hit from a grenade will kill all smaller dinosaurs and severely wound anything bigger. It takes a lot of practice to hit a fast moving dinosaur, but an organised group of three Commandos can take out any threat with the mix of their machine guns and grenades. The MAJOR flaw of the Commando is his lack of accuracy. His Machine gun, while rapid firing, has an incredible spread. As such, if you want to snipe down a retreating Dino this might be impossible. On the other hand, the large spread may just be useful when firing at a big dinosaur group, or when trying to stop a Raptor Pounce or Pteranodon snatch. However, just like in the case of the Pathfinder shotgun, you will do far more damage up close, because more bullets will hit the target. The further away the enemy, the harder things become. (The Following seems to happen at random, during a recent gameplay none of the gameplay unloaded on their own, it might be an occasional bug) Take note, when you resupply at an Ammo Crate any Loaded Grenades become Unloaded. So after getting a fresh batch of ammo reload your grenade launcher.
This is an incredibly useful class, both during smaller and larger games. The Pathfinder uses his trusty Shotgun, Flares and a knife for melee. The Shotgun is extremely dangerous at close range. A direct “full hit” at a smaller dinosaur might just kill it with a single shell. Against larger dinosaurs the shotgun will still deliver a lot of damage. The flares blind Dinos, although they also blind humans but to a much smaller degree. A Dino staring at a Flare will be completely blinded, but this is a double edged sword. If there is a flare, there must be humans, and typically humans hide directly on the flare. So if you are a Carnotaurus or a T-Rex you know exactly where to trample the humans. On the other hand, it will cause a lot of confusion, so if the humans are smart they will not hide directly on the Flare, but use it to their advantage. What is important to note is that the Flare might have a recharge bar (on some servers). After you throw a flare you have to wait a few seconds to be able to throw another one. Thankfully the bar fills up quick enough for you to throw a new flare before the old one expires (it is a tight fit though).
The Pyro from TF2 could learn a bit from the Primal Carnage Pyro. The combination of the Chainsaw and Flamethrower makes him suitable for attacking large numbers of dinosaurs, as well as butchering single targets, as long as they cannot trample over him. Enemies hit by the Flamethrower’s flames will stay lit for a short while, and while it might not outright kill a Dino it can severely damage them. The flamethrower is more of a scare weapon than efficient killer, unless you manage to follow a Dino with your flame long enough. The other problem with the Flamethrower is that it can blind your entire group. While it is good and damaging multiple enemies creating a fire whirlwind will blind friend and foe alike. If there is a T-Rex nearby he will still trample over you. It is useful to know that a lit raptor or Pteranodon will be unable to perform their special attack, because the moment they suffer damage it will get cancelled. The Pyro’s grenades are very dangerous, not only to dinosaurs but also himself. A grenade can kill a Pyro and any smaller dinosaur with a direct or close proximity hit. Larger dinosaurs will still suffer damage but not nearly as much.
As it was said in many countless zombie games, aim for the head. The Scientist uses a Sniper Rifle and Dart Gun. The Dart Gun causes a tiny bit of damage and distorts the enemy’s screen for a few seconds. The usefulness of the dart is severely limited by the length of its effect. You will realise very quickly that unless you keep firing darts at a single dinosaur every few seconds they will recover before your team can do anything. Meanwhile the Sniper Rifle can kill smaller dinosaurs with well placed head shots. Even body shots will hurt terribly. I tried on a number of occasions to sneak near Dinosaur feeding spots and then snipe them down, since that is one of the few moments when they do not actually move. While it might be easy to hit a bigger dinosaur anything smaller will be a huge bother. The problem with sniping is that each time you kill a Dino your position will be revealed. Unless you will change your position after every kill there is a high chance of a “Revenge Kill”.
In case you are wondering, Tranquilizer Darts (from the Dart Gun) are meant to be capable of “Killing” smaller dinosaurs, by hitting them with a sufficient number of darts (this is how you get one of the achievements). I experimented with this extensively and noticed that Dinosaurs, after being shot a sufficient number of times, would begin to look tired, as if falling asleep. However, because I was always with other team members I never had the chance to finish off a Dino with Darts (without killing them through HP drain). Getting a Raptor to a “Sleepy” state took a lot of effort, because of its speed, small clip size and number of darts needed (I am still uncertain of the exact number). I think it is possible, just incredibly difficult (as opposed to just sniping them with a Sniper Rifle). The Cattleprod (Melee weapon) does not do that much button but it reduces a smaller dino’s Stamina to zero.
The Trapper is my favorite class. The Net Gun will incapacitate smaller dinosaurs, giving you very easy and silent knife kills, while your Magnum and Desert Eagle both are mildly accurate and do moderate damage. The problem with the Trapper is that his strength is only against single dinosaurs. The Pyro, Commando and even the Pathfinder have a better chance of dealing with numerous Dinos than a single Trapper. The Netgun also has a limited range, but if you experiment with its trajectory and your angling you might find that shooting down Pteranodons is mildly easy, if they stray in too close. While he is excellent against single smaller Dinos the Trapper also shows his worth against bigger lizards. The T-Rex, Spinosaurus and Carnotaurus will all have their heads clasped shut. In the case of all three that means that their bite attacks no longer work, for a few seconds. This does make a T-Rex and Spinosaurus far weaker, because they are limited to trampling the humans. On the other hand, the effect of the net on larger dinosaurs is very short. So, as a Trapper you can aid in stopping a Smaller Dinosaur Rush, hunt smaller Dinosaurs and help in limiting the combat abilities of larger dinosaurs.
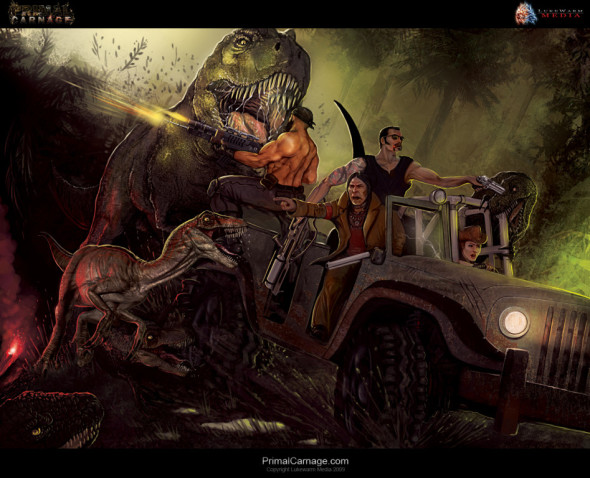
“Lunch is Served!”
Typically the Dinos rule the maps. They are cunning, quick, brutal and efficient, but that is not as easy as it sounds. Playing a Dino in a way that is successful calls for a long of practice and some basic knowledge on how does each Dinosaur operate. Let us begin then!
The Pteranodon is the toughest Dino to use, mechanically. His weapons are also limited, but his Roar can make life much easier for other Dinos. The Pteranodon, as you might imagine, can fly around the battlefield. To start flying you need to hold shift and then press the Spacebar. The Shift will grant you momentum, and by pressing space you will jump into the air and fly up. You can get up in the air without a runway. The important thing to note is that your Pteranodon starts flying directly up, so keep holding down Shift and Spacebar until you are certain you are flying. Even if you jump off a ledge you can still recover from the fall if you immediately press and hold Shift and then Spacebar. You control your Pteranodon like any dinosaur. The Shift Key will make you fly a bit faster, and your Roar will highlight humans on the ground. You need to be mildly close to them, and from what I could tell you also have to also physically “see them” (so, it does not always highlight people behind you or behind cover). This will make them visible to all other Dinos on the map, for a limited time, by highlighting them and putting the “Eye” icon above their heads.
When it comes to attacks you have only two. The basic one is the “Peck”, that you can do while crawling on the ground or flying. This is not a strong attack (unless you swoop down and impale a survivor), but if you by mistake crash into the ground it is your only weapon. Your other attack, which is the most complicated to use, is “Grabbing”. When you fly just slightly above any human you can press your right mouse button and try to “grab” them. If you are successful the human will be in your grasp and you can haul him off and drop him into a river/sea or off a large height. You will move slower when holding a human and if you suffer damage while holding him or her you will let go of your prey. You will also let go of the human if you stamina drains out. Lastly, if you have to gain in height quickly, while in the air, press Space Bar. You can still look down and your Pteranodon will soar up. You can also descent quickly by holding down Control (it works on the same rules as soaring with the Spacebar).
One of the most popular classes, and with good reason. The Raptor is an efficient hunter, and in a pack they can take out numerous humans with extreme ease. The Raptor can claw at his enemies or pounce. Pouncing consumes a lot of stamina, so you may find it impossible to pounce a human after running a certain distance or jumping. With a full stamina bar you can perform two pounces. The pounce itself does a bit of damage, but killing a human at full health will take a few seconds, and you are very vulnerable when ripping a survivor to shreds. You can cease to “Pounce Attack” by pressing the Space Bar, do that when you see a Trapper approaching, since he could net you, killing you instantly soon after. If you are in the middle of a Human group, and lack the stamina to flee or pounce you should use your Roar. The Raptor’s Roar drains all of his stamina instantly, but the rate of his claw attack increases drastically. Just keep clicking the left mouse button and do not stop until everything is dead. The Raptor is also incredibly agile. It has an incredible running speed and jump height. If you see a rooftop there is a solid chance you can reach it somehow. If you buy the different Dinosaur skin packs you can blend into the map almost perfectly, use shadows and foliage! One last thing, while your Raptor claws where it is facing it will only pounce in the direction your camera is looking at. This can let you surprise humans by suddenly pounching in their direction when they think you are occupied with something else. One very important piece of info, your pounce, as you rip a human to shreds, continues to drain Stamina, so your pounce attack may suddenly stop if your Stamina is drained to zero.
This is a curiously useful dinosaur. His bite causes a bit of damage, while also poisoning his target. His “Spit” blinds a target for about two-three seconds, also causing a tiny bit of damage. Against a large group of survivors you can blind numerous humans with a single well aimed spit. As you might notice however the “Spit” has a very limited range, that is why you have your roar. The Dilophosaurus’ roar will increase the range of your next three “Spits”. The effect of the roar is not cumulative, so you will only have three spits at your disposal with a higher range after any roar. Because of its abilities a skilled Dilophosaurus can blind a huddled survivor group and also hunt down single humans, by constantly blinding and biting them. It does not have much health, and it is not as flexible as the Raptor, but it makes a good support Dino.
It’s big, and has an awful lot of HP. It has only two weapons, it’s body and its massive jaw. Humans will typically die the moment a T-Rex tramples over them, and it can swallow anybody, killing them instantly. The T-Rex does have numerous flaws though. First of all, its size. It is a delicious target for Snipers, Grenades… anything really. It is slow, and its sprint lasts only a short while. It cannot get everywhere, and humans can use terrain to their advantage to make it impossible for the T-Rex to reach them. Playing a T-Rex well is very difficult, and alone you will never succeed. With other Dinos you act as the “Big Punch”, charging into a survivor group, already under attack, and trampling what you cannot eat. Because you are slow conserve your stamina for the final charge or when you want to retreat. Take note that the Scientist’s darts will have a serious effect on your movement. One of the “glitches” of the game, often used by T-Rex to reach annoying survivors, is that you can attack through walls with your bite. That means you can reach a survivor hidden directly behind a wall, or inside a cargo container but this also means the humans can fire at your big head, sticking through the wall. Its Roar will buff local Dinos for a short time. You can still reach survivors who are higher or below you, by pressing down Spacebar or Control. The Spacebar will make your T-Rex look up, while Control will make it look down. Based on what I could tell you do not need to hold down either of these to “catch” survivors who are on ground level with you, as long as they are some distance away.
A smaller T-Rex, the Carnotaurus uses a bite attack and its body as its two primary weapons. It’s bite is not its most powerful weapon though, it’s the charge. By holding down Shift and running forward your Dino will gain in speed, eventually lowering its head in a form of bull charge. Any survivors hit directly by your full charge will lose over 50% of his or her health and be knocked back a long distance. If you lose momentum, or crash into something but there are still survivors around you can use your alternate attack which makes you flail around, knocking back and wounding humans. The areas you excel at are also the most dangerous for you. A tight corridor, bridge, tight map corner, these are areas where humans might hide, and your charge can hit almost all of them easily. At the same time you make a decent target for grenades, rifles and shotguns, so your best tactics is to punch “through” the humans and run behind cover or foliage, recover some stamina and health, then charge again. Your Roar causes your damage to decrease but at the same time you recover health when you deal damage to humans.
Below are a few Hints and Tips that you might find useful. If you are looking for some more precise info on any of the classes look above.
Trapper Net – The Trapper Net will immobilise smaller dinosaurs for a few seconds, giving anybody the opportunity to insta-kill them with a knife. From what I could tell the “basic” Pyro, Commando and Scientist Melee Attacks (By Pressing F) will not kill a captured dinosaur, but a Trapper’s or Pathfinder’s Melee Attack will. The Pyro can still kill a Dino with his Chainsaw easily. Another thing to note is that using a Trapper net on Raptors performing a pounce is far better than shooting them. A Net will let you kill off the Raport where it stands, while shooting it will give it an opportunity to flee.
Killing for Profit – Dinosaurs that manage to kill survivors in melee (via pouncing, scratching or eating whole) will regain some health. This is useful to know when your eating spots are “Camped” or you need to regenerate a bit of health through an easy kill. Your stamina does not regenerate from eating or killing survivors. The Carnotaurus can regenerate some of his health through the use of his roar, at the cost of damage. On a few occasions I used that instead of feeding when I charged into a group of survivors without them expecting me.
While I feel this Guide includes a lot of basic information even a seasoned gamer might learn something new, or remind himself of something he might had forgotten. As more updates are released this Guide will be updated, to include all the important information. For more info on the game check the Primal Carnage Website or the Official Forums.


 Darksiders 2: Ice Giant Boss Guide
 Lamberts death, not Ripleys survival, was the biggest challenge in Alien Isolations DLC
 Does Black Ops 3 really look that bad on Xbox 360 & PS3?
 Far Cry 4 Fortress Guide: Pagan Min's Fortress
 Minecraft Mod Examination: Underground Biomes Constructs