

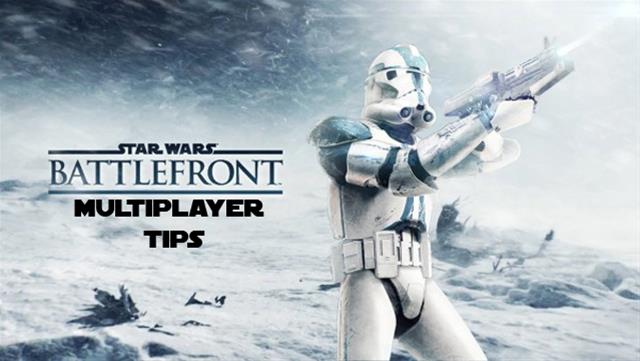
There’s a lot to like about Star Wars Battlefront. It might lack depth overall, but the likes of Walker Assault and Supremacy offer a multiplayer experience arguably unmatched in the genre.
Whether you’re breaking into the multiplayer scene for the first time or are new to Battlefront, there’s a place for you in this hostile yet welcoming part of the Star Wars galaxy. Here are some tips to help you get off the ground and to the top of the leaderboards.
- Supremacy
- Walker Assault
- Blast
- Fighter Squadron
- Droid Run
- Drop Zone
- Cargo
- Heroes vs Villains
- Hero Hunt

Objective: Claim all enemy control points.
The Basics: This mode plays out like a tug-of-war battle. When the match kicks off, the two teams rush to the central control point. Claiming this initial point is important, because doing so will push the enemy back. Each team can control only one point at a time, so once your team has that initial point, you’ll need to defend it, and then rush forward towards the enemy point to claim that and push them further back into the map. The team to claim all points first wins the match.
Tips
- Your loadout here is important, because you need to be able to defend points from long distances, as Supremacy takes place on large maps. You should avoid the CA-87 blaster, because it’s ineffective at long-range. Powerful if you can land a hit, but inefficient at long distances. The DLT-19 and T-21 are great options because they have good range, allowing you to protect a point from a long distance. The latter has high recoil, however, so shoot in bursts. The DLT-19 has a high rate of fire and lower recoil.
- Control your captured point using whatever means. Any power-ups that grant you a turret or shield should be used on or around your points. Don’t waste turrets near enemy bases: use them exclusively to protect your points. Use shields to protect you and your teammates against a barrage of enemy fire, or to protect you while capturing an enemy point.
- The Jump Pack Star Card should be used here, no exceptions! As the maps are large and spread out, you need extra mobility to quickly rush to points of interests and get a good position ahead and/or above of enemies.

Objective: Rebels: Keep uplinks online for Y-wing bombing on AT-ATs, destroy AT-ATs before they reach the Rebel base.
Empire: Deactive uplinks so AT-ATs can push forward, defend AT-ATs during bombing raids
The Basics: Walker Assault attempts to recreate the iconic Battle of Hoth opening from The Empire Strikes Back. As the Rebels, you’ll need to rush and activate uplinks so Y-wings can raid the forwarding AT-ATs with bombing runs. As the Empire, you’ll need to deactivate any online uplinks, and protect the AT-ATs from bombing runs and Rebel fire during raids. If the Rebels bring down the AT-ATs before they can attack the Rebel base, they win. If the AT-ATs attack the Rebel base, the Empire wins.
Tips
- A raid on the AT-ATs is inevitable at some point during a match. If you’re on the Empire, forget about the uplinks once a raid starts. Focus all attention on any ground troops firing at the Walkers.
- As a Rebel, your initial focus should be on getting the uplinks online. If one player is trying to activate the uplink, hang back and protect them from any attacking Imperials. The longer the uplinks are activated, the more Y-wings that are called in.
- When you run a raid as a Rebel, your primary focus when controlling a Y-wing should be to try and trip the Walkers up using tow cables. Don’t both firing on them: they’ll survive the initial barrage. Take the risk and try to get around the Walker legs with the cable to trip them up and bring it down.
- AT-STs can be tough to take down, and can really help the Empire push the Rebels away from uplinks and out of range of the AT-ATs. As a Rebel fighter, you want to aim for the back of the AT-ST, as this is their weak spot. The Ion Shot Star Card is integral for taking down AT-ATs and AT-STs.
- Much like Supremacy, blasters with mid-to-long range are useful here, as the maps stretch out and have long sight lines. The Cycler Rifle Star Card is also a must-have.

Objective: Defeat the enemy team.
The Basics: Blast is your standard Team Deathmatch mode. Kill any enemy you see. The first team to 100, or the team with the most points when time’s up, wins the match.
Tips
- Your blaster choice should change from match to match as the maps are varied. Imperial Station on Endor, for example, doesn’t have as many long sight lines, and a lot of the combat takes place in the corridors of the base. The CA-87 is brutal on this map for this reason, because you can quickly zip around corners and blast an enemy away. The T-21, one of the more powerful blasters in the game, is great for a map like Sulphur Fields.
- Make sure you buddy up and spawn with your partner. You can certainly run it lone wolf, but running as a duo around a map can be devastating for the enemy, especially if you run as an effective team and get each other’s back. You’ll be surprised by how successful and efficient a killer you can be when running alongside someone, even without voice chat.
- As mobility is limited in Battlefront, you need to really shape your Star Card loadout around the sort of player you want to be. If you’re run-and-gun, you need to take advantage of more explosive Star Cards like the Ion Shot or Explosive Shot Charge. Alternatively, if you play slowly, crouched, and use cover often, the Personal Shield is really useful.

Objective: Take out enemy transport ships.
The Basics: Fighter Squadron is more or less a dogfight mode. Throughout the match, Imperial and Rebel transport ships will needed to be guided safely to their destination. The team that takes out the most enemy transports wins. Alternatively, the team with the most enemy kills wins.
Tips
- As soon as you get an alert saying an enemy is targeting you, press up on the d-pad to break their line of sight. Then, once you’ve levelled out, continue to zigzag around for a few seconds to disorientate the enemy.
- Your ship can go from full health to on its death bed after only a few on-target blasts from the enemy. Once you get hit, swoop down to the ground in search of health pick-ups.
- Matches are populated by both AI bots and players. AI bot kills reward about a third of the points of a human-controlled ship kill. Hover over red dots to see which ships are AI controlled and which aren’t: the gamertag of players will appear, whereas AI controlled ships are nameless. Try to take down as many players between transports as possible, although taking out bots is good for your team as well. Try to balance it out at a 1:1 ratio: one player kill for every bot kill.
- When the transport arrives, focus all fire on it. You get rewarded for every direct hit. If you’re defending a transport, hang back and wait for enemy ships to get within range. Then, from a distance, take out the vulnerable ships that aren’t being protected by their teammates.

Objective: Claim all three droids on the map.
The Basics: Droid Run is kind of like your standard Domination match, except targets move around, and claiming all three markers grants you the win. The droids roam around specific areas of the match, so capturing one can still present challenges as you’re now tasked with protecting a moving target.
Tips
- You can always keep two droids captured and wait for the enemy to push forward to try and capture them. This can be smart if you want to play it and safe and keep your captured droid under watch.
- You should only rush to capture the third droid if you’re absolutely certain that your two other droids are protected by other players. Leaving them open and vulnerable can quickly turn the match back in the enemy's favour.
- Be wary of droid placement. Enemies tend to rush droids as soon as they move into an area of cover, so while it might seem that they’re covered and you can use said cover to protect both yourself and the droid, the enemy can see this as an advantage, taking you out and then capturing the droid under the safety of cover.

Objective: Activate the drop pod.
The Basics: Drop pods can fall anywhere on the map. Once they fall, rush to the pod to capture it and earn points for your team. Pod locations change from drop to drop, so you can never be too sure where it will end up next.
Tips
- Drop Zone is the kind of mode that punishes laziness: if you stand still for too long and try to hang back and camp a specific area of the map, chances are you’ll die a painful but quick death. Pod locations are completely random, so you need to be constantly moving to ensure you’re within attacking range.
- Capturing a pod can leave you extremely vulnerable. Use the radar, and if it shows a bright red nearby, make sure you clear enemies before capturing the pod. When the red fades, you’re in the clear.
- If you see a teammate capturing the pod, don’t rush to it for points: nothing will happen. Leave them to capture the pod and protect the perimeter to ensure your teammate isn’t left vulnerable to attack.

Objective: Protect your cargo, and bring the enemy cargo back to your base.
The Basics: Cargo is essentially Battlefront’s Capture The Flag mode. You’ll have cargo to defend, but you’ll also have cargo to steal from the enemy and bring back to your base. The team with the most cargo will win the match.
Tips
- There’s really only one tactic you need for Cargo: decide whether you want to be an attacker or a defender. If you’re an attacker, run and gun is the way to go. Choose a weapon that suits the map: good range for larger maps, more power and less range on smaller maps. You could end up with way more deaths than kills, but you’ll be rewarded well for taking an enemy flag and delivering it to your base.
- As a defender, position yourself with a good view of the area and ensure you have your back covered from enemies coming in different directions. Use this area as a secondary “base”, and move in and out to ensure entry points are covered.

Objective: Defeat all enemies to win the match.
The Basics: Each team has three Heroes or three Villains, and a team of troopers as backup. Hero characters are selected at random, although dying as the Hero will respawn you as a trooper.
Tips
- This mode will sometimes call for a little self-sacrifice to protect your Hero. The Hero players are essentially your team’s best chance of winning, so you want to keep them alive and active as long as possible. Constantly having them dying and respawning won’t help your cause. If you see a Hero being attack, protect the Hero player and stand between them and enemy troopers.
- Try to lure Heroes by using troopers as bait. Particularly for melee-based heroes, lure them to a sector of the map, and then have your own team’s Heroes flank the enemy and attack from all sides.
- You need to be able to recognise an uneven match-up when it occurs. Luke can match it with Darth Vader and Boba Fett, but not with the Emperor, who can take all three Heroes. Han could match it with Boba Fett, but Fett couldn’t take it up to Luke. In some cases, you’ll need multiple Hero characters to take out the opposing Hero.

Objective: Defeat the hero.
The Basics: Hero Hunt is pretty simple: as the Hero character, kill as many enemies as possible. As a trooper, try and kill the Hero to become the Hero. The player with the most kills at the end of the match, wins.
Tips
- The style of play here depends greatly on the skillset of the Hero. As Luke, the Emperor or Darth Vader, you want to stay indoors and keep the action close for melee action. As Leia, Han or Boba Fett, you can take it all outdoors as you can boost and use a blaster for combat at a longer range.
- Don’t bother going at it alone against a Hero because you’ll be slaughtered. The best way to take a Hero down is to come at them from all directions at the same time. Some players will unfortunately die in the process, but with enough firepower and explosives, you should be able to take the Hero down quickly.


 Destiny: The Dark Below guide – The Wakening
 The Elder Scrolls IV: Oblivion Plugin Walkthrough
 Star Wars Battlefront 2 Tweak Guide
 GTA 5 has been out for exactly a year, and its only getting better
 Metal Gear Solid 5: How the ending gets it all wrong