Starcraft 2 Stratagems part 2
Diary of a Teenage Starcraft Noob
By Cody Hargreaves
Wwweeeeelcome back Starcraft fans to another episode of Starcraft 2 Stratagems, the only place on the Internet where you can get your Starcraft 2 tactics and strategies delivered to you by a real-life certified SC2 noob! This week we’re going to be… yeah, okay. I’ve been watching a lot of recorded Starcraft 2 matches this past week (big ups to Husky and HD Starcraft for their amazing work in casting the latest and greatest in SC2 gaming) and it looks as though that ‘T.V commentator style’ is beginning to rub off on me. This can’t be good.
On the plus side, watching professional league Starcraft 2 matches is starting to pay off in a big way. I’m constantly improving, and as I get better… well, I get more stuff to share with you. If you need it, that is. Chances are you could whoop me in a 1v1 faster than I can say “Was that a Zergling running toward my drones?”, but if that the case, perhaps you’ll find a build or two within these pages that you hadn’t seen before that could help you improve your game regardless. Something for everyone. Well, that what I’m going for anyway. Let see how it pans out.
 T IS FOR TERMINOLOGY
Actually, in SC2 ‘T’ is for Terran, and that something like what we’re going to be looking at first today: Starcraft terminology. Again, if you’ve been playing a lot of Starcraft lately chances are you’re already going to know most of this stuff, and if that you feel free to skip ahead to this week build:
The Protoss 4WarpGate. For those of you that don’t, pay close attention. This stuff is crucial.
Macro and Micro: Macro, or
macroing as it usually referred to, is the process of building and maintaining both your economy and your base/unit construction. Micro, or
microing, is almost the complete opposite. It refers entirely to unit management on the field, or the
micro-management of individual units in order to maximise their effectiveness. The key to playing SC2 well is in your ability to master both of these abilities. Simultaneously. Good luck.
Supply/Supply Capped: Very simply,
supply refers to the amount of units you have on the field. Alternatively, supply capped is the bi-product of reaching maximum supply.
Construct additional Pylons.
Build Order: A ‘build order’ is a list recommending the precise time in which you should construct your buildings in relation to the amount of
supply (in this case, worker units) you have in the field. A build order will usually look something like this: 10 Overlord/13 Spawning Pool/15 Gas/16 Overlord Queen/18 Baneling Nest. This is the build order for a typical BanelingBust Opener I use when playing as the Zerg, instructing you to build your first Overlord at 10 drones, your Spawning Pool at 13, your Extractor at 15, and so on. I’ll be including these in my future build descriptions as a ‘quick reference’ tool to help you remember these builds while you’re playing.
 Match-ups:
 Very simply, the race of players in the game; i.e. a PvP match-up consists of 2 Protoss players, whereas a TvZ consists of a Terran and Zerg.
Harassing: Sending a unit into your opponents’ base or expansion in order to slow their economy or draw their attention away from their macro.
Scouting: Scouting, as the name implies, involves sending a unit (preferably a worker) into your opponents’ base at the beginning of a match in order to view their build order (to devise an appropriate counter) and/or
harass them to slow down their economy and building speed.
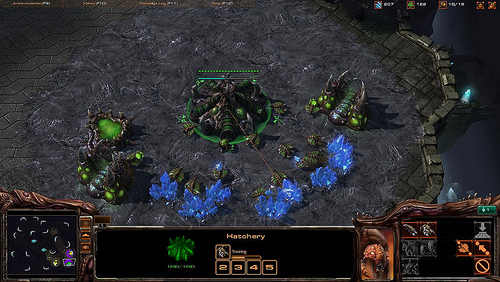
Saturation/Natural and Gold Expands: Expands (or expansions) is the term applied to setting up a second (or third, or fourth) command hub at an additional mineral location in order to effectively double your resource intake. Your
Natural is the expand closest to your starting base; your
Gold (or
Rich) expand is further away and more difficult to secure and protect, but offers additional minerals. The term
saturation is also important to note, as it refers to the amount of harvester units you have gathering at your expand. A fully-saturated expand with 8 mineral nodes would require 24 harvesters (at 3 harvesters per node) and an additional 6 harvesters on gas (three per node).
 Open, Mid-Game, End-Game and Transitions:
 These are a bit of a no-brainer, but they mean quite a lot more than their name suggests. They refer, of course, to the three typical stages of every Starcraft 2 game: the beginning, middle, end, and the transitions that divide them. But their importance is not so much in their definition, but in your ability to spot them while playing.
For example, as a Zerg player I generally begin my game by scouting my opponent, then (once I know what build they’re going to use) tailoring my
open to counter theirs. In the low ranking leagues this is normally about as far as the game gets. Either my
open is successful and the game is over, or, they counter me and we transition into
mid-game.
By the time
mid-game begins I usually know what build my opponent has opted for, and once again attempt to counter; i.e. I’ll build a Roach Warren for a quick rush, or a Spire or Infestor Pit to attack either by land or air depending both on the map terrain and my opponents build. At this point, once again, one of us is usually going to die; however, in games with good (or really bad) players, most of the time they usually don’t. Instead, they run out of resources in their main base and are forced to (if they haven’t already) secure a natural or gold expand. At this point, we
transition into
end-game.
Here, both players have secured a massive economy, and both are beginning to build they army for a final assault. It not uncommon to find both players with over 150
supply, and 2 or more mineral farms running at once. Here, the map resources are diminished, and the two armies are forced to engage in bloody battle. Have you been practicing your micro?
Okay, that enough terminology for today. On with the show.
THE PROTOSS 4WARPGATE BUILD
Strong Against: Almost all openers.
Weak Against: Speedling Rush, not much else.
Build Order: 9 Pylon/12 Gateway/14 Gas/16 Cybernetics Core/17 Second Pylon and Warpgate Tech /18 Second Gas and 1 Stalker/22 Second Gateway/23 Third Gateway and Fourth Gateway.
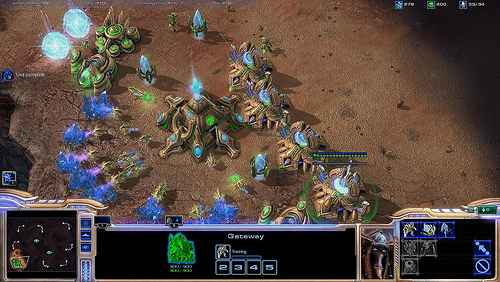 Strategy:
 The object of this build is to produce an insane amount of units as early as possible, and to keep a continuous flow of units assaulting your opponents’ base after your initial rush. Begin by building drones until you reach supply 9, then by constructing your first Pylon while your 10th drone is building. Next, chrono-boost out 2 additional drones to reach supply 12 and build your first Gateway, then at 14 get your first Assimilator and at 16 your Cybernetics Core.
With your Cybernetics Core in play push out another Drone to reach supply 17 and then build a second Pylon to prevent capping. It also a good idea to research Warpgate at this point, and to get a chrono-boost on it at around half-way to ensure that it ready when your additional Gateways arrive. Of course, if you like, you could push out a single Zealot before this to prevent early game scouting, but I’ve heard that it preferable to wait until now (18 supply) and push out a single Stalker in its place while also getting your second Assimilator.
Now, push out a few more drones to run your second gas and at 22-23 supply push out your final 3 Gateways and get ready for the rush. If you’ve timed it well (and believe me, this takes practice) your Warpgate Tech
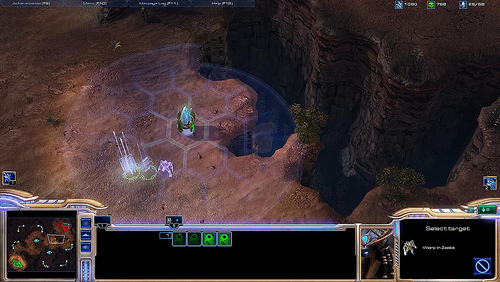
should finish at around the time your fourth Gateway appears. Then, bust out some Zealots and Stalkers (and perhaps even a Sentry if you like), grab one Drone to run with you, and push forward into your opponents’ base. Just before you arrive, have your Drone build a Pylon (preferably somewhere out of plain sight); this will allow you to warp reinforcements from your 4 Warpgates directly to your opponents’ base, saving them the time running from across the map, and should secure your victory then and there.
Simple? Yes. Effective? Double yes. An experienced player will likely see this coming and counter it as it takes a little longer than usual to build up. I usually opt for a 2GATEWAY build in that scenario to allow for an earlier defence, and once I’ve repelled their rush, build up to 4. But that just how I do it. I’d bet you can do better.
 Video Disclaimer: As always, take these videos with a grain of salt. I’m neither a good SC2 player nor a good video designer/recorder/anything-er. Here hoping I make up for that in the writing.
MMOGAMES.COM VENTRILO SERVER
That almost it for today. I hope you managed to get something out of this week guide, and as always, please leave any comments in relation to future improvements or things I’ve left out below. Now, before we go I wanted to mention one more thing briefly: MMOGames.com has a free-to-use Ventrilo Server and both myself and Dan ‘Aeskor’ Ball, along with a cast of other Starcraft players of varying skill levels, will be using it frequently. So, if you have any questions you’d like to ask, or if you’d just like to jump in for a chat while you’re playing, feel free to join us anytime. Details can be found here: (Link: http://community.mmogames.com/forum/mmo-life-community/community-updates/mmolife-ventrilo-voice-chat-guide-1685, and special thanks to Administrator Allen for setting everything up!)


 Eorzean Evening Post: Diadem Loot Drama .
 Pokemon ORAS Tip: How to get easy money
 World Cyber Arena: Where eSports Meets Mobile .
 Music Mechanics .
 FAQ: What is the Worst MMO You've Ever Played? .