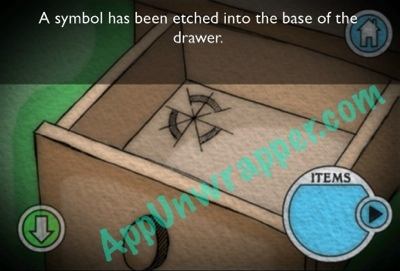
1. You’re in the lighthouse, which is a rocket ship. You need to find a floppy disk for the auto-pilot. Go downstairs and open the desk drawer to see a clue.
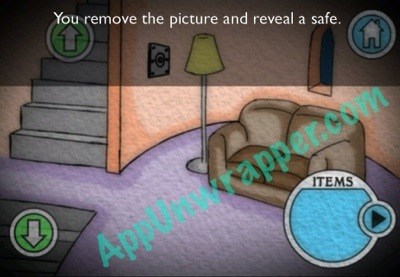
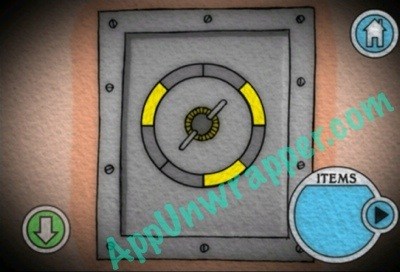
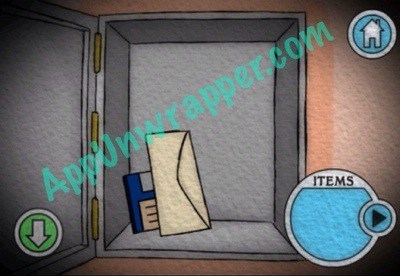
2. Go down another floor and remove the painting to reveal a safe. Use the clue from the drawer to open the safe. Read Uncle Augustus’s letter and take the floppy disk.
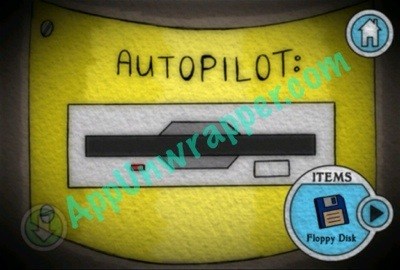
3. Place the floppy disk in the autopilot slot under the lighthouse light. You’ll crash-land on Saturn’s moon!
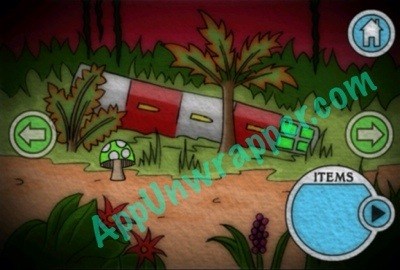
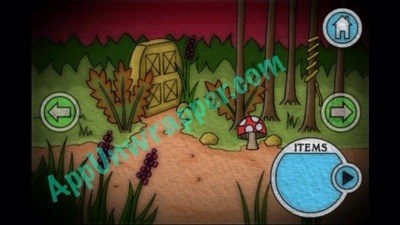
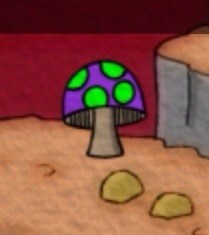
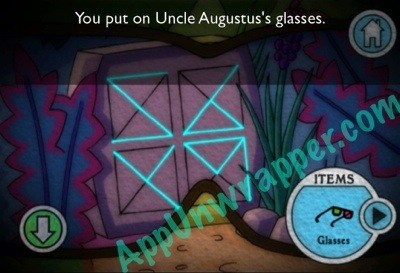
4. Tap the green mushroom and notice the colors as is squeals. Go right. Take the vine from the tree and tap the red mushroom. Also, notice the symbols on the slab that Augustus would be able to read.
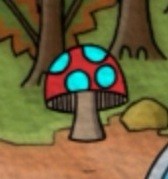
5. If you continue right, a large insect blocks your way. So go back and head left, past the exploding fruit. Continue left past the dead insects. Tap the mushroom and notice its colors.
6. Tie the vine to the broken ladder and climb down. There’s a puzzle here. Match the mushroom colors to their spot colors (the rings) to get a key.


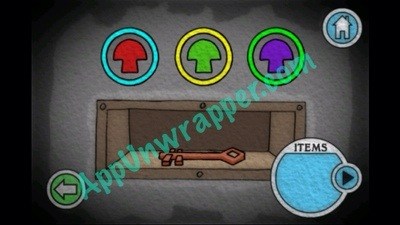
7. Go back to the scene with the large insect. Use the key to unlock the door and head down. Pick up the jar and leave.
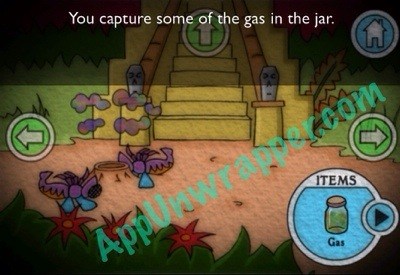
8. Go to the scene with the two dead insects. Wait for the puff of colored gas to appear and then use the jar to capture some of it.
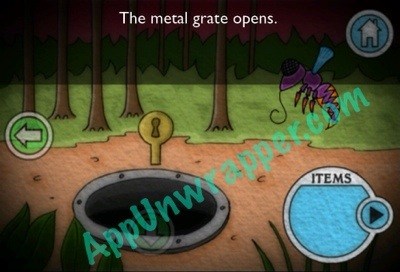
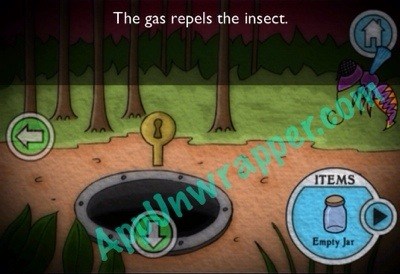
9. Use the jar of gas on the insect blocking your way and he’ll retreat. Continue right.
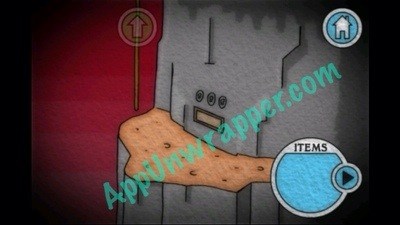
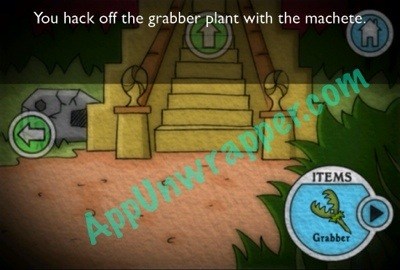
10. Ignore the grabber plant for now. Go up the stairs and take the pickaxe.

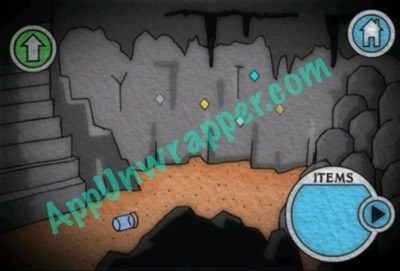
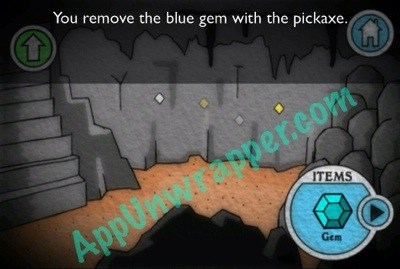
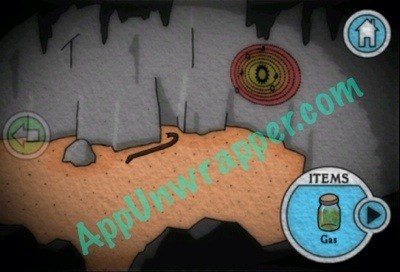
11. Go back down into the mine where you found the glass jar. Use the pickaxe to remove the blue gem from the wall.
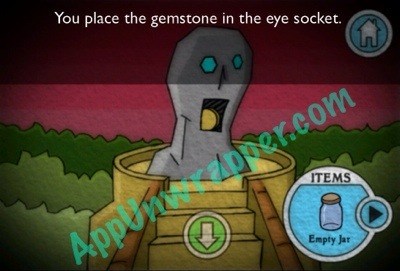
12. Go back to the scene with the dead insects. Go up the stairs and place the blue gem in the eye socket of the statue. Take the metal disc from its mouth.
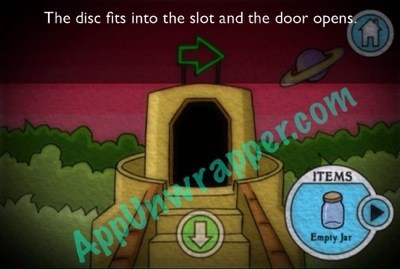
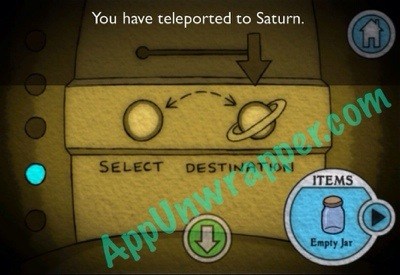
13. Go all the way right again to the grabber plant and up the stairs. Place the disc in the door. This teleports you to Saturn or its moon. You’re on the moon right now, so teleport to Saturn.
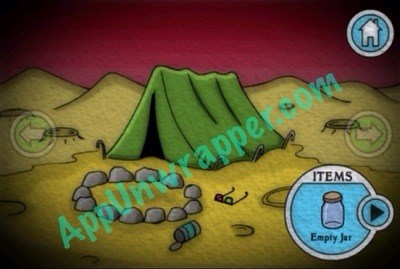
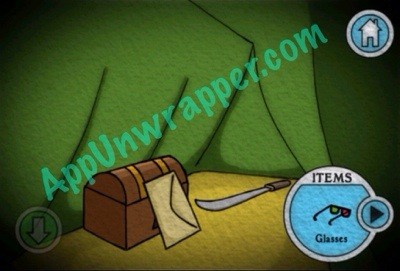
14. Walk left to the campsite. Pick up Uncle Augustus’s glasses. Go inside the tent and pick up his machete. Also, read his note. You can’t unlock the chest yet.
15. Go back to the moon and use the machete to hack off the grabber’s head.
16. Use the grabber head to take one of the exploding fruit.

17. Also, use the glasses on the stone slab to see the true symbols.
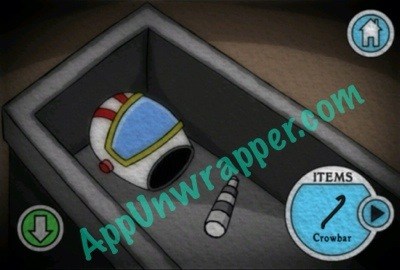
18. Go back into the mine. Use the explosive fruit on the rocks to the right so you can pass. Take the crowbar and a good look (or a photo) of the painting on the wall.
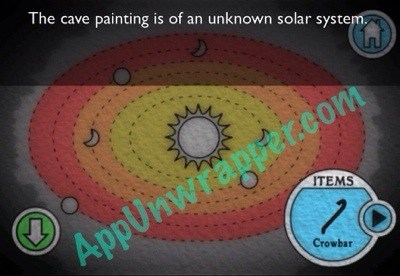
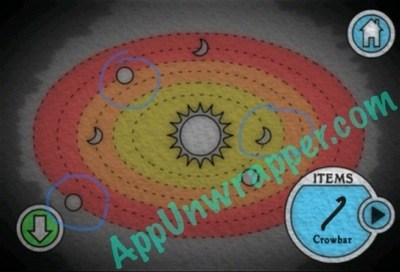
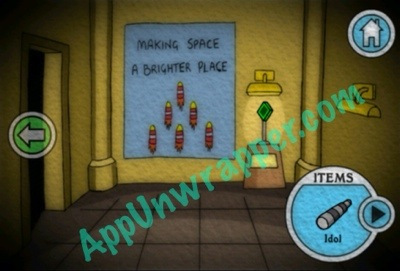
19. Go back to Saturn. Go to the museum (all the way to the right). Use the painting you just saw to solve the puzzle. I circled the planets you need to pay attention to. In the image I posted, just move the moon to the right.
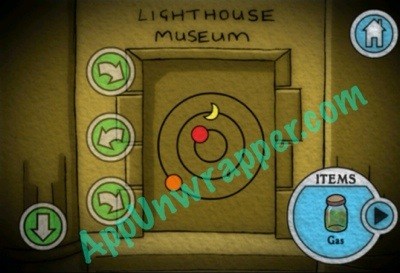
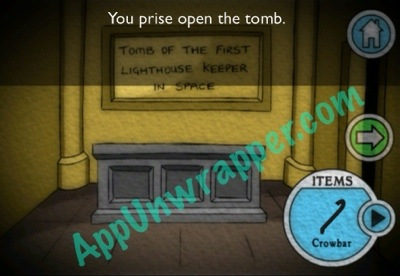
20. Go inside. Head left to the tomb. Use the crowbar to open the tomb and take the stone idol.
21. Go back and to the right room and take the circuit board chip.
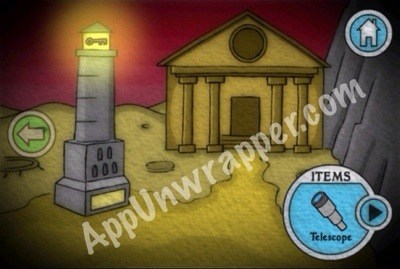
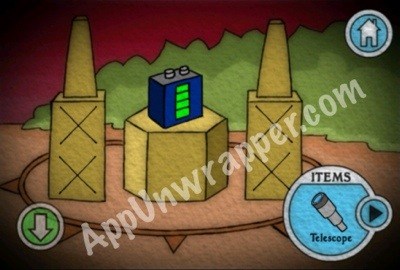
22. Leave the museum. Place the idol in the slot on the big stone lighthouse right outside the museum. We’ll come back to it soon.
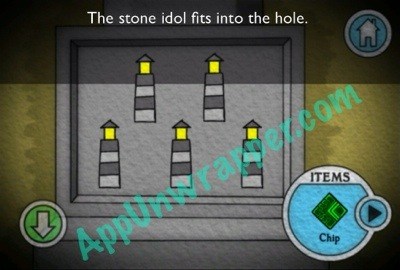
23. Go to the ship that you couldn’t enter before. Place the circuit board chip with the rest of the circuit board and solve the puzzle to open the door.
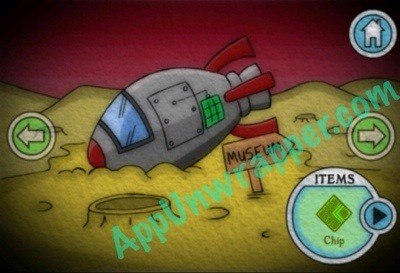
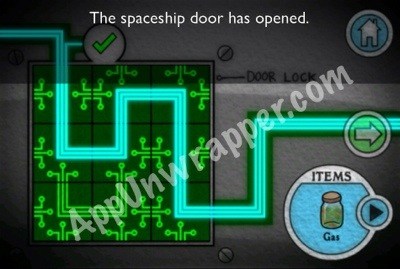
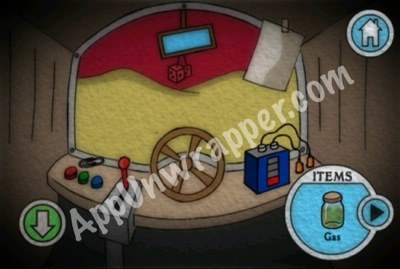
24. Go inside and take the paperclip and the battery. Also take note of the Blast-Off Checklist.
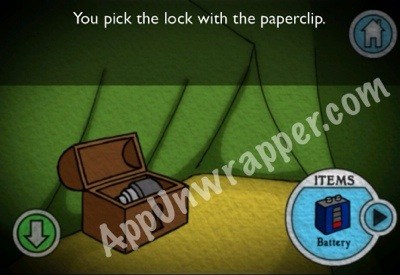
25. Go back to the tent. Use the paperclip to pick the chest lock and take the telescope.
26. Go all the way to the left and use the telescope on the shining yellow star. It’s a bunch of lighthouses! Take note of the colors.
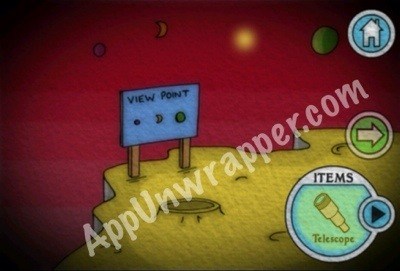

27. Go back to the stone lighthouse by the museum. Change the idol colors to match the colors you just saw in the sky (two green on top, then yellow, blue, yellow on the bottom). Take the gold key from the top of the lighthouse.
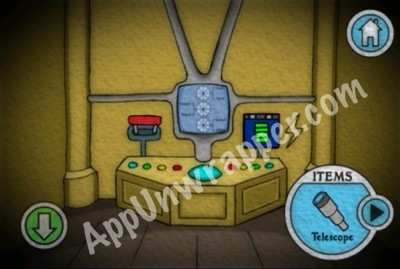
28. Go into the museum and use the gold key to unlock the door straight ahead. If you try to place the battery here, it tells you it needs a charge.
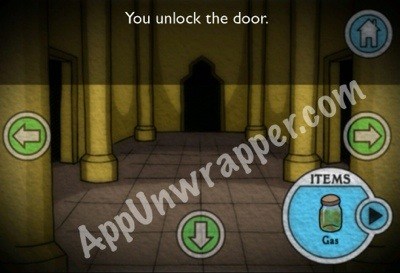
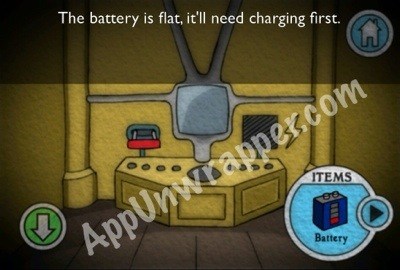
29. Go back to the moon. Go all the way left to a sort of altar. Place the battery on the altar and change the symbols to match the ones you saw on the stone slab. Lightning will strike the battery, giving it a full charge.

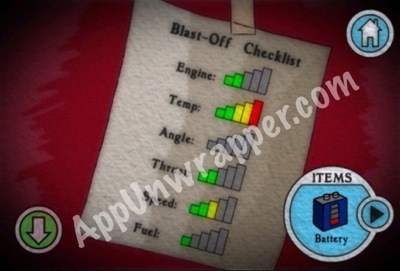
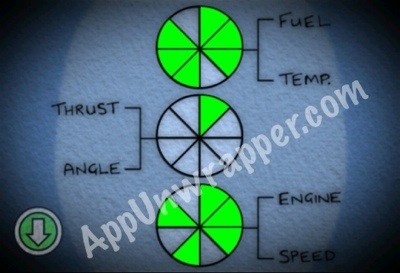
30. Go back to the museum and enter the room ahead. Attach the battery and pull the lever. Now the screen turns on. Look at the Blast-Off Chart and add up the number of bars of each couple to solve this puzzle. (The top circle has 6 green sections, the middle has 2, and the bottom has 5). Then you blast off into space with Uncle Augustus!

Congratulations! If you liked this game, try Spooky Manor, The Magic Castle, or Mystery of the Lost Temples by the same developer.


 Math Academy Remove the Corners Answers
 Hi Guess the Brand Level 14 Answers 371-400
 Whats the difference between Pokemon Omega Ruby and Pokemon Alpha Sapphire?
 Nail that Question – Entertainment Answers
 The Hobbit: Kingdoms Hack for Gold, Stone, Wood & Mithrill - AppGameCheats.com