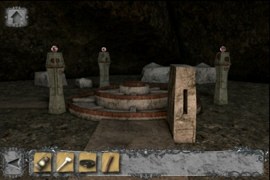
1. Take the rope and tie it to the tree. Then step off the boat onto land.
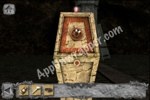
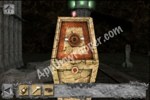
2. Take the left path and go inside the ship. Take the crate, which has gold in it.
3. Go up the ladder, then up the stairs. Take another crate which has good in it. Then leave the ship.
4. Tap to the left of the ship to find yourself in front of a small building. Tap the crate next to it to get more cold coins. Enter the building and take the painting off the wall. Take another crate of the top of the bar. Also open the back door.
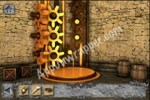
5. Go back to the first screen with the torch.
6. Take the right path this time. Tap on the building and take another crate from the porch.
7. Open the door and enter to talk to the Withered old man. Find out everything he knows and get the Sanctuary Key from him. Trade the painting for the Captain’s Key.
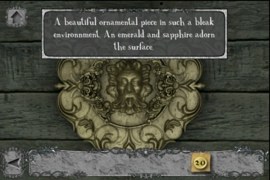
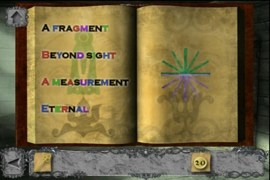
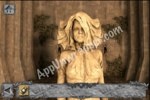
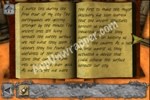
8. While you’re there, look at the sculpture on the wall and read the book on the bookshelf:
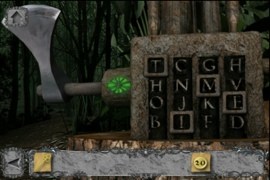
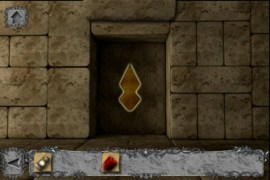
9. Go back to the screen with the torch. Tap left, tap left, tap left. Zoom in on the axe. Notice the green eye by the axe. Look at the book and focus on the green letters. Select them like so, and the green eye will glow. Take the axe:
10. Tap the windmill to see the cavern opening. Then go back to the ship and use the Captain’s Key to unlock the door to the cabin. Go inside take the ruby figurine. Read the book next to it. Also, examine the sculpture on the wall.
11. Go back to the small cabin where you found the painting. Go through the back door and chop down the free with the axe. Now you can cross the lake.
12. Tap on the lighthouse and take the shovel leaning up against it. Then open the door and enter.
13. Take the crate/gold. Go upstairs and talk to the Watcher. Trade him the 30 gold for a ring.
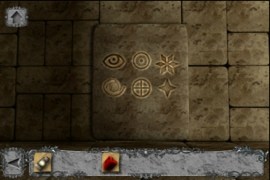
14. Go back to the cabin. Tap on the puzzle near the bar. Remember the three symbols you saw (ship, lighthouse, cavern)? Tap them to get a flute:
15. Go through the back door again and cross the river. There’s a snake statue near the lighthouse. Use the flute on it and it will open up, revealing a Sapphire Figurine. Take it.
16. Go back to the cavern opening and use the shovel to dig at the base of the eye obelisk. Take the telescope.
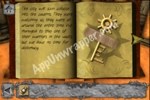
17. Give the telescope to the Watcher in exchange for the Amethyst Figurine.
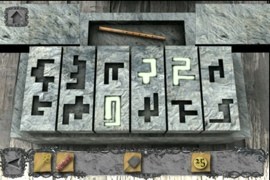
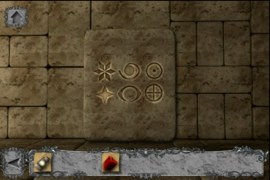
18. Downstairs in the lighthouse, solve the plant puzzle using the three runes you used to get the telescope. Change the gems like so to get the Topaz.
19. Go back to the Captain’s cabin and put the ring on the hand to get a saber.
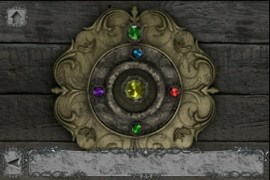
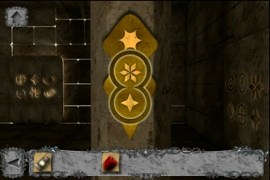
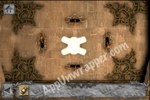
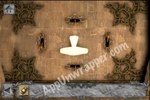
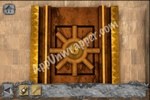
20. Arrange the design on the wall like so, and put the topaz in the middle.
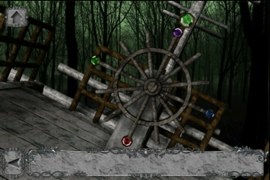
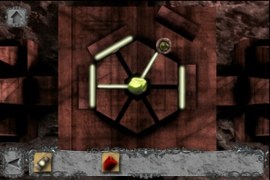
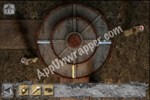
21. Go upstairs and turn the wheel like so to unlock the chest in front of the Captain’s cabin and get the Emerald Figurine.
22. Go back to the cavern opening and cut the undergrowth with the saber. Go through to find the sanctuary.
23. Use the key to open the sanctuary door and go inside.
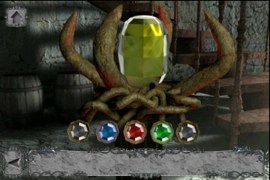
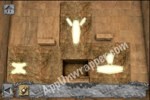
24. Tap on the statue ahead of you. Place the figurines by the corresponding orbs. Take the goblet and trade it to the Withered for his lantern. Now you can enter the caverns.
25. Use the lantern to enter the caverns. Pick up the grime covered object from the table (looks like a bird).
26. Continue forward. Tap to the right of the strange mechanism and pick up the rope.
27. Go back one screen and tap the left side of the screen. There’s a big pit. Tie the rope to the stake and climb down.
28. Enter the temple. There’s a puzzle here. I played around with it and then it opened, but not really sure how it works.
29. Enter and talk to the Wise. Get the Elixir of Breathing from him.
30. Continue on until you see a cart. Take the dynamite from inside.
31. Go back to where you found the rope. Wash the grime covered object with the water to get a raven figurine Use the elixir to go underwater.
32. There’s a puzzle here that we can’t solve yet. Take a crystal and go back up to trade it to the Wise for some gauntlets.
33. Continue on to where you found the dynamite and use the gauntlet to get a piece of sacred ore.
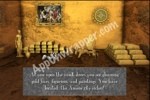
34. Look at the drawings on the walls:
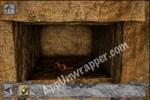
35. Go back up to the opening of the pit. Tap the right opening and you’ll find yourself in a room with lava.
36. There’s a box with a picture of a bird on it. There’s also a pedestal with a raven figure that matches the one you have. Put yours on the pedestal and the box will open, revealing a wheel.
37. Go back two screens to the strange mechanism. Place the wheel next to the one that’s there. Then turn each wheel once to shine light into the top part. Zoom in on that part and take the Artifact of the Star.
38. Go back underwater and arrange the puzzle like so to get the Artifact of the Moon.
39. Go back to the Wise and place both artifacts on the wall to open a secret door:
40. Walk through and look at the drawing:
41. Continue walking. There’s a puzzle here. Put the sacred ore in the center and match it to the drawing on the wall like so:
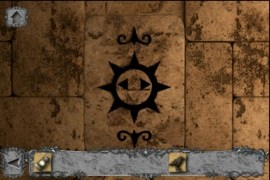
42. Walk through the door that just opened.
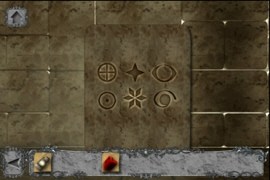
43. There are three slabs (doors) here with symbols on them. There are also three pillars with symbols on them, as well as different colored gems. We’ll be opening the right door first. Match the symbols on the pillars to the symbols on the right door:
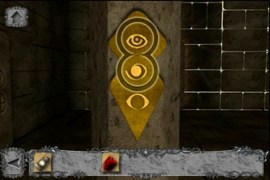
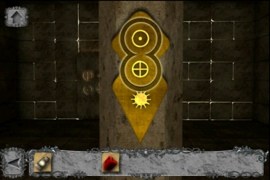
44. The right door opens. Tap the three pieces to rotate them until they look like this:

45. Now match the pillars to the left door:
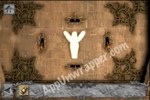
46. The left door will open. Flip the arrow upside-down:
47. Now match the pillars to the middle door to open it:
48. Walk through the door and put the dynamite on the device to blow it up. The floor opens up, revealing an underground city. Go down into it.
49. Tap the left side of the screen and pick up the lever.
50. Go back one screen and enter the cathedral straight ahead. Tap the right pews to find a bone. Pick it up and leave.
51. Enter the building to the right and pick up the belt.
52. Leave and zoom in on the cathedral, but don’t enter. Tap to the right of it to see some pillars:
53. Put the lever in the slot and pull it.
54. Tap to the left of the screen to see some more pillars in front of a building.
55. Thanks to KB for the instructions for the Tower puzzle. Screenshots to follow:
“3 pillars + the one with the lever you put in.
Each pillar has symbols, if you click on the symbols you will see that that each pillar has 2 sets of symbols.
After activating the wheel, whenever you click on the wheel a different section of the wheel is light up yellow\white. Keep hitting it and you will see that it goes all the way around the wheel landing in different spots.
Now click to the left of the screen (while looking at the 4 pillars and the wheel) you will see the tower and 4 other pillars in front of it. Each one has its own symbol, but if you look closely you will notice that they all have a BLUE lines, just in diff positions.
OK now back to the wheel.
Pillar 1 the one that is on far left.
When you look at the symbols all it is basically saying is that if you go to the wheel and light up the section that corresponds to the symbols white\yellow light and press the button under it. that the corresponding blue light will light up on the wheel.
For example: Pillar 1. Tap the pillar until you have selected the set of symbols which shows a Straight white\yellow line pointing down and a Blue one pointing up. Go to the wheel and keep tapping it until the white\yellow light is pointing straight down starting (from the core of the circle not the outer ring) just like in the Pillar you just looked at. Now go back to Pillar 1 and press the button under the symbol. Red light lights up. Now go back to the wheel.. you will notice that a blue light has been uncovered and it is pointing in the same direction that the symbol in pillar 1 shows. Straight up. So with that done, all you have to do is replicate the blue lines with the BLUE line symbols in the other screen.
It is a lot of going back and forth.
So, all you have to do is write down and or remember the pillars with ALL BLUE lights in other screen and replicate them on the wheel.
note: you can only do on pillar at a time (only 2 blue lines at one time)
after you figure out the first one the rest are easy.
I know this sounds confusing to some but it is the best way I can explain.”

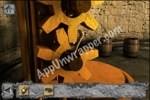
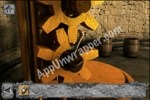
56. After all four lights are lit up, the tower door will open. Enter to see some gears. One is broken. Place the bone in the slot and then secure it with the belt.

57. Pick up the amulet from inside the barrel. Go back to the statue and place the amulet around her neck. This activates the levers behind her

58. The center symbol is now lit. Press it to change the shape (they correspond with the large stones in the church. Select a shape and press the lever that is in the direction you wish the large stone to move.
Spider shape left, man with arms raised top and nose right. Go back to church and you can see alter has opened revealing goggles.
59. Go back to the tower and use goggles on the platform at the base of cogs you repaired. A book will be revealed. Read through it and take the key.
60. Go back to the church and use the key to open the vault.
Congratulations! You made it out! If you liked this game, try these other adventure and escape games.


 How to build it up: Big Business HD hints, tips, and tricks
 Blek animated walkthrough for levels 41 through 50
 Lost Within - Tips, Tricks, and Strategies for Surviving the Asylum
 100 Pics Birds Pack Levels 1-100 Answers
 The Room 3 walkthrough - The Lost Ending