Last week, we brought you the solution for chapters one and two of
The Room - Fireproof Games's masterful mystery iOS and Android puzzler.
This week we take a look at the challenging third chapter of the game, which sees a reduction in scale - but certainly not challenge - from the sprawling chapter two.
As with last week's piece, we've tried to make this photo-heavy, as text is often inadequate when describing the brain-twisting conundrums on offer in the game.
Tune in next week for chapter four, and the conclusion of this epic guide. For now - on to chapter three!
Chapter 3We left chapter two with a brand new, rather small box to play with. Here's how to crack it open.
Start by putting the eye-piece on and scanning the outside of the box until you see those telltale finger-prints on the Talisman plaque. Give it a nudge and it'll swing off to reveal a slider switch. Slide it down to open a tray.
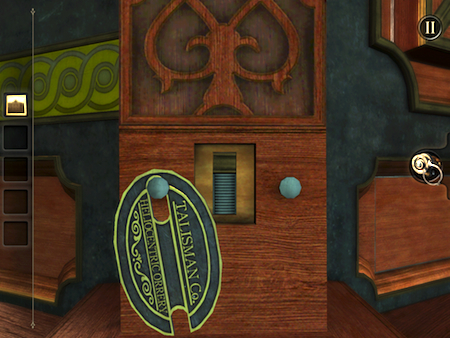
Read the letter and tap the little puzzle box to pick it up. Now tap the box in your inventory to take a closer look.
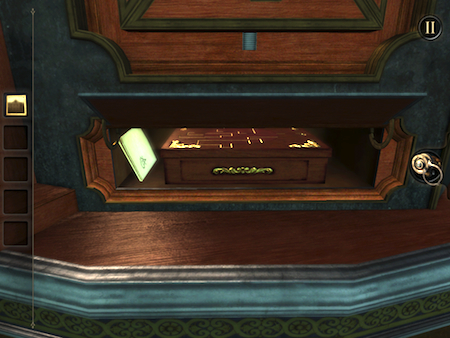
Now you're confronted with a complex ball-on-a-wire puzzle. The idea is to get the ball from the left of the box to the right, using the turntable in the middle to gradually work your way around.
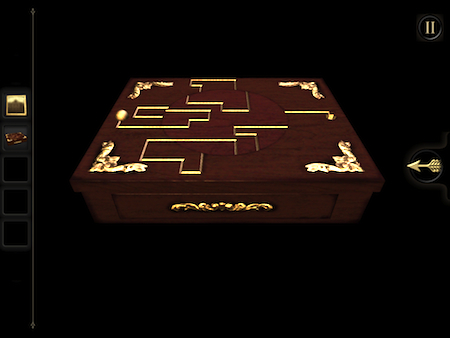
First up, drag the ball around to the opposite end of the centre piece that matches up with your starting point and rotate clockwise one notch like this:
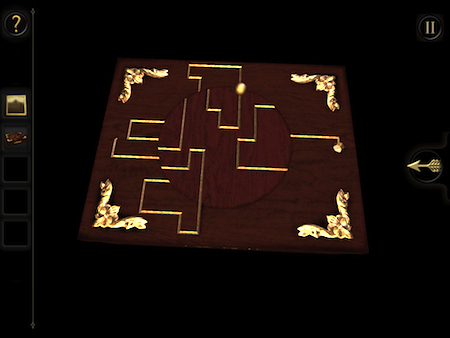
Move the ball off and rotate the centre piece clockwise one more notch. Move the ball left, but stop it on the turntable like this:
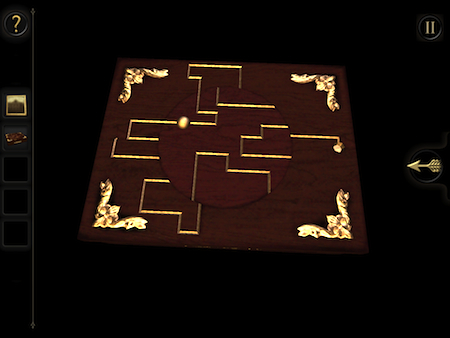
Rotate the turntable one notch anti-clockwise and move it off onto the bottom section of the puzzle and over to the far left, like this:
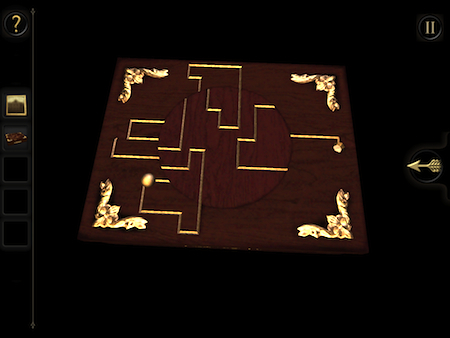
Now move the turntable another notch anti-clockwise and move the ball right onto it so it looks a little something like this:
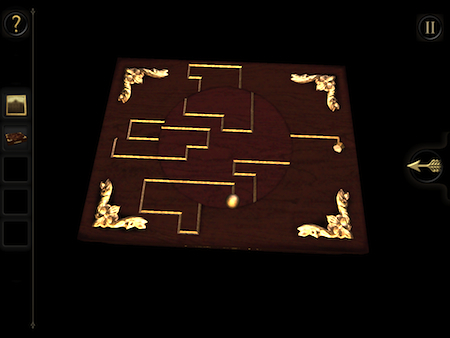
One final anti-clockwise turn of the turntable and you'll be able to complete the box puzzle.
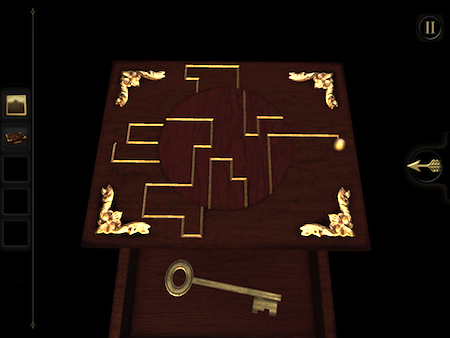
Take the key. Now, back at the main box. Rotate to the right, past the globe, until you reach the golden circle with the lock to its left. Insert the key and turn it to unlock the tumbler.
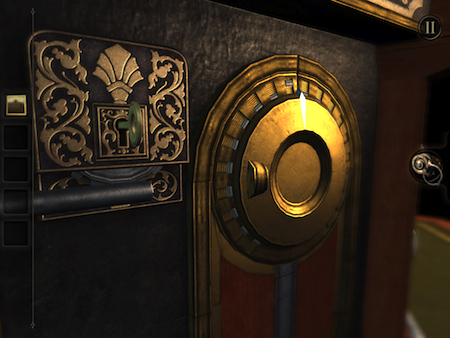
Now carry out the following rotation instructions to crack this here safe. After each set of clicks, return the arrow marker back to the beginning.
Five clicks left; four right; all the way left; all the way right.
Now the safe will open.
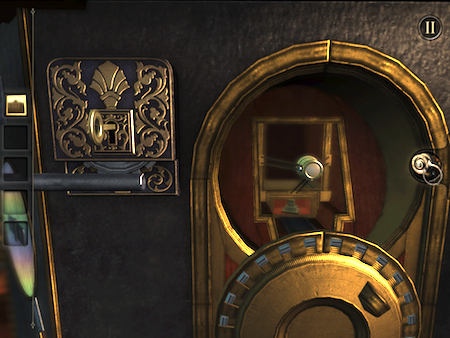
Pick up the small square object and slide the photo into the bracket. Put on the eye-piece and double tap on the viewing lens to look through.
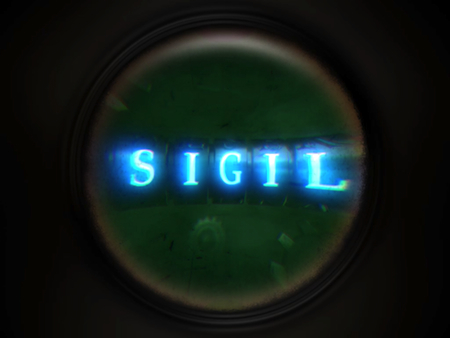
Remember that word, SIGIL. Now move just to the left of the viewing lens puzzle, to the wooden circle. Put on your eye-piece to reveal a pattern.
Turn the circle to the left. Slide the left-hand metal clasp into the gap.
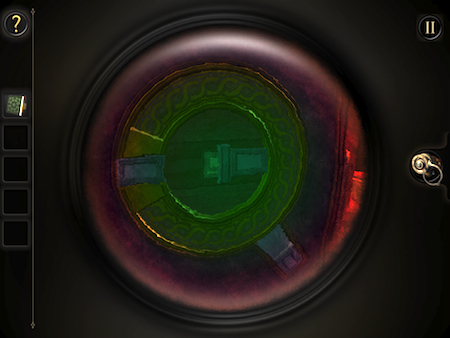
Rotate the circle so that the gap is adjacent to the bottom-right slot. Move the existing clasp back, then move the new clasp on alongside it.
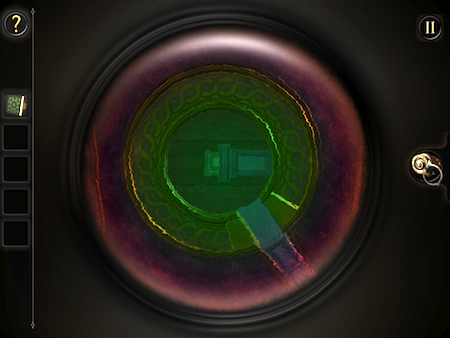
Now rotate the circle so that the gap lines up with the remaining clasp. Slide it on to reveal the square hole in the middle.
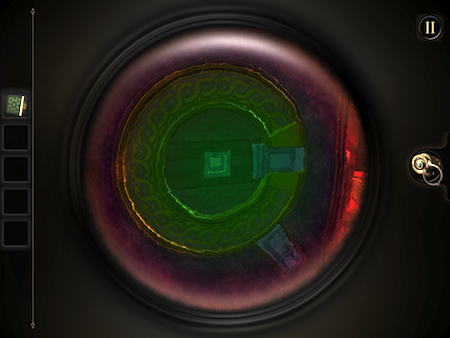
Insert the square object from your inventory to open a keypad to the left. Now insert the letters from the word you uncovered in the photo - SIGIL (not SIGIT, as I've spelt here. Whoops.).
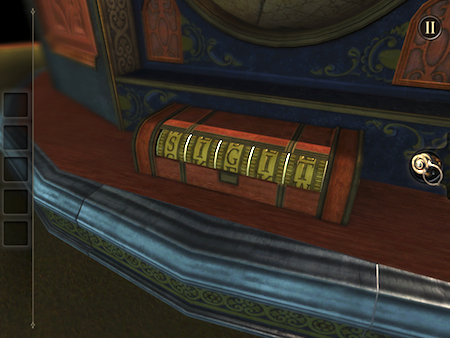
Read the letter in the drawer and take the blue crystal. Flip round to the opposite side of the box and insert the crystal into the slot at the base.
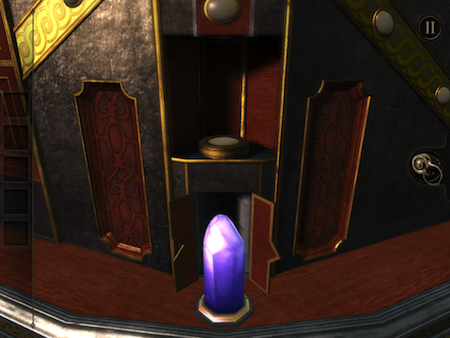
Ooh, a mysterious light. Turn that golden dial to narrow the focus of the light until a drawer opens. Take the flywheel.
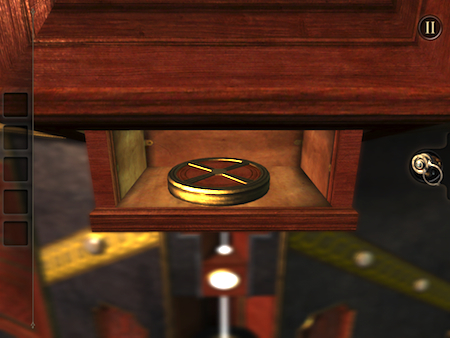
Rotate to the left a little and zoom in on the base of the box. Insert the flywheel into the vacant slot, then slide both buttons to the right simultaneously.
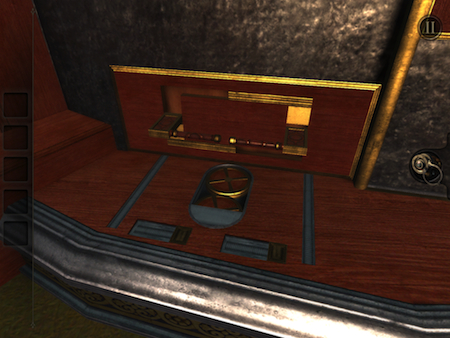
Pull out the drawer and grab the light-reflecting device. While you're in the drawer, put on the eye-piece. Tap the finger prints on the panel to open another hidden drawer.
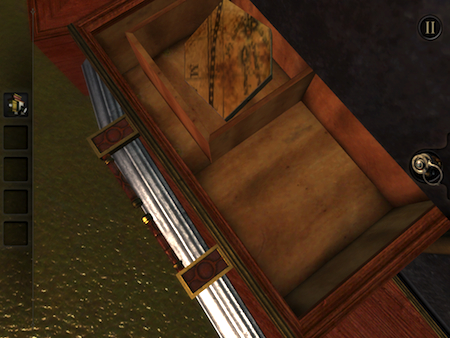
Take the globe piece, then rotate left and insert it into the hexagon-shaped gap on the globe.
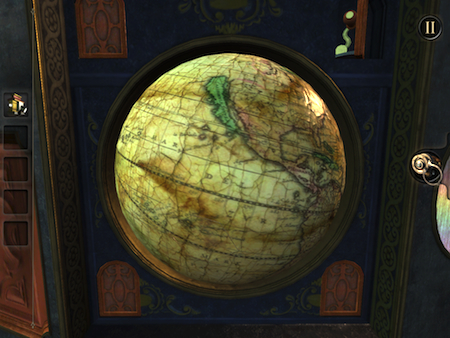
Pick up the handle that appears to the top right of the globe. Rotate to the left and zoom in to the blue and gold circular shutter. Insert the handle into the square hole to the right and crank away.
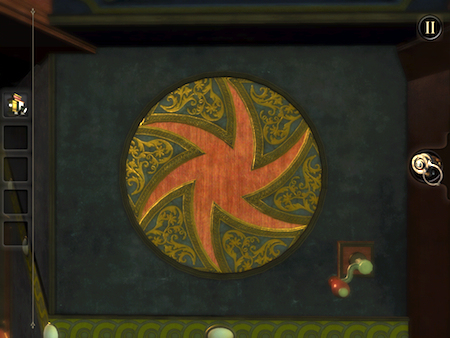
Another wooden bit! You guessed it - time to slip on the eye-piece again. We've got another hex-shape alignment puzzle to solve.
This time you need to rotate the central wheel a little in order to align the pieces of the shape. You'll also need to view the puzzle from the left and a little low down in order to get the right angle.
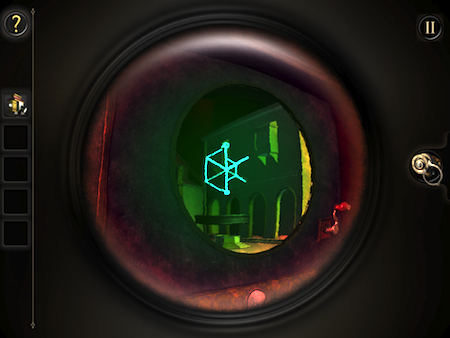
Take the little wooden box that appears, then examine it. Examine its bottom (oo-er) and rotate the cross to align with the corner pieces. Now you have a star-shaped key.
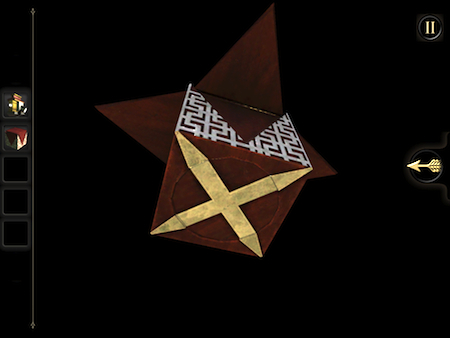
Rotate right a little and insert the star shaped key into the slot above the funny multi-key slot. A telescope will appear on top.
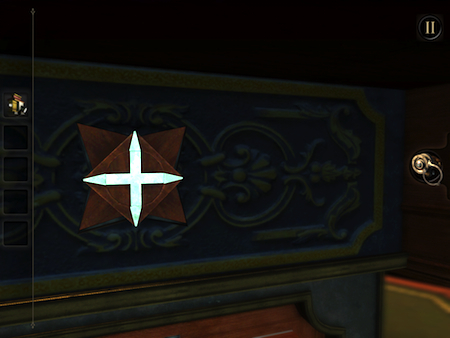
Rotate left around the box and zoom into the light beam section. Insert the light box.
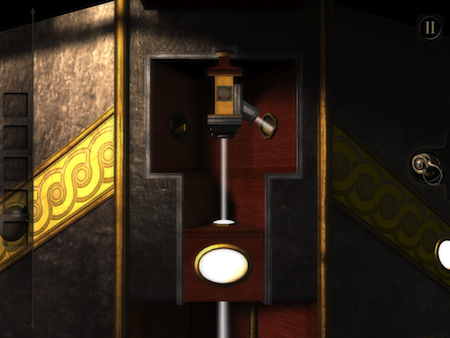
You'll be presented with a little gauge and some buttons. Now, you need to be quick with this next bit. Press the right-hand button and a timer will start.
Zoom out and rotate right and you'll see that a similar gauge has appeared. Press the button. Repeat another couple of times and you'll eventually find a star-shaped map piece. Slot this into the globe, as before.
Now go back to the main dial box and repeat to the left.
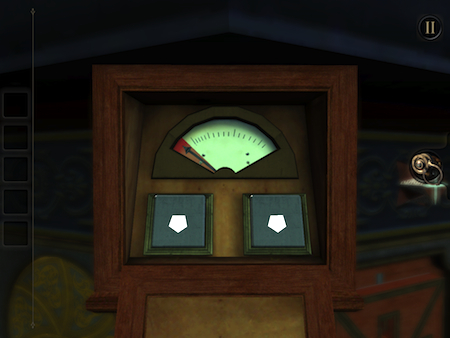
This time you'll eventually uncover a multikey. Move round to the unusual multikey slot, zoom in and drag the new key onto it. You'll now have to rotate the pieces to match the slot.
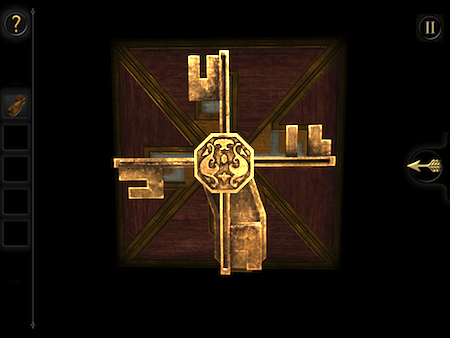
Once done, back out and drag the key onto the slot again. Pick up the mirror from the little safe that opens. Now go back to the light box section and drag the new mirror piece onto the light box.
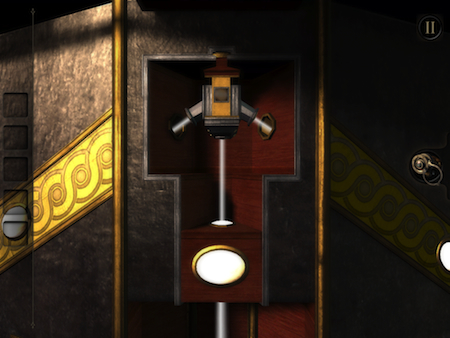
You'll be presented with a black compartment containing a few little mirrors. Put on the eye-piece to reveal an invisible laser beam.
Drag the bottom mirror component so that the beam hits the left-hand mirror. Now drag the left-hand mirror component down so that the beam strikes the upper-most mirror. Now drag the top mirror component so that the beam hits the right-hand mirror. Here's the result:
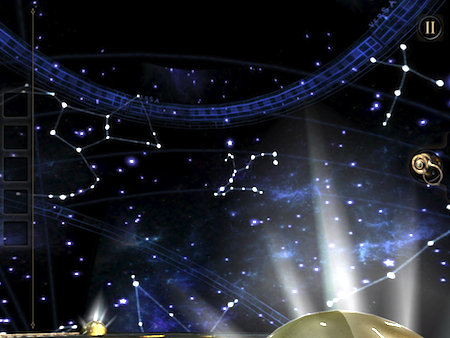
Pick up the map piece and slot it into place on the globe. Now move to the top of the box and look through the telescope to reveal a cross pattern.
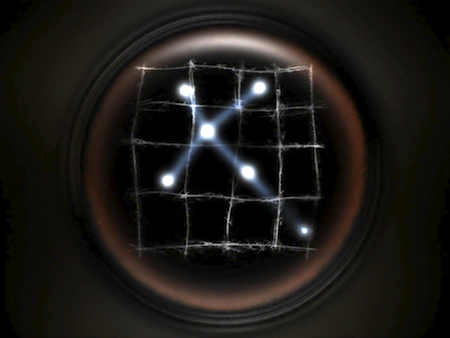
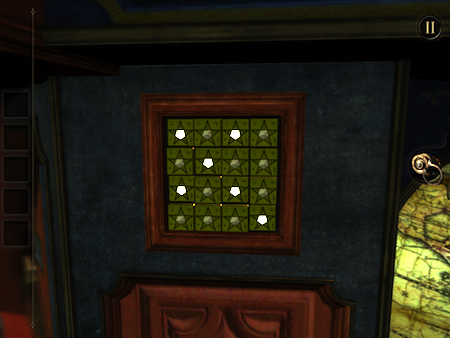
Look below the telescope, on the side of the box, and zoom into the green keypad. Copy the cross pattern onto the keys to reveal the final piece of the map (and the penultimate letter).
Put the final bit of the map into place and pull the handle. The top expands, ready for the final star-gazey challenge.
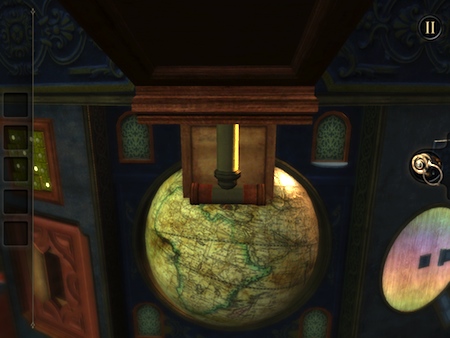
Chapter complete! Tune in next week for chapter four and the final reveal of
The Room's big mystery.



 CLARC: Walkthrough Guide
 PBS Big Picture Challenge All Level Answers
 Zoom Pics Quiz Game Level 1-10 Answers and Solutions
 The Bot Squad: Puzzle Battles - Tips, Tricks, and Strategies for Better Bot Battling
 100 Pics Animal Kingdom Answers Levels 1-100