
The Hobbit: Kingdoms of Middle Earth has just been launched by Kabam and there are already tens of thousands of players trying out their luck at city building and goblin battling in Middle Earth. I am here with a The Hobbit: Kingdoms of Middle Earth guide, a walkthrough for beginners (and not only), teaching you the basics of the game – user interface, how to play and all the information that you need to start on the right foot and have a blast with the game.
We’ll cover in this guide everything that you need to know, on chapters and I am trying to go as in-depth as possible, but there are simply so many buildings and things to do in the game that it’s impossible to cover them all. But having the basics is enough to start with, so let’s check out this walkthrough for The Hobbit: Kingdoms of Middle Earth!
We’ll start with the user interface, which is the main thing you have to get used with to help you navigate easily through the game. Check out the UI in the screen capture below and the details!
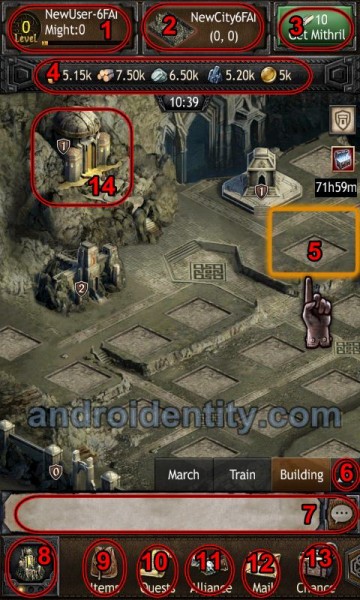
1. User info (User name, level, might and user details). If you tap that icon, you can change your name.
2. City Name & details (again, tap it to change name and access more stats)
3. Mithril: how much of the premium currency you currently have (and the option to purchase more)
4. Resources: how much of each resource you have
5. Building spot: here you can build one structure in your new city, which can later on be upgraded – tap an empty square and you can choose a new building
6. Up arrow: tap it to show it the current focus
7. In-game chat: here you can check out what the players are saying, say something yourself or chat with your allies.
8. Change of view: tap it to switch to Field View (where you can build farms and mines), World View, and getting back to the Castle View (or Keep view)
9 & 10 & 11 & 12 & 13: access the indicated bits with info and details. You can also scroll right here to reveal even more options
14. Your keep, where you can change tax rate for example.
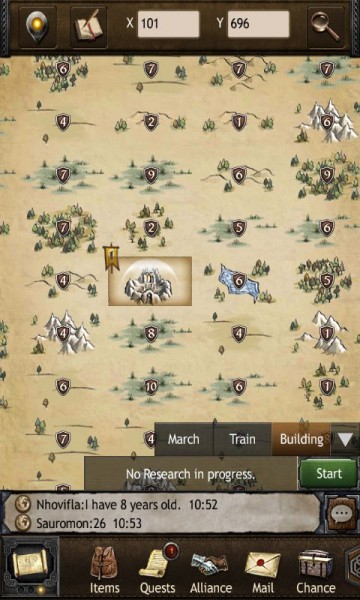
The world view is the place that shows you the surrounding areas, offering you a chance to attack and conquer new territories, in order to expand your kingdom. You can scout the surrounding areas and obviously, don’t go for the biggest levels when you’re weak!
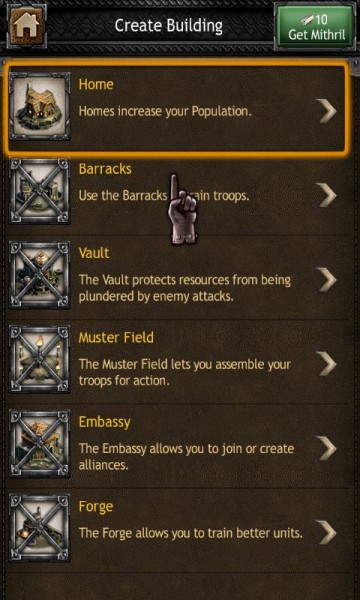
Tapping an empty square while in the Castle View (or Keep View) will bring up the “Create building” menu which allows you to build new structures, which can be later on upgraded by simply tapping on them. The buildings are interconnected, so the idea is to mix and match until you find the right balance.
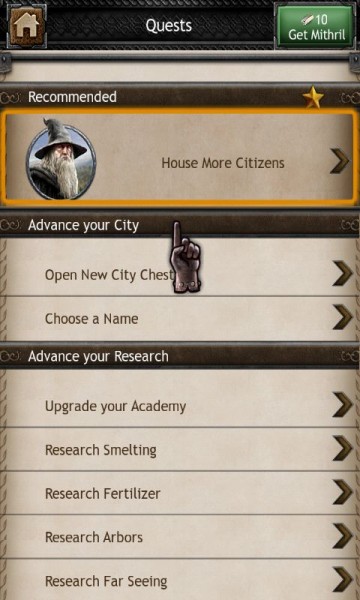
Basically, these are missions that will help you move forward in the right direction and reward you for doing so. Basically, these are your guide through the game, having you build different structures in the correct order. If you already know how to play (which probably isn’t the case), you can ignore them and build everything at your own pace and as you want to. But if you think that you could use some extra help, use the Quests (especially the Recommended one) as a guideline and complete them one by one! And don’t forget to actually Claim the rewards after completing the quests, as they are not automatically given!
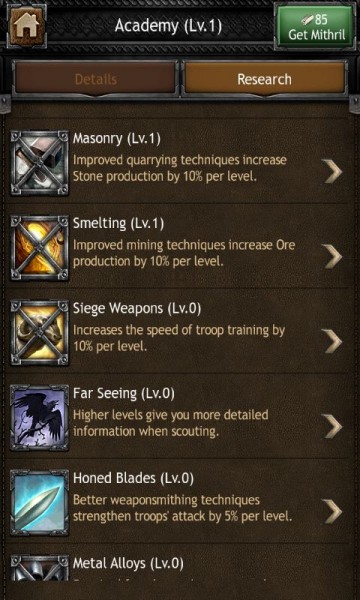
This is also an important part of the game as it offers all sorts of bonuses. You need to meet specific requirements in order to be able to research a new thing, but generally the best thing to do is to always research something. You can access the research option by clicking the Research icon in the game’s menu and select your focus from there. Improve your Academy to be able to research more!
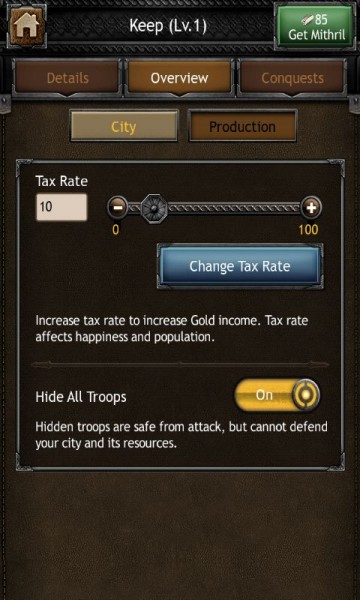
This is the place where you can check out an overview of the city you’re running and, most important, change the tax rates. You can increase them to generate more money, but be aware that this will reduce the happiness in your city, which in turn will mean that fewer people will come live in your city. So a good idea here would be to greatly increase your population in order to get more gold, but more on that in a future article with more in depth strategies.
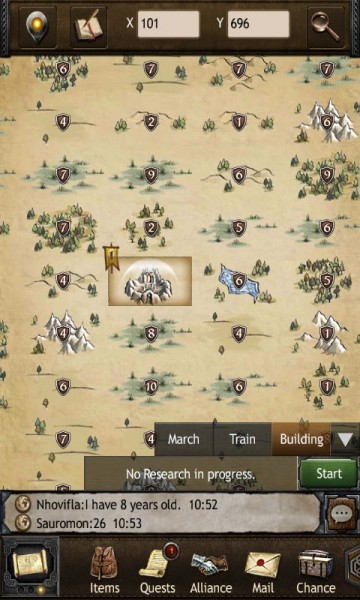
Tapping the change of view button twice will get you to world view where you can scout areas, other players and plan out your attacks and expansion. It’s better and best to scout an area first to know about the power there, but have in mind that cities can get their allies to send over troops when you attack, so things might be different when you get there!
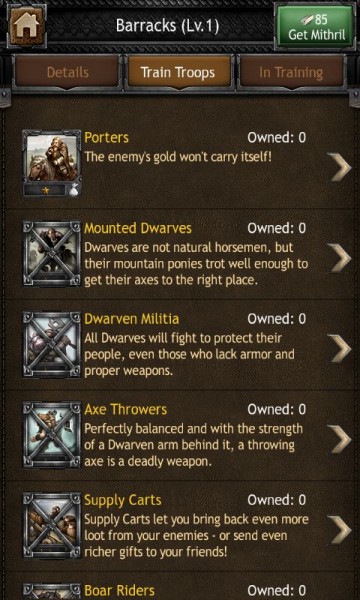
The Barracks are the place where you train your army, an in order to unlock more troops, you must either research or get other buildings. The idea here is that the troops are working on a rock-paper-scissors so one type of warrior is good against another, but does bad against the third one, and this is the reason why you should try to keep your balance and have a bit of everything. Actually, a lot of everything!
You are also in protection mode for the first 7 days after starting the game, and you should take the most advantage of this. Protection is valuable and helps you build your armies and cities – try to be as active as possible during this period, because once you’re out of protection, things get really complicated!
And this is the Hobbit: Kingdoms of Middle Earth walkthrough for the beginners. Stay tuned with Android Entity for a more in-depth guide with tips, tricks and strategies to become the greatest player of them all!

