
We are back with the Need to Escape walkthrough for you, with five more levels solved to help you keep on moving and fulfill that desire to escape. In this article we’re going to check out the Need to Escape walkthrough for levels 11 to 15 and I am sure you will have a great time completing the levels together with us.
Don’t hesitate to check out the Need to Escape Walkthrough for the first 10 levels if you need help with them, or if not and here is where you got stuck, read on for the Need to Escape Walkthrough for levels 11 to 15. Have fun!
Need to Escape walkthrough: Level 11
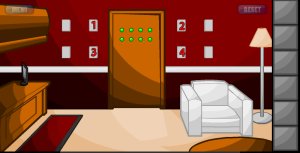
You must make all the dots turn green by tapping the white squares to the sides. It has been painful to solve it, but below you have the instructions on what squares to tap and in what order:

Need to Escape walkthrough: Level 12
If you tap the monitors, you will see they show you the code 78735. But above the panel there is an arrow pointing counter-clockwise, so the actual code is reversed: 53787. Use it to exit.
Need to Escape walkthrough: Level 13
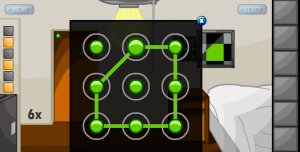
First, drag the rope 6 times and the painting will move. Then, tap the dots and connect the lines to have a figure similar to the square one in the painting:

Need to Escape walkthrough: Level 14
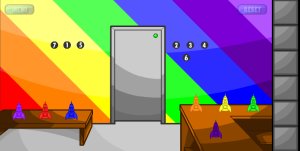
Tap each rocket the number of times indicated on the wall, based on their position (final colors below):

Need to Escape walkthrough: Level 15
The word RISE on the wall tells us about the number codes. R-2 for example means that on the panel we must look for the letter that is 2 spots behind R – P in this case, so we will have to tap the number 7. I+3 means that our letter is L, which is at number 5. Do the same with all the other letters and you will get your code: 7529.
And this is it! We have completed 5 more difficult levels in our Need to Escape walkthrough and I am sure that you had a great time solving them. Stay tuned with Android Entity as we’re going to post more walkthrough articles as soon as we complete the new levels!


