This guide for Everquest Next Landmark is a comprehensive compendium, which includes information on both the key and the less important game mechanics. It has been drawn up basing on the beta version of the game and, with the final version being released, it will be enriched by appropriate updates. In the text, you will find basic information on the system requirements or controls, as well as thoroughly prepared descriptions of the game's mechanics and valuable hints, which the beginner players will, undoubtedly find useful. Landmark is a web-based sandbox game, which was prepared as a side-game of the Sony Online Entertainment studios, which is currently working on an extensive EverQuest Next MMORPG. The quintessence of Landmark is exploration and creation of the vast world, by erecting various structures and buildings, whose construction is limited only by the available materials and the player's imagination. Character creation, in the hero creator and choosing of the appropriate tools, are the first steps towards the cognition of the incredible universe created by the developers of the Landmark. Let's build!
This guide for Everquest Next Landmark includes:
()

Movement

Action

Camera controls


Sprint

Jump


Double jump in various directions


Screen zoom in/out
 THROUGH
  AND
AND 
Individual quick items

Chat activation and sending of messages

Character screen

Inventory screen

World map

Crafting recipes

Friends screen

Patterns screen

Community screen

Plot management screen

The shop with micropayments and photo gallery

Hotkey screen

Options

Main menu
In this chapter, you can take a close look at the game's interface. Each of the elements of the interface has been marked with a symbol and described in a comprehensible way, so that no beginner player has problems starting the game, without any problems.
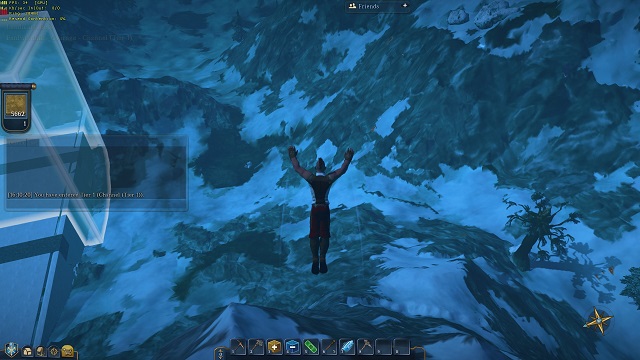 I am not gonna die anyways so, who cares...
The quintessence of Landmark is collecting various resources, crafting valuable items, using those resources and erecting creative buildings and structures. At first glance, this description could, just as well, be used to introduce Minecraft, but there are certain differences between these two games. What is worth paying attention? In landmark, there are no threats to your character. What us even more, you virtually cannot die. In the world that you explore, there are no hostile (nor even neutral) creatures, whatsoever. Even jumps from heights go. If you piece all of these bits of knowledge together, it turns out that Landmark is a sort of a multiplayer building site, where there is nothing to stop you from exploring the world presented in the game.
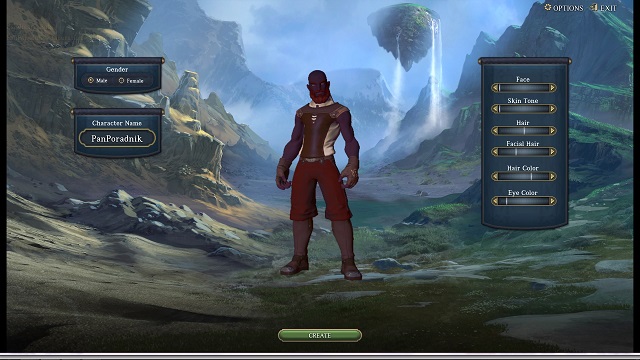 You really need very little to create a hideous character.
Landmark offers a very scanty character creator, where you can only change the standard elements in the looks of the character. And so, you can determine the sex and the name of your character, as well as use sliders to adjust such elements as skin color, face shape or the length of facial hair. What is absent from the creator is the character archetypes, class abilities or even points to distribute, among the basic statistics (strength, agility, intelligence). After you are done determining your character's beauty, you need to choose the server, on which you want to start the game. What is worth pointing out, on a single account, you can have only one character, at a time but, it can log on to all the available worlds and lead separate lives there.
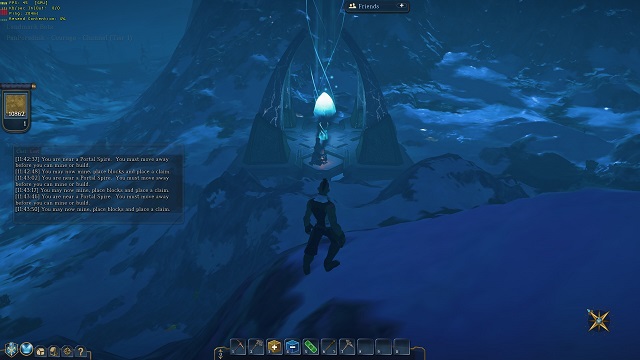 And this is the center of the contemporary civilization. Beautiful, isn't it?
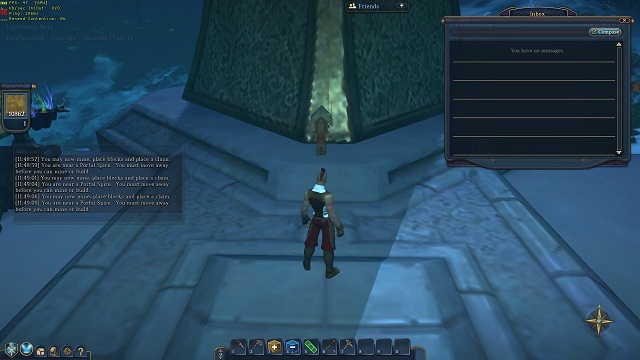
More or less, in the middle of each map, there is a structure that is called Portal Spire, which performs the function of a civilization center, for each server. As much as the building itself does not offer anything in particular, what is immensely important for each player are the six integral elements, which you can interact with. What is meant here are Stone Forge, Tinkerer's Workshop, Alchemy Station, Outfitter's Table, Inbox and the Founder's Pack which have been described below. What is important, no player can, inside the structure, or within the radius of a dozen-or-so steps of it, destroy, build or mine.
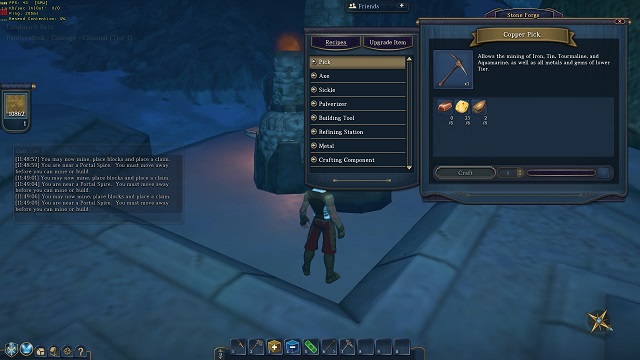 In the hot stove, you can smelt lots of really useful items.
Stone Forge is one of the items that allows your character to craft, to create new items. As the name suggests, for that, you need various metals that you can smelt into valuable ingots or forge them into tools. It also is a place, where you can upgrade your utility tools, i.e. axes, pickaxes, sickles, Pulverizers (the Upgrade Item tab). They are performed with the use of the ancient relics (the category named Disassembled relics has been presented in this chapter), which boost the statistics of items (damage, speed of using and range), as well as their general quality (superior, exceptional and legendary).
1. Pickaxes
In this category, there are five types of pickaxes - Copper, Iron, Tungsten, Cobalt and Mithril. The first one allows you to mine only for the basic and the least valuable resources, which you can later craft into the more advanced versions of the item (which are in turn meant to mine for valuable minerals).
Copper Pick
6 Copper Ingot + 6 Elemental Copper + 8 Heartwood
Iron Pick
10 Iron Ingot + 10 Elemental Iron + 250 Aquamarine + 6 Wild Heartwood
Tungsten Pick
14 Tungsten Ingot + 14 Elemental Tungsten + 400 Amethyst + 8 Petrified Heartwood
Cobalt Pick
20 Cobalt Ingot + 20 Elemental Cobalt + 550 Sapphire + 11 Ancient Heartwood
Mithril Pick
27 Mithril Ingot + 27 Elemental Mithril + 675 Ruby + 13 Frosted Heartwood
2. Axes
IN this category, there are five types of axes - Tin, Silver, Gold, Rubicite and Etherium. The first one only allows you to chop down only the standard trees, thanks to whose wood, you (and not only) you can craft the more advanced versions of the tool (meant to obtain materials only from special kinds of trees).
Tin Axe
4 Tin Ingot + 4 Elemental Tin + 50 Tourmaline + 8 Heartwood
Silver Axe
6 Silver Ingot + 6 Elemental Silver + 325 Topaz + 8 Wild Heartwood
Gold Axe
8 Gold Ingot + 8 Elemental Gold + 500 Emerald + 11 Petrified Heartwood
Rubicite Axe
12 Rubicite Ingot + 12 Elemental Rubicite + 725 Diamond + 13 Ancient Heartwood
Etherium Axe
16 Etherium Ingot + 16 Elemental Etherium + 1100 Moonstone + 15 Frosted Heartwood
3.Sickle
Silver Sickle is an unique item that you use for picking various flowers that grow in the land that you inhabit.
Silver Sickle
8 Silver Ingot + 8 Elemental Silver + 200 Topaz + 16 Petrified Heartwood
4. Pulverizers
Pulverizers are powerful hand-operated machines that are used for instantaneous destruction of large areas, with the exception of resources, which can be obtained much faster and easier, thanks to this. They come in two versions - mechanized and powered.
Mechanized Pulverizer
16 Iron Ingot + 16 Elemental Iron + 20 Tin Ingot + 20 Elemental Tin + 450 Aquamarine + 600 Tourmaline + 26 Wild Heartwood
Powered Pulverizer
20 Tungsten Ingot + 20 Elemental Tungsten + 26 Silver Ingot + 26 Elemental Silver + 600 Amethyst + 800 Topaz + 34 Petrified Heartwood
5. Builder's tools
This group lists the tools that are the quintessence of the game. The Adding option, in general terms, allows you to build, remove - to remove them, heal to restore a given area to its previous condition, selection to highlight the individual area on your plot, to perform a specific action there smooth to eliminate the unevenness of the ground, paint to change the looks of the individual materials and Line, that allows you to determine fragments from one point to another and create the selected resources, with them.
Add Tool
1 Dirt
Delete Tool
1 Dirt
Heal Tool
1 Dirt
Selection Tool
15 Iron Ingot + 15 Elemental Iron + 150 Tourmaline
Smooth Tool
20 Tungsten Ingot + 20 Elemental Tungsten + 200 Amethyst
Paint Tool
20 Tungsten Ingot + 20 Elemental Tungsten + 200 Topaz
Line Tool
30 Cobalt Ingot + 30 Elemental Cobalt + 300 Sapphire
6. Smelters
In this tab, there are several kinds of smelting furnaces, 3 versions to be precise superior, exceptional and legendary. They are used for turning the regular resource into the smelted ones, thanks to which they receive an additional bonus, depending on the level of the furnace (10%, 20% or 30%) in which way they may be smelted into ingots with greater effectiveness (higher amount of product).
Superior Smelter
30 Tungsten Ingot + 30 Elemental Tungsten + 5 Silver Ingot + 40 Coal
Exceptional Smelter
1 Superior Smelter + 45 Cobalt Ingot + 45 Elemental Cobalt + 10 Gold Ingot + 60 Coal
Legendary Smelter
1 Exceptional Smelter + 60 Mithril Ingot + 60 Elemental Mithril + 15 Rubicite Ingot + 80 Coal
7. Ingots
Ingots of metals are used as a very important component for crafting various accessories, or advanced machinery that craft rare items. Here, you can find plans for Copper, Iron, Tin, Tungsten, Silver, Cobalt, Gold, mithril, Rubicite and Etherium ingots.
Copper Ingot
100 Copper Ore
Iron Ingot
100 Iron Ore
Tin Ingot
100 Tin Ore
Tungsten Ingot
100 Tungsten Ore
Silver Ingot
100 Silver Ore
Cobalt Ingot
100 Cobalt Ore
Gold Ingot
100 Gold Ore
Mithril Ingot
100 Mithril Ore
Rubicite Ingot
100 Rubicite Ore
Etherium Ingot
100 Etherium Ore
8. Crafting component
Coal, Tungsten as the only crafting component allows you to craft various sources of light.
Coal
10 Plain Wood Log
 For a tinkerer, nothing is impossible.
Tinkerer's Workshop is one of the devices that allows you to craft - create new items You are going to need various resources and half-finished products to tinker here, thanks to which you can craft various useful accessories, or more advanced crafting stations.
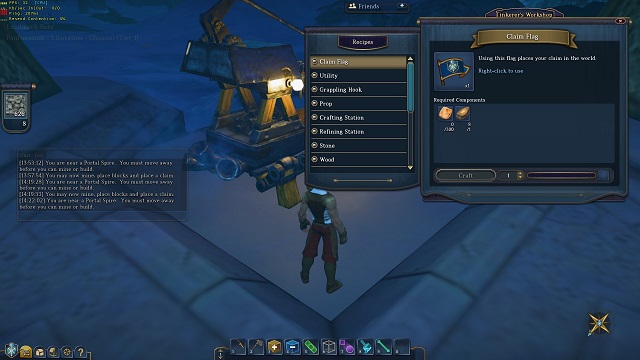
1. Flags
In this group, there only are two items of high importance, i.e. flags. The basic standard, i.e. Claim Flag and its upgraded version - Attached Claim Flag. They allow you to delineate the plots and expand them by new territories.
Claim Flag
300 Copper Ore +1 Heartwood
Attached Claim Flag
10 Iron Ingot + 10 Elemental Iron + 10 Tin Ingot + 10 Elemental Tin + 15 Agate + 15 Aquamarine + 15 Tourmaline + 15 Heartwood
2. Utilities
Here, you can find only one item, which is the Portal Shard, thanks to which you can be teleported instantly to the Portal Spire (the structure in the middle of the map) on a different server, or your selected base (as long as you have any), Lightstone, i.e. a magical stone that allows the owner to create a small source of light, around the character, for the duration of one hour, Ore Prospector that is used to detect ores, and also Ground Sounder- a tool used to search out gem and precious stone deposits.
Portal Shard
5 Copper Ingot + 1 Elemental Copper + 100 Agate
Lightstone
1 Elemental Copper + 10 Agate
Ore Prospector
250 Aquamarine + 5 Wild Heartwood + 15 Elemental Iron + 20 Iron ingot
Ground Sounder
15 Elemental Iron + 5 Wild Heartwood + 250 Aquamarine + 1000 Agate
3. Hooks
Hooks come in two different versions - Explorer's and Adventurer's - they are used for quick movement, especially in steep, mountainous areas. Using them results in releasing a rope that attaches to the element that it hits, thanks to which you can hoist yourself towards that element.
Traveler's Grappling Hook
8 Copper Ingot + 8 Elemental Copper
Explorer's Grappling Hook
20 Iron Ingot + 15 Tin Ingot + 15 Elemental Tin
Adventurer's Grappling Hook
30 Tungsten Ingot + 20 Silver Ingot + 20 Elemental Silver
4. Items and trinkets
This category consists of a huge and difficult to define, in a row, number of items of the adorning value (mainly for interior decoration).
Rustic Stone Vault
250 Pile of Worked Stone + 50 Essence of Earth + 10 Bundle of Burled Wood Planks + 20 Elemental Iron + 60 Iron Ingot
Ornate Small Chest
15 Essence of Earth + 10 Silver Ingot + 10 Iron Ingot + 10 Bundle of Burled Wood Planks
Simple Large Chest
30 Essence of Earth + 20 Cobalt Ingot + 40 Bundle of Plain Wood Planks
Conch Shell
100 Sand + 10 Aquamarine
Yellow Speckled Shell
100 Sand + 10 Agate
Red Speckled Shell
100 Sand + 10 Tourmaline
Open Speckled Shell
100 Sand + 10 Amethyst
Starfish
100 Sand + 10 Topaz
Small Wooden Bucket
5 Copper Ingot + 10 Bundle of Plain Wood Planks
Ornate Pitcher
10 Iron Ingot
Iron Trimmed Mug
5 Iron Ingot + 1 Bundle of Plain Wood Planks
Metal Ring
10 Iron Ingot
Rustic Pillows
1 Woven Jute + 3 Woven Cotton
Curvy Pillows
1 Woven Cotton + 3 Woven Jute
Runner Rug
1 Woven Plumthistle + 2 Woven Jute
Small Round Rug
1 Woven Cotton + 1 Woven Plumthistle + 2 Woven Jute
Large Rectangular Rug
2 Woven Plumthistle + 1 Woven Cotton + 3 Woven Jute
Wooden Crate
5 Iron Ingot + 10 Bundle of Plain Wood Planks
Medium Barrel
5 Iron Ingot + 10 Bundle of Plain Wood Planks
Large Barrel
5 Tungsten Ingot + 15 Bundle of Plain Wood Planks
Iron Trimmed Basin
3 Woven Jute + 15 Iron Ingot + 15 Bundle of Plain Wood Planks
Wooden Stool
5 Bundle of Plain Wood Planks + 2 Woven Jute + 1 Iron Ingot
Wooden Bench
10 Bundle of Plain Wood Planks + 2 Iron Ingot
Stone Bench
1000 Pile of Worked Stone + 4 Woven Jute
Painted Wooden Chair
10 Bundle of Plain Wood Planks + 2 Iron Ingot + 2 Woven Cotton
Ornate Wooden Chair
5 Copper Ingot + 10 Bundle of Plain Wood Planks
Wooden Bed
5 Iron Ingot + 3 Woven Cotton + 25 Bundle of Plain Wood Planks
Small End Table
5 Copper Ingot + 10 Bundle of Plain Wood Planks
Small Wooden Table
5 Iron Ingot + 10 Bundle of Plain Wood Planks
Small Painted Table
2 Woven Plumthistle + 5 Iron Ingot + 10 Bundle of Plain Wood Planks
Coffee Table
5 Iron Ingot + 10 Bundle of Plain Wood Planks
Small Stone Table
1500 Pile of Worked Stone
Large Wooden Table
10 Iron Ingot + 20 Bundle of Plain Wood Planks
Carved Table
5 Copper Ingot + 20 Bundle of Plain Wood Planks
Rustic Bookcase
5 Iron Ingot + 25 Bundle of Plain Wood Planks
Obsidian Obelisk
5 Pile of Worked Obsidian + 40 Topaz + 2000 Stone
Carved Hanging Horn
10 Iron Ingot + 5 Bundle of Plain Wood Planks
Desert Painting
1 Woven Jute + 1 Woven Sunblossom + 1 Woven Cotton + 4 Bundle of Plain Wood Planks
Forest Painting
1 Woven Jute + 1 Woven Sunblossom + 1 Woven Cotton + 4 Bundle of Plain Wood Planks
Tropical Painting
1 Woven Plumthistle + 1 Woven Sunblossom + 1 Woven Cotton + 4 Bundle of Plain Wood Planks
Tundra Painting
1 Woven Jute + 1 Woven Sunblossom + 1 Woven Cotton + 4 Bundle of Plain Wood Planks
1x1 Glass Window
400 Sand
2x1 Glass Window
800 Sand
3x2 Glass Window
2400 Sand
Simple Stained Glass
300 Sand + 10 Emerald + 15 Topaz + 20 Agate + 4 Bundle of Plain Wood Planks
Flowers Stained Glass
500 Sand + 25 Tourmaline + 30 Aquamarine + 10 Topaz + 9 Bundle of Plain Wood Planks
Mailbox
5 Iron Ingot + 10 Bundle of Plain Wood Planks
Rustic Wood Door Right
5 Copper Ingot + 10 Bundle of Plain Wood Planks
Rustic Wood Door Left
5 Copper Ingot + 10 Bundle of Plain Wood Planks
Candle
50 Topaz + 10 Sunblossom + 1 Woven Cotton
Large Candle Group
150 Topaz + 30 Sunblossom + 3 Woven Cotton
Medium Candle Group
100 Topaz + 20 Sunblossom + 2 Woven Cotton
Standing Torch
1 Coal + 1 Bundle of Plain Wood Planks
Andiron and Firewood
5 Bundle of Plain Wood Planks + 5 Iron Ingot
Stone Brazier
1 Coal + 5 Copper Ingot + 55 Stone
Wall Mounted Brazier
1 Coal + 5 Silver Ingot + 5 Iron Ingot
Flared Iron Brazier
5 Iron Ingot + 5 Tin Ingot + 1 Coal
Hanging Iron Brazier
5 Iron Ingot + 5 Tin Ingot + 1 Coal
Iron Chandelier
1 Coal + 5 Silver Ingot + 5 Iron Ingot
Iron Lamp Post
15 Bundle of Plain Wood Planks + 5 Iron Ingot
Small Lantern
1 Coal + 5 Silver Ingot + 5 Iron Ingot
Small Wall Sconce
1 Coal + 5 Silver Ingot + 5 Iron Ingot
Small Hanging Sconce
1 Coal + 5 Silver Ingot + 5 Iron Ingot
White Light Orb
500 White Lumicite
Blue Light Orb
500 Blue Lumicite
Green Light Orb
500 Green Lumicite
Indigo Light Orb
500 Indigo Lumicite
Orange Light Orb
500 Orange Lumicite
Red Light Orb
500 Red Lumicite
Violet Light Orb
500 Violet Lumicite
Yellow Light Orb
500 Yellow Lumicite
5. Crafting stations
IN this tab, you can find the items for comprehensive crafting, i.e. for creation of various items of interesting, and useful, properties. What is meant here is the Stone Forge, Tech Forge, Alchemy Station, Tinkerer's Workshop and Outfitter's Table. Virtually, all of them, with the exception of the Tech Forge, are in the Portal Spire and they are used for common good.
Stone Forge
15 Copper Ingot + 15 Elemental Copper + 50 Coal + 2100 Pile of Worked Stone
Tech Forge
1 Stone Forge + 60 Cobalt Ingot + 60 Elemental Cobalt + 125 Coal + 4200 Pile of Worked Obsidian
Alchemy Station
15 Iron Ingot + 10 Tin ingot + 200 Aquamarine + 50 Heartwood + 150 Bundle of Burled Wood Planks
Tinkerer's Workshop
30 Iron Ingot + 20 Wild Heartwood + 100 Bundle of Plain Wood Planks
Outfitter's Table
10 Tungsten Ingot + 15 Silver Ingot + 400 Topaz + 30 Petrified Heartwood + 200 Bundle of Striped Wood Planks
6. Saw Tables
You can find here the tools for refining resources. The difference is that this category concerns machinery to change the properties of wood and stones, from which you craft wooden planks and hewn stones (superior, exceptional and legendary saw table), but also soil, sand and improved, to an extent, stones. These, in turn, serve to create rare gems, metals and relics (Roughwork, Tradesman's and Masterwork Sifter).
Superior Saw Table
20 Tungsten Ingot + 60 Petrified Heartwood + 200 Bundle of Plain Wood Planks + 1050 Pile of Worked Amaranthine
Exceptional Saw Table
1 Superior Saw Table + 30 Cobalt Ingot + 70 Ancient Heartwood + 250 Bundle of Plain Wood Planks + 2100 Pile of Worked Obsidian
Legendary Saw Table
1 Exceptional Saw Table + 40 Mithril Ingot + 80 Frosted Heartwood + 300 Bundle of Plain Wood Planks + 3150 Pile of Worked Alabaster
Roughwork Sifter
10 Iron Ingot + 10 Elemental Iron + 10 Wild Heartwood
Tradesman's Sifter
1 Roughwork Sifter + 30 Tungsten Ingot + 30 Elemental Tungsten + 25 Petrified Heartwood
Masterwork Sifter
1 Tradesman's Sifter + 65 Mithril Ingot + 65 Elemental Mithril + 50 Frosted Heartwood
7. Stones
In this small group, you can find hewn minerals in the form of stones, i.e. stone, marble, amaranthine, obsidian and alabaster.
Pile of Worked Stone
100 Stone
Pile of Worked Marble
100 Marble
Pile of Worked Amaranthine
100 Amaranthine
Pile of Worked Obsidian
100 Obsidian
Pile of Worked Alabaster
100 Alabaster
8. Miscellaneous
The last category includes various materials that you can obtain from processing stones and wood. These are hewn stones and various rocks, wooden planks, as well as all sorts of trees and plants. The latter perform, first of all, the representative and adorning function.
Rocks
Stone
Bundle of Plain Wood Planks
10 Plain Wood Log
Bundle of Burled Wood Planks
10 Burled Wood Log
Bundle of Striped Wood Planks
10 Striped Wood Log
Trees
Plain Wood Log
Plants
Plain Wood Log
 Well, and there is no recipe for poison...
Alchemy Station is one of the devices that allows you to craft - create new items. It is here that you are going to need rare minerals, fragments of ancient artifacts, wood elements, but also coal, which will serve you to create magical items of useful properties.
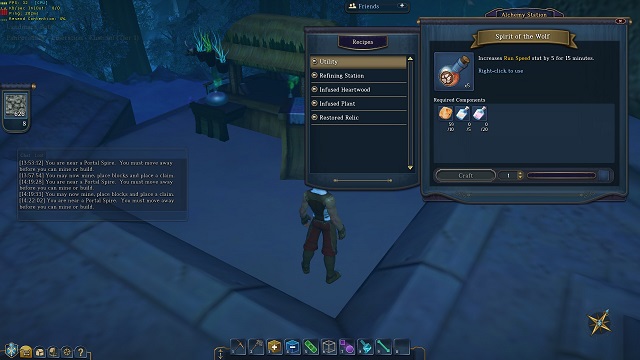
1. Alchemy Wares
This is a category of a general name and it includes several types of special potions that raise certain parameters, for a definite period of time, of the character and also offers dynamite - its description is not necessary. In the case of potions, there is the Spirit of the Wolf (raises the speed of the character by 5 points for 15 minutes), Bottled Moonlight (increases the range of light by 30 points, for 30 minutes), Potion of Greedy Harvesting (increases the range of tools by 25% for 15 minutes), Potion of Nimble Harvesting (raises the speed of mining by 10%, for 15 minutes), Sharp-Eyed Elixir (increases the possibility of finding rare minerals, by 5 points, for 15 minutes), Potion of Minor Yield (increases the chance to mine additional materials, by 10 points, for 15 minutes), Potion of Furious Harvesting (raises the damage dealt by tools, by 25%, for 15 minutes) and Highstep Brew (increases the height of jumps, by 5 points, for 15 minutes).
Spirit of the Wolf
10 Elemental Copper + 5 Infused Cordella + 20 Infused Crystia
Bottled Moonlight
150 Tourmaline + 12 Infused Bluebell
Potion of Greedy Harvesting
5 Elemental Tin + 2 Wild Heartwood + 15 Infused Crystia
Potion of Nimble Harvesting
5 Elemental Tin + 2 Wild Heartwood + 15 Infused Bloodtear
Sharp-Eyed Elixir
100 Aquamarine + 5 Infused Nightbloom + 10 Infused Bluebell
Potion of Minor Yield
250 Agate + 5 Infused Bloodtear + 10 Infused Nightbloom
Potion of Furious Harvesting
5 Elemental Tin + 2 Wild Heartwood + 15 Infused Cordella
Highstep Brew
2 Wild Heartwood + 5 Infused Cordella + 10 Infused Bloodtear
High Yield Dynamite
10 Coal + 1 Spindled Splinter + 1 Woven Jute
2. Infusers
A group that, in this case, consists of stations for refining oils and infusions, thanks to which they gain in effectiveness (10%, 20% or 30% depending on the level of the device). You can find here a superior, exceptional and legendary infuser.
Superior Infuser
25 Tungsten Ingot + 100 Amethyst + 20 Petrified Heartwood
Exceptional Infuser
1 Superior Infuser + 40 Cobalt Ingot + 300 Sapphire + 30 Ancient Heartwood
Legendary Infuser
1 Exceptional Infuser + 55 Mithril Ingot + 500 Ruby + 40 Frosted Heartwood
3. Infused wood
This collection of recipes concerns modifying of the core of the tree, which is called Heartwood by infusing it with appropriate elements of magical properties.
Wild Heartwood
1 Heartwood + 1 Palm Heart
Petrified Heartwood
1 Heartwood + 1 Thistle Seed
Ancient Heartwood
1 Heartwood + 1 Ancient Rootstock
Frosted Heartwood
1 Heartwood + 1 Spindle Cone
Mossy Heartwood
1 Heartwood + 1 Serpentine Resin
4. Infused plants
Here, you can find five types of bottled flowers that have been enriched with special substances. They can be used as an important crafting component, for crafting potions (1st category at the alchemy station).
Infused Nightbloom
5 Plant Extract + 5 Nightbloom
Infused Crystia
5 Plant Extract + 5 Crystia
Infused Cordella
5 Plant Extract + 5 Cordella
Infused Bluebell
5 Plant Extract + 5 Bluebell
Infused Bloodtear
5 Plant Extract + 5 Bloodtear
5. Restored Artifacts
The last group in the Alchemy Station consists of ancient artifacts of all sorts, which may influence the quality and properties of items (picks, axes, sickles and grinders) thanks to their powerful magical properties.
Restored Talisman
3 Talisman Fragment
Restored Idol
3 Idol Fragment
Destructive Rune Stone
4 Rune Stone Fragment
Swift Rune Stone
4 Rune Stone Fragment
Vast Rune Stone
4 Rune Stone Fragment
Restored Power Source
4 Power Source Fragment
Restored Artifact
6 Artifact Fragment
 It's time to start shopping!
1. Accessories
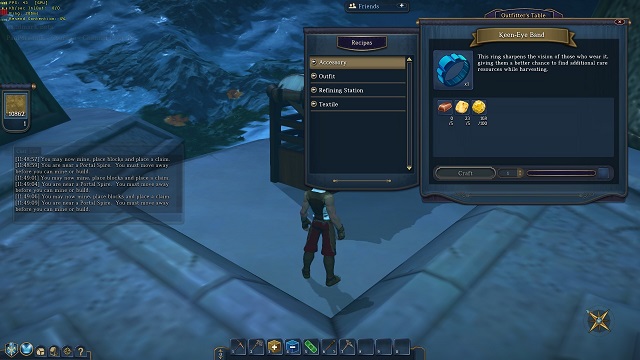
This category groups several trinkets that can be worn, of various, often useful, properties. The Keen-Eye Band provides the wearer with and increased chance of finding valuable materials, while mining, the Ring Of Brawn provides you with faster splitting of surfaces, the symbol Scout's Emblem provides you with the ability to move faster, the necklace Anklet Of Bounding gives you effectiveness, the Tremor Amulet increased range of the tools that you use, the Breeze Band increases the speed of producing them from the inventory, the Assessor's Mark provides you with higher probability of finding rare materials, than the basic Keen-Eye Band, whereas the Messenger's Signet increases the speed of movement, in comparison with the regular Scout's Emblem.
Keen-Eye Band
5 Copper Ingot + 5 Elemental Copper + 100 Agate
Ring Of Brawn
10 Iron Ingot + 10 Elemental Iron + 200 Aquamarine
Scout's Emblem
10 Iron Ingot + 10 Elemental Iron + 5 Tin Ingot + 5 Elemental Tin + 300 Aquamarine
Anklet Of Bounding
10 Tin Ingot + 10 Elemental Tin + 200 Tourmaline
Tremor Amulet
15 Tungsten Ingot + 15 Elemental Tungsten + 300 Amethyst
Breeze Band
15 Tungsten Ingot + 15 Elemental Tungsten + 5 Silver Ingot + 5 Elemental Silver + 400 Amethyst
Assessor's Mark
20 Cobalt Ingot + 20 Elemental Cobalt + 400 Sapphire
Messenger's Signet
15 Cobalt Ingot + 15 Elemental Cobalt + 10 Gold Ingot + 10 Elemental Gold + 500 Sapphire
2. Outfits
Basically, in this group you can find two outfits - Artisan's Outfit and Pathfinder's Gear - which come in several colors. What is important, they do not provide you with any special properties and they only serve as adornments.
Artisan's Outfit (Black)
10 Woven Cotton + 5 Woven Jute + 5 Woven Plumthistle + 5 Woven Sunblossom
Artisan's Outfit (Green)
5 Woven Cotton + 20 Woven Jute
Artisan's Outfit (Orange)
5 Woven Cotton + 20 Woven Sunblossom
Artisan's Outfit (Red)
5 Woven Cotton + 20 Woven Plumthistle
Artisan's Outfit (Rose)
5 Woven Cotton + 20 Woven Plumthistle
Artisan's Outfit (Emerald)
5 Woven Cotton + 20 Woven Jute
Artisan's Outfit (Yellow)
5 Woven Cotton + 20 Woven Sunblossom
Pathfinder's Gear (Emerald)
10 Woven Cotton + 30 Woven Jute
Pathfinder's Gear (Green)
10 Woven Cotton + 30 Woven Jute
Pathfinder's Gear (Grey)
10 Woven Cotton + 10 Woven Jute + 10 Woven Plumthistle + 10 Woven Sunblossom
Pathfinder's Gear (Orange)
10 Woven Cotton + 30 Woven Sunblossom
Pathfinder's Gear (Rose)
10 Woven Cotton + 30 Woven Plumthistle
Pathfinder's Gear (Scarlet)
10 Woven Cotton + 30 Woven Plumthistle
Pathfinder's Gear (Yellow)
10 Woven Cotton + 30 Woven Sunblossom
3. Looms
This group focuses on increasing the effectiveness of production of fabrics that you craft, directly, from various fibers (10%, 20% or 30%, depending on the level of the machine). The stations for such refining are divided into superior, exceptional and legendary loom.
Superior Loom
40 Gold Ingot + 300 Emerald + 60 Ancient Heartwood + 250 Bundle of Striped Wood Planks
Exceptional Loom
1 Superior Loom + 55 Rubicite Ingot + 500 Diamond + 70 Frosted Heartwood + 300 Bundle of Striped Wood Planks
Legendary Loom
1 Exceptional Loom + 70 Etherium Ingot + 700 Moonstone + 80 Mossy Heartwood + 350 Bundle of Burled Wood Planks
4. Fabrics
The last category, in the case of this station, consists of four items, which may be used by the players to craft additional, colorful outfits, at the appropriate station. They are divided into Cotton, Jute and the fictional Plumthistle and Sunblossom.
Woven Cotton
10 Cotton
Woven Jute
10 Jute
Woven Plumthistle
10 Plumthistle
Woven Sunblossom
10 Sunblossom
 Bills. I might have expected that...
Inbox is nothing more than the regular mailbox, where you can read various messages sent to you, as well as send letters.
 Oh, well, where's the damn key!?
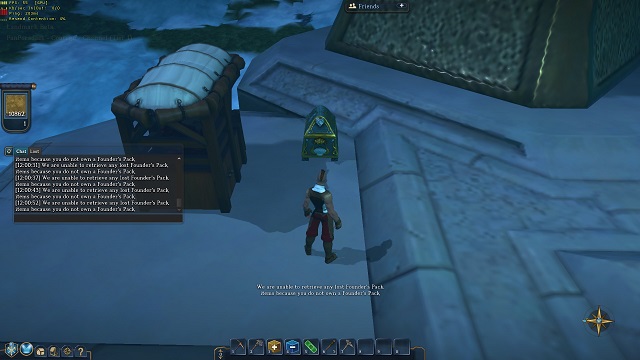
Founder's Pack is a special program, prepared by the game's developers that allows you to play a preview version of the game. It consists of three paid sets, which differ in contents and, which goes without saying, price. Each player gains access to the beta version, as well as to the digital extras for their characters. it is thanks to the adorned box in the Portal Spire players that obtained the Founder's Pack, may receive the items that they are entitled to and gifts. As of now, the Packs have been sold until the last day of March.
 The world is wide open for you.
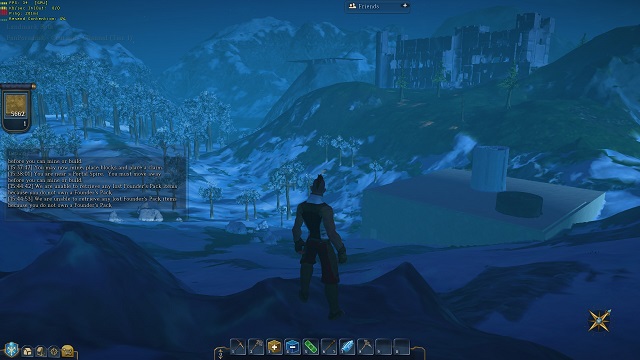
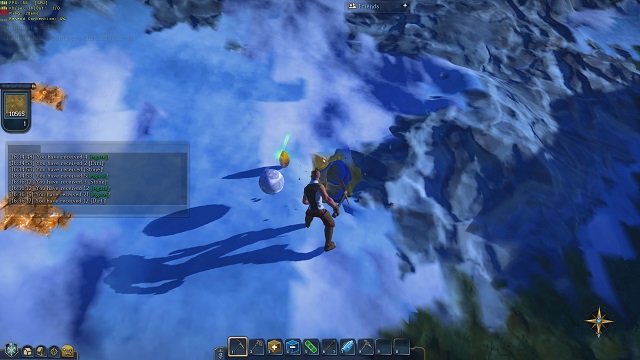
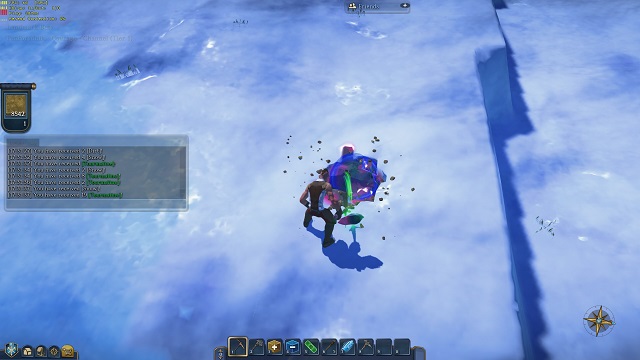
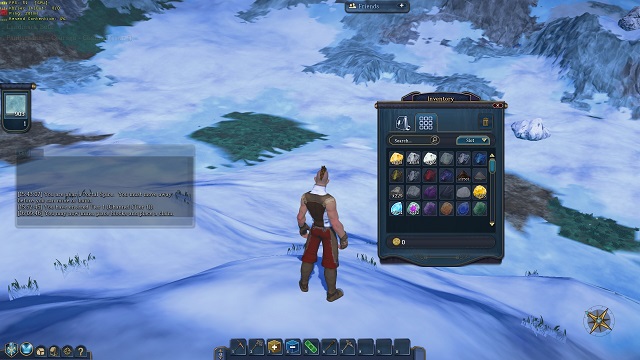
After you have created your character, in the creation menu, and have select the server, you appear in the game world and gain control over your character. The land that you can explore, from now on, is very vast and diverse. It consists of two characteristic biomes. The system is that the way in which the game world looks, is generated for your character, and it is the same on each server. It can, e.g. be a desert and jungle, or tundra and deciduous forest. Of course, what I mean here is the general area type, rather than the placement of all the elements of the environment, in an identical way. At first, you are right next to the Portal Spire, mentioned in the previous chapter, which performs the function of the crafting center (crafting of new items). At present, you do not have any resources, which you could use in any way that would make any sense. That is why, the first thing that you need to do is obtain them. Two tools are going to be useful here and they are in your quick inventory, i.e. the stone pickaxe and the stone axe. As the names suggest, the former is used for mining for various deposits of minerals, whereas the latter is used for chopping down trees, which then can be collected for wood. What is important, you can use these tools only to obtain the predetermined resources of low value, whose obtaining will allow you to craft better tools and, in the long run, obtain more valuable materials. However, this is going to be described further in this guide.
 No work, no pay.
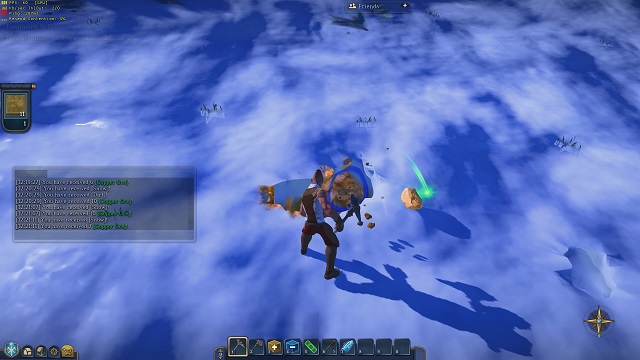
First of all, you need to set out to find some deposits of Copper, thanks to which you will receive a common crafting material. Copper is quite common here so, finding the deposits should not be too difficult. They come in light-brown and, after you hit them, they drop Copper Ore, but sometimes, also Elemental Copper. You are going to need both of these materials, in small quantities, but it does not hurt to make some provisions, for later.
 All that glitters is not gold.
The next material that you need to obtain is Agate (comes in yellow) and it is quite uncommon, under the beds of Copper, or usually, next to it. You simply need to take a look around the area. It drops a single material of the same name- Agate.
 And we go choppipty, chop, chop!
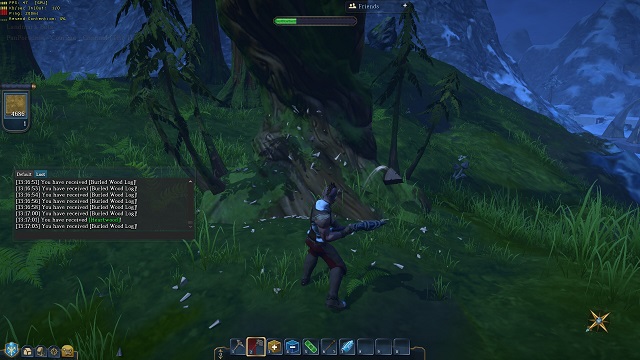
Once you have already performed the job with the pickaxe and obtain all of the materials mentioned above, it is time to use the axe. To obtain the wood that you need, you will have to fid any tree (a big one, preferably) and chop it down completely. It is going to drop Wood Log of all sorts (the type depends on the species of the tree) and the thing that you are the most interested in, i.e. Heartwood. Just like previously, take the rule " the more, the better" to your heart.
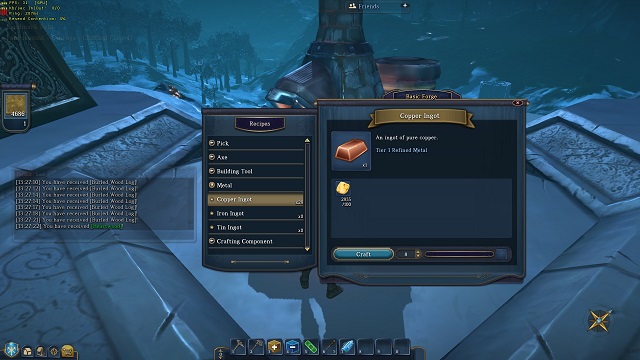 Feel like the real smith.
Then, return to the Portal Spire and craft the improved version of the pickaxe, i.e. the Copper Pick. To do that, access the Basic Forge in the Metal tab and smelt Copper Ore into Copper Ingot. You need 8 copper ingots. After you do that, you are the lucky owner of all the materials that you need to craft the Copper Pick. Before you continue your exploration, it is a good idea to obtain the Keen-Eye Band from the Accessory tab, at the Basic Workshop. It raises your chances at digging out some more valuable materials. To use its magical properties, you simply need to put it on, in the inventory screen.
 Digging becomes really burdensome, sometimes.
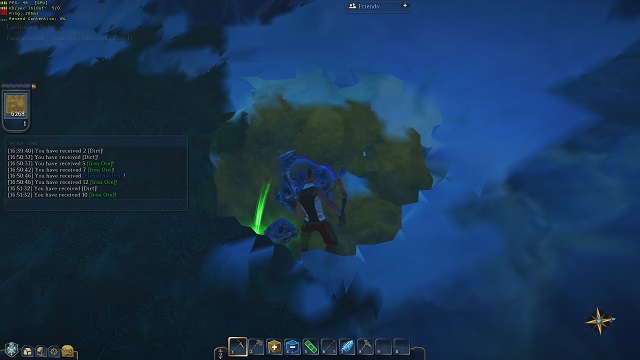
During your second expedition, you will try to find deposits of some more valuable materials, i.e. Iron and Tin. To obtain them, you need to use your shiny, new pick. Iron deposits are grey and, honestly speaking, they are hard to discern among rocks and stones. After you hit them, that usually drop the Iron Ore and the Elemental Iron. Both of these are very much needed by you. As for tin, it can usually be fond under the deposits of iron so, to get to it and collect Tin Ore, and Elemental Tin, you first need to remove the deposits of Iron.
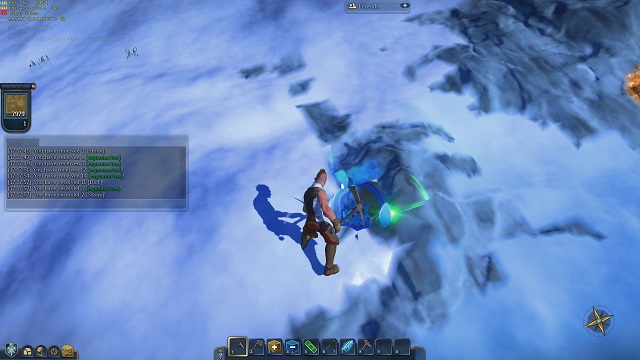 In Landmark resources come in all colors of the rainbow.
The purpose of the last expedition around is to find two more basic materials, thanks to which you will be able to craft, additionally, five more basic items, within the initial phase of the game. What I mean here is the Aquamarine and the Tourmaline. The first one of them is bright-blue in color, and it occurs, in most cases, alone (you can also find it, sometimes, near Iron deposits). It drops a single item of the same name- Aquamarine.
 I felt a twinge in my shoulder.
The second one - Tourmaline - consists of two shades, i.e. pink and green. Just like in the case of Aquamarine, or Agate, after being struck, it drops only one item- Tourmaline. It comes by itself or under deposits of tin (or marble, which you are not interested in, as of now). After you obtain it, you already have got everything that you need and you can return to the crafting center.
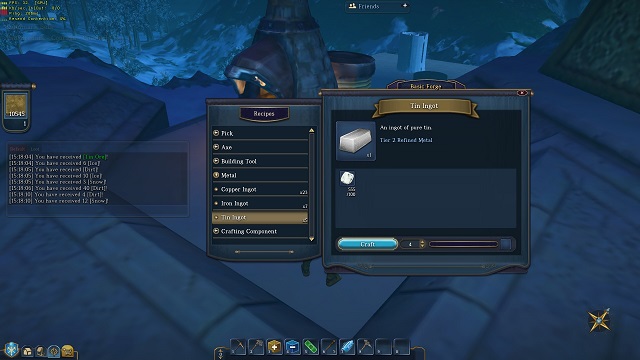 Now, this is going to be a blade!
Now, to craft an upgraded version of the axe, i.e. Tin Axe you need to smelt Tin Ore into Tin Ingot. You only need 4 ingots, to craft a tin axe. If, at this points, you have sufficient amounts of the other supplies, you can craft this item straight away. If you do not, you will have to mine for more.
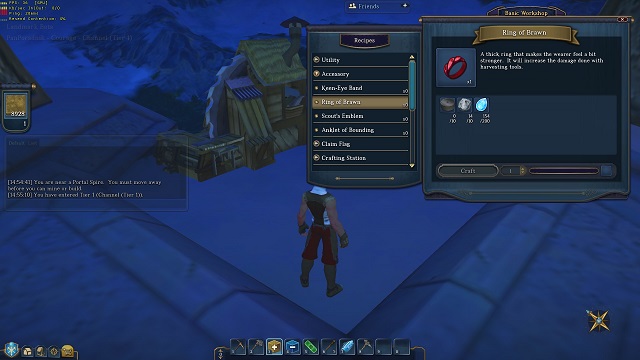 Trinkets and baubles, always fashionable.
To improve the parameters of your character and the speed of mining for resources, it is a good idea to obtain the three remaining items of magical properties. Ring of Brawn ensures faster splitting of deposits, Scout's Emblem increased speed and Anklet of Bounding jumping into greater heights. In theory, you have all the materials to craft them all but, in reality, you will have to smelt Iron Ore into Iron Ingot. 20 ingots, to be precise, will do.
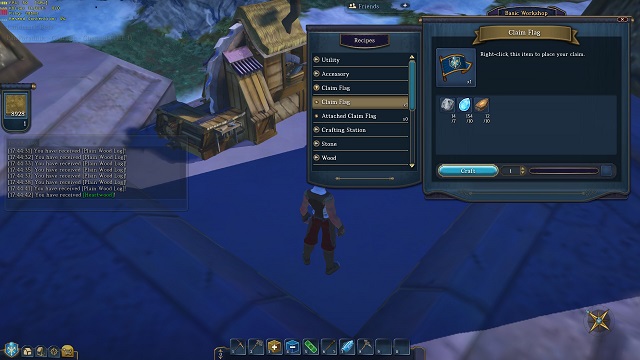 This is it. There is nothing else left to do. In the first phase of the game, that is.
Finally, the last thing left to do is to build the item that allows your informal transition into phase two, i.e. your own four walls. The colorful flag, named Claim Flag is used to determine and delimit your own plot. This however, is described in detail in the next chapter. To craft it, however, you are going to need Elemental Iron, Aquamarine and Heartwood only. It is as simple as that.
 Collect them all.
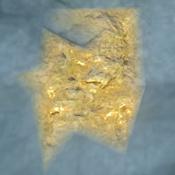
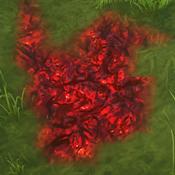
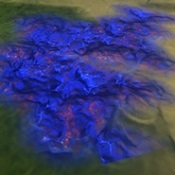
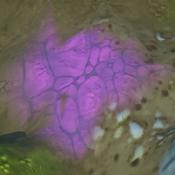
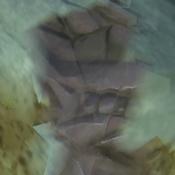
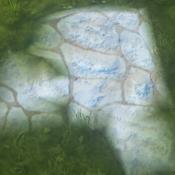
This sub-chapter presents a comprehensive table of all the materials that you can mine with the pickaxe, in the world of Landmark. It consists of three different parts - the name, a short description that mentions where it can be obtained, as well as a picture that presents the material. They have been grouped, with respect to their type (first metals, then rocks and finally gems) and put in order, with respect to their value (from left to right and schematically, the successive lines to the very bottom of the list).
(M)etal
(S)tone
(G)em
M Copper Ore
M Iron Ore
M Iron Tin
Occurs by itself or with Agate.
Usually, occurs with Tin or sometimes, with Aquamarine.
Usually occurs at the end of Iron deposits or, sometimes, with Tourmaline.
M Tungsten Ore.
M Silver Ore.
M Cobalt Ore.
Usually occurs with Silver but also, sometimes, with Amethyst.
Usually occurs at the end of Tungsten deposits or sometimes with Topaz and Marble.
Usually, occurs with Gold or, sometimes, with Sapphire.
M Gold Ore
M Mithril Ore
M Rubicite Ore
Usually occurs at the end of Cobalt deposits, ale and also sometimes with Emerald and Amaranthine.
Usually occurs with Rubicite, but also often with Ruby (not to be confused with Ruby).
Usually occurs at the end of Mithril deposits, but also, sometimes with Diamond and Obsidian.
M Etherium Ore.
S Marble
S Amaranthine.
Usually occurs at the end of Mithril deposits.
Occurs by itself or, occasionally, with Silver and Tourmaline.
Occurs by itself or occasionally with the deposits of Topaz and Gold.
S Obsidian
S Alabaster
G Agate
Occurs by itself or occasionally with Emerald and Rubicite.
Occurs by itself, but also occasionally with Diamond.
Occurs by itself or at the end of deposits of Copper.
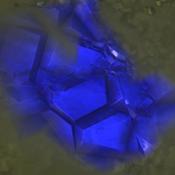
G Aquamarine
G Tourmaline
G Amethyst
Occurs by itself or occasionally at the end of deposits of Iron.
Occurs by itself, but also at the end of deposits of Tin and Marble.
Occurs by itself, but also occasionally at the end of deposits of Tungsten.

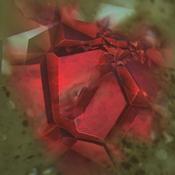
G Topaz
G Emerald
G Sapphire
Occurs only at the end of deposits of Amaranthine and Silver.
Occurs only at the end of deposits of Gold and Obsidian.
Occurs only at the end of deposits of Cobalt.
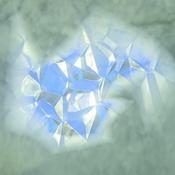
G Ruby
G Diamond
G Moonstone
Occurs by itself or occasionally at the end of deposits of Mithril.
Occurs by itself or occasionally at the end of deposits of Rubicite and Alabaster.
Occurs only at the end of deposits of Etherium.
 IT is time to decide where you build your new home.
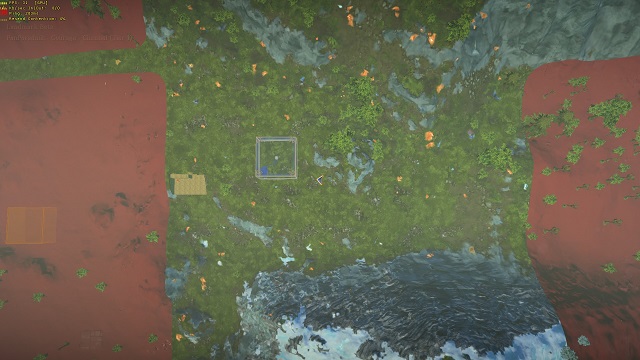
The issue that you need to take as a priority, while creating your own four walls, is finding the appropriate bit of land, where you can start the construction. To establish your plot of land of a predetermined shape (square), in a given spot, you need to use the item named Claim Flag, which you can craft by following the instructions provided in the previous chapter. Once you have done that, you will see a big area around your character, shown from top-down perspective. It is divided into irregular red bits, i.e. ones that you cannot use to build your headquarters on, for some reason. Also, there are the regular ones, which have not been marked in any particular way. It is within those fragments that you can delimit your plot of land. The best solution is to choose a flat piece of land, without any natural formations, i.e. mountains, elevations, forests or chasms - smaller or bigger ones. As much as trees can be chopped down, and the holes patched up, when it comes a huge mountain range, you may have some problems.
 Take it easy. This system seems to be complicated, only at first glance.
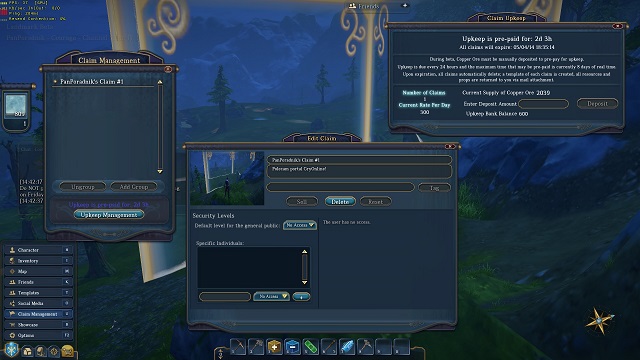
Once you have already made your choice and pressed the mouse button, you will receive a message, where you need to confirm your choice. A very important matter that needs to be paid attention to is the UpKeep, which is the cost of maintaining your property. What is meant in this case are the regular payments for the possibility of owning a strip of land. Fortunately enough, the game developers do not require you to buy a subscription, i.e. spend the real money, on that. The currency here is simply- Copper Ore. 24 hours of upkeeping your estate costs 300 Copper Ore. This is not much, because copper may be considered the most common material in Landmark. You effect the payments in the Claim Management tab, where you can also find detailed options to set up your house. There, you can change the name of your plot of land, the welcoming message, but also the safety rules, which determines the activity of the other players, within your estate. What the five levels are about is whether the other players may build structures on your land, destroy the area and enter your land at all. When it comes to the UpKeep, again, it should be explained in more detail, how the payment system works. There is a certain UpKeep Management sub-section, where you can deposit certain amounts of copper. At certain points, these assets are withdrawn from your account automatically so, a good idea is to deposit large amounts of that material, up front. As little as 2100 Copper Ore allows your estate to exist for a week. What happens, however, if out of external reasons, or simply absentmindedness, you fail to effect the payments in time? Well, then you have a problem because the plot will, irreversibly, cease to exist. Fortunately, the same is not true for the resources that you used up around your estate. All of them, along with the flag, you receive back into your inventory. At the same time, you receive the record of all the elements, which you build on your plot of land, into the Templates tab. Thanks to this option, you can recreate the identical arrangement of your estate, in a completely different area, as long as you have all the materials that you need for that, in your inventory.
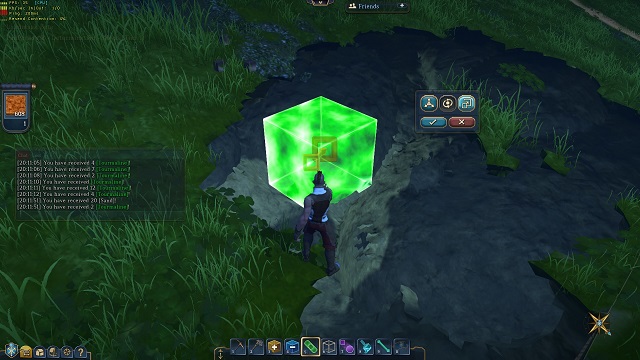
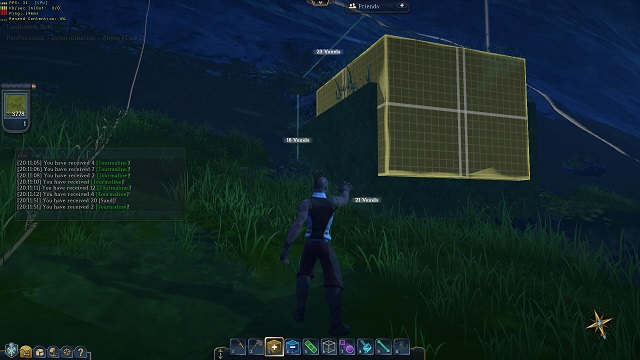
 The materials, the shape and let's get busy.
Just as it has already been stated, the quintessence of the game is creation, but also destruction. Both of these, extremely pleasurable, activities can be performed with only two elements. The first one is the Building screen, which you can find on the left side of your screen. It consists of two tabs, i.e. materials and shapes. The former allows you to select the material (you can see and select, if you have it in your inventory, in any quantity) that you are going to use to build what you want to build. The other one determines its shape.
1. Material
Metal
Wood
Stone
Liquid
2. Shapes
The other element are Add Tool, Delete Tool and Heal Tool (the tool to restore the land to its previous condition), which have been mentioned at the very beginning, in the building tools table. These three are classified as the basic for each builder, without which you cannot do, in any way. The remaining four, i.e. Selection Tool, Smooth Tool, Paint Tool and Line Tool, can be considered some extra additions for the more advanced players.
 Spatial geometry classes have finally come to be useful.
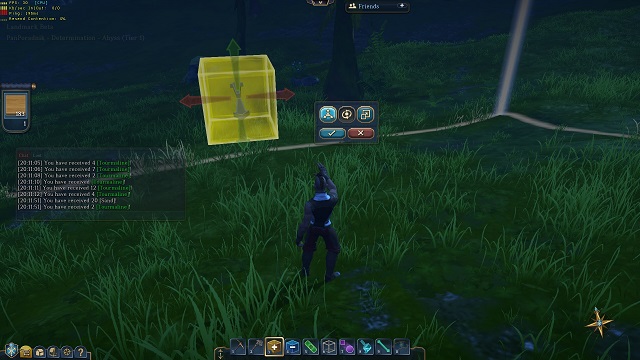
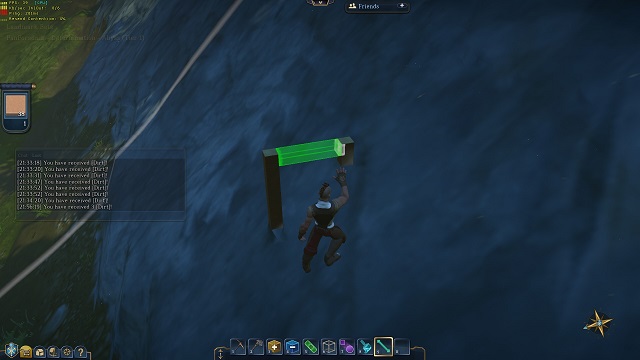
The Add Tool is the orange square with a white cross on it, which it is better to keep in quick inventory, for the sake of convenience, in one of the first slots for hotkeys. After you have activated this tool, you need to bring up the building screen, on the left side of the screen, inoto both of the tabs - both the materials and the shapes. Of course, you first need to select the material and then the shape, into which it is to be formed. Then, determine the spatial situation of the object. For this, you are going to use a complex creator, which consists of the the option to situate the figure in a selected spot (even in the air, if you want to), to rotate it in any way you want and increasing it, and decreasing in size. All of the shapes, with the exception of the sphere and the cube, have three options and, the ones that have been mentioned above, are devoid of the possibility to be rotated. To activate that panel, you need to hold down Shift + Tab, and press the action key to situate that element in the spot of your choice.
 Oops...
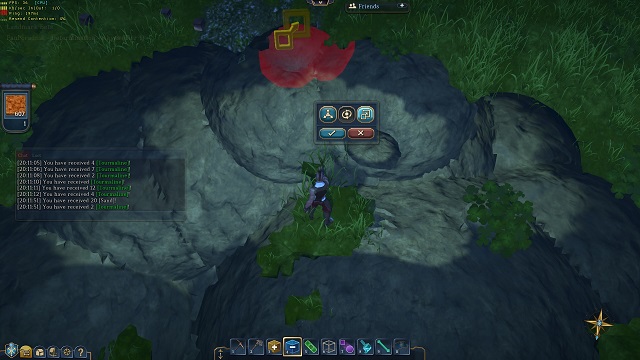
The delete tool is not that troublesome. In the case of using this tool (the blue square with the white minus symbol on it) you do not need to select the individual material and only the shape and/or its spatial situation, the size and so forth so, just like in the case of building. Once everything is ready, you can click, on a specific area, the action key, thanks to which the object of the desired shape will cease to exist. In general, the Delete Tool is more useful in the preliminary destruction of the land, rather than for restoring it to the previous condition, for which the tool, presented below, is better.
 If somebody has made quite a mess, you need to clean it all now.
In general, there are two sides to The Heal Tool (the green plaster). although it is very easy to use it, you can only use it in specific situations and, in addition to that, with patience and care. It does not allow you to select any shape and it is only limited to a tiny square. For that reason, it is good to restore only small strips of land, to their initial condition, or introduce cosmetic changes to the effect of use of the delete tool, which is definitely better, while removing large structures.
 Perfect, just perfect!
The Selection Tool (the transparent square) allows you to delineate any fragment in your strip of land and confirm it, in order to perform specific actions - whether creative ot destructive ones.
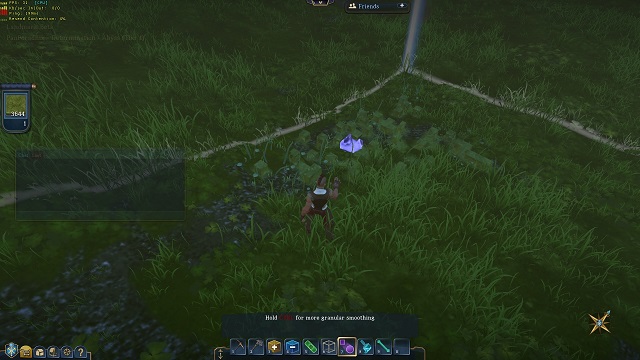
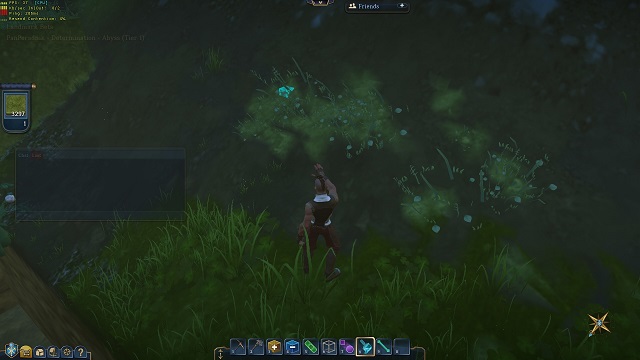
The Smooth Tool is the violet marker, which serves for leveling the area, simply put, especially the sharp edges.
 Paint -hard version.
Paint Tool is the blue brush that works just like the pipette, i.e. it copies a give color, or shape, and replicates it onto a given surface.
 Perfecto.
Line Tool (the blue line) is for determining, and creating strips of any shape and of any material.
 Everything needs to be in order, when it comes to money.
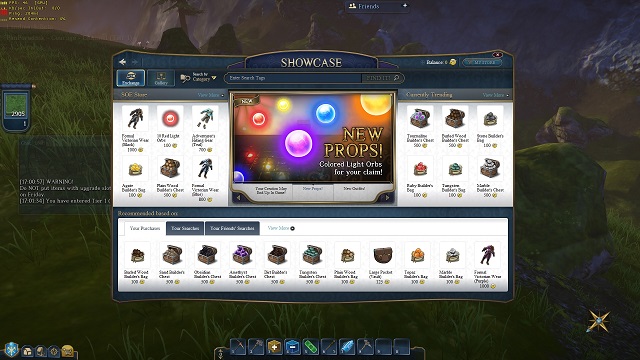
In Landmark the developers have prepared a micropayments shop for the players, whose exact name is Showcase. It consists of two options, i.e. buying for special currency and the photo gallery, where the players can showcase their estates and like each other's (much like I Like It on Facebook) and visit them. On sale, there are plenty of items from four categories.
1. Money pouches
In this tab, you can find the money pouches that increase the number of slots in the quick inventory and of your chest, in which you can keep various valuables.
2. Sources of light
Here, you can find glowing orbs of various colors, which can illuminate your estate.
3. Resources
This category consists of sets of resources - both the common and the rare ones This allows the players to take the easy way and obtain the crafting resources immediately.
4. Outfits
The last group concerns various outfits, thanks to which you can easily stand out from the crowd of the everyday players.
5. Household appliances
The last page includes all sorts of additions for the personal houses and headquarters of players, e.g. furniture, adronments or household defense systems.
As of now, the prices for the special currency of Landmark are as follows:
500 SC = 5 dollars
1000 SC = 10 dollars
2000 SC = 20 dollars
2500 SC = 25 dollars
5000 SC = 45 dollars
10000 SC = 85 dollars
As of now, Landmark can only be played on PC computers, which is why the below information concerns that platform only. In general, the system requirements can be considered high, but not too high. What is important is that you require a good internet connection, to play it smoothly, because Landmark relies on multiplayer, participated by huge numbers of players, at any given time. This guide has been drawn up on a computer with Intel DualCore i5-660, 4GB RAM, ATi Radeon HD 5850 and a 60Mb/s internet connection. Although this specification lags behind, in comparison with the one specified in the "Recommended system requirements" but it is enough to enjoy Landmark without any problems.
Single player: No
Offline Co-op (split screen/hot seat): No
Co-op over the Internet: No
Multiplayer: Yes
This guide has been drawn up for the PC version, of the below specifications:
On the computer of the above specifications, the game ran without major problems. The only thing that you could complain about were the rare frame rate drops and occasional cases of freezing. The reason for this, may be the fact that the game is still in its beta version and it has not yet been fully optimized.
OS: Windows 7/8
CPU: Intel i5 Dual Core / AMD Phenom X3
RAM: 4 GB
GPU: nVidia GeForce GTX 275 / AMD HD 4890
HDD: 20 GB
VRAM: 1,024 MB
OS: Windows 7/8
CPU: Intel i5 Quad Core / AMD Phenom II X6
RAM: 8 GB
GPU: nVidia GeForce GTX 560 / AMD HD 6870
HDD: 20 GB
VRAM: 1,024 GB


 LEGO Star Wars II: The Original Trilogy Game Guide & Walkthrough
 LEGO Harry Potter: Years 1-4 Game Guide & Walkthrough
 Lost Planet 3 Game Guide & Walkthrough
 Legend of Grimrock II Game Guide & WalkthroughLEGO The Lord of the Rings Game Guide & Walkthrough