Court of Oryx is a public event that takes place aboard the Dreadnaught in Destiny: The Taken King. There are three types of runes, and placing them in the pedestals will summon a boss. Players who defeat the boss will receive loot, as well as Calcified Fragments, some of which can only be acquired through these events.
There are three tiers to the Court of Oryx, each progressively more difficult than the last. Here's how to access the Court of Oryx and defeat every boss.
How to get a Reciprocal Rune
The first thing you'll need before heading to the Court of Oryx is to acquire a Reciprocal Rune. To get them, simply complete quests on the Dreadnaught and opening loot chests.
How to get a Stolen Rune
Stolen Runes are more difficult to obtain. You'll get these as rewards for completing Tier 1 battles. You'll have to charge these up by finishing three Tier 1 fights.
How to get an Antiquated Rune
You'll receive Antiquated Runes as rewards for completing Tier 2 battles, Nightfall Strikes, and Crota's Bane faction quests.
Head to the Court and find the corridor with six statues, with three on each side. The three statues on the right are used to start different Tiers of the event.
Tier 1: Activate it with a Reciprocal Rune.
Tier 2: To use this, you'll need to charge up a Stolen Rune by finishing Tier 1 three times. Activate it with a fully charged Stolen Rune.
Tier 3: You must first charge up the Antiquated Rune by finishing Tier 2 three times. Activate it with a fully charged Antiquated Rune.
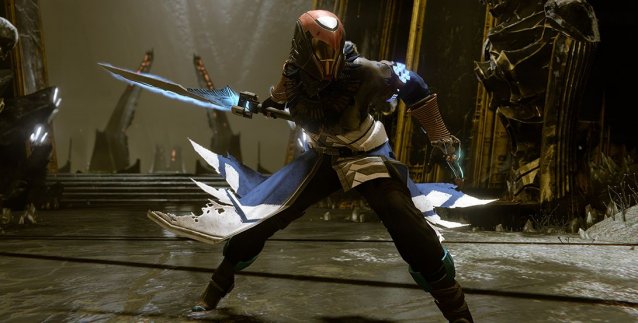
There are six different boss fights to encounter in Tier 1. Each one is random. Your Light level should be at least 190 for these fights.
Alzok Dal, Gornuk Dal and Zyrok Dal - These three Wizards will respawn if any one of them remains alive. Kill them in quick succession or get the health of all three of them down to a sliver and then make short work of them.
Bracus Horu'usk - You must kill his minions before you can do any damage to him. His minions will spawn intermittently, so killing them will be your main priority.
Cra'adug and Mengoor - These two brothers can only be damaged when they're right next to each other. Lure the one with the sword towards the other and kill them when their shields go down.
Krughor - Impervious to damage unless an exploding thrall detonates near him.
Lokaar - He has elemental shields that go down under the right type of elemental attack.
Vorlog - Switches elemental shields intermittently. Pack some Elemental damage weapons.
Tier 2 of the event simply offers a combination of two different challenges. This is where you'll get Calcified Fragments, so be sure to keep track of which bosses you've killed. You can cancel the event to refund your rune by committing suicide. Just jump off the ledge if you don't want to fight a particular boss.
The recommended Light level for these fights is 240. Be sure to take out the bosses you find easier to kill before getting rid of the harder ones.
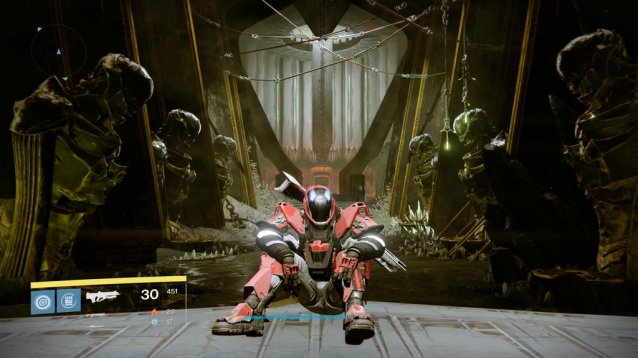
This is where things get really interesting. It's also where you'll find the best rewards. The bosses on this tier of the event rotate on a weekly basis. Three have been introduced thus far.
You will need a full Fireteam for these battles. They are hard.
Kagoor - The key to this fight is downing the Servite Ogre before anything else. Kill the Maleficient Eye to get a damage buff against Ogres. Once the Servite Ogre is down, focus all your attention on Kagoor.
Thalnok - Crota lite. This boss is immune to normal weapons and requires a bit of strategy. Here's what you do.
1. Kill the two Wizards who will replenish Thalnok's shield as you fight him. They go down fast under Solar attacks.
2. Focus your attention on the Swordbearer. You'll need his weapon to do any damage to Thalnok. As soon as the Swordbearer drops his weapon, have one of your Fireteam members pick it up while the others focus fire on Thalnok to deplete his shield. He will get down on one knee and become vulnerable to attacks.
3. When his shield is down, hack Thalnok with the sword. Thalnok's shield will replenish, so you'll need to deplete it again before your sword user can get in another round of attacks.
4. The sword will eventually break and you will have to repeat the entire process at least once.
Balwur - The boss spawns at the top platform, along with three Acolytes of Balwur on the bottom area.
1. This fight involves navigating through a poisoned arena. There is one permanent safe zone beneath the platform that you'll need to go to at the start of the match. Every time you kill an Acolyte, a new safe zone will appear that you can stand in. You can only do damage to Acolytes when you are standing in a safe zone.
2. Kill Acolytes as they spawn and move to better vantage points to do damage on Balwur. That's it. It's pretty easy.
All players involved will receive Calcified Fragments and rewards. The player who activated the rune will get better rewards than everyone else, so don't hesitate to do this more than a few times for everyone in your Fireteam.
Be sure to check out our guides on the fastest way to earn Legendary Marks, Infusing weapons and armor, the fastest way to raise your light level, and how the Exotic Blueprint system works. Here's our guide on finding all 50 Calcified Fragments.


 Onigiri: Why You Should Avoid Power Leveling Early On
 Fallout 4: Operation Ticonderoga walkthrough
 Top 10 Best Games of 2011
 Corpse Party Deconstructed
 Gaming in Times of the Cholera - Reactions to E3 2012