Your Estus Flask in Dark Souls 2 is a key item that is capable of restoring large portions of your health. You start with one, but you can upgrade it to have multiple uses with each Estus Flask Shard you find throughout the game. Not only this, but if you can also increase the power of a single use of the Estus Flask by securing Sublime Bone Dust, then burning it in a bonfire to upgrade your Estus Flask. This becomes increasingly worthwhile the further you venture into the game, and to make sure that you haven’t missed any of these Dark Souls 2 key items, we’re on hand to provide you with a full rundown of where to find all of the Estus Flask Shards.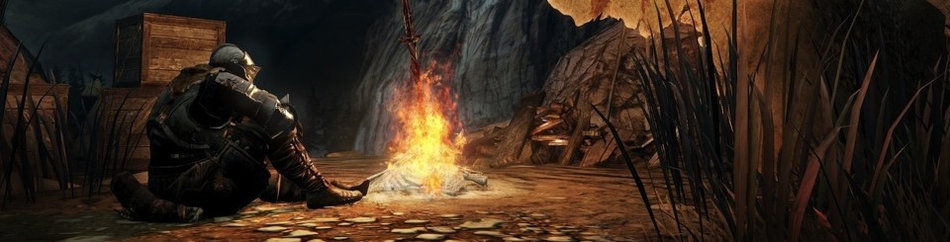

Dark Souls 2 Estus Flask Shard Locations
Estus Flask Shard #1: Majula
Your very first Estus Flask Shard is in Majula. Go towards the area with the large hole in the ground, and locate a well just beyond it. There should be a rock perched on the edge of the well, which you can hit with your weapon to haul up a corpse from the depths bearing a shard.
Estus Flask Shard #2: Forest of Fallen Giants
Once you have reached the Cardinal Tower bonfire, head up the stairs and repeatedly attack the wooden door until it breaks. Loot the entire area and you will find your second Estus Flask Shard in a chest.
Estus Flask Shard #3: Majula
For this one you need a key for the mansion in Majula, which is received from Cale the map enthusiast, whom you should have encountered in the Forest of Fallen Giants (after the rolling boulder, take the path left to the end). Once you have exhausted his dialogue options, he will give you the key. You will now be able to enter the mansion and claim your third shard.
Estus Flask Shard #4: No Man’s Wharf
After you have rung the bell to call in the ship, head down via the tiered platforms until you reach solid ground again. There will be a stone staircase leading to the pier that the ship is docked at, but before you go down there look for a house with a closed wooden door on your left as you face the ship. There are two enemies in here, as well as poison containers, so be careful. Once the threat has been dealt with, look for a chest in the corner of the room containing your fourth Estus Flask Shard.
Estus Flask Shard #5: The Lost Bastille
This one is found around the back of McDuff’s workshop, in the area below the spear-wielding Heide Knight. Take care of the dogs and the undead jailer atop the raised wooden platform, then search for a hidden path leading to a chest. Your fifth Estus Flask Shard is within.
Estus Flask Shard #6: Earthen Peak
As you first enter Earthen Peak from Harvest Valley, there is a series of rooms with an upper walkway and a lower room containing undead metalworkers. Take care of them and jump down to the rooms below. In the second one, there is a platform with a staircase leading into some murky-looking water. You can see an item on a corpse at the end of the tunnel – that’s the shard you’re looking for. 
Estus Flask Shard #7: Shaded Woods
This one is easy: right after you pull the lever to enter the area, search the cells to find your seventh shard. There’s also another one in the area to look out for…
Estus Flask Shard #8: Shaded Woods
Another relatively easy one, provided you have the Fang Key. In the same room as Ornifex, look to the left to see a corpse bearing an item, which is your eighth Estus Flask Shard.
Estus Flask Shard #9: Brightstone Cove Tseldora
To the left of the mist gate leading to the boss, there is an illusory wall. Stand next to it and press A or X to open the route, then follow the path and you should soon see a corpse hanging out of a window on your left with the shard.
Estus Flask Shard #10: Brightstone Cove Tseldora
Near the Lower Brightsone Cove bonfire, there is a small alcove beneath an arched ledge. Inside and to the left is the shard.
Estus Flask Shard #11: Drangleic Castle
Go through the room with the sets of armour standing against the pillars, that leads out onto a balcony. Once outdoors, head right down the steps and through the closed door, and towards the back of the room is a chest containing the penultimate shard.
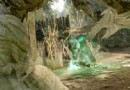
Estus Flask Shard #12: Shrine of Amana
From the Crumbled Ruins bonfire, head forwards and bear to the right, following the pillars. Once you reach the corner of the big wall, go right around it almost as if you were doubling back on yourself. Keep following the pillars ahead of you, and you’ll come to the final Estus Flask Shard sitting in a murky corner.
Did this guide help you to find any Estus Flask Shards that you missed throughout the game? We also have a guide to finding all of the Sublime Bone Dust locations coming soon!
If you enjoyed reading this, here are a few more that you may also enjoy:


 Bound by Flame Guide: How to Defeat the Concubine Bosses
 Lego Marvel Superheroes Red Bricks Locations
 The Walking Dead — Episode Three: Long Road Ahead Walkthrough
 How to Manage Your Office 365 Subscription
 New Deadpool Trailer Breakdown from a Marvel Fan