Unofficial Pokemon Emerald Guide by CM Boots-Faubert for
The first thing that most gamers notice when they begin playing Emerald is that it seems to be a lot like Ruby and Sapphire -- well of course it is! Emerald is what they call the Bridging Game for those two. In the Pokemon Game World the games are released as complimentary color-based pairs, with each having a slightly different set of Pokemon in it, and a different legendary. The Bridging Game is basically most of the contents of both games joined into one. Now if that was all that there was to it, a lot of gamers would skip the main games and just wait for the Bridging Game to come out, but that is not actually all that there is to it, mates. The blokes at Game Freak use the Bridging versions to add in additional content and story to the games, so while they are similar to the first pair they are also uniquely different. There are also a handful of Pokemon in each bridging game that have to be obtained from the two color-matched games that cam before it. The general trend is for gamers to buy one of the first pair, battle and trade with a mate who has the opposite game, and then get the bridging version to play as their base game in preparation for the release of the next generation. That way they have the chance to play through the game again and experience its new content, and transfer all of their Pokemon and items from the first game so that when the next gen comes out everything is all together in the bridging game and ready to go! Or that is the logic anyway, it does not always work out that way, but everybody is different. The animations are different in Emerald, and it also has both of the antagonist groups -- Team Aqua and Team Magma in an equal and much deeper presence, and in fact it is when the two release their chosen Gods that Emerald pretty much parts company from the story in Ruby and Sapphire, offering you an entirely new lore and experience.

Welcome to Pokemon Emerald
In addition to changes in the story that are fairly significant, there are new areas in this version of Hoenn, including the Team Magma Hideout, the Mirage Tower, Marine Cave, Studio Cave, and the Desert Underpass to name just a few. I should also mention the Battle Frontier -- yeah, because THAT is going to be a very important addition to the game for you!
You will find that Gym Battles in Emerald are markedly different, as the leader now have different Pokemon -- and in the case of one gym, a different leader -- and you will also find that Torchic is not the unstoppable dynamo that they were in the other games, so you may want to give a bit of thought on who you pick as a starter this go-around!
Perhaps the most endearing difference in Emerald is the inclusion of Pokemon from other lands in the game, and the expanded breeding system, the new and altered traits and abilities, and the significant changes to the development process of breeding and training Pokemon for competition.
Of all of the games from this generation, Emerald has the best support for the E-Card Reader and its associated cards -- while this was not the huge hit outside of Japan that it was in Japan, it was still pretty popular with the serious Pokemon Trainers in the US and UK, so it is not uncommon to attend an event and find trainers there with full sets of the E-Cards and the Readers in their kit box.
The most important point to be made -- and a large part of why this guide is being written -- is that fans of the series who joined during the DS generation are returning to Emerald in preparation for the release of Black and White in March of 2011 -- because the Pokemon in Emerald can be traded to all of the DS games, which in turn will be able to trade with Black and White, and thus taking the time to play through Emerald gives them access to Pokemon that they might otherwise never have.
Enough interest is targeted towards the game that even a used copy at GameStop costs almost as much as a new one in the box! Demand has an impact on price, and the bloke at my local GameStop told me that they have seen such a spike in demand for Emerald that they had to order more from their warehouse. An interesting turn of events to be sure!
If you have yet to play either Ruby or Sapphire, and this is your first exposure to the Hoenn adventures, well you could have done worse mate! Emerald is an excellent game to play that generation as it has all of the semi-legendary and most of the legendary Pokemon obtainable in it, and its story line is a bit more intense and entertaining -- not to mention that it contains some bog standard Pokemon not available in the other games.
The Welcome Screen
If you have other games from this generation you may want to transfer in some of your higher level Pokemon to make life a little easier -- if you do, and also keep this in mind when leveling the ones you catch in the game, always remember that the badges you have are what dictate what level Pokemon you can successfully issue commands to!
The Badges in the game each bestow specific abilities:
Stone Badge: The power of all Pokemon increases a little. You can now use the move Cut any time.
Knuckle Badge: Pokemon up to level 30 obey you. You can now use the move Flash any time.
Dynamo Badge: The speed of all Pokemon increases a little. You can use the move Rock Smash any time.
Heat Badge: Pokemon up to level 50 obey you. You can use the move Strength any time.
Balance Badge: The defense of all Pokemon increases a little. You use the move Surf any time.
Feather Badge: Pokemon up to level 70 obey you. You can use the move Fly any time.
Mind Badge: Your Pokemon special attack and defense are stronger. You to use the move Diving any time.
Rain Badge: All Pokemon regardless of their level will obey you. You can use the move Waterfall any time.
When it says that Pokemon up to Level X will obey you, that includes any Pokemon that you have traded into the game from another cartridge or obtained in an in-game trade. Bear in mind that with no badges you can fully control Pokemon up to around Level 18 but after that they may not obey your commands until you have obtained the first two badges. Once you have the first two badges then as it says, any Pokemon up to Level 30 will obey you. Also note that with no badges, there is a chance that traded Pokemon will refuse to obey you.
As your adventure begins in Littleroot Town, try to remember to take your time and really enjoy the game! You have plenty of time before Black and White are released, so use that time to savor what is widely viewed as the best story in any of the games after the saga of Ash in the original Red/Blue/Green!
First I want to say -- welcome to Hoenn! Now I admit that the manner by which you arrived was a bit, umm, unorthodox. Your mother is lucky that Child and Family Services did not find out that she had the moving van company pack you in the back of their lorry for the trip, as I am fairly certain that would result in charges!
But no worries about all that! You are here! You are home! At your new home! In Littleroot Town! In... Littleroot... Town... Why am I so excited about that?! Littleroot is the armpit of the universe! Nothing ever happens there! There is nothing to do! Oh man! We live in Littleroot Town! That would be like living in Goomeri in Queensland... Actually now that I think on it, you'd be better off in Goomeri actually, they have shops and restaurants and at least something to do. Well I guess we will just have to make the best of it, mate!
As you climb down off of the back of the truck your mum comes out to greet you, and takes you inside to show you the new digs, and let you see your new room, which she has had the moving Pokemon unpack for you. I swear if one of the Vigoroth broke my Gamecube I am going to be so...
After you check out your room head down stairs where mum will draw your attention to the TV, which has a news crew at the Petalburg Gym, which is the gym your da Norman is the leader for!
Sadly you miss that bit, but mum tells you about your Da's mate who lives in town -- Professor Birch -- and suggests that you pop over and say hello! As you hit the front door to your new home this is the point where your new adventures actually begins. You are about to set out upon on epic adventures full of Pokemon, evil trainers, good mates, and good times. Be happy!
Deciding who to pick
-- The Adventure Begins --
Professor Birch lives right next door, which makes this all a bit convenient, so go ahead and pop over to say hello -- but do not expect to meet the Prof just yet, no no. As you go in you will be greeted by Mrs. Birch, who will send you upstairs to meet their daughter May!
Now, unlike previous games in the series, May is not your rival -- think of her more as a condescending but helpful older kid who tolerates you because she wants to help you learn about her favorite subject in the whole world: Pokemon!
After you have a chat with May and she tells you that she has to go help her da, why not pop in to the Lab to the south end of town and say hello to the Lab Assistant there, and then head to the north path that leads out of town, where there is a little girl waiting.
She tells you that there are scary noises coming from the path and asks you to go and check it out -- when you do (of course you do!) you find the Professor being chased by an angry Pokemon! He calls for help, and directs you to grab a Pokemon from his bag on the ground!
This is where you will be choosing your starter Pokemon -- you can pick from a Treecko, a Torchic, or a Mudkip -- a grass-type, fire-type, and water-type respectively. In the previous games I chose Torchic because they had a decided advantage but in Emerald that has changed. A smarter bet would be to go with Treecko, because they have a slight edge when you get to the Elite 4, but the thing is, I know Torchic really well, and its moves, its abilities, and style -- so even at a slight disadvantage I can make it sing like a Phoenix! So I chose Torchic.
You really need to think this through before you make your choice, because while you will be getting other Pokemon, your starter is always going to be the Captain of your Team, so you should try to pick the one that best fits your style of play.
If you are passive, and prefer to fight middle-of-the-road, Treecko is probably the best choice here. If you are a defensive trainer who prefers to use tactics like xx then Mudkip is the obvious choice, while an aggressive trainer who likes to wade right in and kick butt will find Torchic to be the ideal companion.
Once you have made your choice, you will find yourself facing a wild Zigzagoon for your very first Pokemon Battle! Now obviously the idea here is to defeat it -- you do not have any Poke Balls, and even if you did, you do not know what you are doing anyway, because you are a total noob in the world of Pokemon Trainers at this point in the story, so go ahead and do battle, with the goal being to KO your opponent!
After you win the Prof will thank you and then take you back to his Lab where, after a brief chat, he will gift you with the Pokemon you chose earlier. He then urges you to go and have a chat with his daughter, and effectively dismisses you. That pretty much wraps up your first adventure in Hoenn and Littleroot Town! How about that?
-- The Next Adventure --
Exiting the Lab we may as well head to the Professor's house now and have another chat with May, but between there and the front door to the Lab you will notice that there are three citizens of Littleroot wandering about -- go ahead and have a chat with each to learn something about computer storage and tidbits about Birch.
At the Professor's house, if you have not already done so, chat up his youngest child, who offers you a very friendly greeting. Nice town this Littleroot, has a friendly bunch of people. Sadly when you check upstairs you find that May is not in her room -- so go ahead and leave the house now.
** An Important Bit of Advice **
Before we continue with our adventures in Hoenn I would like to take a moment to have a brief chat with you about your play habits, and in particular making use of the save feature for this title. There is nothing worse than playing for a long time, and then either forgetting to save and turning off the player or worse, running into a string of bad luck that causes something to happen in the game that you would rather had not happened, only to discover that you failed to make checkpoint saves and so cannot easily undo it.
There are no automatic saves in the world of Pokemon. You have to actively develop the habit of making checkpoint saves of your own. What I have done is made it a rule for myself to save whenever I enter or exit a building or change zones. That is an easy to remember prompt, and invariably when something bad happens it happens shortly after exiting a building or changing a zone.
I suggest that you get into the habit of doing the same!
Second, there is the question of hit points (HP). Unlock many games, simply winning a battle does not restore your HP -- to accomplish;ish that you must rest, or partake of the services of a Nurse in a Poke Center in one of the larger towns, who has a machine that can heal up your team of Pokemon while they are still in their balls.
As there is no Poke Center in Littleroot, the developers gave your mm the power to heal -- all that you need to do is enter your house and talk to your mum, and she will automatically put you through the healing process.
If you watched the video you will note that before leaving our room on the grand tour of the new house I removed a potion from the PC storage system. The Potions have the same effect as a healing though they are more limited, as where being healed restores all of your HP, Potions only restore up to the amount that is their maximum.
** End of Useful Chat **
So after leaving the Professor's house, drop in and have a brief chat with your mum if you took any damage at all in the battle earlier -- and even if you did not, since being healed also restores the PP of your Pokemon (think of PP as action points -- you only have so many per move, and when you run out of PP you can no longer use that move until you are healed and thus your action points are restored).
Now that we have taken care of those minor chores, head outside again and then walk north to the path you originally met the Prof on, where you will find Route 101, which connects Littleroot to Oldale Town. In the tall grass on the Route you will meet various trainers who will talk to you, battle you, or offer you pressies depending upon the trainer.
Obviously it is a good idea to talk to any and every trainer that you encounter, because they might offer you useful advice and information, a nice pressie, or the opportunity to pick up a larger chunk of XP than you will receive for wild battles, and maybe some money to help defray your travel expenses if you happen to beat them, which I expect that you will do more often than not.
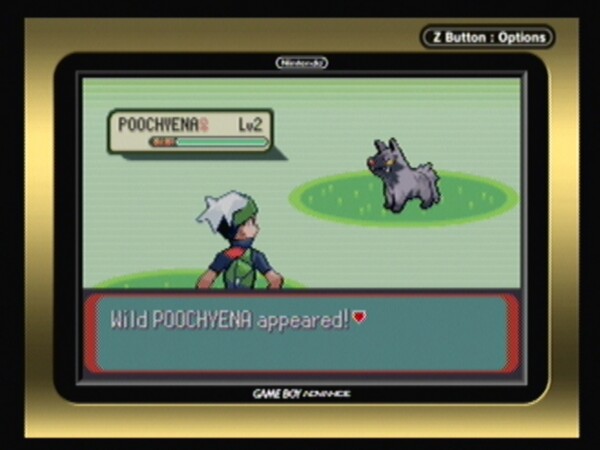
The Tall Grass is where you find Wild Pokemon
-- Tall Grass --
A word about Tall Grass -- that is where you are going to encounter the wild Pokemon that you battle and capture. The Tall Grass is where most of them live, though some also live in water, and in caves, in magma pools, and other odd places. Still the majority live in Tall Grass, and because of that you should expect to encounter wild Pokemon in Tall Grass. Are we clear on that?
Good!
At the moment you have exactly one Pokemon -- your starter -- who is at Level 5, and only knows two moves -- one offensive and one defensive -- and none of those moves are type-moves. If you examine your inventory you should have your daypack (called a "Bag" in this world), which has a number of pockets built into it:
-- Key Items Pocket: will hold all of the Key Items that you collect in your adventures, and there will be a lot of that sort, believe me!
-- Items: A sort of catch-all that contains any items that are not part of the type that the other pockets contain. In this case all that you should have in the entire bag is the Potion that we got from the PC in our house, which should be in the Items Pocket now.
-- Poke Balls: There are actually many different types of Poke Ball, from the bog standard red and white variety to special ones that work on specific Pokemon or under specific conditions. There is also the Master Ball that you will eventually get as a reward, but think long and hard before using that as there is only one of those in the entire game unless you clone it, which though frowned upon is fairly easy to do once you have access to a special area of the game called the Battle Frontier, but more on that subject later!
-- TM's & HM's Pocket: This is where you will store the Technical Machines (TM's) and Hidden Machines (HM's) that you encounter in the world. A TM is a one-time use move teaching device that is destroyed when you use it, but that can teach a useful move to one of your Pokemon. An HM is a more sturdy device that can be used over and over again, but is also much more rare, and only teaches special moves of a sort that you will need to move the story forward, reach special areas in the game, or otherwise perform special functions.
-- Berries Pocket: This is where you will store the many different types of Berry you encounter in the game, berries that are used for a variety of functions, making special items that are used to permanently enhance a Pokemon's abilities for competition, or that have specific temporary effects when they are consumed by your Pokemon. As berries never go bad, and the bag will hold an unlimited amount, you should actively acquire any that you find.
That takes care of your bag -- the only other possession you have that is worth noting is your Trainer Card, also reached through the Pause/Inventory Button, which will eventually contain all sorts of useful information about you, including statistics and the badges you have earned.
At the moment all that it can tell you is your name, the amount of time you have played the game, and how much money is in your wallet. Not that this is not useful information mind you, but later you will find that the ID card is actually useful beyond that.
The Option selection can be used to alter certain aspects of the game, like how fast text messages are displayed on the screen -- I suggest that you change it to the fastest setting -- the borders used in the game interface, and the sound style. Go ahead and change anything there you think needs tweaking but remember to save after leaving that sub-menu or your changes will not be permanent.
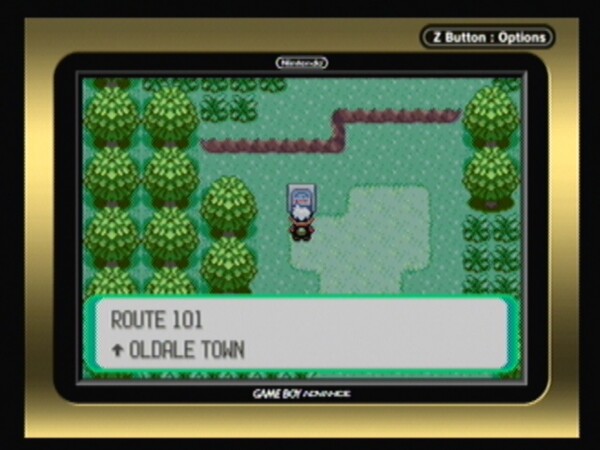
The Tall Grass on Route 101
-- Route 101 --
Route 101 links Littleroot with Oldale Town, and contains a number of Tall Grass spots and trainers for you to meet. It is your first Route in the game.
- - - - - - - - - - - - - - - - - - - -
Route 101 Area Pokemon Report
-- #261 Poochyena (C)
-- #265 Wurmple (C)
-- #263 Zigzagoon (R)
- - - - - - - - - - - - - - - - - - - -
See that enclosed section above? That is the Pokemon Report for this Route -- you will find one of these at the beginning of each new Route or area in this guide. Its function is to provide you with a list of all of the wild Pokemon that are available in the current area. You will use that information to see which are here that you do not already have both for their Dex Entry and for your collection.
The Report lists the Pokemon alphabetically, staring with their Dex Number (Pokedex Number). You do not have a Pokedex yet -- you will shortly receive one -- but if you are not aware, the Pokedex is an electronic device with an advanced AI that is used to record information about Pokemon you encounter that it does not know about already. Among other things, the Dex will keep track of which you have seem and which you have captured (an important bit of info).
The listings above use the National Pokedex Number for each Pokemon. You will not obtain your National Pokedex until near the end of the game, and many of the Pokemon you encounter will be numbered with the Local Version of the Pokedex instead of the National Version until you acquire the National Version. The reason that we use the National numbers here in place of the Local is simple: you will use these Reports after obtaining the National Dex in the process of completing your Dex in the later stages of the game, so having them listed this way is actually advantageous for you.
Each listing shows the National Dex Number, the proper name of the Pokemon, and in parenthesis its CURL Rating, followed by any notes about it that may be important. The CURL Rating is actually meant to indicate how rare that particular Pokemon is, and is named after the code that is used to indicate that rarity. The full CURL codes are:
(C) -- Common
(U) -- Uncommon
(R) -- Rare
(L) -- Legendary
When a Pokemon is (C) Common, that means you will encounter it a lot. When it is (U) Uncommon, not so much, and when it is (R) Rare, that usually means considerable effort is necessary to find and catch one.
The notes section will contain information like any special method you need to use to capture the Pokemon; for example Pokemon that can only be captured by using the move Surf will be so noted. Pokemon that you must fish for will have the Rod Type you need to use to catch them listed, and so on.
-- Back on Route 101 --
In the Tall Grass on your left you will encounter a trainer who will tell you about the Tall Grass! After your chat with him, if you like you can troll in the Tall Grass for some wild battles in order to pick up some XP. It would not be a bad idea to level your starter to around 7 or 8 now, just to give you a bit of an edge.
When you battle you may take damage. Once the damage gets to a certain point your Pokemon is at risk of getting incap'd (incapacitated) -- which is a bad thing. Before their health gets that low, head back home and have your mum heal you up, then you can return to the Tall Grass and continue leveling.
This sort of leveling activity is something you will be doing a lot as you play the game, between your battles with other trainers (battling other trainers is always preferable to wild battles because it pays out in XP and money), so you may want to get used to the notion. Trolling the Tall Grass is also largely how you will go about finding Pokemon to capture and add to your collection, but you need Poke Balls to do that and we have none at the moment!
One good reason to level up early is that other than TM and HM moves, the primary means for your Pokemon acquiring new moves is through leveling. For example if you chose Torchic (I did), you will find that when they reach Level 7 they will learn the move Focus Energy, a passive move that raises their critical-hit ratio, and at Level 10 they learn Ember, a fire-type that is also the first of their Type-Moves that they learn.
When you have finished leveling to your satisfaction, continue along the Route and you will meet a trainer who tells you what to do when your Pokemon are tired. Past the last patch of Tall Grass is the town of Oldale!
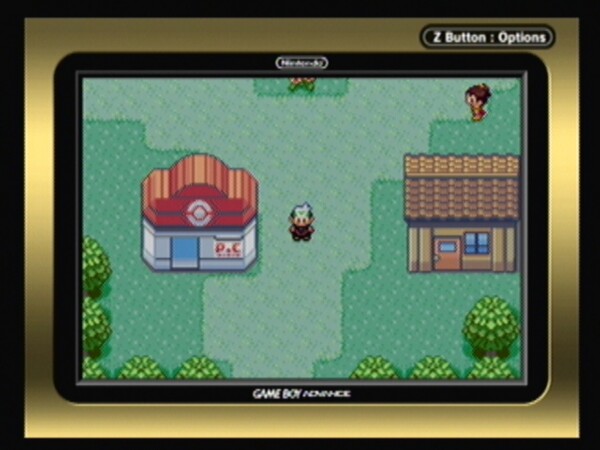
The tiny town of Oldale
As you enter the town you will immediately spot the Poke Center (it has an orange roof and the letters "PC" on its front). To its right is a house, and north is another house, while to the northeast is a blue-roofed building you will come to know as the best place in the world for buying kit! That is the Poke Mart!
For now, head inside the Poke Center and talk to Nurse Joy behind the counter to have her heal your Pokemon. Good on ya mate! You have used the Pokemon Healing Station for the first time! You will be using the services of Nurse Joy and her identical twin sisters all over the land a LOT!
Now first, have a chat with everyone here and you will learn a bit about this place. Now head to the corner where there is a PC set up for trainers to use.
Configuring your Storage Boxes
-- Poke Center PC --
This PC can actually access two different systems -- the PC you have at home, in which you may store items and receive mail, and a special PC that is part of a global network of Poke Centers in which you can store actual Pokemon!
At the moment as we do not know who the inventor of this awesome device is it is known simply as "Someone's PC" to us. This PC contains 14 boxes, and each box can hold 30 Pokemon, which means that in addition to the 6 Pokemon you can have on your team at any time, you can store up to 420 Pokemon in the digital storage system, and gain access to them at any Poke Center in the region, as well as at certain other buildings that have PC's connected to this network.
The first thing that you will want to do is edit the boxes to reflect their basic function, a practice used by most professional trainers to simplify the collection and storage of Pokemon. The basic steps that you will want to take are as follows:
Box 01 -- Change its name to "A-Team" and set its Wallpaper
Box 02 -- Change its name to "B-Team" and set its Wallpaper
Box 03 -- Change its name to "Fire/Fgt" (for Fire and Fighting Types)
Box 04 -- Change its name to "Grnd/Rck" (for Ground and Rock Types)
Box 05 -- Change its name to "Bug/Gras" (for Bug and Grass Types)
Box 06 -- Change its name to "Water" (for Water Types)
Box 07 -- Change its name to "Flying" (for Flying Types)
Box 08 -- Change its name to "Normal 1" (for Normal Types)
Box 09 -- Change its name to "Normal 2" (for Normal Types)
Box 10 -- Change its name to "Misc 1"
Box 11 -- Change its name to "Misc 2"
Box 12 -- Change its name to "Legendry" (for Rare and Special Pokemon)
Box 13 -- Change its name to "Outgoing" and set its Wallpaper
Box 14 -- Change its name to "Incoming" and set its Wallpaper
This nicely covers the sorting in a way that matches the distribution of types that you will collect, giving you a place for each. Note that the way that the box system works, whatever the box was set to that you quit the last PC session was is the box that any new Pokemon will be placed into when you capture a wild one and your team is full.
That being the case, you want to ALWAYS quit the PC on the Incoming Box, right?
This system allows that you will always know what Pokemon are new, and where they are, so you do not end up having to hunt through boxes to find them to sort them out! Every so often you will want to visit a PC and sort out the new ones in the Incoming Box to see to it that they get put where they need to be.
The first pair of boxes that you named "A-Team" and "B-Team" you use to conveniently keep the team that you use for the game -- the A-Team -- and the team you use to battle other real life trainers -- the B-Team -- as configuring and training will be different for both types of battling.
Once you have the boxes squared away, take a quick peak upstairs -- this is the area you will use to interact with other trainers in real life, as it has a special room for battles, and another for chatting and trading Pokemon. As it is presently under construction (it stays that way until you have X number of Pokemon in your collection) head back downstairs once you have had a look see, then go ahead and leave the Center.
-- Oldale Town --
First have a chat with the bloke standing by the house to the east -- he is from the Poke Mart and will give you a bit of a tour, then gift you with a free Potion!
After you chat with the various people outside and inside the two houses, head to the Mart to shop. Sadly they are out of Poke Balls! All that you can purchase are kit items like Potions, Antidotes, Paralyze Heal, and Awakening -- nothing we absolutely need at the moment, so after checking out the menu, quit out.
On the counter to the left is a piece of paper -- go ahead and move to it and open it, and you will see that it prompts you to enter a phrase. This is the trigger that unlocks the Mystery Gift System, and we may as well do this now so that it is done!
For the first word, select the Section "Trainer" and the word "Link" -- for the second, select the Section "Conditions" and select "Together" -- then the Section "Endings" and the word "With" -- and finally the Section "Endings" and the word "All" before hitting OK. What you have done is unlock the Mystery Gift System, but it will not actually activate until after you link to another gamers Pokemon to battle or trade -- after which when you turn the game on you will have the Mystery Gift Menu Selection thereafter available from the Start Menu.
Now that we have taken care of all that, head to the north exit of town and use it!
-- Route 103 --
Route 103 links Oldale Town to Route 110, and is the direction that we need to go in so that we can meet up with the Professor's daughter May. Be aware that this meeting will immediately result in a Pokemon Battle!
- - - - - - - - - - - - - - - - - - - -
Route 103 Area Pokemon Report
-- #261 Poochyena (C)
-- #278 Wingull (U)
-- #263 Zigzagoon (U)
- - - - - - - - - - - - - - - - - - - -
After you enter the Route you will find a ledge blocking the way, and forcing you to go through the Tall Grass. There is a trainer here that remind you that Potions are a great idea, and then after the second patch of Tall Grass you will find May waiting. This would be a very good time to Save Your Game!
May wants to establish the pecking order with you right off the bat -- you apprentice, May master -- got it? Well we cannot have that, so I sincerely hope that you leveled your Pokemon to at least Level 7 so you can kick her butt! Her Pokemon will be whatever is strong against the one you picked -- meaning that it will not be the same one as you picked, and it will not be the one that is weak versus your Pokemon's type, got it? Good.
Your first Trainer Battle with May
-- May Battle Number One --
If you have not leveled your Pokemon to Level 7 minimum go do that prior to talking to May.
Walk up to May and say hello -- she will be recording information into her journal when you approach, and you will surprise her. Without giving you the option to refuse she pushes you into Battle Mode.
For my battle -- and yours if you chose Torchic like I did -- she has a Level 5 Mudkip. The fact that it is Level 5 is fortunate, because if it were a higher level it could know a water move, which would be deadly for Torchic!
Beating her -- you did win right? -- gets you a reward of $300 and the satisfaction of winning. After the battle May compliments you and then departs, telling you that she is returning to the Lab. Now would be a good time to save your game.
Return to town by jumping down the ledges rather than going through the Tall Grass, as you took damage in the battle. When you get to town the first thing you should do is have Nurse Joy heal your Pokemon, and then save the game again.
-- Leaving the Center --
After you leave the Poke Center you run into May again outside, and she encourages you to return to Littleroot Town and her father's Lab. She must have a reason for being so enthusiastic for us to come back home and visit the Lab, right?
Using the ledges it is a quick and safe trip back home, and when we arrive at the Pokemon Lab we find May waiting for us with her father, who greets us as we arrive!
First he tells you what May told him about your battle, and then as something of a reward he gives you the Pokedex that he says he ordered for himself (May already has her own). Birch tells you all about the Pokedex and what it does, and then May acts as if she was not standing right next to him while the entire conversation took place and he gave you the device and is surprised that you now have a dex like hers!
May has her own rewards to gift to you -- Poke Balls! That is a most excellent reward for several reasons -- one, we really need those balls if we are going to start building teams and filling that Dex, and two, now that May has shared some balls with us, the Poke Marts will suddenly be able to sell us more!
** A word on Poke Balls **
The Poke Balls that May gave us are the bog-standard common type, but all that means is they have the normal capture rate of the standard Poke Ball. With that in mind, it is time to reveal that there are in fact many types of Poke Ball, normal and special, with each type having strengths and weaknesses built into them.
The different types of Poke Ball are:
-- Dive Ball: 3.5 x chance for capturing water Pokemon underwater.
-- Dusk Ball: Works best at night or in caves.
-- Great Ball: Has a higher chance of capture than the Poke Ball.
-- Luxury Ball: Same chance as Poke Ball but increases rate of "Like" in Pokemon.
-- Master Ball: Will capture ANY Pokemon without fail.
-- Nest Ball: Higher chance on weaker Pokemon.
-- Net Ball: Increased capture rate on Bug-type Pokemon and in water.
-- Poke Ball: Standard ball with regular catch rate.
-- Premier Ball: Commemorative ball with same stats as regular Poke Ball.
-- Quick Ball: Best capture rate when used at the beginning of a battle.
-- Repeat Ball: 3x chance for capturing types you already have one of.
-- Safari Ball: Used only in the Safari Zone to capture their Pokemon.
-- Timer Ball: Capture rate improves the longer a battle takes.
-- Ultra Ball: A much higher capture rate than the Poke and Great Balls.
Poke Balls are sold at Poke Marts and also are received as rewards for quests and sometimes found. When you are purchasing the standard Poke Ball from a Mart, ALWAYS buy them in lots of 10 balls! The reason for that is because the Poke Marts have a standing special that gives you a free Premier Ball whenever you purchase 10 regular Balls.
Note: the list of balls above presents the balls you may encounter in this game, but does not represent a full and complete list of Poke Balls, as there are other types from the other games as well as these.

The Professor's Pokedex
-- Our Pokedex --
As she gives you the Balls she tells you about her plans to capture the most Pokemon, an admirable goal to be sure! Now that we have our own Pokedex, what do you say we take a look at it?
The main page of the Dex (or Index Page) contains a summary of our Dex Contents including the number of Pokemon that we have seen, the number we actually own, and a search button for use when our Dex is so full that scrolling through the listings is no longer practical. To the right is the listing Index that we can scroll through to find the Pokemon we want to look up.
The first thing that you will likely notice is that the Dex contains an entry for every Pokemon that we have encountered in the game up to this point! That is rather odd since its function is to automatically scan any Pokemon we encounter and then add them to its database, but we did not possess it when we saw these Pokemon!
Still it is rather cool that it does this since we now have a short-list of what Pokemon we can definitely capture in the areas that we have visited. When I opened my Dex for the first time it showed me entries for:
-- Torchic
-- Mudkip
-- Poochyena
-- Zigzagoon
-- Wurmple
-- Wingull
Note that Mudkip is the starter Pokemon that May chose, and is not encountered ANYWHERE in the region in the wild, so discount that from the list above, and of course discount our Torchic, and that leaves four Pokemon that we can and should capture to add to our collection.
You will also note in the Dex that any Pokemon that we own or have owned / captured have a regular Poke Ball symbol to the left of their Local Dex Number, which is good for letting us see which we have and which we do not. In addition to that, you will note that the Dex is displaying the Pokemon by their Hoenn Region number scheme rather than the National Dex numbers that we use in the guide here.
As mentioned previously, later in the game you will unlock the National Dex, and it is after that point that you will begin to seriously start capturing Pokemon to complete your Dex, and that is why they are listed by their National rather than Local Dex Numbers.
Go ahead and move the Dex selector to your Starter Pokemon's entry and click the action button to open it up. As you can see there is a lot of information about your Pokemon -- a page containing a basic description, The Local Dex Number and proper name start the page, followed by its vital statistics, and a representation of its footprint. Below that is a description of the Pokemon that includes any special or helpful information that you may need to know when you battle or capture it.
The next page shows a map of the region, and if this were a regular Pokemon that could be captured in the wilds of Hoenn, the map would indicate -- using colored shading -- what specific areas of the region this Pokemon can be found in -- if it could be found in the region, which it cannot.
The next page utilizes the built-in audio player and sound sampler for your Dex, and allows you to play a recording of your Pokemon's basic cry so that you can learn what they sound like. That can be useful whenever you are moving through large areas of Tall Grass, because when you get close to a Wild Pokemon who is concealed in the Tall Grass you often hear their cry.
The final page for each Dex entry contains a standard size comparison image represented by a shadow outline of you, and one of the Pokemon, in order to give you a perspective based on yourself.
While the Dex contains entries for Pokemon that we have seen (but have not owned or captured) these entries are very basic indeed, containing only its Local Dex Number and Name, its Cry, and the area that it can be found in on the Region Map.
-- Home Again --
Once you have finished examining the Dex, go ahead and leave the Lab, returning to your house in town, where you will find your mum standing outside waiting for you to come home!
She asks if you spoke with the Prof, then notices your new Pokemon and tells you how adorable it is. Recognizing that as you are now well on your way to becoming a Pokemon Trainer you will likely be spending a lot of time away from home and, more to the point, doing a lot of traveling, she gifts you with a pair of Running Shoes.
-- Running Shoes --
Mum gives you instructions on how to use the new shoes -- simply hold down the B-Button when walking to run. The Running Shoes are not added to your Key Items Pocket since you are actually wearing them, so this is the only description that you get in the game, but as is often the case with items in these games, there is a bit more to them than is evident.
- Wild Pokemon: When you are using the Running Shoes in regular areas they double your movement speed, but beware! When you use them in Tall Grass they also double the rate at which you encounter wild Pokemon! In simple terms, if you wish to move through a section of Tall Grass without a wild Pokemon encounter, you should walk, not run.
- Trainers: Normally the trainers that you encounter are a predictable lot; they stand around wherever it is that they happen to consider their spot, and look this way and that. If they are the fighting sort -- and you have never fought them -- then the first time that they see you and you are within their range (around four squares usually) they will automatically engage you in battle.
Fighting these guys always gives more XP than a wild Pokemon battle, and also results in some amount of money as a prize when you beat them, so unless your team is injured it is generally a good idea to go ahead and battle them. Ah, but if your team is in fact hurt, you may not want to fight them, so you will likely wait until they are looking in some other direction and try to sneak past them. Well, if that is the case DO NOT RUN. Using the running shoes to run makes noise, so when you try to run past them they will naturally turn, see you, and go into battle mode. To get past them you will want to walk, not run. Easy-peasy Lemon Squeezy!
Now that you have your new shoes, head inside to talk to your mum and heal up, then head back outside to test out your new shoes. Run back and forth a bit to try them out - pretty spiffy addition to your kit, eh?
At this point we have pretty much moved through the bulk of the kit, we have covered all of the basics, and we have advanced the story to the point where it actually has direction, so what we need to do now is concentrate upon our first baby-steps in building our Team and our Dex entries -- and a good place to start in that direction is to cover the Tall Grass patches that we have already passed through in the previous two sections, only this time as we have balls, rather than kill every Pokemon we encounter we should try to capture one of each as well!
Getting your Freebies at the Poke Mart
-- Poke Ball Rules --
The process of capturing a Pokemon is actually pretty simple -- you troll the Tall Grass until you flush one out, then you battle it. Your goal is to hurt it until you lower its health into the early yellow or red zone and then, using the Poke Balls, you try to capture it.
With any luck, and assuming that you have weakened it sufficiently, you should be able to capture it with ease, but there are some rules that you need to be aware of:
(1) Lower-level Pokemon (those under Level 7) can often be captured with a standard Poke Ball without needing to be damaged or given a state condition.
(2) Pokemon above Level 7 should always have their health reduced as low as you can before trying to capture them, in order to prevent yourself wasting balls in failed attempts.
(3) Balls that fail to capture a Pokemon are broken in the process and cannot be re-used.
(4) With high-level Pokemon, weakening should always be combined with a state condition such as sleep, frozen, or paralysis, as these state conditions can assist in the capture process.
(5) Burn and Poison are undesirable state conditions for use in capturing Pokemon because they continue to do damage over time. When you have lowered a Pokemons health into the red, these two conditions can incap it, which is an automatic fail and prevents capture.
(6) Pokemon that belong to other trainers -- such as those encountered in trainer battles -- can NOT be captured. Attempting to capture a Pokemon that belongs to another trainer will get you labeled as a thief. Who wants to be lumped into the same category as Team Rocket??
(7) The graphical indicator that appears on the ID bar for wild Pokemon that you battle to indicate when you have already captured one of that type does NOT indicate the sex of the Pokemon that you have captured. If you caught a male of that type, when you battle a female it will still show as captured even though you have not captured a female of that type. When hunting for breeding pairs you need to be aware of which sex you have, and which you still need.
Your first Wild Pokemon Capture
-- First Capture --
Right then, it is now time for us to go and capture our first Pokemon and start to build our team and our Dex. As there are sections of Tall Grass between Littleroot and Oldale, and as May has given us five balls, we will go ahead and capture a few on our way back to Oldale Town, but remember that we need to stop at the Poke Mart to purchase more Poke Balls when we get there.
In the first section of Tall Grass we can (and should) capture the following:
-- #261 Poochyena (C)
-- #265 Wurmple (C)
-- #263 Zigzagoon (R)
Once you have captured these three Pokemon, continue to Oldale Town and the Poke Mart, where we will re-supply our Poke Balls. Remember to ALWAYS purchase balls in lots of 10 so that you receive a free Premier Ball!
Now that we have some more Balls, head north onto Route 103, where we can capture the following Pokemon for our collection:
-- #261 Poochyena (C)
-- #278 Wingull (C)
-- #263 Zigzagoon (U)
If you ran out of Balls earlier and did not catch one of the two that are common to both Routes, go ahead and capture one now. Otherwise concentrate upon capturing a Wingull here.
When all is said and done, you should now have five Pokemon on your active team who will all be at different levels -- if you are up for it now, you can take your first adventuring break now and level them up. Our target is Level 8 for all of the Pokemon on our team -- but you may want to hold off on doing that until you have the full team, which you will in a bit. It is your call whether you level now or later...
-- Special Ability Notes --
Among the Pokemon that we have just added to our team is the Zigzagoon, a dog-like Pokemon that is extremely loyal, ferocious in its defense of its master, and perhaps even more interesting, imbued with a Special Ability called "Pickup" that allows it to find items on the ground after battles. Specifically it gives each Pokemon with that ability a 10% chance of finding an item on the ground following a battle and picking it up.
This is an important ability because it can be the source of items and wealth that will help to make your life ever so much easier on the long road to becoming a Pokemon Master, but only if you are shrewd about it!
The quality of the items is directly impacted by the level of the Pokemon with the ability -- for example if it is Level 4 and under it will pick up a lot of Potions -- which is a good thing, do not get me wrong -- but higher levels get things like X-Defend and X-Attack and the like, while the upper level range will often find Rare Candy and lumps of gold. Obviously you will want to level up your Pickup Team when you have the time, as the rewards for doing so are easy to see!
After you have obtained all of the Pokemon noted above, head back to the Tall Grass on Route 101 and capture five more Zigzagoons -- and store them on the bottom level of your A-Team box. These are the members of your Pickup Team. Whenever you feel like it, have some spare time, or need money or items, simply swap them in to your active team, and go trolling for items!
In no time at all your Pickup Team will be full of items! Just remember to stop every now and then and take the items that they find away from them, as they can only find one item at a time, and if they already have an item in their possession, they will not pick up any new items that they find!
-- The First of Many Leveling Pauses --
Now that you have obtained the Pokemon available on these Routes, and you have assembled your Pickup Team and stored it in your A-Team Box, if you have not already done so as suggested earlier, it is time to level up your team. Why? Good question!
The process of batch-leveling your team is something you had better get used to, because the reality is simple: you can progress far further and faster along the story route in this game than you can level. What that means in its most basic definition is that you can easily find yourself facing a team in a gym battle that is WAY out of your league if you simply keep rolling forward without actually preparing for these battles.
How do you prepare for the battles? By batch-leveling of course!
Your team at the moment consists of the five Pokemon noted above. Before we start batch-leveling, go ahead and step out of Oldale Town onto Route 102 now (we have not yet formally covered this Route, but we will soon -- for now do not worry about that).
Head onto the Tall Grass near the pond on this Route and capture a pair of Ralts (technically you only need one for your team and Dex, but shortly you will have the opportunity to do your first in-game trade, and for that you will need a spare Ralts!). You can also capture a Seedot and a Lotad if you like, and really the Lotad can be used in place of the Ralts for your team temporarily, that is your call, but the point of this is to assemble a full team of six Pokemon for the batch-leveling we are about to do!
With your team now full, head back to Oldale Town, which is a convenient place to do your first batch-leveling because the Poke Center is right there, making healing up so easy. Granted the wild Pokemon you will encounter are not high-level but slow and easy wins the race, mate.
At this point, your team should consist of the following:
-- #XXX Your Starter Pokemon
-- #261 Poochyena (C) Dark Type
-- #280 Ralts (R) Psychic Type
-- #278 Wingull (C) Water/Flying Type
-- #265 Wurmple (C) Bug Type
-- #263 Zigzagoon (U) Normal Type
You may notice above that I listed them by number and name, but this time I included their Type as well. There is a reason for that! Ideally your team members should all be different Types -- that way you have maximum flexibility for a given encounter, with the ability (hopefully) to switch to a Pokemon Type that is strong against whatever Type you are battling.
Some Pokemon -- the Wingull above for example -- are dual-Types, which is a good thing, and eventually your team will consist mostly of dualies, but for now the make-up of the team is good for what we are doing. In theory you could actually use what we have above to play through the entire game without much trouble!
Now is the time for you to batch-level your team to a minimum of Level 8. Higher would be better, but you can live with Level 8 for now... Be aware though that after we reach the next town and before the town after that we will need to raise the entire team to Level 13, so any extra Levels you pick up now are bonus!
Your first Pokemon Evolutionary Change
-- Evolution Solution --
When your Pokemon each reach a specific level, they will evolve, changing from one form to another. For most Pokemon, the evolutionary process involves three stages -- the starting stage, the intermediate stage, and the final evolved form. Often you can actually capture Pokemon in all of its different stages of evolution, but most trainers prefer to start with the first form and evolve them through the chain themselves because it gives you maximum control over what moves they learn via evolution and leveling.
Take Wurmple for example -- its intermediate stage is a Pokemon called Cascoon, which is clearly a cacoon-stage, so you can easily imagine what she will look like after the next evolutionary stage, which also happens to the the final stage. The important point here is that the Casoon now has all of the offensive and defensive moves that Wurmple had, plus the evolutionary move Harden.
If you had captured this Pokemon in its Cascoon stage of evolution, the ONLY move it would know is Harden, which is purely a defensive move, making it next to impossible for you to properly level it since it cannot do damage! Thus starting with the Wurmple stage is clearly a better approach.
-- And Onward We Level --
As you level up your team you can use several different tactics, either leveling each one at a time until you get them to the level you want, and then starting on the next, or simply level them by using each to fight until their health is too low to risk it, and then switching to the next, until you need to hit the Poke Center to heal them all (that is how I usually do it).
In this fashion you can quickly level up your team with everyone staying pretty much within one level of each other -- though that approach is not really as important now as it will be later in the game, it is still a good habit to get in to! Keeping level parity in your team is always a good idea but it will be very important later on, when you are facing much higher level Pokemon.
I know that level breaks are a pain -- and this is your first of many, so while it may suck, you really need to embrace the suck and remind yourself that you only have to do this once! Each time they level that is a level you will not have to level again :)
On Leveling Ralts: There are few Pokemon as troubling as Ralts when it comes to leveling them, as it only gains its first offensive move (Confusion) at Level 6, and the one you will have caught will be either Level 3 or Level 4. The best tactic here is to place it in the lead spot on your party, and each time you troll up a wild battle, immediately switch it out for a Pokemon that can actually fight. Doing this will earn Ralts half of the XP for the battle. While it is a slow method to level, it will work, and once you have them to Level 6 you can stop doing it.
Whoa! You are done already?! That was fast! Well, excellent! Now that you are done with the leveling you have essentially completed this Part of the Guide! Good on ya mate!
Before you continue on from here though, please visit the Poke Center in Oldale Town, heal up, and make sure that your PC storage is set to to the Incoming Box, since we will start to acquire Pokemon shortly that will be sent directly to the box from now on. With all of those ducks in a row, go ahead and save now, and then head for the exit on the West side of town for the next stage in our adventure!
As we depart from Oldale Town via the west exit to Route 102 it is something of a false start, as we are not actually on our way to Petalburg City just yet! In fact our destination is the Tall Grass patch to the north just after entering the Route, near the pond.
- - - - - - - - - - - - - - - - - - - -
Route 102 Area Pokemon Report
-- #270 Lotad (R)
-- #261 Poochyena (U)
-- #280 Raltz (R)
-- #273 Seedot (R)
-- #265 Wurmple (C)
-- #263 Zigzagoon (U)
- - - - - - - - - - - - - - - - - - - -
As you can see from the Report above for this Route, there are three Pokemon we do not have (well, technically two as I suggested that you get a Ralts earlier). Regardless of what you have or have not accomplished here, you need to obtain the following in total before we can move on:
1 Seedot
1 Lotad
2 Ralts
That is 1 each for your Dex and to store in your boxes for possible future use on your team and for leveling for the Dex forms, and an extra Ralts because ahead on our journey is a bloke who wants to trade you for that extra Ralts, which will give you the chance to complete the first of a handful of in-game trades. While these are not always to your advantage, they are an element of the game, and so they are worth completing when doing so will not harm us.
The benefits of using your Pickup Team
-- Trolling for Ralts --
As you troll for Ralts and the others, I have a suggestion to make: combine this with leveling your team towards the Level 13 mark.
By doing that, you make it a lot less painful as a batch-leveling session. There is another thing you can do to alleviate some of the pain -- prior to departing the Poke Center in Oldale Town for this troll run, place three or four of your team in the A-Team box, and replace them in your team with members from your Pickup Team.
Really all that you need is the Pokemon you are actively leveling, and your starter to be there in case of emergency, so it can bail you out. That leaves four slots you can fill with Pickup Pokemon, which means four chances after every battle to get free stuff.
To put this in perspective for you, in addition to Potions and X-items, you can also expect to get berries, Repels, Escape Ropes, Great and Ultra Balls, and every now and then, a Rare Candy! Now clearly that is worth doing as it requires practically no effort on our part! Just a trip back to the Center every now and then to heal and, once you raise your active Pokemon a Level, a quick trip to swap in the next active one.
If you proceed in this fashion you should pick up items that you can sell, which will allow you to add items to your kit from the store that you actually want -- like more Poke Balls, and status fixers. Obviously this is your call, but we need to add those Pokemon to our Dex anyway so...
-- Off to Petalburg City --
OK we have obtained the Pokemon we need, picked up some levels and some free stuff, and added some good things to our kit. All of the members of our team should now be at least Level 8 (higher is better), and we now have a full team with a good selection of Types, so it is time to actually head for Petalburg.
Leaving Oldale, go ahead and have a chat with the trainer in the grass to the north to learn that he plans to catch "a whole bunch of Pokemon" and the bloke to the south who will present you with your first official trainer battle that is not with May!
Youngster Calvin presents you with a Level 5 Poochyena, which ought to be a cake walk for you at this stage, playing off 58 XP and $80!
Bug Catcher Rick is a bit further along the path, and he has a pair of Level 4 Wurmple worth 45 XP each, and $64.
The short trainer in the Tall Grass is there for some light comic relief, but the trainer in the area above them is serious about wanting to battle.
Youngster Allen has a Level 4 Zigzagoon worth 51 XP, and a Level 3 Taillow worth 37 XP and $48.
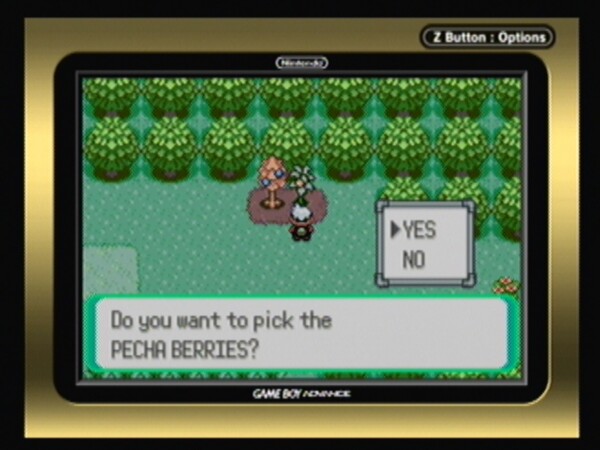
The very useful Berry Trees
Petalburg CIty is to the left, while to the right are some berry trees. If you do not know, Berries are used in the game to make competition items and also for their direct attributes. They can be collected, and they can be planted in the soft soil in order to grow more.
Heading west towards town you encounter another trainer, Lass Tiana, who sports a Level 4 Zigzagoon worth 51 XP, and a Level 4 Shroomish worth 55 XP and $64.
From Tiana head directly south, jumping the ledge here to find a Treasure Ball with a Potion in it. After grabbing that head back up to the main path and continue west to the entrance to Petalburg!
-- A look Around Town --
Head into the Poke Center to heal and save, then chat with the people inside for information purposes. Next stop is the Mart to chat and re-supply any kit you used. The bloke by the pond will tell you that as you have six Pokemon in your team, any newly caught ones will be sent right to your storage box in the PC -- but you knew that!
Talk to the people wandering around - and the ones in the two houses in the proper part of town - before you head west past the Gym, where a bloke will stop you and school you on what you are supposed to do whenever you enter a new town -- report in to the Gym!
Of course what he does not know is that this particular Gym happens to the one our Da is the leader of!
You may as well go into the Gym now, because that annoying little bugger is going to keep you from heading west or visiting the house north of him until you do.
The old man is very pleased that you are treading the path of the Pokemon Trainer, but before his happiness can truly manifest a kid comes into the Gym -- the Wally that that girl is looking for -- so now we know where Wally is!
Your Da loans Wally a Pokemon and instructs you to help the boy catch one for his own -- and no, you cannot politely decline, saying you have an appointment at the dentist, or you left the sushi on the grill...
Wally leads you off to the east, where if you can believe this, he teaches you how to catch Pokemon! As if we have not already caught like five?! Blimey! Then to add insult to injury he captures a Ralts. He has ONE Poke Ball, ONE. And he captures a Ralts. Sheesh!
After you return to the Gym your Da tells you to head for the next town and battle the Gym Leader there, because you are not worthy to battle him yet. Well fine, we wanted to do that anyway!
After leaving the Gym pop into the house we could not enter before to meet Wally's parents, and then take the western road out of town! As you are about to step over the town line you are stopped by a stranger, who walks up to you and pretty much insults you. Great, first your dad tells you you are not worthy to battle, and then this bloke tells you that you resemble nothing like a trainer!
Collect your bad mood and hit the road, mate!
Leaving Petalburg we instantly step on to Route 104 -- thanks to your Pickup Team you should be well found in Potions, Poke Balls, and kit. When I arrived in Petalburg I had 6 Super Potions, a Hyper Potion, and 26 Potions, Antidotes, Repels, Escape Ropes, 3 Ultra Balls, and 7 Great Balls, all of which I had acquired through pickups. In addition to that I had 20 Poke Balls that I bought, and some kit items to correct stat issues that I also bought, having made a mint in X-items that I could sell thanks to that cadre of loyal and helpful Zigzagoon -- how did you do?
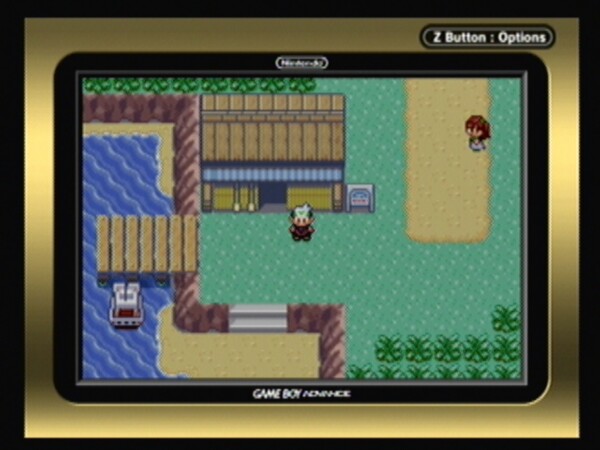
Mr. Briney's Cottage by the Sea
- - - - - - - - - - - - - - - - - - - -
Route 104 Area Pokemon Report
-- #183 Marill (C)
-- #261 Poochyena (U)
-- #276 Taillow (U)
-- #278 Wingull (U)
-- #265 Wurmple (C)
- - - - - - - - - - - - - - - - - - - -
As you can see from the Report, there are two Pokemon that are new to us on this Route, so assuming that you have been following this guide and have the ones that you should have if you have been, now all that we need do is capture a Taillow and a Marill! By the way, the Marill is actually a Pokemon from the previous generation Dex, which you can tell by its National Dex Number, just so you know.
Ahead on the Route is a bloke with some basic advice to weaken them before capture, and then you have a choice to make -- head north into the Tall Grass, or south, then west, then north onto the beach? For now go ahead and walk into the Tall Grass to the north, right?
Remember -- the Gym Leader in the next town has a Level 15 Pokemon among her team, so you are not going to want to avoid any fights for now, because we need to level our team up! Getting the team to all 15 would be great, but if you have them all at Level 13 or so you can still deal with the Gym Leader, so it is your call how high you train them. I went to 15 just because that is how I roll!
You should quickly capture the Marill but the Taillow is going to take more effort -- which is fine! Remember to alternate your team members so that they level closely together, and set your target level now, then stick with that plan! You should find that it is now a lot easier to stay in the field and level without having to worry about health, but remember you have those Potions, so use them if you need to.
North of the Tall Grass is a cabin with a girl in the road in front of it. If you talk to the girl she will tell you about who lives in the cabin. A visit to the cabin reveals it to be empty -- at the moment. Now head back to the entrance to the beach and down the stairs and you will encounter a young girl who though not a trainer herself, gives you useful advice about dealing with trainers.
Walking a patrol-pattern on the beach nearby you will find a trainer you can battle -- Youngster Billy, who has a Level 5 Zigzagoon worth 63 XP, followed by a Level 7 Seedot worth 111 XP and $112.
After the battle be sure to remember to check your Zigzagoon -- you should still have one in your party, and he does have the pickup ability! It would be a shame to have him find things and you not take them, right?
Up the beach a ways is a pair of blokes who you want to say hello to; one will wax philosophically while the other will battle you!
Fisherman Darian has a Level 9 Magikarp -- not precisely what you might think of as a challenge... Still the Magikarp may not be much in this form, but its next form after it evolves is rather interesting. After you battle this one, which is worth 37 XP and a whopping $360 bounty, go have a look at its Dex entry (#129). It is a first generation Pokemon, and while it is mostly harmless, it evolves into a Gyarados (#130) which is anything but harmless!
Notice that boat moored to the dock nearby? Yeah, that will become important later, but for now just mark it in your mind and head back up to the main road.
Ahead on the path is a pair of Berry Trees, and to the west is a set of Tall Grass and an exit to the north, along with a young female trainer named Lady Cindy who has a Level 7 Zigzagoon worth 90 XP and $1400.
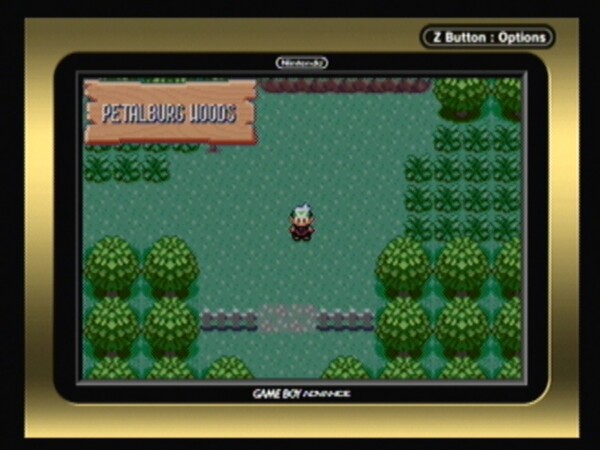
The dark and creepy Petalburg Woods
-- Petalburg Woods --
As you walk past the white picket fences that lead into the dark and foreboding path into the woods you feel a slight chill on your back and arms -- something is odd about this place. You cannot put your finger on just what it is that stands out in your mind, but there you have it!
- - - - - - - - - - - - - - - - - - - -
Petalburg Woods Area Pokemon Report
-- #268 Cascoon (U)
-- #261 Poochyena (C)
-- #276 Taillow (U)
-- #285 Shroomish (U)
-- #266 Silcoon (U)
-- #287 Slakoth (R)
-- #265 Wurmple (C)
- - - - - - - - - - - - - - - - - - - -
Of the seven Pokemon found here, only two are truly new to us, but we actually need to get three here. Of the three, Slakoth is going to be the hardest to find and capture. This is the only area in the game that I know of where it can be captured, and while its form is not exactly a great one, it evolves into a form that is actually desirable and strong... Plus you need it for your Dex, so you may as well bite the bullet and troll one up. Note: if you have one from another game, transferring it into this one is the way to go here, because that way you do not have to spend the time it will take to troll one up!
Now moving on, there is the two cacoon-form Pokemon that evolve out of Wurnple. What I did not mention before when we obtained our Wurmple and evolved it into a Cascoon and then Dustox is that the Wurmple actually has what is called a split-evolution chain.
-- The Curious Case of Wurmple --
Wurmple is at its base appearance not what you might think of as a powerful Pokemon, but like many types, as it evolves it grows into a strong Pokemon with good moves in its level set. When the Wurmple makes its first evolutionary change, that change can go two different ways depending upon a hidden value called its Personality Score.
If the Personality Score is 4 or below, the Wurmple evolves into a Silcoon at Level 7, which then evolves into a Beautifly at Level 10.
If the Personality Score is 5 or above, the Wurmple evolves into a Cascoon at Level 7, which then evolves into a Dustox at Level 10.
Chances are very good that your first Wurmple evolved into a Dustox, like mine as that is the more common line. The easy way to get the Beautifly is to capture a Silcoon -- but in that form the Pokemon has no offensive moves, which makes leveling a pain in the buttocks, and is the reason that there is a sign posted in the woods to remind you how to level under those conditions.
So even though there are only two Pokemon that are new, we actually need to capture three Pokemon here -- a Silcoon, a Slakoth, and a Shroomish!
-- Back in the Woods --
As you venture forward you notice a sign sticking out of the ground ahead, and walk over to read it: "Trainer Tips -- Any Pokemon hat appears even once in a battle is awarded EXP Points. To raise a weak Pokemon, put it at the left of the team list. As soon as the battle starts, switch it out. It will earn XP without being exposed to any harm."
To the west in the grass is Bug Catcher Lyle, who has four Level 3 Wurmple worth 34 XP each, and just $48 in prize money.
Now head east through the Tall Grass to encounter a bloke wandering around in the woods looking for hidden treasure -- and that is your first hint that there are hidden objects that you can find. A good way to find that sort of thing is to use the action buttons on objects like stumps, rocks, boulders and the like, as well as odd spots on the ground that look different than the regular ground.
To the south is a path -- following it will take you to the elevated area that we passed by on the first part of Route 104 that we could not reach with a trainer and a treasure ball. Talk to the trainer to learn what you already know -- trying to capture a Pokemon that belongs to another trainer makes you a thief.
The treasure ball on the ground contains a Poke Ball -- so grab that now, then retrace your steps back to the woods. Head back to the west and into the Tall Grass past the trainer, where you will find another treasure ball on the ground with a Paralyz Heal, so go ahead and grab that now.
A rude introduction to Team Aqua
-- An Introduction to Team Aqua --
As you work your way along the path through the woods you will encounter a trainer who is looking for Shroomish -- but just as you start to chat another trainer (a bad one) pops out! Evidently he had been laying in wait to ambush the first trainer, but the bloke was taking too long so he decided it was time to simply attack!
The good one is called Devon Researcher, and he seems to have some research papers that the bad one is a dressed in the uniform of Team Aqua -- hey! This is your first introduction to Team Aqua! How about that?!
The Team Aqua Grunt wants the research papers very badly -- bad enough in fact to be willing to kill you to get to them. As he demands them, the Researcher hides behind you! It looks like it is up to you to deal with this miscreant.
The Team Aqua Grunt pulls out his only Pokemon -- a Level 9 Poochyena -- but that is no threat to us! After we take it down we are rewarded with 105XP, and $180 -- and the satisfaction of protecting the weak. The Researcher rewards you with a Great Ball -- which would likely be the first one of those we received in the game if not for our Pickup Team. Still, not a bad reward!
After giving you the reward he takes off for Rustboro to warn the officials that Team Aqua has something planned there, and you are left to make your way out of the woods.
Further along the path you meet a trainer who has some good advice for you, and then you naturally run into yet another trainer, but this one wants to battle!
Bug Catcher James has a pair of Level 6 Nincada worth 82XP each, and $96.
Above James on the ground is a Treasure Ball with an Ether in it -- those are always good to find, as Ether will restore 10 PP (Power Points) for a given move, which is useful if you run out of PP. A nearby sign tells you about PP as well as HP, so you may as well read it.
Past the sign is the exit from the woods, which leads to the continuation of Route 104. To the east of the exit path are a pair of odd-looking trees that, if we had the move Cut, we could remove to enter that path. As we do not presently have that move, we will just have to remember that is there and return when we can actually cut down the small trees!

Pretty Petal Flower Shop
-- Back on Route 104 --
As you re-enter the Route you will see to your left (west) a trainer standing near some Berry Trees. Go over to chat with him to learn that he likes spitting seeds out of his mouth -- which is probably more information about him than you really wanted to know -- and then gives you a gift! TM09 -- Bullet Seed!
If you open your bag to the TM and HM Pocket and highlight that TM you will see that it shoots 2 to 5 seeds in a row at an opponent. This move can only be learned by specific Pokemon, none of which are in our party, but you can boot it up anyway just to see how that works. Good on ya mate! You have acquired your first TM!
Grab the berries here and then look to the north where you will see a building -- the Pretty Petal Flower Shop -- which you should now enter!
Inside you should chat up the people as they will fill you in on Berries, and one will give you the gift of a Wailmer Pail -- a Key Item that you will need later so do not forget to get it here! The young girl in the back of the shop will give you a random berry every so often, so go ahead and talk to her whenever you are in the area, right? She also tells you about the Berry Candy you can make from the Berry that is used in competitions, which is worth the read.
Back on 104 be sure to read the sign to learn about Double Battles -- as you are about to have your first one!
Challenge the trainer nearby, Rich Boy Winston, who has a Level 7 Zigzagoon worth 90XP and $1400.
A few steps further on the path and you run in to Lass Haley, who has a Level 6 Lotad worth 04XP, and a Level 6 Shroomish worth 82XP and $96. The Shroomish also gives you your first taste of the move Absorb, which will suck a small amount of life away from your Pokemon!
As you move along the path towards the bridge you will see another Cut Tree with a Treasure Ball past it we cannot reach yet, and on the bridge is our first Double Battle! Let us get to it!
Trainers Gina and Mia are twins who will battle you at the same time, using their Level 6 Seedot and Lotad, who are worth 92XP each, which is split between your two Pokemon. You receive $144 as your reward for winning this battle, so good on ya, mate!
On the shore at the end of the bridge is Fisherman Ivan, who has a Level 5 Magikarp worth 21 XP, a Level 6 Magikarp worth 25 XP, and a Level 7 Magikarp worth 30 XP and $280.
Don't forget to grab the nearby berries and chat up the old woman near them who will give you a bit of advice and a free berry! All that remains is for you to walk to the end of the path and enter Rustboro City! Well done!
Welcome to Rustboro City - the first large city on our adventure. While this does not really qualify as a metropolis, Rustboro is a major city for the Region, and that is fitting as we have a lot to do here, starting with talking to pretty much everyone outside in the streets -- so let us do that now!
We start by talking to pretty much everybody who is out in the streets -- you never know what you will hear or find doing that. After you finish doing that head back to the south entrance to town and follow the outside black fence until you can slip in behind it. Walk along its inner edge to the back area where you will find a Treasure Ball that contains X-Defend.
Starting with the buildings on the south side of town, head into the large gray one, which is housing for the Devon Corporation. Chat up the people you meet here to obtain a Premier Ball, and learn that the company president collects rare stones.
The brown building to the east to hear some naming philosophy, and the Pokemon Trainer's School above that to learn about misc Pokefacts -- then talk to the teacher at the back of the room to receive a Pokemon Hold Item called a Quick Claw.
The blackboard at the back by the teacher -- actually it is more of a green board, but still -- will teach you everything you need to know about Stat Conditions. In the front left corner is that bloke who insulted you earlier -- turns out that his name is Scott.
To the west of the Poke Center is Cutter's House, where you can obtain your first HM -- HM01, which contains the move Cut! Remember, HM's allow you to teach the move multiple times, whereas TM's only let you teach it one time before self-destructing.
You are likely remembering those funny trees we could not cut down that we saw earlier -- but before you run off to chop-chop-chop you should probably be made aware that we cannot use this move outside of battle until we obtain the Gym Badge!
-- A Smile a Day & Hidden Game Goodness --
In the building to the north of the Poke Center on the second floor there is a concerned father standing by the bed of his little girl -- a little girl who it appears needs to be cheered up. Surrounding her bed is an impressive collection of plush stuffed Pokemon dolls, but as you chat with the father there is nothing here to indicate to you that something quite special is hidden in your interaction with him!
The bloke is Mr. Pepper - and the little girl is named Walda Pepper. She may be ill, or just depressed, who can say? But what she wants and what her Da wants is for her to be cheered up, and to make that happen she needs to hear a funny word.
The hidden part of this is that if you can give them the right words, you can unlock special PC Box Wallpaper! This is not the first time that Game Freak has hidden this sort of thing in one of the games, but it is the first time that it was so discretely placed!
The easiest way for you to take advantage of this opportunity is for you to visit the website at Filb (http://www.filb.de/games/gba/emerald/word?lang=2) where you can find the Pokemon Emerald Secret Word Generator!
On this website you can generate the words that you need, based upon your game and Trainer ID number. Just fill in the requested information and then create your own wallpaper and click the "Generate Secret Word" button. The word is not really a word at all, but a code that is case-sensitive and will create the wallpaper image that you design on that web page -- in your game!
Once you have created the wallpaper you want, go to Rustboro and chat up the Dad, tell him the code, and he will create the wallpaper for you because it makes his daughter laugh! Simple as pie! After you get your new wallpaper, when you use the PC to change the wallpaper for a box simply select the "FRIENDS" option instead of one of the previous ones and voila! You get the new wallpaper! Now how cool is that?
Your first in-game trade: a Ralts for a Seedot
-- First In-Game Trade --
In the small house to the east of the Pokemon Gym is a bloke who will trade you a Seedot for your Ralts -- remember when I said you would need an extra Ralts? Well, this is why! So grab your extra Ralts and put it in your party, then return here to trade it with him. Sure we already have a Seedot, but hey, it is part of the game -- and on the off-chance that you did not capture a Seedot, well, now you have one!
The animation that you just saw during the trade is the same one that you get when you trade Pokemon with another human player -- just an interesting factoid!
The last building save for the Gym is the largest -- the home of the Devon Corporation. I guess you could say that this is a company town, and if it is, well then, this is the company!
Inside you run into a bloke who points out the Running Shoes your mum gave you and tells you that they are a product made by Devon Corp! Sadly the door to the stairs that lead upstairs is blocked, and we cannot get past it right now... Ah well, head outside now then.
-- Preparing for Our First Gym Battle --
Now that we have explored the city and taken care of the extras that are part of that, it is time for our attention to turn to our first Gym Battle and scoring our first Gym Badge. But before we do that, how is your team's condition and level?
Ideally you want to go into this Gym Battle with a minimum of your team at Level 13. You can win it with them leveled to that point, though it will be a battle and you will probably end up with some of your team incapacitated and having to use kit and potions to make it happen.
A smarter approach would be to level your team to Level 15, but that would take some time and effort on your part... But let me tell you why that is not a bad idea...
So far we have largely faced wild Pokemon and trainers with Pokemon that were below the level of those on our team, so the battles that we have been fighting have been rather one-sided (you have to admit that). Ahead of us the wild Pokemon and the trainers will be rapidly increasing in level, and that means that the upcoming battles are not going to be the exercise in just picking the correct move that the past battles have been.
It should be obvious to you that you are going to have to level your team at some point ahead, so why not do it now, when it is convenient to your needs? There is Tall Grass quite close to town, which means that when you need to heal and recharge that is a trivial matter, and the Pokemon here are not so high a level that they will cause you too much trouble, but are high enough so that leveling off of them is actually worth it.
No more 2's and 3's in the Tall Grass, nuh uh! Instead there are 6's and 7's which pay out a bit more XP per match, not to mention that there are some Pokemon that we need to capture on the Routes north and east of town anyway... So what do you say, mate? Up for a bit of batch-leveling? Excellent!
-- Batch-leveling near Rustboro --
As the early parts of this game are partly a challenge of managing resources, trotting out your Pickup Team -- or at least some of it -- to use while you level here is not a bad idea at all. For one thing it will add items to your kit that you can really use, and it will get you items you can sell so that you can stock up on stronger Poke Balls. I call that a win-win, and you should too!
So before you start to level, head back to the Poke Center and drop 3 or 4 of your main team into the A-Team Box, sort out the Pokemon that are in the Incoming Box, and then add in some of your Pickup Team before heading to the northeast Route out of town, Route 116!
-- Route 116 --
One of the two Routes leading out of town in the direction we want to head, Route 116 presents the opportunity to pick up some new Pokemon as well as some Treasure and a chunk of XP from Trainer Battles -- pretty much like any good Route!
- - - - - - - - - - - - - - - - - - - -
Route 116 Area Pokemon Report
-- #063 Abra (U)
-- #290 Nincada (C)
-- #261 Poochyena (C)
-- #300 Skitty (R)
-- #276 Taillow (C)
-- #293 Whismur (C)
- - - - - - - - - - - - - - - - - - - -
We need a total of four of these Pokemon for our Dex -- by far the highest new to old ratio in a Route yet! Getting Whismur and Nincada is easy, Abra a bit more difficult, but Skitty requires serious dedication!
Abra may be the one that gives you the most trouble in actually capturing because it flees as soon as you attack! An alternative to that frustration is to simply lob an Ultra Ball at it as soon as it appears -- an almost certain capture!
The treasure ball in the bottom section of Tall Grass contains a Repel -- always a useful item to have, especially in caves!
Nearby is Bug Catcher Jose with his Level 8 Wurmple worth 90XP, and a Level 8 Nincada worth 85 XP and $128.
School Kid Karen is to your east with her Level 9 Shroomish worth 102 XP and $180.
Youngster Joey is to the north with his Level 9 Machop worth 175XP and $144.
The Trainer Tips sign is worth reading, as it teaches you how to halt a Pokemon from evolving by pressing the B-Button during an evolution. You may want to do that if there is an evolutionary move that they only learn at a higher level or, more likely, you want them to retain their current form as is the case with a lot of cute Pokemon.
Head further east now, past Karen to where there is a group of trainers in the open area past the Tall Grass.
Hiker Clark and Youngster Johnson challenge you to a doubles battle -- they bring out their Level 8 Geodude and Shroomish, worth 146XP and 110XP respectively, and a Level 8 Lotad worth 126XP, and $448.
Hiker Devan has a pair of Level 8 Geodude worth 147XP each and $320.
To the north is the Tunneler's Rest House but the entrance is blocked by an out of work Tunneler for now. To the north and west is a raised area that we cannot get to with some Trainers and stuff, but we need to be able to use Cut, so that will have to wait for later. To the east is some ledges -- if we climb up there is a Treasure Ball with an X-Special, and above that is one of the locations that we can create a secret hideout at once that ability is unlocked later in the game.
For now head back to the west, continue leveling and capturing the Pokemon we do not have yet for this Route, and when you are finally ready and your team is at the level that you want for the big Gym Battle, well then, head for the Gym!
-- Rustboro City Gym Battle --
As you enter the Gym you will notice a bloke standing beside one of the statues -- this is the Gym Greeter and there is one in every Gym. It is his job to provide you with information that may be helpful to you in defeating the Gym Leader -- in this case he tells you that Roxanne -- the Gym Leader here -- is a user of Rock Type Pokemon. He adds that Rock Type are vulnerable to Water Type and Grass Type Pokemon, which is very good advice.
Before you can battle the Gym Leader you will have to battle the AGL's -- Assistant Gym Leaders. There are usually several in each Gym, positioned between the door and the Leader. So let us ready ourselves and, when you are good to go, start taking out the AGL's!
Youngster Josh is waiting for you at the entrance to the mini-maze with his Level 10 Geodude, worth 212 XP and $160.
The next battle is a Double with Youngster Tommy and Hiker Marc, who each have a pair of Level 8 Geodude worth 146XP each, and $448.
That battle clears the way to the Gym Leader, Roxanne! If you had to use a lot of PP or took any damage, go ahead and hit the Center to heal up and save, and then return for the Leader Battle!
Your first Gym Leader Battle with Roxanne
-- Gym Leader Roxanne --
She opens with her pair of Level 12 Geodude, worth 220 XP each and follows with her Level 15 Nosepass, which is worth 346 XP and $1500. She awards you with the Stone Badge, which boosts their attacks and allows you to use the move Cut outside of battle. She also gives you TM39, Rock Tomb.
We should cover a few things now... You notice that the Nosepass used a berry to heal itself, and when you lowered its health Roxanne used a Potion on it? Those are common events in Gym Battles, and you need to plan for them as part of your strategy! For example if you know a move will bring the opponent very close to incapacitated, you are better off using a lesser move to reduce their health at the top end, so as not to trigger the use of a potion by the Leader, and then use your killer move to KO the opponent, thus depriving the Gym Leader from having an opportunity to use a Potion!
In addition to the Badge and the cash, it is customary for Gym Leaders to gift you with a TM of one of the moves that their Pokemon knows and that you may have faced in the battle. Remember TM's can only be used one time, so think long and hard about which Pokemon to use it on, or even whether you should use it now or not.
As you leave the Gym following the battle you witness a Team Aqua Grunt running down the street and a Devon Corp employee chasing after him - clearly the Grunt has stolen something! If you chase after them -- they took the eastern road -- you will run into the Devon bloke who turns out to be the same one you helped back in the woods.
He tells you about being robbed and asks for your help -- sort of. It would be an idea to heal up and save at the Pokemon Center before you head off on yet another adventure, mate!
Now that you have healed your Pokemon and saved the game, go ahead and take off after the Team Aqua Thief -- the tunnel is closed, so he is not going anywhere!
You corner the Grunt inside the unfinished tunnel, where he has effectively trapped himself, and of course he tries to fight. He has a Level 11 Poochyena worth 129XP and $220, and the Package containing the Devon Goods. You also rescue the Pokemon he had taken hostage, so good on ya mate!
When her owner turns up to claim her you learn that he is the famous Mr. Briney! Well how about that?!
On your way back out be sure to grab the Poke Ball that is in that Treasure Ball above, and then head back to the Devon Researcher to return the package - but on the way you remember that area we could not get to because of the tree? Yeah! Let's cut that sucker down!
Above is a Treasure Ball, but to get it we have to do a Double Battle first.
Lady Sarah and Rich Boy Dawson have a Level 8 Lotad and Zigzagoon worth 126 XP and 103 XP respectively, and a Level 8 Zigzagoon and Poochyena worth 103XP and 93 XP respectively, plus $3200!
The Treasure Ball contains a Potion -- so bonus! Now cut the next tree for the next battle!
School Kid Jerry has a Level 9 Ralts worth 135XP and $180.
Lass Janice has a Level 9 Marill worth 111XP and $144.
The Treasure Ball past the next tree has an Ether - which is always a good thing to find - and of course you can get berries from the trees here! When you are done getting the berries hook up with the Researcher.
Saving the Devon Corporation
-- Devon Corporation Redux --
Our reward is another Great Ball from him, but this time he decides we should meet his boss!
We are teleported to his bosses office, and then he asks you to deliver the package for him - of course you say yes! When you meet the President he asks you to deliver a letter to Stephen in Dewford Town on your way to Slateport City -- and as payment for the favor he gives you a device called the PokeNav!
In addition to giving you a map to use, this thing has other uses, though at the moment you only know about two, the map and the condition assessor that allows you to check the contest condition of your team.
GO ahead and leave the building now that you are rested and rewarded, and as you leave another Researcher stops you -- he wants to upgrade your PokeNav! The upgrades are a Match Call that allows you to ring up people you have met, and a utility that allows you to view any Ribbons that your Pokemon have won! Now how cool is that?!
-- To Dewford Town --
Right, so you remember where Mr. Briney lives? Well, go there now, as you are going to get him to sail you to Dewford on his boat!
As you are leaving the city May stops you and, after trading Match Call numbers, challenges you to a battle that you win easily! Now, on the way out, remember that spot near the other side of the bridge with the Treasure Ball behind a tree? Well cut it down to grab the X-Accuracy, then head to the cutable trees just inside the woods and cut them next!
Follow that path east to find a trainer who will give you the Hold Item Miracle Seed, and then grab teh Great Ball from the Treasure Ball farther east. Head south on the path, jumping down ledges to get an X-Attack from another Ball, then south to exit the woods on the ledge above Mr. Briney's Cottage! How convenient!
Jump down and then go inside to say hello, whereupon he agrees to take you on his boat to where you need to go! First stop, Dewford!
-- Dewford Town --
At this point you have leveled enough so that you no longer need to be told the stats for each of the trainers, as the only reason we were noting that information was so that you would be prepared to battle them with the right level gap. Provided that you follow the leveling advice in this guide from here on it will no longer be an issue for you!
Along the way your Dad gives you a ring on your PokeNav, and then you arrive!
Talk to the people wandering around -- one is a Fisherman who gives you his Old Rod, which means you can now capture a Magikarp! In the house by the dock a trainer gives you a silk scarf, and in the house above that you can take part in the Top Conversation craze.
-- Dewford Gym --
As you enter you will notice two things -- it is very dark in here, and you are standing in a small circle of light. Talk to the Gym Greeter to learn that the Leader here is into Fighting Types and to learn how to increase the size of your circle of lighe -- by defeating the AGL's!
That is pretty much everything that we need to know! Now let us locate the first AGL and pound them into the dirt, shall we? Head up and right and then down to find your first battle...
Battle Girl Laura haas a Level 13 Meditite worth 253 XP and $312. True to the word, after you defeat her the circle of light grows a little bigger. From here head up and right then up to find the next battle, which is a Double!
Battle Girl Lilith and Sailor Brenden are waiting for you, and they spring their trap with a Level 13 Meditite and Level 13 Machop! They recieve 121XP each from the Machop, 126XP each from the Meditite, and $728 as their reward!
The circle grows a lot bigger thanks to beating a pair of trainers at once time, but as we can now see that this was a dead-end passage in the maze anyway, it is clear that we need to backtrack and then go up! If you stay towards the right once you are heading up the hall to the left of the pair you will encounter your next trainer!
Battle Girl Jocelyn has a Level 13 Meditite worth 253 XP and $312.
Down a short way and left is the next opponent.
Black Belt Cristian has a Level 13 Makuhita worth 241 XP and $416.
Now our circle of light is very large, so we can easily see to head down and left to the next opponent!
Black Belt Takao has a Level 13 Machop worth 244 XP and $416.
As that is the final AGL, and as we used a fair bit of PP here, it is time to leave the Gym and head back to the Poke Center to heal and save! If you need to replace any kit items before you face the Leader do that as well, but you should quickly head back to the Gym to take down our second Leader and, naturally, win our second Gym Badge!
Note: I was able to do the entire set of battles save for the Double on with just my Wingull, whose Wing Attack is deadly to Fighting Types. YMMV, but doing it that way quickly leveled them to Level 19, making Wingull the perfect team member to take on the Leader!
Dewford Gym - The Second Gym Badge is Ours!
-- Brawly: Dewford's Gym Leader --
Standing on his platform is Brawly, a Leader who believes in the Fighting Type. It has been my experience for whatever that is worth that sticking to a single Type is folly, because a well-spread team can eviscerate you. Which we are about to prove here!
He leads with his Level 16 Machop worth 301XP, and follows with his Level 16 Meditite worth 312XP. His final Pokemon is his Level 19 Makuhits, which does require a bit of care in handling. You can do it though - and the 354XP this guy is worth should get you another level!
Your reward is $1900 and the Knuckle Badge. With this badge Pokemon up to Level 30 -- including those you acquire in trade -- will fully obey you! You can use Flash outside of battle, and he gifts you with TM08, Bulk Up, as well.
Good on ya mate! That is another Gym down and an important badge as it now allows you to raise your Team Level beyond 20 without any risk!
Head to the Poke Center to heal and save now, and replace any kit you used up in the battle, and then head for the beach mate!
-- Dewford Beach --
Known as a resort destination, Dewford's pristine beaches are famous for their excellent fishing and topless sunbathing. Serious Pokemon Trainers however are only interested in the Beach for its proximity to the entrance to Granite Cave, the go-to destination for trainers everywhere looking to expand their Dex!
- - - - - - - - - - - - - - - - - - - -
Dewford Beach - Route 106 Area Pokemon Report
-- #129 Magikarp (C) Fishing: Old/Good Rod
-- #072 Tentacool (C) Fishing: Good/Super Rod
-- #320 Wailmer (U) Fishing: Good/Super Rod
- - - - - - - - - - - - - - - - - - - -
As we only have the Old Rod at the moment we can grab a Magikarp - and we should! When we collect the other Rods we can manage the rest of these.
As you leave town you will notice that there are trainers on the beach ahead -- battle the trainers above to reach the cave on the beach -- Granite Cave -- and head inside.
-- Granite Cave --
Talk to the Hiker here, who will give you HM05 -- Flash - which as you know we can now use outside of battle. Yay us! He tells you that Stephen came this way, which is good to know as we need to deliver that letter!
- - - - - - - - - - - - - - - - - - - -
Granite Cave Area Pokemon Report
-- #063 Abra (U) All Floors
-- #304 Aron (C) 2nd/3rd & 4th Floor
-- #074 Geodude (U) 1st Floor & Rock Smash
-- #296 Makuhita (C) 1st/2nd & 4th Floors
-- #299 Nosepass (C) Rock Smash
-- #302 Sableye (U) 2nd & 3rd Floors
-- #041 Zubat (C) All Floors
- - - - - - - - - - - - - - - - - - - -
As you can see there is a mix of generations present here, but a lot of Pokemon that we need both for our Dex and because there are some awesome Pokemon here! Not only can we use this place to fill up some Dex entries, we can also level here, and this is a really good time and place to take our team to Level 25, so do that now.
As you head along the first floor there is an Escape Rope in a Treasure Ball -- be sure to grab that -- and then you take the ladder to the next floor, where you need to use Flash.
As you head along take the path that branches down to grab the Treasure Ball that has a Poke Ball in it. Work your way east to the ladder to the 3rd floor and you will pass a raised area with a rock on it. Go up the stairs here, face the rock, and press the action button to obtain the Held Item Everstone!
The Everstone is an item that, when held by a Pokemon, automatically prevents them from evolving! So if you wanted, for instance, to keep your Torchic a Torchic simply have it hold this item, and it will always BE a Torchic!

Delivering the Letter to Steven
Take the next double-set of ladders and you will reach an area that is well lit -- this is the 4th floor and the last stretch to reach Steven! Just fight your way along and through the exit at the end and you will find him standing in the middle of a narrow canyon-like area.
Walk over and chat him up to learn that he is also in to rare stones. As a reward for delivering the letter he gifts you TM47, Steel Wing! Excellent move!
You exchange PokeNav numbers and then Steven takes off.
Now at this point you are free to do some batch-leveling, so go ahead and run your team up to Level 25 now if you have not already done so. Be sure that you have captured at least one of all of the Pokemon from here, and come see me when you are finished leveling, right?
Wow! That was fast!
Excellent! Now go ahead and leave the cave -- or you can use an Escape Rope to instantly exit if you like, as that is a bit faster. Walking out or using the Escape Rope will get you to the entrance to the cave. As we have done all that we needed to do here for now, it is time to return to the docks and Mr. Briney to finish our mission and deliver that package to Slateport City!
When you arrive it becomes very clear that this is not a small no-consequence place! In fact it appears to be a major resort destination of the sort Dewford can only dream to be!
First get the exploration bit out of the way but talking with everyone and battling the trainers here on the beach. A young bather gives you Soft Sand, and if you walk in just right you get a Double battle that could have been a triple if the game allowed it!
There is a second Double near the Treasure Ball, with the two trainers hidden under beach brollies, so you do get some decent XP from this beach! Inside the Treasure Ball is a Potion, so be sure to grab that.
You get a call from Roxanne as you approach the Seashore House -- go inside to have some more trainer battles and learn where Paris Hilton learned the phrase "That's Hot!" from.
After you beat all of the trainers talk to the bloke in the back and he will give you some free soda pop as he is very impressed by your battling.
-- Slateport Market --
North of the Seashore House is the Slateport Market, a place that should be of considerable interest to any Pokemon Trainer!
Among the items that you can purchase here are plush stuffed Pokemon Dolls (something to remember for decorating your secret hideout later), special stat-altering items like Protein, Iron, and etc. Next to the bloke who sells the stat items is a woman who will award your fully-trained Pokemon with the Effort Ribbon if they have earned it.
A bloke who belongs to the Secret Power Consortium who will only sell to you if you have that, and a woman who will give you an important Key Item called a Powder Jar that you will use for making Berry items.
Pop into the Pokemon Fan Club to learn the move Swagger, be interviewed on TV, and if your Pokemon really loves you, a girl in the back will give you a Soothe Bell held item. Be sure to chat up the Chairmen (sitting on the couch) before you leave.
Visit the Name Rater's house to have him consider the names you have chosen and, if he thinks you can do better, help you change a name. Visit the Battle Tent and talk to the trainers there to obtain TM41, Torment, and learn how the events work by chatting up the bloke at the counter. If you want to battle here go ahead, I will wait for you.
Ready to go? Excellent!
Hit the Poke Mart to stock up on kit -- including Great Balls -- and then the Center to heal and save. Now for the interesting bits... Make sure you buy a Harbor Mail while you are here, I will explain why later.
Walk past the long line of Aqua Thugs to the boat building building, and chat up the Engineer, who will ask you to go find Captain Stern, That sounds like a great idea!
He was not upstairs in the boat building building -- God I love saying that -- boat building building... Muahahahaha! So I went to the Museum and saw that the line was gone, so what the heck! Why not go inside?
On the second floor we find Captain Stern, who is happy to get the package we came to deliver, but just when we think we have done well along comes Team Aqua to screw up our day!
Well obviously that cannot be allowed to happen. Battle Mode!
If you trained your team into the 20's this guy was a push-over. And so was his buddy! The leader -- Archie -- shows up to tell you off, then you deliver the goods to Stern and he takes off, and hey, mission accomplished!
When you go downstairs one of the Aqua Grunts has remained behind -- if you talk to him he gives you TM46, Thief, because he feels guilty for what he tried to do to you!
As you leave the museum, Scott, the bloke who insulted us and is looking for Pokemon Masters walks up to have a chat. He swaps PokeNav numbers with you and then takes off. Odd bloke that Scott!
The real reward for delivering the Package!
-- Collecting the Real Reward --
Now before we do anything else, we need to head back to Mr. Briney and take his boat back to Dewford, and then to Rustboro. I know, every other guide in the world tells you to head north from here to continue on your adventure, right? Yeah, well those guides were written by Trainers who do not understand the importance of the item we are going to be rewarded with.
Because of that, and their failure to return and collect our rightful reward, they made the game 10 times harder on all the poor trainers who used THEIR guide! So trust me mate, this is worth the effort and the time it will take. Head back to Briney and take his boat back to his Cottage now.
Run through the spooky forest, over the bridge, into town, and up to the President's Office to tell him of your success, and he will be pleased! So pleased, in fact, that he rewards you with what has to be the most time-saving uber item in the game: the held item EXPERIENCE SHARE!
"What's it do mate?" I hear you asking. I will tell you that, yes I will! What it does is give the Pokemon that is holding it HALF of the XP from ANY BATTLE. Whether they were in the battle or not. Now, think on that a minute mate. You can now power level your weaker Pokemon using your stronger ones without having to swap them out!
This will not only make it easier to complete your Dex, it will make leveling your Team easier, especially later in the game when you need to swap in new members that have to be leveled up to the team's level!
You don't have to thank me, mate. It is my job to give you the good info, so just say "Good Job!" and we will leave it at that!
Right, now we have to go back to Mr. Briney and use his boat to get back to Slateport -- but along the way I want you to pay close attention to the people and the objects that we pass, as this will become important later.
There are a LOT of trainers on the water here, and once we get the move Surf we will be able to milk them for XP and money, but there is also a wrecked cruise ship on the shore between Dewford and Slateport that will be very important to us later, and I want its location fixed in your mind now.
Right, so back to Slateport now, get!
Back in Slateport you should drop into the Mart to replace any kit you need, heal and save, and then head towards the north exit of town.
- - - - - - - - - - - - - - - - - - - -
Route 110 Area Pokemon Report
-- #309 Electrike (C)
-- #316 Gulpin (U)
-- #312 Minun (U)
-- #043 Oddish (U)
-- #311 Plusle (R)
-- #261 Poochyena (C)
-- #278 Wingull (U)
- - - - - - - - - - - - - - - - - - - -
Ahead you will see the Cycling Road -- and if you chat up the bloke standing outside you too will face a dilemma -- take the Cycling Road or the Low Road to capture Pokemon. Seeing as how there are a few here that we need, and the fact that we really do want to fill up our Dex, we should take the Low Road, but after we get to town it would be an idea to run the Cycling Road for the Trainer Battles there to help us with leveling our team up after the next Gym Battle -- to prepare for the one that follows it!
Now, let us hit the Low Road and troll the Tall Grass for the Pokemon we need -- come see me when you have them all, right?
OK! Excellent progress mate! You now have all of the Pokemon on this Route that we needed, so now we should head into Mauville proper!
-- The Low Road --
As we move up the road Professor Birch appears, confused that May is not with you. Actually I had no notion that she should have been, but whatever. We swap PokeNav Numbers, and then he asks us to keep an eye out for May and takes off.
A bit up the road and we have a nice Double Battle near the intersection with Route 103 -- after we beat the two trainers here, depending upon how that went you may need to retreat to the Poke Center to heal and save. Either way if you did, head back and continue on the Route.
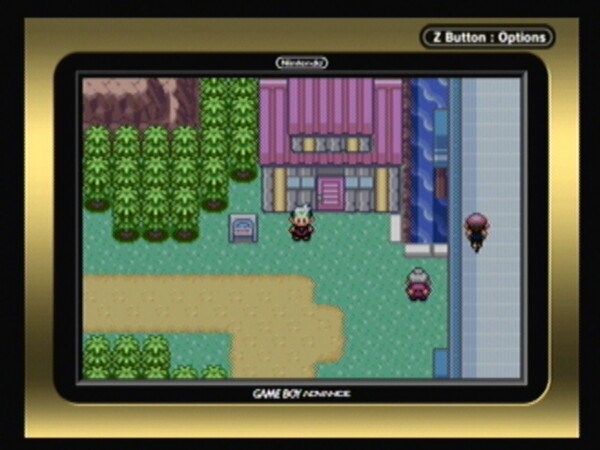
The Trick House on Route 110
-- The Trick House --
Up ahead you will find the junction and the Trick House. Head inside the Trick House for a brief bit of Poke Fun -- look for the flash as you enter then go to it and use the action button to reveal the hidden trickster.
After you reveal him he invites you to take the door behind the scroll -- doing so will present you with some trainer battle opportunities, so go ahead and do that now! Go through the maze to get the scroll and the Orange Mail, Using the Secret Code from the scroll you open the rear door and enter the Trick Master's flat, where he rewards you with a Rare Candy and the promise to think up a new challenge for next time!
Use the door out to leave and when you are back outside, instead of heading to the east on Route 110, take a brief side trip to the west, and Route 103!
-- Route 103 --
This Route connects Route 110 to Oldale Town, and should be familiar to you - the other side was the second Route you traveled on at the start of the game! The side we are on is separated from that side by water, but once you get the move Surf, this becomes the shortest way between Littleroot and Mauville, and in a way, the shortest way to the rest of the world!
- - - - - - - - - - - - - - - - - - - -
Route 103 Area Pokemon Report
-- #129 Magikarp (C) Fishing: Old Rod
-- #279 Pelipper (R) Surf
-- #261 Poochyena (C)
-- #319 Sharpedo (U) Fishing: Good Rod
-- #072 Tentacool (C) Fishing: Good Rod & Surf
-- #263 Zigzagoon (U)
-- #320 Wailmer (U) Fishing: Good/Super Rod
-- #278 Wingull (R/U) Grass and Surf
- - - - - - - - - - - - - - - - - - - -
For now we should concentrate upon capturing the Pokemon we need that we can capture, and adding this side to our explored areas! There are some trainers to battle here, and using Cut, head above in the closed off area to grab some berries and a Guard Spec from a Treasure Ball past the berries along the cliff wall, and a Treasure Ball with a PP Up in it as well as some very good XP from battles!
-- Back on Route 110 --
Having completed our brief side-trip it is time to head east and resume our travels on Route 110!
A short way along the path you will find a Treasure Ball with a Dire Hit in it, followed by a Trainer Battle!
Another chance to show May how much we Rock!
As we progress along the northern section of the Route we run into May! Well, the Prof did ask us to keep an eye out for her, but before we can take a breath to tell her about running into the Prof she attacks us!
Trotting out her Level 18 Lonbre, we kick its but for 543 XP, so she follows that with her Level 18 Slugma worth 300 XP, and finally her Level 20 Marshtomp, which is worth 596XP and $1200.
To make up for attacking us and then getting beaten so badly May gives us an Item Finder as our reward -- a Key Item that can be used to locate hidden items on the ground! A most excellent "Sorry I attacked you and you kicked by butt" pressie!
With that, May rides off on her bicycle -- we need to get one of those by the way -- and we are left on Route 110 wondering what we did to deserve getting kicked around and insulted by May?
Be sure to grab the Elixir from the Treasure Ball on the Route, and score some of that awesome XP from the Doubles Battles as well, some Nanab Berries and then stroll right in to town!
-- Mauville --
On the way in be sure to talk to the people here and there, so you learn about TV shows, bikes, and the fact that there is a bike shop here in town. As you enter town you will spot a Treasure Ball behind the wall there -- grab the X-Speed from that, and in town you can have that trainer teach Roll Out to one of your Pokemon if you like.
As you explore the town you will see that there are several Routes branching here, as this is the crossroads of the area. Route 111 to the north, 117 to the west, 118 to the east, and of course, 110 is south.
Before we get down to brass tacks, start looking into the houses and buildings here. Ignore the house west of the Poke Mart for now, we will go there in a bit, as we are not quite ready for that transaction just yet.
Head into the Poke Mart to replace any kit items you may need, Awakenings, Paralyze Heals, that sort of thing, and get some Great Balls to replace the ones that we used to capture Pokemon on Route 110.
Now visit the house east of the Mart to obtain HM06, Rock Smash -- a move we can get some very good use out of! Notice the TV in the corner that is flashing? Go take a look at it and you will see the interview you gave earlier at the Pokemon Fan Club in Slateport! How cool is that? Whenever you see a TV in a house flashing like that it means that there is a program on you can watch -- and you should! It will not always feature you, but still, TV is a goodness.
Our next stop is the house to the north, which turns out to be the bike shop. Rydell, the owner, offers you a free bike, you pick the type, and promises that you can come back and swap it out for the other type any time you like. How very generous of him!
On the tables in the back are instruction books that explain in detail both types of bike, so if you do not know how they work, go have a read there, I will wait for you.
Done? Good! Hit the door mate!
Our next stop is the Poke Center to heal and save. Now would be a good time to open the PC and sort all of the Pokemon we have been catching into their proper boxes as well, so why don't you do that?
When you reach the Gym you find Wally and his uncle -- remember Wally? You helped Wally capture his Pokemon! Anyway he wants to challenge the Gym Leader, but his uncle thinks that may not be a really bright idea.
Wally wants to have a battle with you to prove how far he has developed as a trainer. You know what you have to do, right? Crush him! Wow... I actually felt kind of bad doing that... As they are leaving Wally's uncle invites you to have a visit if you are in town, and you say sure, no worries mate!
Scott shows up to offer his opinion of your crushing Wally -- yeah, Scott... Thanks a lot...
Playing the Slots at the Game Corner
-- The Game Corner --
South of the Gym is the Casino -- but you need a coin purse to play there -- so go ahead and chat up the people here to learn that you need a coin purse and for one of them to tell you where he thought you might get one. Now head to the first house we saw when we entered town and chat with the woman there. Remember the Harbor mail I told you to buy in Slateport? Right, she will trade us her coin purse for that Harbor Mail!
Now that you have your coin purse, head back to the Casino, and then talk to the bloke in the corner who will give you some coins. The slot machine is all about timing -- you stop the wheels with the A Button, so if you time it right, you can win big!
-- Mauville City Gym --
As you enter the Gym chat up the Greeter to learn that Wattson is the Leader of this Gym, and he favors Electric-Type Pokemon. He suggests using Water-Type here, which is not really bad advice at all!
To get to Wattson you will need to take on his AGL's and throw a few switches... So why don't we do that now?
It looks like the first battle was intended to be a Double, but you do not have to fight it that way -- you can approach the trainer on the bottom from the side and do it as a single instead.
Battle Girl Vivian has a pair of Level 17 Meditite worth 331 XP each and $408.
Guitarist Kirk has a Level 17 Electrike worth 378XP and a Level 17 Voltorb worth 375XP and $544.
Youngster Ben has a Level 17 Zigzagoon worth 217XP, and a Level 17 Gulpin worth 273XP and $272.
Bug Maniac Angelo has a Level 17 Illumise worth 531XP and a Level 17 Volbeat worth 531XP and $1020.
Guitarists Shawn has a Level 17 Voltorb worth 375XP and a Level 17 Magnemite worth 324XP and $544.
That wraps up all of the AGL's, so go ahead and run back to the Center to heal and save, and then return to the Gym and face off against Wattson. Now at this point you should have your entire team at Level 25 with a few of your team members closer to Level 30, so Wattson should be no problem for you at all!
Our Battle with the Mauville Gym Leader
-- Gym Leader Wattson --
As you enter the Gym set the switches to allow you to access Wattson in the very back of the Gym, and then perhaps you should save just before you begin to battle, right? I mean, just in case... Because if you have not been following this guide and your levels are significantly lower than what is specified here, this could be a tough battle.
I am warning you right now, all of his Pokemon have the move Shock Wave, and it is really an annoying move. Add to that the programmers tilted the game in Wattson's favor for this battle -- more on that in the after battle notes -- and you are facing a very frustrating battle here. So save first, and be sure to use your best tactics and moves to go for his throat. Do NOT hold back or go for a finesse style of play, as that will just get you killed. Hit him hard, hit him fast, do as much damage as you can in as short a period of time as you can, and you will be way happier, trust me on that.
He starts with his Level 20 Voltorb, which is worth 441XP, following with his Level 20 Electrike worth 445XP, his Level 22 Magneton worth 759XP, and his Level 24 Manectric worth 864XP and $2400.
In addition to the money Wattson gives us the Dynamo Badge and TM34, Shock Wave. With this Badge the speed of our Pokemon is increased, and we can use Rock Smash outside of battle! Good on ya mate! You have your 3rd Badge! Now we just need to get our 4th, which will raise our control level to 50!
After Battle Notes: I have no doubt that you are not very happy right now. You worked hard, you know your Pokemon, and you are a good trainer, but it seemed like everything that could go wrong did go wrong with that battle, right? Well, believe it or not, this is not your fault.
You will notice that Wattson pretty much got all of the breaks, landed excellent blows, maxed out his hits and, when he needed to, had plenty of time to apply potions to his Pokemon, while you seemed to fail a lot more than usual, and when you did hit, your blows did the minimal damage. Not your fault mate, you just ran smack into the first instance of what they call Grief Code.
In simple terms, the people who make video games believe that you will be happier with a game that takes longer to beat. Rather than add extra content to the game, they grief it to slow you down, so you will feel better... about... umm... Something is wrong with that logic. They are confusing tedious with challenging. No gamer likes it when they tip the game in favor of the game in so raw and obvious a way -- I am telling you this so you understand that the frustration you are feeling with this battle was intentional on the part of the programmers. Just so you know.
-- Back on Track --
Having wrapped up matters in the Gym, head to the Center to heal and save and get ready for our next stage in this epic adventure! Oh, and hit the Mart to resupply any kit you used up, right?
Mauville is a crossroads town, with Routes heading in every direction, so before we continue along the way on our adventure, we are going to grab the Pokemon that each of the three new Routes has to offer us along with the items and Trainer Battle XP they can deliver. So hit the Center to heal and save, hit the Mart to restock kit, and then we will start by heading north out of town!
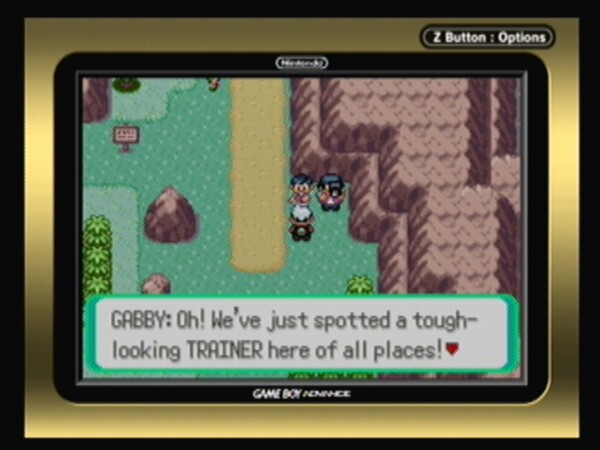
Keep an eye out for your chance to be on TV!
-- Route 111 ---
This is one of the major Routes in the region, connecting Mauville with Route 113 and Mount Chimney, presenting one of the most interesting experiences in the game when it comes to the type of land you will experience, going from the green of city to open fields, then rockier terrain that leads to a desert with an endless sandstorm, and finally into the mountains. But that is not what we are setting out to experience here mate, we just want the Pokemon it can give us!
- - - - - - - - - - - - - - - - - - - -
Route 111 Area Pokemon Report
-- #343 Baltoy (R)
-- #339 Barboach (C) Fishing: Good/Super Rod
-- #074 Geodude (U) Rock Smash
-- #118 Goldeen (U) Fishing: Old/Good Rod & Surf
-- #129 Magikarp (C) Fishing: Old Rod
-- #183 Marill (C) Surf
-- #027 Sandshrew (C)
-- #328 Trapinch (U)
- - - - - - - - - - - - - - - - - - - -
The Route begins nicely with a Doubles Battle - I wish they all did that - that pays us in some decent XP, and the money ($1024) is not bad either! With that battle out of the way you have opened up access to the Route, so head north and you will find stairs leading up the plateau.
To the left you will see a Treasure Ball and two trainers near it. You want to approach the left-hand trainer head-on so that you trigger another Doubles Battle, which will also pay off nicely in XP and money! The Treasure Ball contains an Elixir -- always nice to find -- so be sure to grab that.
-- The Winstrate Family Challenge --
The trainer walking above will tell you about the Winstrate Family, who come at you in four sequential matches -- and baby that sounds right up our alley! They live in that house there, so why don't we go over and introduce ourselves?
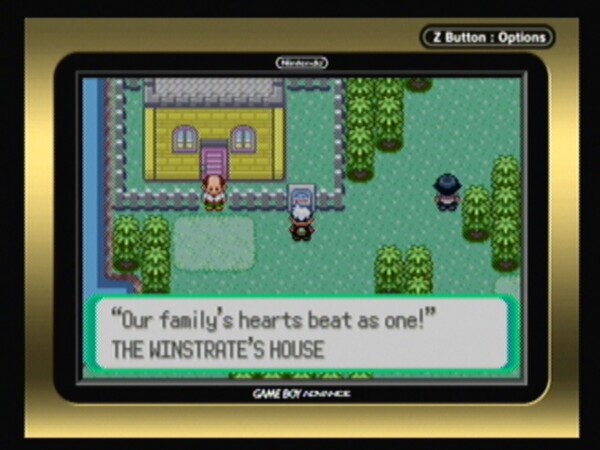
The Winstrate Family -- Pokemon Trainers One and All!
These people offer you an excellent opportunity to pick up good XP and money -- they appear to be a very wealthy family!
Each of the Pokemon you face have Oran Berries, so they can (and will) heal themselves when you hit them especially hard. As you beat each trainer a new one comes out of the house to face you, one after the other, so be prepared to use potions and/or switch out Pokemon. I used potions because this was too good an opportunity to power level one of my team!
After you beat them they invite you to come into their home -- do that! Talk to each of them around the table clockwise to learn about their powerful grandson/son/brother and receive a new hold item, called a Macho Brace, as a reward for besting them. Check the TV to see if there is anything on, then you may want to head back to the Pokemon Center to heal and save!
Ahead is your first opportunity to use the HM Rock Smash outside of battle to smash a few rocks blocking our path -- so do that! There is a small chance that inside one of the rocks will be a Pokemon like Geodude!
Just beyond the rocks is another TV crew, only this time instead of asking you questions they want to film you in action! Talking to them initiates a battle, and the payoff -- in addition to good XP -- is a massive $1632 in payolla! After the battle comes the interview, which means we are certain to be on TV again! How about that?
Just past the TV crew in the middle of the Route is a Girl Scout looking for a fight, so oblige her, but keep an eye on your team levels as you do NOT want them going above Level 28 or 29, because once they hit 31 you can no longer reliably control them, and you will need them for the next Gym Battle to actually listen to your commands.
Further up the Route is a path that branches to the left (west) and, at the branch is a Boy Scout who is also looking for a battle! Man the Scouts in Hoenn are a tough lot! The split to the left leads to Route 112 -- and as the road ahead goes right into a sandstorm that is so bad we cannot penetrate it, what do you say we head to the left?
-- Route 112 --
This is the preferred path used to get around the perpetual sandstorm that is on the northern section of Route 111, and it connects onward via the Fiery Path. In addition you can use the cable cars on this Route to access both Mt. Chimney and the Jagged Pass.
- - - - - - - - - - - - - - - - - - - -
Route 112 Area Pokemon Report
-- #183 Marill (C)
-- #322 Numel (C)
- - - - - - - - - - - - - - - - - - - -
In addition to providing a bypass, this Route also features two Pokemon in its Tall Grass -- one we should already have, another not. If you do not have a Marill at this point, now is the time to grab both a Numel and a Marill!
You can access the Tall Grass here without having to fight the Trainer on the lower path, but why would you want to do that?! Go ahead and beat on him for a bit and then the one past him above for the new Dex entries we get for our trouble!
After you beat them both, troll the Tall Grass and grab our new Pokemon, then use the stairs to head up to the plateau and take on the trainers here for XP and money. To the left on the first plateau is a cave entrance, and if you go inside there, you discover that you have found the entrance to the Fiery Path!
The Fiery Path will be on our list of destinations -- but it is not for now -- so turn around and leave mate! It is time to head back to Mauville because we do not want to go any further here just yet, especially not up that mountain, so just head back now, umkay? Excellent!
Back in town, hit the Poke Center to heal and save, and then head to the east for our next Route explore and Dex additions!
-- Route 118 --
Route 118 is the only Route in the entire world that has two sets of background music on it, an oddity that has no explanation that I am aware of, but interesting nonetheless! This is going to be a much shorter explore than the previous Route, so grab your kit and your Poke Balls and get going!
- - - - - - - - - - - - - - - - - - - -
Route 118 Area Pokemon Report
-- #318 Carvanha (C) Fishing: Good/Super Rod
-- #309 Electrike (C)
-- #352 Kacleon (R)
-- #264 Linoone (U)
-- #129 Magikarp (C) Fishing: Old Rod
-- #310 Manectric (U)
-- #279 Pelipper (R)
-- #319 Sharpedo (U) Fishing: Super Rod
-- #072 Tentacool (C) Fishing: Good Rod & Surf
-- #278 Wingull (U) Grass and Surf
-- #263 Zigzagoon (C)
- - - - - - - - - - - - - - - - - - - -
As you can see above there are a fair amount of Pokemon here that we need -- but sadly not as many that we have the ability to capture now as we could like. Still, consult your Dex to see what you have not captured from the list and get what you can as we explore this stub-end of the route, yes?
Starting with a Doubles Battle makes this a better Route in my book! And so we do! There are two more trainer battles on the shore, but as we do not have Surf this pretty much ends our exploration of this Route... For now. Sadly the Tall Grass is on the other side of the water, so you cannot add any Pokemon on that part for now either, so just return to the Center to heal and save, and then head west from town for the final phase of our exploration -- and I promise that this one will be more fun and more productive with respect to our Dex!
-- Route 117 --
The only claim to fame that this Route has is the fact that its east-west path links Mauvill with Verdanturf Town -- well that and its pretty flower gardens and ponds. It also happens to be the home of the Pokemon Daycare Center, a very important structure that you will grow to love later in the game, as it is going to be the source of a lot of the entries in your Dex!
- - - - - - - - - - - - - - - - - - - -
Route 117 Area Pokemon Report
-- #341 Corphish (C) Fishing: Good/Super Rod
-- #118 Goldeen (U) Fishing: Old/Good Rod & Surf
-- #314 Illumise (C)
-- #129 Magikarp (C) Fishing: Old Rod
-- #183 Marill (U) Grass & Surf
-- #043 Oddish (C)
-- #261 Poochyena (C)
-- #273 Seedot (R)
-- #313 Volbeat (R)
- - - - - - - - - - - - - - - - - - - -
Exiting the Mauvill Pokemon Center you simply follow the road to the west, and you quickly pass on to Route 117 right where the Daycare Center sits. We are going to take a short recess while we explore the Daycare Center and what it can do for you, OK?
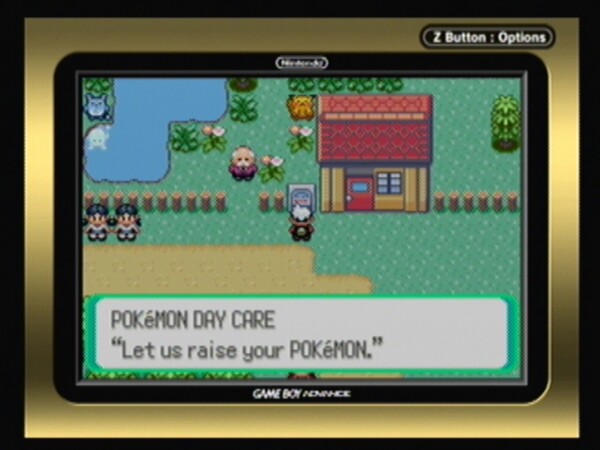
The Pokemon Daycare Center
-- The Pokemon Daycare Center --
First, go inside, and you will see a nice reception and waiting area with a counter that is staffed by the wife of the husband and wife team that operate this valuable service to Trainers everywhere! In the corner is a PC that is hooked to the PokeNet, which will come in handy when you start to really use this place for its intended purpose.
Now that you have seen the inside, head back outside and take a good long look and tell me what you see? Yes, that is the husband of the team standing by the break in the fence -- a break in the fence that has an actualy purpose other than to allow him to go in and out I want to add.
How it works is simple enough -- when you have two Pokemon you want to breed you leave them at the Daycare Center and, if they succeed in breeding with each other, that success will produce a Pokemon Egg. When an egg has been created the bloke outside there will step through the fence and stand on the side of the road there, which is the visual indication that you need to know an egg is ready!
Simply go and chat him up, and he will give you the egg! Then you can go inside and swap out the Pokemon you have lodged there if you do not want them to produce another egg. When you have an egg, the hatching process is simple: you put it in your party and take a certain number of steps.
The detailed information on breeding your Pokemon is way beyond the scope of this Guide, however there is plenty of breeding information available online -- and if you decide that you simply have to have a proper guide to this, you will need to email the admin at SuperCheats and tell them you need a proper breeding guide written. If enough of you do that, the admin will send me an email saying: "Oy! We need you to write a breeding guide!" Then I will do it!
In addition to using the Daycare Center for breeding, some trainers like to use it to level their Pokemon. You heard me, I said Level Their Pokemon! You see for every step you take in the world, any Pokemon you have lodged in the Daycare Center age a little bit. Take enough steps, they raise a level.
When you get lower-level Pokemon that you want to be able to swap in and out of your party for utility purposes, this is the best way to get their levels up as long as it does not matter what moves they get on leveling -- because you will not be there to decide what gets got and what gets deleted. But as long as you have been saving TM's that should not matter much to you.
Right, so that is the quick and dirty tour of the Pokemon Daycare Center, the fixture nearby Mauville that makes the town more than just a travel hub, but a destination!
-- Back on Route 117 --
The south fork has a Trainer and some berry trees, so go battle him and then clear the berries, replanting as you like, then hit the north fork for a Doubles Battle and then hit the section where the fork rejoins for another easy chunk of XP and money!
This Route presents one of the densest concentrations of trainers encountered so far, presenting an excellent source for power-leveling a single team member.
Along the top edge of the narrow flower garden is a path you can reach by cutting a tree that has a Treasure Ball on it -- grab the Revive from here (our first) -- a marvelously useful tool in your battling that will allow you to bring an incapacitated Pokemon back into the battle! I wish we had dozens of these, but rare they are right now!
You can use the Tall Grass here to capture any of the Pokemon on this Route that you do not have in your Dex already -- and when you are done doing that, look to the south part of the road and you will see another Treasure Ball behind a fence. Work your way over to that and grab the Great Ball in it, then move to the far west of this narrow area and search the ground at the end there for a hidden Repel. Now resume your trek west entering Verdanturf Town.
-- Verdanturf Town --
"A windswept highlands with the sweet fragrance of grass" touts the sign that greets you as you enter the town, and while there really is not a lot to do, it appears that the people here are happy!
Start our visit with a trip to the Poke Center to heal and save, chat up the occupants for a chance to have one of your Pokemon learn the move Fury Cutter, and then dodge next door to the Mart to resupply our kit. You should probably grab a few Nest Balls as this is the only place in the Region that they can by bought. You can also buy Burn and Ice Heals here -- and probably should -- and perhaps a Fluffy Tail or two, as it will allow you to instantly flee a wild battle even if you have been trapped in it.
In the lower-left house is a woman who can evaluate your Pokemon to tell you how much they like you, and if you check the TV in her house there should be something good on!
Go in to the Battle Tent and chat up the Trainers there to get TM45, Attract. Now head into the Rusturf Tunnel for a quick look around!
-- Rusturf Tunnel --
As you will recall we have already been in the other end of this tunnel -- we trapped that Aqua Grunt there and met Mr. Brimey there. Well, we need to be in this end, as there is an HM here we need to get, so go ahead and work your way along to the north first, fight the sole trainer, and then grab the Max Ether in the Treasure Ball ahead.
When we reach the area that is still blocked of we find the two lovers separated by the boulders. The only thing for it? We have to smash those boulders!
To show how grateful he is, the boyfriend gives us HM04, Strength, a move we will find very useful later on! The pair leaves for Wanda's House, and we backtrack to the entrance then head west and down to reach Route 116!
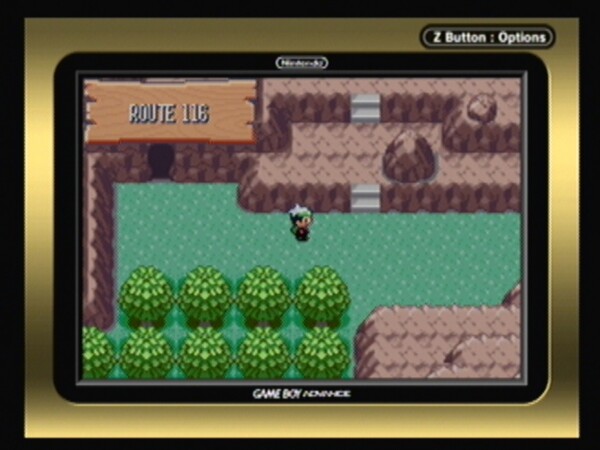
The hidden paradise on Route 116
-- Route 116?! --
This hidden area is a lost stub of Route 116 -- the Route at the other end of the tunnel! It seems that this tiny paradise is the secret recreation spot and home base for the team that is in charge of the Tunnel Drilling project! As you know, Route 116 happens to be the only place in the region where Skitty and Nincada can be captured together in the wild -- but we should already have them... If you do not, and you should check your Dex now please -- head all the way through the tunnel to the other side where Route 116 is, and capture them now!
Actually before you do that, you should first go help that bloke find his glasses, OK? Using the Item Finder you should get to them lickity-quick! It turns out that the glasses you find -- Black Glasses -- are not his, and he decides that they must not be here anyway and leaves! Well good for us! We have a new hold item!
Now head up the stairs and grab the HP Up from the Treasure Ball here before you discover that this is a dead-end! We have to find the other side of this Route because there is no Tall Grass here!
Head back to Mauville now, then north to Route 112, because it is now time...
The Fiery Path was born out of necessity -- without a pair of Go-Goggles travelers cannot pass through the perpetual sandstorm that blocks off the desert to the north and east, so this cave was dug into a tunnel to provide passage to Fallarbor Town by going directly under Mount Chimney!
- - - - - - - - - - - - - - - - - - - -
Fiery Path Area Pokemon Report
-- #088 Grimer (R)
-- #109 Koffing (C)
-- #066 Machop (U)
-- #322 Numel (C)
-- #218 Slugma (U)
-- #324 Torkoal (C)
- - - - - - - - - - - - - - - - - - - -
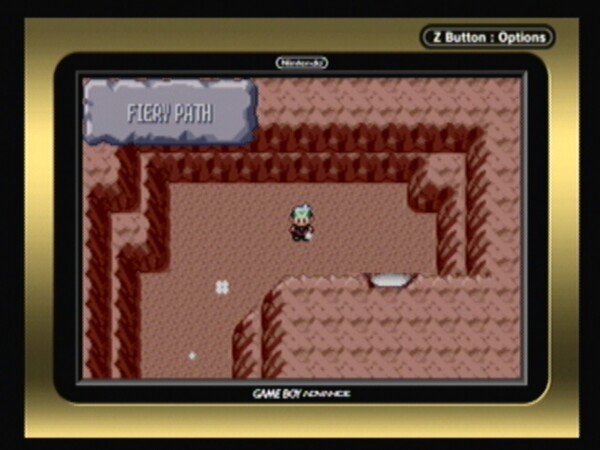
Steam bursts through the ground of the Fiery Path
In addition to being the only way to get past the desert without the rare and special goggles required to brave the sandstorm, the Fiery Path is also a place of hot wonder, with some very rare items for those who know how to find them -- and have HM04.
Check your Dex to determine which of the above Pokemon you still need, and then spend a little time trolling the first part of the Path to pull and capture them before we head through the Fiery Path in earnest, OK?
Once we have captured the ones we need, simply head north to the exit -- we cannot move the boulder blocking the branch tunnel to the left because we need the next Gym Badge to be able to use Strength outside of battle, but we are getting there, slowly.
Note that if your team is getting dangerously close to Level 30 you should hold off trolling for these Pokemon until after you get the next Gym Badge to prevent ending up in a situation in which you cannot direct your team.
When you exit the Path you end up on the far end of Route 112, on the other side of the desert..
-- Route 111 / 112 --
Nearby are some Berry Trees but first take care of the Trainers here! Time it correctly and you can step between them to initiate a Doubles Battle!
After the battle and the Berries, head east to hook up with the continuation of Route 111, and turn north, battling the Trainer here and then you can obtain TM43 from the Trainer on the path to the north -- TM43 is, if you are curious, the move we have been waiting for that will allow us to make our own Secret Hideout!
It is called Secret Power -- and it is a wicked cool move. I don't know about you but I am planning on placing my Secret Base in that nub of a continuation of Route 116 that is a little green paradise! Basically you can place a Secret Base anywhere where there is one of those cuts in the rock or a tree of a certain shape -- like that one there!
In addition to that, remember that merchant back in the market area of Slateport who said they only did business with Trainers who had the move Secret Power? Yep! That bloke sells all sorts of items you will want to have to decorate your new Secret Base!
Now, with that settled, you can go ahead and make a base here if you like - I am waiting - but if you want to do it I will patiently stand here while you do that. Just let me know when you are ready to go, okay?
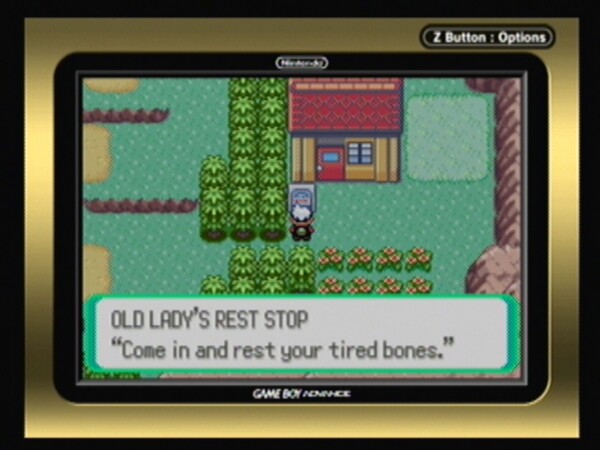
The Old Lady's Rest Stop
-- Old Lady's Rest Stop --
Now that you are done, you see that tree to the east? Cut it down and go to the building here, which is a convenient rest stop. I do not know about you, but I burned through a chunk of PP on the way here, and my team needs to rest, so I am going to avail myself of the facility here.
Nothing on TV at the moment, so rest, heal, save, that is the order of the day!
Now that we are well rested head north and chat up the Trainer here for a free berry, then harvest the berries from the Berry Trees here.
You see that ramp going up the cliff to the east? If you have the bike that goes fast (as opposed to having the Acro Bike which is more of a trick bike) you can rip up that to the top and run along the ledge here!
Now head west and battle the Trainer and then continue on until the Route changes to Route 113.
-- Route 113 --
Due to falling soot from Mt. Chimney, Route 113 is the coldest Route in all of Hoenn, with regular temperatures that are lower than anywhere else in the region due to the soot blocking out the light and warmth of the sun.
- - - - - - - - - - - - - - - - - - - -
Route 113 Area Pokemon Report
-- #227 Skarmory (R)
-- #218 Slugma (C)
-- #327 Spinda (C)
- - - - - - - - - - - - - - - - - - - -
This is an important area - and not just because it has some new Pokemon for us - but because it is the area that we go to in order to collect soot. Did he say "collect soot?" I believe he did!
If you have the special Key Item, you can collect soot here, which can then be traded for special items. Some of the items are very special indeed, so this is one of those areas we will be wanting to spend some extra time and effort upon - more on that in a bit.
For now though, as you can see there are Pokemon here that we need - but as our team is now dangerously close to Level 30 so we are going to skip the battles we do not need to fight by running, and just capture the Pokemon that we need to, right? We can come back to this area in a bit...
As you walk along you will knock the soot off of the Tall Grass - ignore that for now. Avoid lumps in the soot - those are hidden Trainers -- and try to avoid the Trainers you can see -- while we work our way through the area to get to Fallarbor Town!
I don't know about you but I had a really bad time capturing the Skarmory -- even with it in the red I went through a huge pile of Poke Balls of several types before I finally managed it! I ended up having to use a Nest Ball because it would not stay inside any of the other types...
When you reach the small hut go inside to talk to the Glass Blower and he will give you the Key Item, Soot Sack. Now you can collect soot! Good on ya!
-- Fallarbor Town --
As soon as you reach town hit the Poke Center to heal and save, then the Mart to resupply your kit!
After you heal up in the Poke Center, you see that girl in the green dress by the PC? Go over and chat her up to learn that she is Lanette, and she invented the PC storage system! Wow! We finally learn who "Someone" actually is!
She asks you to visit her at her home on Route 114 and then leaves -- so now is a good time to open the PC and sort out all of the Pokemon you have captured into their proper boxes, as the Incoming Box is getting a bit full!
While you are in the Mart chat up the other customers to learn about Stone Evolution, then shop to replace your Kit. One of the Trainers here will teach one of your team the move Metronome if you like -- if not, remember that they are here for later!
At this point we need to organize our activities and get some of the stuff that we skipped done! It is never a good idea to leave too much undone to be done later as you tend to forget stuff... So what you should do at this point is put some of your A-Team in their box, and then go through your captured Pokemon looking for Pokemon that are of Types that you do not have on your A-Team now.
You may not have an Electric or a Fighting Type -- if not, those would be good ones to develop now, wouldn't they? Yes they would! So pick two that you do not have, and add them to your active team so that we can head back to the soot zone and begin collecting soot, capture the other Pokemon that we did not get on our way here, and clear out the Trainer Battles for the area!
Doing it this way means you are not wasting the XP from the Trainer Battles since it is going to level additional team members! When you are done -- or rather once we arrive in Lavaridge Town and are ready to battle the Gym Leader, you can re-assemble your main A-Team for that fight, but until then use the alternates for all of your fighting so that you can level them and not risk sending any of your A-Team over Level 30.
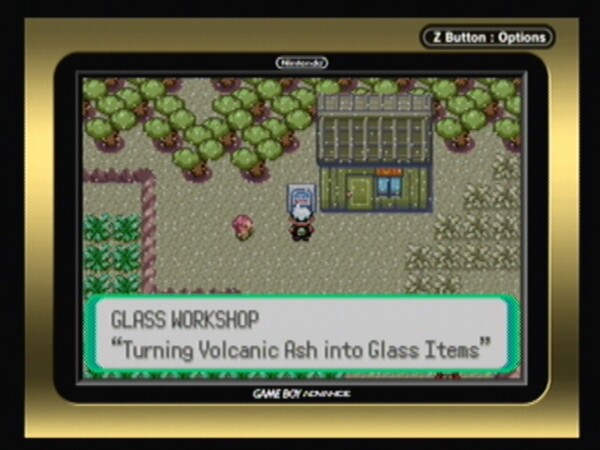
The Glass Workshop on Route 113
-- Cleaning up Loose Ends --
We can start by trolling the tall grass in the soot zone to capture the Pokemon from there that we need, while at the same time collecting Soot. How much Soot do you need? Well, Soot collection is measured in steps, and the following are the requirements for the items that the Glass Blower can make for you:
* Black Flute (1000 steps) Reduces Wild Encounter Rate
* Blue Flute (250 steps) Heals Sleep
* Pretty Chair (6000 steps) Secret Base Furniture
* Pretty Desk (8000 steps) Secret Base Furniture
* Red Flute (500 steps) Heals Attraction
* White Flute (1000 steps) Increases Wild Encounter Rate
* Yellow Flute (500 steps) Heals Confusion
Of all of the items he can make obviously the flutes are the most valuable to us.
As you are working your way through the Tall Grass you will notice lumps in the ash -- some of these are hidden trainers but others are items -- the lump closest to town is TM32, Double Team, while the one next closest is a Trainer.
As you work your way along the Tall Grass sections you will see a Treasure Ball with a Max Ether in it, so grab that and then hop down the ledge and work your way to the next lump to the east, which is an Ether. The lump east of that is a Trainer that sets you up for a Double Battle, instantly followed by a battle with a third hidden Trainer after you win. The lump near that Trainer lump is actually a Nugget, which is worth $5K at the Poke Mart!
The nearby Treasure Ball has a Super Repel, and then you drop down the ledge and start harvesting Soot again! This is actually a great place to batch-level, and if when we need to do that again after the next Gym we should remember that!
When you feel like you have enough Soot head back to the Glass Blower to check. The priority for items is Yellow Flute, Red Flute, Black Flute, and then White, followed by whatever else you want.
As soon as you have collected all of the Soot you need and turned it in for the items, and cleared the Trainers here, head back to Fallarbor Town and hit the Poke Center to heal and save, and then head east to the Move Tutor's House and check that out.
The Move Tutor explains that he can teach your Pokemon moves -- any move that they have forgotten in fact -- but only if you pay him in Heart Scales! We will have to keep that in mind for later...
-- Professor Cozmo --
An old man in town tells you something is up at Professor Cozmo's House -- so of course we have to go and check it out, right? The house is directly south in town, so go in and chat with the woman inside, who tells you that Team Magma took him away to Meteor Falls!
Well you know what we have to do -- we have to rescue him and find out just what Magma is up to! Before we do that though, head outside and look in the crater, where you will find a Nugget. Take that to the Mart and sell it, and replace any kit you used before we set off on our next adventure to rescue the Professor.
-- Route 114 --
The northern-most Route in the region, Route 114 is home to rare Pokemon found nowhere else in Hoenn, and delivers vistas of ancient rock formations and mountains.
- - - - - - - - - - - - - - - - - - - -
Route 114 Area Pokemon Report
-- #339 Barboach (C) Fishing: Super Rod
-- #074 Geodude (C) Rock Smash
-- #118 Goldeen (U/R) Fishing: Old/Good Rod & Surf
-- #271 Lombre (C)
-- #270 Lotad (C)
-- #129 Magikarp (C) Fishing: Old Rod
-- #183 Marill (C) Surf
-- #274 Nuzleaf (R)
-- #336 Seviper (U)
-- #333 Swablu (C)
- - - - - - - - - - - - - - - - - - - -
Clearly there are some Pokemon here that we do not have -- and some of them we can even capture now without having to come back! But alas, many we will have to return for. Still, make good use of your presence here and grab what you can, right?
Once you have taken care of that, follow the Route west and talk to the Trainer with his Poochie to get TM05, Roar. Above him is a Fisherman you can battle, but use a flying type because his Barboach knows Magnitude, and that could get messy!
Once you have defeated the Fisherman, head south past the next pond then east for a Double Battle, then grab the Energypowder from the Treasure Ball in the trees here. Depending upon how badly things went you may need to retreat to the Poke Center to heal and save...
As you work your way south there will be more Trainers to battle, and when you reach the far side of the bridge, pop in to the house on the right, where you will find Lanette!
After the conversation you have with her all of the PC's on the Poke Net that used to say "Someone's PC" will now be identified as "Lanette's PC" which is rather cool if you think about it. It was a mystery and you solved it!
She gives you a Lotad Doll that is xfered to the PC, and you can read some detailed notes about Boxes on her desk and an email from Bill, the bloke from Kanto who designed the PC and Box system used there.
The Trainer outside her house gives you a berry, then you can battle the two below them for some decent XP. There is a stand of Berry Trees above the house to the east but you have to backtrack to reach it.
On the ledge to the west is a Treasure Ball you can break a rock to reach that contains a Protein you may want to grab. As you work your way around the ledges you will arrive at the entrance to the tunnel to Meteor Falls -- which is where Magma took the Professor.
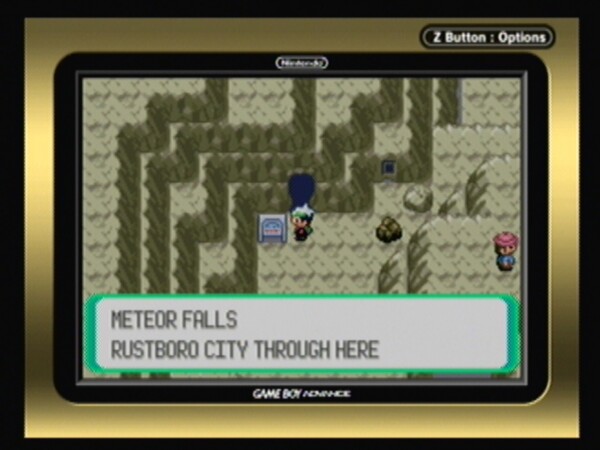
The entrance to Meteor Falls
-- Meteor Falls --
A large cave in the northwest part of Hoenn, Meteor Falls is at once mysterious and enchanting. When you get inside the foreboding feeling is emphasized by dark music and a dank view.
- - - - - - - - - - - - - - - - - - - -
Meteor Falls Area Pokemon Report
-- #338 Solrock (C)
-- #041 Zubat (C)
- - - - - - - - - - - - - - - - - - - -
I don't know about you but I was expecting there to be more to this then just walking inside and bang! There is Team Magma! I mean I thought we would at least have to battle our way through a few rooms, maybe catch a Pokemon, and then encounter Magma and their nefarious plot, but no, there they are plain as day!
As soon as we appear the Magma blokes get all chest-bumpy mad, and we tell them which way up is, and you know where this is going, right? And just then who should show up but Team Aqua! Could this get any worse? Why, yes. Yes it can!
Just when it looks like we are going to mix it up, Magma grabs the meteorite and bolts -- then the Aqua leader tells us that he misjudged us -- well, bit of a left-handed compliment that, but still, coming from a nutter that wants to flood the earth I guess you just have to take what you can get, right?
The Professor tells us what happened to him -- and it is clear that we need to get to Mr. Chimney right away to stop Magma from unleashing a deadly effect that will magnify the sun's rays a gazillion times, killing us all!
OK, our fastest way to Mt. Chimney is actually through the caves here and out the other side rather than retrace our way back to Fallarbor. The route down is quick, sure, we just have to jump a bunch of ledges, and out the other side is Route 115 -- which we never visited when we were in Rustboro!
Before you head off to Mr. Briney's Cottage you will remember that he is in Slateport waiting for you! He cannot be in two places at once, so you are not going to be taking the boat to Slateport this time -- but hey, we don't have to! Remember? We opened the cave! We can conveniently walk to Mauville from here! Poit!
Head through the cave, pausing just long enough to capture a Solrock, and out on to Route 115.
-- Route 115 --
Route 115 is a rural path connecting Meteor Falls to Rustboro, and providing access to the ocean for Fisherman and Trainers based out of Rustboro.
- - - - - - - - - - - - - - - - - - - -
Route 115 Area Pokemon Report
-- #039 Jiggleypuff (R)
-- #129 Magikarp (C) Fishing: Old Rod
-- #279 Pelipper (R) Surf
-- #333 Swablu (C)
-- #277 Swellow (R)
-- #276 Taillow (C)
-- #072 Tentacool (C) Fishing: Good Rod & Surf
-- #320 Wailmer (U) Fishing: Super Rod
-- #278 Wingull (U) Grass and Surf
- - - - - - - - - - - - - - - - - - - -
As you can see there are a few Pokemon here that we could add to our Dex, so get at it! When you are done pop down to Rustboro and head east to the cave entrance, then through the cave to Verdanturf Town, hit the Poke Center to heal, save, and swap out your team for the active A-Team that you benched to prevent it from over-leveling. Hopefully you did not level any of them beyond 28, right? The reason we are grabbing them now is because there are some Level 24's we will be facing, and immediately after taking care of the next challenge we will be heading for our next Gym Battle...
Be sure to hit the Mart to replace any kit you used up, and when you are ready, head for Mt. Chimney!
It is a fast run to Mauville and up Route 111 to the Route 112 Junction, so you should get to the entrance to the Cable Car with time to spare. A cute hostess escorts you on to the Cable Car and up you go!
When you exit the station you are confronted by Magma and Aqua Grunts really going at it! It is an all-out old fashioned free-for-all but the first thing that you notice is that it is all over the gaff, no direction at all. Run past the first pair and up to the steps past another group having it on and you will encounter a Doubles Battle with a pair of Magma Grunts blocking the path you need to take.
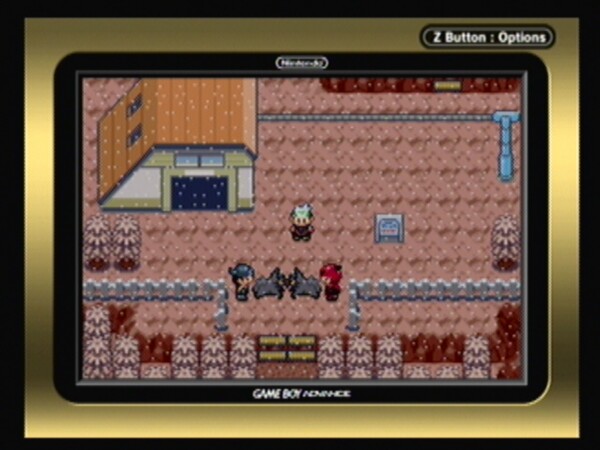
The battle at Mt. Chimney
Put the beat-down on them and then continue north, where you have to battle one more Grunt before you reach the Team Magma Leader, who has set up some sort of machine at the top of the Volcano!
What he wants is to unleash the power of the volcano and the sun to dry up the oceans -- in the mistaken belief that doing this will make the world a better place.
After you defeat him the leader of Team Aqua runs up to chat with you, thanking you for your help. You have him very confused, wondering whose side you are on! Well, no matter, grab the meteor out of that diabolical machine and head down to the bottom of the stairs. Instead of using the Cable Car, take the exit below to the Jagged Path.
-- The Jagged Path --
- - - - - - - - - - - - - - - - - - - -
Route 115 Area Pokemon Report
-- #066 Machop (C)
-- #322 Numel (C)
-- #325 Spoink (C)
- - - - - - - - - - - - - - - - - - - -
Follow the path down, battling as needed, until you reach the bottom at Route 112. It is just a few steps west from there to Lavaridge Town!
-- Lavaridge Town --
Our first stop is the Pokemon Center, where we heal and save. This Center is a bit different than the others we have visited, starting with the fact that it has a back door! Go ahead and use that now, to discover the entrance to the Center's Hot Springs! How cool is that?
If you go into the hot springs and search in front of the two women in them, you will find a hidden Ice Heal -- grab that now -- then head back to the Center. You can have a chat with the Trainers in the Center if you like, then step over to the PC and deposit one of your team -- just for a moment mate, trust me!
With an open spot on your team head outside and to the left, where there is a hot sand bed you can soak in, but more important, an old woman standing there you want to chat up! When you do she tells you about this Pokemon Egg she has and how she wants you to hatch it for her! Go ahead and take the egg, soak in the hot sand if you like, then go deposit the egg in your PC and grab your team mate that you just put in there.
-- Lavaridge Pokemon Gym --
As we head to the Gym I want to remind you that this is a crucial victory -- the badge we are about to win will expand our ability to command Pokemon to Level 50, which as I am sure you have noticed we really really need! So when you go in here, use your best tactics -- work smarter, not harder!
For serious Trainer Fans in the audience, I wonder if you know that the Lavaridge Gym only appears in two episodes of the anime series -- in the first episode that it appeared in, Ash and his mates arrived to discover that Flannery was the new Gym Leader, having just taken over the position from her grandfather.
The Gym was in horrid condition, with holes in the battle arena floor and the decorations in tatters, so Ash, Brock, and Misty, along with the help of Max and May, offer to assist Flannery in cleaning up and fixing up her new Gym, the bulk of that activity taking up the episode. The second episode was of course the next one, in which Ash has his battle with Flannery.
As you chat up the Gym Greeter, you learn that the Leader here is Flannery, and he favors Fire-Type. Well, considering where we are that actually makes sense. Like most Gym Leaders, Flannery has fallen into the trap of preferring one Type, a weakness that we can use to our advantage!
First though, we need to take out his AGL's, so if you are ready we can start with that! To get to them we need to use the sand-teleport-pads -- so take direction mate, and do the following:
(1) Take the Pad to the bottom left here and then head east -- what looks like a Pad above you is an AGL, who will pop up to battle you!
Kindler Jeff has a pair of Level 22 Slugma worth 367XP each and $704.
(2) This is a dead-end area, so take the pad you used to get here back to the entrance and then follow the hall north to the next pad, head south along this very narrow corridor, and then west to the middle pad, which is actually an AGL!
Hiker Eli has a Level 23 Numel worth 433XP and $920.
Now step over to the pad below him - another disguised AGL - and trigger that battle. You could have fought these as a Doubles -- you can if you like -- but as this is a guide I am showing you them one at a time.
Kindler Jace has a Level 23 Slugma worth 384XP and $736.
(3) Take the pad to the west (closest to the wall) then go north to the bottom of the trio of pads for an AGL battle.
Cooltrainer Gerald has a Level 23 Kacleon worth 649XP and $1104.
Step to the pad to his right (by the wall) for the next AGL battle.
Kindler Cole has a Level 23 Numel worth 433XP and $736.
Directly to the north is the next AGL battle, the pad by the wall being where you want to step.
Kindler Axle has a Level 23 Numel worth 433XP and $736.
(4) Take the pad to the west to teleport to the next area, and then head north to the upper right pad in the corner here, which is really an AGL!
Kindler Keegan has a Level 23 Slugma worth 384XP and $736.
(5) Take the pad on the left to the next area, and then walk to the pad that is up and on the right for the next (and last) AGL battle!
Battle Girl Danielle has a Level 23 Meditite worth 448XP and $552.
By now most of your team members are really close to if not already at Level 30. You still have full control over them, but once they hit Level 31 they will not always obey you, so try to plan this out so that you use the best one for each of the upcoming battles and then switch to the next best one, thereby not finding yourself in a position where your troops will not follow the orders of their leader!
We need to leave the Gym and head back to the Poke Center now to heal and save, then hit the Poke Mart to replace any of the kit we used during these battles. With that done, return to the Gym and do the following:
(1) Take the North Pad
(2) Go west and take either one of the Pads past the two defeated Trainers here.
(3) Take the Pad to the north, then the next pad to the north.
(4) Take the pad above (to the north) that is to the left of the Trainer here.
(5) Go down the hall and take the first Pad you come to.
(6) Take the bottom right Pad.
(7) Go south (down) and jump down the ledge, then take the Pad here.
(8) You are now facing Flannery!
Our Battle with the Lavaridge Gym Leader
-- Gym Leader Flannery --
Leading with her Level 24 Numel, worth 451XP, she follows with her Level 24 Slugma, which is worth 400XP.
The next battle is with her Level 26 Camerupt, which is worth 975XP, and the finale features her Level 29 Torkoal, which is worth 1000XP.
Beating Flannery earns you $2900 as well as the Heat Badge -- allowing us to use the HM Strength outside of battle, but more important, allowing us to reliably issue orders to Pokemon up to Level 50, including ones we received in trade! Oh that could not have come at a better time, mate!
Flannery gives us TM50, Overheat, a very powerful move. Like all powerful moves though, it has a weakness -- the more that you use it, the lower your Special Attack power gets. You want to bear that in mind before you put that move in the number one slot on your moves list and use it as your main attack mate.
To leave simply jump down the ledge and hit the exit door! As you exit the Gym May turns up, and rather than be snarky or want to kick you around, she actually appears bearing gifts -- or rather "A" gift: the Go-Goggles needed to enter the nearby desert area! How cool is that?! You know I thought May was rather annoying, but now she is my new BFF!
Having delivered her pressie and her comments, she tells you that she is now off to battle your Dad, which means she is a bit ahead of us in the Badge Department mate, but still, good on her! I hope she does well!
Those goggles will come in handy mate, because now that we can control Pokemon up to Level 50, we need to batch-level our team to Level 45 like right now, and the desert is not only an excellent place to do that, it also has some Pokemon that we need to add to our Dex! Ah, but before we do that there are some minor chores that we need to take care of first, which I outline below!
-- Minor Chores that we need to Take Care of First --
(1) The Egg that we received from the Lady by the Hot Sands
Sitting in our PC Storage Box is the egg that the old woman gave to us. This is one of those things where it is simply easier to just deal with it head-on rather than try to work it in to some other plan. So head to the Poke Center and, after you have healed and saved your game, drop one of your team into their box and add that egg to your party.
You hatch eggs in this game by taking a certain number of steps. Usually the number is measured in the thousands, not hundreds, but that is not as daunting a task as you may think! With the egg in yourt pack, exit the Poke Center and walk over to the cliff wall to the left by the hot sands.
Face east.
It is exactly 25 steps from where you are standing to the end of the sandy road -- if you run east and stop just in front of the Hiker who is pacing back and forth at the ledges here, you have taken 25 steps. So all you need to do is run between these two points, over and over... And over... And over... Until the egg hatches!
Right, so go do that now. I will wait for you, just do not be all day about it then, will you mate?
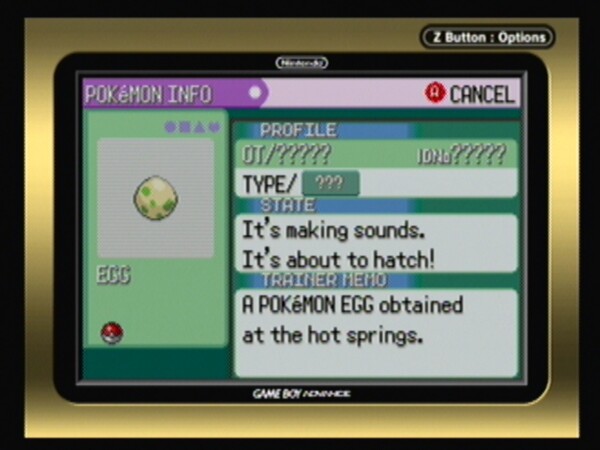
Hatching a very special egg
Done? Excellent! And may I just add that I have never seen a finer specimen of Wynaut in all of the fourteen years that I have been a Pokemon Trainer! And you know what is bonus about this little guy? In addition to being cute, it evolves into #202 Wobbuffet at Level 15, a Pokemon that in the hands of a very skilled and experienced Trainer can be just devastating!
What makes this Pokemon so special? Well for one thing there is its ability: Shadow Tag. If you are not aware, this ability prevents an opponent from running or escaping, and if you have ever spent ages trying to capture a Legendary or a Pokemon like Abra that will flee at the drop of a hat, you can easily see the value in that!
At the moment we do not have time to do anything with her (I ended up with a girl, but the gender distribution on this one is 50/50 so you can easily get a breeding pair if you like) so for now pop her into a box in your PC. We will work on leveling and evolving her when we get around to doing our preparation work after beating the Elite 4 in order to complete our Dex and prepare for chasing down a certain Legendary Pokemon who shall remain nameless for now...
(2) Wrapping up Lavaridge Town
If you have not already done so, we need to complete the things that we need to do in Lavaridge, because shortly we will be leaving, and this is not on our list of revisits in the near future mate!
So first, if you did not visit the hot springs do that now, and grab that item from the floor of the hot spring.
Next, chat up everyone in town, because you can learn some things here you may not know.
Visit the Herb Shop (the building across the path from the Gym) and chat up the old man inside, who will gift you a held item called Charcoal that is very useful for Fire-Type Pokemon, as it raises the power of any of their Fire-Type moves while they are holding it.
The counter woman at the Herb Shop will sell you her wares, but you should know that unlike Potions and the like, Pokemon do not particularly care for this sort of thing, and using it too much can have some unexpected results, starting with lowering their affection for you! I know that these items are cheaper, but in the world of Pokemon, just like in ours, you get what you pay for!
Visit the house next door to the Herb Shop and speak with the man there to learn just where that egg you were given came from! Now you know for sure - though you really already knew - where little Pokemon come from! Before you leave talk to their son by the table if you want to have one of your Pokemon learn the move Mimic. If you do not want to have that taught to one of your team, just make a mental note that this is where the move tutor is for Mimic in case you want it in the future!
This concludes everything that we need to do in Lavaridge Town -- so we are going to leave now. Before we do that, pay one final visit to the Mart and top off your kit, then head to the east!
(3) Batting Clean-Up: Gathering in any missed Trainer XP
As you read a few minutes ago, we are about to go into our second major batch-leveling event, and as that can be a rather worrisome and boring endeavor, it behooves us to backtrack and fight any Trainer Battles that we may have skipped -- either by accident or on purpose -- in our journey to this point.
This also sets us up nicely for another chore we need to do, so for now, head east jumping down the ledges -- pausing to grab the Nugget from the Treasure Ball mid-way down -- to continue on the Route, then use the north up the stairs to head back up the Mountain.
Take the scenic Cable Car ride to the top and then battle any and every Trainer that you did NOT battle on your way up the first time, and be sure to buy a few Lava Cookies from the vender outside of the Cable Car Station when you arrive, right? This is the only place you can get those, and they function as a Full Heal, removing ALL status problems from your Pokemon! A good thing to have in other words.
I suggest buying around 10 of them if you can afford it, in fact as a general rule I always try to keep 5 items of each kit type on hand if possible, so as not to run out, but as this is a rarer item that you can not buy elsewhere you should probably double that number.
Once you complete the full circle and end up back in Lavaridge Town, head back down the path to the Cable Car Station to do the next chore.
Note: To capture a Spoink you will need the Acro Bike. On the Jagged Path there is a spot on the right as you descend that has round stones that give access to the Tall Grass below. The only way to access this is to use the Acro Bike.
Simply mount the bike, move next to the stone, then hold down the B-Button and then snap the left joystick towards it to engage the jumping feature. Once you have it engaged simply hop from stone to stone until you reach the Tall Grass, then troll until you pull a Spoink and capture it! Easy-Peasy Lemon Squeezy!
After you battle the lone Magma Grunt who seems to be lost, be sure to grab the Treasure Ball to the right that has a Burn Heal in it -- it is always nice to find Free Kit!
By the time you reach town you should have added a few levels alone just by cleaning up the Trainers you missed or skipped, so good on ya mate!
(4) The Fiery Path
Now that we can use HM Strength outside of battle we need to pay a quick visit to the Fiery Path, where if you will recall there was a branch that we could not explore because we did not have Strength in our move lists.
This is your additional chance to capture Grimer and Torkoal if you have yet to do so -- so do so!
Using HM Strength you will push the boulder that is blocking the path west until it hits another boulder, then walk around, push the second one north, then the first back to the east so you can move north to the 3rd boulder, which you push west just enough to be able to get past it and head north.
Grab the Treasure Ball here and TM06, Toxic -- which is really why we came here -- then head south to the next boulder and push it south and then east against the wall. This is tricky and easy to mess up by accident, but you need to move the second boulder east then walk around the third one to head south here.
At the bottom of this dead-end area is another Treasure Ball with a precious Fire Stone in it! This is an evolution item, and the other reason we came here. Now that you have this, backtrack and leave the cave, because assuming you got all of the Pokemon from here, we are done here! Just use an Escape Rope mate, no sense in backtracking.
(5) Back to Fallarbor Town
Now that you have the Go-Goggles just run through the desert to Fallarbor town; on the way grab the Treasure Ball with its Stardust, and capture a Trapinch and Baltoy - hey why not?
When you reach Fallarbor Town go to the Professor's House and deliver the Meteor that Magma stole back to him, and in exchange for it he gives you TM27, Return. Now that this good deed has been done, there is only one thing left for us to do here -- the Soot Collection.
If you are like me, all you did was collect enough Soot to get the Red and Yellow Flutes, as those are clearly the most useful. Well, that is true, but you need the Blue one too, and the Black and White ones would be good to have... I don't care about the furniture, but if you do, get that as well, either way, but head over to the Soot Fields and begin harvesting mate.
Just to be clear this is actually a two-fer -- you are harvesting the Soot you need and in addition shaving a lot of time off of our batch-leveling we will shortly be doing in the Desert! Win-win mate! So do battle the wilds you pull in the process of gathering Soot, won't you? Be sure to Level your team equally so none get too far ahead of the others, right?
We are shooting for Level 45 over-all, but that is not going to happen here. Still you can get a good jump on the leveling.
When you have all of the Glass Blower Items, head towards Rustboro to clean-up any Trainer Battles you missed on that Route and through the Cave past the Falls and, once you reach Rustboro, head through the Cave and back to the other side of the map, get to the Desert and begin the batch-leveling process until you have your entire team at around Level 43 to Level 45!
- - - - - - - - - - - - - - - - - - - -
Desert Ruin Area Pokemon Report
-- #343 Baltoy (R)
-- #331 Cacnea (U)
-- #027 Sandshrew (U)
-- #328 Trapinch (C)
- - - - - - - - - - - - - - - - - - - -
If you are missing any of the above from your Dex you should have no troubles at all capturing them during the batch-leveling!
At this point in the game you are halfway to battling the Elite 4, which means you are pretty much half of the way through the game! That being the case there are some things you should have accomplished in getting here, and it is a good idea for us to examine that now, so you can fix anything that did not get done, right?
At this point in the game the following should be true:
You have acquired all of the following Pokemon:
-- #063 Abra
-- #304 Aron
-- #343 Baltoy
-- #267 Beautifly
-- #268 Cascoon
-- #269 Dustox
-- #309 Electrike
-- #074 Geodude
-- #118 Goldeen
-- #088 Grimer
-- #316 Gulpin
-- #314 Illumise
-- #039 Jiggleypuff
-- #352 Kacleon
-- #109 Koffing
-- #264 Linoone
-- #271 Lombre
-- #270 Lotad
-- #066 Machop
-- #129 Magikarp
-- #296 Makuhita
-- #310 Manectric
-- #183 Marill
-- #312 Minun
-- #290 Nincada
-- #299 Nosepass
-- #322 Numel
-- #274 Nuzleaf
-- #043 Oddish
-- #279 Pelipper
-- #311 Plusle
-- #261 Poochyena
-- #280 Ralts
-- #302 Sableye
-- #027 Sandshrew
-- #273 Seedot
-- #336 Seviper
-- #285 Shroomish
-- #266 Silcoon
-- #227 Skarmory
-- #300 Skitty
-- #287 Slakoth
-- #218 Slugma
-- #338 Solrock
-- #327 Spinda
-- #325 Spoink
-- #333 Swablu
-- #277 Swellow
-- #276 Taillow
-- #324 Torkoal
-- #328 Trapinch
-- #313 Volbeat
-- #293 Whismur
-- #278 Wingull
-- #265 Wurmple
-- #263 Zigzagoon
-- #041 Zubat
That is a total of 57 Pokemon mate. If you open your Dex and its summary does not say at least 57, then you did something wrong. Check the entries in your Dex and compare them to this list -- if any of these guys are missing, backtrack in the guide to their section, then go there and capture them if you want your play to stay in parity to this guide. You do not have to do this, but as I say, if you want everything to match between your game and the guide, well, you need to do it.
You should have obtained the Experience Share hold item from the President of the Devon Corp as your reward for delivering the letter to Stephen.
You should have Four (4) Gym Badges.
You should have in our bag:
-- HM01 Cut
-- HM04 Strength
-- HM05 Flash
-- HM06 Rock Smash
Your PokeNav should have the following options:
-- Hoenn Map
-- Condition
-- Match Call
-- Ribbons
And there should be 34 Registered Numbers in it.
If all of that is true than you are in great shape mate! If any of it is not true, you need to backtrack and get it fixed.
Well mate, it is time to go home. It is time to visit with your Mum, have a look at the old room, sleep in your bed, and then pay a visit to Dad in Petalburg and kick his butt! He may have known you were not ready before, but now? Now he is going to find out just how well you have taught yourself the arts of Pokemon Training and being a Trainer!
As with all of the other Gyms, when we enter there is a Gym Greeter waiting for you to offer some helpful information -- in this case he explains about the different rooms and what they mean. What we need to do is clear out the AGL's in order to clear the way for our battle with Dad!
* Speed Room
Cooltrainer Randall has a Level 26 Swellow worth 901XP and $1248.
* Accuracy Room
Cooltrainer Mary has a Level 26 Delcatty, worth 768XP and $1248.
* Confusion Room
Cooltrainer Parker has a Level 26 Spinda, worth 472XP and $1248.
* Defense Room
Cooltrainer Alexia has a Level 26 Wigglytuff, worth 606XP and $1248.
* Recovery Room
Cooltrainer George has a Level 26 Slakoth, worth 462XP and $1248.
* Strength Room
Cooltrainer Jody has a Level 26 Zangoose, worth 918XP and $1248.
* One-Hit KO Room
Cooltrainer Berke has a Level 26 Vigoroth, worth 702XP and $1248.
After you finish off the last of the AGL's return to the Poke Center to heal and save, then hit the Mart to replace any kit you used during the battles before returning to the Gym to finally face-off against your Dad, and show him your stuff!
Our Battle with the Petalburg Gym Leader
-- Battle with Gym Leader Dad --
Norman begins the battle with a Level 27 Spinda worth 490XP, and then brings out his Level 27 Vigoroth, which is worth 729XP.
His next Pokemon is his Level 29 Linoone, worth 784XP, followed by the main event, his Level 31 Slaking, which is worth 1395XP.
After you beat him your dad hands over $3100 as well as the Balance Badge, which increases the base defense of your Pokemon and allows you to use the HM Surf outside of battle. He also gives you TM42, Facade.
Just as you are wrapping up receiving your rewards and your Dad's praise Wally's father comes running in, grabs you, and drags you off to his house! He tells you how happy he is that his son's health has finally firmed up, and tells you that he credits it in part to you helping Wally to capture his own Pokemon!
As a gesture of thanks, Wally's Dad gives you HM03, Surf, which as you know is one of the most important HM's in the game! With this we can now reach areas that were blocked to us, make full use of all of the Routes, and even more important, capture Pokemon that were just out of our reach before! Thank you Wally's Dad!
-- Exploring the Towns --
If you will remember the first and last times we came through here we really did not have the time to stop and smell the roses, or even take a look around. Well, we have the time now so what do you say we pay closer attention to this new city we live near and that our Dad works in, shall we?
First talk to the people in the Poke Center to learn some things and share your profile with a collector. Chat up the folks in the Mart while you are shopping, and then say hello to the old fellow out behind the Poke Center.
See that pond there? Here is a great opportunity for us to use Surf for the first time! Surf to the other side and you will find a Treasure Ball with a Max Revive in it -- a Max Revive will awaken an incapacitated Pokemon and restore all of its HP! Very cool item, too bad you cannot buy these or I would stock up on them!
Surf back and look to the south side of town, where there are a few houses you can visit and gossip with the people who live in them.
If you surf the pond on the south side there is a Treasure Ball with an Ether in it on the left, and on the right an open area that has a hidden Rare Candy on the ground! Now that is truly an awesome hidden treasure!
Spending some time Surfing the pond here can get you a Marill if you do not already have one. Once you are done head for shore and then for Oldale Town, then turn south for home!
-- The Other Family Reunion --
Now that we have said hello to Dad, oh, and kicked his butt! Oh yeah! Uh HUH! Err.. Calm down mate... Easy there...
With that done though, it is only right that we drop in on Mum, as after all this victory we have had over Da was partly her doing. She nurtured us, she encouraged us, and she gave us that bitchin' pair of Running Shoes!
So briefly hit the Poke Center to heal and save, the Mart to stock anything from our kit we used in the Gym Battle, and then head east to Oldale Town and immediately south to Littleroot, where we will pop in to visit with Mum!
When we get there Mum has a surprise for us -- a pressie to celebrate our victory and the progress that we have made as a Pokemon Trainer! Mum is sure that we have what it takes to be a Pokemon Master, and maybe even the Pokemon League Champion -- but she knows that to get there we are going to need loads of money and XP.
Ever the practical old girl, she chooses a pressie that can actually help us to achieve those goals: an Amulet Coin!
If you do not know, the Amulet Coin is a hold item for Pokemon that doubles the amount of money you receive as your prize. Now that really is a gift that keeps on giving!
Now that we are finished visiting with Mum, pack up your bag and pop in to the Lab to say hello, and let him take a look at your Dex. He may or may not give you some advice but it is all good either way, so now that you have done the polite thing, head north to Oldale Town and continue on to Route 103, where you turn east and Surf over the river to the other side. Actually do not be so hasty in the passage -- if you Surf around a bit you can capture a Tentacool, and there are some Trainers here to fight as well!
On the other side continue east towards Mauville, but stop off at the Trick House on the way! By now the owner will have reset it with a new challenge, so head inside and solve it! When you are done, if you have not already cleared it, head up on to the Cycling Road and fight all of the Trainers there.
After you clear the Cycling Road (assuming you do) double back to the entrance so you can resume our travel on the Low Road -- and mid way along the first stretch go through the break in the fence on to the water and Surf out to the island to grab the Rare Candy in the Treasure Ball there. Now Surf back to the Low Road and continue along. I do not have to tell you to battle any Trainers you missed or avoided from earlier do I?
When you are finished cleaning up the Trainers on the Cycling Road and obtained the Rare Candy wake me up, OK? Ima take a nap.
Done? Already? You sure are fast mate! Right, so off we go to Mauville, and when we get there, hit the Poke Center to heal and save and then head east onto the short stub of Route 118, only this time as we have Surf, well, you get the idea!
If you did the batch-leveling in the Desert Ruins you may want to bear in mind that we can only control up to Level 50, and our target at the moment is Levels 45 - 46 so try to keep the team within that zone, OK? If you are already close to that, pick up some alternate Team Members form the PC and start using them to battle, as you need to level them anyway and this is a good way to do it!
-- Back in Mauville --
Well, it has been a long and strange journey, but we are once again in Mauville, only this time we have 5 Badges and a lot more experience! We also have Surf, which means when we hit the water's edge on Route 118 it is no longer going to stop us!
If you did not have the chance to spend any time in the Casino, you may want to do that now, as there are some darn useful TM's available there as prizes, and of course there are those decoration items you can use in your Secret Hideout!
Either way, Casino or not, hit the Poke Center to heal and save and then head East Young Man!
As you exit the Center you will notice a familiar figure standing in the center of the crossroads -- Wattson! Go over to say hello and he gives you a mission to go to New Mauville and turn off the Generator. Hey, no problem mate! We can do that! He even gives you the key!
Shutting down the New Mauville Generator
-- New Mauville --
A power plant that is located underneath Mauville, New Mauville can only be reached using Surf off of Route 110, its entrance located under the Cycling Road. This area did not appear in the anime series or in the previous generation of games, and is the only place in the game where Electric-Type can be found in any number!
- - - - - - - - - - - - - - - - - - - -
New Mauville Area Pokemon Report
-- #101 Electrode (R)
-- #081 Magnemite (C)
-- #082 Magneton (R)
-- #100 Voltorb (C)
- - - - - - - - - - - - - - - - - - - -
Simply head back down to Route 110 and over to the break in the fence by the entrance to the Cycling Road on this side, and Surf into the water here. You see that tree on the small island? You can turn that into a Secret Base if you like! I will wait!
Surf east under the road and you will see the entrance to New Mauville -- it looks like a cave. Go inside and use the key Wattson gave you to gain entry. This is a Wild Pokemon area just so you know, and walking or running can cause you to end up trolling them up, but on the cool side if you look at the Report there are a few we still need!
Throughout the area there are Treasure Balls -- and what appear to be Treasure Balls but are actually Pokemon! Be sure to pick up both -- as you can use the items and the XP :)
Once you reach the switch to turn off the Generator be sure to gran the Thunder Stone in the Treasure Ball nearby -- that little Stone is what makes this side-quest worth doing! Now that you have accomplished your mission, use an Escape Rope to get out!
Returning to Wattson to report your success causes him great happiness -- and he rewards you for your help with TM25, Thunderbolt! So you had some fun, scored some XP, obtained another evolutionary stone, and got a TM in the bargain -- I call that a good day!
Hit the Poke Center to heal and save, the Mart to replace any items, and then the road to continue our adventure!
Special Warning: You cannot help but collect a bag full of items as you play the game, and that is the point to this warning, a bag FULL of items, you see? Your pack will only hold so many items, so every now and then you need to sell the items you know you do not want or need, and visit the Poke Center or your house to deposit the items you want but will not immediately use in your home PC storage system! That way you keep some open space in your pack, and are not forced to abandon items you find due to your pack being full!
-- Back on the Road --
At this point you have taken care of the side-quest for Wattson, cleaned up your bag, had a heal and save, so pop out into the street and head east onto the stub of Route 118 and Surf over to the other side!
When you land on the beach walk over and chat up the Fisherman, who will give you a Good Rod! Excellent! This now opens the door to a dozen or more Pokemon we could not capture before! Nearby the Fisherman is a cameraman and reporter -- go chat them up to have yourself a televised battle with them. Another chance to be on TV -- you are almost famous...
After the interview begin to work your way east, fighting the Trainers you encounter along the way, until you reach the grass, where you get a surprise visit from Steven! He gives you some confusing advice and then walks off... Hit and run Buddha?
If you cut the tree above you can get some Berries we do not have yet, and then head east to the Berry Master's House!
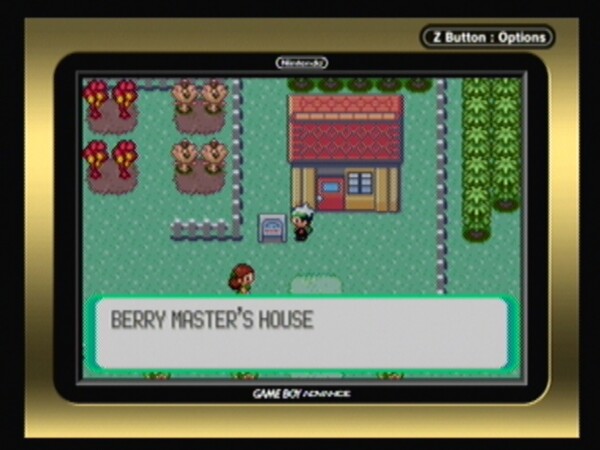
A visit to the Berry Master's House
-- The Berry Master's House --
A few things you should know -- this is the only place in the game with what amounts to a grove of Berry Trees -- so if you plan on growing particular berries in quantity this is the place to do it!
You should know that you can get a common berry from the Berry Master once every day just by chatting with him. The other thing you should know is that you can score rare berries here as well!
To obtain the rarer berries simply visit the Berry Master's House and speak with his wife inside -- she will ask you for a phrase, and what you say will directly lead to you receiving a specific berry.
The rare berries are only obtained this way, and most Trainers hold on to then until they have reached a place in life or the game when they want to take a break, and then simply spend their play time raising berries, often right outside of this house in that grove of trees!
You can only get a berry from her once a day -- so you should keep track of when you spoke to her last and what berries you have obtained, right? For your convenience, here is the list of rare berries and their corresponding phrases:
Berry Number -- Berry Name -- Phrase
------------------------------------------------
31. Spelon: GREAT BATTLE
32. Pamtre: CHALLENGE CONTEST
33. Watmel: OVERWHELMING LATIAS (Latias is in your Dex)
34. Durin: COOL LATIOS (Latios is in your Dex)
35. Belue: SUPER HUSTLE
That is pretty much all that you need to know, other than how to grow berries.
The simple instructions are to plant a berry, then water it, then return every so many hours and if the ground looks fry, water it some more. When the berries appear on the tree harvest them. If you did a good job there will be more than just one or two berries per tree.
A complete berry manual is beyond the scope of this guide -- but there are some excellent Berry Guides on the Web, so Google is your friend here!
-- Route 119 --
Backtrack to the crossroads to the west and head north, and as you proceed you will notice a new type of Tall Grass that you have not encountered before. Trainers are concealed pretty well in here, so you may have to hunt around to get them all, but battle the Trainers here before you cross to the road on the other side, right?
- - - - - - - - - - - - - - - - - - - -
Route 119 Area Pokemon Report
-- #352 Kecleon (R)
-- #264 Linoone (C)
-- #043 Oddish (C)
-- #357 Tropius (U)
-- #263 Zigzagoon (C)
- - - - - - - - - - - - - - - - - - - -
The only one you should need is Tropius -- though I suppose it is possible that you have not captured a Kecleon yet, but the others you should already have! A little effort is needed to capture both, but once you have, continue along the Route, battling the Trainers you encounter to add several rare entries to your Dex!
Some areas of interest on this Route -- a house full of bird-type Pokemon -- there because the boy-half of the relationship misunderstood the whole Pokemon and Fly thing, assuming that to do it you needed a bunch of Pokemon that could Fly so that you could hang on to them!
Inside the house is the girlfriend, and you really should talk to her mate, because she tells you about something that may not actually be just legend and myth.
As you head north on the Route you will have the opportunity to pick up some more berries, and XP, and hey -- berries and XP, that is a good combination! You will also battle your first Pokemon Ranger -- you don't know what a Pokemon Ranger is?! You need to expand your Pokemon Game Collection mate!
If you have the racing bike (as opposed to the Acro one which is what I have) you can jet up the slopes here, otherwise you need to use the stairs. You will shortly be introduced to a new type of Trainer - the Ninja -- who is really good or really bad (depends on your PoV) at hiding in plain sight.
When you finally make your way out of the wilderness a large modern structure of glass and steel will appear -- the Weather Institute! But what is this?! Team Aqua! Oh, this cannot be a good thing!
Shutting down Team Aqua Again!
-- The Weather Institute --
The very first thing that you should do is sneak in to the left hall and use the bed there to rest up, and then save. That way you start on an even-footing and, if things go horribly wrong you can reload :) You will also note that there is a PC here that is connected to the PokeNet!
Talk to the child here and learn that everyone is upstairs... Well, not everyone...
Start out this side-quest by beating up every Aqua Grunt you can find! Why? Because when you solve this mystery they all leave, and you lose your chance at some easy XP. I went ahead and put some of my alternate team members on my active team just to get this XP so I don't want it lost and you do not either!
When you finally reach Aqua Admin Shelly she is downright insulting! Are you going to stand for that?! I did not think so!
After the battle a messenger runs in to warn Shelly that Team Magma just moved through the area heading for nearby Mt. Pyre! The Aqua crew immediately set out for Mt. Pyre, their plans here ruined by us! Way to go us!
The scientists give you a new Pokemon as their way of saying thank you -- so bonus! A new Dex Entry and a pretty cool Pokemon in the bargain!
We are pretty much done with this side-quest now, so head back downstairs and use the bed to rest up, then save and leave the Institute. The bridge that was previously blocked by Team Aqua is not blocked any more, so we should cross over... Because hey! Look! It is May! And she wants to battle!
-- Another Rival Battle --
Like you May has been leveling her team, but unlike you she has not been quite as serious about it, which means that even with your alternates on your team you still should have a major edge against her!
She opens with her Level 29 Lombre, worth 876XP, followed by her Level 29 Slugma worth 484XP, and finally her Starter, a Level 31 Marshtomp that is worth 949XP. May gives us $1860 in prize money, but in addition to that she gives us a pressie! HM02, Fly!
Now that is one of the more useful HM's but we cannot use it until we get our next Gym Badge. Hmm, I really want to use Fly to visit me Mum... Well there is nothing for it then! Head for the next Gym now!
Lucky for us the city is a dozen steps away up the path :)
First thing to do is hit the Poke Center, heal and save, then chat up the Trainers in the Center. Next hit the Mart, replace our kit and, hey! We can finally buy Ultra Balls and Hyper Potions! Excellent!
On your way through the town towards the Gym chat up the Trainers and people you see. In the first treehouse is a Trainer who wants to trade a Plusle for a Volbeat -- both are relatively hard to get, but I think that they are getting the better end of that deal, so I said no. You can do the trade if you like...

A City in the Sky - Treehouses in Fortree
In the next treehouse is a Trainer who will teach one of your Pokemon the move Sleep Talk if you want - it is not a bad move, but if you do not know for sure which you want to have it, best off saying no and then coming back later. The woman here will give you TM10, Hidden Power, if you can guess correctly three times the way she has palmed a coin -- Right Right Left worked for me :)
For the moment ignore the ladder that goes down to the Gym - that path is blocked by something invisible so you cannot go there straight away anyway! Instead go through the rest of town and out the Route on the other side!
-- Route 120 --
Route 120 connects Fortree City to Route 121, which will take you to Lillycove City, Mt. Pyre, and the Safari Zone, so that makes this a pretty important Route, wouldn't you say?
- - - - - - - - - - - - - - - - - - - -
Route 119 Area Pokemon Report
-- #359 Absol (U)
-- #339 Barboach (C) Fishing: Good Rod
-- #118 Goldeen (C) Fishing: Good Rod & Surf
-- #352 Kecleon (R)
-- #129 Magikarp (C) Fishing: Old Rod
-- #183 Marill (U) Grass & Surf
-- #262 Mightyena (C)
-- #043 Oddish (C)
-- #261 Poochyena (C)
-- #273 Seedot (R)
- - - - - - - - - - - - - - - - - - - -
Right now you don't care about anything except heading along the Route until you run into that invisible object again when you try to get a Treasure Ball -- and then again on but this time Steven is here! He helps you to see it for what it is, and mate, if you do not have one of these yet, capture it!
Using the Devon Scope Steven reveals that the object that has been tormenting you is in fact a Kacleon! Now as I say, if you do not have this, capture it now. Steven gives you the Devon Scope -- and now that we have that, beat feet back to town and hit the Poke Center to heal and save, and then go clear the path to the Gym mate!
-- Fortree City Gym --
As you enter the to be expected Gym Greeter is there, and he tells you about the Gym. The Leader is Winona, and she is in to Flying-Type Pokemon.
Before we can take on Winona we need to take care of the AGL's, naturally, so let us do that now!
Bird Keeper Humberto has a Level 30 Skarmory worth 1080XP and $960.
The next battle can be fought as wither a Double or two Single Battled depending upon how you approach them. This is your call!
Picnicker Ashley has a trio of Level 27 Swablu worth 427XP each, and $432.
Bird Keeper Jared has a Level 27 Doduo worth 555XP, a Level 27 Skarmory worth 972XP, and a Level 27 Tropius worth 976XP and $864.
The next fight is a Double as there is no way around it..
Bird Keeper Edwardo and Camper Flint have Level 29 Swellow and Doduo, worth 502XP each and 297XP each respectively for your two Pokemon, followed by a Level 29 Xatu and Level 29 Pelipper worth 531XP each and 508 XP each respectively for your Pokemon. They pay a prize of $1392.
Bird Keeper Darius has a Level 30 Tropius worth 1086XP and $960.
After defeating Darius you should return to the Pokemon Center to heal and save, hit the Mart to replace any Kit, and then return to the Gym for the Leader Battle!
The Fortree City Gym Leader Battle
-- Winona Gym Battle --
Your battle with Winona is probably not going to be one of the easiest Gym Leader Battles you have fought, but if you are prepared -- and you have the right Pokemon in your team -- you will do OK. I chose carefully, and actually used two of my team alternates for this battle, because they were the best fit. That is what alternates are for after all, to be brought in when they will be a better fit.
In this case they were not fully leveled to the team level, but that was not a problem as it turned out because their Types and move sets were right!
Winona opened the battle with her Level 29 Swablu that was worth 459 XP.
Her next was her Level 29 Tropius worth 1050XP!
She followed that with her Level 30 Pelipper that was worth 1053XP.
Her Level 31 Skarmory came next, and I switched to the team alternate that was specially chosen specifically for this battle, and earned a nice 1116XP for my efforts!
Her final was her Level 33 Altaria, which was worth 1329XP. I switched back to the main alternate for this battle.
The reward for this battle was $3300, and the Feather Badge, which in addition to allowing us to command Pokemon up to Level 70 (including traded Pokemon) also allows the use of HM02 -- Fly -- outside of battle. She gifted us with TM40, Aerial Ace, as is the tradition for Gym Leader Battles.
Obviously raising the control level is important, but having Fly available? That is just major.
Now that the battle is over and you have earned your 6th Gym Badge go ahead and return to the Pokemon Center to heal and save, then hit the Mart to replace any of your kit that you used in the battles.
We will be indirectly heading for Lilycove City next, as that is the logical place to base our operations out of as we do the side-quests that are on our plate and the main story -- and hey, if any of the towns is a genuine big city here is it Lilycove!
First though we need to wrap up some odds and ends and take care of the next few Routes, so that is our plan!
Back on Route 120 head to the steps down to the Treasure Ball that we were blocked from -- now that we know what it is, we can use the Scope to reveal it! If you did not capture the one on the bridge with Steven, or this one is the opposite gender, then definitely capture it now as well! If it is the opposite gender you have a breeding pair!
Captured or killed, head down to the bottom of the stairs and grab the Nest Ball, then drop into the water and Surf to the far end where you will find the entrance to a a cave called "The Scorched Slab." Inside is a Treasure Ball containing TM11, Sunny Day, that you really should grab now!
Backtrack to the stairs and continue along to the path through the Tall Grass and over the bridge. There will be a few Trainer Battles, but eventually you will reach Route 121.
-- Route 121 --
The main route between Fortree City and Lilycove, Route 121 terminates at the juncture of Route 122 and he Safari Zone.
- - - - - - - - - - - - - - - - - - - -
Route 121 Area Pokemon Report
-- #044 Gloom (R)
-- #352 Kecleon (R)
-- #262 Mightyena (C)
-- #043 Oddish (U)
-- #261 Poochyena (C)
-- #353 Shuppet (C)
-- #278 Wingull (U)
- - - - - - - - - - - - - - - - - - - -
There should be a few Pokemon here that you need, so look to getting those before you continue too far along the Route!

The Safari Zone sits on Routes 121 and 122 like a Beacon
As you approach the Safari Zone you see a group of Team Aqua Grunts heading towards Mt. Pyre -- just ignore them for now, there is no timer running on that quest, and we have other things to do!
Head past the Safari Zone for now -- that is one of the areas you will be returning to later in the game, after you take out the Elite 4!
-- Lilycove City --
Welcome to Lilycove home of oompa music, the Lilycove Department Store, Contest House, Pokemon Trainer Fan Club, the Cove Lily Motel, and the Move Deleters House!
So let us hit the high points since our stay here is mostly utility-minded, and we need to be able to visit the Department Store, which May is blocking!
We have another battle with May, and note that she is up to four team members now! This battle goes almost exactly the same as the previous one, and once we defeat her she flies off.
Head into the store to buy what you need, and then hit the Center to heal and save. Now we need to head back to the Safari Zone and then head south on to Route 122, as we need to deal with the Aqua/Magma Question now!
-- Route 122 --
- - - - - - - - - - - - - - - - - - - -
Route 121 Area Pokemon Report
-- #129 Magikarp (C) Fishing: Old Rod
-- #072 Tentacool (C) Surf & Fishing: Good Rod
-- #278 Wingull (C) Surf
-- #279 Pelipper (R) Surf
-- #320 Wailmer (C) Fishing: Good Rod
- - - - - - - - - - - - - - - - - - - -
From the pier below the Safari Zone surf around the Mountain to the far side and then come ashore on the narrow spit of land at the cave entrance. Enter Mt. Pyre and work your way to the western exit, where you find yourself outside on a ledge.
Follow the ledge to some stairs and go up, then keep going to the Treasure Ball, which has TM48, Skill Swap, in it. Take that and continue along the path west, up another flight of stairs, then east and up again. At this point you encounter that odd smoke -- grab the Max Potion from the Treasure Ball then cut back around and up the other stairs, all the way to the top, where you will zone.
Just moments too late to stop Team Aqua!
-- Confronting Team Aqua --
You know you are in the right place because ahead of you are Team Aqua Grunts!
When you reach the top you find Aqua's Leader Archie has what he came for, and they are leaving. The Caretaker Couple tell you what they can, and give you something that they found after Magma's visit - a Team Magma insignia!
To be clear, it is a good thing that the emblem was left behind because with it we can gain access to the Magma Hideout! And we need to do that soon -- those two orbs are the only things that keep the world's weather in balance! The further they are separated the worse the weather will grow, and it could potentially be an Armageddon situation if we do not get those orbs back on top of this Mountain!
No pressure or anything... I am just saying...
-- Onward Through the Fog! --
Okay, unlimber your wings mate, and Fly to Lavaridge Town now. When you land use the Poke Center to heal and save and then head directly for the Jagged Pass now via the Cable Car Station!
When you reach the upper Station -- isn't the ride in this thing lovely? -- exit and zone to the Jagged Pass, heading straight down the center jumping from ledge to ledge. When you reach a certain point, sensing the Magma Insignia in your pack, the computer that controls security for the Magma Headquarters will open a secret door in the side of the Pass -- go in it!
The path you need to follow is really obvious, but there are some extras you can pick up along the way! Use Strength to move the boulders and continue north. You will have the opportunity to capture a Graveler here -- I suggest you do that!
Follow the path around -- it only goes one way -- fighting as needed until you reach the area with the stairs and an exit. Take the exit to the next area and head east, going down and then west to fight the Grunts there.
Continue down the stairs once you have beaten the pair of Grunts on this level, head to the level below where there are patrolling Grunts and kill them! Just kidding -- you cannot kill them, but you can defeat them and you should!
Continue down the stairs and you will reach a point where you can go into a cave or further down -- further down is where we will go in a bit, but for now enter that cave to double back to a different part of the previous area.
Head all the way to the right, ignoring the ladders here, and go up and up again, then zone out on to a narrow ledge. Follow that around to where you battle a Grunt, then keep going to the end and grab the Rare Candy from the Treasure Ball we saw when we first entered the HQ!
Now double back and zone to the previous area, and take the next set of stairs on the way back to fight some Grunts and grab a Max Elixir from a Treasure Ball.
Continue west to the next ladder and a Double Grunt Battle, then grab the Full Restore from the Treasure Ball ahead before backtracking and zoning to the main area and heading down the stairs south and zoning to the next area.
Follow the ledge and battle the Grunt before you go down the ladder here; when you get to the bottom head east then south instead of zoning immediately. Battle the Grunt in the corner and then west to grab the Treasure Ball with its Nugget. Zone out the door that is south of you and follow the path, battling the grunt at the turn.
This grunt will accidentally reveal that the Legendary Pokemon Groudon is the subject of their efforts -- thank him then defeat him! Now continue north for another Double Battle, and a single battle a little further on.
This Grunt tells you that Groudon will awaken soon -- clearly when that happens Team Magma has something planned, but what?
In the far corner is a Treasure Ball with a Max Revive in it so grab that before turning south and reaching the Magma Leader, who is standing at the Lava Pool watching the sleeping Groudon!
Before you can stop him he triggers the Blue Orb, waking Groudon! But what he is expecting to happen does not happen, instead Groudon flees! Maxie blames you, and attacks!
After the battle zone and grab the Escape Rope from the Treasure Ball and use it! As soon as you are out, Fly to Slateport City!
-- Slateport City --
Hit the Poke Center to heal and save then run to Captain Stern's drydock above and right of the Center, where you will find a crowd hanging about for Stern's press conference about the new exploration submarine they have just completed.
As the camera crew departs and you think everything is winding down, Team Aqua swipes the sub! As they are escaping the leader gives you a clue as to where they are going -- arrogant SOB isn't he?
Run outside and immediately Fly to Lilycove City, then run to the beach and out into the water, then Surf north to the entrance to the Aqua HQ!
-- Aqua Hideout --
This is pretty straight forward -- just fight your way along the linear path using the warp panels. Basically there are two main paths, one leads to the confrontation, the other to a lot of fights. It really does not matter which you follow first as you will want to clear all the battles for both! Have fun with this!
When you reach the room that is separated by a narrow water channel defeat the Grunt and then take the bottom left teleport pad to a room full of teleport pads. Work your way through those to the office of the Team Aqua Leader and grab the Master Ball that is on the floor there along with a Nugget, a Voltorb, and an Electrode. If you need one or both, capture them instead of KO'ing them, right?
Backtracking to the room divided by the water channel, head east for a Double Battle then use the pad there to go along another linear path that includes pads. There will be a single and then Double Battle, and finally you reach the sub pen, where you have a battle with Aqua Admin Matt!
It seems that this battle was intended only to delay you while the boss departed in the sub...
Use the bottom warp panel on the right - then go south and you are in the room where you entered this place from. Surf south and out, and then
As soon as you are outside Fly to Lilycove, go to the Poke Center, heal and save. Hit the Department Store to replace any kit you used, then hit the beach and Surf to Mossdeep City (check your map). Note that at this point we are not really interested in side-trips, we need to stop Aqua!
First I want to say good on ya! You have come a long way in a short period of time. Before we hit the Gym to get our next badge we need to head to a house to the north-west, where the Fishing Guru lives. Talk to him to get the Super Rod, the last Rod we need for the set.
We are in streamline mode now, with our sights set on defeating Team Aqua, stopping the end of the world, and then defeating the Elite 4 in that order, the rest can wait! So get that Rod now!
Got it? Good! Now go to the Gym!
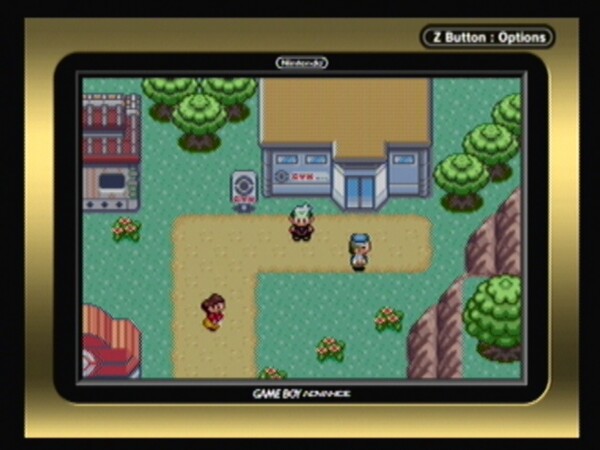
The Mossdeep City Gym, a Twins Gym
-- Mossdeep Pokemon Gym --
As with all of the previously visited Gyms we are met by the Gym Greeter as we enter. He tells us that this is a Psychic-Type Gym, and suggests that Fighting and Poison Types will work best. Good info, really.
Now let's take out the AGL's first!
Psychic Preston has a Level 36 Kirlia worth 1080XP and $864.
Psychic Maura has a Level 36 Kadabra worth 1117XP and $864.
Psychic Blake has a Level 36 Girafarig worth 1149XP and $864.
Psychic Samantha has a Level 36 Xatu worth 1318XP and $864.
Psychic Nicholas has a Level 36 Wobbuffet worth 1168XP and $864.
Hex Maniac Kathleen has a Level 36 Kadabra worth 1117XP and $864.
Psychic Macey has a Level 36 Natu worth 562XP and $864.
Gentleman Clifford has a Level 36 Girafarig worth 1149XP and $2880.
Psychic Virgil has a Level 36 Ralts worth 540XP and $864.
Gentleman Nate has a Level 36 Spoink worth 685XP and $2880.
Hex Maniac Sylvia has a Level 36 Meditite worth 702XP and $864.
Psychic Hannah has a Level 36 Kirlia worth 1080XP and $864.
-- Mossdeep Gym Leader Battle --
Once you have managed all of the AGL's it is time to take on the Gym Leaders so head to the Poke Center to heal and save then head back to the Gym! You did notice that I said "Leaders" and not "Leader" right? Yes, there are two -- twins named Tate and Liza.
The best advice that I can give about this Gym Battle is that you have to take the initiative and keep it -- if you do not and they can get it, you will face an endless cycle of confused and sleep states, and once that happens it is pretty much over. Aggressive play is the only solution to this because these two really know how to use their Pokemon!
Before you begin this battle -- while you are standing in front of the pair -- save your game! Chances are you are going to be re-fighting this until you find the right combination of your team members and moves to actually win it, and in between you will be a bit on the frustrated side. This is, hands down, the toughest Gym Leader Battle in the game so far!
The battle starts with their Level 41 Claydol, and Level 41 Xatu, worth 829XP each and 750 XP each respectively, followed by their Level 42 Lunatone, and Level 42 Solrock, worth 675XP each and 675XP each respectively.
Your reward for winning this battle is $8400 (double with a held item), the Mind Badge (your 7th) that will enhance your Special Attack and Defend stats and allows the use of the HM Dive outside of battle -- an HM you are going to need soon!
Their gift to you -- as is the tradition -- is TM04, Calm Mind, and the satisfaction of winning one of the toughest Doubles Battles in the game!
Stopping Team Aqua from getting the Rocket Fuel!
-- The Rocket Fuel Dilemma --
After you defeat the Mossdeep Gym Leaders head to the Poke Center to heal and save, and then head towards the eastern-side of the island, and you will notice a large group of Team Magma Grunts surrounding their Leader as they head north towards the Rocket Launching Facility. This cannot be a good thing!
Following them up the stairs you arrive at the entrance to the Mossdeep Space Center to find a tranquil and normal scene outside, but when you step through the doors to the building you discover that inside it is anything but peaceful!
The staff at the Center are all grouped at one end of the room, being held prisoner by elements of the elite Team Magma Grunt Brigade! This cannot be allowed to stand!
Before you engage the Grunts in combat, step over to the scientists to learn what has happened -- as you know, a little information can often make all the difference! The first bloke you chat up fills you in on the situation, and then unexpectedly hands you a very rare, very valuable stone-based evolution item, a Sun Stone. I hope you thanked the man -- these things are hard to find and very useful for the evolution of Pokemon that otherwise cannot evolve! It will certainly come in handy later!
After you chat up the other prisoners it soon becomes obvious that you need to defeat the Grunts and make your way upstairs to stop the Magma Leader from stealing the Rocket Fuel. While you have no idea what he wants it for, you know two things for certain sure: it is not to launch a rocket, and no matter what the reason actually is, it will not be a good thing for humanity or the Pokemon of the world!
-- First Floor Battles --
The Grunts here are pretty predictable when it comes to fighting, and strategically there is only one you really need to battle -- the one blocking the stairs to the next level of the Center. Once you get past him, you will be able to reach the Magma Leader and, with any luck, stop him before it is too late.
Now having said that, these guys represent a nice chunk of XP -- and assuming that you still need to level your alternates (or your main team if you cut short your batch-leveling in the Desert earlier) you can use that XP. That being the case, it would be an idea to battle all of the Grunts in the room before you battle the one blocking the stairs.
With the three Grunts defeated, head over to the one by the stairs and take him on, easily defeating him and clearing the final impediment to progress towards the Leader -- or so you thought!
-- The Space Center Second Floor --
When you step through the doors at the top of the stairs you find yourself surrounded by a trio of Magma Grunts, each seriously meaning to stop you. Fortunately they are willing to fight you one-on-one instead of all at the same time, so you quickly beat them down. Over in the far corner you can see the Leader and someone who looks familiar to you but you cannot hear what is being said.
After battling the trio, check with the scientists to be sure that they are OK and then move down to the corner to discover that the familiar face you glimpsed is that of Steven -- past World Champion Pokemon Trainer, Master Breeder, member of the Elite 4, President of the League, and perhaps one of the most gifted Pokemon Researchers alive today!
Steven wants your help in dealing with the Leader, who it becomes clear is refusing to listen to reason, leaving you no option but to help Steven beat some sense into him!
This is a unique battle you are about to fight -- with the Leader having a full team of six Pokemon, while Steven and you must choose the three Pokemon from each of your teams that you think will best aid you in the fight to come. Once you have selected your three -- and he his -- the six together make up the opposing team that will face-off against Team Magma's Leader.
Between the last time we battled him and now Maxie has come a long way with his team, and he is a bit better at strategy, but between you and the greatest living Pokemon Trainer/Researcher in the world, well, it really is not a very fair battle, and the outcome is clear almost from the start.
Once he has been defeated, as unlikely as it seems, reason finally works its way into the situation, and the seed of doubt that has been planted germinates into growing concern about what Team Aqua has planned. This is where we leave off with Magma, and Steven asks you to visit him at his home, which is here, on the island, and then he leaves as well.
You make your way to his house, a spartan almost monk-like cottage on the far western side of the island north of the Poke Center, and there he gives you the gift of HM08, Dive, an HM that will allow you to dive to the bottom of the sea and move around there -- which is exactly what you need to be able to visit the next city on our adventure! Wow that worked out well! It is almost as if he knew what we needed and was ready to give it to us!
-- After Action Report: Team Magma --
As you are aware, Emerald has two main plots and a number of sub-plots in the game. The first Main Plot is you -- your desire to become a Master Trainer, work your way up the ranks, obtain all 8 GYm Badges, and then challenge the Elite 4! That is the basic plot for all of the games in the series regardless of the generation, so it should be a well-known legend to you.
The other Main Plot is the struggle between Team Magma and Team Aqua, and the dangers that this struggle presents to the world of humans and Pokemon in the Hoenn Region. The events that you have just completed in this part of the game bring to a close half of that story line, with the other half, Team Aqua, remaining for us to solve.
At this point in the game you should have seven (7) Gym Badges, you should be able to control Pokemon up to Level 70 including those traded to you, and you should have all of the HM's except HM07.
Your team should be very well developed and familiar to you, and should consist of a core group of 6 Pokemon that are your "A-Team" and a handful of additional Pokemon of different Types that you rotate in and out of the A-Team as needed that are classified as Alternate Team Members (as opposed to B-Team Members, who they are not, as your B-Team is the one you build to battle human Trainers in real life).
Both your Main Team and Alternates should be very close to Level 45, as that is the target Level for your Team at the moment. If they are not, or there are some that are lower, now is a very good time to revisit the areas where you may have missed Trainer Battles, and to make use of the Match Call device that is installed in your PokeNav Unit.
Spend the time now to level your team and alternates so that you are ready for what is coming, because very quickly the level of opponents you will face will start to climb, and failing to put in the work and get your team to the target level will cause this game to grow exponentially more difficult for you!
Spend some time now training and leveling, and then return to the Guide when you feel you are ready to continue our adventures in Hoenn!
Our next destination is the Sea Floor on Route 127, which is where Team Aqua is currently up to no good. When you are ready, and you have taught one of your team members the new HM, Fly to Mossdeep City, hit the Poke Center to heal and save, then the Mart to top-off your kit and sell off anything you do not want or need so that your pack does not get so full you cannot pick up new items.
Now head down to the water, consult the map to get your bearings, and Surf to Route 127!
-- Route 127 --
This Route is best known for the fact that its underwater passages contain no seaweed, which reduces the presence of Wild Pokemon. Nobody knows what caused the seaweed here to die, or the odd concentrations of Wild Pokemon found in different areas of the Route.
- - - - - - - - - - - - - - - - - - - -
Route 127 Area Pokemon Report
-- #129 Magikarp (C) Fishing: Old Rod
-- #279 Pelipper (R) Surf
-- #319 Sharpedo (C) Fishing: Super Rod
-- #072 Tentacool (C) Surf & Fishing: Good Rod
-- #320 Wailmer (C) Fishing: Good Rod
-- #278 Wingull (C) Surf
- - - - - - - - - - - - - - - - - - - -
Surf to the large darker area on the surface and then Dive to the bottom. From here, follow the path south until you come to a cave entrance, giving access to the well-concealed present hideout of Team Aqua and, no surprise, the present location of the Legendary Pokemon that they hope to awaken and use to attain their goal of turning the world into one large sea.
You must work your way through the hideout, battling Grunts, as you search for the Aqua Leader, at which point you must succeed in convincing him that his plans are not just insane, but could destroy the world!
Leaving the Poke Center you run to the beach and the water's edge, jump in and use Surf to head a surprisingly short distance south, where you encounter a dark patch on the surface of the ocean! Using the new HM, Dive, you slowly descend into the mysterious depths, finding yourself at the start of a narrow canyon-like path filled with shadows.
As you work your way south you will notice the barren almost lifeless surroundings have an almost foreboding feeling to them, and it is not relieved when the path turns to the east and then south again for a short jog before turning west. As you are about to continue along to the west, you notice a large square that is lit up -- an underwater cave? Moving closer to investigate you see that it is precisely that, an entrance to an underwater cave and what is more, laying on the bottom in the soft sand is the missing submarine!
Surfacing in what turns out to be a very large underwater cavern with extensive -- and mostly dry -- tunnels and open areas, you head to the sandy beach and begin to search, finding evidence that humans are here rather quickly. Before you know it you are once again engaged in battle with a Team Aqua Grunt!
Constantly on the lookout for opportunities to pick up extra experience for your team, you view these evil doers as a convenient source for both XP and a little money! They view you as something that must be destroyed - but hey, at least you both understand each other, right?
Getting to the heart of the Aqua Base
-- An Underwater Lake --
Using your HM moves you work your way past impediments and clear out the different sections of the cavern, and as you move from area to area you soon find yourself facing a huge underwater lake with rapid currents visible on the surface!
It is tricky because you must avoid being forced into the center opening, which will eject you back to the cavern where the submarine is sitting beneath the water, with your goal being instead to reach the opening on the far side of the lake.
-- The Great Boulder Puzzle --
After you defeat the Aqua Admin and her Grunt Boyfriend you are confronted by a puzzle of boulders that are blocking your way. This is really simply a logic problem, but rather than spend the next half-hour working this out for yourself and having to reset it by leaving the chamber and returning, you can simply do the following:
(1) Facing the first three boulders, move the left and right ones one space north.
(2) Now push the third boulder (what was the middle one) to the left one space, and step into the gap in the line of boulders you have created.
(3) Push the center boulder (the one you are faxing to the north) one space north and ONLY one space! Now carefully step into the space it was previously occupying.
(4) Push the boulders on your left and right to the left and right one space.
(5) Now step one space right and push the boulder to the north one space north; step two spaces left and push the boulder to the north one space north.
(6) Step one space north and push the boulder to your right one space east (to the right) thus clearing the path to the exit! Good on ya! You made that look dead simple mate!
Inside the new cavern walk to the east and pick up TM 26, Earthquake, from the Treasure Ball. That is a very powerful and useful TM!
All that is left for you to do now is head to the south until you find the Legendary Pokemon Kyogre asleep in the center of the lake here. Before you can think of what to do, the Team Aqua Leader -- Archie -- comes running up, and confronts you. A battle now ensues in which you handily pound his team of Pokemon into the mud at your feet.
Before you can stop him, in a panic Archie triggers the orb, awakening Kyogre, but rather than provide him with the ability to control the Legendary beast, all the orb does is lay in his hand, impotent, as the beast escapes! Archie is very disappointed!
By now you should have figured out that you are going to have to deal with this pair of Legendary Pokemon -- the two groups have unleashed what could easily end up being a world-altering combination of opposing forces, and it is our job to deal with that.
When you get outside Steven shows up -- he is not happy but you cannot blame him! Heck, we are not happy either! Still he has his say, and you have to make a decision now: follow hom to Sootopolis now, or Fly to one of hte towns with facilities, heal, restock your kit and THEN follow him to Sootopolis. It is your call, but I followed him straight away.
You already have the Pokemon for these Routes, so just Surf your way north then west along Routes 128, 127, and then 126 -- either avoiding the trainers or fighting them as you choose (I avoided them) -- and fighting or running from the wild encounters (I ran because I was in a hurry to get to the city).
Look on the map to get your bearings and then head to the south side of the volcano that Sootopolis is inside of -- there is deep water marker here, so dive down and you will see the cavern entrance ahead -- go inside then surface.
Entering Sootopolis City
As soon as you surface you will see the two Legendary Pokemon square off and battle -- there is nothing you can do about that right now, so go around them to the north where you will find Maxie and Archie at the Pokemon Gym.
They are both horrified at what they have done -- but hey, that is why we build prisons -- so horrified criminals have someplace to stay and be really... err.. Yeah. To the right is the Poke Center -- go there to heal and save if you have not already done so, okay?
There are townsfolk blocking your path to the deeper parts of Sootopolis at the moment, but that is okay, because we have something that we actually need to do -- so head west (left) now past the Gym to another spit of land where Steven is waiting for us. Once we step on to the land and approach him he tells us that our being here means that we are involved in this crisis -- and we should follow him as he has someone that he wants us to meet!
-- Cave of Origin --
- - - - - - - - - - - - - - - - - - - -
Cave of Origin Pokemon Report
-- #042 Golbat (U)
-- #302 Sableye (U)
-- #041 Zubat (C)
- - - - - - - - - - - - - - - - - - - -
Follow him we do, and he leads us to meet the Legendary Trainer Wallace, who used to be the Sootopolis Gym Leader until recently. After a brief conversation with Wallace in which pretty much nothing is explained, he asks if you might know where the current whereabouts of one Rayquaza might be? Well, sure we do! He lives in the Sky Pillar -- doesn't everybody know that?
Apparently not...
Once you tell Wallace where the peacemaker can be found he does a vanishing act -- looks like we have to get to the Sky Pillar on our own... So go ahead and backtrack to the entrance, where you can say hello and goodbye to Steven -- who has heard of the Sky Pillar but has never actually been there it seems. Well, we'll have to find it for ourselves then!
If you have not already done so, now would be an excellent time to hit the nearby Poke Mart to stock up on kit, then cross to the other side of town, heal, and save. Done? Excellent!
If you have not played either of the two previous games then you are not aware that Rayquaza is the G Golden Ticket here -- he is the one Pokemon that can stop Kyogre and Groudon from destroying each other -- and the world. The trick is going to be capturing Rayquaza in order to make that happen.
After we heal and save -- and assuming that we have finished restocking our kit -- what we want to do is leave Sootopolis via the undersea cavern, and then head east until we can go south to Route 129. As you exit the cavern and ascend back to the surface and follow the route you will encounter the trainers that I dodged -- if you did not dodge them as well then no worries, but if you did, now is a good time to battle them if you like. You can always use the extra XP.
After you exit the underwater cave you pop up on Route 126. Head east and a little north and you enter Route 127, at which point you want to head south as soon as you can, following the deep water trench that is marked in dark blue on the surface south and east. You pass through a very narrow section of Route 128 and find yourself on Route 129 with the path now back open to the west -- which is a good thing as that is where we need to go!
Heading west on Route 129 you will encounter a few swimming Trainers you likely have yet to battle -- so go ahead and battle them as avoiding them is rather hit-or-miss anyway. When you pass through the narrowing cut you will battle Triathlete Allison, after which you pass through the narrowest point west then south, and cross from Route 129 onto Route 130.
Route 130
You should already have the Pokemon that can be caught on this rouute, but there are a few Trainers here for you to battle -- Swimmer Rodney has a Level 34 Gyrados that can be fun to battle, then for quite a distance you will not see anyone but will likely pick up a few wild encounters.
Eventually you encounter two Trainers swimming north and south on the path -- you can battle them one at a time if you like or both at the same time, your call. They are Swimmer Katie (Level 22 Goldeen & Level 33 Spheal) and Swimmer Santiago (Level 33 Tentacruel & Level 33 Wailmer).
Having easily beaten them, continue to the west and you will encounter another almost identical pair of swimming Trainers -- how about that?
Since I am a fan of doubles battles I took then on at the same time -- note that as the battle starts Trainer Talia tells you that if you beat her, she will give you some information...
Swimmer Kevin has a Level 34 Spheal and Triathlete Talia has a Level 34 Staryu -- neither of which should be much of a threat to you. After the battle you should do something that you probably never do after a battle -- talk to the Trainers you just pounded into the surf.
When you speak to Talia she tells you that "There is an odd place nearby. There's a huge tower there. Why don't you go take a look?" Why indeed? Kevin does not have anything useful to tell you, so at this point take Talia at her word and head north to see what this odd place is all about!
Actually what you need to do is head west and a little north through some rocks, then a bit east to the sandy beach, but you get the idea.
The only thing here is a spit of sandy beach and a cave entrance -- so all that is left is to head in, right?
Awakening Rayquaza
The Sky Pillar
- - - - - - - - - - - - - - - - - - - -
Sky Pillar Pokemon Report
-- #354 Banette (R)
-- #344 Claydoll (U)
-- #042 Golbat (C)
-- #302 Sableye (U)
- - - - - - - - - - - - - - - - - - - -
And once you head in -- bang! You have found it! Good on ya mate! You are in the Sky Pillar! Man you made this seem so easy!
As soon as you exit the other side of the cave Wallace appears -- he apologizes for abandoning you, and tells you that he has opened the door to the tower for you... You follow him to the door as the earth starts to shake, then it begins to rain. Wallace tells you that it is all on you mate, and then takes off for town. Now would be a great time to save your game!
A Word of Warning -- You may be tempted to Fly back to town to resupply and heal if you had a rough time on the way here. DON'T. You cannot Fly back, so unless you want to repeat that journey -- minus the Trainer battles of course -- you will just have to tough it out with what you have on you.
The path up to the top of the tower is pretty simple, but along the way you have the opportunity to grab a Pokemon that I know you do not have -- Claydoll! It is worth taking the time to grab them now, plus you get a new entry into your Pokedex so why not? If you have not leveled up a Golbat or caught one of them and a Sableye at the Cave of Origin you can capture both here as well if you like.
Once you reach the third level it will look like a dead end -- but notice the broken floor section? Walk on that and you will fall down a level to the area you could not reach before, and low, a door! Use the middle door to reach the blocked-off section on the level above, and go through the left door to fourth level of the Tower.
As you pass through the next door you are out on the top levels of the Tower -- use the stairs to reach Rayquaza, who is sleeping on the roof here. As you approach he wakes up and... Nope. No battle. He just flies away!
Here is the deal mate, you did what needed to be done -- you woke up Rayquaza. Now that he is awake, he senses that there is a disturbance in the Force, and he heads off to investigate. Now, the logical thing for you to do would be to Fly back to town now, but hold on. If you check the map you will notice that there is a town nearby...
It would be a shame to have come all this way without obtaining a Fly Point on the map, yeah? So rather than Fly back to town, instead hoof it down to the beach and continue west from here, and you will reach Pacifidlog Town!
Good on ya! Killed two birds with one small rock you did. Now that you have flagged Pacifidlog Town on the map you can fly back here any time you want to explore, and since we are kind of on a mission here, it would be an idea to Fly back to Sootopolis now, right?
Back to Sootopolis
As we land at the Poke Center the skies split and Rayquaza descends, engaging the two battling beasts with its special attack and hey! Awesome! The day is saved!
The sun comes out, the rain is gone, all three Legendary Pokemon have disappeared, and the residents of Sootopolis are no longer blocking your access to the rest of town!
Surf over to the Gym and chat up Max and Archie to get their last words before they disappear, and then talk to Wallace, who thanks you and gives you HM07 -- Waterfall! He explains that you need to beat the Gym Leader here and obtain the Rain Badge -- and invites you to do that when you are ready.
Before we do that though, let us chat up Steven for his last comment on the debacle, and then take a few minutes to explore the town, shall we?
First let us head west (left) to the Poke Mart and restock the kit we used up. Be an idea to have some extra healing potions added to the kit now, as they may come in handy later...
The house to the left of the Mart has an old couple in it that will tell you a bit about the town, and there is a TV here you can catch the most recent show on now. How come we always seem to be on TV?
Visit all of the houses on this side of town to learn some more background information, and obtain TM31 -- Brick Break -- before you head east (right) to the other side of town, stopping at the Center to heal and save.
Inside the Center to the right of the desk is a Move Tutor who will teach one of your Pokemon the move Double-Edge -- but be aware that he will teach it only ONE time. Also note that this move is an alternate form of Tackle that has a blow-back impact on the user, which means that using it can and often does damage the user. It may be useful for the Gym Battle, and maybe not... Your call.
We still cannot explore the east side of town now, the people are still blocking it, so really all that we have left to do is the Gym Battle, right? And you are prepared... Right? Excellent! Head for the Gym!
Solving the Sootopolis City Gym Ice Puzzles
Sootopolis Gym Ice Puzzles
The Gym Leader here is Juan, and this is an Ice Gym -- and it seems one of the more annoying ones based on the conversations that I have had with other trainers, so I am going to take the unusual step of providing you with step-by-step instructions here rather than just telling you where to go, right?
So, save before you enter, then head inside and say hellow to the official Gym Greeter, who will tell you that the Leader is Juan (we already knew that), that he is a Water-type Master (we did not know that!), and that this is an Ice Gym (we knew that).
The trick with Ice Gyms is to never step in the same place more than one time. If you do, the floor shatters, you fall, game over -- the other half of the trick is, to move on you have to break (not shatter) EVERY floor panel! That being the case, you have to be clever about how you proceed -- it really is something of a puzzler, which is fine, because we LIKE puzzles!
Ground Floor
To the right in the entry foyer is a ladder leading down -- ignore that for now and head to the stairs and stop just at the top, before you step on to the ice. Now do the following:
(1) Up
(2) Left
(3) Up
(4) Right
(5) Right
(6) Up
(7) Left
(8) Up
And you reveal the stairs and climb up to the next level!
First Floor
This bit is a little more complicated than the previous bit -- both because it is bigger and because is is divided by some boulders! If you do not instantly see the proper path when you look at the floor, no worries mate. It took me a bit to work it out as well, but here is what you need to do:
(01) Up
(02) Left
(03) Left
(04) Left (to the wall)
(05) Up
(06) Up (to the wall)
(07) Right
(08) Right
(09) Down (beside the boulder)
(10) Right
(11) Right (to the boulder)
(12) Down
(13) Right
(14) Right (to the wall)
(15) Up
(16) Up (to the wall)
(17) Left
(18) Left
(19) Left (you are not at the stairs!)
(20) Up!
There -- all tiles broken, magic stairs appear, well done mate!
Second Floor
So, the Ground Level was easy enough, the First Floor a bit more difficult, but this?! Gah!
Right then, step-by-step carefully, and she'll be apples mate! Just do this:
(01) Up
(02) Left
(03) Left
(04) Up (beside the boulder)
(05) Left (to the other boulder)
(06) Down
(07) Left
(08) Left (to the wall)
(09) Up
(10) Up
(11) Up to the wall
(12) Right
(12) Down (to the boulder)
(13) Right
(14) Down
(15) Right (to the boulder)
(16) Up
(17) Up (to the wall)
(18) Right
(19) Down (to the boulder)
(20) Right (to the other boulder)
(21) Down
(22) Right
(23) Down (to the wall near the right of the entrance)
(24) Right
(25) Up
(26) Right
(27) Right (the far right boulder is above you)
(28) Down
(29) Right (and you are in the lower-right corner of the room!)
(30) Up
(31) Up
(32) Up (now in the upper right corner of the room!)
(33) Left
(34) Left
(35) Down (the boulder is to your right now)
(36) Left
(38) Up (to the wall)
(39) Left
(40) Left (and the stairs magically appear!)
(41) Up!
Excellent job mate! No need to drop through the floor on this one!
Now before you step up to battle the Gym Leader there is something that you should be aware of -- there actually ARE AGL's in this Gym -- they are located in the levesl BELOW you -- and if you had made a mistake and broken through the floor, you would know that... But you did not, because you are THAT good!
Still, you really should battle them before you take on Juan -- because you cannot after you beat him, and as they have relatively decent XP, it is really a good idea to do them... So, instead of stepping up and bracing Juan, turn around and walk onto the broken ice so you fall through the floor here!
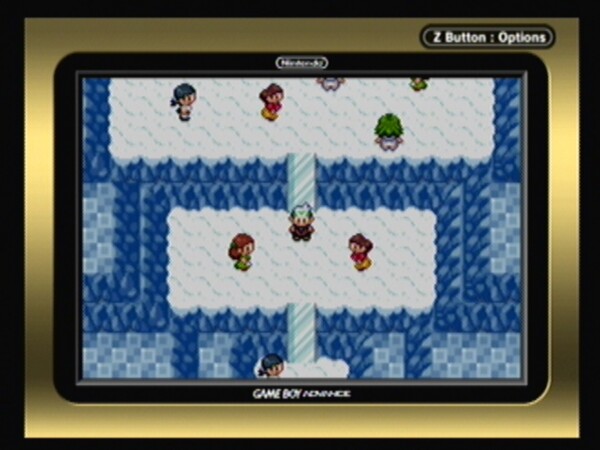
The Assistant Gym Leaders are well hidden in Sootopolis
Second Level AGL's
After you drop through the ice you find that the room is packed with AGL's! Cool!
We will start with the top-left side, Beauty Tiffany, who opens with her Level 39 Carvahna that is worth 735 XP, followed by her Level 39 Sharpedo that is worth 1462 XP and $3120 in reward!
Below Tiffany on the left-most side of the room is Lass Crissy, who starts with a Level 39 Goldeen that is worth 927 XP, following with a Level 39 Wailmer worth 1144 XP and $624 reward money for winning the battle.
Directly to the right in a red dress is Pokefan Bethany, who has a unique team in that they consist of all three forms of a single Pokemon Evolution! She leads with her Level 35 Azurill worth 247 XP, then brings out her Level 37 Marill worth 459 XP, and finishes the battle with her Level 39 Azumarill worth 1278 XP and $3120 reward money. That's a nice reward indeed!
Next to the right is Beauty Olivia -- who is in the center of the room -- and she leads with her Level 35 Clamperl which is worth 1065 XP, following with her Level 37 Corphish worth 879 XP, and finally her Level 39 Lombre worth 1177 XP and $3120 reward.
Next to the right is Beauty Bridget -- just walk along the wall as she will come to you when she spots you! Bridget leads with her only team member, a Level 40 Azumarill worth 1311 XP and $3200 reward money. An easy battle!
The final AGL on this Level is Lady Briana, who has a Level 40 Seaking worth 1456 XP and a whopping $8000 reward money! Whoa! A few more like this and we will not have to worry about kit money for sure!
Now that we have finished off the Trainers on this level hit the ice slide to go down to the next level!
First Level AGL's
You can do this battle as two singles, but it is intended to be fought as a double -- this is obvious by the layout. To make this easier to follow though, I am going to do it as single battles so you have accurate stats on XP and reward money for each.
Starting on the left side is Lady Daphne, a pretty southern bell of a Trainer in a green ball gound. Her team consists of a pair of Level 39 Luvdisc worth 918 XP each and a very nice $7800 reward money. More of these please!
Next is Pokefan Annika, who has a pair of Level 39 Feebas worth 508 XP each and $3120 reward money, which wraps up the AGL's for this Level!
Ground Level AGL's
The order of battle here is pretty much established by the ice slide, as there is no way to avoid battling Andrea first unless you drop in from above -- but it really does not matter which you battle first, right? Both have single-Pokemon teams and both are very easy battles.
Lass Andrea throws out her Level 40 Luvdisc which is worth 942 XP and $640 reward money.
Beauty Connie has a Level 40 Goldeen worth 951 XP and $3200 reward money, and that is it for the Sootopolis City Gym AGL's!
OK as we have worked our way through all of the AGL's, now would be an ideal time to leave the Gym, head ot the Center, heal and save, and then return and backtrack to face Juan!
Did you notice that Steven and Wallace are still outside here waiting? I suspect that they plan on observing our battle with Juan -- I also suspect that we will be battling both Steven AND Wallace in the near future... But hey, I am a suspicions Trainer, what can I say?
Preparing for the Juan Battle
Who is waiting for you mate? Juan is! As you step forward and say hello, Juan tells you that it was he that taught Wallace everything that there is to know about Pokemon -- which means in theory he is the master, right? Well, maybe but then again, maybe he has to beat us first!
First some advice:
Tactics -- plan out your attacks on each of his Pokemon so that you NEVER almost kill them. Because once they drop below 22% he will use a Max Potion automatically and they will be back at 100% health, essentially negating your progress. Your best tactic is to take them down to 25% or so using moves you know the damage rate on, and then hit him with your heaviest blow to KO the Pokemon.
Kit -- the last Pokemom that you fight for this Gym Battle is a grief-fight. It has a nasty combination of moves, and the game is tilted slightly in Juan's favor for this battle -- and because of that, if you are not going in with a strong well-trained well-leveled team, chances are pretty good that you are going to have problems with the last battle. That being the case, adequate kit is your friend here, because if you have to fight a battle of attrition, you can only win if you can outlast the PP limit.
To do that takes restores and potions, pure and simple. If you find that you simply cannot take out the last Pokemon directly, what you will need to do is simply survive until he runs out of PP for his offensive move and for Rest. Once that happens, his Pokemon will literally kill itself -- I have seen this happen, it is ugly, but if it is the only way, it is the only way. So stock up on pots and restores, make sure you have your flutes, and stay on top of healing and stat issues so you can survive to win.
That is the best advice that I can give you -- and it is really good advice! Remember that sometimes you have to embrace the suck. Often it is not how you win, but whether you win. Now enough pop-philosophy mate -- it is time to battle Juan!
Earning the Eighth Gym Badge
The Sootopolis Gym Leader: Juan
Juan leads with his Level 41 Lucdisc, which is worth 966 XP. He follows with his Level 41 Whiscash worth 1387 XP, and then his Level 43 Sealeo worth 1179 XP.
Next Juan brings out his Level 43 Crawdaunt which is worth 1483 XP, and finally he pulls out his Level 43 Kingdra, a formidable opponent because it knows the moves Ice Beam, Double-Team and Rest, and has a berry that it can (and will) use to instantly awake after resting. That combined with the Max Potions that Juan has makes the 2040 XP you earn defeating it a hard-earned victory.
If you are angry or frustrated...
Look mate, some of the battles in this game are clearly rigged in the favor of the game. The idea is to make it difficult, stretch out the battle, and give you the feeling that you have accomplished something, but sometimes, as in the case here, the programmer took things too far, mistaking tedious grief code for challenging... So yeah, a LOT of Trainers get really angry and frustrated when they beat the first four Pokemon and then fail on Kingdra.
The reason you are failing is (A) Double-Team makes him really hard to hit, even when he is sleeping and not moving, (B) Rest pretty much fully heals him regardless of the damage you do, and (C) this particular battle is giiefed.
Just know that Kingdra does not have unlimited PP and eventually you will exhaust its offensive PP and then be able to take it out.
So yeah, it is painful. Yes, it is not fair. But remember, you only have to fight this battle one time, and when it is done, and you have won, you have the personal joy of knowing that you took the best that they could dish out and you walked away the winner. Good on ya mate!
After-Action Notes
You will notice in the video that I made very effective use of the two Flutes that I possess -- the Yellow Flute and the Red Flute, which cure Confusion and Attraction respectively. The Flutes are obtained from the glass blower near Fallarbor Town -- there is a full set of Flutes and though the Yellow and Red are perhaps the most useful, it would be a good idea to own the full set. In other words, you should take the time to collect the ash that is required to have him make them for you.
You have defeated Juan!
With Kingdra KO'd he has nothing left, and so he is forced to acknowledge you as the superior Trainer! Yay you! Of course he cannot lose without insulting you -- and of all the things he could have used, your age, your Pokemon, your Mom -- he picks your clothing?! Low blow mate.
As you have won he has no choice but to award you the Rain Badge -- the Eighth and final badge on your quest! He hands you $4600 and
With the Rain Badge now yours, any Pokemon no matter what its level -- whether you caught it or received it in trade -- will obey your commands! In addition to that, the Rain Badge means you can now use Waterfall outside of battle -- and that is a good thing because we need that move to access several key areas, but more on that in a bit...
His gift to you is TM03, Water Pulse, which is a useful move as you saw in your battle with him.
Finally he swaps Pokenav codes with you, and the battle is won! All you need to do now is leave the Gym by falling through the floor behind you and walking out! Well done mate!
As you exit the Gym notice that both Steven and Wallace are now gone -- it appears that they have seen what it was they came here to see -- and now that you have obtained the final badge and taken out the last Gym Leader, they have moved on.
Now that we have the last badge and can use Waterfall outside of battle there are some odds and ends we need to wrap up as well as other unrelated things to be done -- yes we could now go to the final city (Every Grande) now that we can traverse waterfalls, and we will be visiting that city to be sure, but first there are some things we left off earlier because we lacked the ability and access that we can now take care of.
It would be a disservice to you not to cover these -- and they are things that we should do anyway since we are now pretty much in training mode for our attempt to take on the League and become the greatest Pokemon Trainer in the world woot!
In theory the next logical path we should follow is our battle with the Pokemon League in order to prove our skills and become a true Pokemon Master Trainer and the League Champion. And we will be doing that to be sure, just not next or now.
Instead we will exit the Gym and Surf to the east (right) and visit the Sootopolis Poke Center, where we will heal and save first, and then begin wrapping up this short list of things we should have done already or could not do until now!
What we need to do now is wrap up a lot of odds and ends that we could not do before because we either did not have the moves that we needed, or the HM's -- and now we do! Ideally you will complete all of the subsections here because it will (A) get you extra XP to level with, and (B) get you some moves you may want for the big battle. That plus it completes these parts of the game so why not?
When you step outside of the Center you will notice that the town residents who were previously blocking access to the east are now gone, and you have full access to the town area to the east! Now is an excellent time to check out what is there...
-- To the right is a house with an old man who likes to watch young trainers. There is a door in the rear that is blocked by potted trees so you cannot access it now. Note for future reference and exit the house.
-- In the house to the north is a girl who will gift you with a Wialmer Doll just for visiting her and making her day a little brighter. Accept the doll and then leave the house.
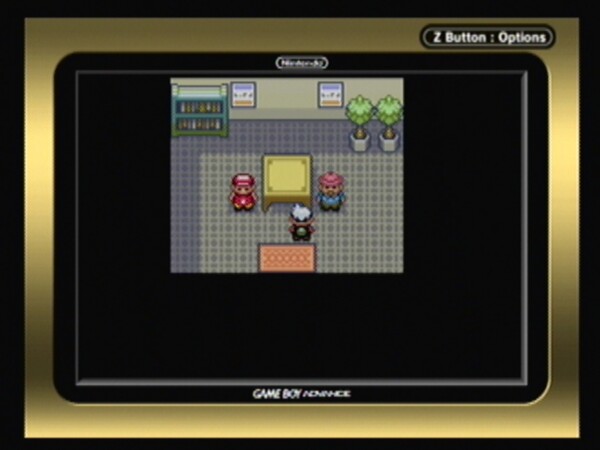
Lotad or Seedot -- they want to measure both
-- In the next house to the north are two fishermen who are arguing about the relative sizes of Lotad. If you have one in your party, the left-side fisherman will ask you to show it to him. The bloke on the right claims that Seedot is the bigger Pokemon relative to Lotad, and asks you to show him a Seedot if you have one.
Depending upon the size, the two blokes will award you prizes that range from Ether to Elixer, both of which are desirable and useful for the challenges you will face on Victory Road and as you battle the Elite Four and Pokemon Champion.
The Elixer restores the PP of ALL of the moves of a Pokemon by 10 PP.
The Ether restores the PP of a specific move you select by 10 PP.
Collecting as many of these as you can prior to taking on the Elite Four is a good idea, so taking the time to grab these Pokemon from your boxes to show them is a no-brainer!
-- The house to the north has a couple in it that tells you about treasures and the Ancient Ruins.
-- The house all the way to the north has an old woman who will ask you about the two orbs that Archie and Max had.
That pretty much covers all of the things you can see and do here other than chatting up the two residents who can be found on the path as you move from house to house. We are finished with Sootopolis -- for now.
As previously mentioned there is a set of Flutes in the game that either replace status correcting items or function as an exclusive status correcting item. The Flute Collection consists of:
-- Black=Acts like Repel (Substitute for Repel Potions) - 1000 Steps
-- Blue=Fixes Sleep Status (Substitute for Awakening Potions) - 250 Steps
-- Red=Cures Attraction - 500 Steps
-- Yellow=Cures Confusion - 500 Steps
-- White=Increases Wild Encounter Rate (basically it is the opposite of Black) - 1000 Steps
In addition to the Flutes you can also obtain:
-- Pretty (glass) Desk - 8000 Steps
-- Pretty (glass) Chair - 6000 Steps
Specific quantities of Volcanic Ash must be collected in the Soot Sack by walking through the ash-covered grass on Route 113 and in the Jagged Pass. The Ash is traded to the Artisan in the house on Route 113, who will create the flute you request (as well as exclusive furniture for a player's secret base).
Acquiring the Flute Collection
It should be noted that the flutes can be traded to other games when they are held by a Pokémon that is being traded or transferred. They may not normally be available in every game so this may be the only way to obtain them in other games. You should also note that these items are not normally "hold" items -- meaning that they reside in your bag rather than being held by the Pokemon upon which the effect you desire is used. The Flutes do not use charges or have limits on how often or how frequently they can be used.
Obtaining a full set of the Flutes should be a priority for every Trainer *prior* to embarking upon the quest through Victory Road or the Elite Four as they have obvious uses and application. For that reason we are now going to head to Fallarbor Town and complete collecting Ash for any Flute types that we do not, as yet have. For example I have the Red and Yellow now, which means I need to collect sufficient Ash for a Blue, Black, and White Flute to be made.
Fly to Fallarbor Town
Using Fly, go to Fallarnor Town, and then head east (right) along the path until you spot the house to the north off of the path, in the Ash zone. The house is called the "Glass Workshop" and has a sign that identifies it as such outside.
Inside the house is the Artisan and one of his employees -- if you speak with him he will tell you how many steps you must take in order to make the item you selected / the next item in the list. Simply walk through the Ash-covered plants/grass to collect the Ash in your Soot Sack (Key Item), and when you have taken the required number of steps, return to the Glass Workshop and speak with the Aritsan.
He will make the item for you pretty much while you wait -- and in no time at all you have an awesome item that will save you time and money! How? Well, there are no restirictions on the use of the Flutes -- you do not have to take a certain number of steps, they can be used as often and as many times as you like -- and more important, they replace kit items that you normally pay for! For instance, the Blue Flute that you see me obtain in the video is used to awaken a sleeping Pokemon whether in battle or outside of battle, and that means I can sell my Awakenings Potions and not have to every buy another one because of the Blue Flute! Now how cool is that?
Right, before we sign off on this section there is one quick small side-quest for us to complete so exit the Glass Workshop and run west (left) through town all the way to the river west of the south bridge. From shore you can just spot the waterfall to the north here.
Surf into the river then use Waterfall to climb the waterfall here. Note that if for whatever reason you have not caught a Marill they spawn easily Surfing here. If you have not captured a Barboach yet, the pool at the top of the waterfall is an excellent place to do so using the Super Rod, fishing while Surfing or from shore.
At the top of the waterfall on the left is a treasure ball containing a Rare Candy! Now there is a useful item!


 Mortal Kombat X Guide: How to Play Sub-Zero
 Destiny House of Wolves Guide: Prison of Elders Treasure Chest Loot Explained
 Sequence 4 - Unnatural Selection: Assassin's Creed: Syndicate Walkthrough
 Organize Your Time with These 4 Linux Calendar Apps
 The Red Solstice (PC) beginners guide