
Many people's game of the year, Metal Gear Solid 4 is a game that can be replayed again and again, with different approaches making it a fun experience time after time. There are also many secrets to unearth from the slightly twisted mind of Hideo Kojima, as well as a robust multiplayer mode, Metal Gear Online. This guide aims to explore all aspects of Konami's epic stealth shooter.
The game is a markedly different experience depending on the difficulty played on, with different enemies, routes and events as you move through the challenges. This guide aims to provide a general path through the acts of Metal Gear Solid 4, but bear in mind that there may be guards where you don't expect them or none where they are mentioned here. Where there are crucial differences, they are mentioned.
Metal Gear Online is also covered in this guide after the walkthrough for Metal Gear Solid 4. There are also tons of gameplay secrets, passwords and other things at the end of this guide.
Snake is back…
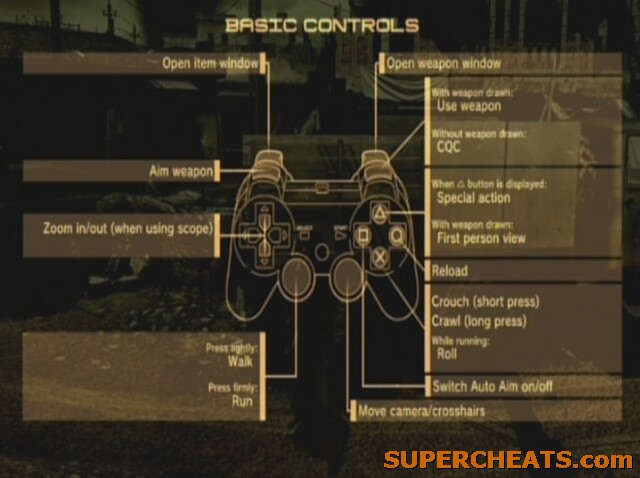
Control Layout
Some general advice in playing the game is to get used to the levels, bosses and strategies on a lower difficulty before jumping in at the Big Boss challenge. You will then have a much better chance of succeeding.
Stay crouched as much as possible, use silenced weaponry and try to avoid direct combat. While the game is unique in the series in that it is possible to complete the game using pure action-orientated combat (except in Act 3 perhaps), the AI is clever enough to put a stop to you if you make too much noise. It is not worth restarting the section as soon as you are spotted in most cases though, fighting your way out of an alert phase is definitely a possible strategy.
Read the manual for a great and nicely illustrated tutorial. Key features mentioned include the Solid Eye, showing enemy locations when in range and the threat ring, with a similar effect but used automatically when Snake is crouched, showing bent lines indicating the threat level and direction of any organisms in the area (including rats and crows!). Take everything slowly as your health and psyche recharge in time, and you stand less chance of getting spotted. iPod songs and various items increase Psyche and health too – it is important not to use them unnecessarily as they become imperative later in the game!
Use the weapon and item equip menus (R1 and L1 respectively) to pause the game quickly if you're in a touch spot and catch your breath and plan a strategy, select a health item or change your gun.
This guide only gives one route through the level. The beauty with Metal Gear Solid 4 is the massive array of moves, items and routes through each level. Experiment to your heart's content and if you get stuck, fall back on the route written here!
Cutscene Tip...
You can zoom in during some cutscenes and mission briefings by pressing Up on the D-Pad. The harder you press the more it zooms – you can then move the camera around too with the right stick.
The total cutscene length including mission briefings from Act 2 onwards is an impressive 7 hours, 66 minutes (not including in game codec calls). How many DVDs is that?
(Cut Scene 1, Length: 04:03)
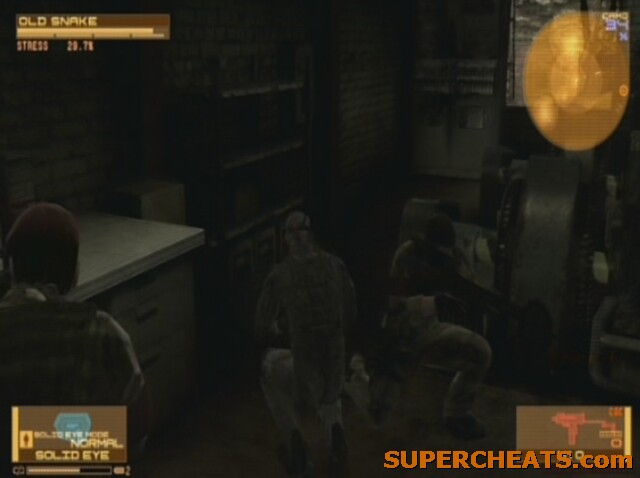
We join a Solid Snake disguised as a member of the local militia group caught up in a conflict against PMCs (Private Military Companies). The ultimate goal of this section is to locate Rat Patrol Team 01.
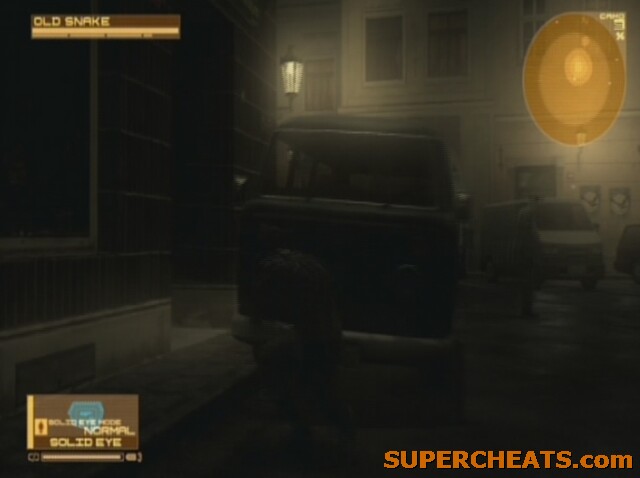
As the cutscene shows the hunched, smoking figure disembarking the truck, gameplay begins. The instruction manual provides the real tutorial for this section, but I'll provide the basics for these first few sections too. As the heads-up-display materializes you are in full control of Snake for the first time. Use this area to get used to controlling him in the glorious next-gen graphics. Everything should feel pretty familiar to Metal Gear Solid veterans.
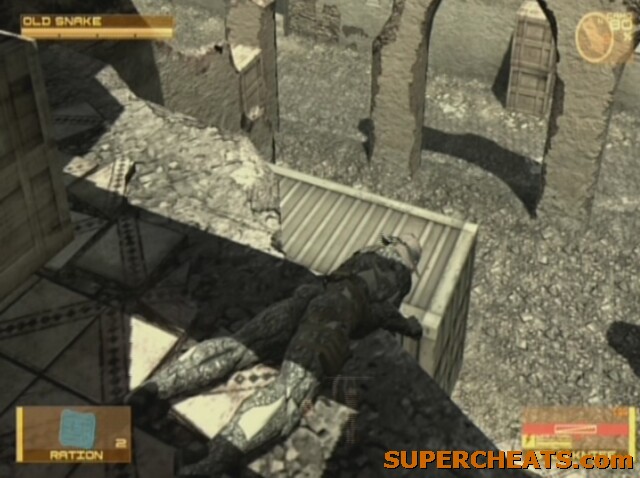
To progress, walk towards the truck you saw Snake disembarking from and hold X to go prone and lie flat. Crawl under the body of the vehicle to trigger the next cut scene (there is a Ration underneath the other truck too).
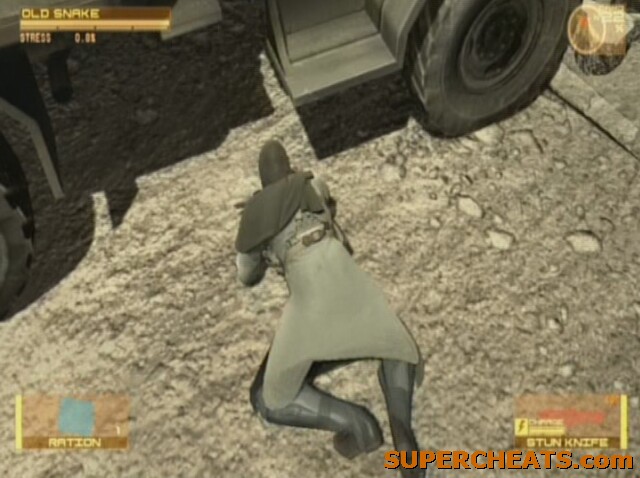
Go prone to proceed
(Cut Scene 2, Length: 00:50)
Now simply walk down the street, ignoring enemy militia as we are appropriately disguised until a cut scene is triggered. Feel free to experiment some more with the controls in this section.
(Cut Scene 3, Length: 01:40)
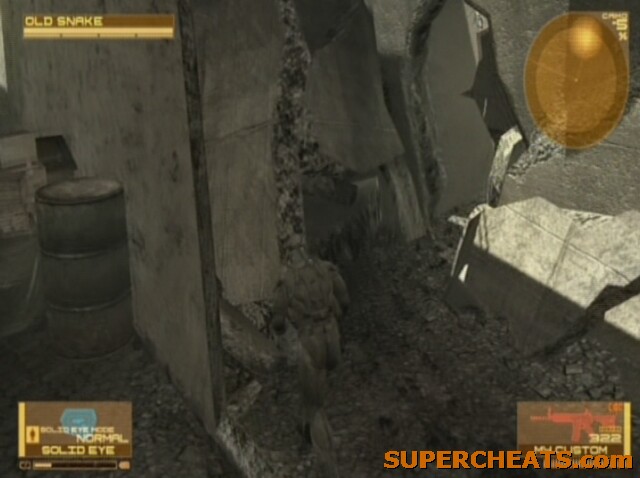
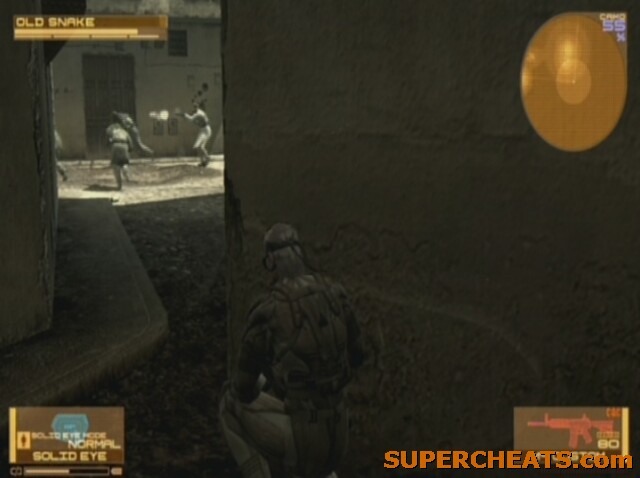
Move north down the street, waiting for the first Gekko to charge forwards and take out the militia before you run behind it. Turn right into the decrepit building at the earliest opportunity to give yourself decent Gekko cover. Head into the street to the east and duck underneath the overhanging rubble.
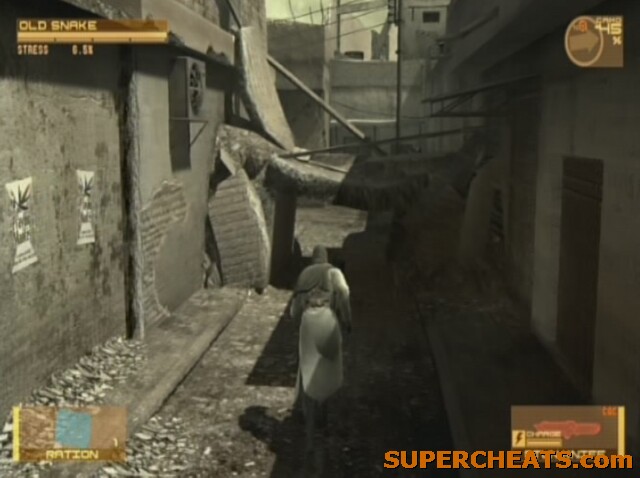
Head underneath this overhang
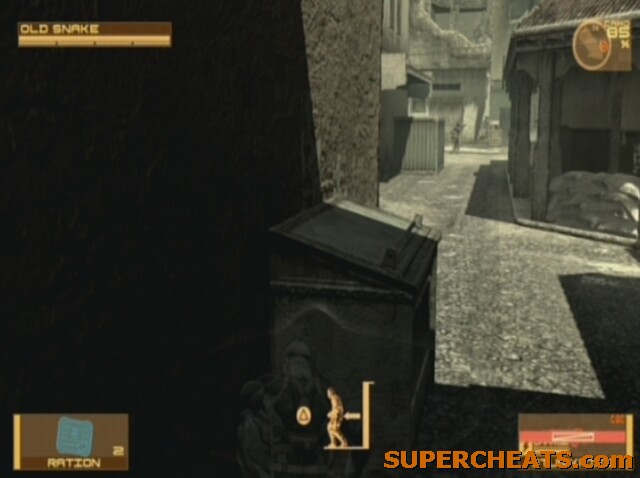
Turn left at the end and wait for the patrolling Gekko to turn its back away from you. At this early stage in the game, particularly on the easier difficulties it is very much possible to alert the Gekkos to your presence and simply run off to trigger the cutscene. Enemy engagements can be easily avoided here. Another will land in so quickly round the corner and enter the next building on the right. Take cover if necessary to ensure the Gekko doesn't see or pursue you. There should still be enough militia left to take most of the fire on your behalf. Wait until the newest Gekko moves off down the side street then reemerge to where you entered the building and go through the next doorway on the right to trigger the cutscene.
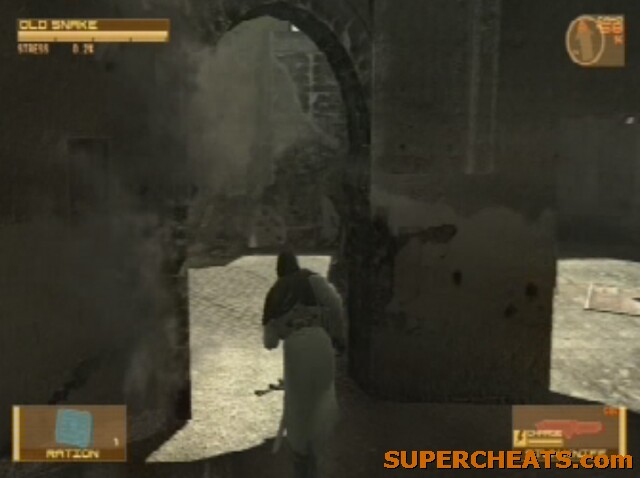
The door with the arch is the one you want to take to complete the section
(Cut Scene 4, Length 04:45)
OPENING: END
(Cur Scene 5, Length: 04:32)

(Cut Scene 1, Length 01:33)
Head down the path you are looking towards at the start of the section. Watch out for guards patrolling on the right as you emerge. Head into the doorway on the right as soon as you round the corner and move through, triggering a cutscene.
(Cut Scene 2, Length: 00:16)
An APC rolls in via the cutscene which gives us more enemies and a large vehicle to avoid. The militia and PMCs have a small firefight by the APC. When you reach the door on the left going back out to the street, go prone and crawl through the small space in the wall next to it (also getting an Arsenal Compress in the process). Stay prone as you come out and wait for any guards in sight to turn away, which may take a little while. Crawl to the burnt out car and go prone, allowing your OctoCamo suit to activate at any sign of trouble. Enter the doorway next to it and have a root around inside.
You can pick up Rations from on top of the bed in the eastern room of the building as well as to the right of the pile of rubble blocking the way through the centre of the room. To proceed, go prone and crawl underneath the rubble.
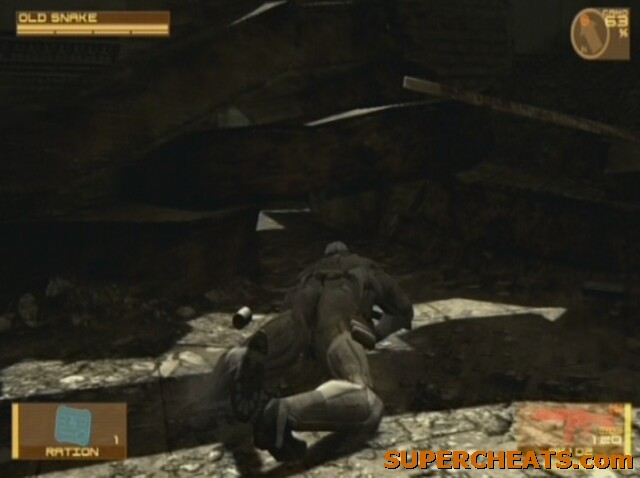
Crawl under this rubble to move on
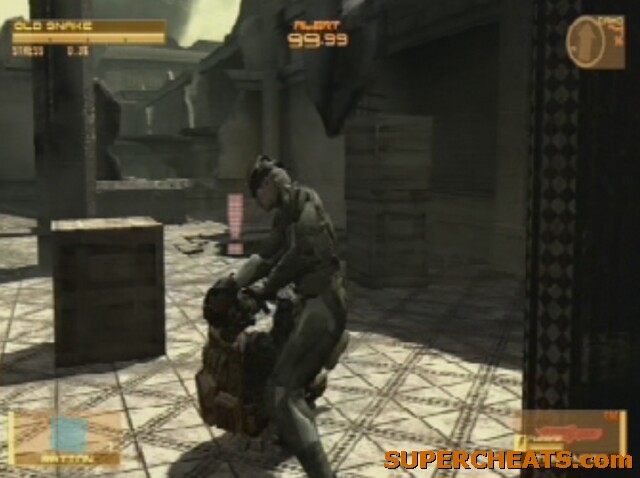
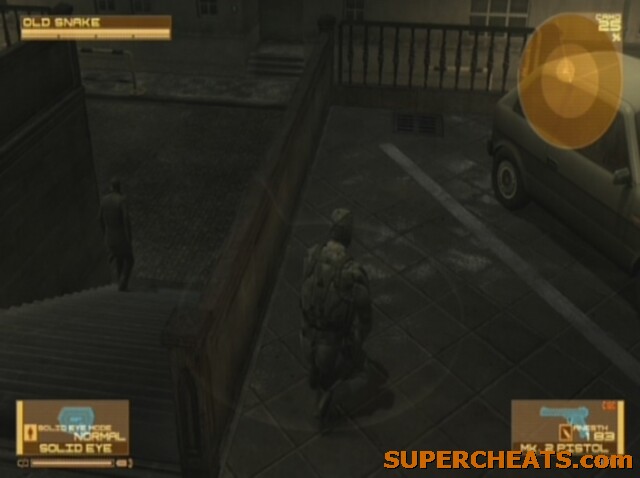
You are treated to the sight of a member of the militia being finished off by a PMC troop. Wait for the dust to settle and the guard to visibly move on, and crawl out from your hidey-hole. Move up to the first set of crates and cover behind them, then proceed to the next set by the wall on the right. The guard we saw earlier should now be in a side room to the south-east with his back to the door (handy how Metal Gear Solid guards do that). He will walk backwards towards the door, turning as he nears the front and moving north. As he does this, move up behind him and take him out using CQC (close-quarters-combat, by pressing R1 while using a weapon with the CQC icon next to it in your inventory) and your Stun Knife.
A great chance to try out CQC
Continue under the cover of the buildings and move into the next door. There are now no guards until you reemerge into the open, but be careful not to stand up and jump around in view of the street. As you near the western door of the building, leading outside, let the two PMC soldiers move down the street with their back to you before moving. Quickly turn to the right and run behind the cargo container, then through the door to the southeast to move to the next area.
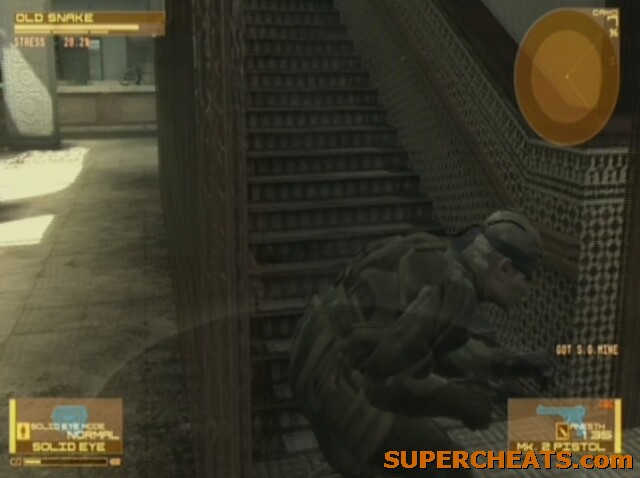
Head up the stairs at the start of this section. At the top of the stairs you will notice a guard facing the other way in one of the rooms ahead. After rolling over the crack, move through the first room as the guard progresses forwards. Sneak up on him while crouched and press R1 once as close as possible to initiate a CQC attack.
Show this guard who's boss
To be on the safe side you can hide the body in the previous room's lockers, though it isn't strictly necessary. Hold Triangle to drag the body, and press it while next to the lockers to open them and then manually drag the body in.
Take out the guard in your way
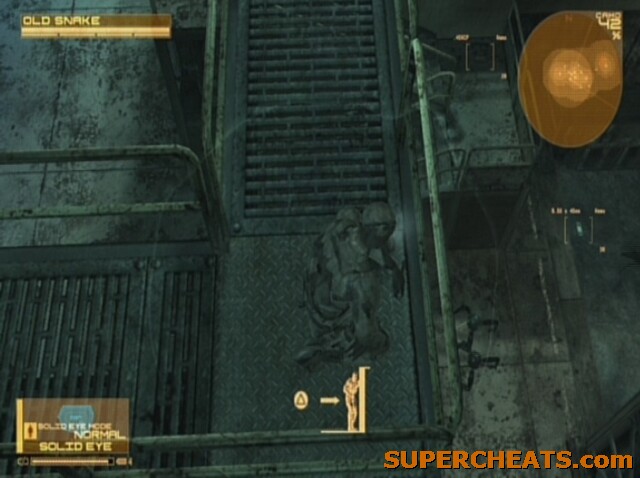
Move past the hole in the floor in the next room and go to the breach in the wall. Press Triangle to vault it and drop down to the next area. Go prone once you hit the floor. Using the threat ring you should be able to see where enemies on the lower levels are in relation to you. Staying prone and in the shadows in this section avoids the risk of being spotted, but if you're the impatient type you may want to crouch walk all the way along. Enemies will have to climb the ladder to get to you so you're in a decent defensive position should the worst happen.
Move all the way along until you get to the hole in the floor at the far, eastern end, picking up the Ration nearby. Press Triangle to initiate a drop-down. Try and do this behind the yellow cargo container to avoid a greater chance of being spotted.
There will be one guard nearby to the west, as well as one farther away to the north. Use the threat ring to work out just what direction they're travelling before moving to the right and round the corner. You will see a dumpster which provides cover if you're being searched for, as well as a hiding place to wait for the distant guard to move on and somewhere to survey the area from.
Use the camera to look around the corner and make sure the patrolling guard isn't looking your way before moving on. You can however be spotted and simply run to trigger the cutscene however, if you feel like exploiting the game somewhat. The room we need to get to is directly round the corner and to the right from the alleyway with the dumpster. It's marked on the radar if you've got lost.
(Cut Scene 3, Length 03:24)
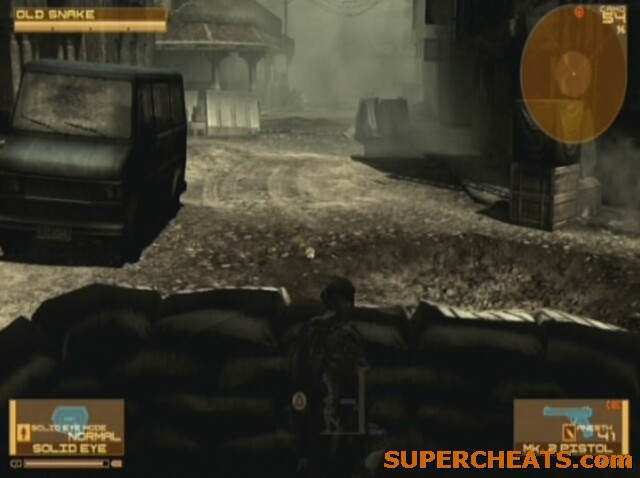
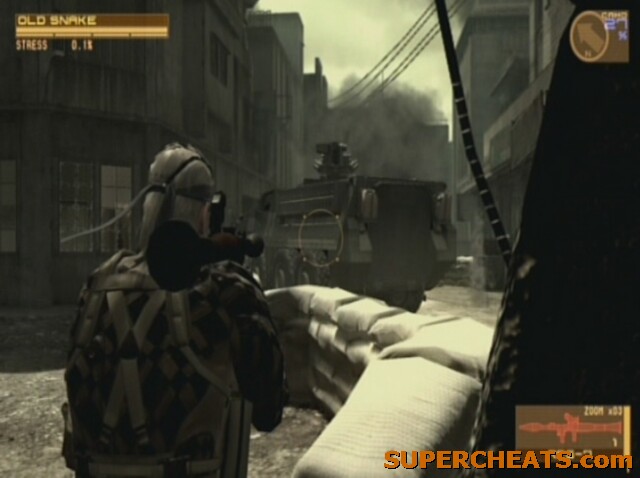
In the cutscene we are given the Solid Eye and Metal Gear Mk. II in our inventory, making the picture of enemy movements considerably clearer. Head towards the pillars, using the Solid Eye's Baseline Map to discover when the soldiers outside move off or get destroyed by the exploding van. Move up to its carcass with any survivors actively engaged in the fire fight down the street. Get behind the sandbags or round the front of the van to get a great view of the area ahead.
We now need to move up on the right hand side of the street. Try to stay in the shadows as there are numerous PMC and Militia troops in the area who aren't afraid of diverting their attention onto you. Most of the rebels will be killed in the combat, but it can't hurt to be careful all the same. If they do spot you just retreat back to the van as they won't follow for long with all the commotion further up the street. Once you reach the concrete barriers, stay next to the wall and keep moving forwards. You'll have to get virtually level with the Militia soldiers, so either take them out with the Mk. 2 Pistol or sneak past in the shadows. Again, if they spot you, just keep going forwards as they'll either give up on you or get shot trying to follow by the PMCs. Head into the alcove on the right and continue forwards (turn left as you enter the opening) to follow a corridor through the section.
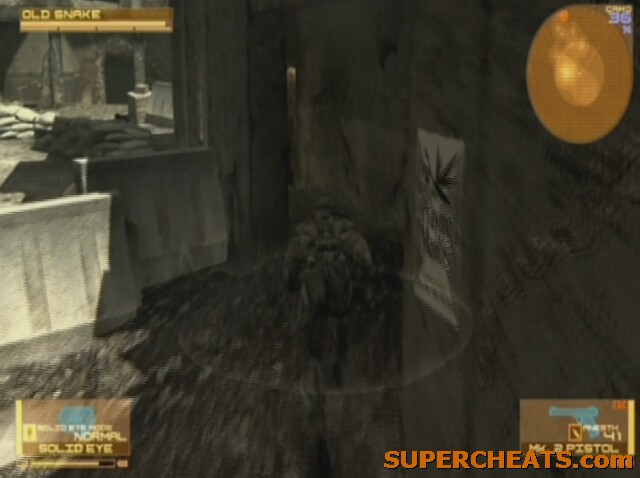
Crouch walk through the corridor. While a lot happens in front of you, with a guard running towards you and getting shot, there is little threat as long as you keep your head below the window. As you get to the end of the corridor wait for the guard round the corner to get blown towards you before moving out. Crouch walk to the small trench in the ground and go prone. The Militia are getting overrun here but it is also a perfect opportunity to give them a helping hand and get them onside for the rest of the level. Try not to get their attention, but move over to the northern side of this open street, using your Solid Eye to locate an RPG. Pick it up and equip it using the Start menu, and blow up the PMC vehicle. The Militia should now see you as an ally and not fire on your position. You can also give them spare Rations to improve their mood towards you (stand next to them with a Ration equipped and press Triangle when prompted). Use a machine gun to take out the rest of the PMC troops in the area.
Follow the Militia troops up the street going almost straight from east to west at the far north of the area sloping up hill to find the second tank. There will be another RPG pickup nearby, dropped by a Militia soldier. You may have to dart in front of the vehicle to pick it up. Fire at it to destroy it and win the battle for the Militia. They will now love you thanks to all your help. Head back down the street following the objective marker to reach the next section.
Help the Militia to make the next area a doddle!]
This section is the Militia's safe house and so is literally crawling with soldiers. As long as you helped them out in the last section you'll be greeted with their acclaim rather than their bullets. In this area you can explore the entire level without worry of enemy fire, so collect as many items as possible. Equipment in this section includes Rations, Regain, a GSR, Pentazemine, Compress, Theme of Tara iPod Music, a Cardboard Box and ammunition, notably RPG-7 Ammo. Head up the stairs at the end of the section to move on. Simply moving through the corridors should lead you there.
(Cut Scene 4, Length: 11:14)
After the call with Otacon ends, giving you more information on Drebin and how you can use him, head up the two flights of stairs on the right to collect a Petrol Bomb. Drop back down and go through the small opening in the rubble to the north.
Head through to proceed
Follow the route through, ignoring the blips on the radar and any rubble that comes crumbling down. Various routes through open up as the place falls apart, but move on until you see the two Militia soldiers aiming out of the building. While exploring the various windowed areas in this section to collect items you can help your rebellious buddies if you get the urge, otherwise climb up the rubble in the eastern corner. Move through and wait for the rubble to collapse. Climb up the next pile you come to in the same manner, before dropping and allowing Snake to automatically hang on to the outcropped ledge. Shimmy along to the other side and press Triangle to hoist yourself up. Drop down all the way to the left and move forwards, climbing up the step and proceeding through the gap on the right. Head down the gap and into the basement.
(Cut Scene 5, Length 01:24)
Now we want to follow the Militia troops down the road who should very much still be on side. If you stick to the left undercover you can flank the PMC soldiers near the barricade in the road. RPG the tank to take that out of the equation, or, just use the battle for cover and head straight out of the street to the right, underneath the overturned car (go prone and crawl) due north in the alleyway nearest the barricade. 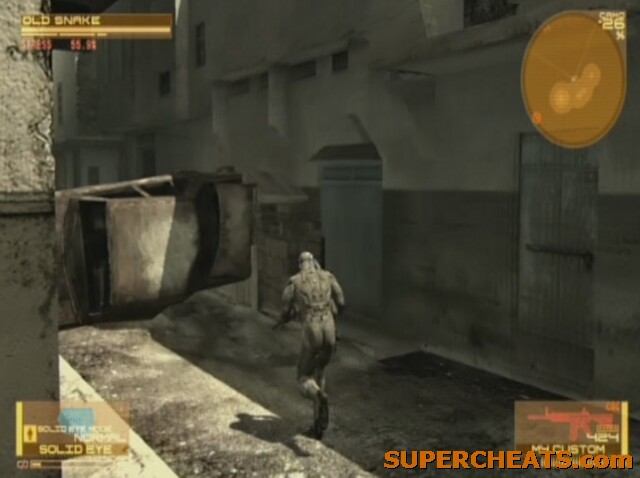
Get underneath that car!
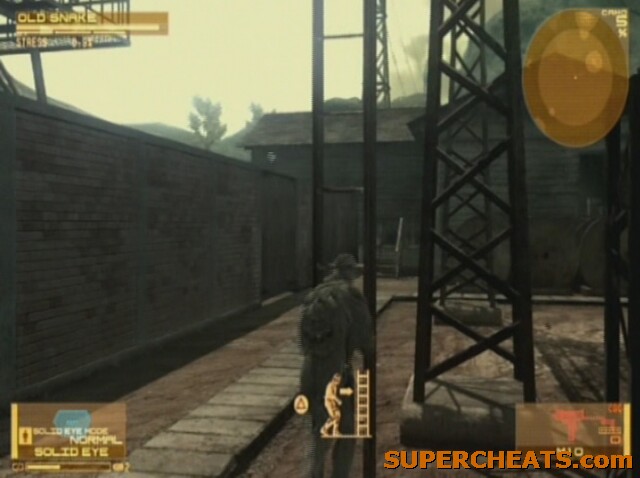
There is also another way to take out the enemies in the area. In the next alleyway towards the direction we began the area there is a ladder leading up to a mortar position which you can use to take out the PMCs nice and early.
Once underneath the car, head on to where the Militia soldiers are covered. Get behind the sandbags and you'll see the street and buildings ahead literally stacked with enemies. Pick off the enemies around the sandbags on the other side of the street using the first-person view of the M4 Carbine or alternative, before slowly moving up using crates, sandbags and outcropped walls for cover. Ensure you don't neglect the windows of the tall building as you move up. Pass the enemy sandbag emplacement and head towards the van once the area appears to be clear. Two PMC soldiers will come running in your direction so move around the right hand side of the van as they get close to stay out of sight. You can always sneak up behind them and take them out once they pass if you're hungry for CQC-induced blood.
More PMC troops will come in your direction so keep watching the Solid Eye to take them out sharpish or duck into the shadows or side-streets. Turn left at the end of the main street to head towards the exit marked on the map. The route is littered with PMCs engaged in combat and most of the time you can flank them and get past with relative ease. Move up the side street towards the exit marker, past the blue minibus. 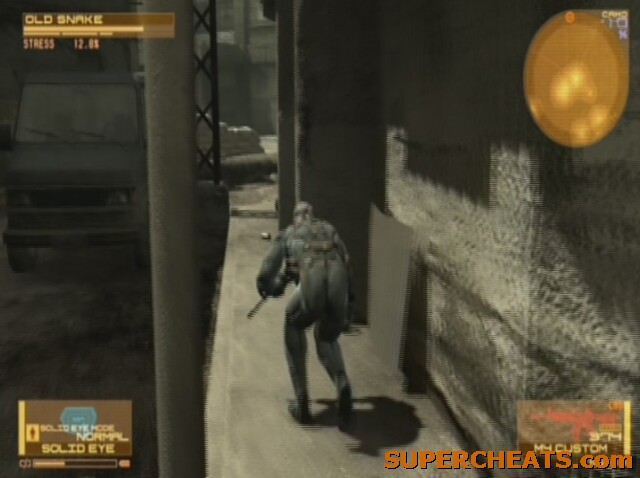
Stay to the side to avoid confrontation
As you move into the middle of a giant battle between Militia and PMCs just sprint across onto the Militia side. Otacon will inform you that a PMC air strike is inbound, so watch out for that, but you should be able to get to the exit before it hits. The exit itself is rather well hidden, it's basically a blue door nestled underneath the overhanging building in the cover.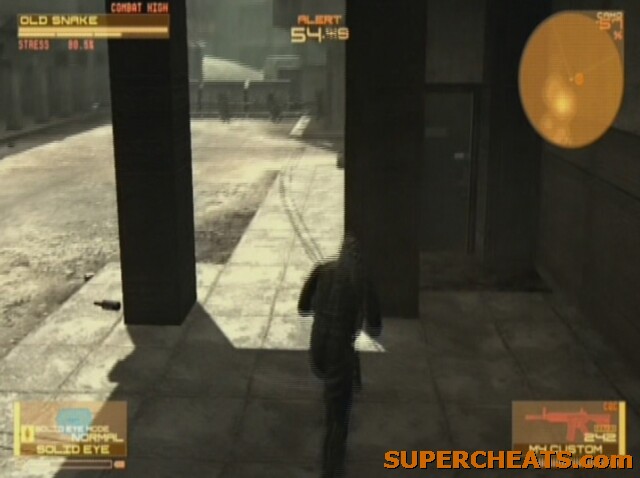
The infamous blue door
This is a relatively simple area to get through, with no enemies until the next cutscene. Be aware though, the floor is littered with bombs and mines. While you can see them in plain sight, switch to the Solid Eye's Night Vision mode to make them stand out clearer. If you have plenty of Rations it is not so necessary to be all that careful, though you may not want to waste them unnecessarily. There is a good amount of loot on each floor of the building, and you can collect all of the mines and bombs by going prone and crawling over them to add them to your stash.
When ready, move up each level using the stairs to the north.
Head up the stairs while watching out for mines and traps
Get off at the first floor if you want to collect as much as possible, otherwise head up to the second level. Up the next flight of stairs to the top are some Noodles and a dead end. Follow the gangway all the way round the inner courtyard until you get to the mine at the end opposite the stairs you came up on. Crawl over this and head up the next flight, though again, feel free to take a diversion to pick up items en route.
Crawl over traps while prone to collect them for yourself
Next head outside and turn left. As you head towards the bar indoors be aware of the mine on the right as you enter. Collect the items on the right hand side of the bar before moving through the door opposite where you entered and heading down the corridor to trigger the cutscene and meet up with Rat Patrol.
(Cut Scene 6, Length 17:16)
We are quickly shot into action following the cutscene, so be ready for a tough fight. The Haven Troopers that spotted Akiba's lens flare have come up to investigate. Take out the Troopers in the open area as you move out of the bar, watching for grenades. Hide behind the bar but make sure you have room to roll in case any explosions come in. They can use the ceilings and walls, as well as walking like normal soldiers, so be on your guard and try not to use the first person mode unless absolutely necessary as it's too slow to readjust your aim. Follow Rat Patrol downstairs to the upper floor of the courtyard. Many Troopers drop in and once you have moved into the middle they will also attempt to flank you from the right hand side. Move into the bar area if necessary and allow Rat Patrol to take the heat.
The first fight with Meryl's Rat Patrol
Once the Patrol begin to move through, follow them into the bar as well. The Troopers hold P-90s, so be sure to pick them up if you want to. As you move into the restaurant section enemies will burst in through the windows. Some may well get pretty close to you so be ready to engage in CQC if necessary. Move through and take out any enemies en route. Grenades are a great tactic here, whether they are the stun or more deadly varieties. The Troopers really pack a punch on the harder difficulties, so make your shots count.
Follow the Patrol through the building now, where you should encounter only minimal resistance until you climb down the stairs to the floor below. In a similar location to where the large fight occurred previously, this courtyard area will see numerous Troopers come in at the far end. Some will also appear on the floor above where we were earlier; again, grenades or petrol bombs are very useful here. Rat Patrol will move out once clear through the toilets. When you emerge near the trip-mines crouch through the hole in the wall to their left to face more enemy soldiers. Take up position facing in a certain direction and try to hold off all incoming enemies. Rat Patrol do a decent job of suppressing the rest.
Rat Patrol squirm back through the hole and a cutscene kicks in.
(Cut Scene 7, Length 00:33)
As the scene ends get behind the bar and prepare for a fight as a JCB pushes through the wall, followed by a flashbang and more Troopers. With the area clear move out of the other door behind the bar with Rat Patrol and follow them until the cutscene.
(Cut Scene 8, Length 00:53)
Jump down the lift shaft ahead yourself, as extravagantly as you want, and move through the room to enjoy another cutscene.
(Cut Scene 9, Length 05:08)
We begin where the cutscene left off, in the basement of the Palace. Collect any P-90s in the room and head out up the pile of rubble at the northern end, pressing Triangle to climb up the step. Move inside and climb over the boxes and crates on the right, again using Triangle.
Head through the corridor until you come past the second corner to see some Militia covering behind the wall ahead. They will all move up as you emerge. Follow them to the concrete blocks to trigger a cut scene.
Follow your Militia allies
(Cut Scene 10, Length 00:22)
A tank arrives via the cutscene and it will prove invaluable in getting through this section. Head behind the wall on the right as the tank moves down the street and pick off any PMCs in the road ahead. You can always wait for the tank to come in too as it forces the enemy to fall back. Once it's in line with you, step out behind it and use it as cover (don't stay too close however as it will be destroyed shortly!)
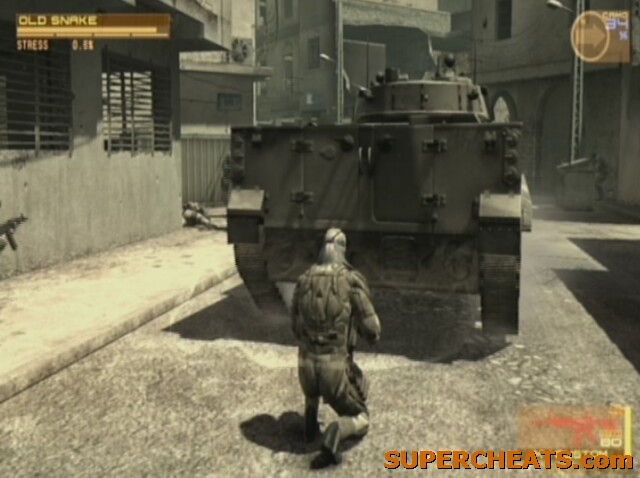
The deadliest cover around
Once the tank is stopped dive for the dumpster on the eastern side of the street corner to provide a good cover position for taking out enemy PMCs. Follow the Militia down the street heading north and climb up the ladder under the veranda on the left hand side of the road near the end of the street. Follow the route all the way around until you come upon an open section and the opportunity to jump down, triggering a cutscene and the end of the section.
(Cut Scene 11, Length 04:00)
Ignoring the piles of dead bodies that have been amassed, move down the street heading west. As you approach the destroyed JCB you'll see two PMC soldiers walking backwards. They turn to face your direction half way and continue to move in this direction. Hide behind the wreck and allow them to move past before continuing.
Move up on the left hand side of the street and stop by the pile of crates.
Stop here to wait for the guard
Wait for the PMC soldier by the barbed wire to face you then turn and begin walking in the other direction before you move up to the next crate on the left. He will stop to look in your direction, wait for him to move again and dive into the left hand alleyway not far from your current cover. Duck under the hole in the wall and head up the stairs in the building. Using the Solid Eye, wait until the guard walks past the top of the stairs and take him out using CQC or a silent weapon.
The beginning part of this area in video form
Head through the corridor to the left and drop down the hole in the floor.
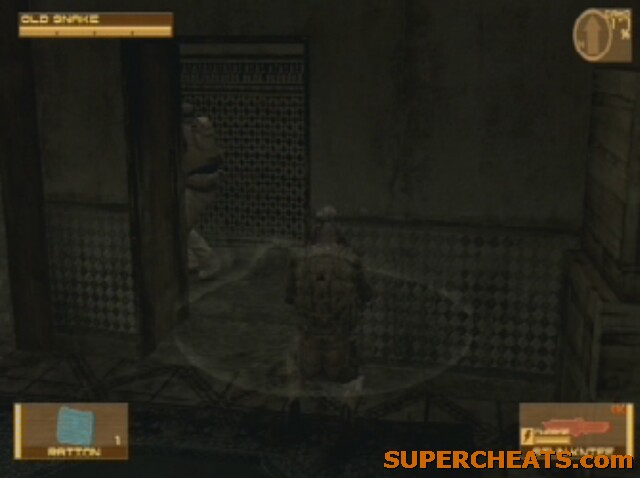
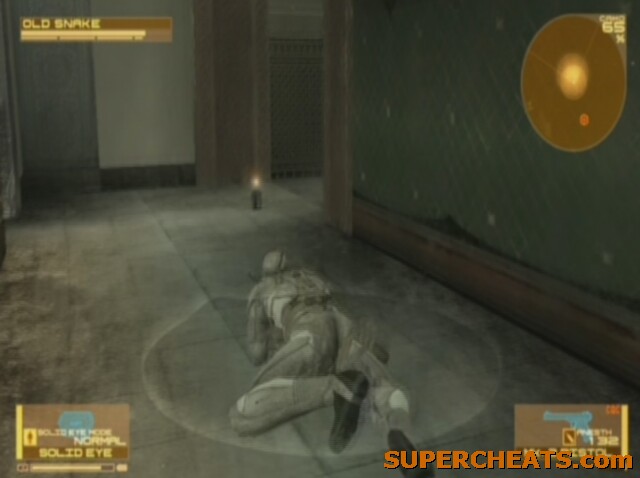
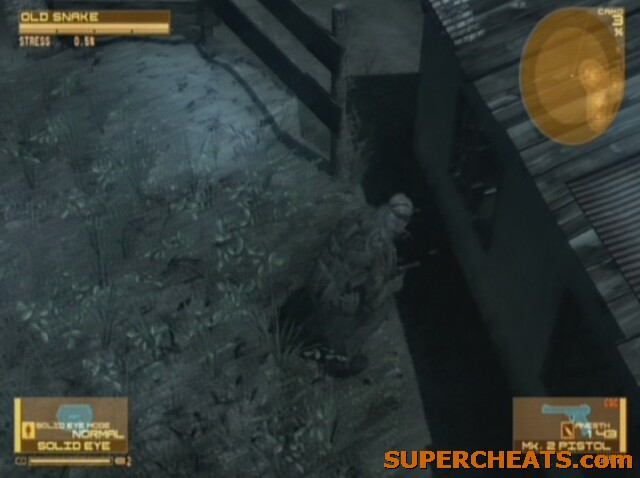
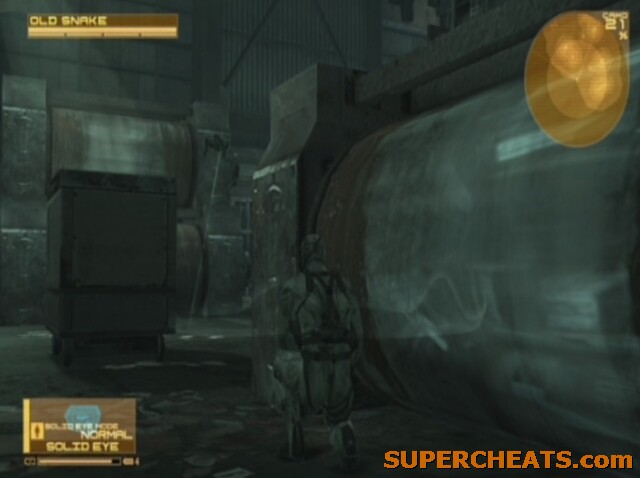
When you drop down head north and go through the red door on the left of the corridor. Turn right to see a large opening and a fountain crawling with guards. Go prone and let your OctoCamo do its job while waiting for the nearest to walk right past your opening. You should be able to take him out without alerting any other guards, but pull his body back through your opening if you want be safe. Crouch walk, keeping to the left hand side and go prone through the hole in the wall by the lumber pile.
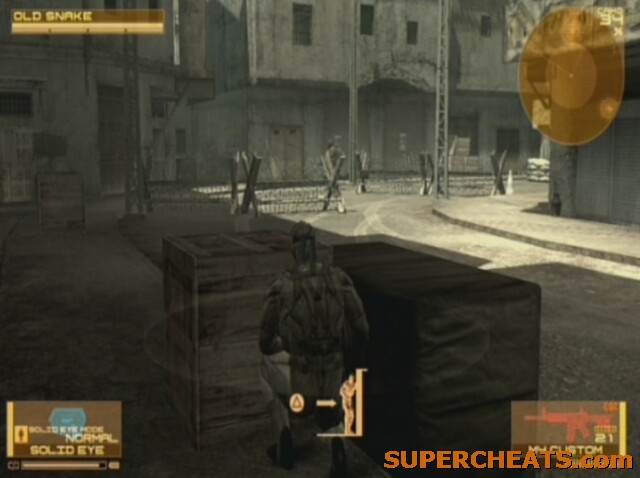
Don't go out past the wooden box as there is a guard patrolling. Cover on the edge of the box and watch until he turns round.

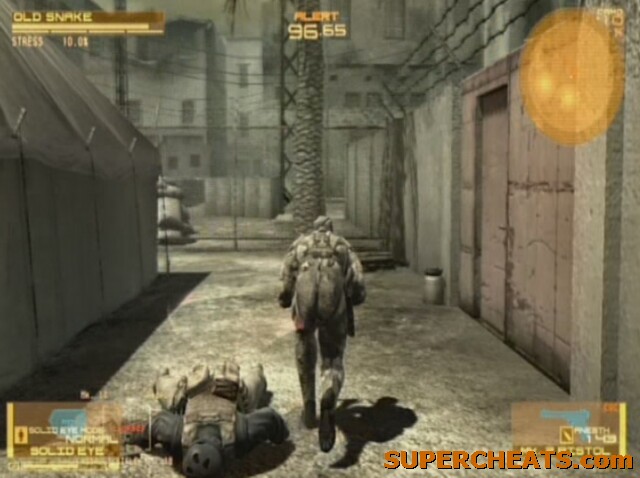
Using the Solid Eye watch for when he passes around the other side of the truck and make a dash for the cargo containers to the north. You can either sprint through this section or try to remain stealthy. With the nearest guard's back turned slink around the right hand side of the tents. Follow the route round to the back wall and go through the red, metal door to exit. There may be a guard patrolling the back route, but just shoot him or sprint past. Should you get spotted just run to the exit. It is a short distance so don't worry about getting caught up on the way.
(Cut Scene 11, Length 09:30)

Press Square when the screen splits up to take control of the Metal Gear Mk. II and move it around the level. You can go to full screen using the onscreen prompts too. You can find various items around the area, including a Battery neat the helicopter, a Camera behind one of the desks and an iPod tune and some Noodles upstairs.
(Cut Scene 1, Length 09:33)
You begin behind some rocks above the PMC base. Militia troops are being held hostage in the centre as you may have noticed in the cutscene, so now you have a few choices. If you free the rebels, they will help you take out the rest of the guards in the section and indeed through the rest of the level. You can buy a sniper rifle from Drebin via the Start menu and pick off the guards like that from the top of the hill, though there are many of them, or, get up close and draw them towards you with gunfire to free the Militia early and allow them to help you take out the rest. This guide will go for this second option. If you want to avoid confrontation altogether, just follow the directions given as the method outlined here is designed to use sneaking as much as possible anyway.
To begin, once the guard in sight on the road below turns away, head left and drop down behind the building, shielding you from the guards' view.
Drop down here
Move along to the right hand corner and, with the guard looking away, dart across to the grass in the shade across the street. Go prone or crouch until the guard either gets close enough to spot you or is just a couple of metres away. Take him out with a silenced weapon and wait for his allies to come and inspect the area. Take each of them out from your covered position. Move up the wall towards the rebels and pick off the PMC soldiers in the area. More will come to investigate, so do the same. Keep in the shadows and your weapon silenced so that the enemies coming in do not know your exact position – ideally you want to stay out of alert mode. After taking out all the guards in the immediate area the Rebels will get up and take the weapons.
Rescue the Militia
Now head to the east, where you want the thinner of the two paths, the second one as you go from south to north. Any guards you see en route should be despatched using silenced weapons so they don't all come up on you at once (there are a lot in the area). As you move along take out the guard up on the ledge above before stepping up and climbing onto it yourself using the lower ledge. Move up in the same fashion on the left hand side of the embankment. You can wait for the Militia troops to catch you up and deal with many of the PMCs if you want. As you reach the top behind the house and move through the corridor you'll receive a call about your new psychological counselor.
Move through the trees to find the Militia and follow them. PMC soldiers may well come in on your position once the Militia stop briefly; be aware. Bear left once the fighting starts, moving slowly and picking off any enemies with a silenced weapon – keep the attention on the PMCs. You will eventually come to an overhanging rock with grass and a handy shadow. Use this if you are in alert mode as well as to pick off PMCs stealthily from distance. You can lure in enemies with noise, then pick them all off as they are searching for you.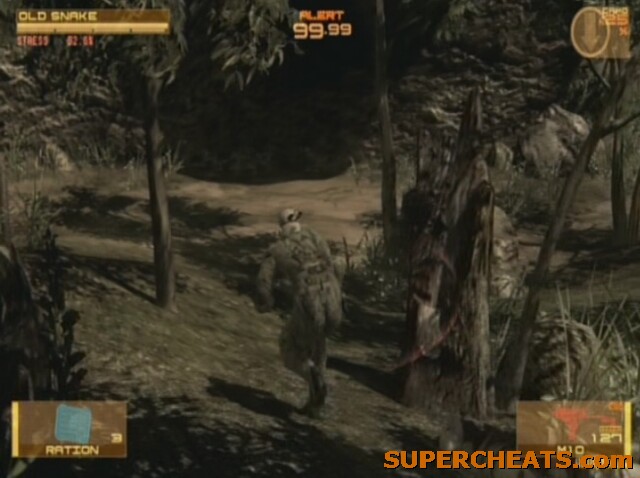
Head for the shadow and overhanging rock if you get into a spot of bother!
With the area cleared, move up towards the barn to the north. Take out the PMC soldier on the ledge above, or sneak beneath him. Head down the left hand channel where the path splits, waiting for the PMC guard to turn before using CQC or silenced weaponry to take him out. Do the same with the next one shortly afterwards before moving on to the exit towards the Power Station.
After the mysterious call from Raiden, warning of snipers in particular, move up against the rocks in the shadows on the right. Transfer over to the left using the boulders for cover and hug the left hand wall now, in the shadows. Be sure not to get caught out in the open as there are a good number of enemy snipers watching the surroundings. The Militia will move up with you and provide cover, but try not to get amongst them too much as they inevitably don't fair too well in combat. Go prone and crawl into the grass ahead.
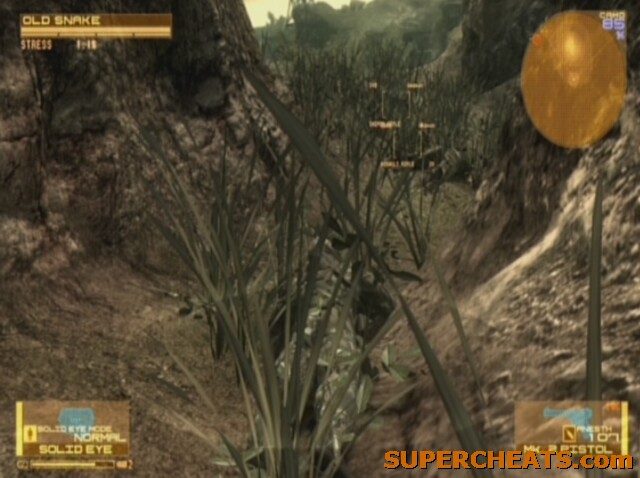
Use the grass for camouflage
Head onto the top of the hill, staying prone, and, depending on the difficulty, you can either follow the line of grass behind the rock ahead, or get up and crouch run to it. There are many explosions and Militia that you can use for cover if you feel the need to. Once you get to the rock go prone again and crawl out to the log.
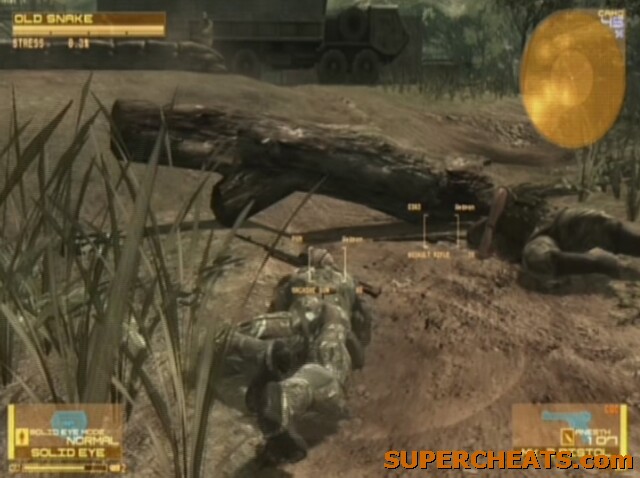
Use the log for cover
If you move slowly you should be able to avoid detection, but be ready to get up and run to the right if the worst happens. Be careful of any corpses lying around as these frustratingly force you to get up and run. You can use the craters on the way to go prone in if you come under particularly heavy fire.
Once over on the right hand side there may be Militia to give you a hand. If not, be aware of a PMC guard by the truck while moving forward. Use the pile of lumber for cover if necessary and wait for Militia support.
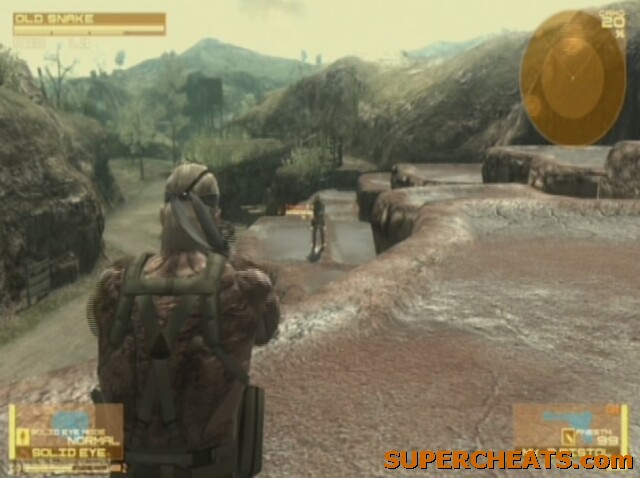
Moving up to the Power Station from the start of the area
If you want to push on stealthily, go prone underneath the truck and emerge through the gap in the wall and dash up the stairs. You may find an enemy guard patrolling on the entrance to the building. There are enemies inside, so creep carefully and use the Solid Eye to locate them. The Militia disrupt their positioning so it is quite difficult to provide accurate locations in a guide.
You can now either pick up the C4 in the eastern wing of the building and detonate it on the main panel in the control room or wait for the Militia to do it. Then head outside and follow the road round to the tank.
(Cut Scene 2, Length 10:41)
You can now track back and collect items or visit the secret area on top of the electricity pylons that have now been deactivated by going out of the western exit of the control centre and climbing up the ladder.
Once at the top of the first one, head to the northwestern corner and press Triangle to drop onto the wire and climb across to the next one (the one with all the goodies). Items available up there include a Rifle Scope, a Surface to Air Missile Launcher (found below the pylon itself) and a PSS located nearby. You leave the enclosed area below the pylon by climbing the boxes against the southern wall. You can also head back through any areas accessed before in this level to pick up any items and ammo if you're running low.
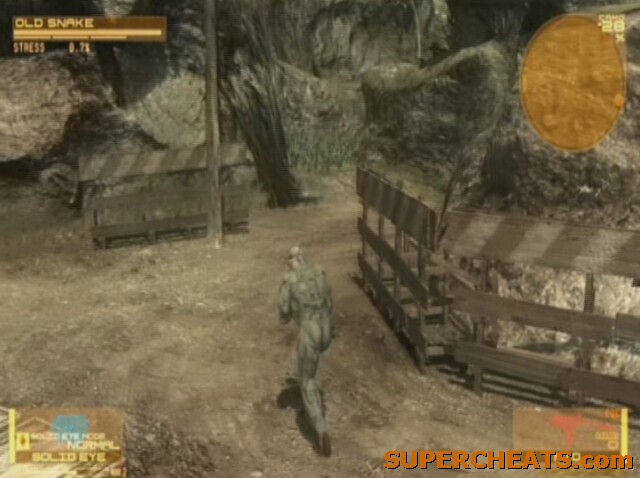
Once you're finished in the area, begin to head in the direction Drebin went in. Before the road turns to tarmac, just away from the edge of the facility, take the narrow path flanked by two wooden palisades as shown below. Make sure you don't take the wide road path as this is longer and harder.
Follow the path through, ignoring the patrolling Militia who are friendly towards us anyway. Be sure to pick up the Javelin surface-to-air missile and the XM8 assault rifle in the northwestern corner of the area just before the grass-filled path that you need to take to move on. Go past the Militia soldier and follow the runners up the hill on the left heading roughly north. Continue up this path to exit the section.
Jack/Raiden will give you a call as you enter the ominously-named Confinement Facility, as well as Rose immediately afterwards. Move along the fenced path but climb up the rock shelf on the right as early as possible. You'll find a PMC guard on one of the ledges below to the right, so take him out before he can sound the alarm.
Get rid of this guard before he can call for backup
Drop down the ledges to where the guard was and walk along at this level until you get to the next step with the fence on the left. Climb up it using Triangle. Once you get in sight of the road go prone. You need to wait for the enemy behind the sandbags near the road to move off, or, alternatively, pick off enemies using a scoped weapon from your safe position up high. Then move down the hillside path and head to the right through the grass and behind the large rock. It should be safe to crouch or run here. Militia may come down the right hand channel to assist you. The Militia's presence will spark off a skirmish in the area, with enemies emerging by the tank as well as one in the tower beside it.
Cross the road and follow the left-hand outside wall of the base. Head out of the northwestern path to exit the section. If you want to collect the items from the base simply support the Militia in their goal.
Head along the path to find some friendly Militia. Move up on the left, staying prone in the grass to keep yourself hidden as the area is crawling with enemies in nooks and crannies just waiting to pop out and spot you. Cross the path as you near the top of the hill into more grass. 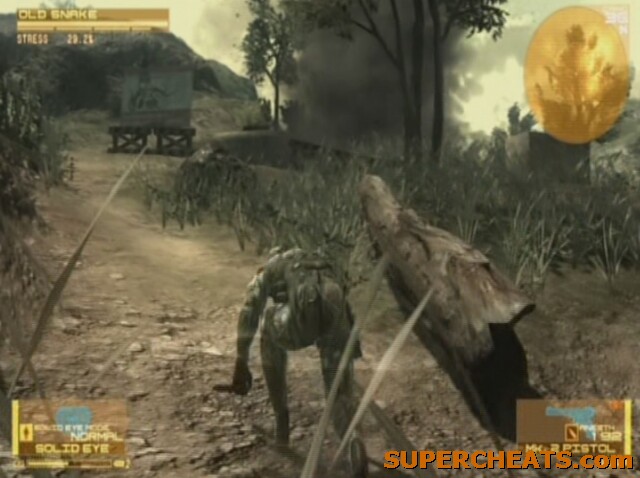
Continue slowly up to the top
Move through the grass while prone and take out any PMCs in sight from your concealed position with silenced weaponry. Get up when you reach the eastern fringe of the grass and move towards the large crate and sandbags. A cutscene will play.
(Cut Scene 3, Length 00:07)
A JCB and more Militia arrive on the scene. You can just hold position here or switch to an assault rifle and let rip; after about 15 seconds the next cutscene will be triggered automatically.
(Cut Scene 4, Length 00:10)
Get up and run along the main road towards the large wall and gate that the JCB demolished. Turn right as soon as you enter the base and follow the wall along behind the tents. At the end of the second one having rounded the corner, head west towards the main building, stopping behind the crates underneath the wall. 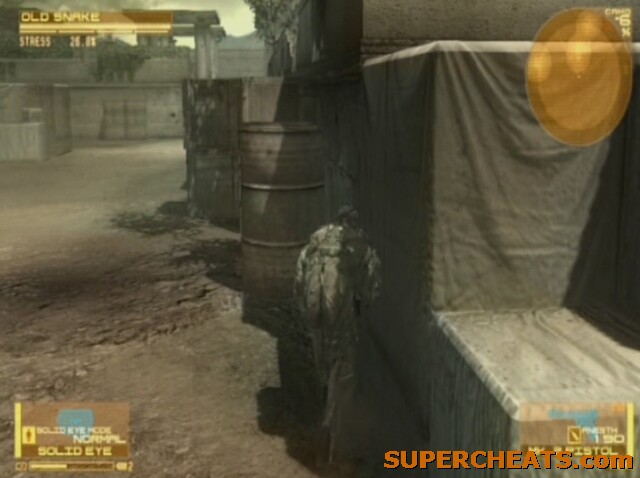
Stop here to survey the area
You could go straight across once going through the main gate at the entrance to the base, but there are plenty of enemies with long-range weaponry looking to make this all-guns-blazing tactic difficult. Keeping snug to this wall for cover, begin to move towards the steps further west. You can turn to face the wall to pick off any PMCs terrorising the Militia above if you wish.
Go prone once you get to the steps and slink up them. There will be enemy guards at the top so be careful not to stick your head out. If you stay just below the top of the steps then guards will be able to walk past you on their way to fighting the Militia without spotting you, just use the Solid Eye to learn when they are coming your way.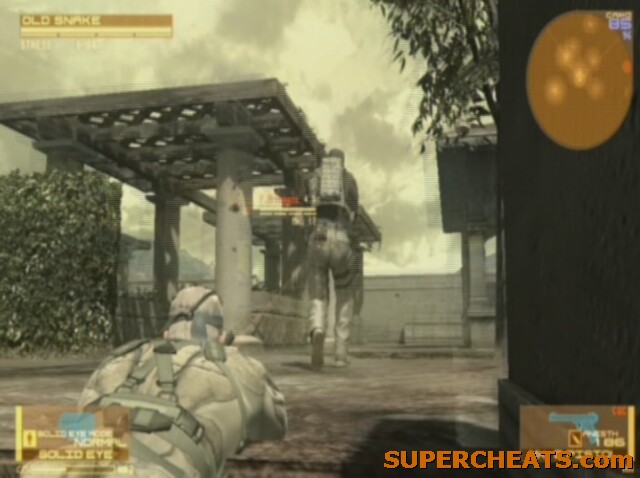
Guards are oblivious to your position here
Pick any enemies that are likely to spot you off with your silenced pistol, but stay hidden where possible. Go right behind the boxes at the top of the stairs and climb up the concrete beneath the window to the right of the main door, parallel with the boxes. Press X while next to the window to breach in with a roll. Collect the frag grenades in the room and head out into the lobby through the door.
This immediate area is clear but as you move through in sight of the stairs a pair of guards will come down. Press yourself up against the northern wall in the lobby or the room with the stairs in, or, for more fun, lay a Sleep Gas Mine or similarly quiet ordinance quickly and watch the fireworks. 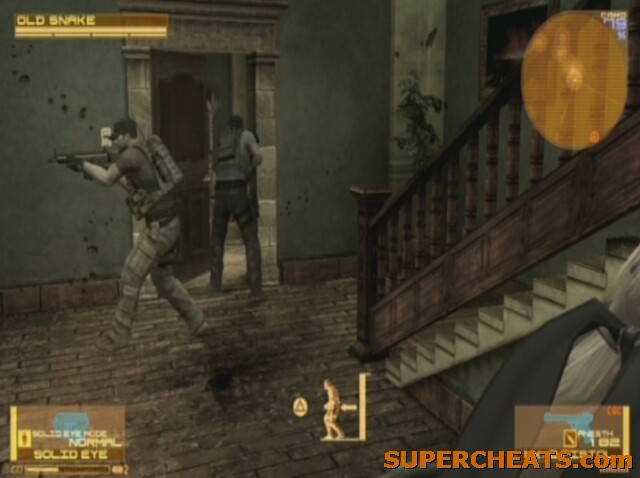
Hide and let the guards move past
Head up the stairs once the two guards have gone (or kill them or knock them out) and follow the left wall round to enter the door in the corner-room. Head into the bedroom and collect the Playboy on the table in front of the bed and go through the door on the eastern wall. Turn left once on the balcony and drop down through the skylight. Head down the steps into the cellar.
You can find Noodles and a Claymore in the first room and a grenade and stun grenade in the next room on the right. Go out of there and turn right to continue down the corridor. Turn left at the end and climb the ladder to the back of the light corridor to complete the area.
(Cut Scene 5, Length 12:17)
(Cut Scene 6, Length 11:03)
You exit the cutscene with heaps of enemies baying for your blood. Back into a corner facing the doors and set up a defensive position. You could climb near the bed facing the doors, or go prone underneath it. After taking out the first four or five enemies (shotguns, grenades or heavy machine guns are recommended) move out to clear the rest using the Solid Eye. Some may be hiding up on the ceiling and they all move pretty fast, so be sure to use stun grenades to slow them down if necessary.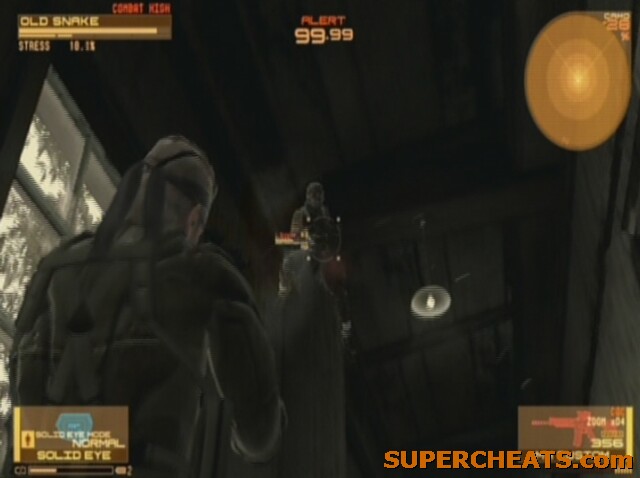
The Haven Troopers get everywhere in the building
Keep watching the Solid Eye for more. You'll probably have to despatch over a dozen enemies before a cutscene is triggered, just make sure they don't sneak up behind you.
(Cut Scene 7, Length 01:06)
You'll start with Octopus facing you, so switch to a shotgun or large machine gun and try and knock down her health straightaway with an early barrage. She'll then disappear from view. Wait for a scream or taunt to spot her using your Solid Eye. She camouflages herself as the Mk. II, hides on the walls, in cardboard boxes and in the rafters, and generally is pretty tough to spot. She will take her time to attack with her machine-gun until you open fire at this stage, so just go roughly to the room where she is hiding and have a root around.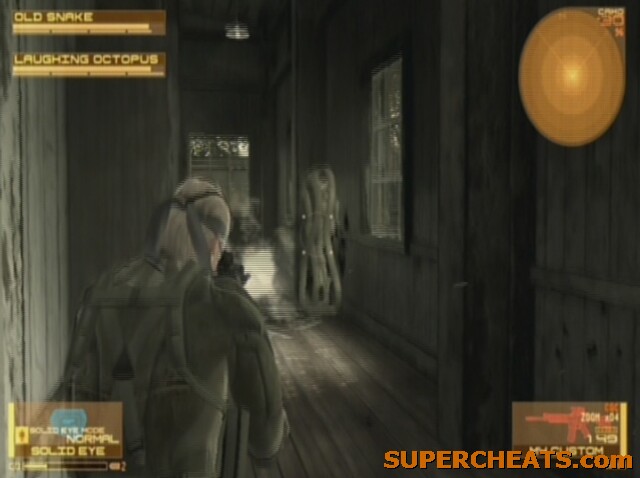
She can camouflage just as well as Snake
Upon being knocked down with bullets, Laughing Octopus will unleash black smoke and possibly missiles to make her escape (though you can still inflict damage upon her at this stage) and stun you if too close. You can probably take off about one bar of health each time before she runs off. If you lose her try going in the outer corridor to draw her in through one of the windows, but be sure to look up at the ceiling as well! As you take off more than about half of her health she'll start walking around to actively come and get you, also rolling at you (climb up on objects or knock her down with your weapon nice and early to avoid it) and firing more projectiles.
With her health completely down a cutscene plays.
(Cut Scene 8, Length 03:10)
Laughing Octopus becomes Laughing Beauty. Now that the boss has lost her speed and weaponry all she can do is amble towards you and try and hug you to death. Just walk backwards, being sure not to get trapped in any corners and shoot her to pieces. If she does manage to get a hug in on you it will take away a substantial amount of health, so be ready with the appropriate equipment, and waggle the left stick, followed by Triangle when prompted to shake her off.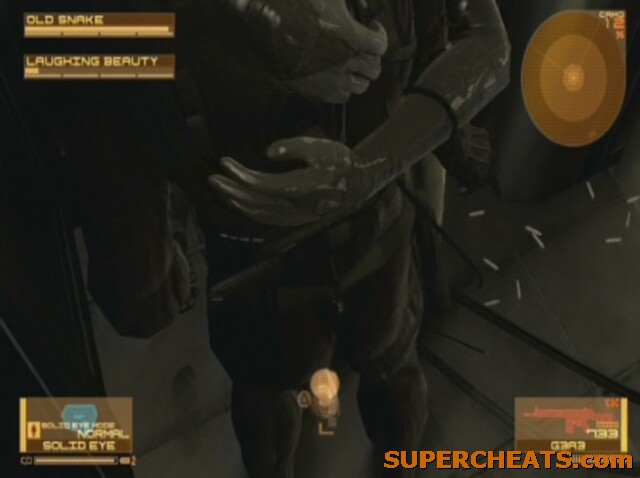
Laughing Beauty's death-hug!
(Cut Scene 9, Length 05:56)
(Cut Scene 10, Length 02:19)
In this section, as the cutscenes suggest, you need to use the Solid Eye's night-vision setting to follow the trail of footsteps around the mountainside. Keep to the densest areas of footsteps, collecting the Ration on the right as you move through. Continue to follow the path as it heads east, then north through the grassy patch.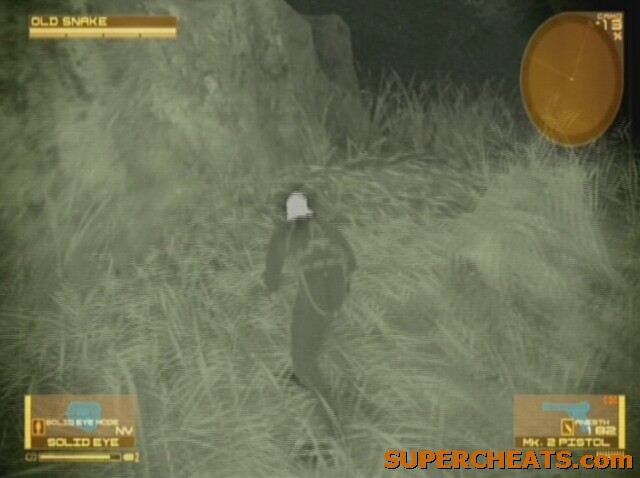
Use night-vision to follow the footsteps
Once you get to the grassy area go straight on to find a guard going to the toilet into a ravine. Unfortunately there is a fence blocking a rag-doll fueled hilarious death, but an easy CQC kill is still easily enjoyed here. If you want no distractions and to bypass this section, turn left after passing through the grassy area (if you did visit the guard, then it's obviously a right turn on your way back down the track). Back to business now and you should cross a bridge if you're heading in the right direction – it should be roughly north, but if in doubt, retrace back to the grassy area and make sure you head west at those crossroads. Be aware of the guard up ahead as you cross, wait for him to move towards the left before taking him out before running past up the path to the right as his demise may be spotted if he's too far in the other direction.
As the path begins to open up you come into a sniper-alley. Pick off the first one with a silenced weapon from distance, he's up high on the ledge as shown below.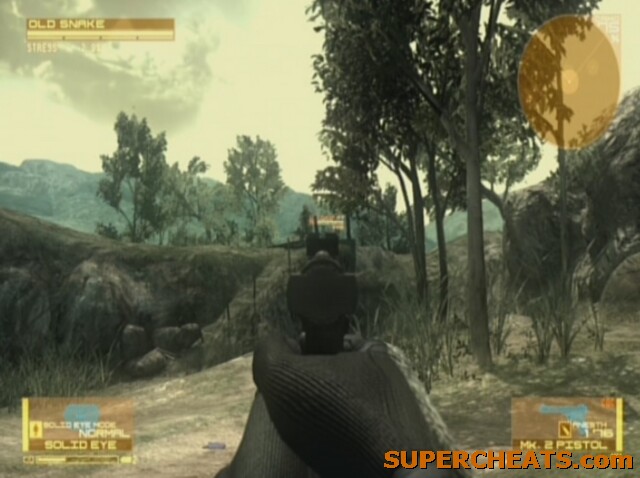
Take out the sniper
Take the first path on the right from here, ignoring the next sniper up high while staying close to the right hand side of the path so as not to be spotted by him. In the next clearing there is another guard who you can also pick off from range in Solid Eye mode. There is another enemy in the area, inside the shack up-ahead, but he's too engrossed in a Playboy to notice what is going on, so just CQC him to remove him from the situation. There is also an RPG-7 behind the shack itself. Take the northern path sloping downwards from here, which will ultimately lead to yet another clearing. Use the boxes for cover and move around the right hand side to take out the guard crouched down just past them, again using CQC if you want. Head down the grassy path east of the guard, or the first one on the right in the clearing if the guard is out of position. It will lead you to the river.
Cross the river, taking the central path, another grassy one until the clearing. Turn left and take the northeastern exit from the clearing (the one in the corner rather than the most immediate one on the left). Follow this path until the grass turns to sand at which point you should be aware of a guard up ahead by the two dead trees. Take him out with a silenced weapon. Take the southern path, straight ahead up the hill. Silence the guard in the area at the top of the hill. Go straight across in this area past the rock and long grass. Go down the next left at the thin path and then right into the cave to finally finish this area!
(Cut Scene 11, Length 06:18)
(Cut Scene 12, Length 00:07)
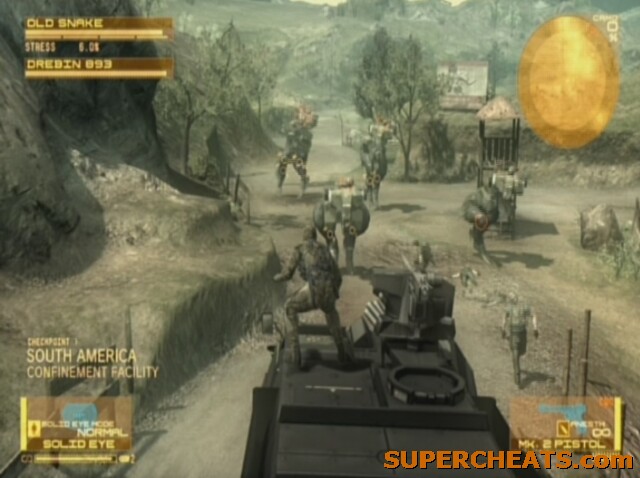
This is an on-rails section and is a nice departure from the tense stealth sections preceding it. It is one of the easier sections in the game and as such does not take a lot of explaining. As Drebin drives you through just make sure you are taking out any infantry enemies that get too close as they can climb on top of the vehicle and will force you to disembark from the mounted gun and take them out in close quarters. All of the enemies can be fairly easily despatched using the gun emplacement at the head of the vehicle.
Take out the larger enemies and robotic units by shooting them in the head as you move through the areas. Ensure you have a shotgun equipped for when you need to get off the gun and defend the top of the vehicle as inevitably some enemies will cling on.
(Cut Scene 13, Length 00:09)
Watch for enemies climbing on top of the vehicle
This area is crawling with Gekkos, which must be shot in the head or preferably the legs, to be defeated. Many more enemies will climb up on top of Drebin's vehicle too, so be ready to get off the gun and CQC or shotgun them. I recommend keeping your Mk. 2 pistol as your main weapon so you can quickly disembark the gun and use CQC easily.
A video of this on-rails section
(Cut Scene 14, Length 00:20)
In this section you just need to shoot the green gate doors to proceed with enemies and a tank also buzzing around you. It may be necessary to break briefly to deal with enemies, but otherwise just pummel the door with the mounted gun (you could dismount and use RPGs) – it does take some time, but keep at it!
Deal with the Gekkos as Drebin leads the way to the next area.
(Cut Scene 15, Length 00:27)
Let Drebin drive you along the mountainside and through the paths, taking out any Gekkos blocking the way, though most will just get run over!
(Cut Scene 16, Length 00:06)
(Cut Scene 17, Length 05:11)
We've now ditched the vehicles and need to get to the extraction point.
Head down the slope and turn left at the bottom to duck behind the first market stall underneath the arches.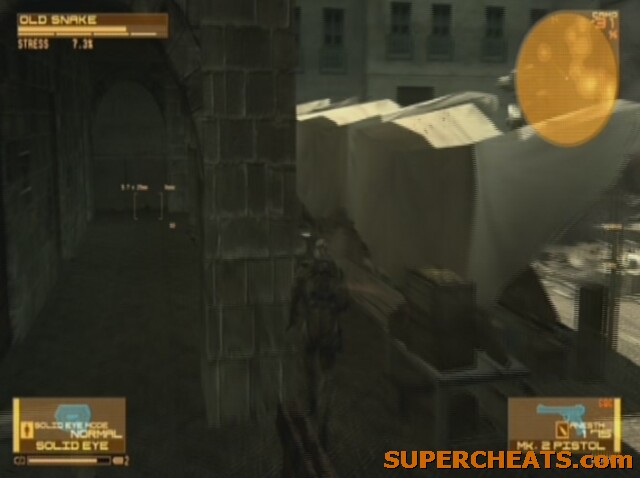
Head through the shadows to avoid the Gekkos' attention
Continue on in a straight line down past the side of the houses, with civilians running through at you. There is a Gekko exploring around the corner so prepare a suitable grenade to stun it so you can get past. There is also an M72A3 anti-tank rocket launcher near where the Gekko first emerges and this is also a viable tactic if you back off and unleash a rocket on it. Should you get too close it will knock you to the ground and make getting past very tough indeed, taking off around two-thirds of your health each time.
Head down the alleyway and back out onto the main street, using the same tactics as before to get past the Gekko patrolling the street, or waiting for it to move past. There is another one blocking the end of the road; dash/roll underneath it after stunning it with a grenade to complete the level.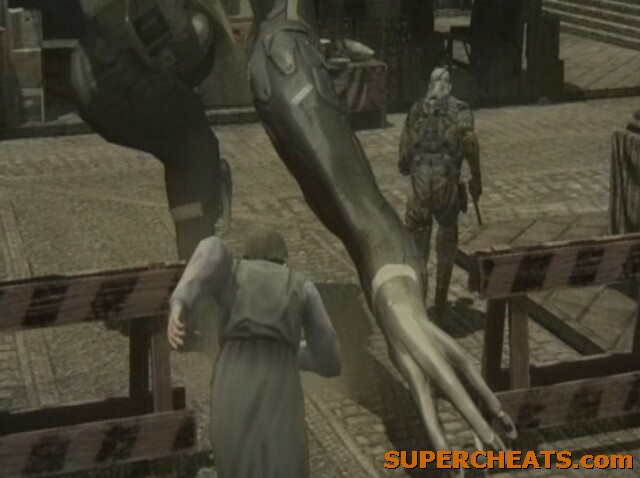
Get through the last Gekko's legs
(Cut Scene 18, Length 08:44)
Again you can take control of the Mk. II to get ammo at the rear of the plane, another Battery upstairs, as well as an iPod track, specifically the Shin Bokura no Taiyou theme.
(Cut Scene 1, Length 11:47)
In this section the goal is to follow the resistance member to find Big Mama's hideout. The area is well protected by PMC troops and you'll want to switch out of the civilian disguise and back into your OctoCamo suit and FaceCamo mask. Equip the Mk. 2 silenced pistol and be prepared for plenty of crouch walking. You shouldn't actually need the Signal Interceptor unless the resistance member is captured or you lose track of him, so keep the Solid Eye on.
You can track the resistance member manually by listening out for his distinctive whistle. The Solid Eye picks up quite a lot of interference from crows, but is still pretty effective. Turn right and then left from your starting position, sticking to the left hand wall to trigger a cutscene.
(Cut Scene 2, Length 00:25)
Now that we have found the resistance member the task should be simply to follow him. Stay well back; if a PMC guard could see you from where the resistance member is then he'll be able to, so crouch on corners and use the camera to keep an eye on him, then move as he takes a direction. On the different difficulties there are varying guard positions and extra patrol cars so be aware and don't take the locations for enemy guards stated here as gospel.
You start this section on the wrong side of a van – the resistance member will come your way, so move round to the front of it to stay out of his line of sight.
Hide behind the van so the resistance member doesn't spot you
Follow him east down the street, waiting for him to cross the road before pursuing. Use the Solid Eye while in cover to detect whether he has begun to move or not if you are ever in doubt. Often he hides in doorways so it is sometimes unclear as to whether he is right in front of you or not. Should he spot you he'll either run off or try and attack you. If you dart him one, then stand on his body and press Triangle a couple of times to wake him up before running off into cover you can continue unhindered.
Be careful while moving not to hit any dumpsters or cans that are lying around on the pavement as these can alert both the resistance member and PMC guards if you were following closely. Hide behind the phone box as the resistance member will come back out of the alleyway, changing direction because of PMC guards in the way. He will continue down the main road heading east. Soon he'll stop and Otacon will inform you that you need to take action so the resistance member can continue on his journey. Get your Mk. 2 out and use Triangle to pick off the PMC guard from distance. The resistance member will look rather confused, then continue on until he gets to the next guard up the hill in front of the park. Do the same, then follow him into the park itself.
Take out the PMC guards in his way
He'll hide in a doorway on the way up the hill so be aware – he hasn't gone into an alleyway so don't follow too closely or he'll reemerge and spot you! He turns left at the top and the crosses the road, entering the park up the steps around the corner. Another left at the top of the stairs and he'll move to the fountain in the centre of the park. He will take the route to the north before sprinting back in your direction to relieve himself, so watch out for that!
He should then walk over to the wall and crouch down, slinking towards the exit before stopping by the guards. You'll need to take them out so he can proceed. Again, silenced weapons only. If by chance he gets arrested just wait it out and switch to the Signal Interceptor until the location of another comes through. It will be marked with a shaded area on the map with the Interceptor equipped. Listen for his whistling then switch to the Solid Eye so you don't walk out right in front of him. They often appear in the next section, so if he was arrested in the park the next one may continue outside it.
If all goes to plan he will exit the park by the nearest exit, then turn right and go up the ramp, stopping in an alcove near the phone boxes for a short while. He should then move through and go down the steps on the other side.
He turns left at the bottom and then crosses the road. He will then follow the road and turn right, albeit in a slightly roundabout way stopping in every doorway en route. Follow through the archway heading directly north, turning left at the end to exit the section.
On Big Boss the route is different at the end and there is a patrol car to worry about as you head north. Just follow the target and stick to the edge of the street, darting into an alcove if the car comes your way. He will then lead you to a different exit.
This only applies to Big Boss difficulty, on all the easier ones this (and the next) area is skipped so move on to the Midtown NE part of this guide if this applies to you. The resistance member starts by looking at the wall, then feigning to continue before coming back to look again. You need to use the vans ahead for cover so as not to be spotted by the PMC helicopter or its spotlight. There shouldn't be a need to shoot any guards in this section as you can get by on pure sneaking alone. From the road, head up the western steps and then down underneath the bridge, but watch out for the guard in between and make sure he's looking away when you make your move. Wait for the searchlight to move away then dash for the next bridge along. The resistance member crosses the river and heads through a gap on the other side. Follow him at a good distance to proceed to the next section.
The resistance member will move out into the centre of the river, then come back towards where you start. Avoiding the spotlight, head for the bridge nearby. Hide underneath to allow the helicopter and spotlight to make another pass, then head up the steps and over the bridge, turning right at the end. Go up to the hole in the wall on the left and send the Mk. II through it, knocking over the bin by the guards and making as much noise as you can to lead the guards north. This takes them out of the resistance member's route. Head along the road to the right now and you'll see the resistance member again. Follow behind the PMC guards until you reach the exit.
Big Boss: Follow the resistance member down the street and round the corner. Hide under the pillars down the street to avoid the PMC guards, then follow the resistance member round the next corner to the exit.
Other difficulties: Move up to the van on the left hand side of the street, making sure you are hidden from the view of the resistance member. You will be warned about a helicopter up ahead which will aim to spot you with its searchlight. There is also a PMC soldier across the street, but neither should spot you if you follow the pavement round to the right as you go through the arch and crouch walk behind the parked cars in the same direction as the resistance member. Watch for the helicopter on the Solid Eye and make sure you only move quickly once it moves off.
Follow along the pavement until the resistance member turns left round the corner towards two PMC guards. How he hoped to blag his way past them is anyone's guess, but you need to intervene to make sure he is not captured. Dart the two PMCs and stay back to allow the target to move on.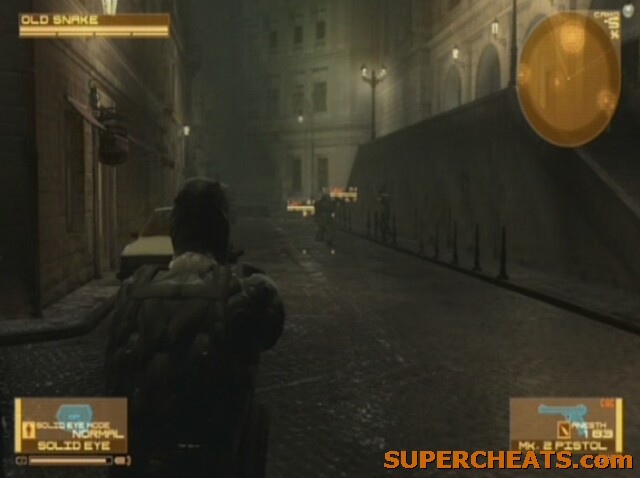
You need to take out these two guards or they will arrest the resistance member
You could also use a non-lethal grenade and just wake up the resistance member manually with Triangle while on top of him to get things moving again. He may well run off in the opposite direction once freed, but he should turn round and continue along his previous path. He will then go left, down the road going directly west and running to the end of the sector.
We're back on the same path again now. If you're quick you'll be able to see the resistance member duck into an entrance on the left. Don't move up as he'll reemerge disguised as a PMC soldier. He'll continue down the alley and turn right. With his disguise it means the PMC soldiers won't stop him, yet he'll walk right through them, making it nearly impossible to follow him stealthily. Still, keep to the right and hug the wall, allowing the resistance member (wearing a pedal-bike helmet) to pass the two guards. Continue down the road before taking out the two PMC guards with well placed silenced bullets so he doesn't get spooked.
Continue to follow him until he crosses the next road and heads southwest. He will now have joined up with a posse of other PMC guards.
Take out those guards!
Ignore the first one as he leaves the group (use the Solid Eye while hidden to keep track of them), then follow the resistance member as the other two break off and leave him on his own. You need to watch out for a patrol vehicle now (on most difficulties), which will be doing fixed routes around the area. Follow the resistance member down the alleyway and stop to wait for the vehicle to do another round before following him across the road. You could RPG the vehicle and eliminate most of the guards in this area in one go, but you'd risk alerting the rest on foot (and the resistance member, who is not afraid to attack you). As you follow him the vehicle will make another pass before you have a chance to get to the end, so cross and use the alcove on the left combined with your OctoCamo and crouch to get your camouflage up to 90% or higher so the vehicle doesn't spot you. Move between the alcoves on each side of the street to gradually progress.
Once at the top he'll take the road going directly north. At the end he'll pause, before going off to the right to remove his disguise (you'll get a cutscene for this as you get near enough).

Make sure you get into an alcove or at least attach to a wall while crouched as during the cutscene time passes and the patrol vehicle may well be in the area.
(Cut Scene 3, Length 00:05)
As he is out of his disguise now the patrol vehicle can spot and arrest him, but there's not far to go to trigger a cutscene so just fend off any attacks as you will have doubtlessly done before if the worst happens and then follow the resistance member down the street towards the gates.
(Cut Scene 4, Length 12:18)
(Cut Scene 5, Length 13:38)
(Cut Scene 6, Length 00:13)
After all these cutscenes you get an on-rails section courtesy of Big Mama and her Triumph motorbike. While you can select other weapons for this section, they are limited to submachine guns which are both weak and low on capacity. The one provided by Big Mama does a job, but this entire section is hindered by some fiddly aiming. Nonetheless, it is made suitably easy as a result. Allow Big Mama to steer you through the streets and shoot as many enemies as you can. In this area the van we are trying to protect shouldn't take much damage even if you miss more enemies then you hit.
Enemy vehicles will come alongside the van in this area and so you need to try and take out the gunners as quickly as possible to avoid damage to the objective. Some enemies will climb on the van itself and do damage that way.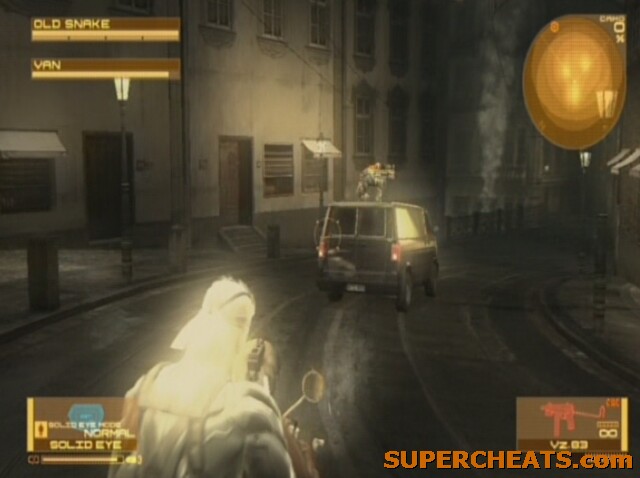
Take out any enemies who get on top of the van
Sliders will be flying around with rocket projectiles, but they can easily be destroyed and give you a nice Drebin points haul for each taken down.
(Cut Scene 7, Length 00:45)
(Cut Scene 8, Length 00:11)
The boss for the next section, Raging Raven, appears with her cronies in this area, and any damage you dish out on her now will be sustained in the boss battle ahead too, though hitting her enough to make it worthwhile proves difficult. As you go through the streets and alleyways just make sure that you don't take too much damage and collect as many Drebin Points as possible from downing the sliders. There is no van here to worry about protecting so just look out for yourself.
(Cut Scene 9, Length 03:16)
(Cut Scene 10, Length 02:02)
This is a pretty simple boss fight and is easier than Laughing Octopus in that there is far more room for you to maneuver, and Raven shows herself far more readily.
Climb up the various sets of stairs quickly, ignoring the sliders that burst through and the explosions going off around you.
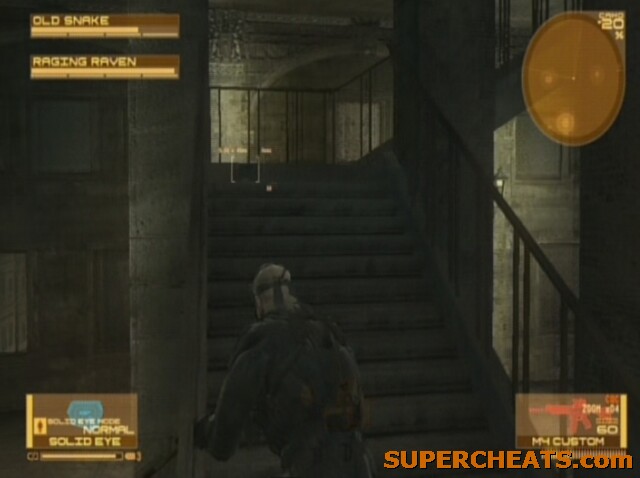
Head up the stairs
Once you reach the top go to the balcony and begin taking out the sliders flying around. A powerful machine gun should be your weapon of choice here, with the machines fairly easy to despatch for good Drebin Points and annoying Raven, reducing her attack power.
As Raven (she looks like a slider with a large body) stops to fire grenades at you, take shots at her with a machine gun (a scope is good for this) or rocket launchers, which deal a heck of a lot of damage with each hit, but are equally easy to miss and will undoubtedly require you buying more from Drebin. Roll and retreat inside when she launches her grenades.
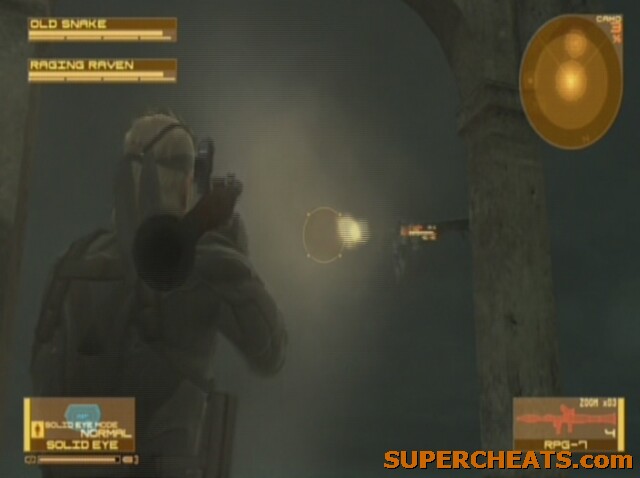
RPGs are great here, but leave you exposed if you miss
Once you get Raven's health down to halfway you will probably have to go down a few floors to lure her back into the action, before returning to the top as the optimum position. If you are getting too bombarded by her carpet bombing retreat inside the building and pick off her sliders as this reduces her attack power before you expose yourself to take her out. If she knocks you off you should just fall down to the outside balcony of the level below.
Continue to barrage her with rockets and bullets until her health reaches zero; she may decide to go down lower again, in which case just continue to go down and lure her back up. On the top level there is an iPod track, Essence of Vince from Metal Gear Acid.
The tactic for defeating Raging Raven
(Cut Scene 11, Length 02:48)
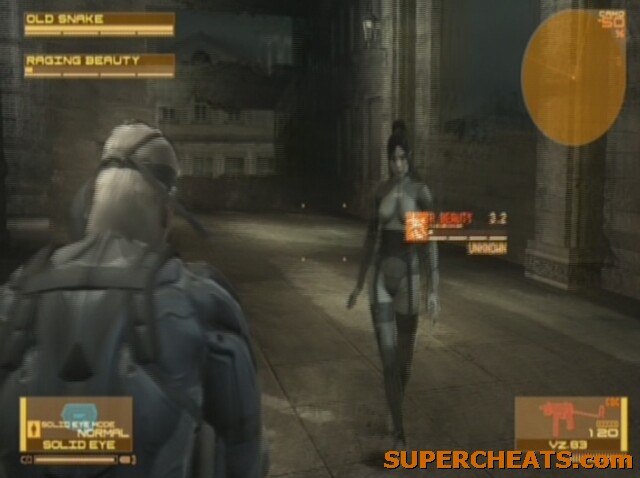
Raging Raven becomes Raging Beauty. Prepare for a similar experience to the one that Octopus gave you in the first boss battle as Raven sheds her suit and lumbers towards you. This again is easier than Octopus as there is far more room to back away and just pummel her with bullets. Take down her new health bars to finish the battle and the act and receive the MGL-140 grenade launcher.
(Cut Scene 12, Length 04:45)
(Cut Scene 13, Length 02:52)
(Cut Scene 14, Length 27:21)

After the opening section aboard the boat you can take control of the Mk. III once again to get ammo downstairs where you start, another Battery upstairs, as well as an iPod track nearby, this time the Lunar Knights main theme. You also get a Raiden FaceCamo
This will be instantly familiar to fans of the series, and is worth getting through for a bit of fun, though is not compulsory. Go around the right hand side of the boxes you start behind and run through the main gate towards the helipad. Wait for the searchlight to go in your direction, then back the other way and follow its line before ducking down to the path halfway along on the left. It's pretty tight, but you should be able to outrun the light if you get caught out in no man's land.
Dodge the searchlight
Turn right at the bottom of the slope and continue towards the back of the level where the main doors are. You'll see a guard's vision cone on the radar, to avoid it, go behind the truck a few metres outside his vision. You can then slink up the left hand edge of the truck to just miss his line of vision and go round the front of the cab. Wait until the patrolling guard goes in the other direction, and then continue to follow the back wall around until you get to the camera. Duck and move against the wall underneath it to avoid its sight.
Move under the camera to get past
Head up the stairs just to the right of the camera and follow the walkway to directly in line with the centre of the helipad. Go prone and crawl through the gap in the wall to wake Snake from his daydream.
The MGS4 flashback
(Cut Scene 1, Length 00:22)
You receive a MGS 1 Snake FaceCamo if you completed the diversion.
(Cut Scene 2, Length 01:13)
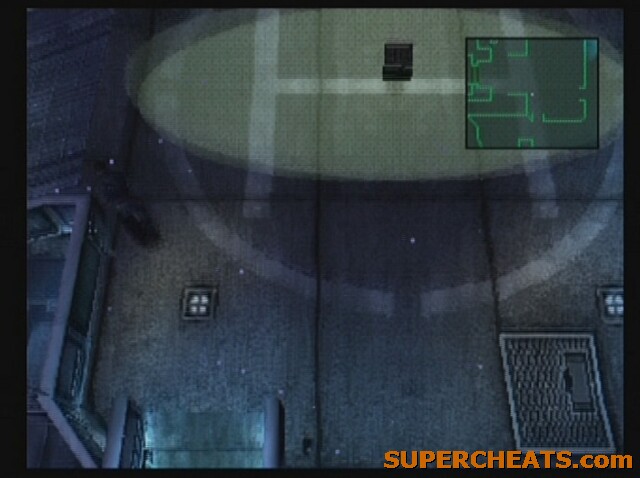
This area doesn't have any enemies in it, but there are plenty of items. Switch to Night Vision mode to be able to actually see more than a metre in front of you as you collect the various items on offer. Head out using the path to the east, but move slowly as there is a Gekko prowling ahead. Stay to the lower path and hug the wall, keeping an eye on the Gekko and remembering its patrolling patterns.
You can see its line of sight in Night Vision mode, so as it turns away from the lower path just move along further, keeping against the wall. Follow the bottom path to go east to the heliport. Note that the next section is not split by a cut or loading scene.
Avoid the Gekko shielded from sight by the snowstorm
You can probably manage to take off Night Vision just here to get your bearings and a bit of a breath of air. There are no enemies around the heliport so feel free to explore, reminisce and collect the items dotted around. There is a Ration against the southern fence and a very useful Chaff Grenade on the helipad itself. Head to the northeast of the base to the stairs (follow the route you used in the MGS1 flashback if you get confused!) and a cutscene will be triggered.
(Cut Scene 3, Length 00:14)
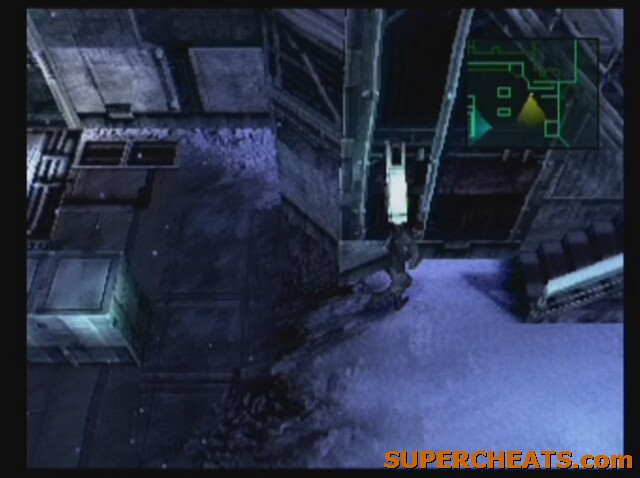
Follow the walkway and crawl through the gap to reach the Tank Hangar. Follow the ventilation shaft all the way along, ignoring the rats but collecting the iPod music en route. Feel free to look through some of the grates to spy on the enemies below. Once you come to the destroyed hole in the vent, press Triangle to hang down, then wait, suspended in midair. There are literally dozens of Dwarf Gekkos in the area, so while hanging, wait until the trio nearest you rolls away and the one in the corner scans the other side of the corner, then drop down yourself.
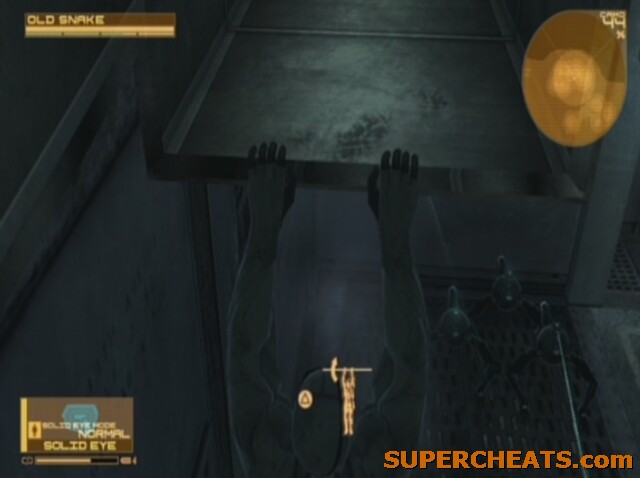
Avoid the Gekkos if you can help it!
Head backwards (or right as you are looking over the centre of the hangar) and around the wall to the small alcove to wait for the Dwarves to make another pass. As they move off again, check that the patrolling group in the hangar is also looking away and vault over the railing and down to the bottom level of the hangar. Spin around quickly and duck under the door, rolling through the scanning beams to emerge in the snow. If you alert the enemy use the Chaff Grenade we picked up or just get out of that back door and hide in the snow. Don't go too far or fire in this area though unless you're using a suppressed or silenced weapon.
Why? Well there are two sleeping Gekko ahead which, while you can crouch walk past them, will wake up and pursue you if you make too much noise. There are also plenty of items in the area, but getting too many of these will risk waking the Gekko. You may need to reactivate Night Vision to be able to spot them effectively. Move between the two Gekko (towards the end of the area directly to the north) and go prone to crawl underneath the gap in the door.
First Floor
Turn off your Night Vision and go down the slope, crawling under the door. There are no enemies in this area so feel free to explore for items. Otacon will call you and let you know that we should be able to get through using the door at the back, to the direct north. He'll call you again however, informing you that it is locked once you get close. We now need to head up to Otacon's office. Go back and up the nearest set of stairs, following the walkway to reach the elevator. Press Triangle by the panel to call the lift.
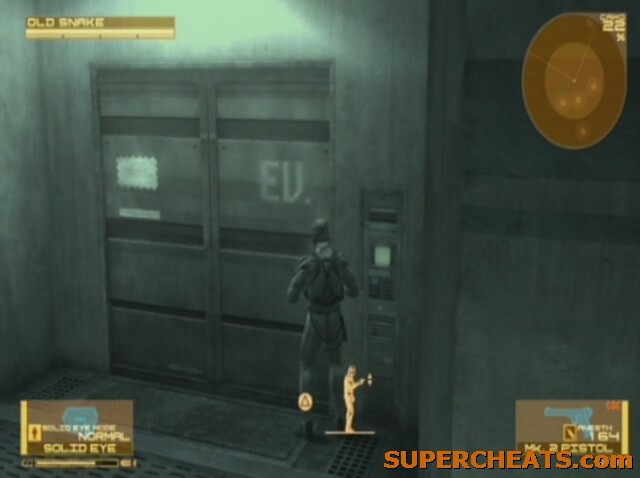
The elevator to take you to floor B2
Once inside, move to the panel by the door, press Triangle and select floor B2.
Floor B2
Go straight on and down to the end of the corridor, turning left at the bottom. Take the next left and follow this corridor all the way to trigger a cutscene.
(Cut Scene 4, Length 07:12)
There are a variety of possible codes to enter here, though only one is the correct one, the others unlock secrets. The full list is in the secrets section of this guide. If you just want the basic one, the code is 42873. You lose Physche if you get it wrong and there are two possible endings to the cutscene depending on whether it's right or wrong.
Collect the Ration on the floor just to your right as you start following the cutscene. Go back out the way you came in but beware! Once you enter the main corridor a Gekko (where it came from who knows?) will enter the building, and you'll have to be intelligent to get past him. You can cloak the Mk. III and send it underneath the desk in the doorway at the west of the main corridor that the Gekko is patrolling, and then follow the path through to the flashing panel in the room to the left of the lift to electrify the floor (a context sensitive Triangle command will come up). You could use a Chaff grenade on the Gekko but bear in mind that you have to call the lift which takes time and it may well have recovered. You could try to destroy the Gekko manually, but this is obviously notoriously hard – enough rockets will do it though.. The easiest option is to use the Mk. III. You could also use the Solid Eye to locate the Gekko and crawl underneath the desk yourself. If you get spotted you won't be able to call the lift until peace is restored.
The electric-floor panel by the lift
The Gekko can't get through many of the doorways, so just fall back and recompose yourself if you get spotted. Once in the lift select Floor 1.
First Floor
Head back down the steps to the previously locked door.
(Cut Scene 5, Length 00:35)
A Gekko is now in the room with you and you need to draw its attention away from the Mk. III. Again, there are many ways of doing this, including destroying the Gekko itself. You could lay some mines in the area around the Mk. III before the Gekko spots it, then allow it to get close and deal some serious damage to it. The easiest way is to head to the collection of crates and missiles towards the southern end of the hangar. Get up against some of the crates and shoot at the Gekko. Do this every time the Gekko loses interest in you and starts on the Mk. III. Then, as it begins to chase you, just run around the crates and missiles (you should be faster than the Gekko) keeping it just out of your line of sight and hide once you get a chance.
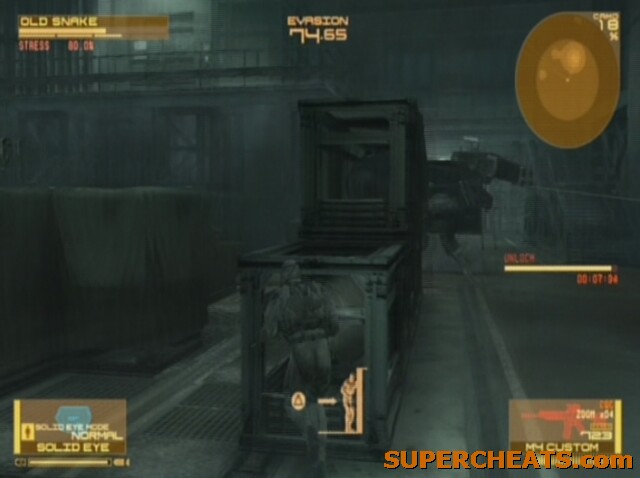
Play cat and mouse with the Gekko to keep it busy
This buys you time as it searches before you can draw its attention again as it makes for the Mk. III. Use Chaff Grenades if you have any left to buy yourself another slice of time and an opportunity to hide if necessary, though they are at a premium and not to be wasted.
Keep an eye on the progress bar and try to stay hidden as it nears the end or the Gekko will get to you during the next cutscene.
How to keep the Gekko busy
(Cut Scene 6, Length 00:05)
Head through the door once it's open. Don’t worry about getting spotted as you can just keep running through to trigger the next section.
There are no enemies in the area, so collect the ammo at the top and stun grenades nestled against the edge of the ramp on the lower level. Continue northwest until you reach another slope. Drop down to the next level to trigger a cutscene preceding a boss fight.
(Cut Scene 7, Length 02:27)
Now unfortunately you have the displeasure of the hardest boss fight in the game, particularly on harder difficulties and even more so if you are going for no alerts or non-lethal kills. Basically Crying Wolf is parading the map as well as heaps and heaps of Haven Troopers. With the snowstorm blowing a gale Night Vision is recommended. Just move around the far edges of the level, trying not to catch any trooper's attention, looking for the head of Wolf (this is the only part that shows up on Night Vision. Get out a Sniper Rifle (This is essential! Use the scope to find her from range) and shoot the critter right in the head. You should be able to get a good few shots off before Wolf runs around again, taking off a bar or more if you're lucky.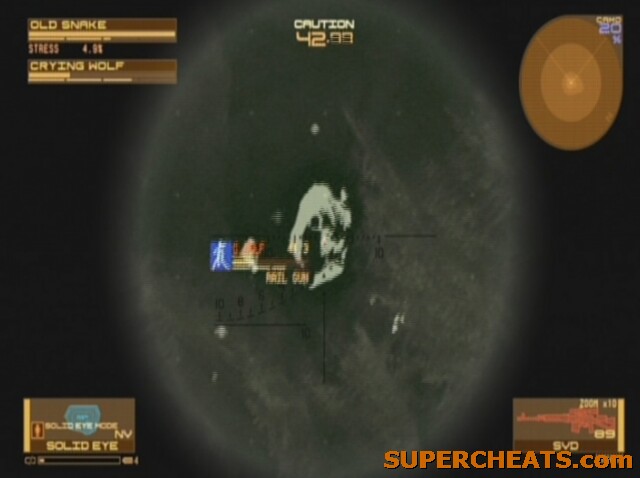
Snipe her in the head!
Alternatively, plant heaps of claymore mines anywhere you go to inflict damage on Wolf as she runs around and take her down only when directly in sight using an assault rifle or explosives. You could also camp in one part of the map and just sit it out, though this takes patience (meaning your Night Vision battery may run out) as Wolf doesn't patrol rigidly, rather trying to sniff you out depending on the wind direction. You can use this to your advantage by staying upwind of her so she comes to find you, but obviously it's better to have the element of surprise on your side rather than vice versa. For any strategy here it is crucial not to get too many Haven Troopers on your back as this makes scoping to search for Wolf very tricky. Once you get her health into the last segment she'll step up her search and try even harder to locate you. With it all depleted, a cutscene will play.
(Cut Scene 8, Length 03:21)
Crying Wolf becomes Crying Beauty. She will now walk towards you trying to grab on, as the other bosses have. Just unload your weapon of choice into her (the same sniper rifle is good fun here) until her new health bar is gone.
(Cut Scene 9, Length 05:04)
You get the Gekko-killing Railgun after this fight, a real help for the latter stages of the game.
(Cut Scene 10, Length 01:20)
The wolf is still wandering around which is quite cool, but once you've exhausted the fun of teasing it proceed forwards inside the doors at the direct north of the area. 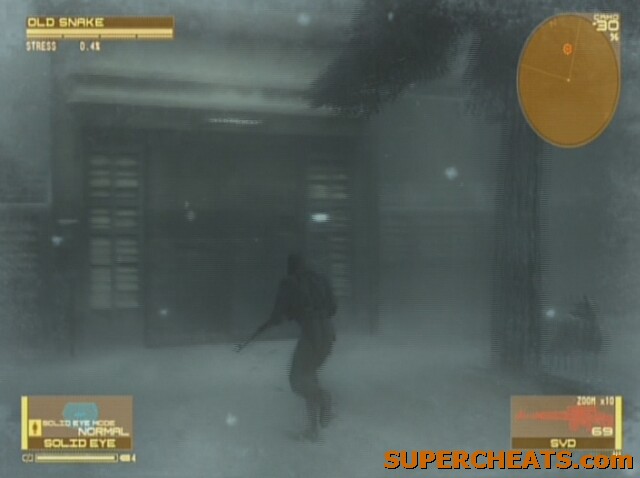
Head through this door to escape the icy wastes
There is the iPod track The Best is Yet To Come from MGS1 inside the door on the right. Continue past the crates straight-on before turning right and then left to get a hilarious call from Otacon.
Continue left down the slope following this.
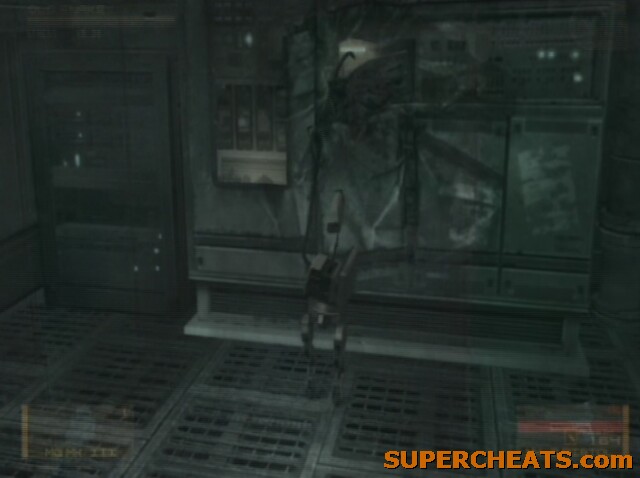
Head left out of the door onto the gangway and straight on to the western wall. Press Triangle to hug onto it and shimmy along to the right after getting the Ration on the left. The game will drop you into a hanging position automatically, so move in this way further right until you come to the walkway. At the first corner on this walkway, climb up so you are standing on it. From here, glance down and follow the patrol of the Drawf Gekkos until they make their way up the steps.
Drop down from the walkway once the Dwarf Gekkos head up the steps
Climb back over the barrier on the eastern side of the walkway and drop down. Crouch walk in the opposite direction (roughly northwest) past the bottom of the stairs and the sight of the Dwarf Gekko on the wall to reach the elevator. Call it with Triangle by the panel and head for floor B5.
Getting through the Blast Furnace area
Floor B5
As the doors open you'll see a Gekko patrolling. Creep up behind it and it will make a right turn. Get up and follow the left-hand wall with the Gekko now facing away and moving off. Head up the first set of steps and then the second, moving through the door to the northern area.
Stay to the left, but head around the right hand side of the dumpster then stop at the end of the first cylindrical piece of machinery where you'll be able to see a Dwarf Gekko up on the wall ahead.
Turn right at the edge of this machinery
There are a swarm of them patrolling just on the other side of the wall the Gekko is stationed on, so you need to be careful as you move to the Dwarf's right while it scans left, then get up on the conveyor belt that stretches from right to left (south to north). Crawl along it to the left (north) and move onto the next belt along, then sneak through the small gap against the wall. There is a large Gekko patrolling the area so you may have to use a Chaff Grenade and make a dash for it, or at least be quick and very careful in your sneaking.
The gap in the wall is ahead
Once through the gap, turn left and head through the door and jump down (or use the ladder) to escape the kill-zone through the door below.
Head to the end of the corridor and crawl through the small vent where the wall meets the floor. Don't do anything dramatic when you exit the vent as there is a lone Dwarf Gekko in the area. Wait for it to move to the right then leave your position and follow it. Watch out for the vents in the floor! Use the right hand wall for cover and wait on the corner, looking around it to monitor the bot's position.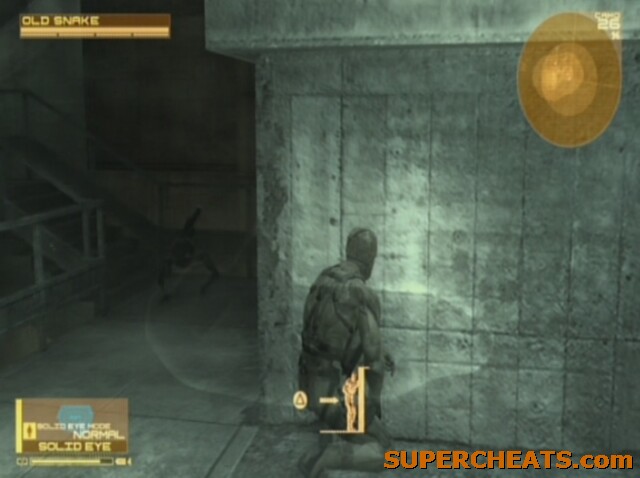
Follow the Dwarf Gekko once it moves up the steps
It will jump up the first set of stairs. Don't follow just yet as it will scan behind it and may catch the top of your head if you're too close. Allow it to begin to move up the next set too and head left, then right. Wait for it to move to the right and for the beam near the exit (to the left) to move away, then sprint to the door. Turn inside the door and head to the exit at the end. You won't be able to escape if you're in alert mode, so be careful or you'll have to fight off an army of Dwarf Gekko (not particularly hard, just tedious!).
(Cut Scene 11, Length 03:16)
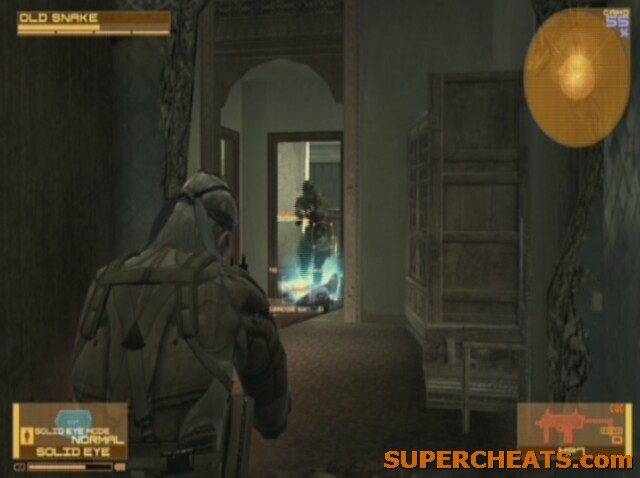
With Vamp's arrival on the scene we now need to take him down, despite his immortality! This boss fight itself is actually pretty easy however. Vamp moves very quickly, but as he's jumping and sprinting all over the arena he won't actually damage you. Any major blows will come after he runs directly at you. Take this opportunity to throw everything you have at him – you should be able to knock him over most times before he gets too close. A gun like the PKM which has a massive magazine (needing few reloads) is a great choice here.
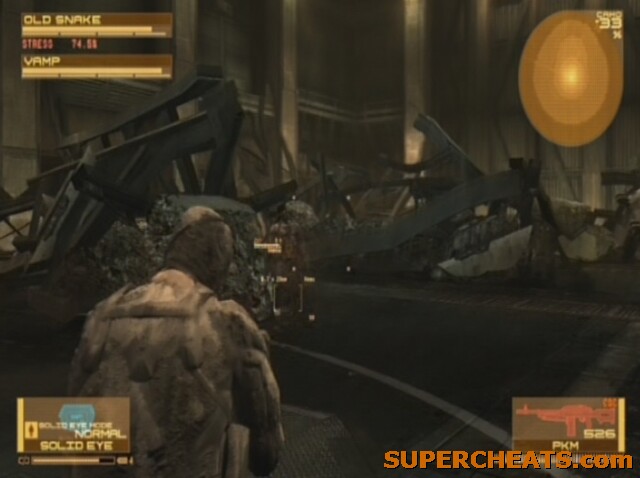
Shoot Vamp as he moves towards you
Once you get his health near the bottom, equip the syringe Naomi gave you in the equipment inventory and finish him off with your main weapon. With all his health gone, he'll fall flat on the ground and you need to run over to him, unequip your weapon and initiate CQC once he stands up. Press Triangle when prompted and you'll ram the syringe into his neck thus combating Vamp's immortality-inducing nanomachines.
(Cut Scene 12, Length 03:26)
Heaps of Gekkos now storm into the arena as Raiden tries to finish off Vamp.
The Railgun we need to use for this fight will already have been selected during the cutscene. Ready it as with any gun, then press Triangle to use the scope and charge the weapon. To take down the Gekkos effectively you need a fully charged weapon with all six power bars filled up. This allows for one hit kills (you can even kill multiple Gekkos at once if they are standing in a line), though if you get pushed back you can shorten the charge to prevent them from detonating themselves. If you see them crouch down and their red lights begin to flash it means they are about to blow up, so focus on those ones! Back yourself underneath the outcrop of rocks to the north from where the cutscene ends for a decent position for all this. With no peripheral vision, this area protects you from all but one direction. If you need more ammo either buy it from Drebin (killing all these Gekkos generates heaps of cash!) or find extra rounds by Metal Gear Rex.
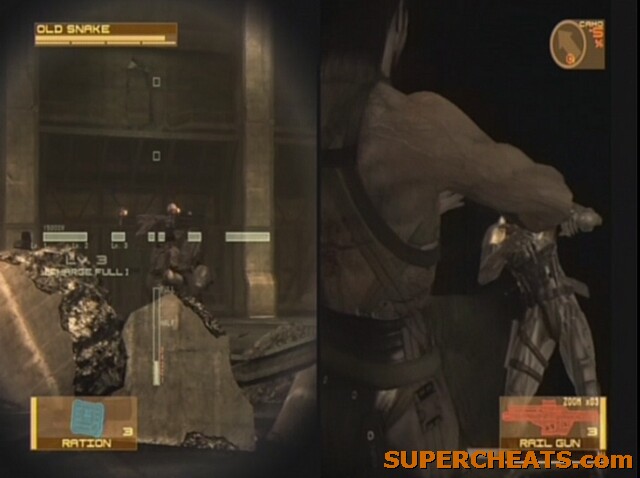
The Rail Gun makes mincemeat of the Gekkos
This fight will take about four minutes, with multiple waves of enemies (don't assume it's over until the cutscene plays as it does go quiet for a while in the middle). Once Raiden has finished doing his job on the right half of the screen (in tandem with the amount of Gekkos you are killing), a cutscene plays.
(Cut Scene 13, Length 10:35)
A nice break from the usual combat now, and we get to ride on board and control Rex. Press X to swing around and take out enemies nearby (they will slow you down if you let them get to close). You get three weapons in addition to this. A laser, gatling gun and missiles. Switch between them as you would with any gun. Staying still for too long will see you receive too much damage, but the whole area only really takes a couple of minutes to get through, so destroy as many enemies as you can for the all important Drebin Points. There is no way to repair Rex however, so don't feel you have a licence to take damage as and when you like – you may well be skating on thin ice by the end of the level. Follow the route to the end corridor.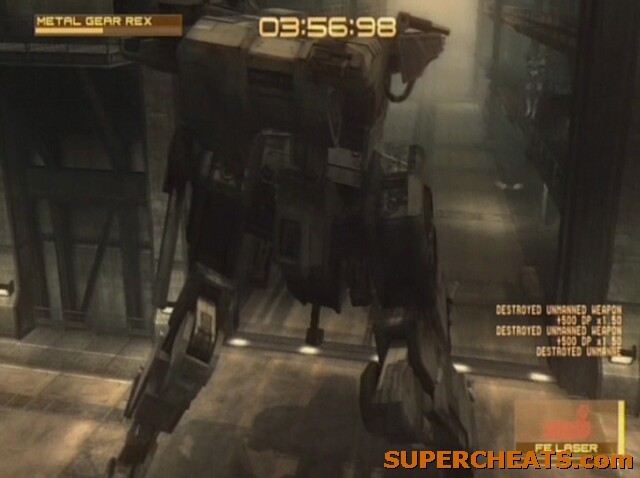
Head through the corridors terrorising the Gekkos
(Cut Scene 14, Length 01:35)
The last boss fight of this act now (promise!) and we're fighting Liquid who is in control of Metal Gear Ray. In this fight the priority should be to bombard Ray with as much firepower as you can. Exhaust or overheat one weapon then switch to the next as you strafe right and left to avoid Ray's attacks. The missiles are by far the best choice as a primary weapon however as they disable Ray temporarily, forcing him to the ground where you can continue to pummel him and prevent his quick movement. Allow them all to lock on for full effect. Hide behind the buildings and use angles to get shots on Liquid's machine. This is not as hard as many of the boss fights in the game, but as you can't repair you need to try and take out Ray as fast as possible and avoid unnecessary damage.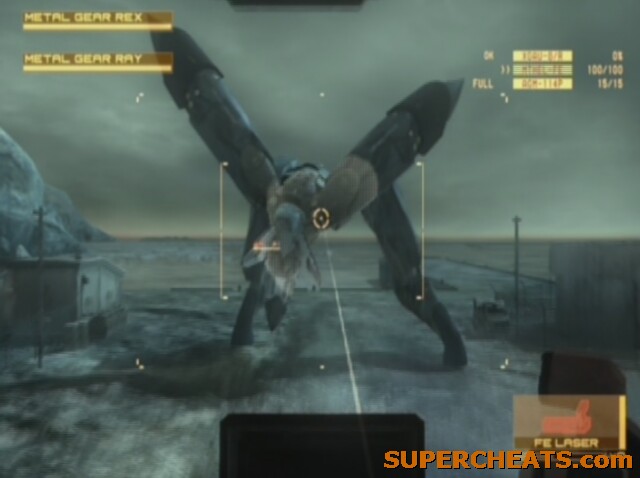
Metal Gear Ray is a formidable opponent
If you get hit hard Rex will collapse and you'll be left open to close combat attacks. Try to avoid letting Ray get too close, and barrage him if he moves in on you. Take all his health down to finish this memory-filled act.
(Cut Scene 15, Length 07:43)
MISSION BRIEFING (Length 11:01)
(Cut Scene 1, Length 12:04)
(Cut Scene 2, Length 01:38)
From where you start enemies will be converging on your position and you need to move out silently and stealthily. I recommend getting a suppressor for your gun or using the Mk. 2 pistol so as not to turn the caution phase into an alert phase (which is very hard to get out of on higher difficulties). The rule for this section is just to stick to the left wall and don't make too much noise!
The first two enemies will drop down in the left hand corridor of the ship. Take them out either with darts or suppressed fire. Be sure to take out the one most likely to run off and raise the alarm – the one further back on most occasions, and go for headshots. Two more will jump down, following the pattern for this section of the enemies operating in pairs. As you take out this second pair more will jump down in the next open area.
Proceeding along the left-hand side of the ship
You need to be careful of the troopers jumping down as they may well spot you from up-high and raise the alarm. Take out the enemies to the right and left, heading down the left channel with this done. Any other encounters on the way should be dealt with similarly. It is imperative not to raise the alarm as it makes the next section very tricky indeed. Follow the path and you'll eventually reach a blockage of crates that would otherwise force you into the path of a Gekko. As we don't want to do that, slink through the gap (you need to be pressed against the wall) at the side of them.
As you move through take out the two Haven Troopers that appear on the scene. There is also a pair of Gekkos guarding the door with which you must leave this area. One may get destroyed by our friendly fire, but you may need to make a tactical decision here. Either take them out with the Rail Gun, or sneak to the southern wall where the door is located. You need to be near it and tap Triangle for a few seconds to open it, so two Gekkos on you will make this very tough. If you take them out you'll doubtlessly alert the troopers, but should just about be able to get the door open before you're stopped by enemy fire. You can sneak to the door as long as only one Gekko remains, just wait until it turns away. Any Chaff Grenades you have here are very useful should the situation escalate.
Head down the corridor, collecting the items in the centre, before getting into the elevator. If you are under alert you must take out all the Troopers coming to your position before you can exit the section. As they are entering through a narrow gap this isn't such an issue. The lift will descend and the next section will then be loaded.
Head through the corridor in front of you to trigger a cutscene.
(Cut Scene 3, Length 00:57)
With Haven Troopers now all around you in the upper sections of the area, you need to choose your most effective weapon for taking down enemies quickly, which may well be a shotgun or even the Mk. 2. Move out into the centre and take out as many Haven Troopers as you can, then retreat back into the corridor that you came out of (the walls provide great cover). The Troopers should move in on you and allow easy kills, funneling them down into one place in front of you. Edge out and despatch any stragglers. After the first wave is defeated, a small section of silence will follow before another wave of Troopers.
These guys appear in the upper tier of the room, allowing you to pick many of them off from distance.
The Mk. 2 is a decent weapon for this section
You can break the glass barriers protecting their lower-body with a couple of darts from the Mk. 2 to get rid of most of them easily. They do have flashbangs so watch out for them. You may find some odd ones in the lower section on your floor too before the wave finishes. Another short break and another wave to come. This lot will be on your level, so retreat back into the corridor again and dart them into unconsciousness. 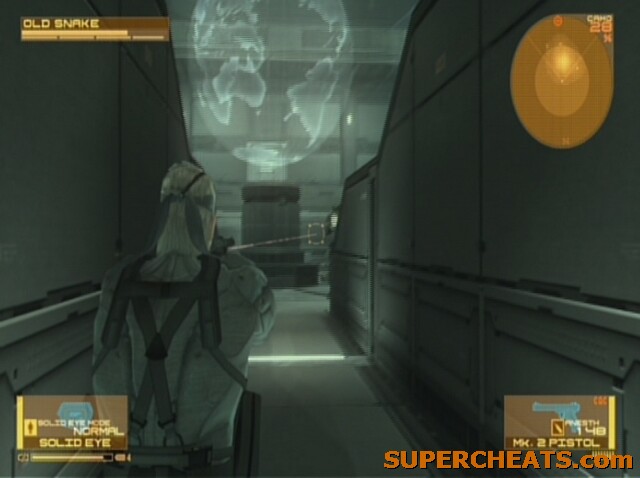
Use the corridor for easy cover
Explosives are good when they gather at the entrance to the corridor and allow you to take out many at once. With the last enemy vanquished or unconscious, a cutscene will trigger ahead of an impending boss fight.
(Cut Scene 4, Length 03:07)
The boss fight with Screaming Mantis now takes place. She has control of Meryl and a good few Haven Troopers. Head to the upper level of the arena and move away from Meryl and Mantis' other cronies. You need inject yourself with the syringe used to kill Vamp to remove Mantis's controlling effects from your own body en route to the top of the area. Once on the top corridor, shoot the voodoo doll that is floating on the left hand side of Mantis as she faces you. 
Shoot that left doll!
After a few series of shots this will trigger a short cutscene.
(Cut Scene 5, Length 00:15)
Meryl will now be moved right up to your level and almost thrown at you. You don't want to shoot her as her health is also integral to the success of the boss fight, so get out the Mk. 2 and knock her unconscious. Now turn your attention back to Mantis, who will be throwing Haven Troopers your way. You can keep the Mk. 2 out and deal with them like that or use lethal weapons, but make sure not to shoot Meryl by accident. The Mk. 2 works well on the doll too and as we are not actually removing the health of Mantis it's not essential to use a more powerful weapon (though the scope on some help). Shoot the doll a few more times for another cutscene.
(Cut Scene 6, Length 00:15)
This time Mantis uses even more enemies and they will fire on you from distance so it's important to get this bit over with quickly. Meryl is also a little suicidal so time really is of the essence. Just dart or shoot the doll but be warned that Mantis may use Meryl to shield it, so to be safe the Mk. 2 is again recommended (it will disable Meryl and then can be used to hit the doll). After a few hits she will now drop the doll (watch carefully for it and if you suddenly notice that she is only holding one you'll need to go into the middle of the arena to search for it – Otacon should let you know if you've missed it). Run over it as you would with any item to pick it up. Equip it as a weapon via the menu on the start-screen and then simply use it to fire at Mantis (it homes towards her but a few shots will probably be needed to make contact as she may well dodge around all over the place).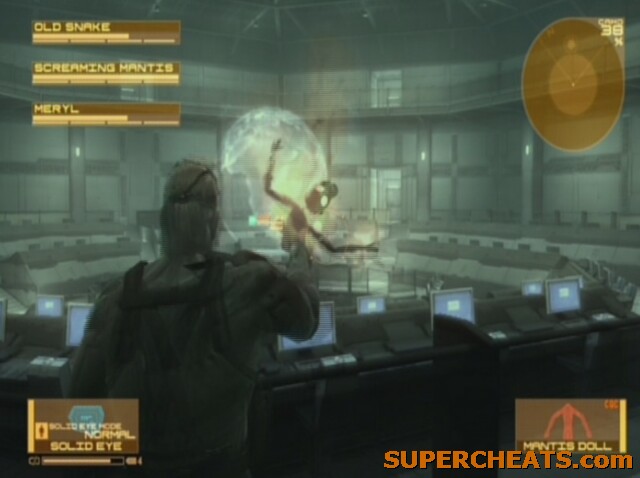
Hit Mantis with the doll
Once it hits, hold L1 and shake the controller to use the SIXAXIS motion sensing and literally shake the life out of Mantis when prompted on screen (you'll have to be quick about it!). Now this will finally have an effect on her health bar, reducing it to zero in one go.
(Cut Scene 7, Length 04:05)
Screaming Mantis is now Screaming Beauty. You now simply have to pummel her into submission using whatever weapon you desire. You know the drill by now - just walk backwards and fire!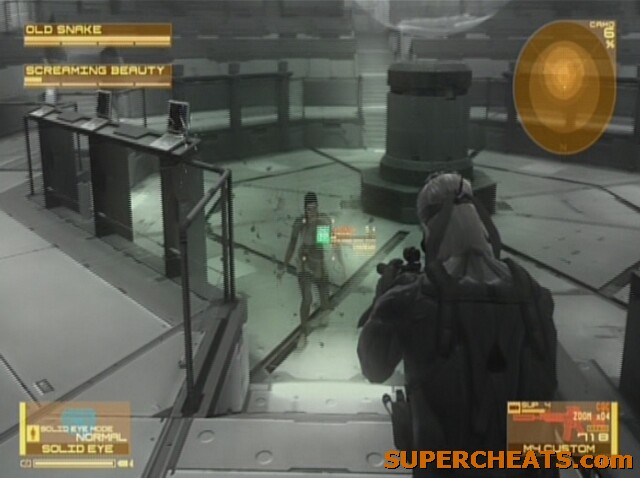
Catch your breath and simply shoot at her
(Cut Scene 8, Length 09:56)
This section is a nice respite. Run in a straight line until you reach a cutscene (and listen to the audio flashbacks on the way).
(Cut Scene 9, Length 05:35)
Run through the next set of corridors, rolling to avoid the attacks of the Dwarf Gekkos. You can also shoot them, but you'll never be able to get them all so just clear a path – be warned that they explode after a few seconds if you land a shot on them.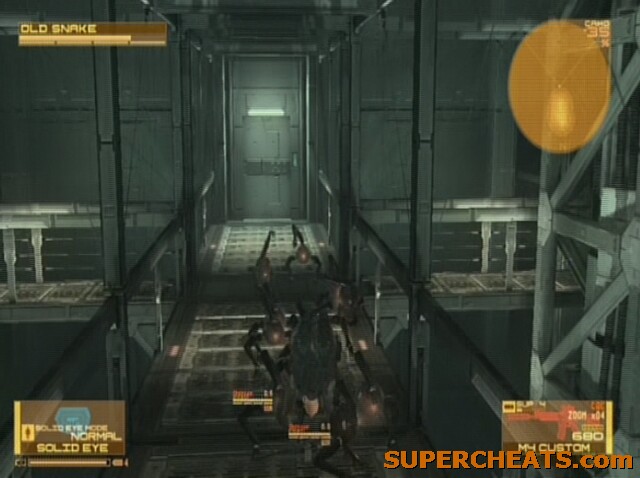
Rolling allows you to avoid the Dwarf Gekkos' melee attacks
Keep on rolling until you come to an empty corridor – this is the end of this small area.
(Cut Scene 10, Length 06:24)
Now for a beast of a corridor. You have to guide snake using the control stick through the first section, then once he collapses, mash Triangle to get him to crawl while still avoiding the walls with the stick. Once through the next one he slumps even lower to the ground, moving even more slowly. Switch hands, fingers, use friends, family and pets to stop your hand from falling off with all the Triangle pressing – this is a real endurance test! Don't worry about your health, that's just a reflection of Snake's ability to move quickly and you have no control over it (no Rations etc.). Keep mashing for now. Nearly at the end and Snake will be literally clawing his way to the door. 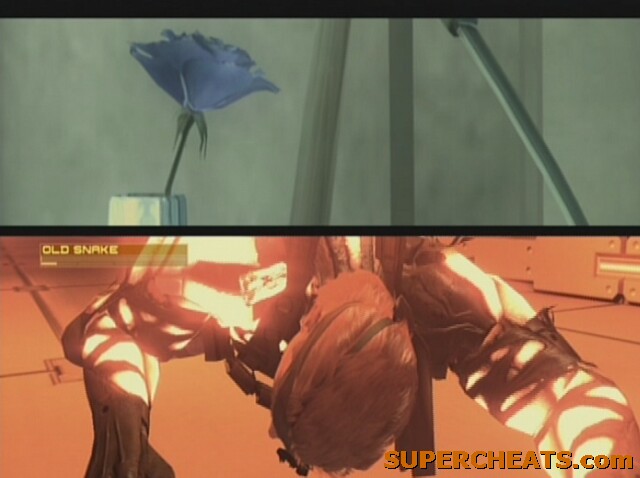
Pummel that Triangle button!
Get part way down this clawing section and a cutscene will trigger!
(Cut Scene 11, Length 12:30)
(Cut Scene 12, Length 08:19)
You've done it, reached the final boss fight with Liquid himself. This section, played like a beat 'em up, has a completely different set of controls, but shouldn't be too hard if you've got through the rest of the game on this difficulty. The basic controls are L1 to Block and R1 to Punch/Kick. Just start by absorbing some of Liquid's attacks and get to learn his combos. Often it appears he has stopped pummeling for one combo but he frequently has an extra move for when you drop your guard. You can shimmy by darting on the right stick to dodge, and use X to duck. Push R1 multiple times to get your own combos going.
Liquid may block a punch and kick, but often the second high kick gets through. Doing this may well knock him down, allowing you to start the next combo before he stands up so that the final lethal kick lands on him again just as he rises, knocking him down and allowing the process to repeat.
Exploit Liquid with repeated combos when he gets knocked down
(Cut Scene 13, Length 00:13)
Liquid steps up the fight now, so concentrate on your blocking and countering. The important thing is to get him on the ground and then start the combo before he gets up to avoid his now more powerful attacks. You can now also throw him on the ground by pressing Triangle when prompted, then holding R1 to choke Liquid, followed by Triangle again (when prompted on screen) to remove a large amount of his health.
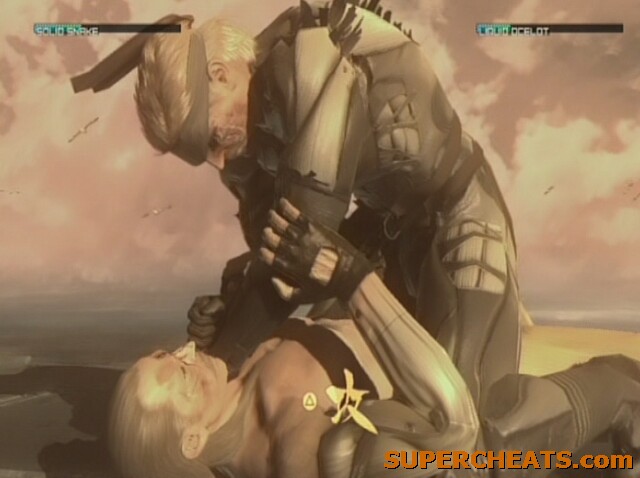
If you mistime any of these button presses Liquid will counter and deal the damage on you. You can also now press Triangle when on your feet to recover a slither of health if it's low enough to begin with (it doesn't work while you're blocking).
(Cut Scene 14, Length 00:10)
Liquid now tries to grab you as often as possible, but continue with the tactic (dodging works really well at this stage). Use the onscreen prompts to initiate more powerful attacks, but use the punch, kick, kick combo to continue to power his health down.
(Cut Scene 15, Length 00:17)
The HUD is gone (this is like an interactive cutscene) so there is no visible health and you now just need to press R1 each time the dramatic camera angles and short cutscenes end to land heavy blows on Liquid. When the camera pans out to show Liquid and Snake in the centre you can attack. Just keep them coming until he is too weak to continue. No other buttons work here, but the battle is all but over.
(Cut Scene 16, Length 05:05)
The game is now complete. Enjoy the next few lengthy cutscenes that tie up the story in between and after the rolling credits.
Epilogue: Naked Sin

(Cut Scene 1, Length 06:52)
(Cut Scene 2, Length 07:06)
(Cut Scene 3, Length 03:15)
(Cut Scene 4, Length 08:52)
(MAIN CREDITS)
Debriefing: Naked Son
(Cut Scene 1, Length 27:40)
(FINAL CREDITS)
There is a voiceover (lasting a couple of minutes) just after the credits with a grey-tone Metal Gear Solid 4 logo in the background where Snake reveals his life's decision from now on to Otacon.
(Cut Scene 2, Length 00:17)
You are then treated to an analysis of your entire campaign performance, and are awarded a title relevant to it. You also get a Race Gun pistol and a variety of suits and command vests. Make sure you save so that your items are carried over when prompted, and that's it! Congratulations!
Metal Gear Online is the multiplayer component of Metal Gear Solid 4, a fairly robust and well structured frag-orientated experience. This section of the guide aims to give you some basic tips on how to survive in online multiplayer, and on some of the more confusing areas of play.
Getting Started
Konami have implemented an odd registration system that requires you to make an account before you can play, regardless of your PSN details. 
Either once you start Metal Gear Online from the Metal Gear Solid 4 menu or on another Internet browser you need to go to http://id.konami.net. From there you can register for multiplayer using two usernames (they can't be the same) using lowercase letters or numbers only. The password must be numbers only. You can then return to MGO and login before creating your character.
You can only have one character at a time and must purchase others for a somewhat pricey £3.99 (though you only really need one character anyway unless you have a sibling who wants to play too and are worried about them ruining your kills/death ratio). You can customise his appearance and combat outfit and then pick various skills to help you in battle in each of the four available slots (a bit like Call of Duty's perks). Through extended play and use of these skills they will be upgraded, though this takes a seriously long time!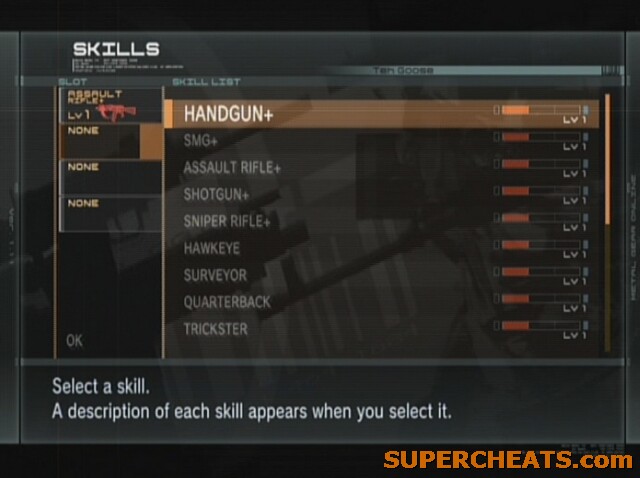
The multiplayer is essentially the same as the single-player campaign in terms of controls and feel, though there are a few things worth noting.
Getting Started: The game boasts a unique newbie training area in the Training Lobby. Here you can get used to the online feel of things, set up controls for it and test out your skills. Novice Training sports a tutorial to get you started. Solo Training allows you to pick a map and perform target practice on dummies dotted around (as well as friendly dummies!). Combat Training, if you can find an available room is where one player, the host, teaches new players the ropes in the game. It is recommended that you play in the Auto-Matching rooms when you finish training and you will be selected with players of a similar ability so as not to be too outclassed. Free Battle also has rookie rooms, but there's not guarantee you won't get a few top-notch players in there.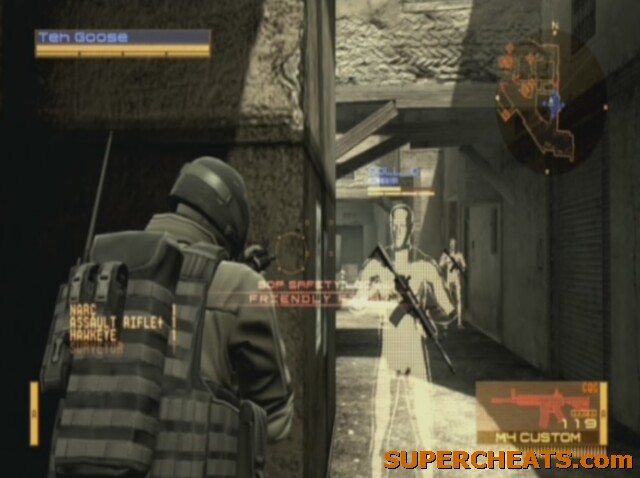
Auto-aim: As a new player to the multiplayer it is advisable to use auto-aim. You activate this by pressing Square while in over the shoulder mode (holding down L1 to ready the weapon). There are a variety of skills in the game that look to take advantage of the auto-aim feature, but it is disabled by default in the options. Once you feel comfortable enough switch it off (making headshots easier). For headshots while in auto-aim and more accurate aiming generally use the first-person mode by pressing Triangle while holding L1 to ready the weapon.
Communications: The Select button which operated the Codec in single-player now is used for chatting with other players online. Push it once for the pre-set Codec, twice for text-chat and hold it for voice chat. The pre-set commands allow you to quickly order and respond to your team mid-battle, a priceless feature that you should get used to using. 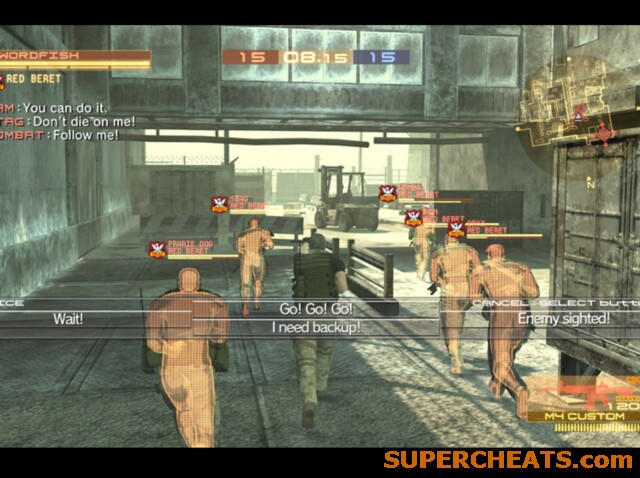
Inventory: As you shouldn't have more than two weapons or items of equipment you only need to tap R2 to switch weapon or L2 for items rather than fiddle around with the menu by holding it down as you have to in single-player.
Transportation: There are catapults as seen at the start of Act 5 of the single-player campaign which enable you to travel up high in the multiplayer. Press Triangle next to one to launch yourself to great vantage points (plant a mine where you land to catch the next jumper unable to alter his course!).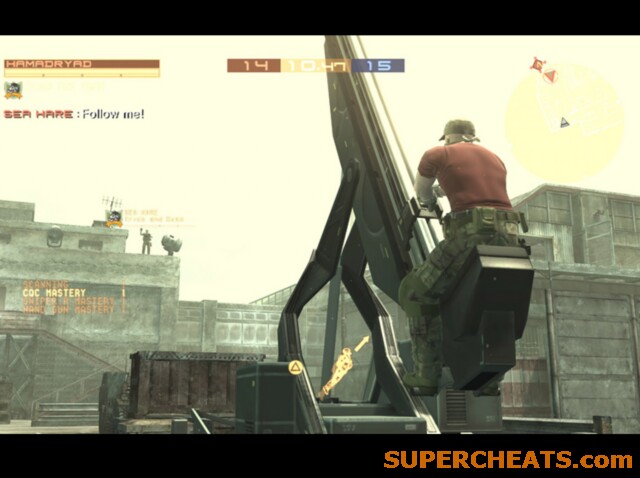
SOP System: There is a system similar to the nanomachines that are ever-present in the story in single-player online called SOP. You have to elect to link to other teammates at the start of the game or while playing. To do this, press Triangle while next to them to salute or point, indicating that you are now linked in. When the teammate appears to glow in the colour of your team, it is successful and working. If they are also linked to others, you can see them as well. Like this you can create a web of nanomachines making game play much easier and more strategic. When you or they die, you must reconnect the link using Triangle. As they interact with the environment, such as enemies or traps, the data updates and allows you to assist. Watch out for icons showing hearts, indicating that a teammate is reading a porno magazine; stars, to show they are knocked out; a skull if they are dead; Zzz if they are sleeping; an exclamation mark if they are in combat.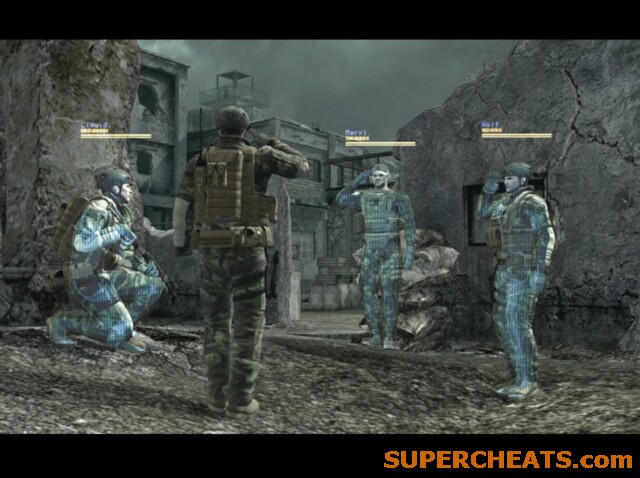
If you can inject an enemy with a Scanner while engaged in CQC (like injecting enemies in the single player with the Syringe) you can see all their linked data for their team. Being linked in then is also a risk!
Respawning: If you get killed you have to wait a short while before you can reappear in the game (though some modes don't support respawns). Enemy players are adept at 'spawn killing', that is, hiding and watching players spawn until their invulnerability goes down, then shooting them. You can pause to stop the spawn if you see an enemy near the point, or spawn behind them with invulnerability and take them out! Just be aware that unlike in some games there are no restrictions on where you spawn in relation to enemy players. On certain modes however you can pick your spawn point on the map to get back into the action as quickly (or as slowly!) as you want.
Most of all, treat the online as an extension of the single player and try to convert your tactics online. Hide in corners, hang from ledges, plant mines, use CQC and just imagine you're playing against some rather advanced (most of the time at least) AI opponents!
A general tip is to just pick skills based on the sort of game modes you plan on playing, and the sort of player you are. If all you will be doing is Deathmatch and aggressive modes with little sneaking or stealth as many will, there is no sense in spending your skill slots on anything other than those of an aggressive nature.
As you use each skill they level up over time (over a lot of time!) and then cost an extra skill slot. So if you have Assault Rifle Level 3 (taking up 3 slots) you can only then have a Level 1 weapon ability or a secondary skill to take up the last slot. You can change skills, appearance, friends and view stats in the 'Personal Data' main menu option.
Primary skills:
These cost 1, 2 or 3 skill slots depending on their level. All can level up to a maximum of Level 3.
Weapons (reduced recoil and reload times):
Handgun , SMG , Assault Rifle , Shotgun , Sniper Rifle :
Level 1: Decreased recoil and reload
Level 2: More decreased recoil and reload
Level 3: Most decreased recoil and reload
Combination Skills: Hawkeye, Surveyor – you can level these up easily at the same time as the weaponry skills. To increase your level as quickly as possible just use the respective weapon or play in a room that only uses that class of weapon.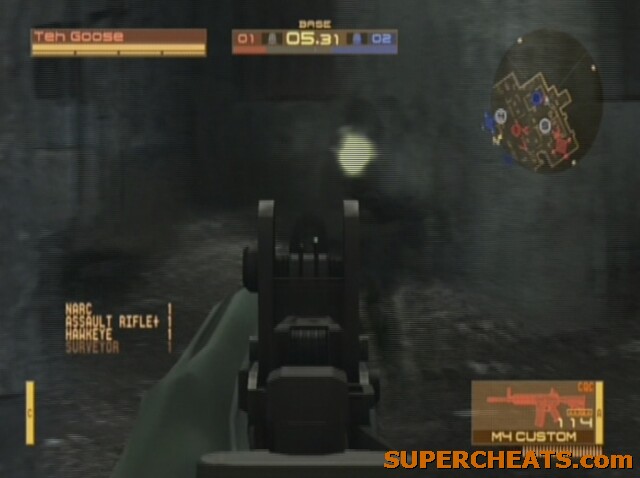
Surveyor (increases auto-aim lock on distance):
Level 1: Increased lock on
Level 2: More increased lock on
Level 3: Most increased lock on
Combination Skills: Weaponry Skills
Level up quickly by only using auto-aim to shoot enemies. Press Square while in over the shoulder mode to activate auto-aim.
CQC (close quarters combat mapped to R1):
Level 1: Allows basic CQC
Level 2: Increased CQC damage and human-shield ability
Level 3: Most increased CQC damage and disarm ability
Combination Skills: Handgun , Blades, Scanner
Level up quickly by using CQC as quickly as possible (you need a CQC weapon such as a handgun or knife equipped [look for the CQC icon on the weapon image]). You can also level up Scanner in tandem by injecting the Scanner while using CQC as much as possible or in a friendly game room. Be sure not to choke them by pressing R1 too hard.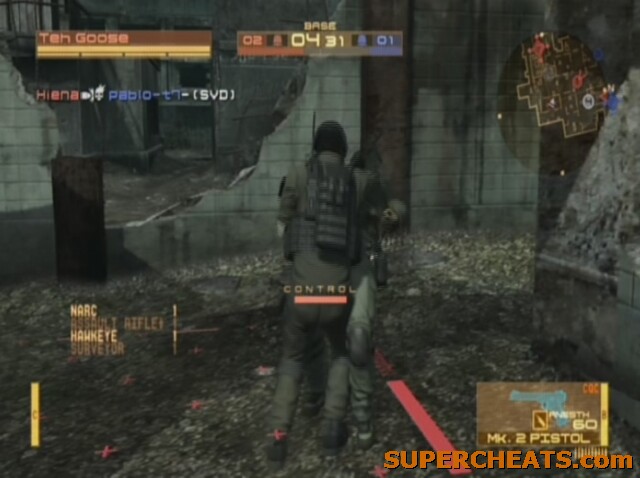
Blades (faster knife attacks):123
Level 1: Faster knife attacks
Level 2: Faster knife attacks
Level 3: Fastest knife attacks
Combination Skills: CQC
Level up quickly by using knives as much as possible. Stun enemies or knock them out before reviving them and knifing them. Used with CQC you can knife enemies in the throat (R1 followed by Triangle when prompted) using a combination move at CQC Level 1.
Runner (increases run speed):
Level 1: Faster running speed
Level 2: Faster running speed
Level 3: Fastest running speed
Combination Skills: All
Level up quickly by running everywhere – walking or crouching doesn't count. Find a friendly game room and set your controller up to run while you do something else.
Unlockable Primary Skills:
Box Move (faster movement while in a cardboard box):
Level 1: Allows faster movement while disguised in a cardboard box
Level 2: Allows faster movement while disguised in a cardboard box
Level 3: Allows faster movement and the 'box tackle' move to take down enemies while disguised in a cardboard box (X)
Unlocked by using a cardboard box for over an hour in total. Select it as a skill from then on to increase levels further.
Combination Skills: All
Level up quickly by staying in a box in a friendly room for hours on end.
Quick Recovery (faster waking up of friendlies):
Level 1: Faster recovery of teammates
Level 2: Faster recovery of teammates
Level 3: Fastest recovery of teammates
Combination Skills: All
Level up quickly by waking teammates only. Enemies give you no points. Find a friendly room and use non-lethal weapons to knock out and revive your teammates. This does not level up in Deathmatch, only team games.
Secondary Skills:
Hawkeye (extra zoom in FPS mode):
Level 1: Increased zoom in FPS mode
Level 2: More increased zoom in FPS mode
Level 3: Most increased zoom in FPS mode
Combination Skills: Weaponry Skills
Level up quickly by only using first-person mode to shoot enemies (press Triangle after readying your gun). In the options menu you can set this view as default.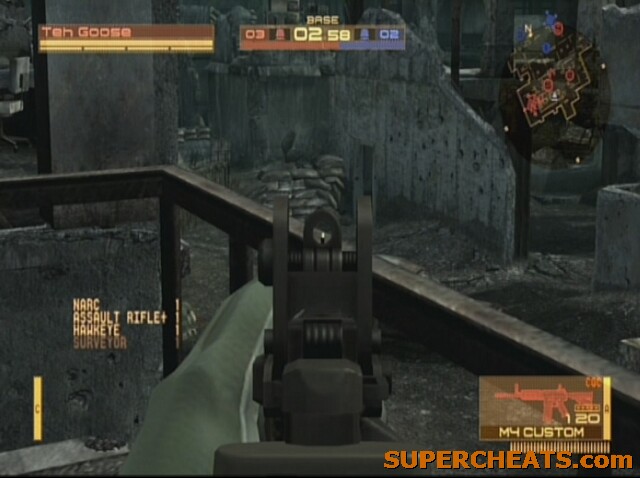
Note: This doesn't increase scoped zoom.
Quarterback (increases distance for throwing weapons):
Level 1: Increased throwing range
Level 2: More increased throwing range
Level 3: Most increased throwing range
Combination Skills: Weaponry Skills
Level up quickly by using grenades as much as possible.
Trickster (lay traps more quickly):
Level 1: Increased speed while laying traps
Level 2: More increased speed while laying traps
Level 3: Most increased speed while laying traps
Combination Skills: Sixth Sense, Weaponry Skills
Level up quickly by laying lots of traps, then collecting them again yourself and repeating – you don't lose any ammunition and you can also upgrade Sixth Sense in the process.
Monomania (shows enemies you've attacked on SOP):
Level 1: Longer exposure of enemies via SOP
Level 2: Longer exposure of enemies via SOP
Level 3: Longest exposure of enemies via SOP
Combination Skills: NARC, Surveyor
Level up quickly by ensuring you are SOP linked with teammates and that you try not to take out the enemy straightaway, giving your team time to see them on SOP. You can level up NARC and Surveyor at the same time. Enemies appear as a different colour on SOP. Linked teammates glow.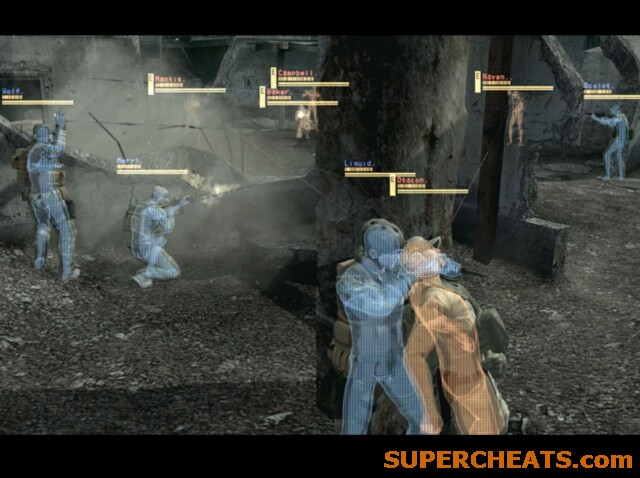
Sixth Sense (shows traps on SOP):
Level 1: Larger range of trap detection
Level 2: Larger range of trap detection
Level 3: Largest range of trap detection
Combination Skills: All
Level up quickly in conjunction with Trickster to lay and collect traps repeatedly.
NARC (shows enemies you're locked on to or when damage is dealt through SOP):
Level 1: Larger range of effect
Level 2: Larger range of effect
Level 3: Largest range of effect
Combination Skills: Surveyor, Monomania
Level up quickly by locking on to as many enemies as possible and from Level 2 onwards allowing (or setting it up with a friend) so that the enemy lock on to you.
Scanner (inject a tracker into an enemy while using CQC by pressing Triangle):
Level 1: Increased duration on SOP
Level 2: Increased duration on SOP
Level 3: Maximum duration on SOP
Combination Skills: CQC
Level up quickly by equipping the S. Plug in the equipment menu and using CQC on enemies. Press Triangle when prompted to inject them (much like the needle in single player). Be sure not to choke them by pressing R1 too hard.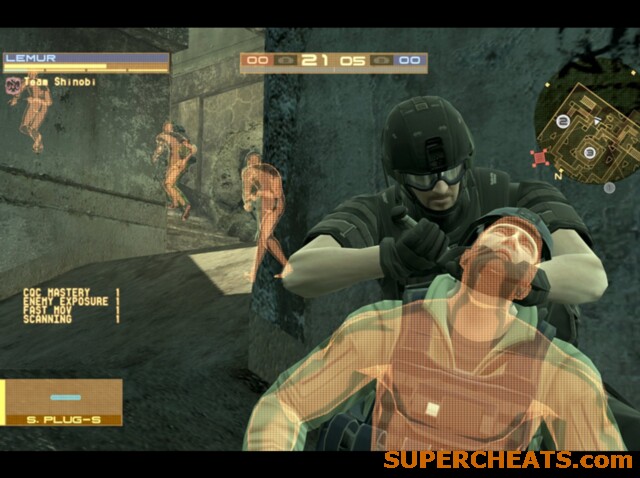
Deathmatch:
A free-for-all frag fest with few rules. Length is moderated by respawn tickets and a timer. Pick an aggressive skill loadout if this is going to be your mode of choice. You don't need supporting skills like Surveyor, Monomania, NARC or Scanner as these are designed to help teammates and there are none here! Weapon skills are the best, with Blades, Quarterback and CQC also being useful. If you are winning you appear on the SOP as a glowing character, so a good tactic is to plant traps and corner yourself in the map with a few minutes to go if you're winning. You should be able to rack up a few kills as the rest of the pack comes to get you using the SOP.
Team Deathmatch:
Team-based frag fest where teamwork and strategy is essential. This game mode supports two teams and the winner is whoever reduces the other team's respawn tickets to zero, or the team with the most when the time runs out. SOP supporting skills are worth looking at here, and it's also worth considering skills that take advantage of enemies' divided attention, such as CQC (you can sneak up behind people and create easy kills for the team) and also other team kills, such as Quick Recovery.
Capture Mission:
Both teams race to capture separate targets and return them to their bases where they then must hold them until a timer reaches zero. A decision must be made on players to defend, attack and support. If both teams have their targets the timer is reset so it is important to keep teammates around the enemy drop-off point too. You can see the time in goal for each team at the top of the screen. More team-based action with possibilities for stealth and infiltration are here but at the same time defence is important, and enemies will be huddled together making Trickster or Quarterback good skills. The SOP abilities allow you to keep an eye on the enemy team and ensure they are not overwhelming your target.
Base Mission:
There are various bases located over the map and the first team to capture them all, or the team with the most when the timer runs out, wins. It is important to remember that unlike in a lot of games there are no points for the duration that you hold the bases. The only important thing is making sure you capture all of the enemies or at least always have the majority of bases on the map when the timer starts to get low. Frequently the enemy team will allow you to capture many of the bases and just heavily defend a couple before taking lots near the end while your team is concentrated on one place. Grenades are great here, as is CQC and Scanner because you can use it as people are capturing bases and level up quicker as a result. Try to learn where most of the enemies are and take unguarded points and remember not to play it as an individual just capturing and killing for yourself as nothing matters if your team loses!
Rescue Mission:
Essentially an attack/defend mission as you would find in other games, one team works to capture Ga-Ko (the target) and the other defends. The most important thing is to not let the enemy get it to begin with using traps, grenades and heavy defence. The attacking team does have to take it back to their goal though, so keeping one defender in the middle of the map or by their base isn't a bad idea. SOP skills are really handy for tracking a player after they have taken Ga-Ko. As attackers use Sixth Sense to spot enemy traps, watch for grenades and bombard their base yourselves. If you die you can not respawn. You can however turn 'ghost pranks' on in the settings to allow players to move around as ghosts and play pranks on other players once they die. Sometimes you will become an evil spirit which can be seen by other players.
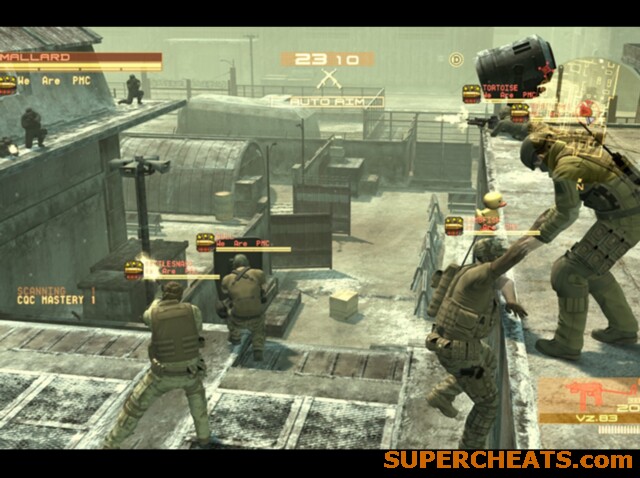
Sneaking Mission:
Fans of the campaign will love this, where one player is chosen randomly as Snake and must get a certain amount of dogdags from the other players. Remember, kills are not the ultimate aim if you're Snake! You need to knock out other players and search them with Triangle, or hold them up, then search them with Triangle. Kills are still important, both for ensuring you don't get killed yourself too many times, and for deciding the game at the end. Stealth is what it's all about here, so use your advantage of OctoCamo as much as possible. As regular players you need to try to take Snake out from range so he can't get a Mk. 2 shot on you or hold you up. He has full use of OctoCamo so be aware! If there are enough players the Metal Gear Mk.II will also take part on Snake's team under player control. It is risky to pick a particular skill set for stealth or offense here as you don't know if you'll end up as Snake or a regular player (though obviously the chances are you'll be a normal character)
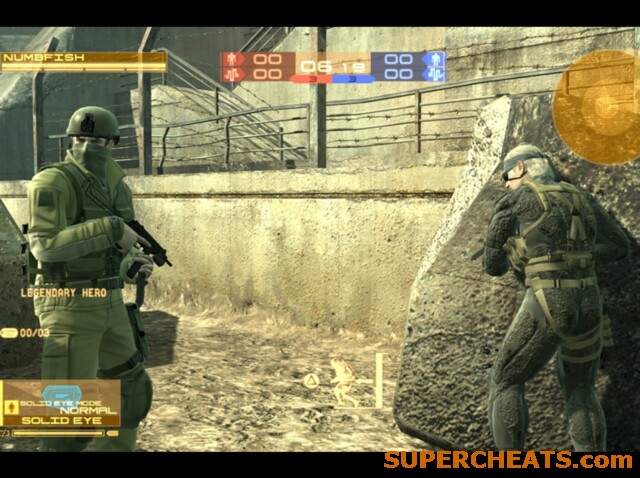
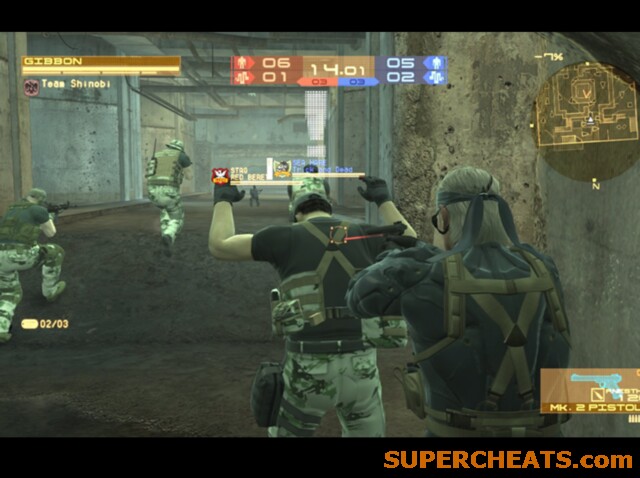
Team Sneaking:
Like Sneaking Mission, but with an entire team instead of just one stealth player. One team can use full stealth abilities to capture the target (Ga-Ko or Kerotan) and return it to their base, while the other must stop them. If either team kills all the other team members they also win. Pick your skills and weapons based on whichever you are best at – but it is again a risky strategy to go too heavy on stealth or aggressions as you don't know which team you'll be!
Shake the controller to return OctoCamo to its default appearance.
Shake the SIXAXIS while talking to Rose on the Codec to make her breasts wobble. On the third playthrough she changes her shirt. Talk to her after dying and you may have a conversation about how it feels as though you have died before.
In the mission briefings drive Metal Gear Mk. II to the radio upstairs to play music. Hit the TV and large screen that the Colonel appears on similarly to see models on the screens.
When a new character is introduced with the name of a voice actor press R2 to see the motion capture actor instead of the voice actor.
Tap X to regain Psyche in the cutscenes
Call Otacon after seeing rats in the Shadow Moses vents to hear about how they helped in MGS.
While hiding in a dumpster you can press L1 to aim and fire
If you only pick up the camera in Act 4's briefing you can find secret photos already on it of Sunny and Naomi.
Kill enough enemies in one place and Snake will vomit after Liquid's taunt that he loves the killing.
Press Triangle by statues to blend in and take their pose. You can break off a rather sensitive part of certain statues with repeated use.
If it takes you longer than three minutes to kill the Boss Beauties (you can drag it out by moving away) the screen turns white and you can take pictures of them in various poses. Play "Oishii ChuhanSeikatsu" on the iPod in a Beauty fight to see them dance and pose.
Play "Oishii ChuhanSeikatsu" in a mission on the iPod and pause the game to see Sunny dancing to it.
In the Vista Mansion locate the two Akina Minami posters and use first person to see them to increase Snake's Psyche.
When controlling the Mk. II or Mk. III look at Snake to see him using a PS3 controller to manoeuvre it.
In Act 1's briefing there is a PS3 upstairs. You can see Sunny unpacking a PSP and PS3 here too.
In Act 2's briefing there is a PS3 on a table. Sunny is playing Penguin Adventure on her PSP, Kojima's first game.
In Act 2 during the Laughing Octopus boss fight lie prone on one of the beds and flip over. Octopus will try to get on top of you.
In Act 3 if you press Triangle next to the statue in the park and wait for another resistance member they will relieve themselves on you.
In Act 4 when you are asked to enter the code in Otacon's office there are various options giving you different rewards to the correct 48273, as well as two cutscenes depending on whether you get it right or wrong. Below is the list of codes:
14893: 100,000 Drebin Points
13462: iPod Track - Policenauts Ending
78925: iPod Track - Old L.A. 2040
You can also get 1,000 Drebin Points here by walking to the locker to hear an audio flashback.
In Act 4 if you are using a DUALSHOCK controller when fighting the Screaming Mantis boss you get an alternate cutscene once the ghost of Psycho Mantis appears. He tries to mimic his feat from MGS and activate the controller's vibration, celebrating the fact that it has returned. If you are using a SIXAXIS however, he complains about the lack of rumble and concedes that his powers are failing.
In Act 4 after the Crying Wolf boss fight kill one of the wolves in the area and the rest will attack you and Otacon and Rose will berate you if you Codec call them.
In Act 4 as you get to the lift to fight Vamp there is a Darth Vader helmet on the floor.
In Act 5's briefing use the left stick to alter the height of projection.
At the end of the game you are rewarded with an emblem based on your performance throughout the acts. Here is a summary of them and how to go about obtaining them:
Big Boss: Completion with no continues, alert phases, kills, health boost items, stealth camo or bandana on The Boss Extreme difficulty, and in under five hours. Unlocks: the Patriot, Big Boss FaceCamo and iPod song.
Fox Hound: No continues, 3 or less alert phases, no kills, health boost items or stealth camo or bandana on Big Boss Hard (or higher) with completion in under five and a half hours. Unlocks: Thor .45-70
Fox: No continues, 5 or less alert phases, no kills, no health boost items, no stealth camo or bandana and completion in under 6 hours on Solid Normal. Unlocks: Long Barrel Desert Eagle.
Hound: Completion with less than 3 alert phases, no kills, continues, health boost items, stealth camo or bandana on Naked Normal in under six and a half hours. Unlocks: Type 17 Pitsol
Mantis: No alert phases, continues or health boost items and completion in under five hours.
Wolf: Completion with no continues or health boost items.
Raven: Completion in less than five hours
Octopus: Completion with no alert phases. Unlocks: Stealth Camo
Bear: Use CQC choke to defeat 100 enemies
Eagle: 150 or more headshots
Assassin: Over 50 knife kills, over 50 CQC holds and are discovered fewer than 25 times. Unlocks: Altair (Assassin's Creed) Disguise.
Pigeon: No Kills
Blue Bird: Give over 50 healing items to militia in Acts 1 and 2
Hawk: Praised by militia in Acts 1 and 2 by killing enemies in front of them.
Little Gray: Get 69 unique weapon types
Ant: 50 body searches during hold up
Gibbon: 50 hold ups.
Tortoise: Over an hour inside the cardbox box or oil drum.
Rabbit: 100 pages viewed in a magazine
Bee: 50 uses of Scanning Plug or Syringe
Gecko: An hour pressed against walls
Scarab: Over 100 rolls
Frog: 200 rolls or jumps sideways
Inch Worm: An hour crawling
Lobster: 2 and a half hours crouched
Hyena: Collect 400 weapons and items
Hog: 10 combat high phases (triggered by firing more than 100 times during the alert phase)
Pig: Over 40 health boost items
Cow: Under 100 alert phases
Crocodile: 400 kills
Giant Panda: 30 hours or over completion time
Scorpion: 75 or fewer alert phases, under 250 kills and under 25 continues
Tarantula: 75 or fewer alert phases, over 250 kills and under 25 continues
Centipede: 75 or fewer alert phases, 250 kills and more than 25 continues. Unlocks: Corpse Camo with over 41 continues.
Spider: 75 or fewer alert phases, 250 kills and more than 25 continues. Unlocks: Corpse Camo with over 41 continues.
Jaguar: More than 75 alert phases, under 250 kills and less than 25 continues
Panther: More than 75 alert phases, more than 250 kills and less than 25 continues
Leopard: More than 75 alert phases, under 250 kills and more than 25 continues. Unlocks: Corpse Camo with over 41 continues.
Puma: More than 75 alert phases, over 250 kills and more than 25 continues. Unlocks: Corpse Camo with over 41 continues.
Chicken: Completion in over 35 hours with over 150 alert phases and over 500 kills, 50 continues and 50 health boost item uses. Unlocks: Corpse Camo.
Some unlockables have already been covered on our skills/unlockables page in the Metal Gear Online part of this guide, here are some more...
Non-lethality:
There are various unlockables that you need to complete the game with no kills in order to get. Use the Mk. II, Shotguns with V-Ring ammunition (from Drebin) or the Mosin-Nagant to tranquilise enemies, or of course non-lethal CQC. Everything in the game can be taken out with these, no matter how futile it logically seems.
Additional Unlockables:
Solar Gun (knocks enemies out when fully charged): Find all 4 Beast Dolls and the Frog Soldier doll. The 4 Dolls are found in the following ways:
Frog Soldier: Take out the Haven Troopers using non-lethal weapons after meeting up with Rat Patrol in Act 1. The doll is in the garage at the bottom.
Laughing Octopus: Take out this boss using non-lethal weapons. The doll is on a bed during the Laughing Beauty stage.
Raging Raven: Take out this boss using non-lethal weapons. The doll is on the top floor during the Raging Beauty stage.
Crying Wolf: Take out this boss using non-lethal weapons. The doll is just behind the starting position during the Crying Beauty stage.
Screaming Mantis: Take out this boss using non-lethal weapons. The doll is on a bed during the Laughing Beauty stage.
Mk. 23 (MGS classic pistol): Found under the truck at the entrance to the building on the Helipad in Act 4.
Race Gun (can ricochet off surfaces): Complete the game
Scanning Plug (use while an enemy is in a CQC hold – allows you to see an outline of all other enemies linked to them): Buy from Drebin after playing for 10 hours online
Stealth Camouflage (invisibility to human enemies): Buy from Drebin (5 million points) after completing the game or unlocks after completing with no alert phases.
Emotion Bullets (trigger a variety of emotional effects on enemies they hit depending on the colour of the bullet): Buy from Drebin having completed the game at least once
Emotion Smoke Grenades (trigger a variety of emotional effects on enemies in range depending on the colour of the grenade): Buy from Drebin having completed the game at least once
Mantis Doll: Obtained after defeating Mantis in Act 4
Sorrow Doll: The other doll that Mantis holds in the boss battle. Shoot it down and collect it like the Mantis Doll.
Bandana (infinite ammo in all guns): Buy from Drebin (5 million points) after completing the game or unlocks after a no-kill playthrough
The Passwords menu is unlocked after one completion in the Extras menu.
1aytmmymhk: Unlocks 1911 Custom (a powerful silenced pistol)
abraham: Unlocks "Mobs Alive" iPod tune
jmsotsynrn: Unlocks Type 17 Pistol
mekakorkkk: Unlocks Mk.23 Pistol
mnsoymsyhn: Unlocks Mosin-Nagant sniper rifle
deskyhstyl: Unlocks Desert Eagle (Long Barrel)
aottrykmyn: Unlocks Altair Costume
thomas: Unlocks "Desperate Chase" iPod tune
pkhhnwhsjt: Unlocks Patriot (SMG with huge power, unlimited ammo and no reloads)
george: Unlocks "Gekko" iPod tune
tshsniammr: Unlocks Thor .45-70 (one-shot-kill pistol)
theodore: Unlocks "Midnight Shadow" iPod tune
skynytktjp: Unlocks the Mk. 2 scanning plug
mgo2play: Unlocks the "Subsistence Action" iPod tune
There are various ways to get more Drebin Points. Here are some of them:
Cheaper Items: On Wednesdays and Sundays the store is 20% cheaper. You can set your PS3 clock to exploit this. If you kill heaps of enemies or shoot down helicopters the store is significantly cheaper again, due to an increase in the war price.
Infinite Points: In Act 1 after you first meet Akiba (marked as Cut Scene 5 in this guide) go to the stack of three crates past the first stack after the cutscene ends. There are a few militia soldiers here who will continuously respawn and die, dropping valuable RPG ammo after a short while that you can sell to Drebin instantly and thus generate a virtually infinite supply of points. Ensure you don't go in front of the crates or they will stop spawning.
To see the ghosts you need to have the Sorrow Doll equipped and use the camera obtained during the Mission Briefing as you play through Act 4:
Heliport:
Tanaka
A Frozen Genome Soldier
Nishimura
Shigeno
Muraoka
(1,3,4 and 5 are developers probably, so are other random Japanese names)
Tank Hangar:
Decoy Octopus
Master Miller
Sigint/DARPA Cheif
Genome Soldier
Canyon:
Raven
Koboyashi
Korekado
Nuclear Warhead Storage Building: (First Floor):
Gas Mask Genome Soldier
Makimura
(Floor B2):
Baker the AT President (Otacons office)
Shimizu
Kantoku
Takabe
Matsuhana
Snowfield:
Sniper Wolf
Sato
Shinkawa
Nakamura
Casting Facility:
Sasaki
Hirano
Supply Tunnel:
Negishi
Kaneda
Underground Base:
Liquid Snake
Cyborg ninja/Grey Fox
Kimura
Cut Scene 1:
Militia troops entering the city – None
Cut Scene 2:
Emerging from underneath the truck as more militia troops arrive – None
Cut Scene 3:
Snake moving up with the militia and seeing the Gekko units for the first time – None
Cut Scene 4:
Snake stealthily creeping through and finding a Gekko dripping blood on him. - Press L1 here to get a first-person view of the machine. Another bursts through the wall and reveals Old Snake in all his musky glory. It also introduces the OctoCamo suit for the first time. There is another L1 opportunity as the Gekko is about to crush the 'No Place for Hideo' crate.
Cut Scene 5:
After the save game opportunity a flashback occurs. Press X while Snake is saluting for a flashback during a flashback! Otacon is introduced here for the first time, as well as the reason why Snake is so old. Another X opportunity presents itself after Otacon suggests 'trying another doctor' about 2 minutes and 15 seconds in. The third X opportunity is just after this, about twenty seconds later as Snake walks to the helicopter. The colonel is then introduced. Once it is revealed that 'we've found him' at 4 minutes and 8 seconds in, another X opportunity is available.
Act 1
RED ZONE NW SECTOR
Cut Scene 1:
A codec conversation with Otacon plays out and reveals that our first objective is to find the Mk. II. – None
Cut Scene 2:
An APC arrives with more troops. – None
Cut Scene 3:
An introduction to the Mk. II and Solid Eye – There is an X interaction shortly after the Mk. II surfaces.
Cut Scene 4:
Drebin is introduced and explains about ID tags and his buying and selling routine - None
Cut Scene 5:
We get a glimpse of Akiba and receive an oil barrel to aid our mission of stealth. There is an L1 first-person opportunity as Snake looks into the barrel.
Cut Scene 6:
Rat Patrol is introduced. Press L1 to see Akiba in first person after about 50 seconds. Then X shortly afterwards for a flashback. Another X moment after 2 minutes to see a Meryl flashback. At around 3 minutes and 44 seconds, another X opportunity. L1 after 4 minutes 22 allows you to see the data in first person.
Cut Scene 7:
Akiba disarms the trip-mines – None
Cut Scene 8:
Rat Patrol jump down the lift shaft – None
Cut Scene 9:
More battles between Rat Patrol and enemy Troopers, as well as the location of Liquid – None.
Cut Scene 10:
A Militia tank enters the area – None
Cut Scene 11:
The terror of what lies ahead! After 2 minutes and 14 seconds you have a L1 chance to see GAP in midair.
Cut Scene 12:
We see Liquid and a strange weapon apparently unleashed on the troops. On the first sight of Liquid after about 1 minute and 15 seconds press L1 to see him through Snake's eyes. Press X about 5 seconds later for a Liquid-themed flashback. Press X after 7 minutes and 11 seconds just before Naomi syringes herself to see her in a flashback.
MISSION BRIEFING
Sunny is making some less-than-appetising eggs as Otacon outlines the mission ahead. There is an X flashback about 2 minutes 18 in, as Otacon mentions 'Meryl and her boys'. At around 3 minutes there is a Liquid flashback. Press X after 7 minutes 25 to see a Shadow Moses flashback, followed almost immediately by a Mei Ling one.
ACT 2
Cut Scene 1:
A guinea pig is eaten by a snake. Press X just after that (about one minute in) to see a flashback. The PMC base is then revealed, complete with Rebel hostages and Vamp. Press X after 3 minutes 51 to see a Vamp-themed flashback.
Cut Scene 2:
Another meeting with Drebin. Press L1 after 2 minutes and 10 seconds to look out of the top of his tank in first person. Press X after 5 minutes and 17 seconds while looking at the photos on Drebin's wall to see some flashbacks related to them. Press L1 just afterwards to go into first person and look over the images yourself. Then, straight after that, X will give you flashbacks of the various bad guys Drebin mentions. Next, at 6 minutes and 57 seconds, a Patriot X flashback.
Cut Scene 3:
A JCB crashes through the gates and bedlam occurs! – None
Cut Scene 4:
The JCB continues through the main defensive gate – None
Cut Scene 5:
Snake locates Naomi and reveals himself to her, also being assessed medically. Press L1 before they meet after 51 seconds to look through the window of her lab and see a first person view as he moves forwards. After 2 minutes and 44 you can see an X flashback. L1 after 3 minutes 15 to look around the room and see Octopus out of the windows in the corridor as a sign of things to come. L1 after 10 minutes allows you to see Snake's naked torso in the mirror. Press L1 for a first person view of going inside the scanning machine after 12 minutes 4 seconds. You can now save the game. Secret L1 chances: After losing Psyche when Naomi reveals Snake doesn't have long to live you can look at her chest and regain the lost Psyche. When Snake drops the cigarette he can look up her skirt.
Cut Scene 6:
The conversation continues and Laughing Octopus is fully unveiled complete with cronies who take Naomi. A flashback at 02:05 is your first chance for more Drebin points. Again, at 6:55 for a Drebin flashback.
Cut Scene 7:
Laughing Octopus gets ready for a fight – None
Cut Scene 8:
The Octopus rejects its host and the human beneath is revealed - None
Cut Scene 9:
Laughing Octopus is defeated – None
Cut Scene 10:
Snake leaves the lab and investigates Naomi's footprints – press X at 1 minute 10 seconds to see her feet in flashback-form. Press L1 10 seconds later to look at the prints in the sand in first person and night vision.
Cut Scene 11:
Snake takes on Vamp to get Naomi back, with a little help from Drebin – None
Cut Scene 12:
Snake gets in position for the on-rails section to come – None
Cut Scene 13:
Drebin heads back towards the Confinement Facility – None
Cut Scene 14:
A tank is met and dealt with by Drebin – None
Cut Scene 15:
Drebin has to deal with another tank – None
Cut Scene 16:
Drebin heads to the marketplace – None
Cut Scene 17:
Entering the city using some unorthodox driving from Drebin and being confronted by more Gekkos – The first flashback is at 1 minute and 6 seconds. The next one is at 4 minutes 13 after Raiden makes his appearance.
Cut Scene 18:
Raiden takes on the seemingly-immortal Vamp as Snake and Naomi make a getaway – None
MISSION BRIEFING
More eggs from Sunny and we learn that Liquid is trying to get hold of Big Boss's corpse. Press X as Naomi is tarting up Sunny after 3 minutes and 30 seconds to see a flashback and get some Drebin points. At 10:10 there is another flashback too. Nearly a minute later at 11:01, as they are looking at Raiden you can press X again. One more at 17:17 as Otacon and Naomi are looking at the picture of his sister.
ACT 3
Cut Scene 1:
Snake arrives at the station and meets up with Meryl. - None
Cut Scene 2:
The resistance member emerges – None
Cut Scene 3:
The resistance member removes his disguise – None
Cut Scene 4:
Snake 'infiltrates' the facility and locates Big Mama – after 48 seconds press L1 to see a first person view of the human-shield situation.
Cut Scene 5:
Discussion of Liquid's plan with Big Mama as the PMC close on our position – After 8 minutes and 39 seconds you can press L1 for a first person op. X at 09:32 will give you a Big Mama flashback. Press L1 at 10:20 to see the Triumph motorbike in all its shiny glory. X at 10:52 gives a humorous 'first person shooters influence children' flashback. SECRET GAME IS MGS4.
Cut Scene 6:
The introduction to the motorcycle section and Gekkos are aiming to spoil the party – None
Cut Scene 7:
The van and motorbike move through the riverside with Raging Raven in pursuit - None
Cut Scene 8:
The opening to the Riverside East section - None
Cut Scene 9:
The van is turned over with a slider rocket and Big Mama is injured – The first flashback is after 1 minute 12 seconds. The second is 2 minutes 54 with a Big Mama/Snake flashback.
Cut Scene 10:
Snake climbs the tower and Raging Raven storms in - None
Cut Scene 11:
Raven sheds her suit – You can press L1 after 2 minutes and 5 seconds to look at her behind in first person.
Cut Scene 12:
Raven is defeated and Drebin explains her past – None
Cut Scene 13:
Snake gets back to Big Mama and they proceed through the sewers – Press X after 1 minute 49 to see a related flashback.
Cut Scene 14:
Snake and Big Mama stumble upon Liquid – Press L1 early in the scene after about fifteen seconds to peek round the corner in first person mode and see Liquid.
MISSION BRIEFING
Watch the Mk. II as it explores Liquid's boat and does its best to look up Naomi's skirt – Press X at 4:26 for a flashback. X again at 8 minutes 15 will give you a Metal Gear flashback.
Cut Scene 15:
Snake wakes from his daydream in the helicopter – None
ACT 4
Cut Scene 1:
Snake makes a less-than-graceful landing from the helicopter – None
Cut Scene 2:
A humorously familiar cutscene showing the security camera guarding the stairs - Press X a second in to see a flashback of it from MGS1.
Cut Scene 3:
Exploring Otacon's old office and entering the security code – Press X after 3 minutes 42 seconds to see an Octacon-related flashback. At 4:59 there is another one. Again at 6:26 and finally twenty seconds later at 46 for an old-fashioned security flashback.
Cut Scene 4:
A Gekko comes out of the lift to get you – None
Cut Scene 5:
The hangar door is opened – None
Cut Scene 6:
Crying Wolf is introduced, complete with Railgun – None
Cut Scene 7:
Crying Wolf sheds her suit to become Crying Beauty - None
Cut Scene 8:
Crying Wolf is vanquished and Drebin tells you her story – None
Cut Scene 9:
The Mk. III opens the door and the wolf mourns Crying Beauty – Press X for a flashback after 20 seconds.
Cut Scene 10:
Snake looks around the tunnel and Vamp and Naomi show up – X after 22 seconds will give you a Metal Gear flashback.
Cut Scene 11:
Suicide Gekkos come to help Vamp, Raiden comes to help you – None
Cut Scene 12:
Vamp and Naomi leave you – After 8 minutes 20 there is a flashback chance.
Cut Scene 13:
Time for some Rex on Ray action – None
Cut Scene 14:
Liquid makes his escape – None
MISSION BRIEFING
The plan is drawn up for the final battle – Press X after 6:29 to see a Naomi/Otacon flashback. Press it again after 8:07 to see another one. At 9:04 too. One minute later is a first-person L1 opportunity, allowing you to look around while dazed.
ACT 5
Cut Scene 1:
The strike team board the vessel – None
Cut Scene 2:
Incoming hostiles! - None
Cut Scene 3:
Snake is surrounded and Meryl is located – None
Cut Scene 4:
Mantis is controlling Meryl but Johnny arrives on the scene – 2 minutes in is a first person L1 opportunity. Straight afterwards you can press X for a Mantis flashback.
Cut Scene 5:
Mantis uses Meryl against you – None
Cut Scene 6:
Meryl turns the gun on herself – None
Cut Scene 7:
Mantis sheds her suit to become Screaming Beauty – None
Cut Scene 8:
Screaming Beauty is defeated and Psycho Mantis appears, and is defeated by the power of the PS3! – A memory-card flashback after 2 minutes and 9 seconds is the first here, followed by a SIXAXIS/DUALSHOCK 3 one at 2 minutes 56 and another at the 3 minute point. At 3:27 there is one more. Drebin then explains Screaming Mantis's backstory and Meryl makes a stand against the Haven Troopers.
Cut Scene 9:
Meryl and Johnny hold off the Haven Troopers and reveal their feelings for each other – X after 2 minutes 2 seconds will give an appropriate flashback, again at 2:53, this time relating to Johnny's apparent illness in the Middle East. At 3:14 there is a flashback looking at Meryl and Johnny's history in MGS1.
Cut Scene 10:
Snake suffers from the nanomachines as he enters the next corridor – Press L1 after 2 seconds to look through Snake's affected eyes. Raiden makes another day-saving appearance to allow you to continue.
Cut Scene 11:
Snake and the Mk. III reach GW and Otacon uploads the virus, and downloads a message from Naomi – None
Cut Scene 12:
Liquid keeps Snake alive for one last, epic duel – None
Cut Scene 13:
Stage two of the fight is about to commence – None
Cut Scene 14:
Stage three of the fight is starting! – None
Cut Scene 15:
The last stage is in the making – None
There are various short cutscenes in this last stage, all a couple of seconds long. There are also automatic flashbacks for anyone with eagle-eyes.
Cut Scene 16:
Liquid is vanquished and Snake leaves the area – None
EPILOGUE
Cut Scene 1:
Meryll and Johnny are married, but Snake is mysteriously absent – None
Cut Scene 2:
Raiden (Jack) and Rose make up and get back together, complete with their son ¬– None
Cut Scene 3:
Snake appears to kill himself – None
Cut Scene 4:
Drebin's back story is explained – X Flashback at 01:52
DEBRIEFING
Cut Scene 1:
Big Boss is back from the dead to tie up the loose ends – X Flashback at 05:54. 11:27 will also give you a Zero flashback, and another at 14:03. The next is at 14:54, about Drebin's influence in the game. At 15:11 you can see one more before a small recess then another at 19:31. You can see a flashback as Big Boss is saluting at 21:42.
Cut Scene 2:
Sunny gets the eggs just right and reveals that the sun 'is rising again' - None
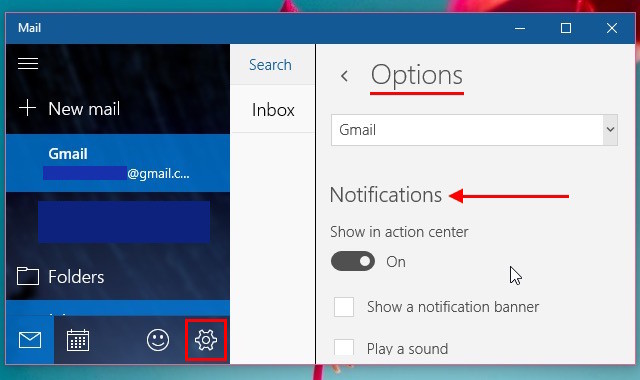

 Fallout Shelter (iOS / Android) Special Stats benefits and locations
 The Walking Dead: Episode 2 Walkthrough
 Catherine Achievements list for Xbox 360
 FIFA 16: Best Young Players for Your Career Mode
 Mario Kart Wii Guide