From the lead designer of Portal comes the next hugely creative puzzle game for all ages called Quantum Conundrum, and we’ve got a walkthrough prepared to get you through the devious dimensional quandries you’ll face. After an explosive scientific accident in the giant mansion of Doctor Quadwrangle, a young boy will discover the man’s greatest creation — the Interdimensional Shift Device.
With the ISD, you can shift between four dimensions at will. While the geometry of the world stays the same, the properties of the dimension are different. Unlocking each dimension and using those properties will help you overcome each challenge, and these puzzles are going to get very complicated. Give your brain a break with our full walkthrough.
To dive deeper into this Quantum Conundrum, check out the achievements or jump dimensions to our cheats page.
Blue Wing
Yellow Wing
Red Wing
Uber-IDS
Quantum Conundrum Walkthrough
Blue Wing
Hall of Wonders
Pick up your luggage and head into the mansion. You, an aggravating child, are visiting your uncle’s manor.
Press the button next to the door, and take your luggage into the next room.
There is another button next to the door. Use your luggage to jump up and press it. Move into the next room and watch the dimensional chaos.
When it opens, move through the metal door into the front hall. Follow the blue carpet into the hall, and go to your uncle’s office.
Throw the switch and take the glove in the box. Go to the blue wing in the middle of the hall. You can start your journey here. Head through the next metal door.
Move through the hall of wonders, which is filled with displays of some of your uncle’s inventions. Take the “advanced” drinking bird and use it to press the buttons and open the door.
Throw the switch, and enter the next room.
Quantum Conundrum Walkthrough
Blue Wing
A Shift in Perspective
You’ll see your first IDS battery. The bird will activate fluffy dimension. Use it to move the now light safe into a position where you can use it to jump to the next ledge.
Use the next safe to open the door by putting it on the portable kinetic mass to electricity converter. For the sake of this walkthrough, we’ll just call it a scale.
Move into the next room and put the IDS battery in its place. Use the bird, or “Desmond,” to activate fluffy.
Place the safe on the scale and move through the door. Use the next safe to jump to the next platform, then jump again.
Find the next IDS battery, and throw it into the receptacle.
You can now switch between dimensions at any time. Use it to put the safe on the scale, and move through the door. Walk down the hallway and throw the switch to the metal door.
Quantum Conundrum Walkthrough
Blue Wing
Huckin’ Stuff
When DOLLI throws a safe at you through the window, go through the window and move the battery into place. Use fluffy to put the safe on the scale.
In the next room, use the scale to deactivate the lasers.
Press the button to dispense a safe. Use fluffy to throw the safe across the gap, then deactivate fluffy to activate the scale. Move through the open door.
Press the button in the next room to dispense another safe. Before it breaks the glass, use fluffy. Walk across to the other side, and deactivate fluffy to break the glass and activate the scale.
Move through the next door and use a chair on the scale. Use fluffy to throw the safe over the wall, and do it again on the next wall.
Activate the scale and move into the next room. Let your uncle give you a rundown on his invention’s history.
Quantum Conundrum Walkthrough
Blue Wing
Air Raising Scheme
Press the button on the wall. Use fluffy to give the safe extra distance once it has been dispensed. Use it to break the glass.
Continue this until you have three safes. Use the scales to open the door.
Directly in front of the door is a collectible. Throughout the game you can find Awkward Noise Generators. Pick it up.
Jump through the window and use a safe to activate the scale. Use the safes on the conveyer belt to jump up to the next platform. Head up the stairs and into the next room.
Quantum Conundrum Walkthrough
Blue Wing
Fluffy Journey of Discovery
Use a safe to break the window, you degenerate. Press the button to activate the fan.
Stand on top of a safe, and activate fluffy over the fan to ride it to the top. Jump to the next platform.
Move into the next room, and press the button to dispense a safe. Use the fan while fluffy is activated to place the safe in the middle of the gap. Jump on the safe and clear the gap.
In the next room, press another button. Use the three safes in the middle of the room, and the fan, to build a stairway.
Jump on each of the safes, and jump onto the next platform. Press another button to activate the next fan.
Jump down and grab a safe. Ride the safe to the top and jump to the next platform. Head down the hallway into the next room.
Activate the next fan, and quickly use fluffy. Jump across the two safes to the other side of the gap.
Do the same thing for the next gap, but you may have to adjust the position of the safes using fluffy. Exit through the metal door.
Quantum Conundrum Walkthrough
Blue Wing
Kalodiophobia
Listen to your uncle as he explains the “heavy” dimension. You will see a room with a collection of wires. You will need to activate the correct scales to finish the puzzle.
Press the button to dispense cardboard boxes. Every few seconds, the room will activate the heavy dimension allowing the cardboard boxes to weigh down the scale.
Place the cardboard boxes on the correct scales to activate the DOLLIs. The correct combination is a box on the first scale in the first row, and two boxes on the middle and right scales in the back row.
Run to the top of the steps and jump onto the stack of safes. Jump to the next platform, and move through the next door.
Quantum Conundrum Walkthrough
Blue Wing
A Weighted Decision
Place the battery in the receptacle. You will now be able to control the heavy dimension. Activate the scale and move into the next room.
Use heavy dimension to have the DOLLI break the glass. Move up the stairs, and pick up the box. Throw it at the glass while heavy is activated to break it.
Move through the hallway into the next area. Don’t look for the pile of random objects. You won’t find them.
Quantum Conundrum Walkthrough
Blue Wing
Stairway to Fluffy
Stairway to Fluffy
Press the button to use the DOLLI. Activate heavy to have the safe block the lasers.
Move up the stairs and press the button. Use heavy dimension to use the laser to break certain safes in the stack of safes. Do this until you build a proper stairway.
Use the stairway to make it to the next platform. Grab the battery and place it in the receptacle. There is also an Awkward Noise Generator on a shelf on the second floor.
Go back downstairs and grab an object. Use the heavy dimension to block the lasers so you can make it through to the next door.
Quantum Conundrum Walkthrough
Blue Wing
Needle in a Haystack
Use the cardboard boxes to disrupt the blue lasers. Take the IDS Battery from Ike. Throw the battery into place and press the button.
Grab the battery that DOLLI dropped and place it in the receptacle. Use a cardboard box and a safe to disrupt the laser. Use heavy dimension to ignore the fan.
Once the blue laser is disrupted, and the red lasers are deactivated, move into the next room. Take a look at the very disturbing picture of Ike holding a red balloon.
Quantum Conundrum Walkthrough
Blue Wing
Is This the Real Life? Is This Just Fantasy?
Place Desmond near the button and use the DOLLI to get a cardboard box.
Pick up the cardboard box. Stand close to the door and throw the box at the blue laser. For the split second that it is disrupted, enter the opened door. The next door should open up once the other door is closed.
In the next room, activate the DOLLI and retrieve the safes. use them at the back wall to build a staircase to the next platform. Jump to the next area, but bring one of the safes with you.
Activate the scale and move through the door. Place the battery in the receptacle.
Grab a chair and head towards the lasers. Use heavy dimension and the chair to block the lasers as you move forward.
Use the DOLLI to dispense a few safes. While in fluffy, stack the safes horizontally using the fan to disrupt the blue laser.
Move through the door into the next area, and listen to your uncle talk about his inventions again.
Quantum Conundrum Walkthrough
Blue Wing
Springing to New Heights
First off, take a few minutes to watch Ike ride Desmond like a pony. Once you’re done, pick up the battery and move it into place. In this room, you will see a platform that will work like a spring.
Place a cardboard box on the spring platform. Activate heavy dimension to compress the spring, then deactivate it to send the cardboard box flying. Activate heavy once again to break the glass above.
Use heavy and the box to break the glass in the back of the room. Take the safe and place it on the scale in the other room.
Use the cardboard box to break the next set of glass behind the next door. Use the DOLLI to get a safe.
There should be a spring in front of a gap. Place the safe on the spring and activate heavy. Stand on the safe, and activate fluffy to send yourself flying across the gap. Move through the metal door into the next area.
Quantum Conundrum Walkthrough
Blue Wing
Mind the Gap
Use the button to dispense a safe. Move it over to the spring. Stand on top of the safe.
Use a double bounce, like a trampoline, to get more energy to reach the top. Do it again to retrieve the safe. I recommend that you break the glass behind the conveyer belter before continuing.
Place the safe on the next spring, and use heavy and fluffy to launch yourself over the gap.
Retrieve two safes off of the belt, and place them on the two springs. Stand on the left safe, and launch over the gap with the safes. Save them before they are destroyed by the laser.
Use the scale to open the next door, and move into the next area.
Quantum Conundrum Walkthrough
Blue Wing
Around the World
Head into the room full of lasers. Use DOLLI to retrieve two safes. Throw the safes and use heavy to block the lasers. Make sure you throw one of the safes over the first set of lasers.
Hopefully you’re good at basketball, because you’ll need to shoot a conductive poly-cell into each of the electro-vats. Pick up the first poly-cell with fluffy, and bounce it off of the backboard into the electro-vat.
There are two more electro-vats. Grab another poly-cell and head over to the next vat. Put the safe on the spring, and stand on it while holding the poly-cell. While in the air, toss the cell into the vat.
Place a safe on the angled spring. Place the poly-cell on the flat spring. Activate heavy, and stand on the safe. Activate fluffy and launch yourself towards the poly-cell. Grab it while in the air, and quickly throw it into the third electro-vat.
Go into the opened door, and move into the hallway. You should be close to the generator now.
Quantum Conundrum Walkthrough
Blue Wing
A Minor In-Conveyance
Step onto the conveyer belt. Jump over the lasers. In the next area, make yourself adjacent to the couch on the opposite belt. Activate the heavy dimension to block the lasers so you can pass them.
The next set of lasers will be on the opposite side. Move to the same belt as the chair, and once again use it to block the lasers.
Continue down the belt until you reach the end. Jump off and land on the next conveyer belt. For this walkthrough, we will not be flipping the switch to the right.
Jump and doge the lasers. In the next area, jump to each section of the belt. You will need to jump according to where they are turning. Be aware of where the belts are moving to.
Ride the belt until you reach the end, and jump to the next one. Grab a safe and place it on the spring. Activate heavy, and jump on the safe. Activate fluffy to launch yourself over the gap.
In the next area, you will have to dodge lasers while jumping between belts. This part is mostly trial and error. Once you dodge all of the lasers, grab a safe from the belt and place it on the spring.
Launch yourself through the glass by activating heavy while in the air. Flip the switch to the door, and move into the final area.
Quantum Conundrum Walkthrough
Blue Wing
End of the Beginning
Throw a chair through the window with heavy dimension. Grab another chair from the belt and move up to the laser floor.
Slowly move forward while periodically blocking the lasers with a heavy chair. I recommend doing this at the very left of the floor.
While dodging the lasers, use the staircase to move up to the next room. Use the buttons to deactivate all of the lasers.
Head down and use the DOLLI to dispense a few safes. Open the door and activate fluffy. Place the safes against the wall on the gap and stack them horizontally. Walk across the safes, and jump across the rest of the gap.
The generator will now need to be restarted. Use the DOLLI to get a safe, and place it on the generator. Activate heavy dimension and let the arm swing down. You will need then use fluffy dimension right before the arm starts to swing up. Time it just right to reach the momentum you need to start the generator.
Once the generator is powered up, head through the door into the main hall.
Quantum Conundrum Walkthrough
Yellow Wing
Our Safes Will Blot Out the Sun
Head down the stairs and move through the room. Look out, you’re about to be crushed by flying objects!
Time will slow down. Walk into the next room and head up the stairs. Everything will move in slow motion, allowing you to jump across the furniture to the other side.
Move up to the metal door, but turn left and jump on the safe to the other side. Continue to jump on safes until you reach a button that will open another door.
Move Desmond to the heavy dimension button, and place the cardboard box on the scale. Head back the way you came in.
When the heavy safes block the lasers, jump each gap until you reach the first room. Use the DOLLI to place a cardboard box on the scale. Continue forward into the next area.
Quantum Conundrum Walkthrough
Yellow Wing
Ticket to Ride
Jump through the slowly spinning blade, and then ride the safe. Jump onto the next platform. Ride the slow-moving table, but quickly jump to the next platform before hitting the lasers.
Move to the other side and ride the table again. Jump off when your uncle tells you to, and land on the platform to the right.
A DOLLI will launch furniture upwards. Jump from each piece of furniture until you reach the top.
Ride the table to the top, then jump on the couch. It will speed up right before hitting the lasers, so jump over them. Land back on the couch and fall to the bottom.
Dodge the spinning fan, and continue through the metal door.
Quantum Conundrum Walkthrough
Yellow Wing
Do the Robot
Press the button and grab the cardboard box. Place it on the scale and use heavy. Slow down time and quickly move the box into the other room before the lasers appear.
Use the scale and have Ike give you an IDS battery.
Remove the time-slowing battery, and place the fluffy and heavy batteries into the receptacle.
Take two safes from the robots, and use heavy to move them to the next room.
Once you have two safes in the first room, place them on the scales to open the door. Move forward and listen to your uncle jabber on about keytars.
Quantum Conundrum Walkthrough
Yellow Wing
Hang Time
Head through the first set of lasers and into the first room. Take the fluffy battery from Ike.
Pick up the box and slow down time. Disrupt the blue laser, and quickly move through the second set of lasers.
Place the battery into the receptacle, and use fluffy to pick up the chair. Throw it, and slow down time.
Quickly move into the first room, and hold the box to disrupt the laser. Once the chair is passed the lasers, you can drop the box.
Pick up the chair and place it in front of the broken stairs. Use the chair to jump to the next location.
Move through the metal doors into the next area.
Quantum Conundrum Walkthrough
Yellow Wing
It’s Slow Throwing From Here On Out
Grab the cardboard box from DOLLI. Head back into the first room and grab safe number 21,157.
Throw the safe at the red lasers and slow down time immediately. Pick up the cardboard box and move towards the blue lasers to the right.
Use the box to disrupt the lasers as the safe moves safely to the other side. Have the safe land on the scale.
Once the safe is on the scale, move through the open door and down the stairs towards the next area. Before you leave, you should go to the bottom floor of the first room and pick up the Awkward Noise Generator.
Quantum Conundrum Walkthrough
Yellow Wing
Cat’s in the Cradle
Press the button and have the DOLLI dispense a safe. The BOT-bots will destroy any foreign objects that try to pass them, so you cannot bring the safe with you.
Instead of carrying it, throw the safe across the first gap to the left of the BOT-bot. Move across to the other side and pick it up.
Keep walking until you hit another BOT-bot. Throw the safe to the left of the BOT-bot and slow down time. Move forward and catch the safe before it falls.
Keep moving forward until you reach yet another BOT-bot. Throw the safe towards the middle of the room and slow down time. Move to the scaffolding in the middle and catch the safe again.
Continue this process for the fourth BOT-bot, and place the safe on the scale. Retrieve the battery from Ike. You will need to move back the way you came with the battery.
Do the same thing with the battery that you did with the safe. Continue forward while catching the battery, then throw it into the receptacle at the beginning of the room. Grab another safe from DOLLI.
Move into the next area and throw the safe at the scale below the lasers. Activate heavy while it is in mid-air, and activate the scale. Continue through the open door into the next location.
Quantum Conundrum Walkthrough
Yellow Wing
Is It Safe to Ride?
Press the first button to send a battery flying. The DOLLI will continue to dispense safes. Slow down time and ride a safe into the next room.
Place the battery into the receptacle and grab a safe. Create a stairway out of the safes using the fan.
Place a safe on the scale in the room. Move through the opened door.
Drop down onto the conveyer belt and grab a safe. Go up the stairs and throw it across the gap. Slow down time and ride the safe across the gap.
Grab a couch and move up the stairs in the next room. Throw the couch across the room and slow down time to jump across the gap using the couch. Grab the Awkward Noise Generator.
Use the scale to open the door, and move into the next location.
Quantum Conundrum Walkthrough
Yellow Wing
Time Weighs Heavy Upon Us All
Move up the stairs in the library and press the button. Slow down time.
Grab the first box and jump to the book shelf. Jump on the safe and throw the first box.
While in mid-air, grab the next three boxes. Throw them all to the other side.
In the air, jump to the second book shelf. Put the boxes on the scales and activate the heavy dimension. Move through the metal door to the next location.
Quantum Conundrum Walkthrough
Yellow Wing
The Odds Are Stacked Against You
Move into the main room and move up the stairs. There is a battery on the other side of the fan. Ride a safe towards the fan.
Slow down time and jump into the fan. Grab the battery and move to the main room.
Place the battery in the receptacle and pay attention to the laser. While the safes are moving, dodge the lasers and use them as a bridge to the other side. Grab the Awkward Noise Generator.
Move back to the main room. Once again pay attention to the laser. Use heavy dimension to stop the laser from destroying the safes.
Ride the last stack of safes to the end, and slow down time as they are falling. Jump the gap to the next door.
Quantum Conundrum Walkthrough
Yellow Wing
Robot Block Party
Follow the path into the room with the robots. Slow down time to save the boxes from the robots, but don’t get pushed into the pit.
Place a box on each scale to have a robot carry a safe across the room. Stop the boxes from hitting the activation beam to save the robot.
Once the robot makes it across the room he will fall into a pit. Slow down time to use the robot and safe as a bridge.
Receive the IDS battery from Ike and place it in the receptacle. Throw a table across the gap and use it to make it to the other side of the room.
Once you clear the gap, flip the switch to the door and move to the next location.
Quantum Conundrum Walkthrough
Yellow Wing
A Boost of Confidence
Have the DOLLI dispense a safe. Put the safe on the spring and use it as a trampoline.
Place it on the second spring where Ike is and grab the Awkward Noise Generator.
Head over to the third spring and use heavy and fluffy to spring the safe into the scale on the roof. Go up the stairs and through the door.
Slow down time and use the two flying safes as a bridge. Get another safe from DOLLI and place it on the angled spring.
Ride the safe over the gap, and do the same thing for the second gap.
There should be a spring near a button. Press the button as you launch yourself using the spring, and slow down time after DOLLI dispenses two safes. Jump on the safe and ride them into the next room.
Place a safe on the scale and continue into the next location.
Quantum Conundrum Walkthrough
Yellow Wing
Manhattan Transfer
Check behind the door in the first room for a button. Take Desmond and place him on the button. Move up the flooded room.
Have DOLLI throw a chair. Ride it to the center of the room. When you pass the battery, grab it and transfer to another chair. Move towards the receptacle.
Place the battery into the receptacle and ride a chair towards the lasers. Dodge the lasers and head through the metal door.
Quantum Conundrum Walkthrough
Yellow Wing
Catch and Release
Go into the main room towards the floor. Grab the IDS battery from Ike and move it into place.
The DOLLI in the middle of the floor will dispense flying objects. Slow down time and jump on a piece of furniture. Another DOLLI will dispense a safe.
While in mid-air, quickly activate fluffy and grab the safe. Throw it at the scale on the other side of the room.
Move through the opened door into the next room. Press the button to have DOLLI throw safes.
Place a safe on the spring and ride it to the other side of the room when your uncle says go. Slow down time and jump on the table that is flying across the room.
Using fluffy, grab and throw the safe while you are in the air. Slow down time again and ride the safe over the gap.
Jump to the next platform and head through the metal door.
Quantum Conundrum Walkthrough
Yellow Wing
H-O-R-S-E
Move into the laser-filled room. Use DOLLI to get two cardboard boxes.
Place a box on the spring and use it to disrupt the first laser. Slow down time and grab the second box.
While the first set of lasers are disappearing, use the second box to disrupt the next blue laser on the right of the room. Move through the second set of lasers.
Dodge the third set of lasers, and head towards the fourth. If you threw the second box correctly, the fourth set of lasers should soon disappear. Move into the next room.
Use the two buttons to get a safe and a poly-cell. Shoot the first dodecahedron using the spring to the right. Activate heavy before it reaches the lasers.
Grab another poly-cell and place it on the middle spring. Place a safe on the left spring. Jump onto the safe and ride it. Slow down time and jump onto the platform on the left.
Open the two middle doors to let the poly-cell fly safely through. Head down to the main floor and grab another poly-cell. Ride the poly-cell to the top, and open the two left doors. Once the poly-cells are in the electro-vats, move into the next location.
Quantum Conundrum Walkthrough
Yellow Wing
What Goes Around…
Use DOLLI to get a safe. Use the safe to reach the next platform. Jump to the scale and press every button on the platform. Jump on the flying safe and jump off onto the next platform.
Wait for the couch, and jump on it while it is flying. Use it to intercept the heavy battery mid-air. Place the battery in the receptacle. The receptacle can be reached by riding another safe. Ride the safe until it hits the wall.
The safe should land on a platform near a shelf. On the shelf you can find another blueprint. Jump down to the floor and place the battery.
Jump back up to the platform again using the first safe. This time, throw the safe in slow motion, and grab it before it falls. Throw it onto the scale and use heavy dimension to save it from the lasers.
Jump on the safe, and jump onto the next platform. Move through the metal door into the next location.
Quantum Conundrum Walkthrough
Yellow Wing
The Path to Higher Learning
Move into the room and grab the first battery. Place it in the receptacle. Move up the stairs and press the button. Slow down time as the tables are falling.
Jump on the first table. You cannot jump to the second table without letting them fall in normal time first. Quickly switch between slow and fast until you can reach the second table. Jump onto the next platform.
Press the button and ride a chair to the third platform. Take the fluffy battery from Ike and ride a table to the first room. Place the battery in the receptacle.
Move towards the room with the fan. Grab a piece of furniture and throw it over the fan. Ride the furniture to the other side of the gap and grab the heavy battery.
Ride another piece of furniture across the gab. Carry the IDS battery to the receptacle and place it. Head up the stairs into the next room.
Activate fluffy and press the button. Jump onto the first safe as it is floating above the lasers. Slow down time and jump onto the second safe. Continue this process until you reach the other side. Continue into the next location.
Quantum Conundrum Walkthrough
Yellow Wing
Land of Misfit DOLLIs
You’ll find a room with DOLLIs throwing furniture around. While slowing down time, move from each piece of furniture until you reach the last two DOLLIs. Jump on the foot rests and climb them like stairs.
Jump to the second set, and do the same thing. Jump to the next platform and move down the hallway.
Press the button to the DOLLI in front of the gap. A huge stack of safes will be dispensed and Ike will knock them over. Slow down time and use the falling safes as a bridge.
At the receptacle, put the heavy and fluffy batteries in place. Move to the conveyer belt.
At the conveyer belt, slow down time and dodge the lasers. On each side of the lasers there will be a platform with a DOLLI and a button. Jump to each side using a safe to clear the gap. Press the buttons to open the door.
Ride the conveyer belt to the end once the door is open. When you are ready, press the button.
The DOLLIs will throw lasers across the room. At the end of each laser is a platform that you can safely jump on. Use the lasers as a bridge to clear the gap.
Once on the other side, you will be at the next generator. Use DOLLI to dispense a safe and place it on the generator. Start it up just like the previous generator. Exit into the main hall.
Quantum Conundrum Walkthrough
Red Wing
Reversal of Fortune
Head into the first chamber. You will find the reverse gravity dimension. Continue forward and dodge falling furniture.
Move into the next room and climb the platforms to the receptacle. Put the battery in place, and use the button to open the hatch.
Grab the safe using fluffy dimension. Place the safe over the scale. You may want to make sure it doesn’t fly away when reverse gravity is activated.
Exit through the open door and listen to your crazy uncle laugh.
Quantum Conundrum Walkthrough
Red Wing
The Safe-est Way to Travel
Jump on top of the first safe. Ride it to the top. Jump on the second safe and use it to jump onto the tubes.
Make your way to the other side and jump on the group of safes. Jump from platform to platform until you reach another set of tubes to stand on.
Jump onto the staircase of safes and continue across the platforms. Exit through the door and make your way into the manor. Continue through the metal door into the next location.
Quantum Conundrum Walkthrough
Red Wing
Lament of the Flightless Bird
Move forward towards Desmond. Take the battery under him and place it in the receptacle.
Use reverse gravity to place the safe on the scale. Pickup Desmond and move through the door.
Place Desmond on the next button and take the heavy battery from Ike. go back and place the heavy battery in Desmond’s original spot.
Get a box from DOLLI and place it on the scale. Place Desmond on the heavy dimension’s button, and move through the door. Continue upwards until you reach the door to the next location.
Quantum Conundrum Walkthrough
Red Wing
Going Up?
Grab the battery from Ike and place it in the receptacle. Grab the safe and head towards the top.
Grab another safe that you can ride in reverse gravity.
Place the second safe under the door near the roof. Stand on it and reverse the gravity. The door will open. Jump off of the safe and head through the metal door into the next location.
Quantum Conundrum Walkthrough
Red Wing
The Greatest Puzzle in the World… Tribute
Press the button to dispense a safe. Place it on the scale. Throw the safe through the window and grab the battery.
Place the batter in the receptacle and retrieve the safe.
Stand on the platform near the robots. Bring the safe up with you and place it under the scale on the roof. When the door opens, jump in and grab the next safe.
Open the door to that room and place the safe on the scale near the door in the next room. Pick up the first safe and put it on the second scale. When the door opens, continue to the next location.
Quantum Conundrum Walkthrough
Red Wing
A Course of Matter
move into the first room. Use reverse gravity to retrieve the cardboard box. Throw the box through the window. Move into the room and place a box on the conveyer belt.
Use reverse gravity to make sure the box doesn’t fall. When the box reaches the lasers, use heavy dimension to stop it from being destroyed.
When there is a gap in the conveyer belt, reverse gravity to make the box rise to the conveyer belt above. When you reach the end of the belt, reverse gravity to have the box move above the scale.
Let the box drop on the scale and use heavy dimension to activate it. Once the door is open, continue through.
Quantum Conundrum Walkthrough
Red Wing
Not Your Typical Sushi Bar
The room is flooded so you must go around. Jump onto the first conveyer belt, and then jump onto a safe. Use reverse gravity to raise the safe high enough to safely jump to the next belt.
Continue across the belt until you find where the safes are being dispensed. Raise the safe to the top and slow down time. Jump to the next belt.
Reverse gravity to raise a safe to the belt above. When it reaches the end, drop it and slow down time. Use it to jump the gap.
Continue to the other side. Do the same thing with the next belt to clear the gap. On the next side, drop a safe once more to jump to the next belt.
When you reach the next side, divert a safe to the conveyer belt on the roof. Jump across after you drop it in slowed time. You should now be near the door. Drop one more safe and use it to jump the gap to the door.
Throw the switch and continue through the metal doors.
Quantum Conundrum Walkthrough
Red Wing
Through the Glass Flooring
Turn left at the beginning and reverse gravity to bring the three safes up. Slow down time and use them as a bridge.
Grab the IDS battery and make a bridge once more. Continue across the gap and place the battery in the receptacle.
Look to the glass next to the receptacle and notice the cardboard box. Use reverse gravity to make it hit the angled roof. Activate the heavy dimension to send it flying through the glass.
Place the box on the scale and activate the heavy dimension. A case will open containing a fluffy battery. Retrieve it and place it in the receptacle. Use the DOLLI to get three safes.
Place them on the glass above the conveyer belts. Walk around to the other side and wait for them to reach the next belt.
Wait for the safes and reverse the gravity. When they are high enough, activate the door by pressing a button, and use the safes as a bridge across. Continue into the next location.
Quantum Conundrum Walkthrough
Red Wing
Nothin’ But Vat
Activate fluffy to deactivate the first set of lasers. Switch between reverse gravity and fluffy to get passed the various sets of lasers.
Exit through the door and head towards the electro-vats. Grab a poly-cell from DOLLI. Use reverse gravity to get extra hang-time while throwing the cells at the electro-vats.
Once the poly-cells are in the vats, a door should open to the left. Head through the door.
Continue down the hallway and take a look at the roof. There’s another blueprint just below the ceiling. Go back and grab a poly cell, and ride it to the top so you can reach the blueprint.
Throw the switch to the door and continue through the manor.
Head down the hallway until you reach a DOLLI behind glass. Press the button so it will dispense a safe.
Use reverse gravity to protect the safe from the lasers. At the end of the belt, use reverse gravity to activate the scale. Continue to the next room.
The next room will have a DOLLI behind glass also. Press the button and activate reverse gravity. You will need to dodge many sets of lasers. Most of this will be trial and error.
Once you have dodged the lasers with reverse gravity, the safe will be at the end of the belt. Drop the safe and activate the scale. Go into the opened door and place the fluffy battery in the receptacle.
Grab the safe and head towards the glass again. Ride the safe to the top and land on the platform. Exit the room through the metal door and continue.
Quantum Conundrum Walkthrough
Red Wing
Whoever Belt It, Dealt It
Head down the hallway until you reach a DOLLI behind glass. Press the button so it will dispense a safe.
Use reverse gravity to protect the safe from the lasers. At the end of the belt, use reverse gravity to activate the scale. Continue to the next room.
The next room will have a DOLLI behind glass also. Press the button and activate reverse gravity. You will need to dodge many sets of lasers. Most of this will be trial and error.
Once you have dodged the lasers with reverse gravity, the safe will be at the end of the belt. Drop the safe and activate the scale. Go into the opened door and place the fluffy battery in the receptacle.
Grab the safe and head towards the glass again. Ride the safe to the top and land on the platform. Exit the room through the metal door and continue.
Quantum Conundrum Walkthrough
Red Wing
Flipping Out
The first thing you will see is a gap. Use reverse gravity to flip the platforms as you move. Some of the platforms require you to flip them in mid-air. Continue until you reach a conveyer belt.
Grab a safe from the belt. Drop it over the edge and slow time. Jump on the safe and ride it to the top. Jump to the next platform.
Continue across the flip platforms. Continue until you reach a DOLLI. Grab a safe and place it on the scale. A flip platform will try to block the scale.
Slow down time while you activate reverse gravity at the correct time. If done correctly, the platform will flip and send the safe at the scale.
Move through the door and drop the safe to the scale on the floor. Continue through the sets of metal doors.
Quantum Conundrum Walkthrough
Red Wing
Robot Transfer
Open the first door. Jump across to the other side of the maintenance bay. Use reverse gravity to move one of the safes to the scale on the roof. The technique for this level is the same between rooms.
Move through the next door and ride a safe to the next scale while transferring between robots. When the scale is activated the door will open.
Continue to the next room. Transfer the safe between BOT-bots. Once you reach the scale, another door will open. Continue through to the next chamber.
Quantum Conundrum Walkthrough
Red Wing
I Saw the Sine
Move up the steps in the room. Slow down time when DOLLI throws a safe. Ride the safe and reverse gravity to the other side.
Place the battery that Ike has in the receptacle. Bring another safe to the platform. Ride it to the next platform.
Once you are at the top of the room, place the safe on the scale. Move through the door and head to the next location.
Quantum Conundrum Walkthrough
Red Wing
Couch Surfing
This level involves one thing. Couch Surfing. Initiate the room’s boot sequence then wait for DOLLI to spit out a couch. Slow down time and jump on.
Reverse gravity periodically to dodge the lasers without destroying the couch.
Reach the other side and throw the next switch. Jump on the table.
Use heavy dimension to block lasers, and continue to reverse gravity. When you reach the wall, transfer to the couch.
Surf to the next platform and grab the fluffy battery from Ike. Throw the switch.
Jump on the next couch and move towards the fan. Activate fluffy to have the fan blow you towards the next one. Use the fans to change direction.
When you reach the next platform, throw the switch to the door. Continue to the next location.
Quantum Conundrum Walkthrough
Red Wing
Choose Wisely
At the beginning of this level you will have to choose between the batteries. We will be picking fluffy for this walkthrough.
Place the battery in the receptacle. Move to the other side of the room and take a safe. Ride the safe to the top platform and hit the button to change the path of the BOT-bot.
Go back to where Ike is and break the window. Grab the next battery and place it in the receptacle.
Slow down time and jump through the spinning fan. Grab the Awkward Noise Generator. Head into the room where the robot is going.
Slow down time and stop the cardboard boxes from interrupting the laser. This will allow the robot to move safely across.
Continue into the next room and slow down time. Jump through the fan and continue up. Grab the next battery and place it in the receptacle.
Place a safe under the scale on the roof and another safe under the door. Use reverse gravity to jump into the doorway while on the safe. Grab the final battery.
Place the heavy battery into the receptacle and grab a cardboard box. Put a safe on one of the scales near the door and activate heavy. Put the cardboard box on the other scale and move through the door.
Quantum Conundrum Walkthrough
Red Wing
Sine Language
Use DOLLI to get a safe. Drop the safe over the edge and slow it down. Jump to the next platform using the safe.
Move into the next room and use DOLLI. Pick up the safe and throw it. Slow down time and jump the gap using the safe as a bridge.
Grab the battery from Ike and place it in the receptacle.
Get the safes from DOLLI by reversing gravity until they reach you. Send one safe to the other side of the gap.
Throw the next safe and jump on it. Reverse gravity until you reach the door.
Put the safes on the scales to open the door. Continue into the next area. You’re almost at the next generator, but something’s not quite right.
Quantum Conundrum Walkthrough
Red Wing
Beginning of the End
Press the button in the first room. DOLLI will dispense a safe. Use reverse gravity to bounce it off of the slanted roof. Reverse gravity until it breaks through the window.
Jump out of the window and head towards the next buttons. Dispense a row of safes, then push them off of the edge with the robots. Slow down time.
Jump on a safe and continue to the other side of the room while reversing gravity. Open the door and head into the next room.
Go to the conveyer belt and look at the rotary transformer. Jump on a safe and reverse gravity. Jump on the belt while it is on the top of the transformer, and continue into the next room.
Grab the fluffy battery and place it in the receptacle. Go down the hall and grab the safe from DOLLI. Place it on the generator.
Start the generator the same way you have done it in the previous levels. Continue to the end of the game, but something has gone wrong.
Quantum Conundrum Walkthrough
Uber-IDS
Only A Minor Setback
Flip the first switch and activate heavy dimension. Use the DOLLI to get the safes. Pick up the safes and put them on the ledge.
Throw one safe and slow down time. Throw it high so it doesn’t touch the lasers. Use the other safe to boost up and jump on the thrown safe. If the safe touches the lasers, quickly activate heavy dimension.
While surfing on the safe, use reverse gravity to reach the doorway. Head in and throw the first switch.
Use the button to drop a stack of safes. Use heavy dimension and slow down time. You can use these dimensions to build a staircase out of the safes. Once you have a staircase, use the couch to jump on the first safe.
Jump to the next platform and go through the door. In the next room, throw the switch and press the first button.
You will need to use the laser to break safes in the stack of safes. Use the spring to jump high enough to reach the top of the stack. When the stack is low enough, jump to the next door.
In the next room, grab the Awkward Noise Generator. Throw the switch at the front of the room.
Pick up the safe and jump to the next platform.
In the elevator room, grab Desmond and put him on the button. Press the other button in sync with Desmond. The elevator will come to you, or will it?
Quantum Conundrum Walkthrough
Uber-IDS
Only A Minor Setback Part II
The next part is mostly falling. Dimensions will shift without you doing anything. Continue to fall while dodging lasers. You can take a hit from a laser without dying, but you will die if it keeps happening.
When you reach the bottom of the shaft you will fall near the Uber-IDS. Luckily it seems as though you’re related to Chell, because you survive the fall.
Ike will appear throughout the platform with batteries. Search for Ike near the Uber-IDS and place all four of the batteries with the receptacle.
Once all of the IDS batteries are in the receptacle, the Uber-IDS will power up, but it will be unstable. Grab a piece of luggage and surf towards the core of the Uber-IDS.
Head towards the silhouette of your uncle, and get trapped in the pocket dimension. That’s how our story ends, folks. You’re not dead, but you’re trapped safely in the pocket dimension.


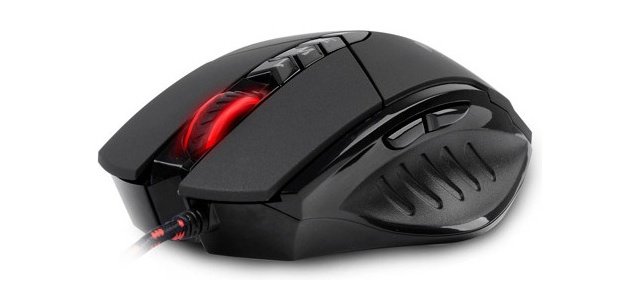 A4Techs Bloody Gun3 V7 Gaming Mouse Review
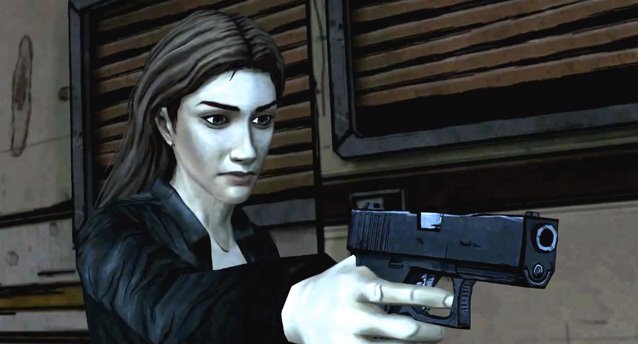 How The Walking Dead Used Artificiality To Heighten Emotion
 Ink Ball Walkthrough
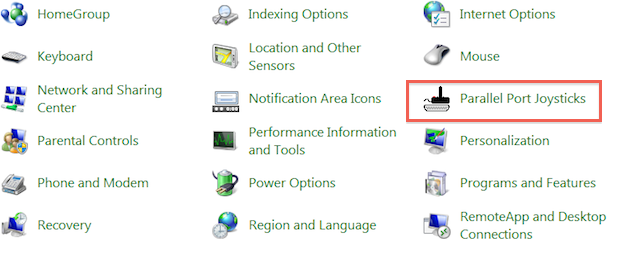 Turn Your Mouse Into A Joystick For PC Gaming
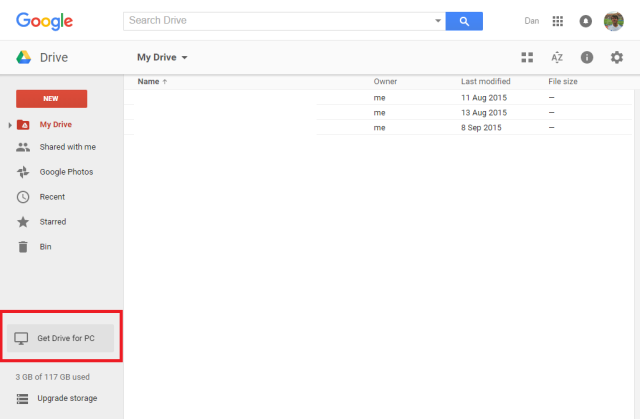 The Only Google Drive Guide You'll Ever Need to Read