Tales from the Dragon Mountain: The Strix Walkthrough, Guide, & Tips
Tales from the Dragon Mountain: The Strix Walkthrough

Welcome to the Tales from the Dragon Mountain: The Strix Walkthrough!
Explore the mystical woods and mountains of Pozoj Creek and defeat the evil spirit called Strix!
Whether you use this document as a reference when things get difficult or as a road map to get you from beginning to end, we’re pretty sure you’ll find what you’re looking for here.
This document contains a complete Tales from the Dragon Mountain: The Strix game walkthrough featuring annotated screenshots from actual gameplay!
We hope you find this information useful as you play your way through the game. Use the walkthrough menu below to quickly jump to whatever stage of the game you need help with.
Remember to visit the Big Fish Games Forums if you find you need more help. Have fun!
This walkthrough was created by Cateia Games, and is protected under US Copyright laws. Any unauthorized use, including re-publication in whole or in part, without permission, is strictly prohibited.
CHAPTER 1: Arrival

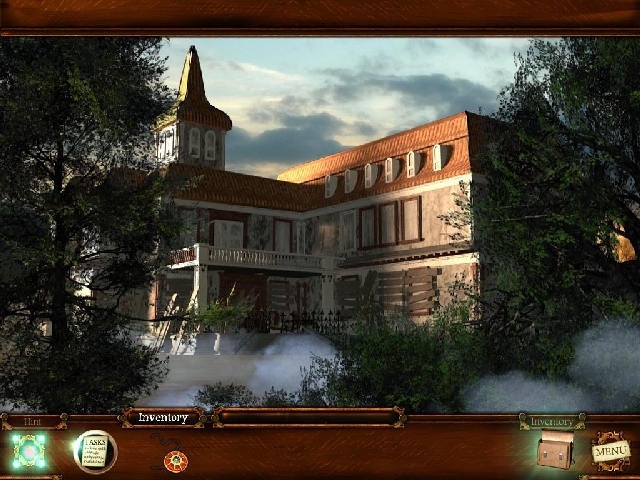
- Click on the house to approach it.
- Read the text on top of the screen while the mist settles.
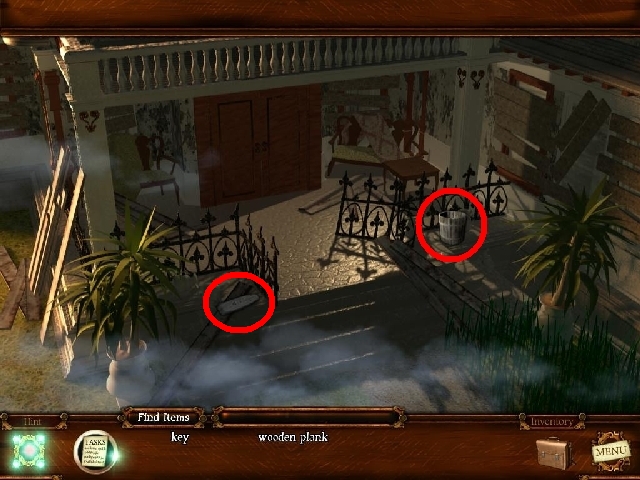
- Click on the bucket to move it aside; you will see a key beneath it.
- Left-click on the key and the wooden plank to pick them up.
- Select the key in the inventory and use it on the house door to unlock it.
- Click on two cogwheels to pick them up.
- Click on the locker to come closer to it.
- Once you have approached it, click on the drawer to open it.
- There are matches inside the drawer, click on them to pick them up.
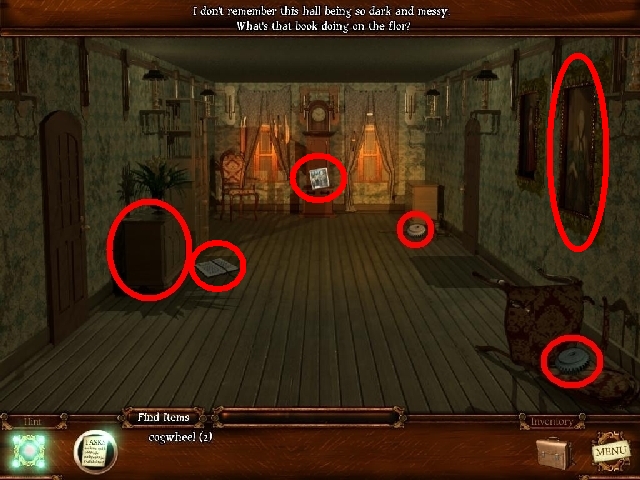
- Return to the Hall.
- Click on the diary on the floor to read what is written inside it.
- Click on the photo under the clock and study it – click on the Grandma, Grandma’s medallion and Malik.
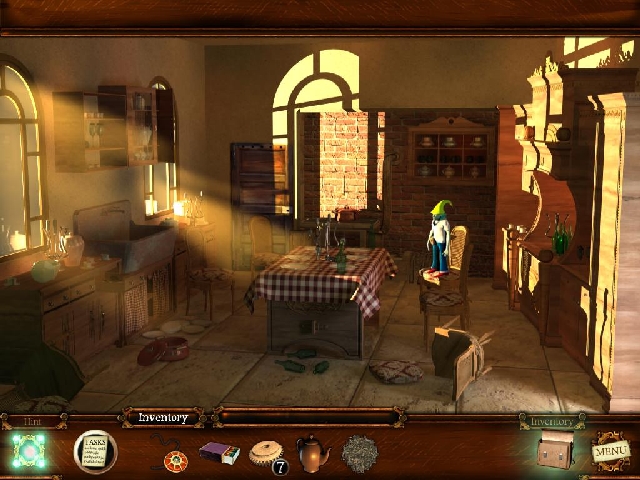
- Click on the left door to go to the kitchen.
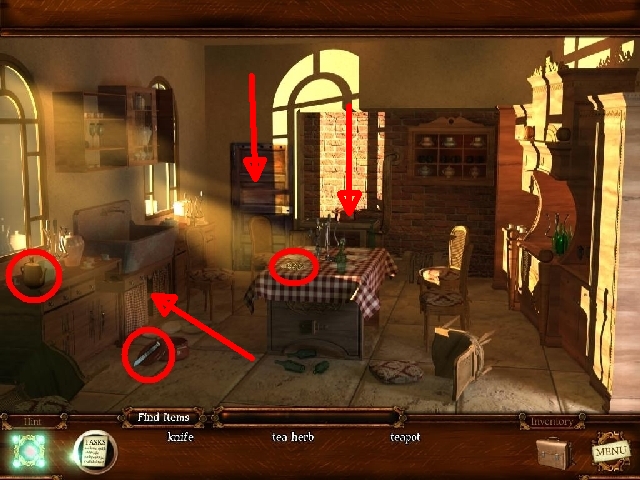
- Click on the knife, tea herb and teapot to pick them up.
- Door to the Backroom is locked, you will have to find the key.
- Return to the Hall.
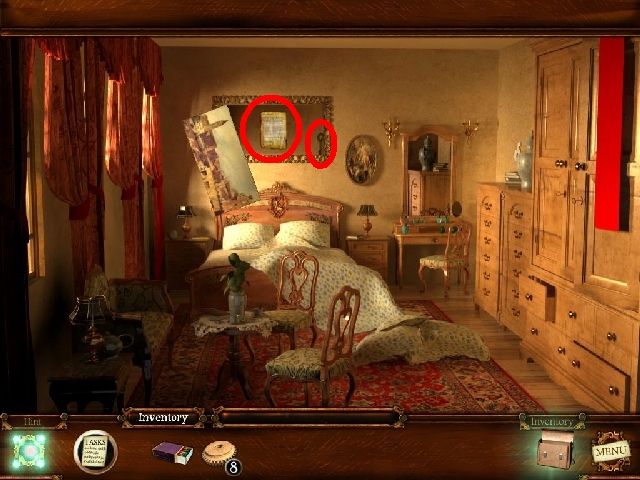
- Approach the picture that hangs on the right wall.
- After you examine it, use the knife to cut it out.
- After you remove the picture, pick up the key.
- Return to the Kitchen.
- Use the key on the back door to unlock it.
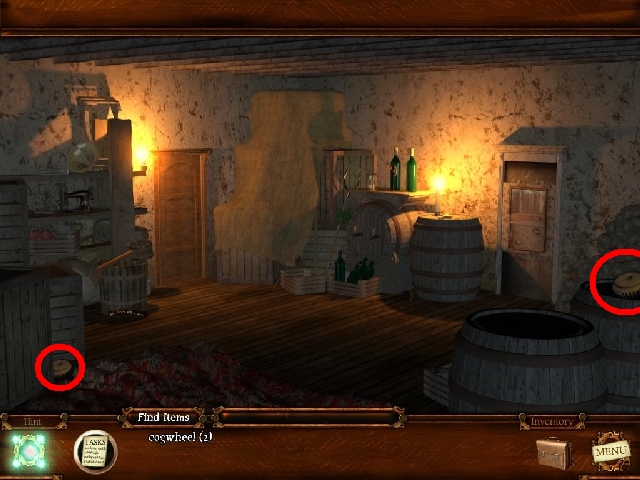
- Pick up two cogwheels.
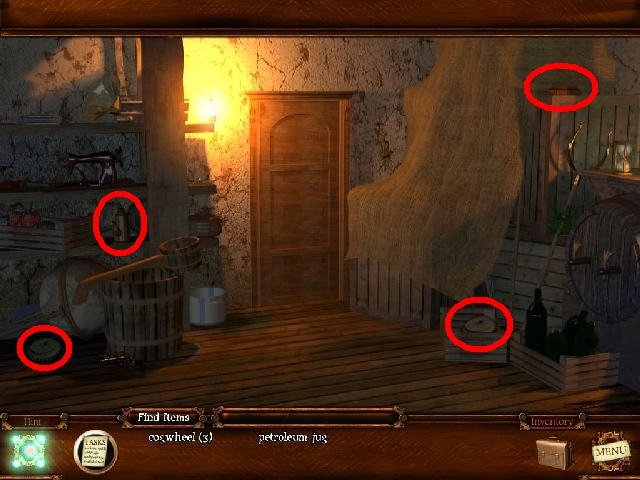
- Approach the shelves.
- Pick up three cogwheels and petroleum jug.
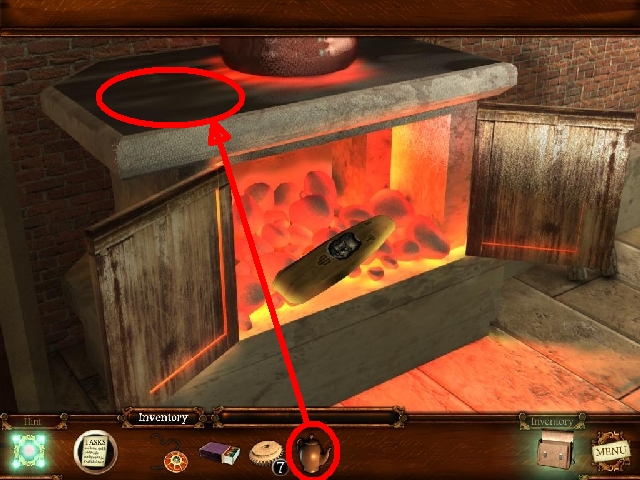
- Return to the Kitchen and approach the Fireplace.
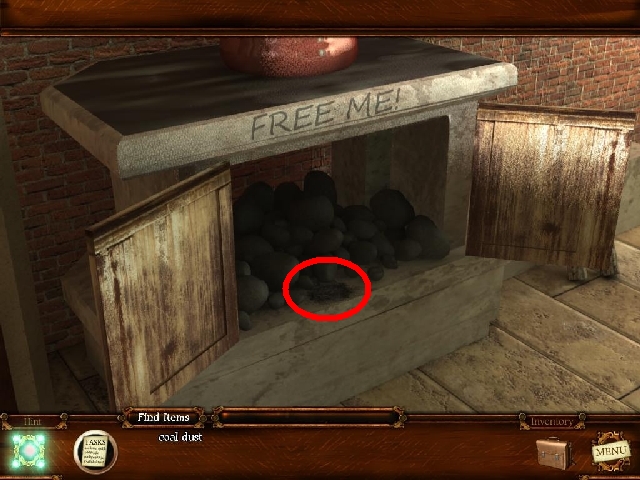
- Notice the text written on top of the fireplace.
- Click on the coal dust to collect it.
- Double-click on the wooden plank to enter the puzzle.
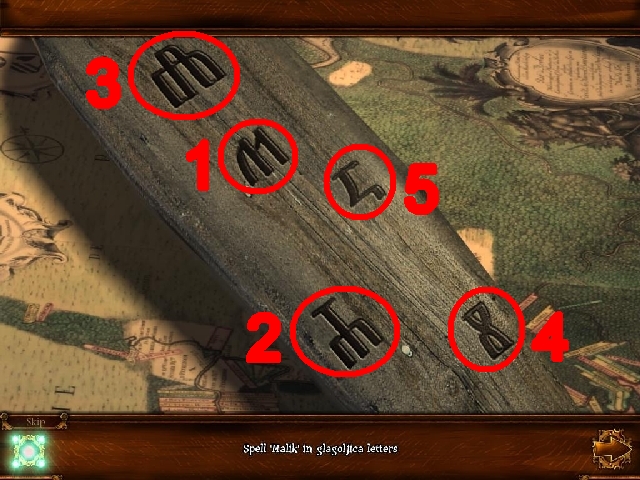
- First of all you should spell the name „Malik“ using glagoljica letters.
- Loking from top to bottom, press the letters in following sequence.
- Letter two, Letter four, Letter one, Letter five, and finally, Letter three.
- Now the indent in the plank has appeared.
- Note that it is stained with coal dust.
- Use the coal dust on the indent; Malik’s face appears.
- Note the fire symbol on his forehead.
- Return to the Fireplace.
- Use petroleum jug on the fireplace and then light it up with matches.
- Once the fire has been ignited, put the wooden plank in it.
- The new character – Malik appears.
- After the dialog, approach the cupboard unted the sink in order to get some water.
- Turn pipe elements until the right combination is found.
- Turn them in following order from top to bottom.
- Pipe element 1 – 1 turn.
- Pipe element 2 – no action required.
- Pipe element 3 – 1 turn.
- Use the teapot on the sink to fill it with water.
- Use the tea herb on teapot to put it inside.
- Now you need to cook it, so approach the fireplace again.
- Put the uncooked tea on the fireplace.
- Pick it up after the smoke comes out of the teapot.
- Return to the Kitchen.
- You cannot give tea to Malik yet, because you need the cup.
- Go to grandma’s bedroom to pick up the cup.
- To get there, first you have to return to the Hall, then go to the library through the right door.
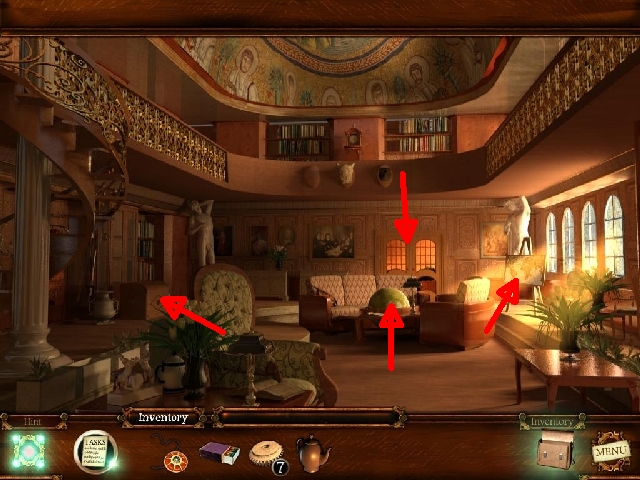
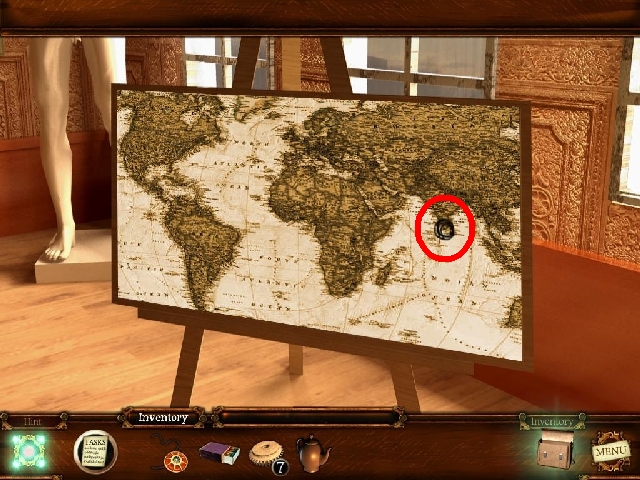
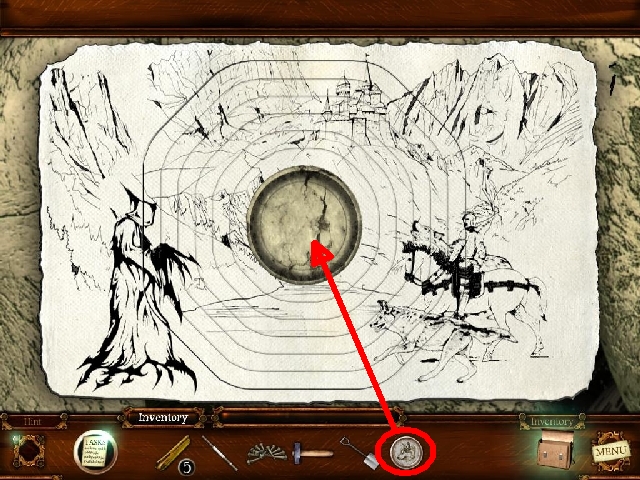
- Once in the library, approach the map.
- Click on the map to examine it.
- Note the marked area.
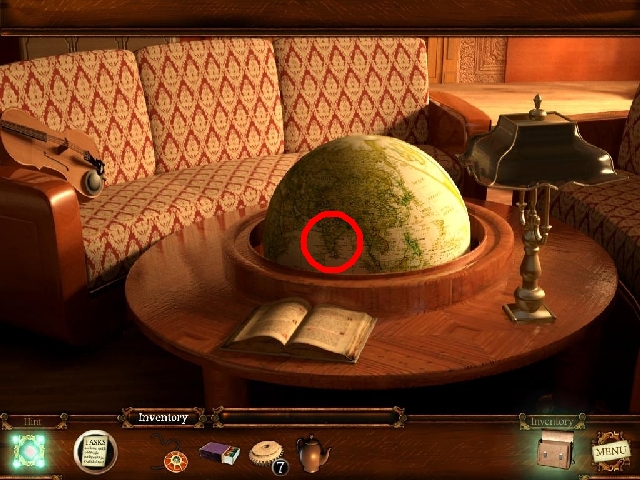
- Now return to the Library and approach the Globe.
- Rotate the globe until you can see the position that was marked on the map (click two times on the left part of the globe).
- Click on the same position on the globe.
- You will get the cogwheel.
- Now head to the bedroom.
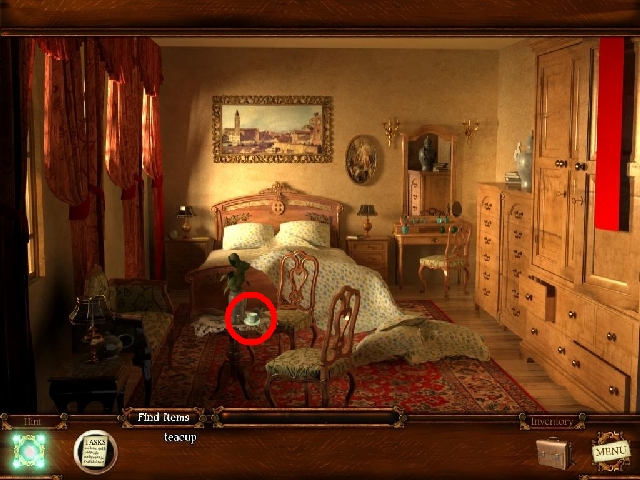
- Pick the teacup which is located on the small table in front of the bed.
- Now return to the Kitchen.
- Now put the tea in the teacup.
- Give the teacup to Malik.
- After he gives you the ring, return to the Library.
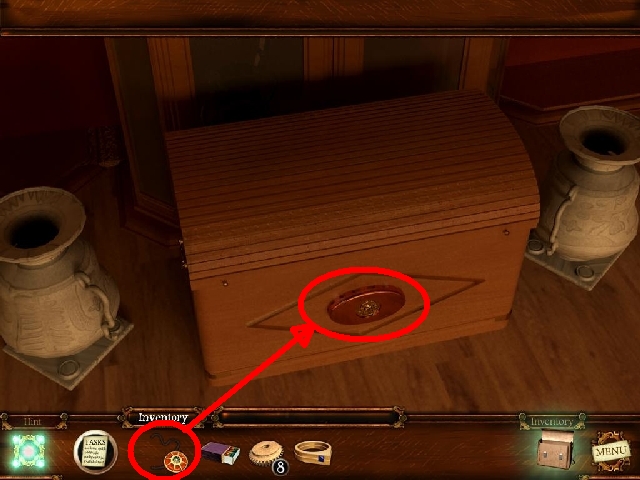
- Approach the Chest.
- Use the medallion with the lock mechanism.
- After that, use the ring with the lock mechanism.
- The chest will open.
- Pick up the crest and go to the Bedroom.
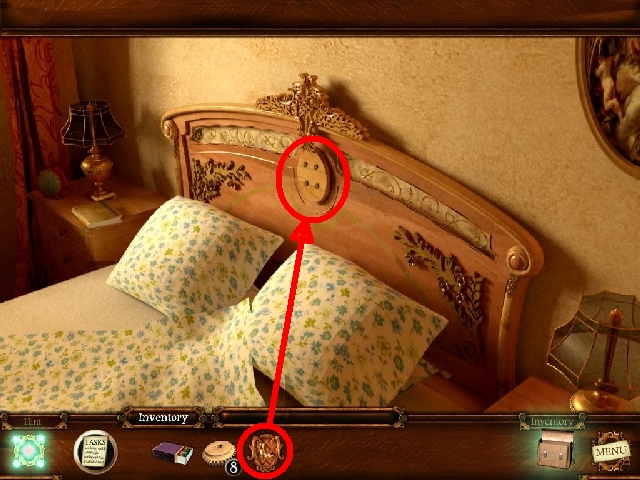
- Approach the bed.
- Place the crest in the slot above the bed.
- Pick up the letter and the key.
- Go back to the Kitchen Backroom.
- Approach the closed right door.
- Now you will have to solve two puzzles.
- By now you should have collected all eight gears needed to solve the first puzzle. If you have not, please return here after you have collected all of them.
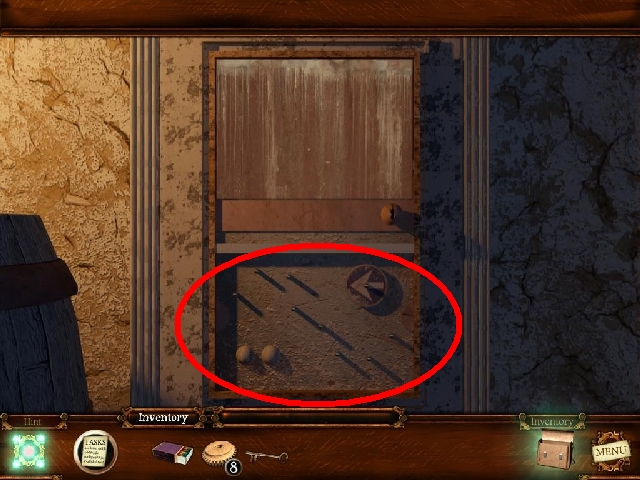
- When you have all eight cogwheels, approach the puzzle.
- Place the cogwheels in the corresponding slots in whichever order you prefer.
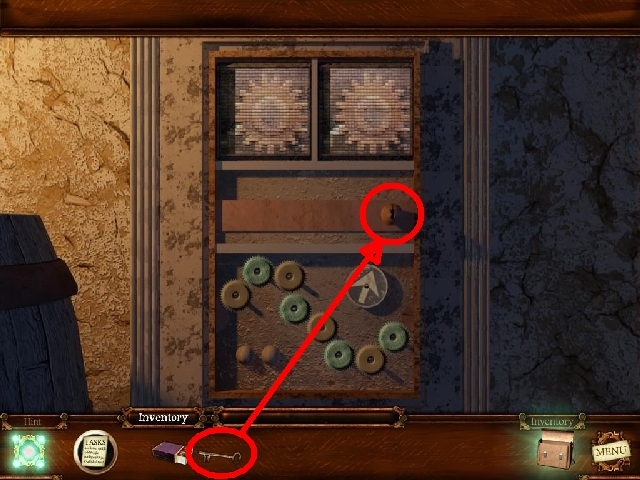
- After you have placed them all, the locking mechanism will activate and reveal the second puzzle.
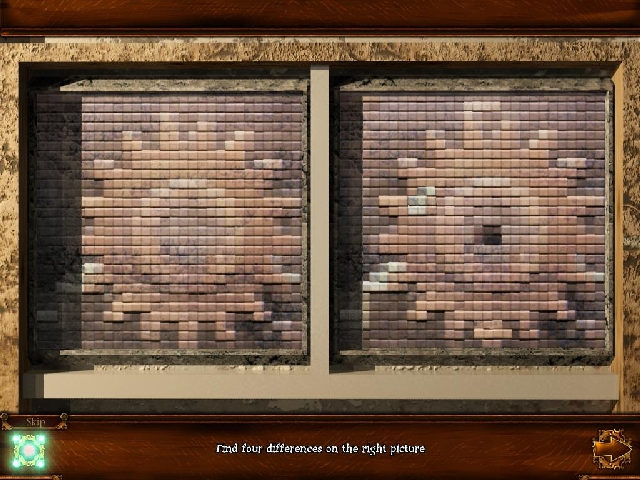
- Approach the second puzzle.
- Here you have to find four differences on the right picture.
- After that puzzle has been solved, insert the key in the keyhole.
CHAPTER 2: Garden
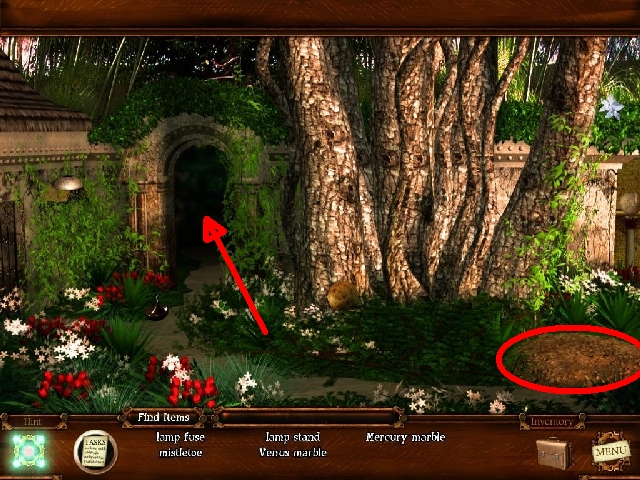
- Find all listed items.
- Go to the right.
- Find all listed items.
- Go to the right.
- Find all listed items.
- After you have collected all the necessary parts, you will get the lamp.
- Return to the Garden Left and enter the shed.
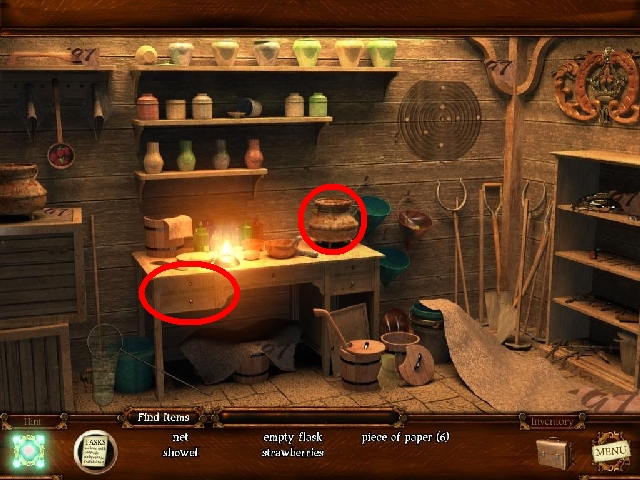
- Find all listed items after the light has turned on.
- Exit the shed and use the shovel to dig out the key buried under the dirt mound.
- Back in the shed, use the key to open the left drawer.
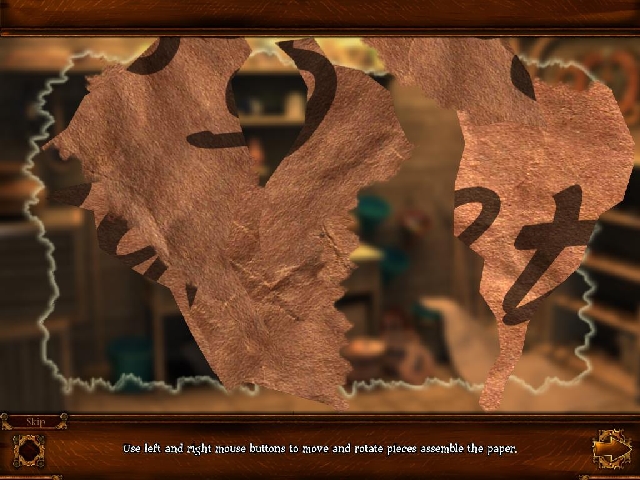
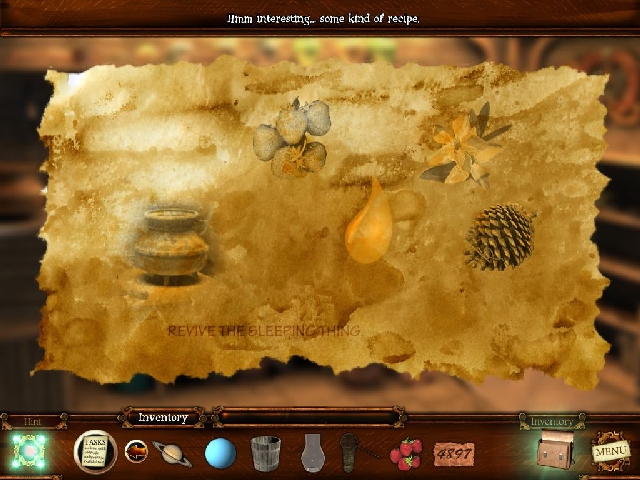
- Take a look at the paper that is in the drawer.
- Note the items that you have to collect.
- Double click on the pieces of paper in the inventory to solve the mini-game.
- Notice that when you pass over a puzzle element with your mouse cursor, it will highlight.
- Left-click on the highlighted element to rotate it clockwise.
- Right-click on the highlighted element to rotate it counter-clockwise.
- Drag the element until you place it in the correct place to merge them together.
- After you put all the pieces in the correct position, you will receive the code paper.
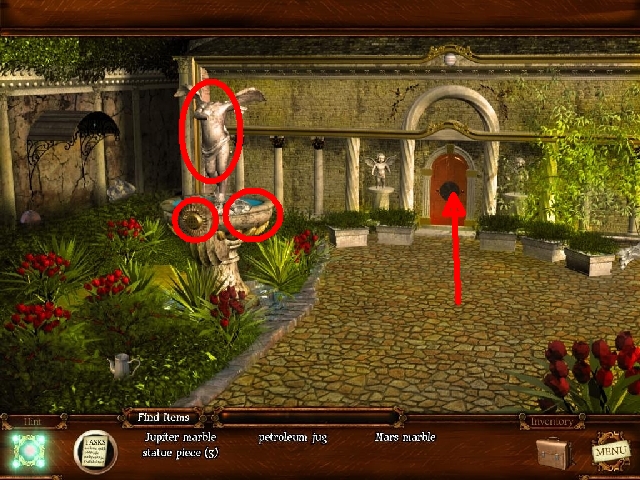
- Exit the chest and go to the Garden Right.
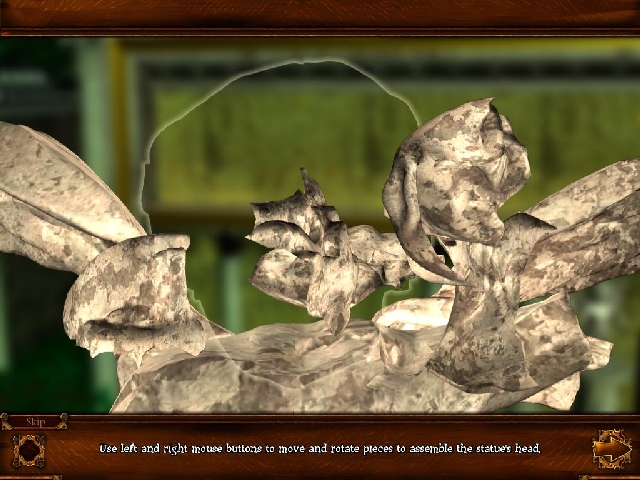
- Approach the statue.
- You have to solve the mini-game.
- Notice that when you pass over a puzzle element with your mouse cursor, it will highlight.
- Left-click on the highlighted element to rotate it clockwise.
- Right-click on the highlighted element to rotate it counter-clockwise.
- Drag the element until you place it in the correct place to merge them together.
- After you put all the pieces in the correct position, you will receive the Earth Marble.
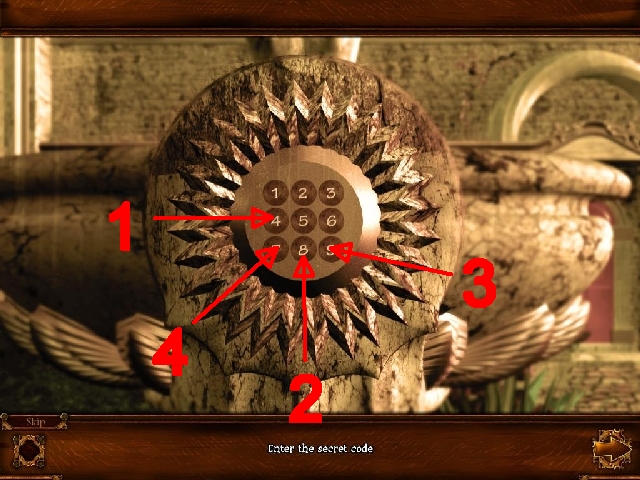
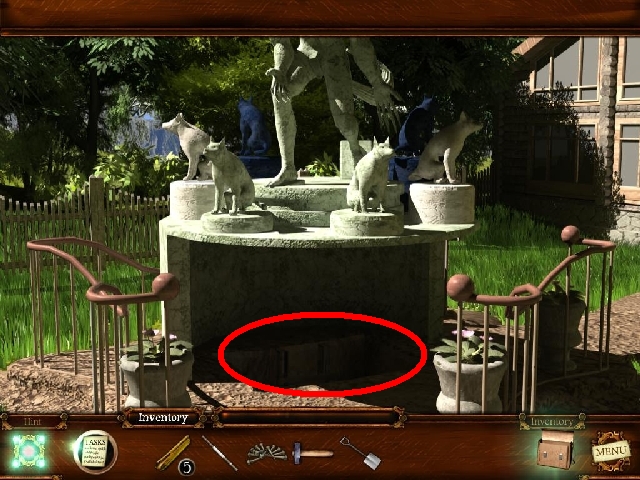
- Now approach the Locking mechanism that is located on the fountain base.
- Enter the secret code – 4897; You will receive the Neptune Marble.
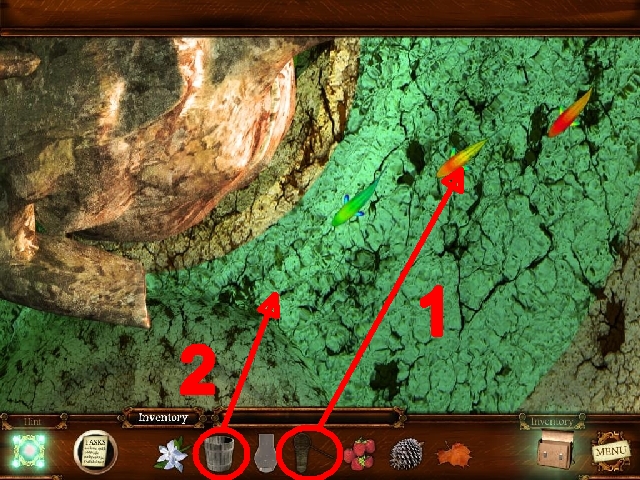
- Approach the fountain itself.
- Use the net to catch a fish.
- Fill the bucket with water.
- Approach the door guarded by two little angel statues.
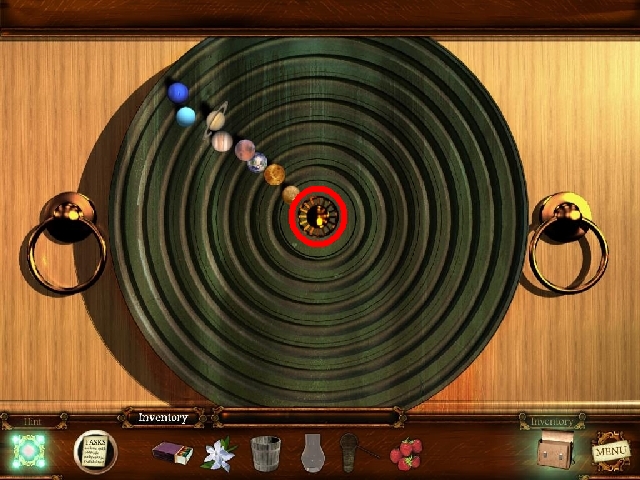
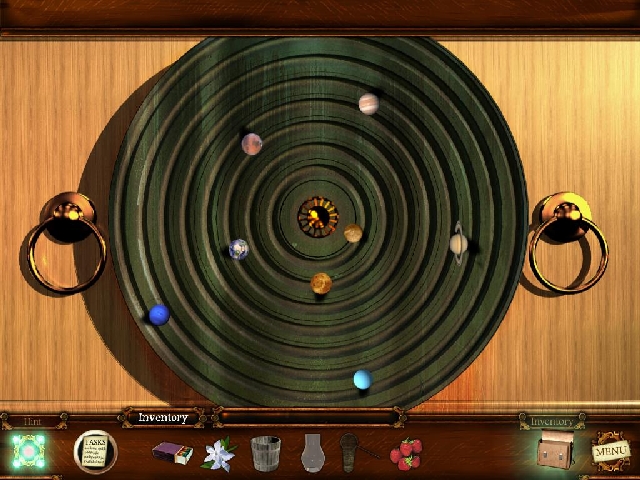
- Put all the planet marbles on the round mechanism.
Press the central Sun Marble to unlock the mausoleum door.
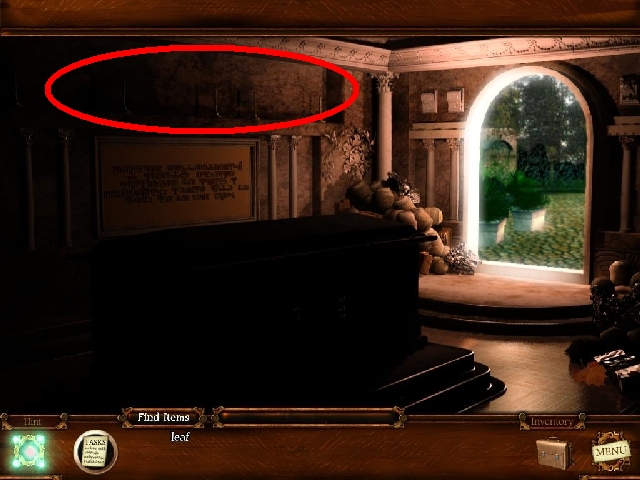
- Enter the Mausoleum.
- Find all listed items.
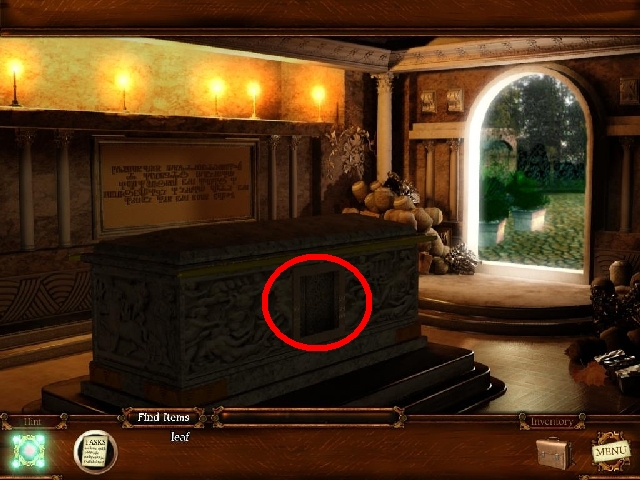
- Use the matches to light the candles.
- Approach the side of the tomb to solve the puzzle.
- Once you left-click on an element, it will become highlighted.
- Then click on the adjacent one to swap their positions.
- Continue doing so until you have completed the puzzle.
- Once you have put all the elements in the correct position, you will get the pine.
- Exit the Mausoleum.
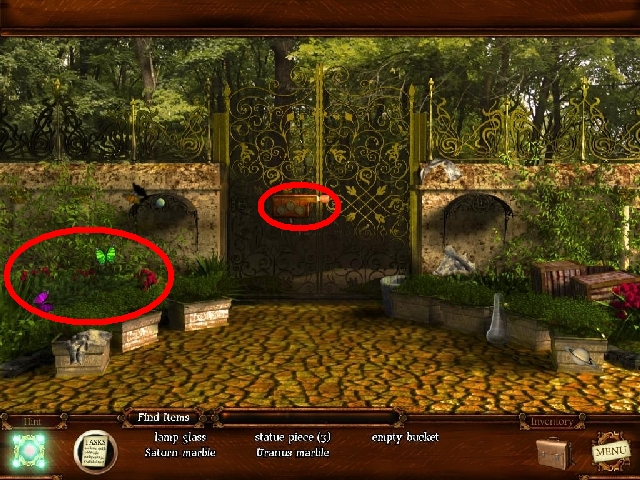
- Go to the Gateway.
- Use the net to catch a butterfly.
- Now return to the shed.
- Now it is time to make a potion.
- Put the mistletoe, strawberries, pine and bucket of water in the cauldron.
- The potion has been made.
- Use the empty flask on the pot to take the potion with you.
- Exit the shed.
- Use the potion on the big tree.
- You have released the Stribor now.
- Go to the Gateway and approach the door.
- Malik will tell you to ask Stribor for advice.
- Return to the Garden Left and ask him what to do.
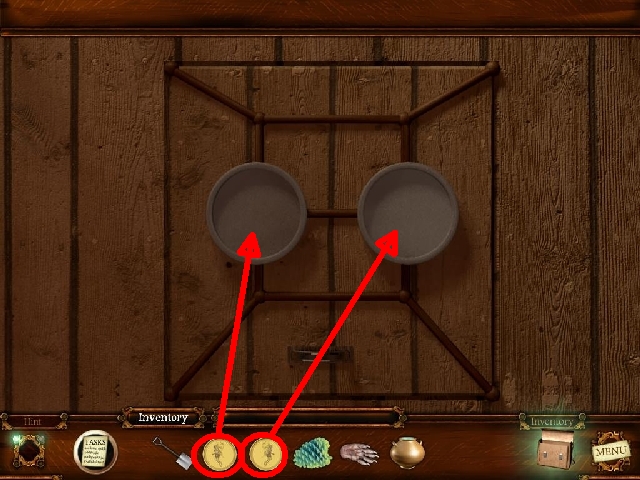
- Stribor will now give you the coins needed to unlock the door to the forest.
- Return to the Gateway again.

- Put the coins into the slots.
CHAPTER 3: The Wolfmaster
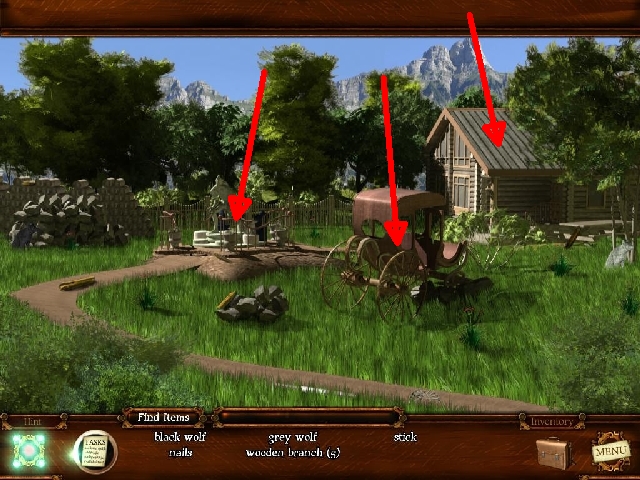
- Find all listed items.
- Approach the Carriage.
- Pick all items there.
- Return to the entrance.
- Approach the Statue.
- Place the wolf statues on the corresponding pedestals.
- You will get a wolf medallion after that.
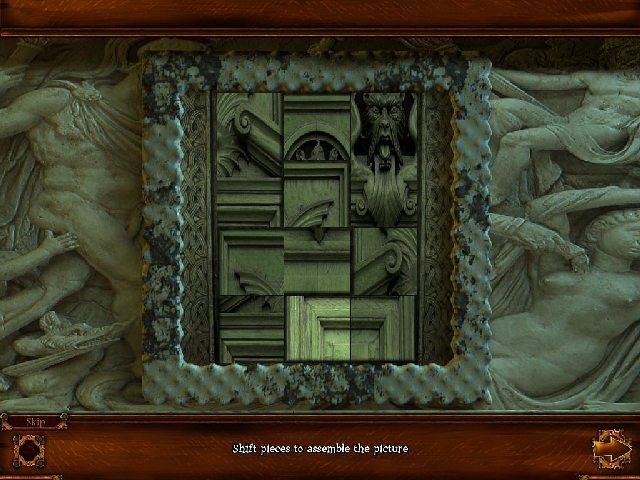
- Approach the chest of the staue.
- Rotate the puzzle elements to assemble the picture.
- Left-click on a picture element to rotate it.
- Continue rotating the elements until you have assembled the picture.
- After the picture has been assembled, place the wolf medallion in the slot in the center of the picture.
- Then left-click on the placed medallion to activate the mechanism which will then raise the statue.
- Click on the opening under the statue to enter it.
- Find all listed items.
- Since there is nothing more you can do here right now, exit the mine and approach the Hut.
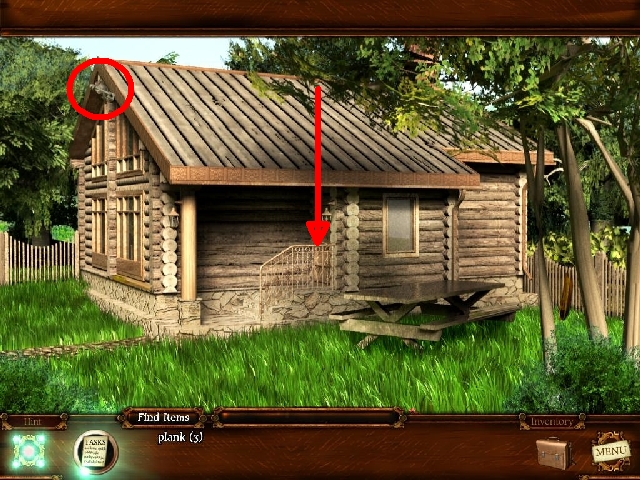
- Find all listed items.
- Note the key that is hanging from the roof.
- After you have assembled the ladder, place them on the house wall closest to the key.
- Left-click on the key ti climb the ladder and pick it up.
- After you have got the key, approach the hut door.
- Unlock the door and enter the hut.
- Notice that windows are dirty and that very little light is coming inside.
- Pick up the cleaning cloth and clean the windows.
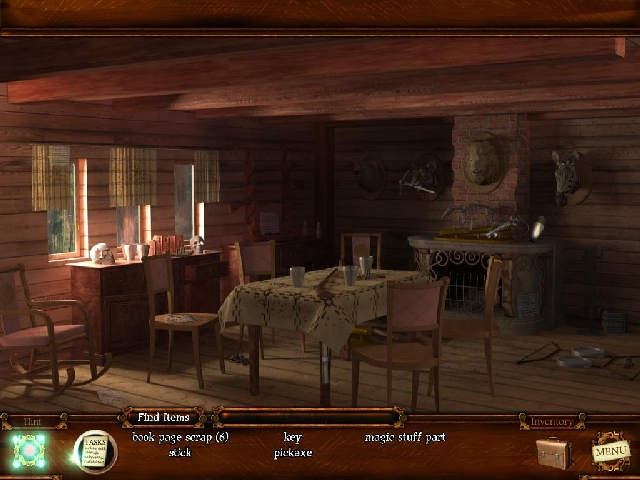
- Find all listed items.
- Double-click on the book page scrap to assemble it.
- Notice that when you pass over a puzzle element with your mouse cursor, it will highlight.
- Left-click on the highlighted element to rotate it clockwise.
- Right-click on the highlighted element to rotate it counter-clockwise.
- Drag the element until you place it in the correct place to merge them together.
- After you put all the pieces in the correct position, you will receive the book page.
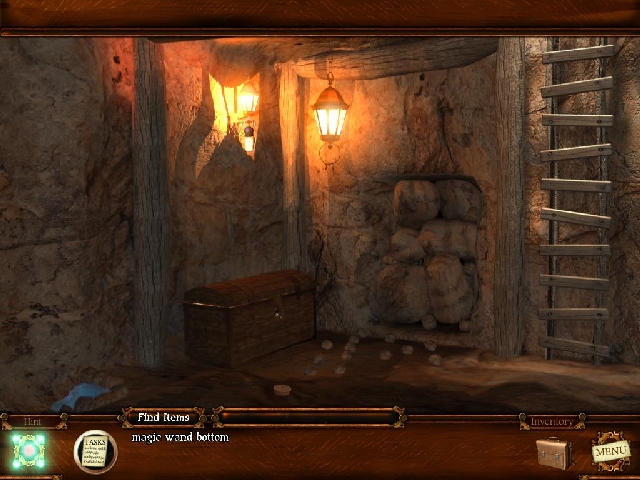
- Return to the Mone.
- Approach the Chest.
- Use the key to unlock it.
- Pick up the spell book.
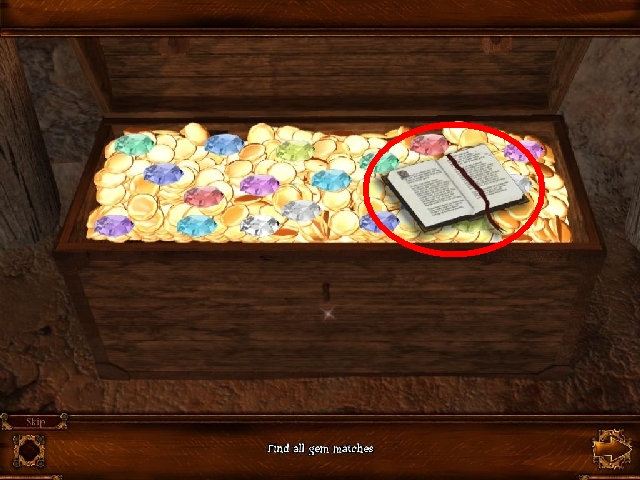
- Mini-game: Find all gem matches.
- Left-click on a gem.
- Find another gem that has the same color.
- Left click on it.
- Continue doing so until you have collected all the gems.
- You will receive the white gem.
- Now you have collected all necesarry items to assemble the magic wand.
- Left-click on the book page to select it.
- Then click on the spell book to insert that page in it.
- Now that you have a complete spell book, move on.
- Use the pickaxe on the big rocks that are blocking the passage to break them.
- Collect the glass jar.
- Enter the passage.
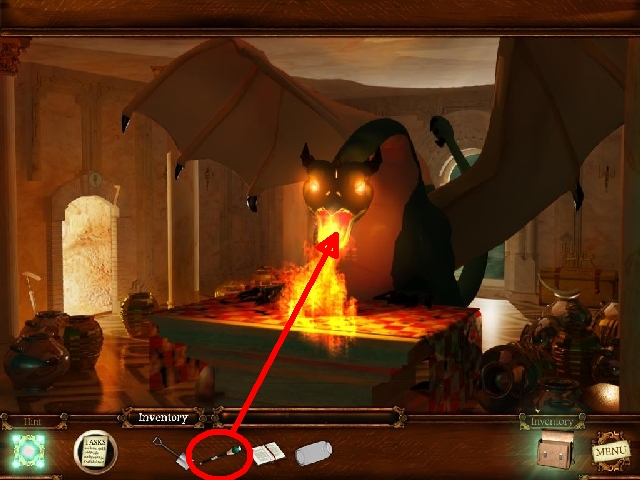
- Once the dialog with Malik is over, use the magic wand on the Dragon.
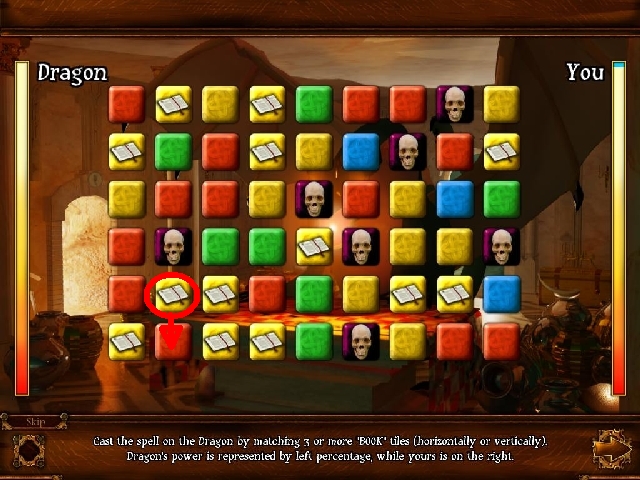
- A match-3 minigame will open.
- Defeat the Dragon by matching 3 or more ‘Book’ tiles (horizontally or vertically).
- Dragon’s power is represented by left percentage, while yours is on the right.
- Be careful no to match 3 skull tiles, because you will lose some power by doing so.
- Find all listed items.
- Select the glass jar in your inventory and then left-click on the dragon to put it inside.
- Double-click on the broken jar piece.
- Notice that when you pass over a puzzle element with your mouse cursor, it will highlight.
- Left-click on the highlighted element to rotate it clockwise.
- Right-click on the highlighted element to rotate it counter-clockwise.
- Drag the element until you place it in the correct place to merge them together.
- After you put all the pieces in the correct position, you will receive the empty jar.
- Proceed to the left passage.
- After the dialog, give the dragon in jar to the Wolfmaster.
- The wolf guard will disappear, so now you can find and collect all listed items.
- After you have collected everything, approach the Wolfmaster again.
- A mini-game will appear.
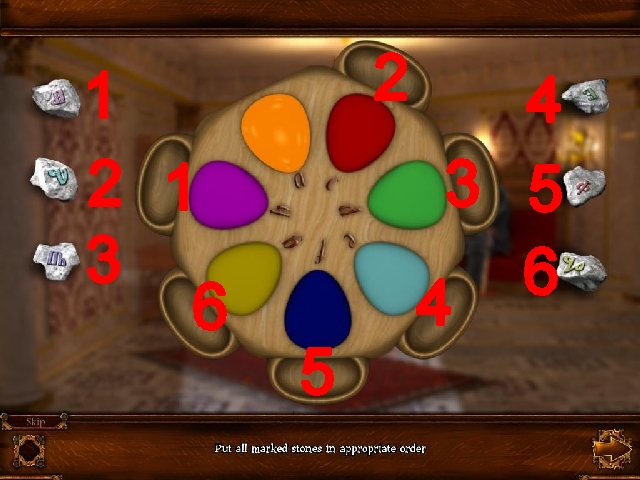
- Select a gem and place it in the corresponding slot.
- Try placing the gems in different slots until the light related to it turns on.
- After you have finished the mini-game, there is another dialog with the Wolfmaster.
- He will give you the magic pine and wolf’s paw.
- Return to the mine.
- Place the golden pump in the water spring.
- Place the empty jar under the pump and left-click on it to fil tha jar with water.
- Take the jar and go back to the Hut.
- Once in the hut, approach the door on the floor.
- Place the pixie coins in the corresponding slots.
- Now lift the door.
- You will see the fertile garden soil.
- Use the showel to dig out a hole.
- Place the magic pine in the hole.
- Pour the water from the jar on it.
- Now comes the cutscene in which the hut is being lifted to the sky.
CHAPTER 4: Laboratory
- Left-click on the door straight ahead to activate the minigame.
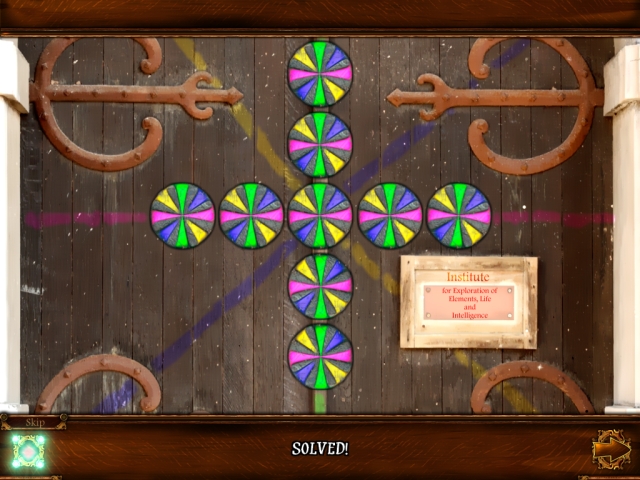
- Objective is to match the colors on the knobs with line colors on the door by rotating the knobs. Once this is achieved the door will unlock allowing access to The Institute.
- Left-click on each knob to rotate it counter-clockwise.
- Some knobs when rotated also make the other knobs rotate, so you have to find and rotate those first, and then the rest of the knobs.
- Refer to the screenshot to see this mini-game in solved state.
- Go left to the Physics lab.
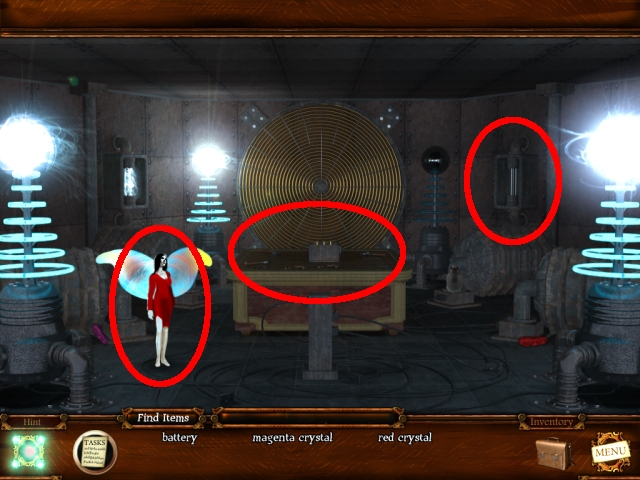
- Find all listed items after the dialogue ends.
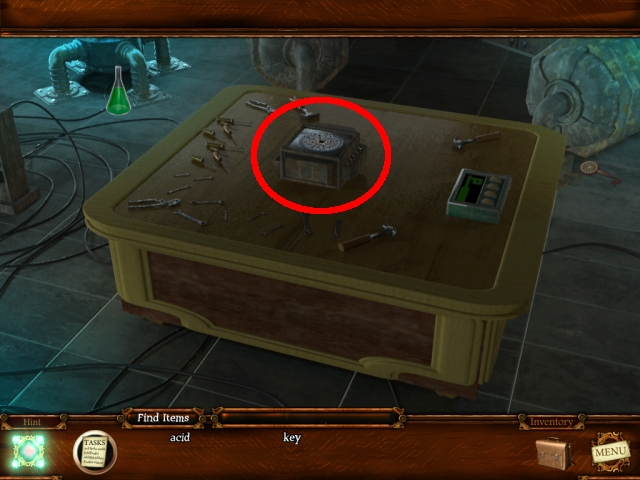
- Go forward to approach the table.
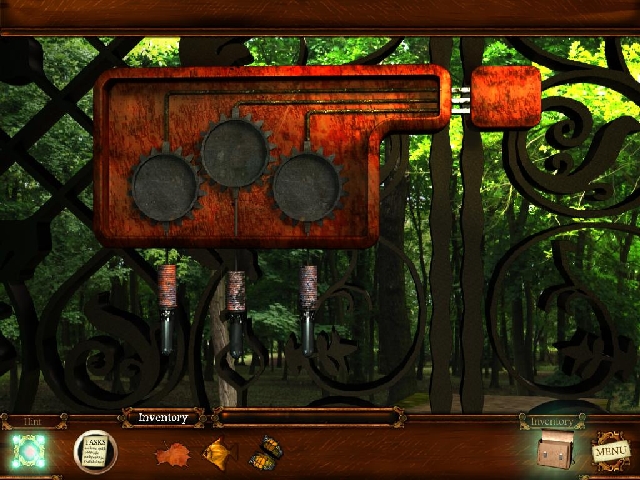
- Left-click on the apparatus on the table to approach it.
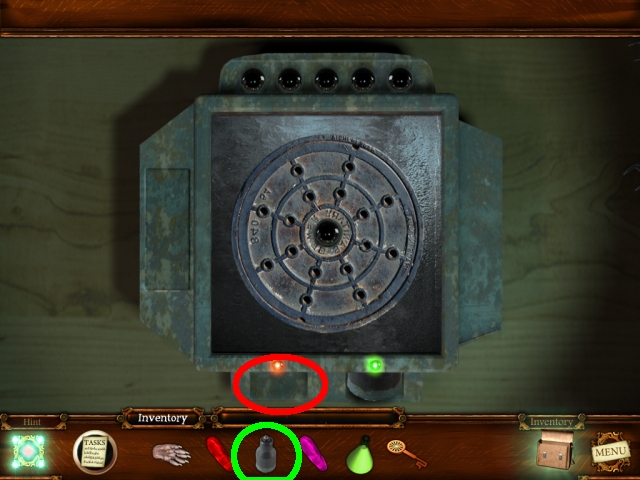
- Insert the battery from your inventory into the mechanism battery slot to activate the minigame.
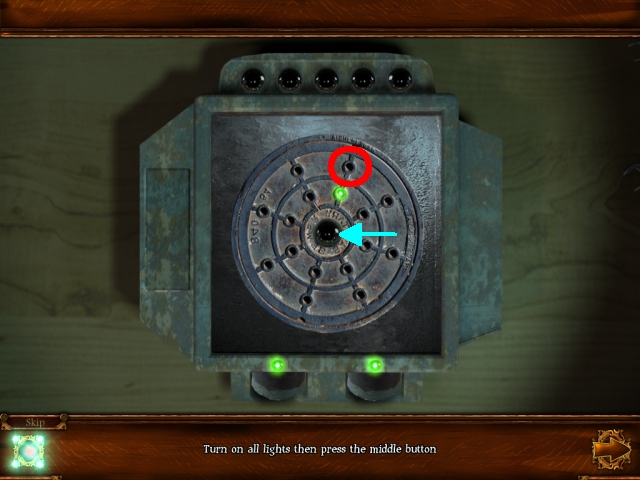
- Turn on all of the green lights. Some lights turn off the other ones, so you’ll have to find a combination to make all of the lights turn on.
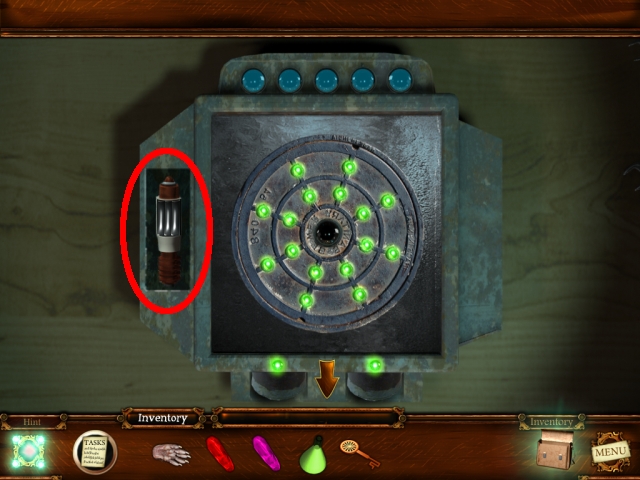
- When all lights are turned on, a middle button will light-up blue. Press it to open the compartment on the left.
- Take the capacitor fuse from the opened compartment and exit the scene.
- Go right to the power terminal.
- Find green crystal.
- Use the capacitor fuse from your inventory on the terminal to charge it.
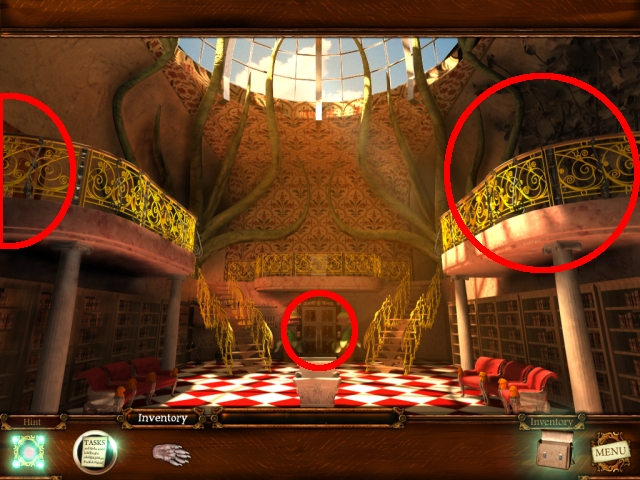
- Exit the Physics Lab and go to the Institute Main hall.
- Go right upstairs to approach the Biology lab door.
- Find the yellow crystal.
- Use acid from your inventory on the plants blocking the door.
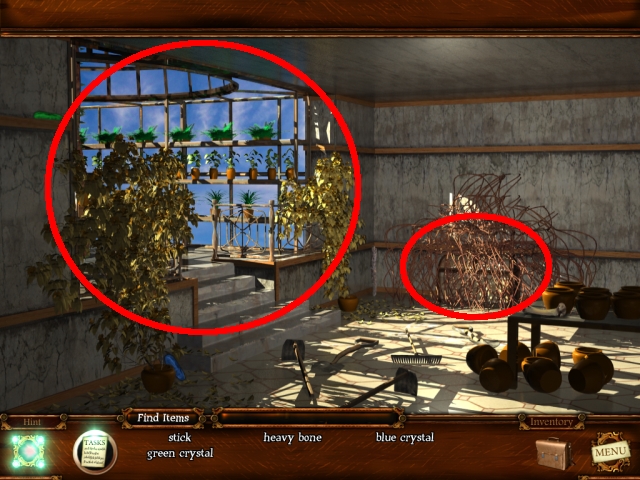
- Find all listed items.
- Go left to approach the flower area.
- Find all listed items.
- Go back.
- Go right to approach the chest.
- Use the pliers from your inventory on the bushes.
- Wait for the bushes to disappear and open the chest by left-clicking on it. You will get the meteor.
- Exit the Biology lab and go back to the Institute main hall.
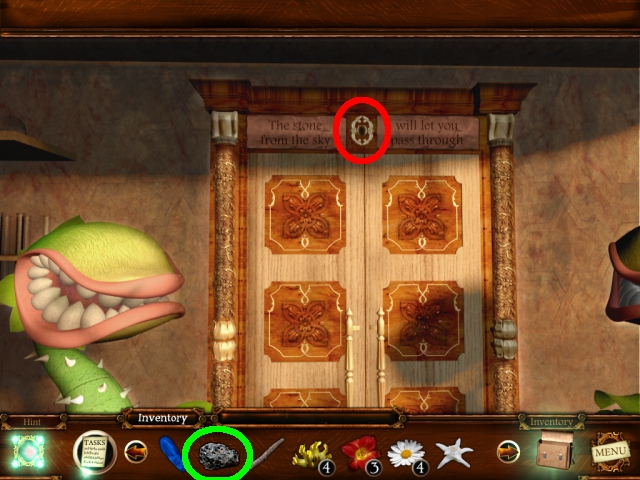
- Go straight ahead to approach the Alchemy lab door.
- Use the meteor from your inventory on the slot above the door.
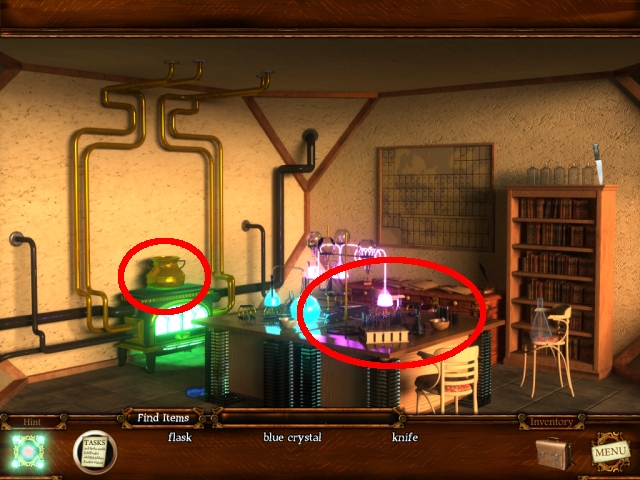
- Find all listed items.
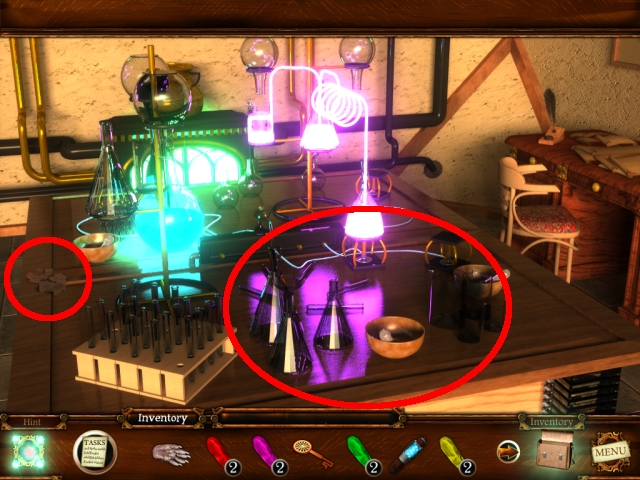
- Approach the table.
- Find all listed items.
- Click on the left pieces of paper and solve the puzzle to get the potion recipe.
- Go back.
- Approach the cauldron on the right.
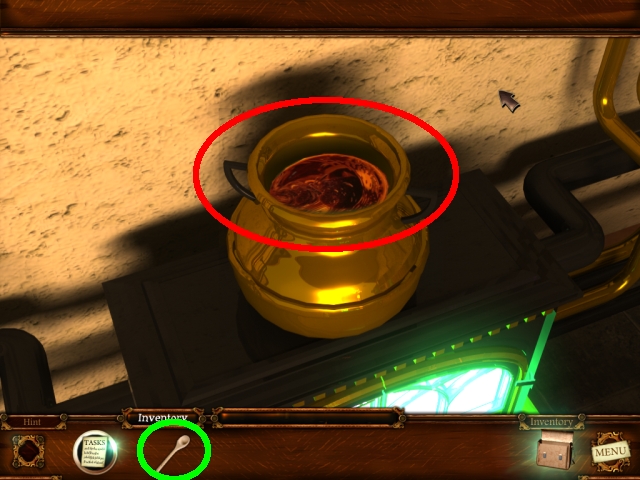
- Use the laddle from your inventory on the contents of cauldron to get the liquid glass.
- Go back.
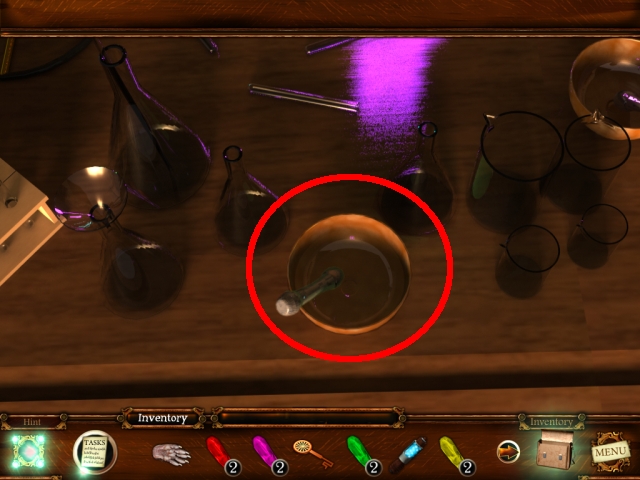
- Again approach the table.
- Aproach the table further to the vessel.
- From your inventory put the following items in the vessel: yellow valeriana, red iris, white daisy, liquid glass in laddle and wolf paw.
- After mixing, use the flask from your inventory on the contents of the vessel. Now you have the potion of teleport.
- Go back to the Main hall.
- Go left to the Physics lab.
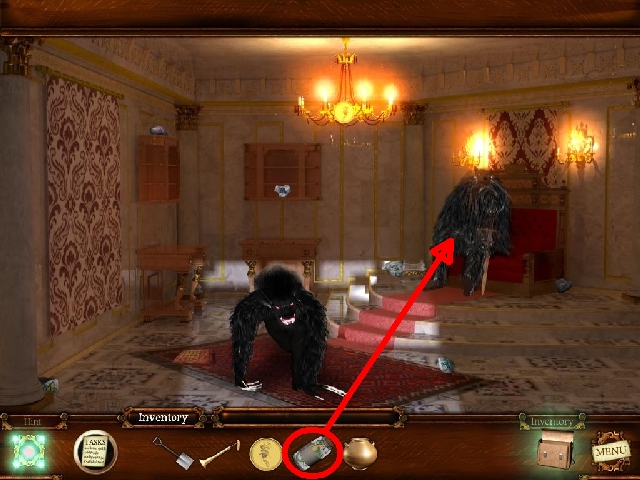
- Use the white edelweiss from your inventory to the Amala.
- She will give you the sword.
- Go back and exit the Institute to the Institute entrance.
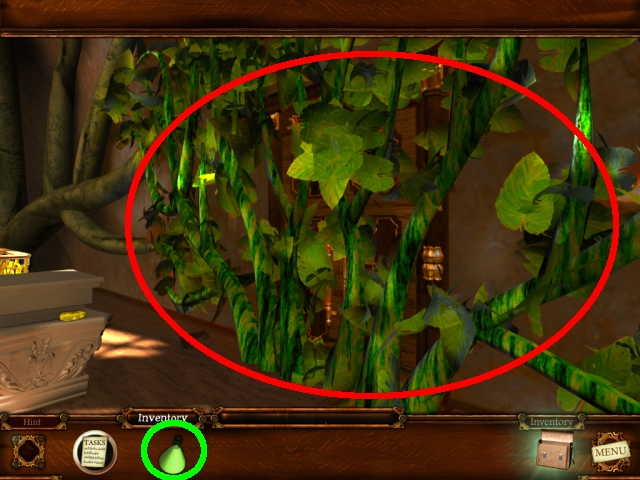
- Approach the plant on the left.
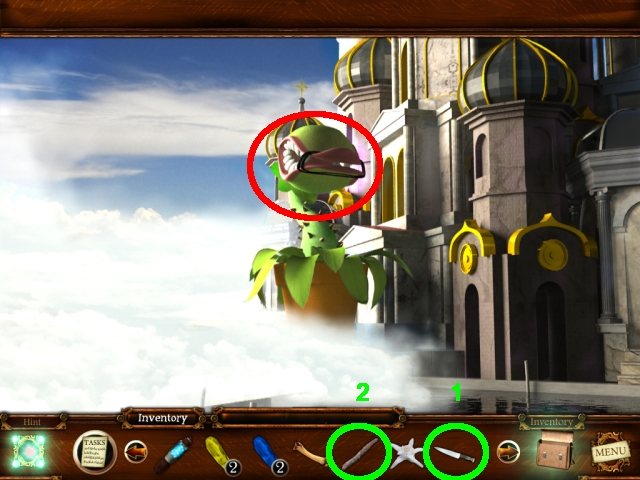
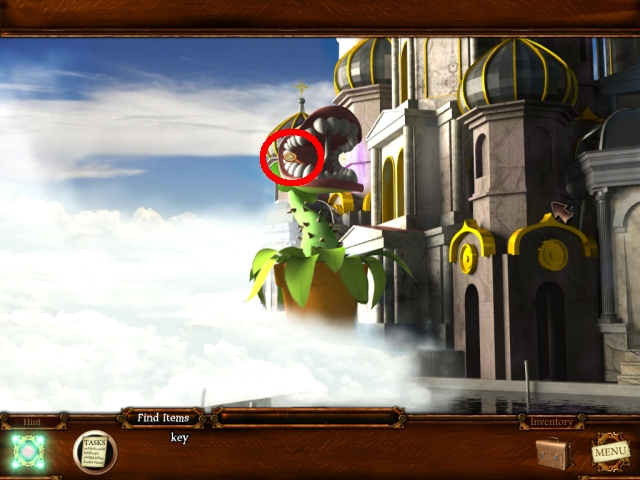
- Use the knife from your inventory on the ropes around the plant’s mouth.
- Use the stick from your inventory on the plant’s mouth.
- Take the key from the plant’s mouth.
- Go back.
- Approach the chest on the right.

- Use the heavy bone from your inventory on the chest.
- Left-click on the chest to close it.
- Use the key from your inventory on the one of the chest locks.
- Use the another key from your inventory on the other chest lock.
- Go back.
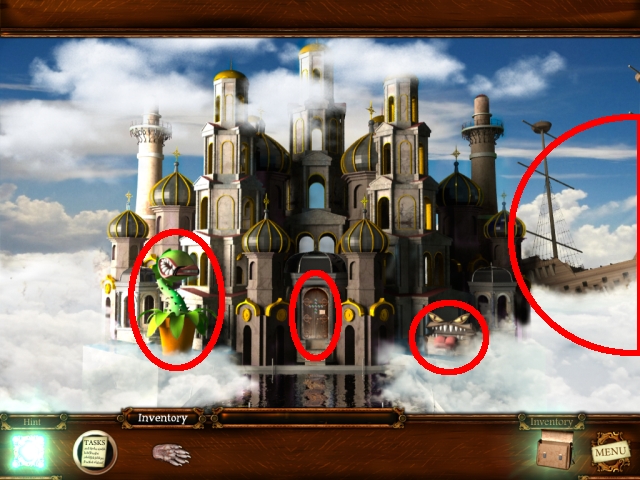
- Approach the air ship on the rightmost side.
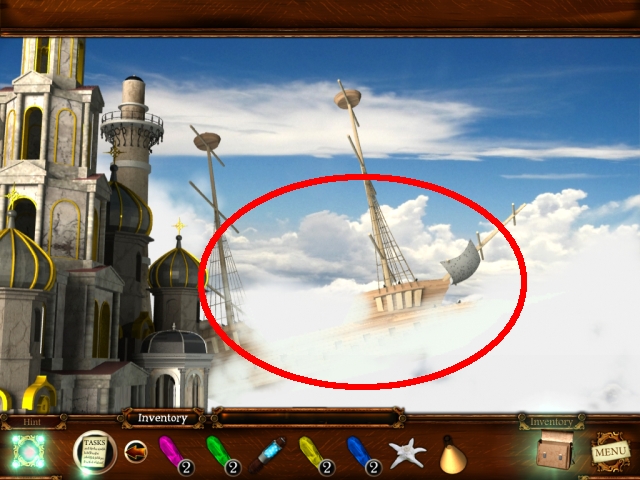
- Further approach the air ship straight ahead.
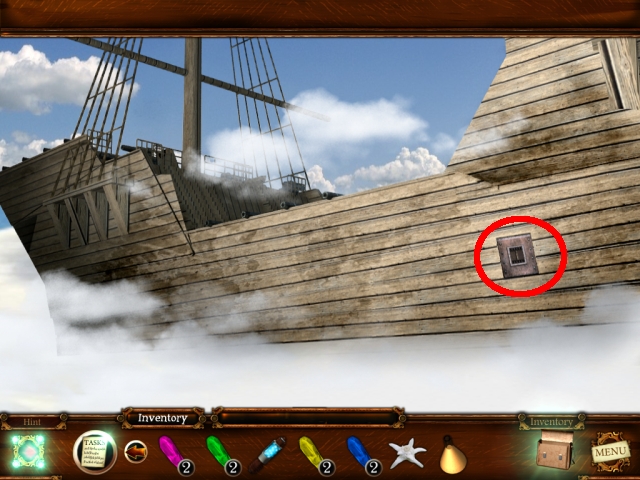
- Approach the Air ship control panel on the right.
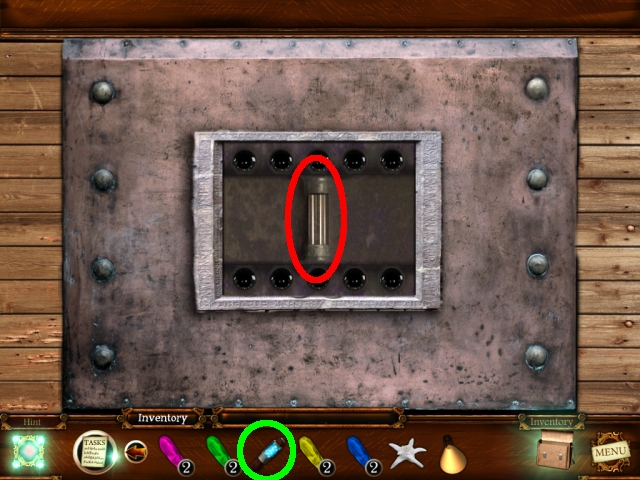
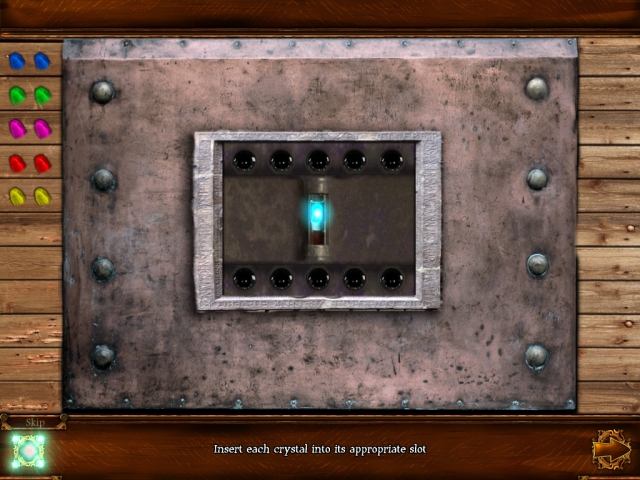
- First, use the charged capacitor fuse from your inventory on the fuse slot to activate the mini-game.
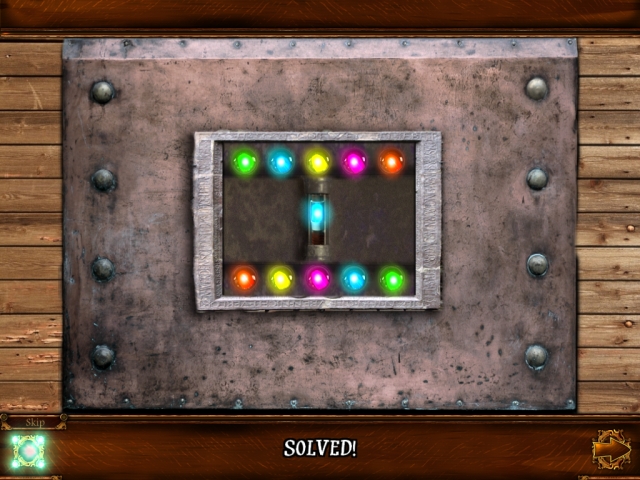
- Put the crystals in the appropriate slots: 1-green, 2-blue, 3-yellow, 4-magenta, 5-red, 6-red, 7-yellow, 8-magenta, 9-blue and 10-green (see the screenshot for solved state).
- Watch the cutscene.
CHAPTER 5: Mountain
- Find all listed items.
- Approach the wreckage to the left.
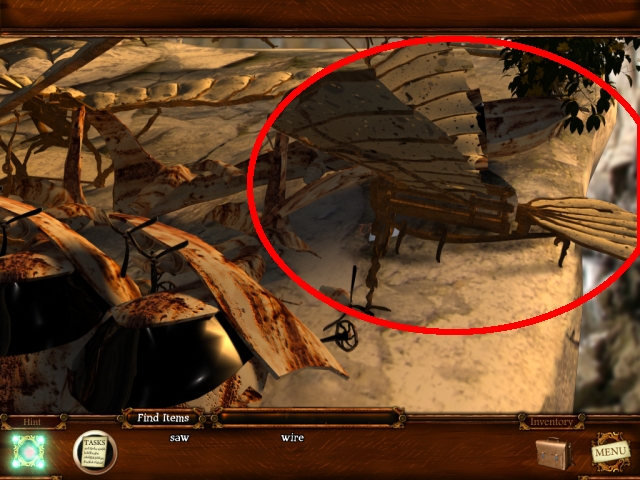
- Find all listed items.
- Push the old airplane until it falls down the chasm.
- Take the saw and wire.
- Go back.
- Approach the blocked cave on the right.
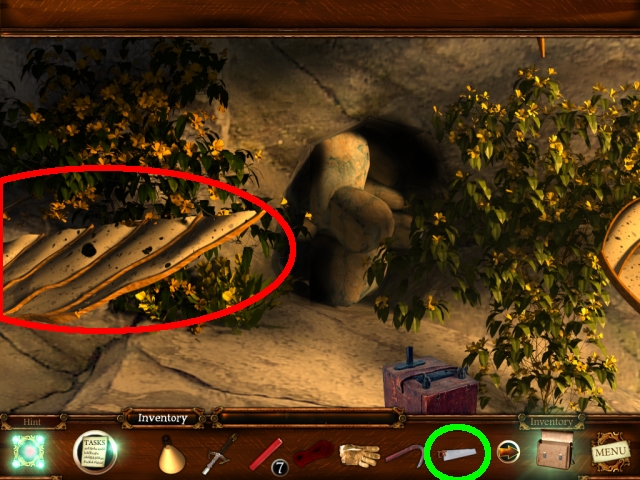
- Use the saw from your inventory on the airplane wooden wing to get a plank.
- Go back.
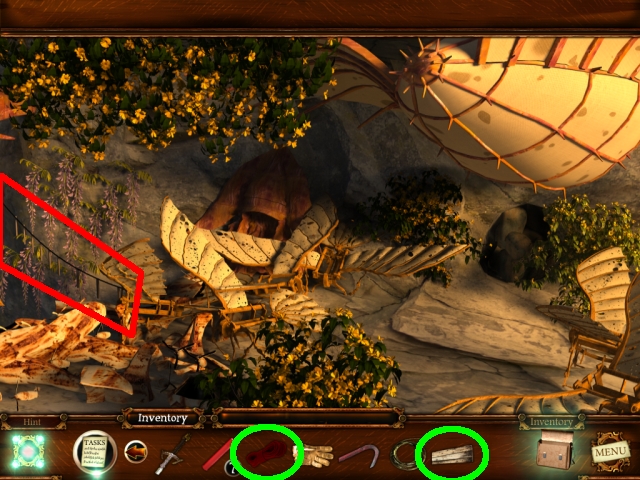
- Use the rope from your inventory on the broken bridge on the left.
- Use the plank from your inventory on the broken bridge.
- Use the repaired bridge to approach the Crashed flying machine.
- Find all listed items.
- Go back and go to the Infront of the blocked cave.
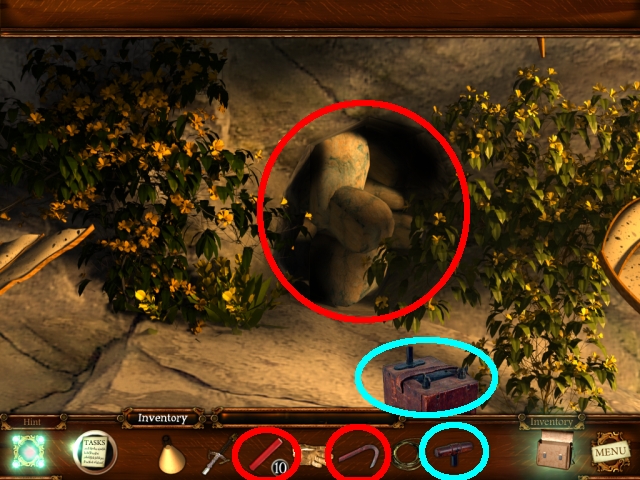
- Use the explosive sticks from your inventory on the blocked cave.
- Use the wire from your inventory on the blocked cave.
- Use the detonator handle from your inventory on the detonator.
- Push the detonator handle by left-clicking on the detonator.
- After the smoke from the explosion clears, enter the cave.
- Find all listed items.
- Approach the chest on the right.
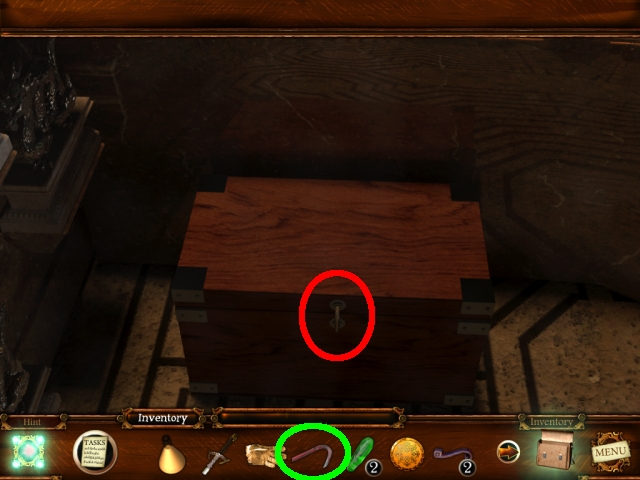
- Find all listed items.
- Use the crowbar from your inventory on the chest.
- Find all listed items.
- Go back.
- Approach the small altar on the left.
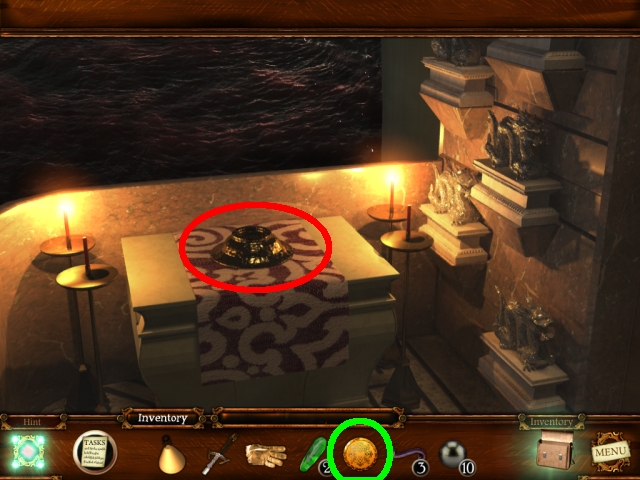
- Use the medallion from your inventory on the altar slot.
- Click on the altar to open the round mini-game table.
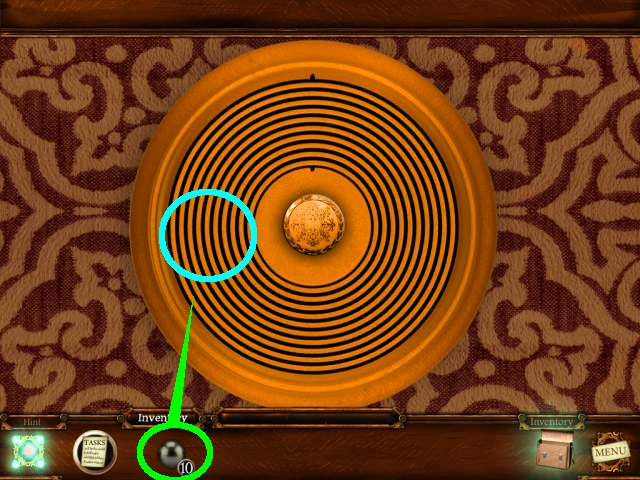
- Use spheres from your inventory on the round mini-game table to activate the mini-game (see the screenshot).
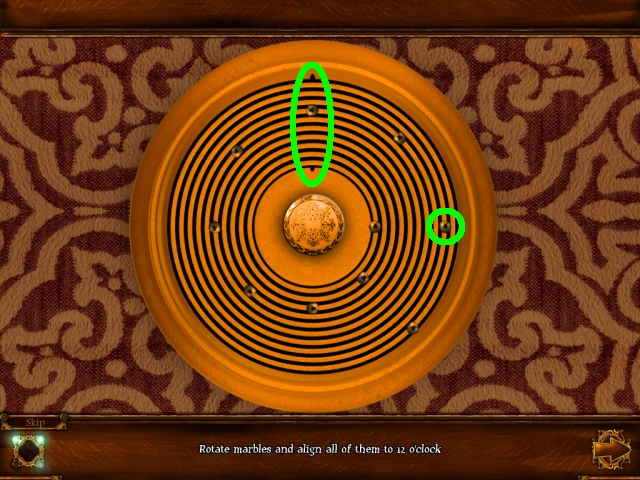
- Solve the mini-game by rotating the metal balls so that they are in 12 o’ clock position. Some metal balls when rotated also rotate some other balls, so you have to find those and rotate them to the 12 o’ clock position first.
- After you solve it you will get a key
- Go back.

- Use the key from your inventory on the door key hole.
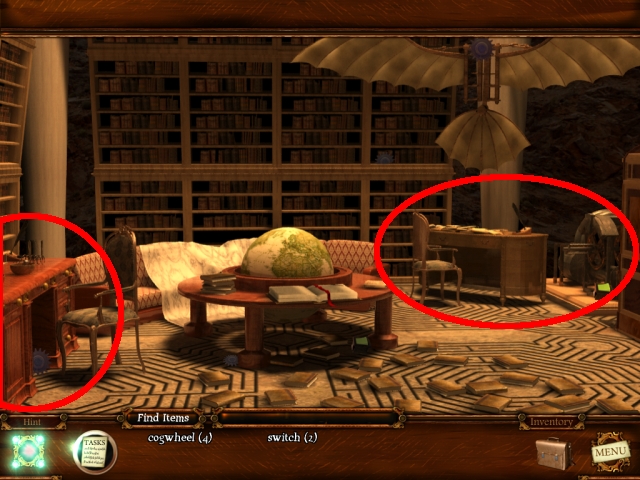
- Find all listed items.
- Approach the left desk.
- Find all listed items.
- Go back.
- Approach the right desk.
- Find the screwdriver.
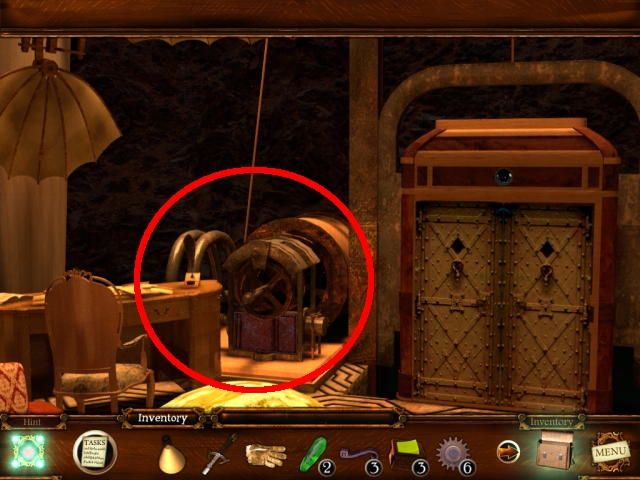
- Approach the Elevator control mechanism.

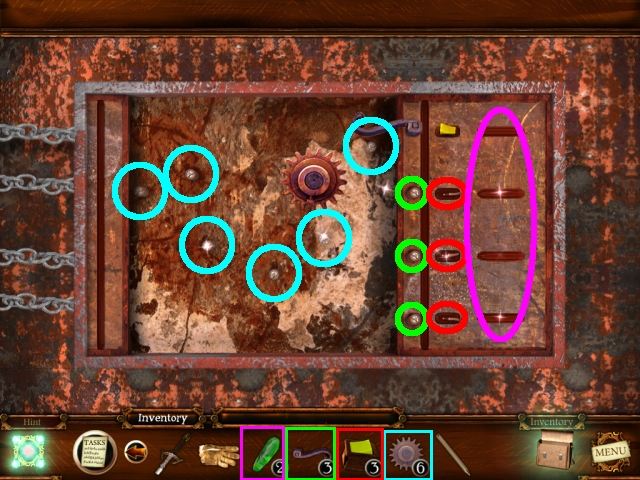
- Use the screwdriver from your inventory on the four screws.
- Place all of the cogwheels from your inventory on the cogwheel poles.
- Use the gloves from your inventory on the loose wires.
- Use the switches from your inventory on the slots where the loose wires were.
- Once placed, click on the each switch to turn it on.
- Use the handles from your inventory on the handle poles.
- Use the green crystals from your inventory on the crystal slots.
- Push down the handles in order: 2, 3, 4, 1, 4.
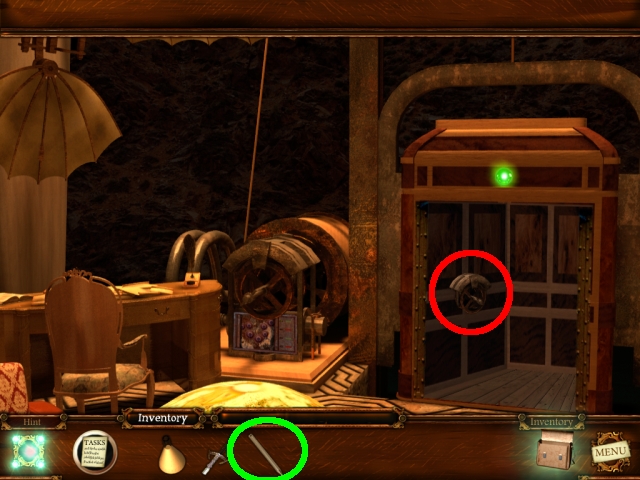
- Use the handle from your inventory on the elevator.
- Left-click on the elevator to make it take you down.
- Find all listed items.
- Go back (left-click in the topmost area of the scene).
- Once again approach the Elevator control mechanism .
- Use the two red crystals from your inventory on the remaining crystal slots.
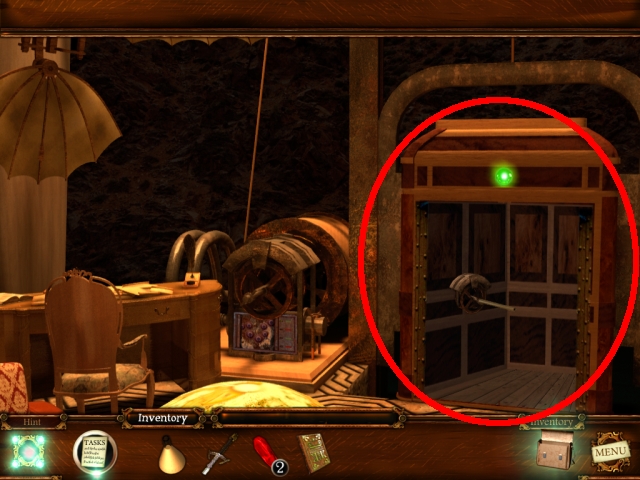
- Left-click on the elevator and it will take you to the Top of the world.
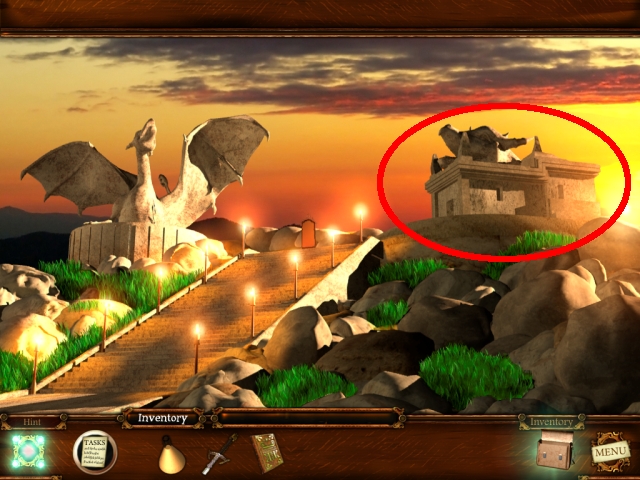
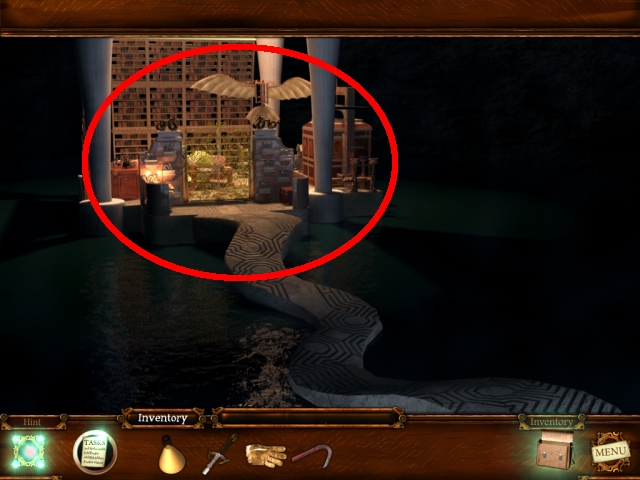
- Enter the Temple on the right.
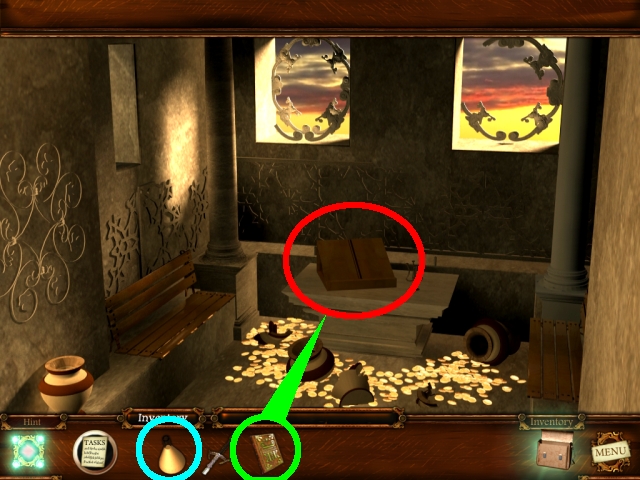
- Use the book from your inventory on the temple book holder.
- Double-click the potion in your inventory to drink it.
- After the cutscene left-click on the book to read it.
CHAPTER 6: The Strix
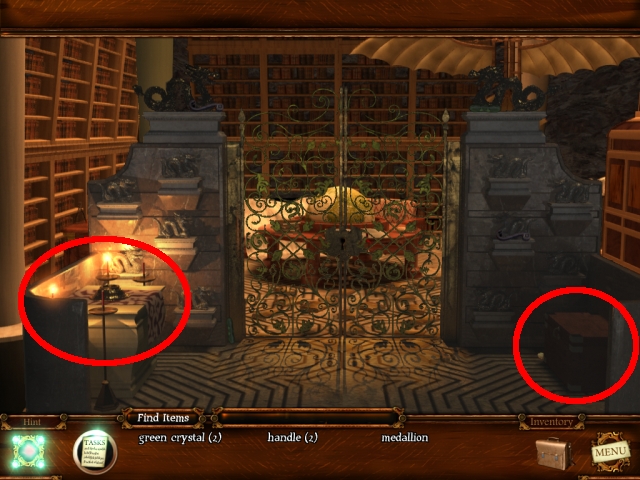
- Exit the bedroom.
- Exit the library.
- Exit the hall.
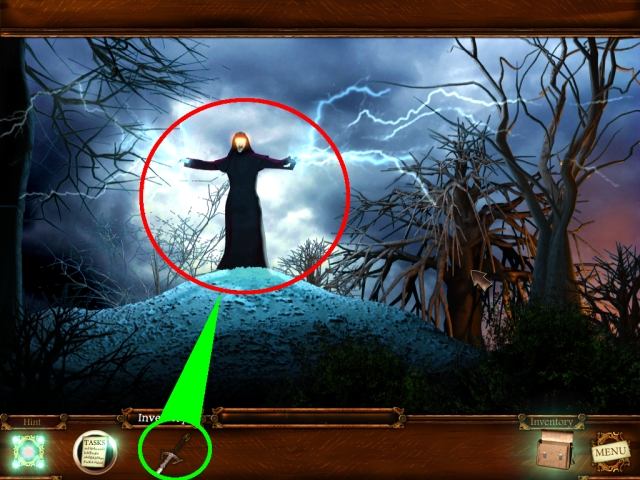
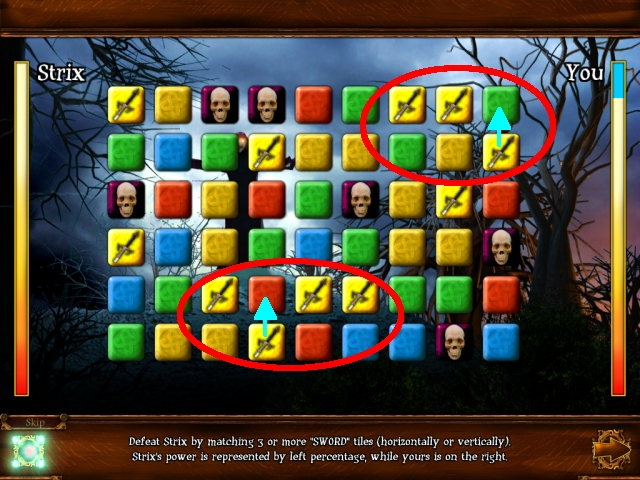
- Use the sword from your inventory on the Strix after the dialogue ends.
- Solve the match3 puzzle to defeat the Strix.
- Congratulations! You have successfully completed Tales from the Dragon Mountain: The Strix.


 Surface: The Noise She Couldn't Make Walkthrough, Guide, & Tips
 Legacy Tales: Mercy of the Gallows Walkthrough, Guide, & Tips
 Hidden Expedition: The Crown of Solomon Walkthrough, Guide, & Tips
 Kate Arrow: Deserted Wood Walkthrough, Guide, & Tips
 Hidden in Time: Looking-glass Lane Walkthrough, Guide, & Tips