True Fear: Forsaken Souls Walkthrough, Guide, & Tips
True Fear: Forsaken Souls Walkthrough

Welcome to the Game Name Walkthrough
What if everything you knew about your life, everything your family ever told you, turned out to be a lie?
Whether you use this document as a reference when things get difficult or as a road map to get you from beginning to end, we’re pretty sure you’ll find what you’re looking for here.
This document contains a complete Game Name game walkthrough featuring annotated screenshots from actual gameplay!
We hope you find this information useful as you play your way through the game. Use the walkthrough menu below to quickly jump to whatever stage of the game you need help with.
Remember to visit the Big Fish Games Forums if you find you need more help. Have fun!
This walkthrough was created by Green Gamer Productions, Inc., and is protected under US Copyright laws. Any unauthorized use, including re-publication in whole or in part, without permission, is strictly prohibited.
General Tips

- Warning: The collectibles shown in this guide can only be obtained in the Collector’s Edition.
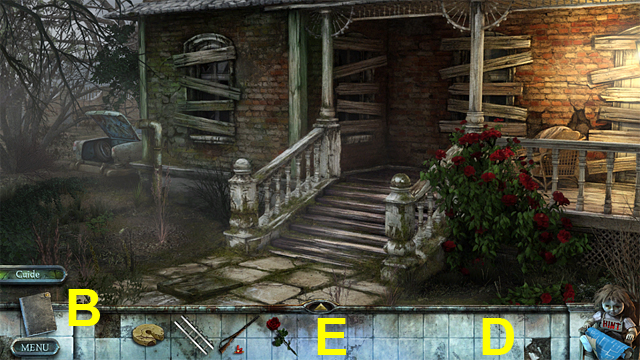
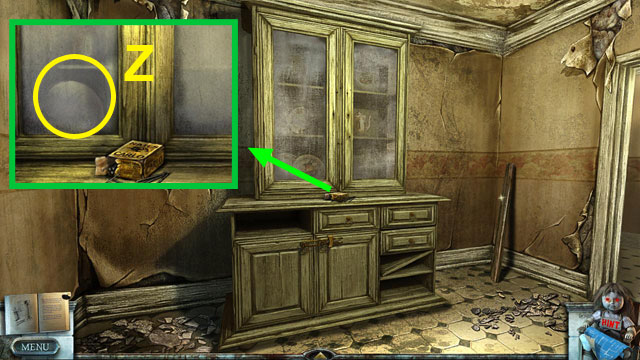
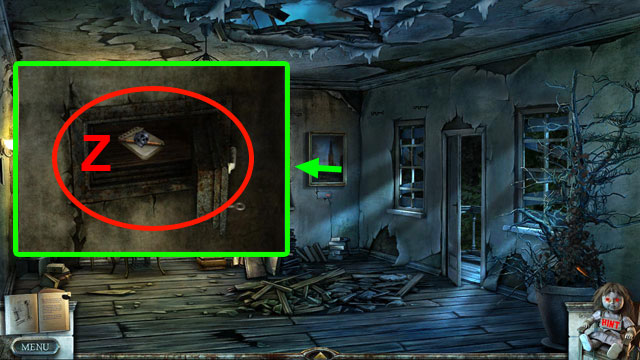
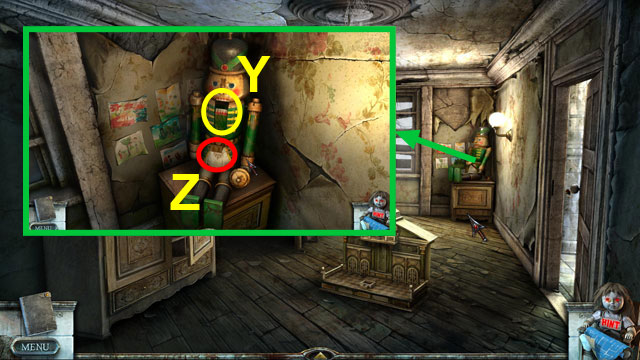
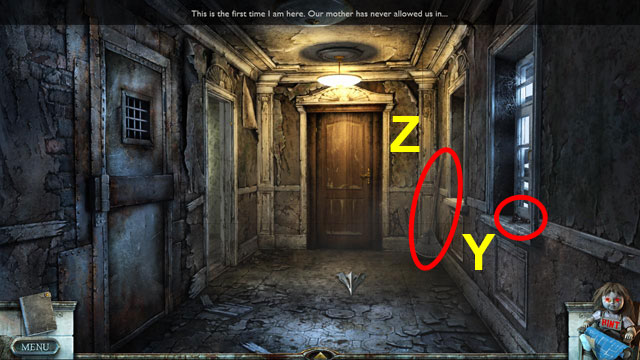
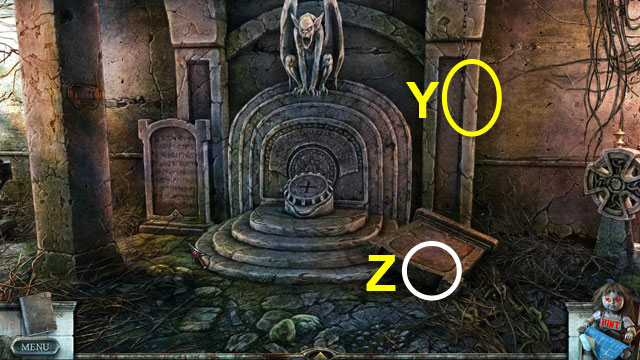
- If the mouse cursor turns into an Arrow, this indicates that you can travel to another location. Simply press the Arrow to travel in that direction (Z).
- The MENU button allows you to exit to the Main Menu or change the game Options, while also pausing the game (C).
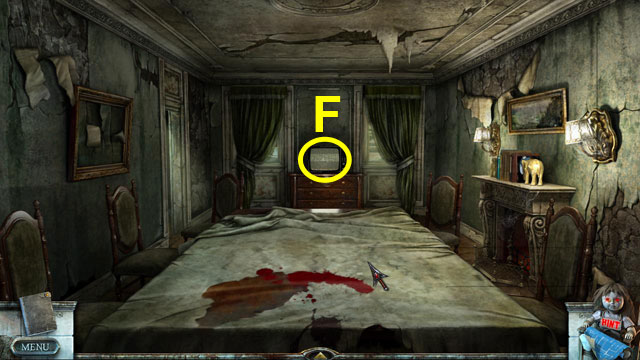
- The Doll can help you by highlighting areas of interest for you (F).
- Observe the Doll, she will only help you when her eyes glow red and she is animated. If the Doll has her head down, she is not ready to help yet.
- All the important information you uncover will be written down in the Diary. Touch the book to open it (B).
- Inside the Diary you can view both information important to gameplay and the storyline.
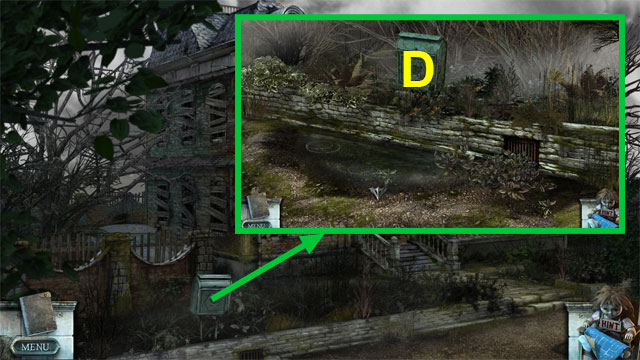
- If you move the mouse cursor to the bottom of the screen, the Inventory bar will open up (D).
- You can lock the Inventory bar by pressing on the arrow in the middle of the Inventory bar.
- This will ensure that the Inventory bar remains always open. Press the arrow again to unlock the Inventory bar (E).
- Please note that on some monitors the Inventory bar will always remain locked and thus the arrow will not be present.
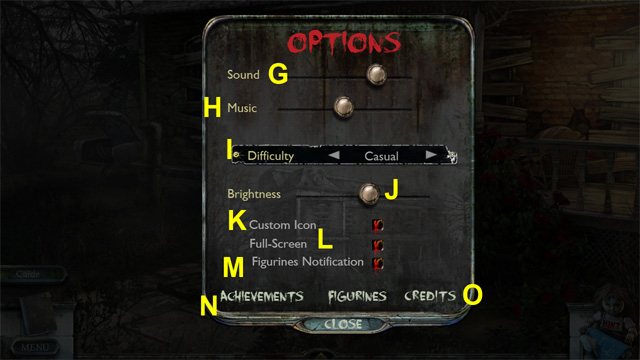
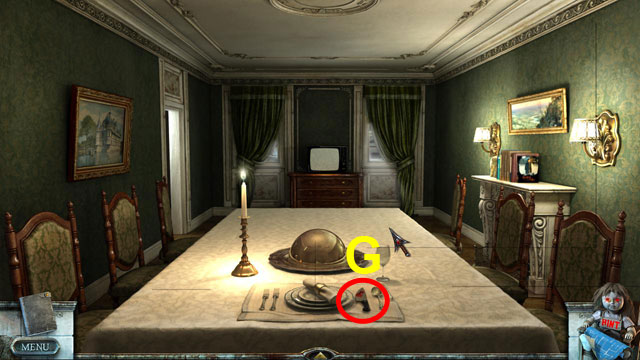
- The Sound slider allows you to change the sound effects volume (G).
- The Music slider allows to change the Music volume (H).
- Use the arrows to change the difficulty level (I).
- Drag the Brightness slider to adjust the overall brightness of the game (J).
- The game was designed to be quite dark and we encourage you to play it this way, but we understand that it sometimes can be frustrating and tiresome to watch dark graphics.
- If you are having troubles seeing the mouse cursor or having performance issues, try un-checking the Custom Cursor check box (K).
- If you are playing on a non-wide monitor, uncheck the Wide Screen check box (L).
- If it seems that the graphics are being stretched and objects don’t look natural, try changing the Wide Screen setting.
- Press CREDITS to view the list of men and women who have worked on the game and all those who have helped us in the process (O).
Prologue
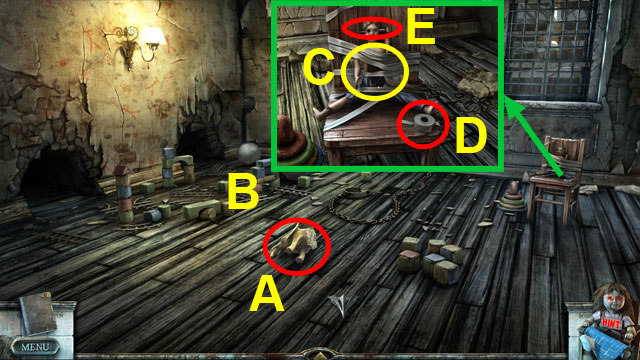
- The following actions are only available if you choose to play the Tutorial.
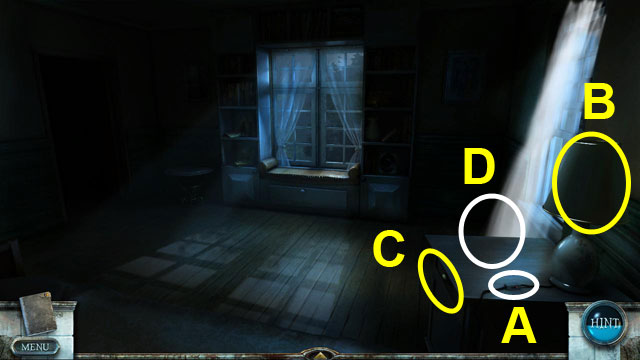
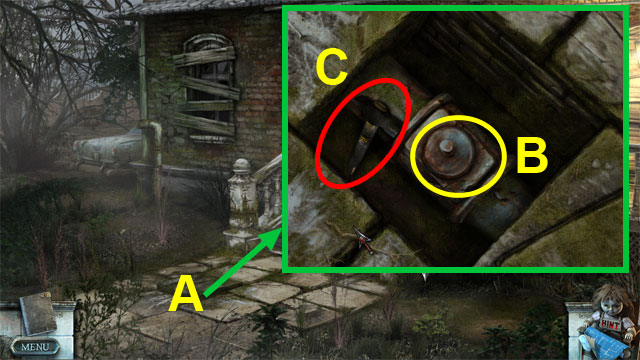
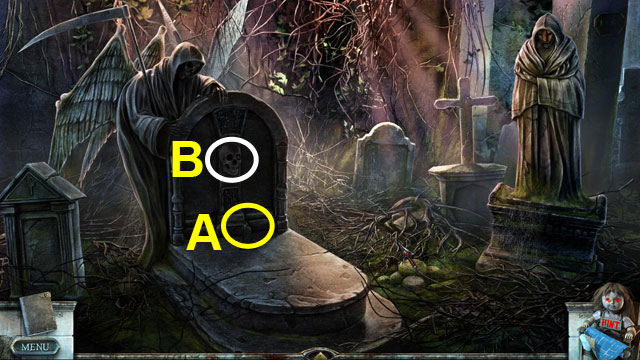
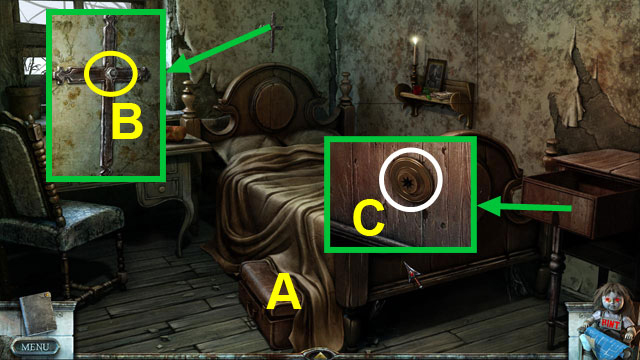
- Flip the switch (A).
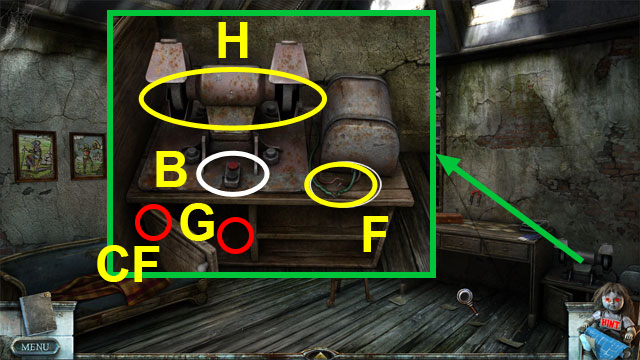
- Touch the lampshade to take it off (B).
- Touch the light bulb to unscrew it (B).
- Touch the drawer to open it (C).
- Take the LIGHT BULB (C).
- Touch the LIGHT BULB in the inventory and then touch the lamp to screw it in (B).
- Touch the lampshade to put it back on (D).
- Flip the switch to turn on the light (A).
- Move left.

- Look into the peephole (Z).
- Put the chain on (E).
- Open the lock (F).
- Push the door handle to open the door (G).
Chapter 1: Bolts and candles
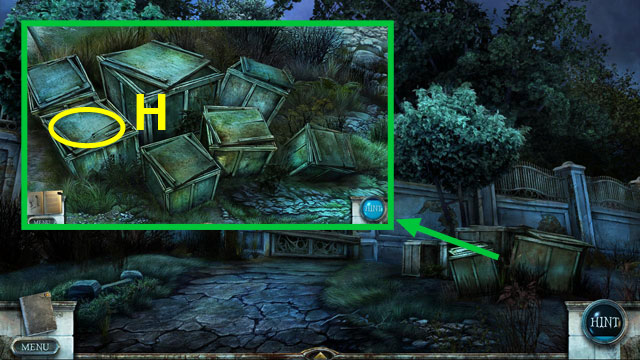
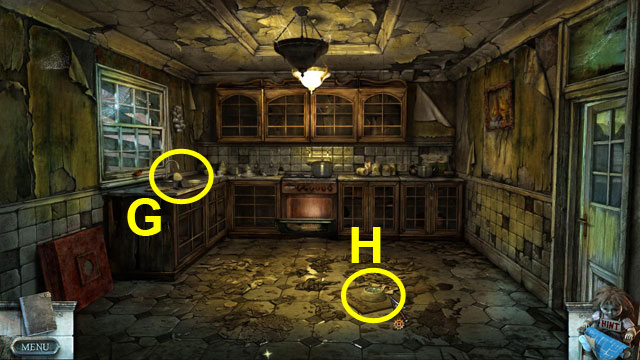
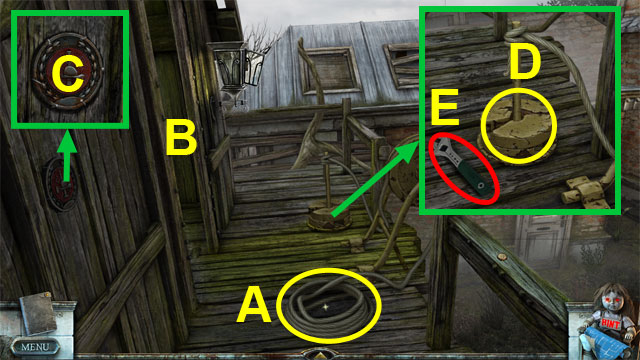
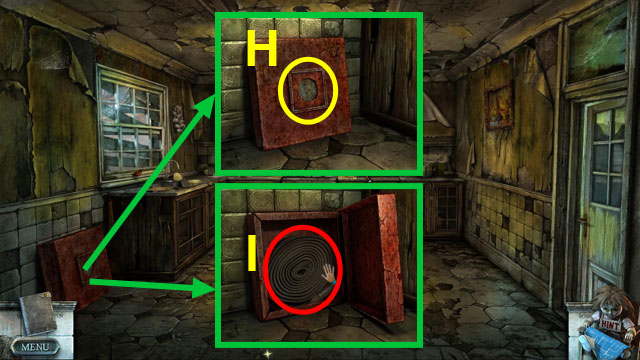
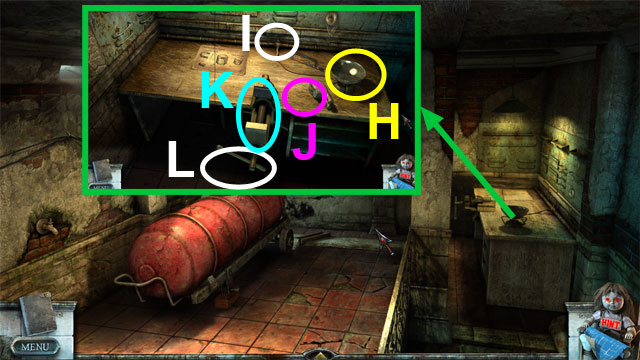
- Open the crate and take the CROWBAR (H).
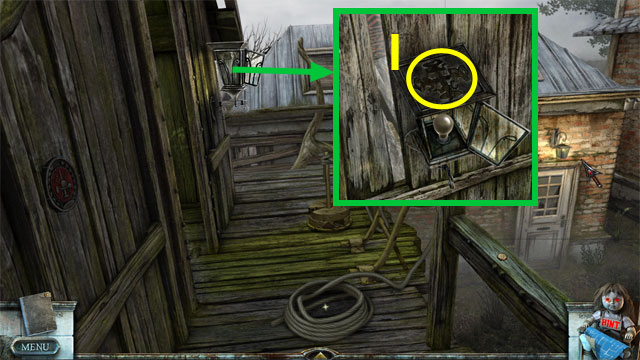
- Move forward.
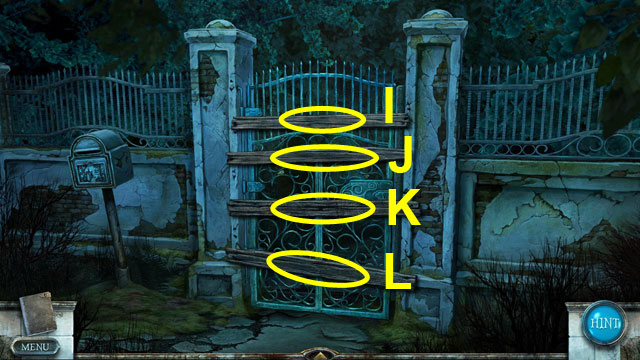
- Use the CROWBAR to tear off the planks (I, J, K. L).
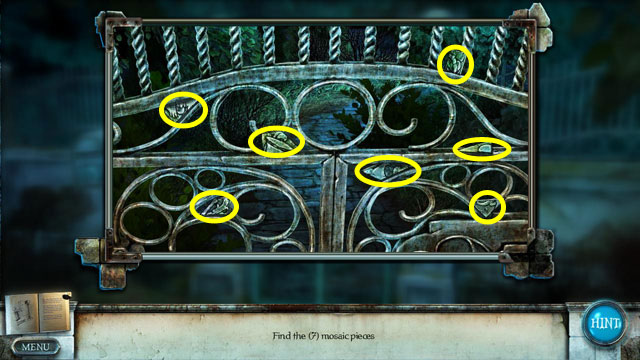
- Collect the mosaic pieces (yellow) to receive the PUZZLE PIECES.
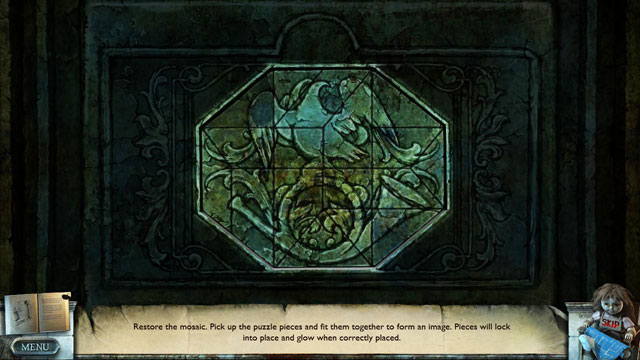
- Use the PUZZLE PIECES on the mailbox and assemble the logo as shown.
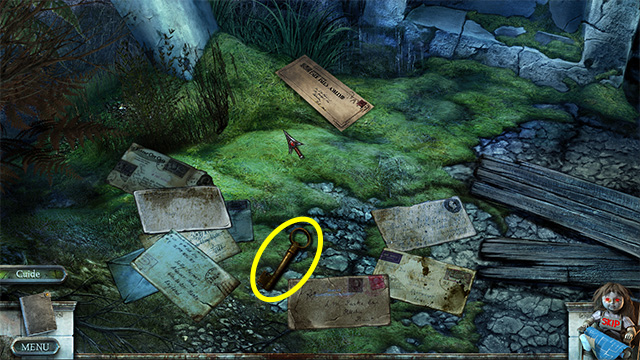
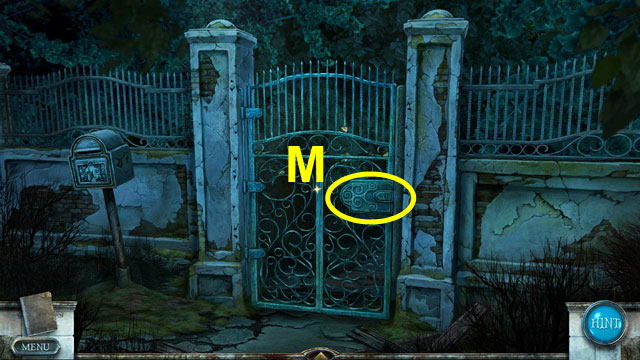
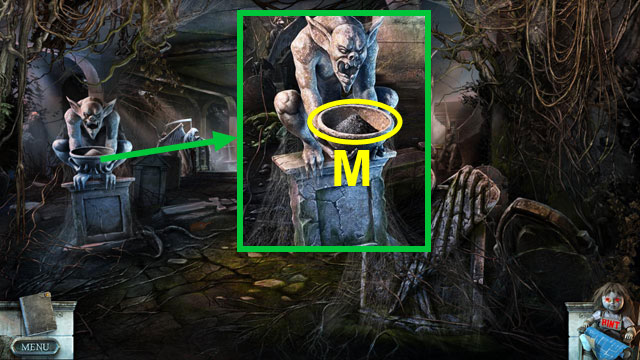
- Push the letters aside to find the GATE KEY.
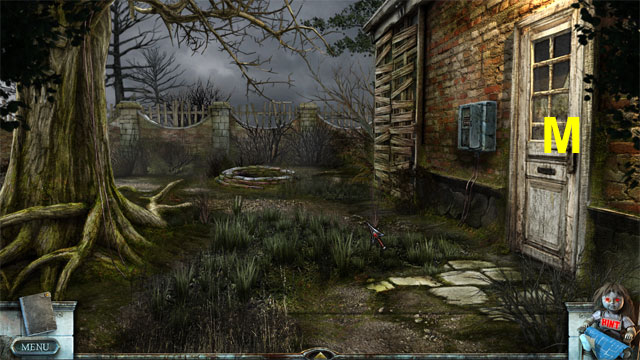
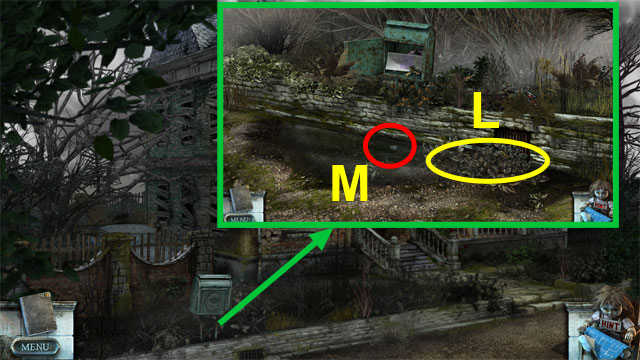
- Use the GATE KEY to unlock the gate (M).
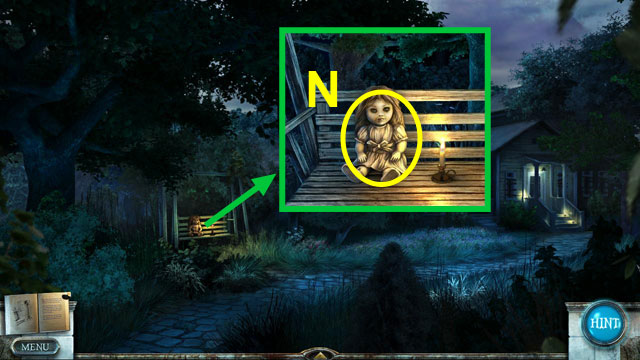
- Move forward.
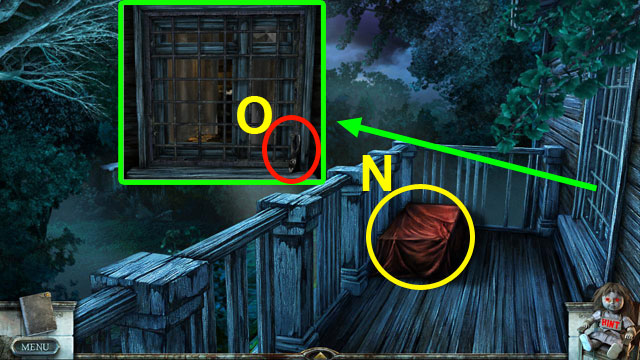
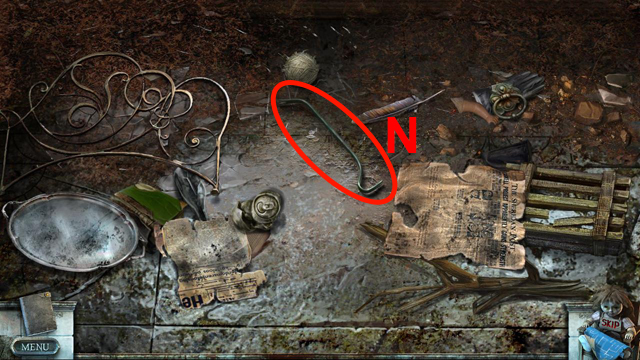
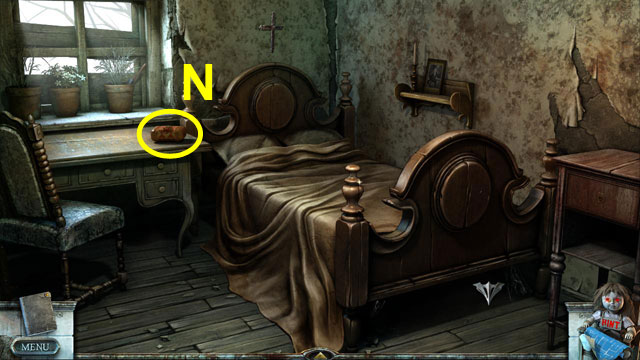
- Pick up the doll (N).
- Take the GARDEN GLOVES (N).
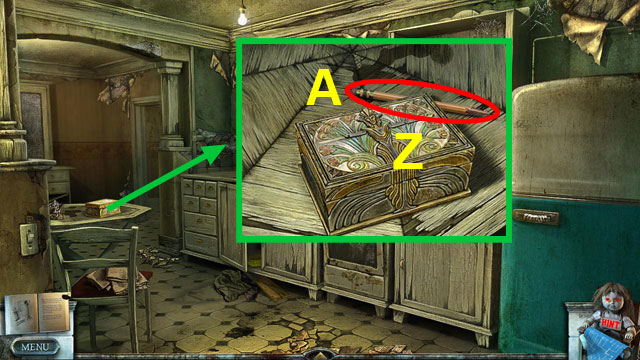
- Move forward three times.
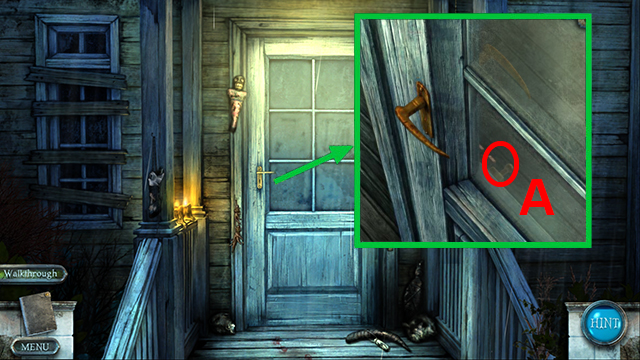
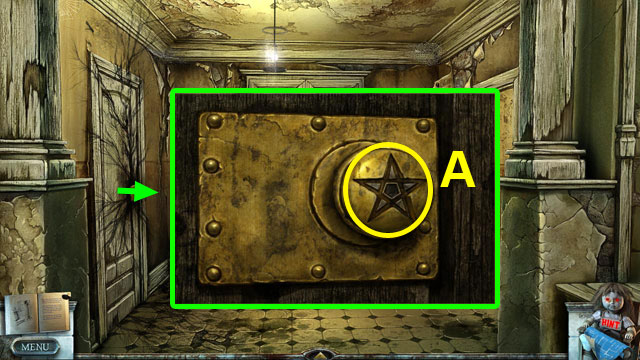
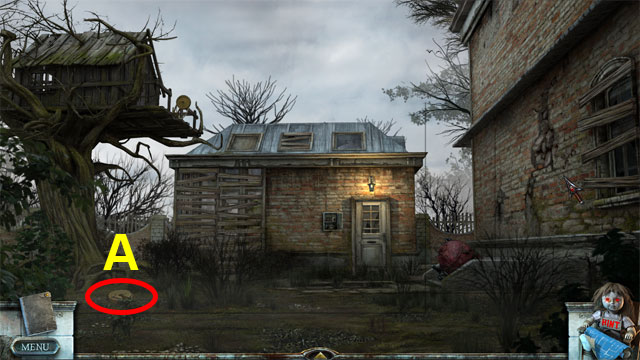
- Take a closer look at the window; break it with the CROWBAR (A).
- Use the GARDEN GLOVES to unlock the door (A).
- Move forward.
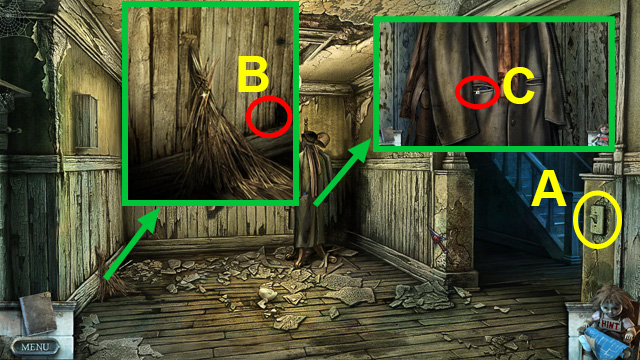
- Turn on the light (A).
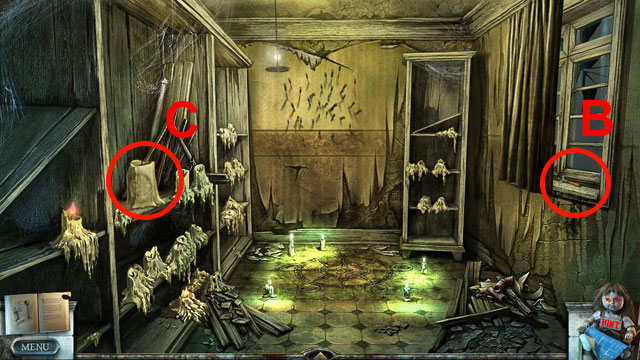
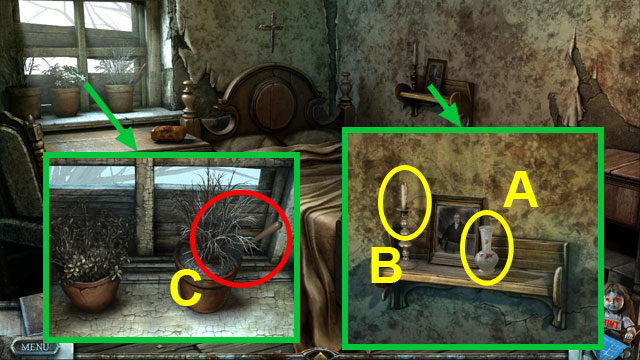
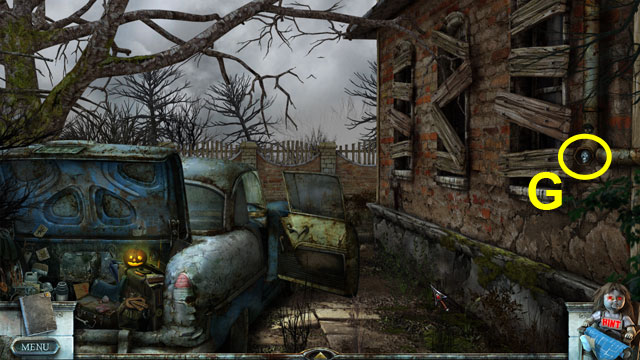
- Take the EYE EMBLEM (B).
- Take the PIECE OF DRAWING (C).
- Move right; move forward.
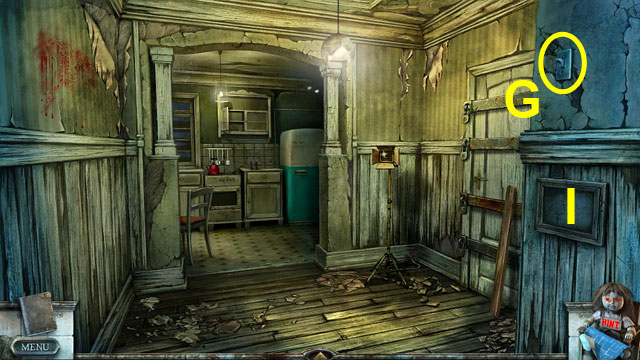
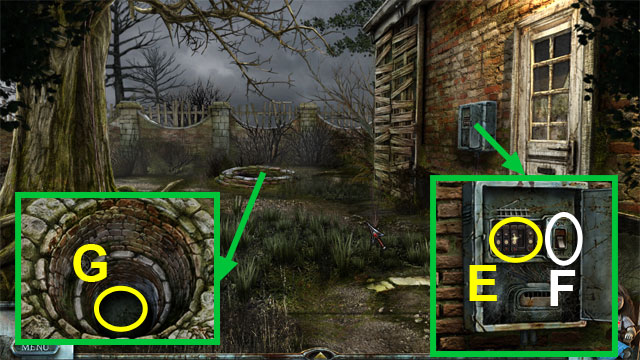
- Pick up the map from the wall (G).
- Flip the switch (G).
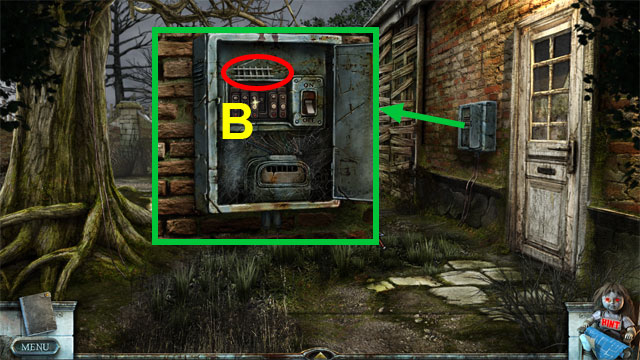
- Open the fuse box cover (I).
- Move back.
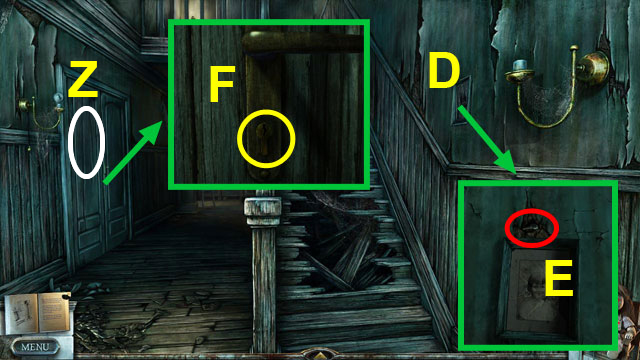
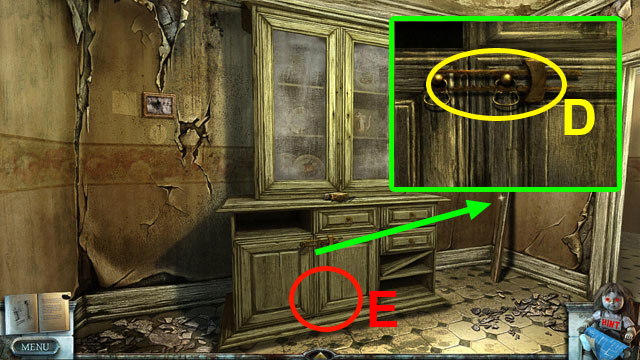
- Take a closer look at the picture on the wall (D).
- Take the LIVING ROOM KEY (E).
- Insert the LIVING ROOM KEY (F).
- Turn the key (F).
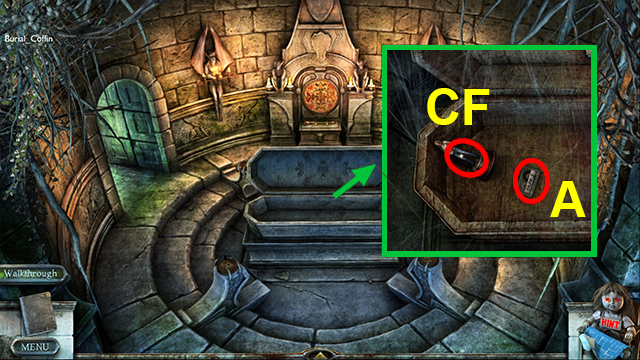
- Enter the living room (Z).
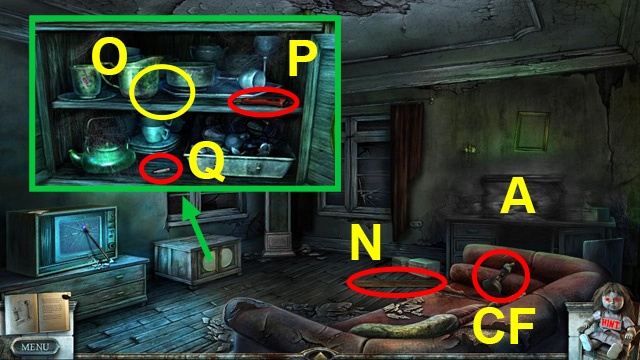
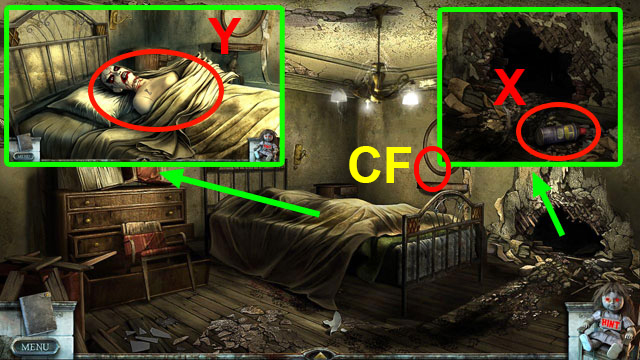
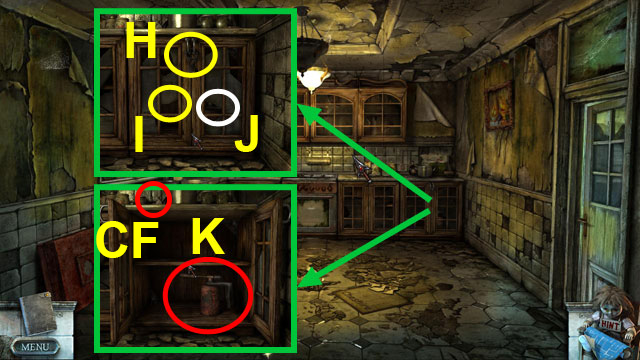
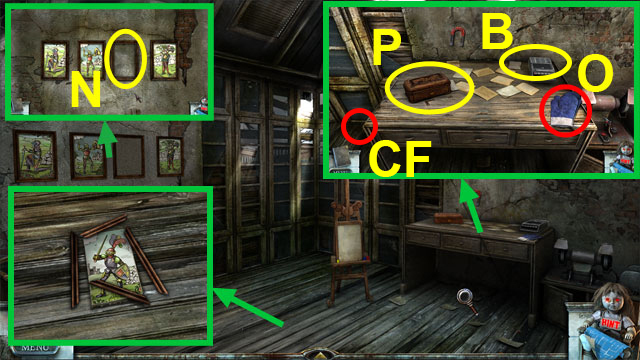
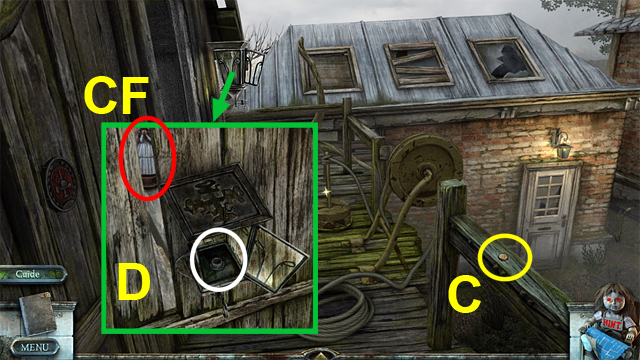
- Pick up the Collector Figurine (CF).
- Take the PLANK (N).
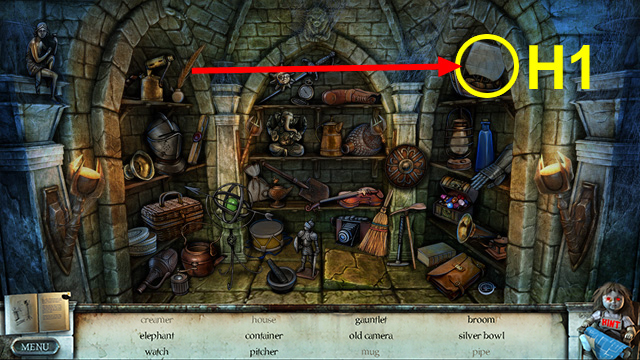
- Take a look at the broken aquarium to play a HOP (A).
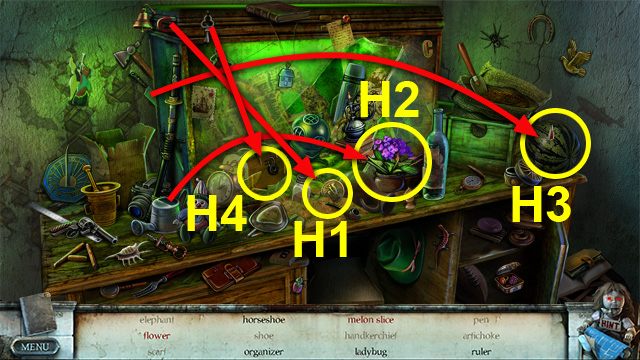

- Play the HOP to obtain the RULER.
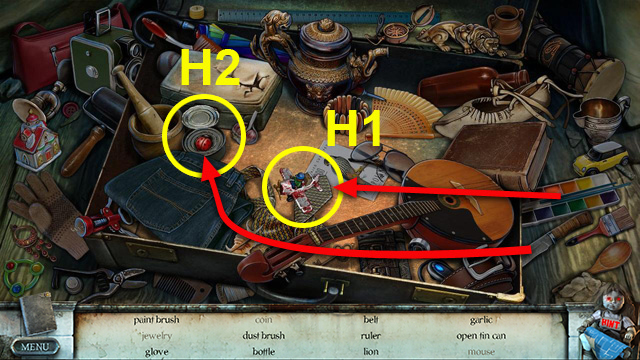
- Use the magnet to obtain the coin (H1).
- Use the watering can to water the flowers; pick up the flower (H2).
- Cut a piece of the watermelon with the knife (H3).
- Use the key to unlock the chest (H4).
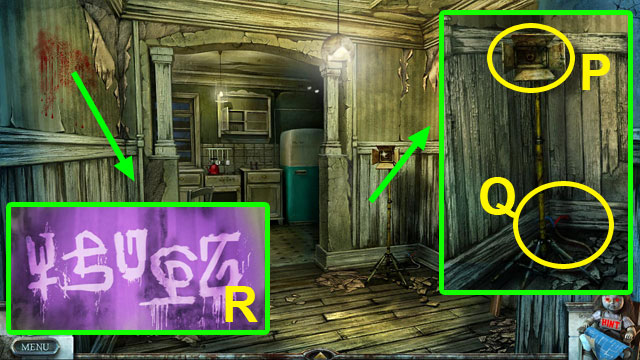
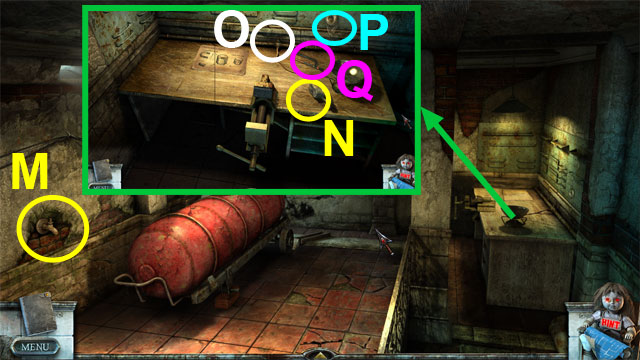
- Use the RULER to open the cupboard (O).
- Take the BOX CUTTER (P).
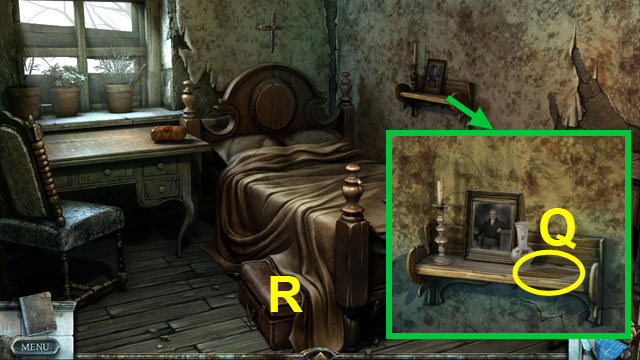
- Take the FUSE (Q).
- Move back; move forward.
- Insert the FUSE in the fuse box.
- Flip the switch (4), then the switch (3).
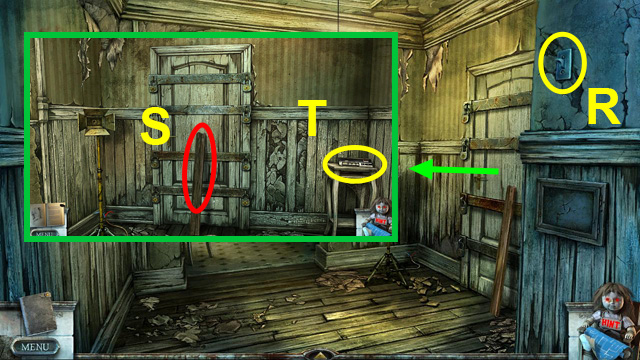
- Flip the switch to turn the lights on (R).
- Take the PLANK (S).
- Move forward.
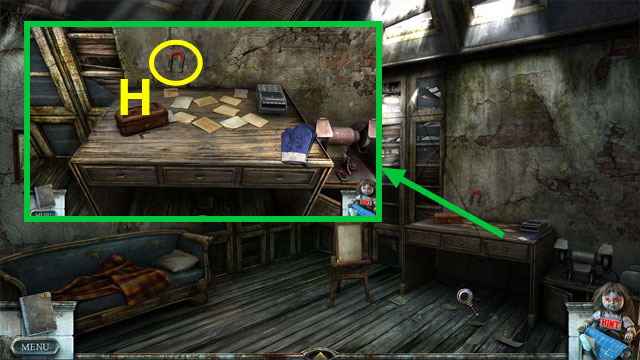
- Take the PENCIL (A).
- Take the PLANK (B).
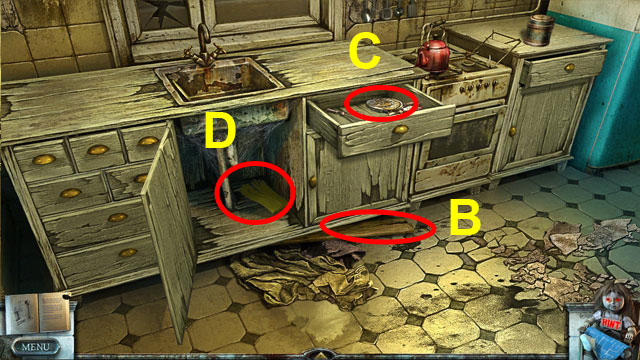
- Open the drawer and take the SNAKE EMBLEM (C).
- Open the door and take the RUBBER GLOVES (D).
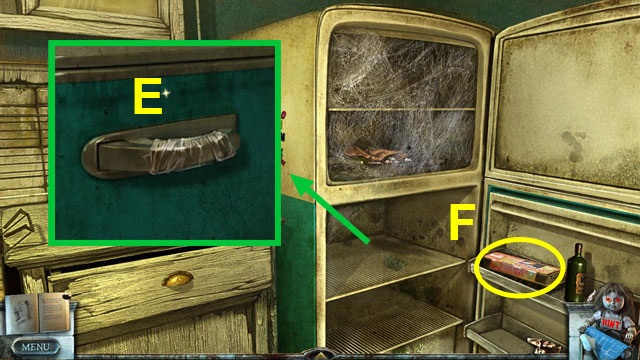
- Use the BOX CUTTER to free the handle (E).
- Open the fridge (E).
- Open the box of eggs (F).
- Take the BLACK LIGHT BULB (F).
- Move forward.
- Take the PLANK (G).
- Take the NAILS (H).
- Move back three times; move left.
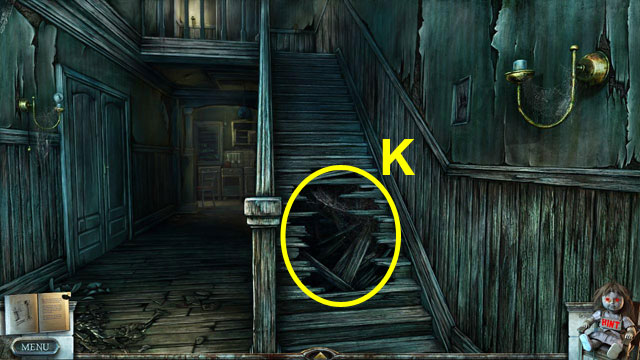
- Use the RUBBER GLOVES to obtain the HAMMER (J).
- Move back.
- Put the PLANKS on the broken stairs (K).
- Insert the NAILS (K).
- Nail the planks with the HAMMER (K).
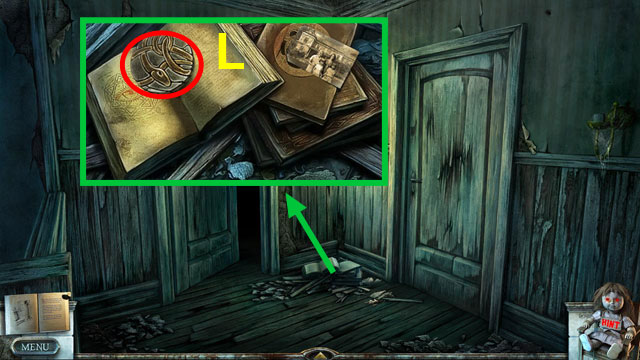
- Move up the stairs.
- Take the SNAKE EMBLEM (L).
- Move left.
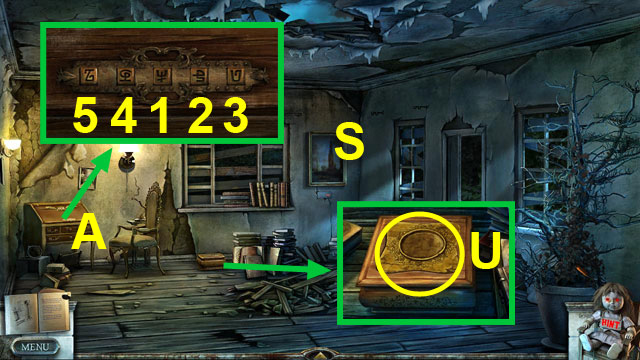
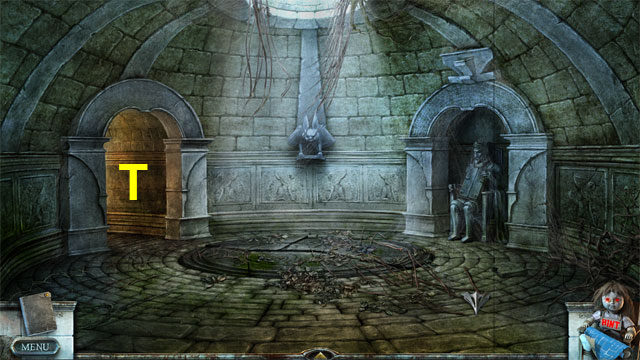
- Insert the EYE EMBLEM (U).
- Open the chest (U).
- Take the FLASHLIGHT (U).
- Move right.
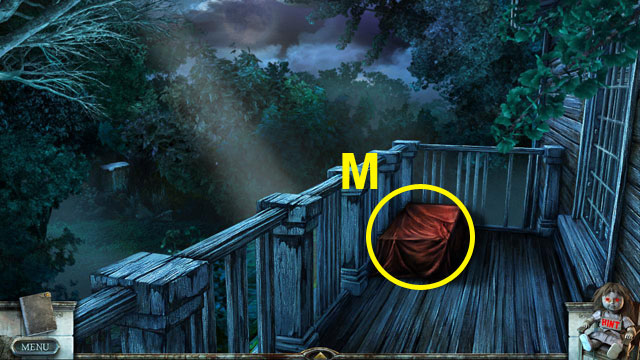
- Take the red cloth off the case (M).
- Take a closer look at the case (M).
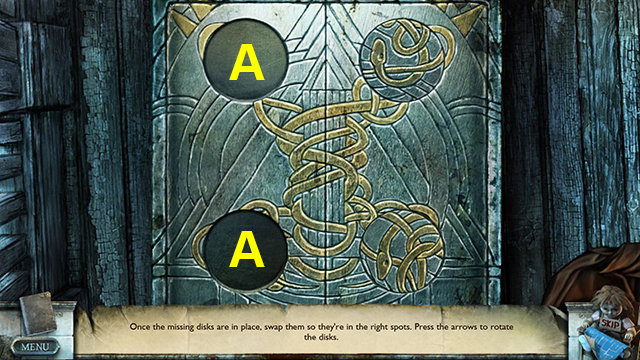
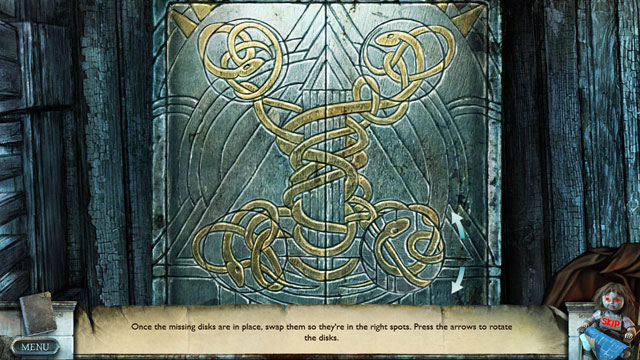
- Place the SNAKE EMBLEMS in the holes (A).
- Rotate and swap the emblems to complete the picture.
- Take the BATTERY (N).
- Take a closer look at the windows; take the NIPPERS (O).
- Move back three times; move forward.
- Insert the BLACK LIGHT BULB in the construction lamp (P).
- Add the BATTERY to the lamp (Q).
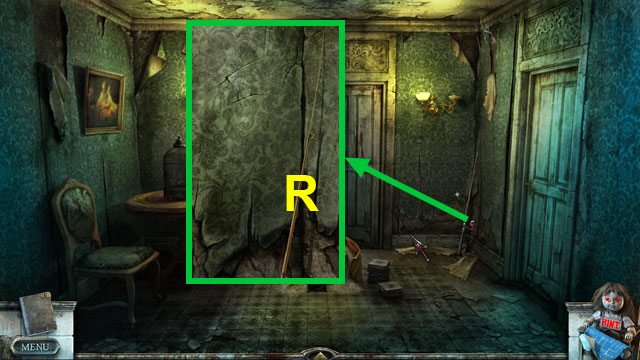
- Take a look at the drawings on the wall (R).
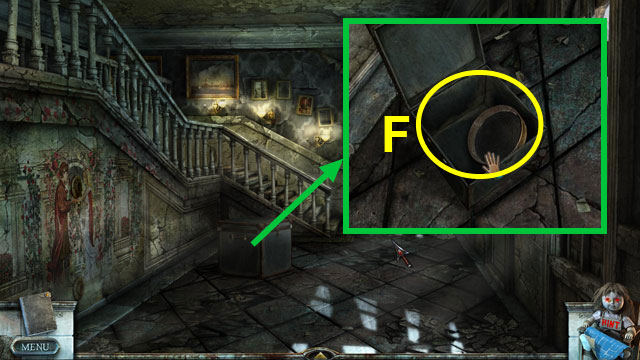
- Move back, then up the stairs; move left.
- Touch the painting to drop it (S).
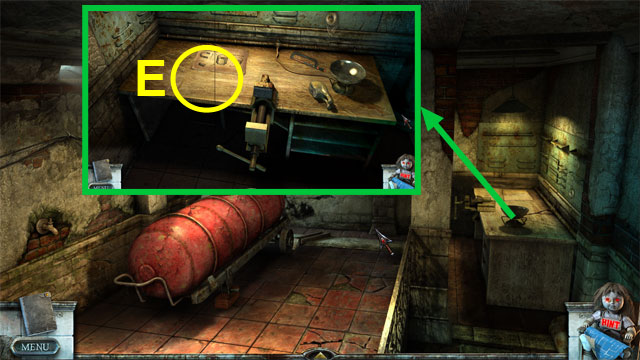
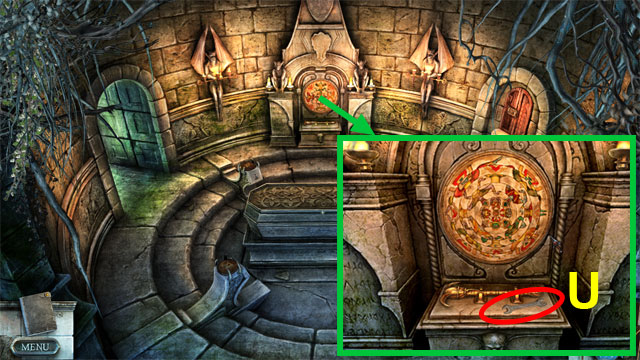
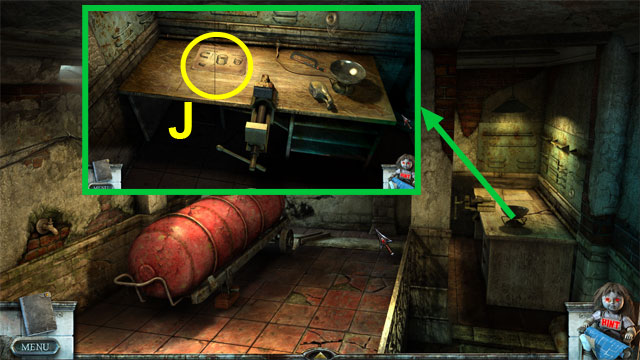
- Look at the desk; enter the combination (1-5).
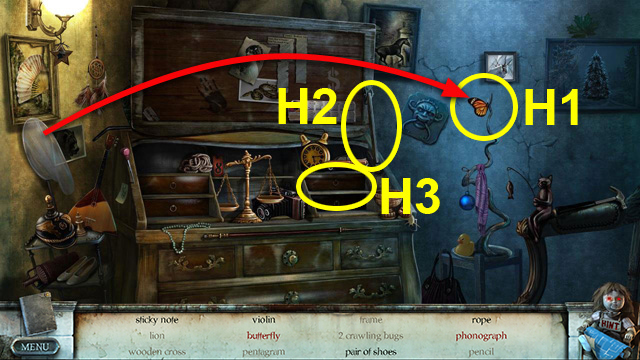
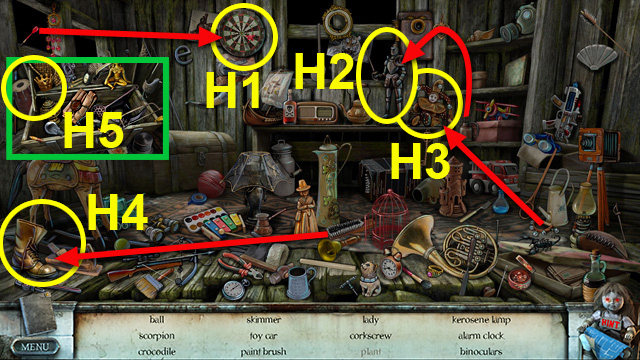
- Look at the desk to play the HOP (A).
- Play the HOP to obtain the ROPE.
- Catch the butterfly with the net (H1).
- Close and open the table to reveal more objects (H2).
- Open the drawer (H3).
- Move back three times.
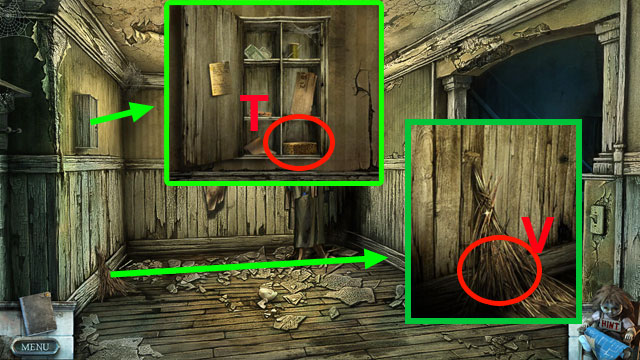
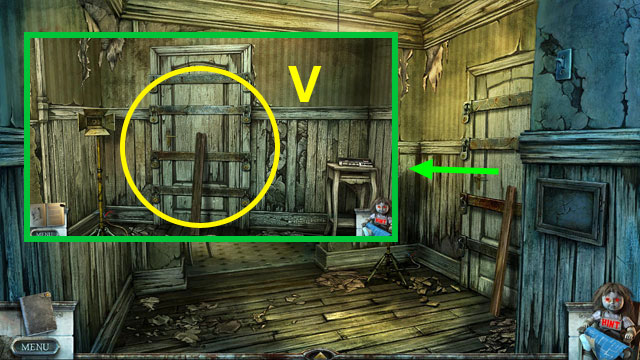
- Use the ROPE on the straw.
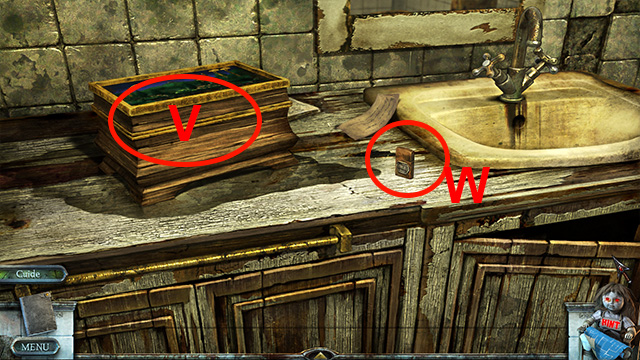
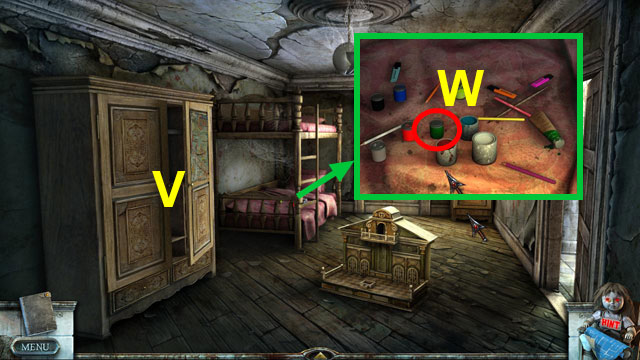
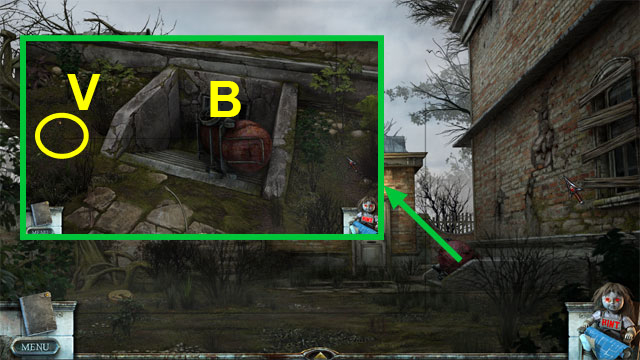
- Take the BROOM (V).
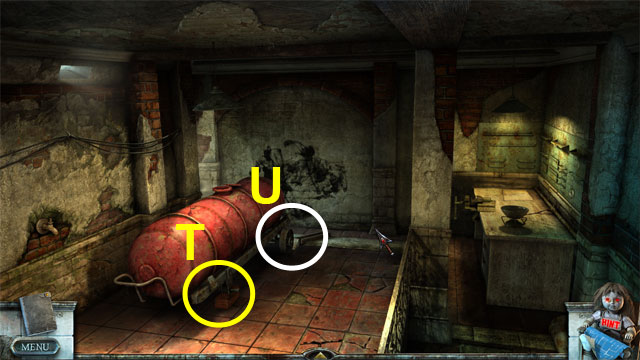
- Use the NIPPERS to remove the nails (T).
- Take the DRY SPONGE (T).
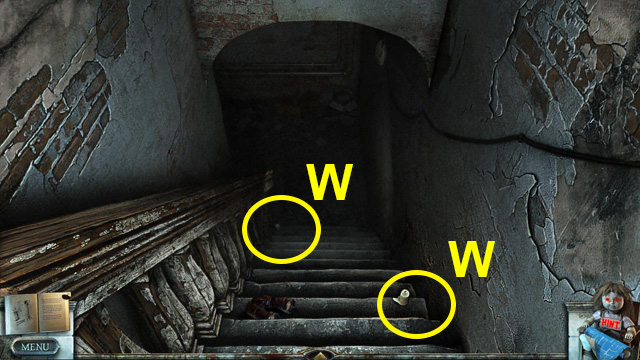
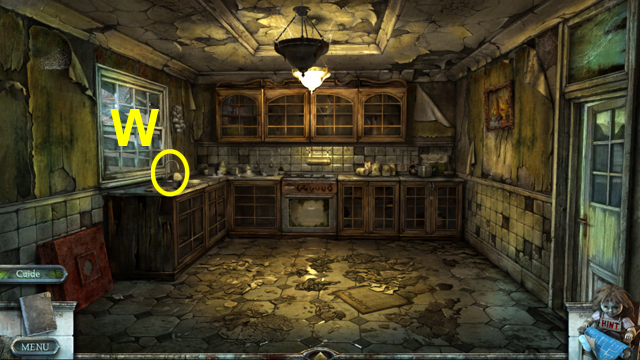
- Move right; move forward twice.
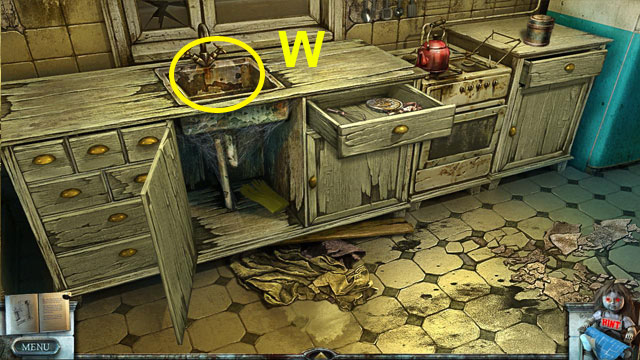
- Put the DRY SPONGE under the water (W).
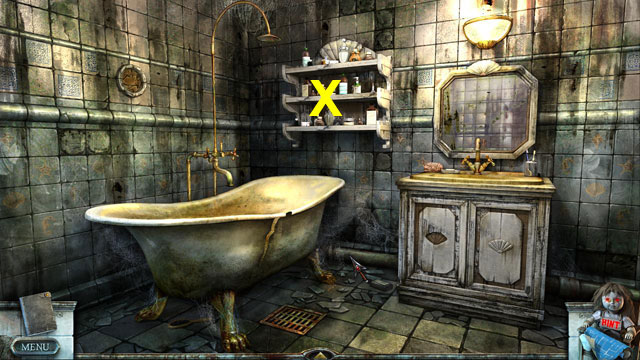
- Use the BROOM to clean the spider web off (X).
- Take the SCREWDRIVER (X).
- Move forward.
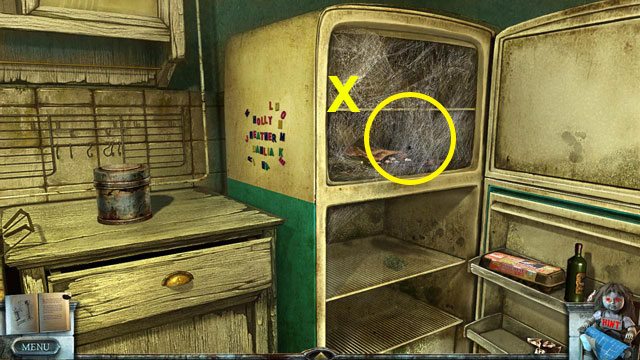
- Use the WET SPONGE to clean the dirty glass (Z).
- Move right.
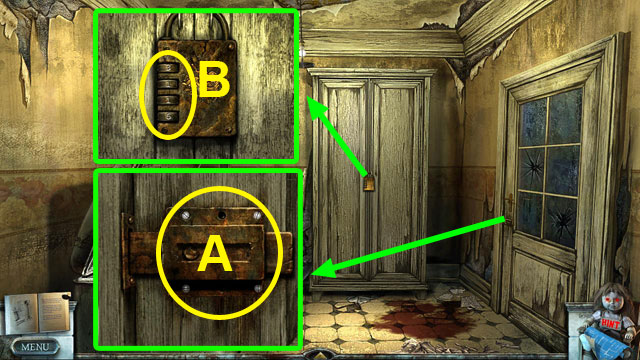
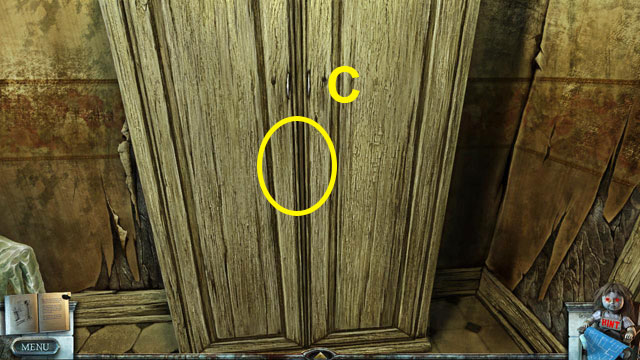
- Enter the combination 1723 (B).
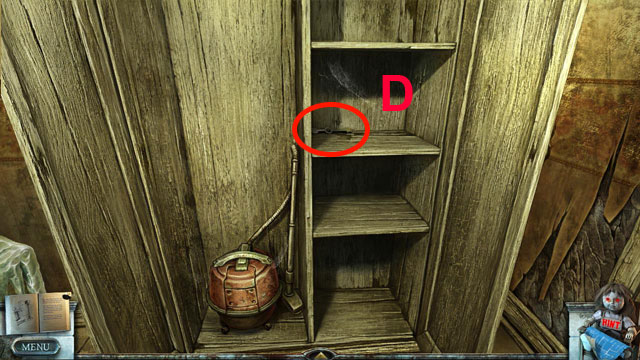
- Open the closet doors (C).
- Take the CLOCK HAND (D).
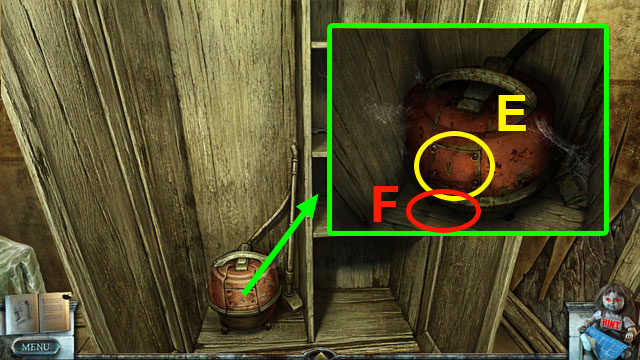
- Use the SCREWDRIVER four times to remove the screws (E).
- Open the vacuum cleaner (E).
- Take the CARRIAGE (F).
- Use the SCREWDRIVER four times to remove the screws (A).
- Move right.
Chapter 2: Heather

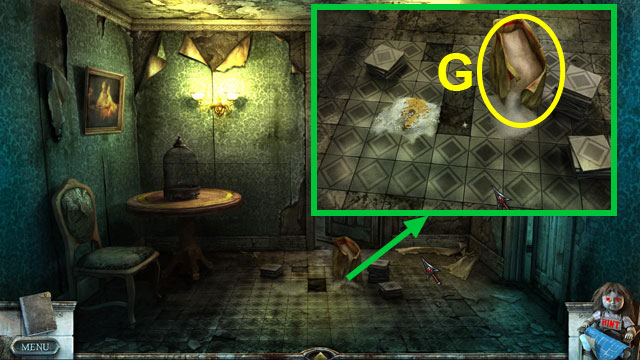
- Take the SHEARS (G).
- Touch the pillows four times to move them all (H).
- Take the LIGHTER FLUID (H).
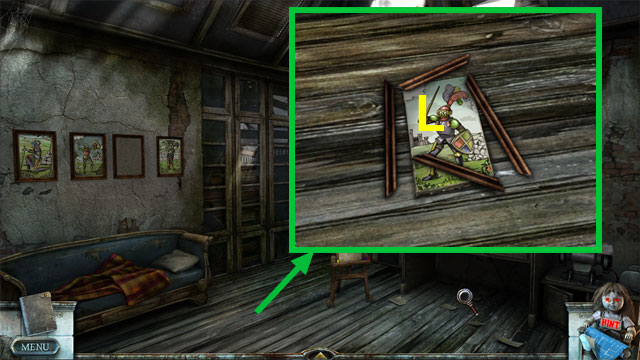
- Look at the table (A).
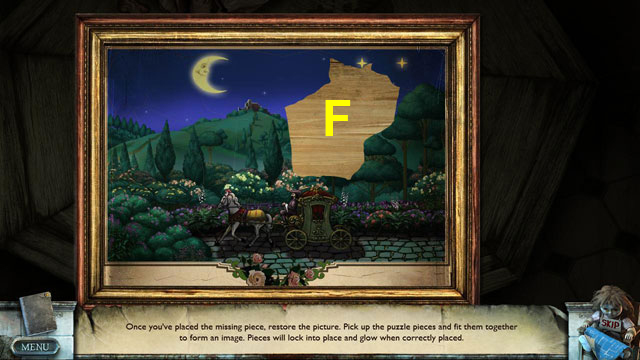
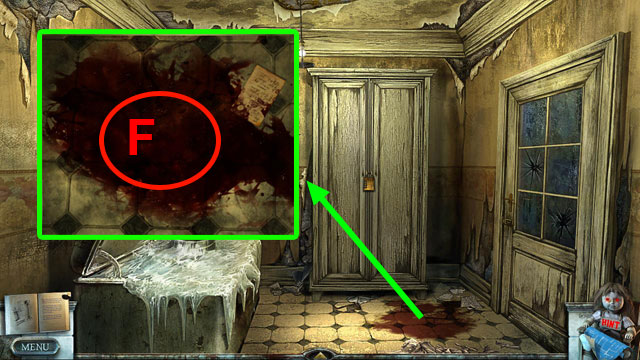
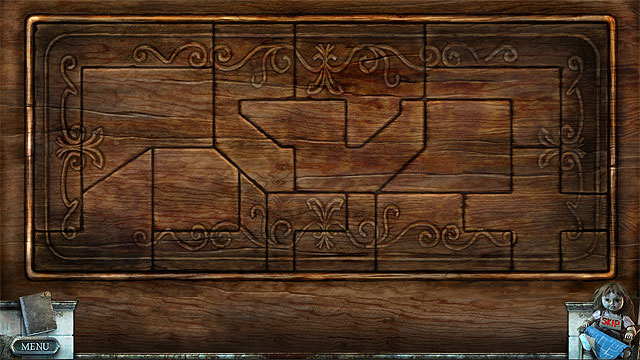
- Place the PIECE OF DRAWING among the other pieces (F).
- Assemble the drawing as indicated.
- Move left.
- Put the FLASHLIGHT on the ground (I).
- Take the CLOCK KEY (J).
- Take the BINOCULARS (K).
- Move back six times, up the stairs, left, then right.
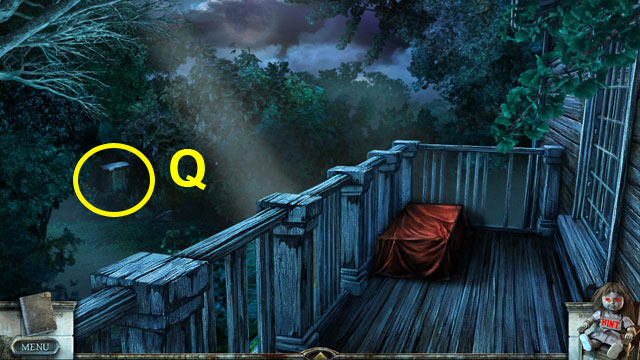
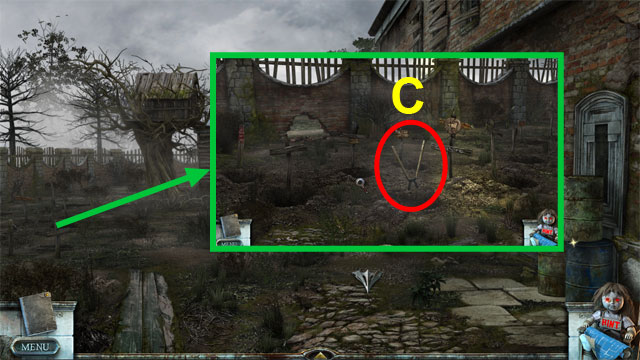
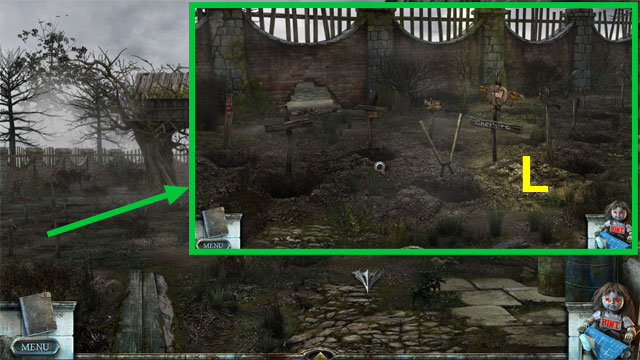
- Use the BINOCULARS to see the stone in the forest (Q).
- Move back three times; move left.
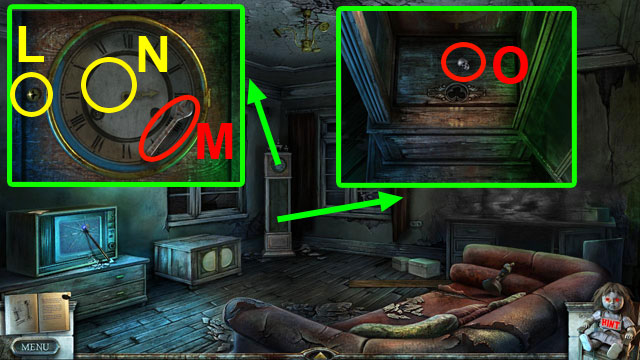
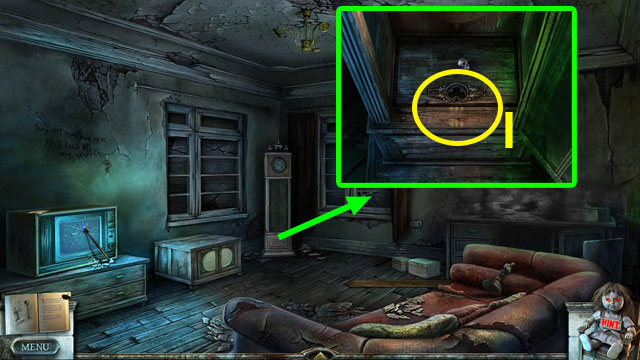
- Insert the CLOCK KEY (L).
- Turn the key (L).
- Take the WRENCH (M).
- Place the CLOCK HAND (N).
- Set out the correct time 6:46 (N).
- Take the SKULL (O).
- Move back; move up the stairs and forward.
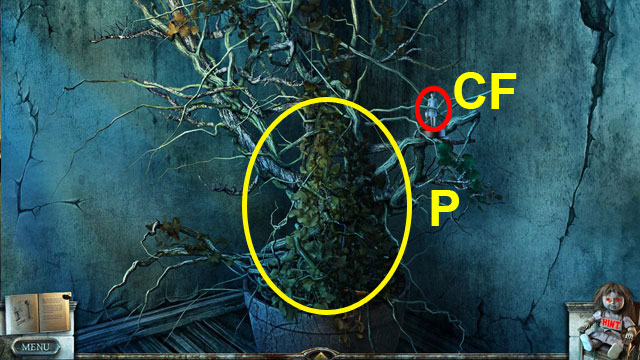

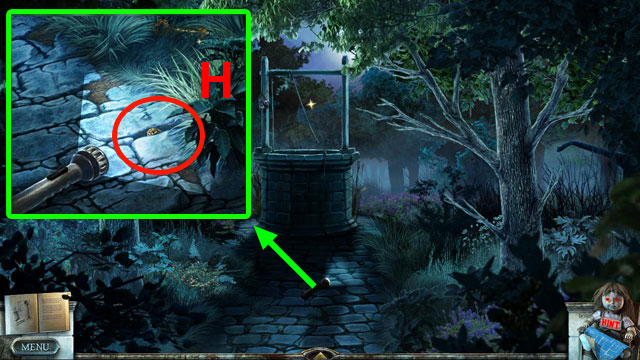
- Use the SHEARS on the vines twice (P).
- Take the WELL HANDLE (P).
- Pick up the Collector Figurine (CF).
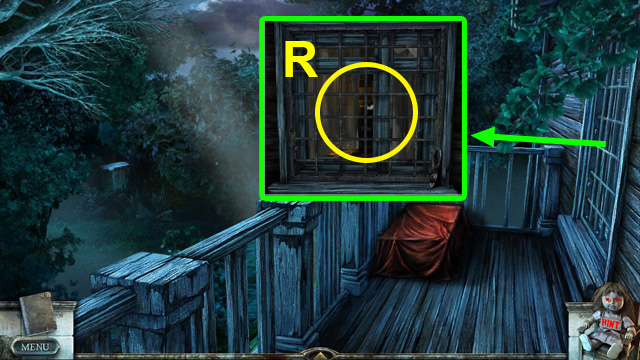
- Move right.
- Use the WRENCH to take the rails off (R).
- Move right.
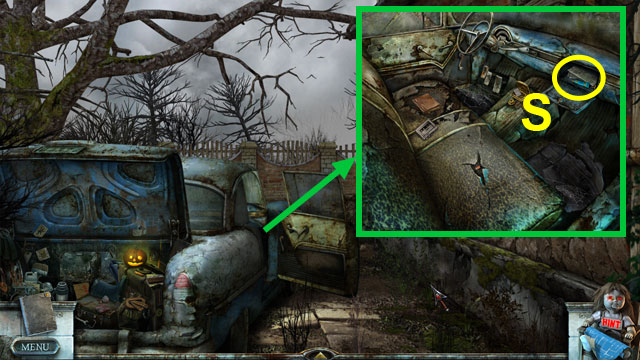
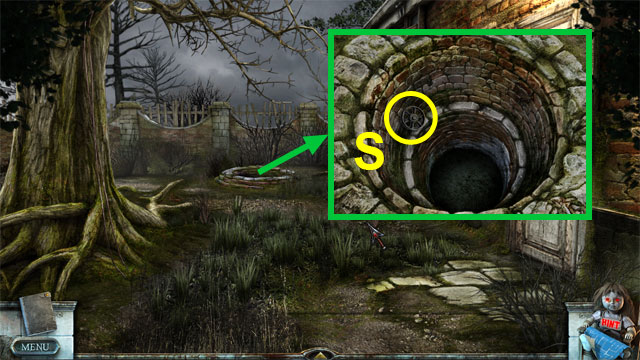
- Take the STAIN REMOVER (S).
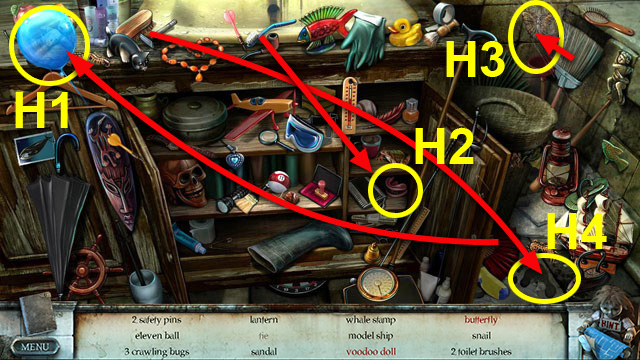
- The cabinets under the sink contain a HOP (F).
- Play the HOP to get the TWEEZERS.
- Use the fan to move the balloon (H1).
- Brush the teeth with the toothbrush (H2).
- Use the broom to clean the spider web off (H3).
- Brush the stain off the floor (H4).
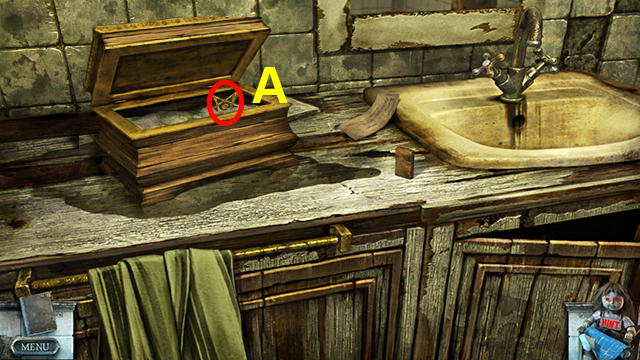
- Touch the lighter to open it (W).
- Put the LIGHTER FLUID in the lighter to obtain the LIGHTER (W).
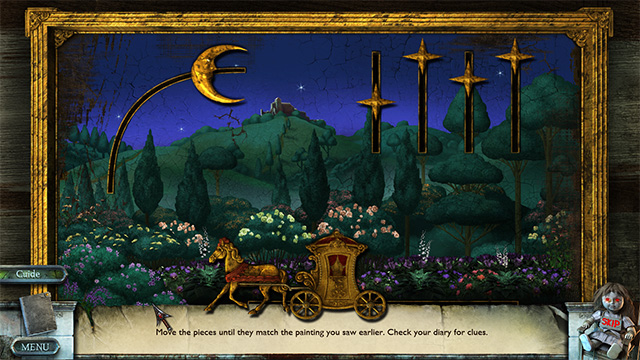
- Insert the CARRIAGE in the scene (V).
- Move the shapes to copy the image from the torn drawing.
- Take the SCARY MEDALLION (A).
- Move right.
- Take the ANTI-RUST SPRAY (X).
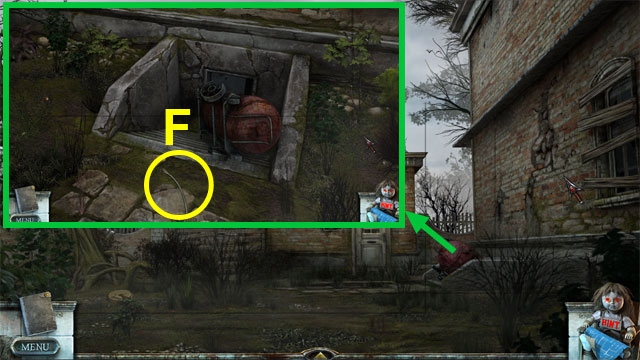
- Pull the blanket (Y).
- Take the SAFE KEY (Y).
- Pick up the Collector Figurine (CF).
- Move back three times.
- Insert the SAFE KEY (Z).
- Turn the key (Z).
- Turn the handle (Z).
- Take the SKULL (Z).
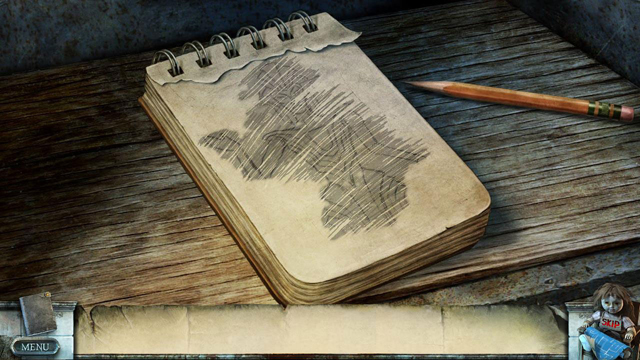
- Use the PENCIL on the notebook (Z).
- Apply pressure over the page to uncover the hidden figure.
- Move back twice; Move forward three times.
- Insert the SCARY MEDALLION (A).
- Turn the handle (A).
- Move left.
- Pull the curtain (B).
- Take the CAN OPENER (B).
- Use the LIGHTER to light the big candle (C).
- Take the CLUBS EMBLEM (C).
- Move back.

- Use the ANTI-RUST SPRAY to open the lock (D).
- Open the door (E).
- Take the HAIRDRYER MANUAL (E).
- Move right.
- Use the STAIN REMOVER to dissolve the stain (F).
- Take the TOOTH (F).
- Move back twice.
- Open the can with the CAN OPENER (G).
- Take the PLASTIC BAGS (G).
- Move forward, right twice, then forward.
- Use the TWEEZERS to pull the RING out of the crack (H).
- Move back six times; move left.
- Insert the CLUBS EMBLEM (I).
- Lift the cover (I).
- Take the RAKE (I).
- Move back, up the stairs, left, then right twice.
- Pull the electric plug out (T).
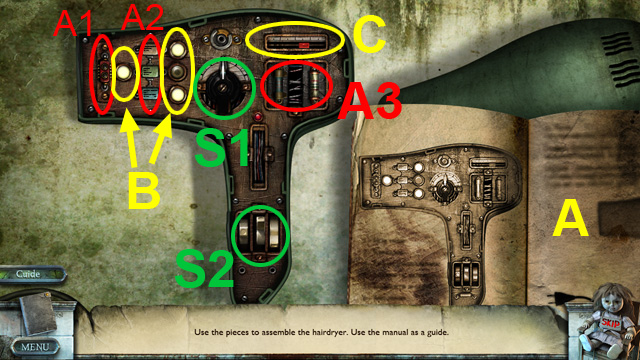
- Take a look inside the bath (A).
- Set the HAIRDRYER MANUAL by the hairdryer (A).
- Put the parts in their correct places (A1)(A2)(A3).
- Switch the lights as indicated on the image (B).
- Set the slider to the third position (C).
- Set the switches to the indicated positons (S1) (S2).
- Move right.

- Use the PLASTIC BAGS to take the LOCK OF HAIR (J).
- Move back five times, forward three times, then right.
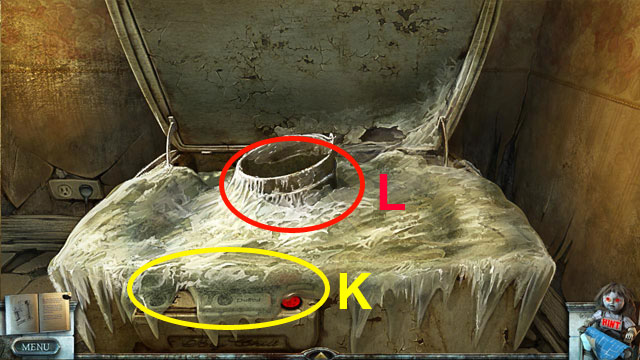
- Use the HAIRDRYER to melt the ice on the control panel (K).
- Press the button (K).
- Take the BUCKET (L).
- Move right.
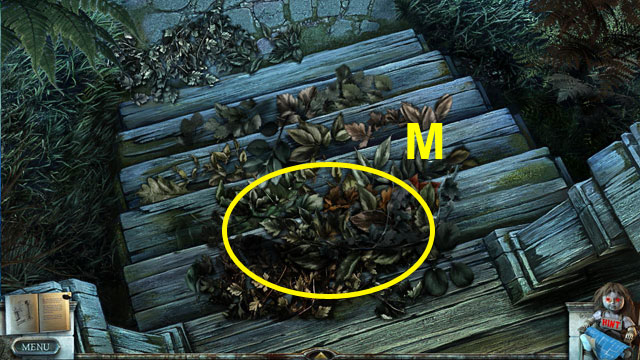
- Use the RAKE to clean the leaves (M).
- Take the FIGURINE HAND (M).
- Move forward.
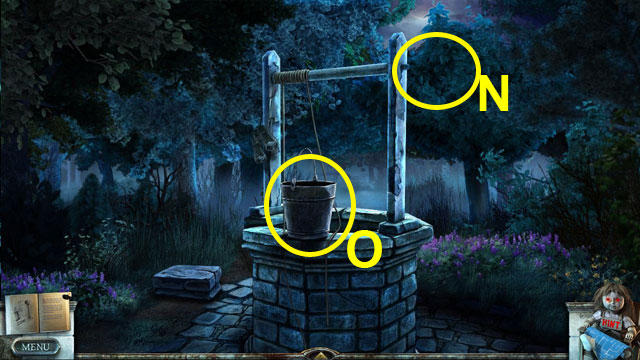
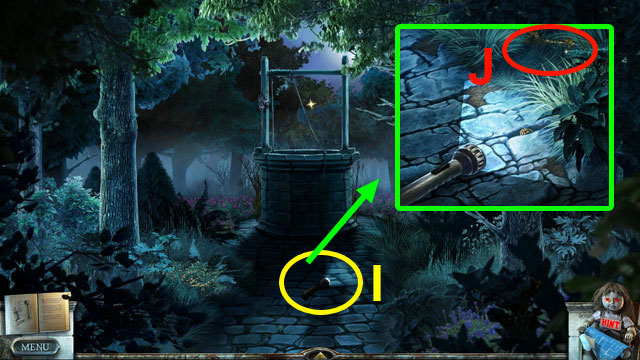
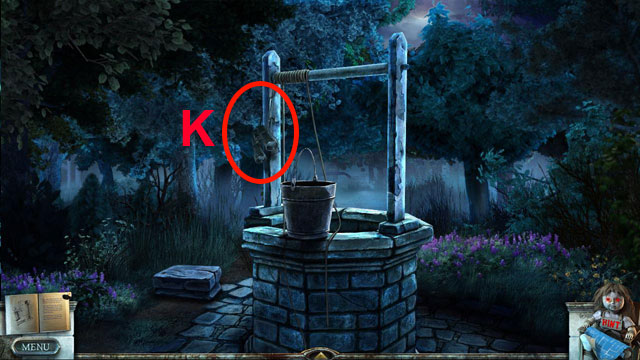
- Insert the WELL HANDLE (N).
- Set the BUCKET on the side (O).
- Touch the rope to attach it to the bucket (O).
- Touch to lower the bucket (O).
- Touch to raise the bucket back (N).
- Take the JEWEL (O).
- Move back four times.
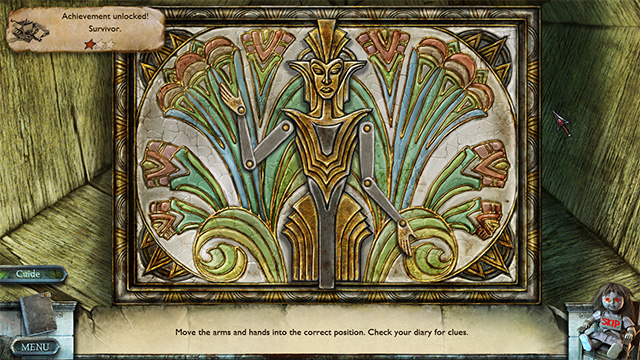
- Replace the FIGURINE HAND (Z).
- Touch the arms to rotate them to match the puzzle’s solution.
- Take the GLASSES (P).
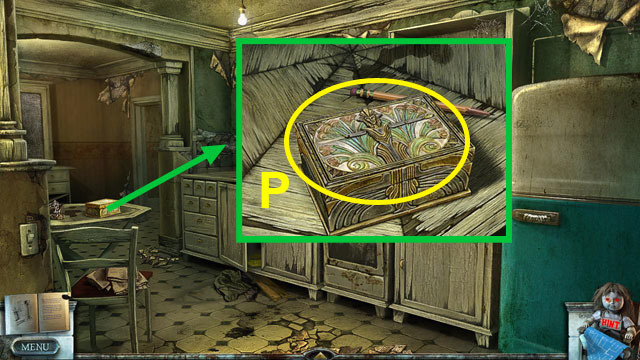
- Move forward; move left.
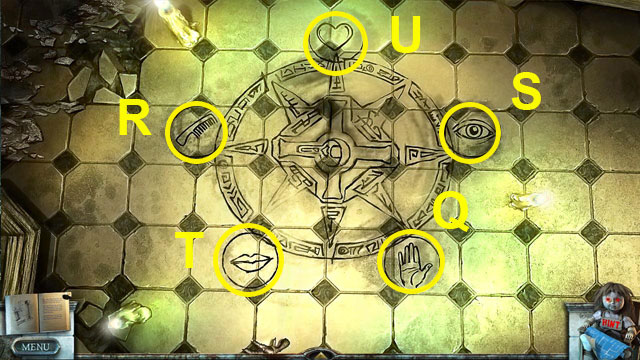
- Put down the JEWEL (U).
- Put down the LOCK OF HAIR (R).
- Put down the GLASSES (S).
- Put down the TOOTH (T).
- Put down the RING (Q).
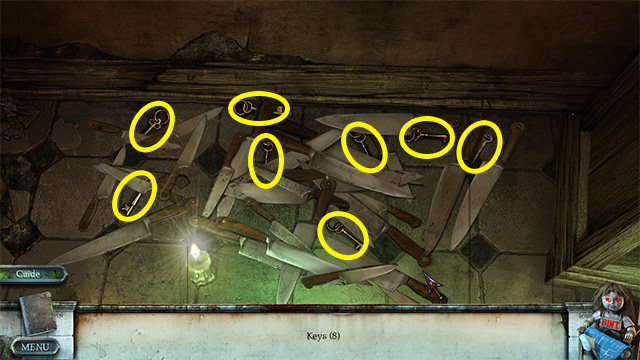
- Pick up all the KEYS.
- Move back three times.
- Use the KEYS four times to unlock the locks (V).
- Open the door (V).
- Move forward twice.
- Light candles with the LIGHTER (W).
- Move forward and use the LIGHTER to light the darkness.
Chapter 3: Coming home
- Move forward, left, then forward twice.
- Take the WEIGHT (A).
- Move forward.
- Take the RAILROAD PIECE (B).
- Move back twice.
- Take the SHEARS (C).
- Move back twice.
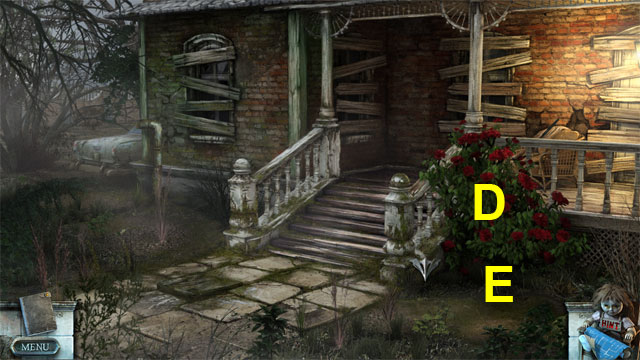
- Use the SHEARS to cut the rose bush (D).
- Take the CAR KEYS (E).
- Take the ROSE (E).
- Move left.
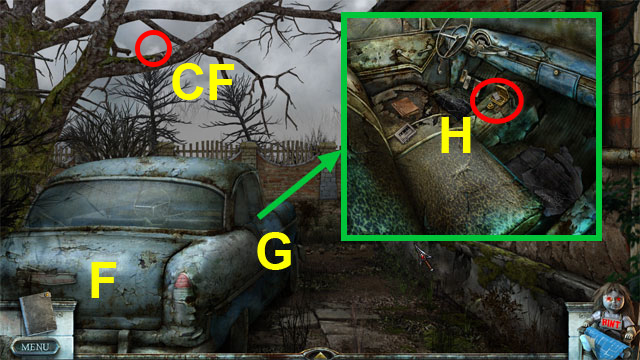
- Pick up the Collector Figurine (CF).
- Use the CAR KEYS to open the trunk (F).
- Use the CAR KEYS to open the car door (G).
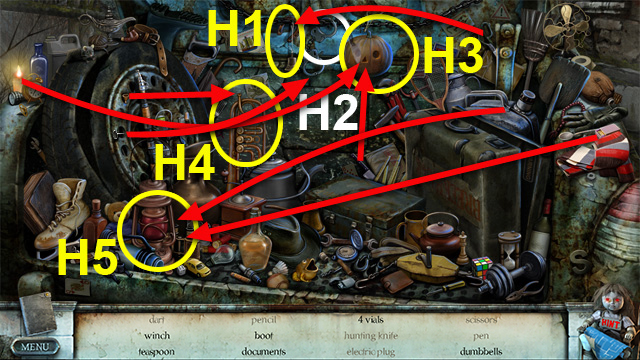
- Look in the trunk to play the HOP (F).
- Complete the HOP to obtain the SHOTGUN SHELLS.
- Use the scissors to cut the bell off (H1).
- Touch the handcuffs to unlock them (H2).
- Carve the pumpkin with the knife (H3).
- Put the candle inside the carved pumpkin (H3).
- Replace the tip on the trumpet (H4).
- Light the gas lamp with the matches (H5).
- Move back; move forward.
- Use the SHOTGUN SHELLS to obtain LOADED SHOTGUN (I).
- Move back, left, then forward.

- Use the LOADED SHOTGUN to blow holes in the barrels (J).
- Touch the barrels to move them (J).
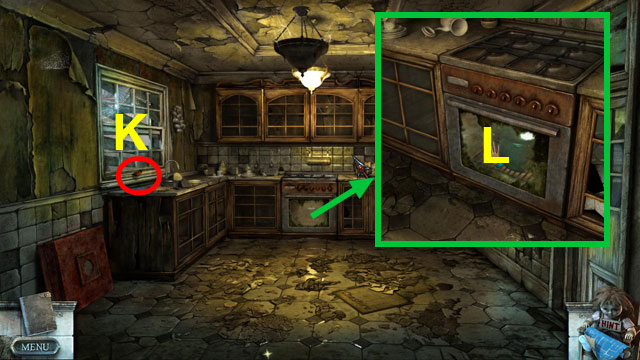
- Open the door; move right.
- Touch the oven to open it (L).
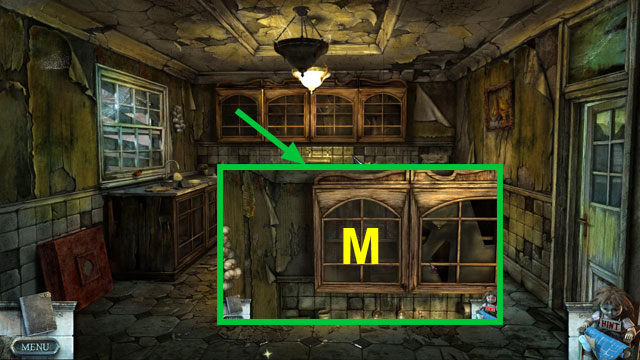
- Touch the cupboard doors to open them (M).
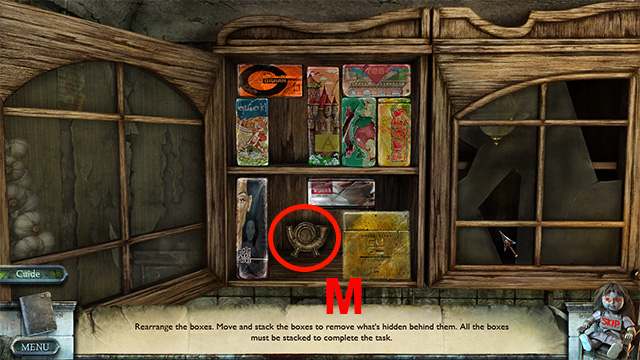
- Touch the boxes to move them around until you can take the MAILBOX EMBLEM (M).
- Move right; move left twice.
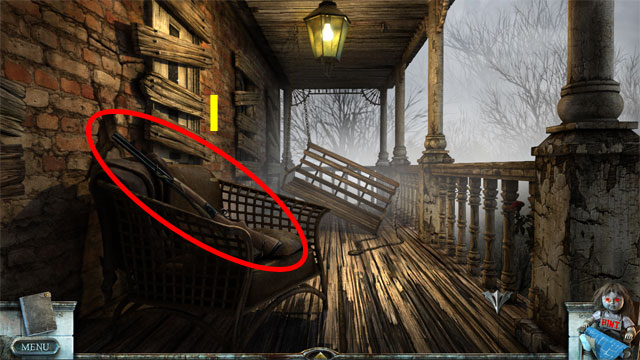
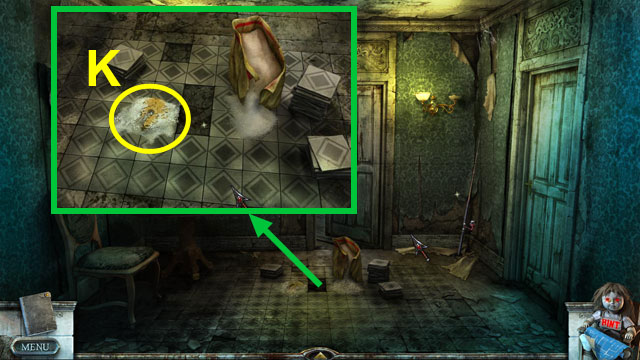
- Touch the junk pile on the floor.
- Touch the junk to move it around until you can take the CROWBAR (N).
- Take the MOSAIC PIECE (A).
- Take the NUTS (O).
- Move back.
- Take the GAS KNOB (P).
- Move forward.
- Open the cage (Q).
- Take the SPATULA (S).


- Touch the key to turn it (T).
- Take the GRANDMOTHER’S KEY (T).
- Touch the handle to open the door (U).
- Move forward.
- Look in the closet to play the HOP (V).
- Play the HOP to obtain the ROPE LADDER.
- Put the flowers in the vase (H1).
- Use the lipstick to write the answer to the equation (H2).
- Use the xylophone to play the music note (H3).
- Take the GREEN PAINT (W).
- Move right.
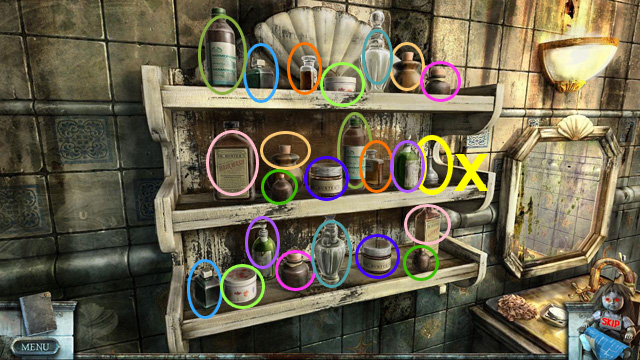
- Take a closer look at the shelves (X).
- Select matching pairs until only one bottle is left; take the OIL (X).
- Move back.
- Use the OIL on the nutcracker’s mouth to open it (Y).
- Put the NUTS into the nutcracker’s mouth (Y).
- Take the HEART LOCKET (Z).
- Move back; move right.
- Put the ROSE in the vase (A).
- Use the LIGHTER to light the candle (B).
- Take the SHOVEL (C).
- Move back four times.
- Use the CROWBAR to break the padlock (H).
- Touch the chain to remove it (H).
- Touch the cupboard doors to open them (I).
- Touch the cupboard doors to open them (J).
- Take the GAS BURNER (K).
- Pick up the Collector Figurine (CF).
- Move back.
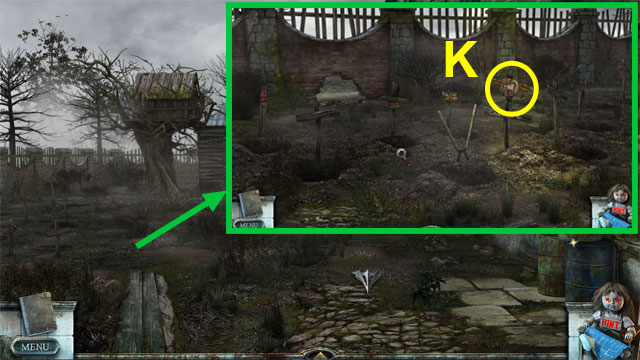
- Use the SHOVEL to dig up the grave (L).
- Take the BOWL (L).
- Move forward twice.
- Use the GRANDMOTHER’S KEY to unlock the door (M).
- Move right.
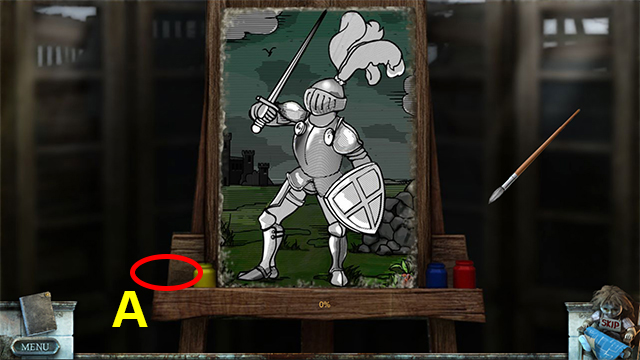
- Put the GREEN PAINT on the easel to activate a puzzle (A).


- Touch a color and then an area on the painting to color it.
- Color the painting by following the example.
- You will receive the PAINTING.
- Use the PAINTING on the empty frame (N).
- Touch the frame pieces to re-assemble them.
- Take the OVEN MITTS (O).
- Insert the missing MOSAIC PIECE (P).
- Assemble the mosaic to open the chest.
- Take the VALVE (P).
- Pick up the Collector Figurine (CF).
- Move back three times; move right.
- Use the OVEN MITTS to take the pan out of the oven (Q).
- Touch the cover to take it off (R).
- Use the SPATULA to obtain NAILS (R).
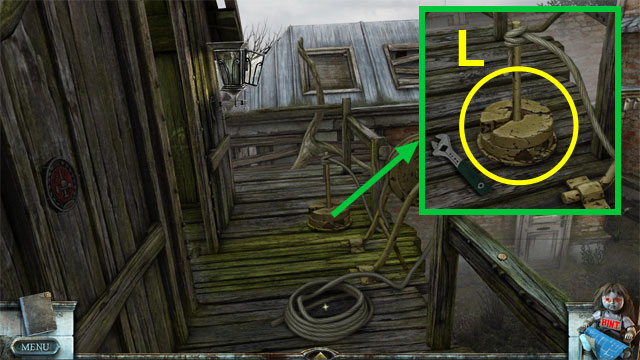
- Touch the HANDLE to take it (S).
- Move right; move left.
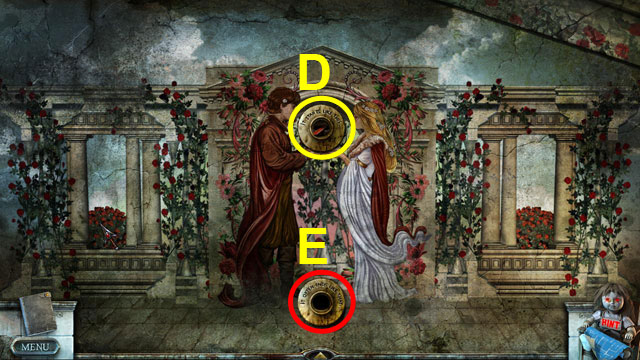
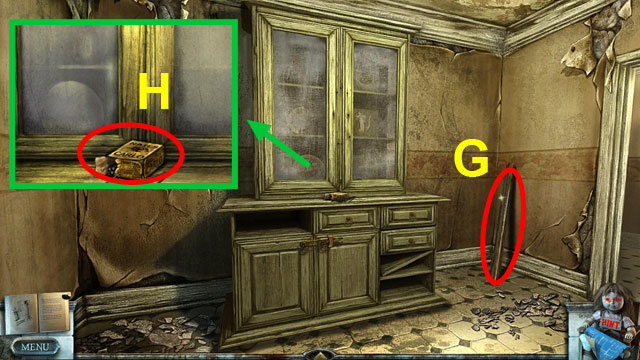
- Drop the HEART LOCKET in the top opening (D).
- Take the REMOTE CONTROL (E).
- Move back.
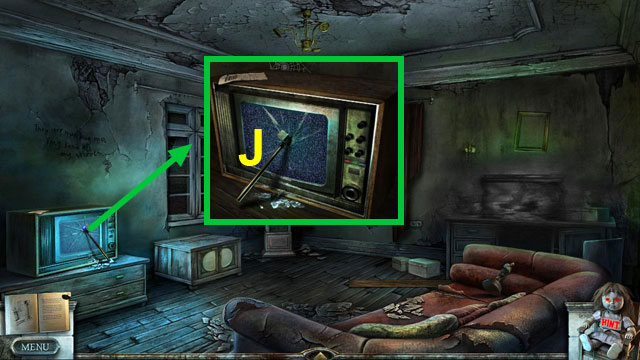
- Use the REMOTE CONTROL on the TV (F).
Chapter 4: Something is different

- Take the KNIFE (G).
- Insert the HANDLE (T).
- Touch the lid to remove it (U).
- Take the CERAMIC EYE (V).
- Move back four times.
- Use the CROWBAR to remove the stone (A).
- Insert the VALVE (B).
- Touch the valve to open the water (B).
- Take the HAMMER (C).
- Move back.
- Insert the MAILBOX EMBLEM to open the mailbox (D).
- Touch the mailbox to open it (D).
- Take the MUSIC BOX KEY (D).
- Move forward twice.

- Use the GAS BURNER to heat the chain (E).
- Use the CROWBAR to break the heated chain (E).
- Use the ROPE LADDER to obtain the LADDER ON HOOK (F).
- Move back, left, forward, then right.
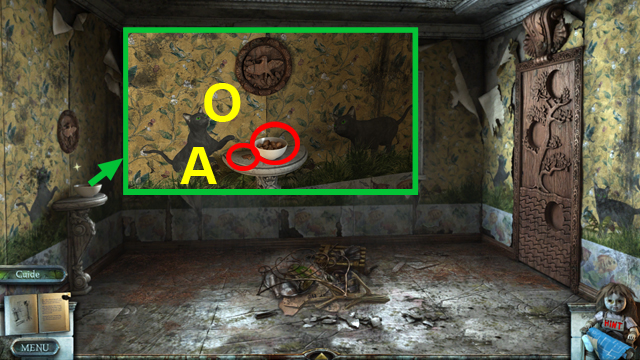
- Use the BOWL to obtain the BOWL WITH WATER (G).
- Set the BOWL WITH WATER on the cat mat (H).
- Move back; move forward.
- Insert the LADDER ON HOOK to pick it up (I).
- Take the WIRE CUTTERS (J).
- Move back.
- Use the WIRE CUTTERS to cut the wire (K).
- Take the CAT EMBLEM (K).
- Move forward twice; move right.
- Set the NAILS in the frame (L).
- Use the HAMMER on the nails to repair the frame (L).
- Take the REPAIRED FRAME (L).
- Move back three times, right twice, left, forward, then right.
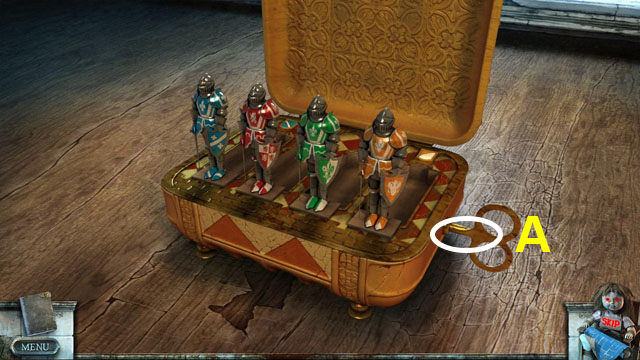
- Zoom into the music box on the table (N).
- Use the MUSIC BOX KEY to activate the music box (A).
- Repeat the sequence in which the knights stand up by touching them in the same order.
- The final knights poses will be written down in the Diary.
- Move back five times, forward twice, then right.
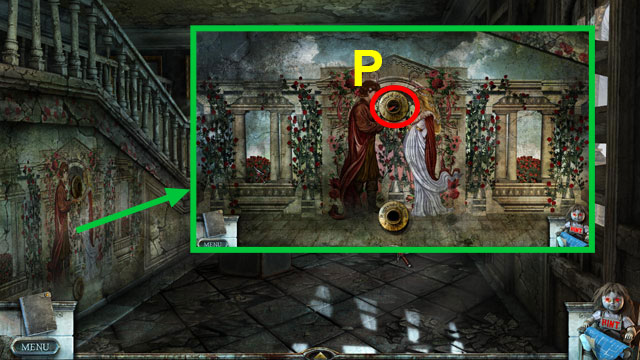
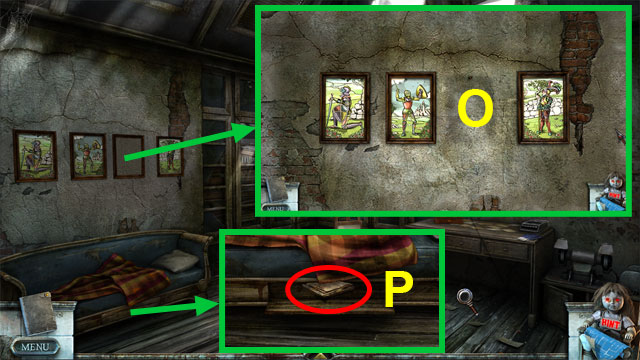
- Put the REPAIRED FRAME on the wall (O).
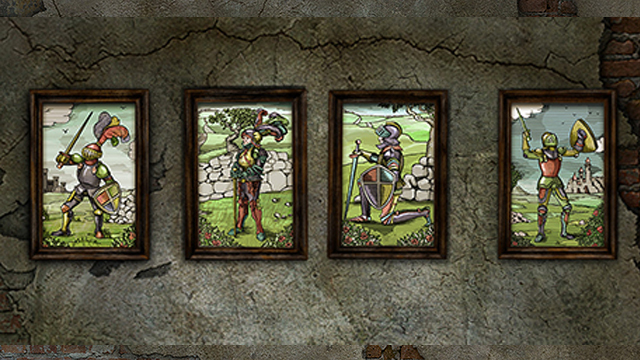
- Swap the paintings by touching one and then another to achieve the shown order.
- Take the LETTERS (P).
- Move back three times, right twice, left, forward, then right.
- Put the LETTERS on the shelf (Q).
- Look in the suitcase to play the HOP (R).
- Play the HOP to obtain the GLOVE COMPARTMENT KEY.
- Paint the airplane (H1).
- Use the knife to open the can (H2).
- Move back six times.
- Use the GLOVE COMPARTMENT KEY to open the glove compartment (S).
- Take the PUTTY (S).
- Move forward, right twice, left, forward twice, then right.
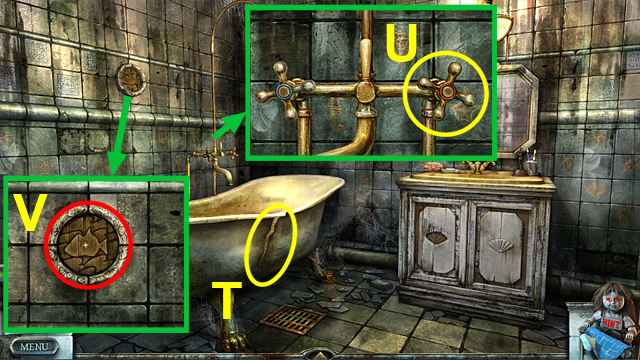
- Use the PUTTY to close the crack in the bathtub (T).
- Touch the tap to turn on the water (U).
- Take the FISH EMBLEM (V).
- Move back three times; move up the stairs.
- Use the KNIFE to obtain the BIRD EMBLEM (W).
- Insert the BIRD EMBLEM (X).
- Insert the CAT EMBLEM (Y).
- Insert the FISH EMBLEM (Z).
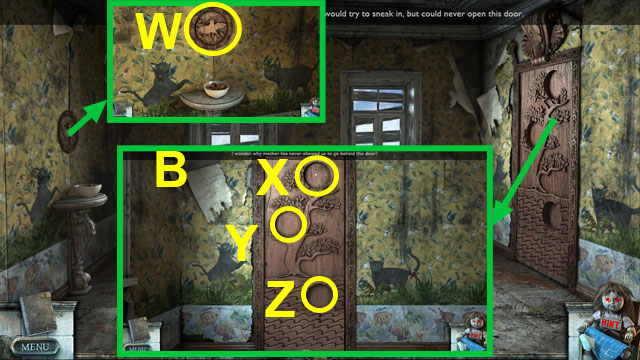
Chapter 5: Mother’s world
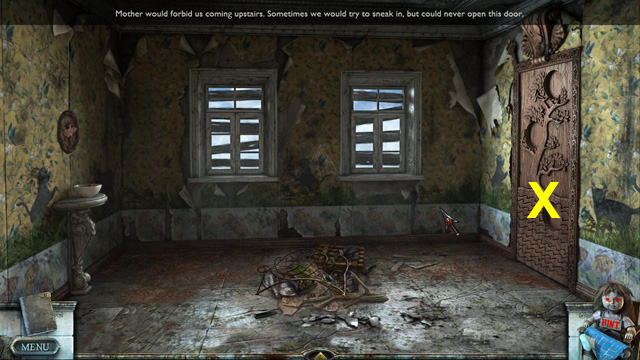
- Touch the carved door to open it (X).
- Move forward.
- Take the BISHOP PIECE (Y).
- Take the RAKE (Z).
- Move left.
- Take the BROKEN ELEPHANT (A).
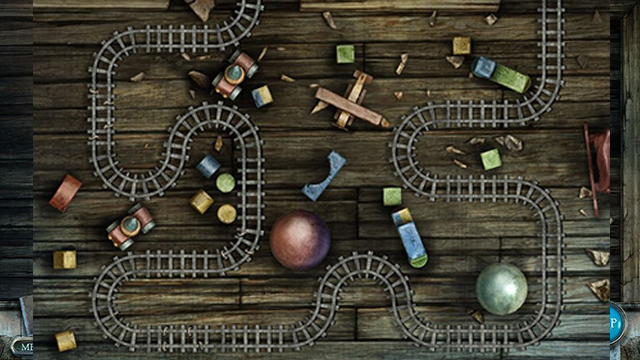
- Use the RAILROAD PIECE to activate the railroad puzzle (B).
- Place the railroad tracks to complete the track as shown.
- Touch the tape to tear it off (C).
- Touch the cover to take it off (C).
- Take the ADHESIVE TAPE (D).
- Take the BATTERY (C).
- Take the BOLT (E).
- Move back six times, forward twice, then right.

- Use the ADHESIVE TAPE to repair the wires (F).
- Touch the button to turn the machine on (B).
- Use the KNIFE to obtain the SHARPENED KNIFE (H).
- Move back four times.
- Look in the trunk to play the HOP (J).
- Play the HOP to obtain the WINCH.
- Use the scissors to cut the bell off (H1).
- Touch the handcuffs to unlock them (H2).
- Carve the pumpkin with the knife (H3).
- Put the candle inside the carved pumpkin (H3).
- Replace the tip on the trumpet (H4).
- Light the gas lamp with the matches (H5).
- Use the SHARPENED KNIFE to cut the seat open (K).
- Take the BATTERY (K).
- Move back twice.
- Use the RAKE to clear the leaves (L).
- Take the SKULL (M).
- Move forward, left, forward, right twice, left, then forward twice.
- Look in the closet to play the HOP (N).
- Play the HOP to obtain the FAUCET STEM.
- Put the flowers in the vase (H1).
- Use the lipstick to write the answer to the equation (H2).
- Use the xylophone to play the music note (H3).
- Insert the BATTERY (O).
- Insert the BATTERY (O).
- Take the TRAIN ENGINEER (P).
- Move back twice, up the stairs, right, then left.
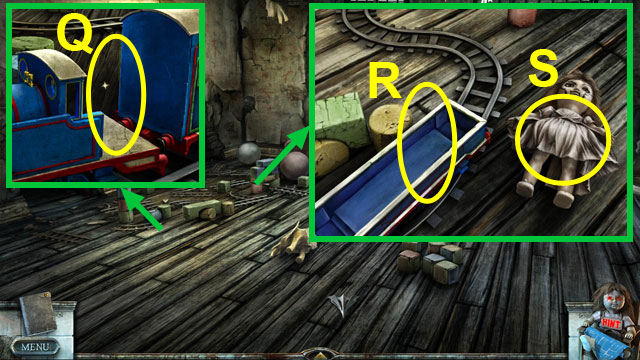
- Put the TRAIN ENGINEER in the locomotive (Q).
- Touch the doll to remove it from the train (R).
- Touch the doll to lift her dress (S).
- Use the SHARPENED KNIFE to open the doll (S).
- Touch the photo to see it (S).
- Move back; move forward.
- Take the DRIED MILK (T).
- Take the WEIGHT (U).
- Take the DAGGER (D).
- Touch the painting to reveal the safe (E).
- Move back five times.
- Use the DRIED MILK on the bowl with water (X).
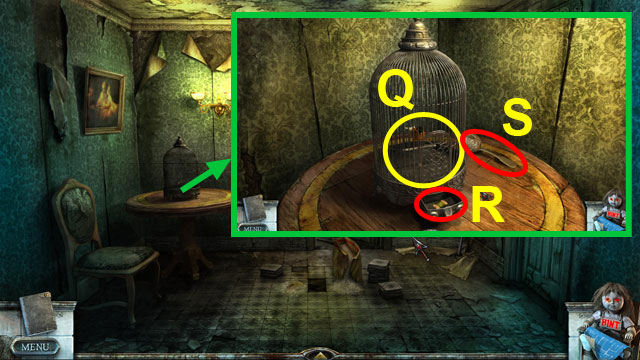
- Take the YELLOW BIRD (K).
- Move right, left, then forward.
- Set the YELLOW BIRD on the perch (Q).
- Touch the door to close it (Q).
- Take the GAME HANDLE (R).
- Move back, up the stairs, right then forward.
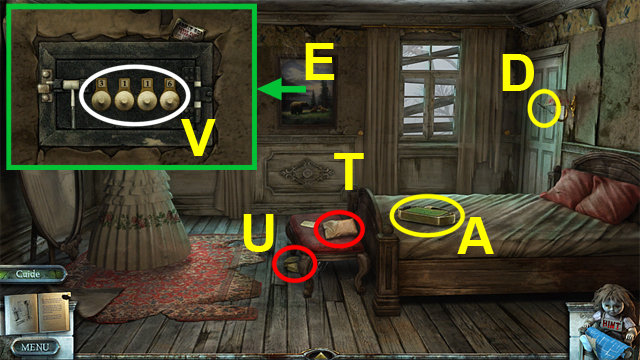
- Take a closer look at the object on the bed (A).
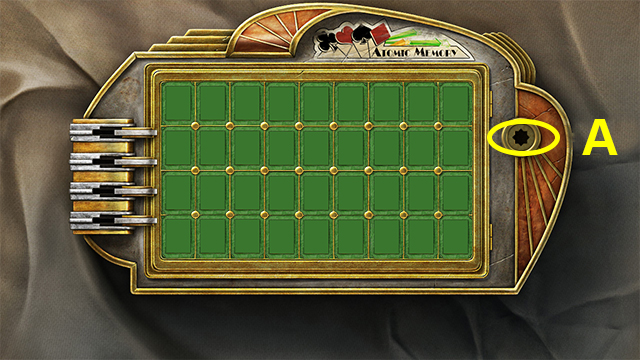
- Insert the GAME HANDLE (A).
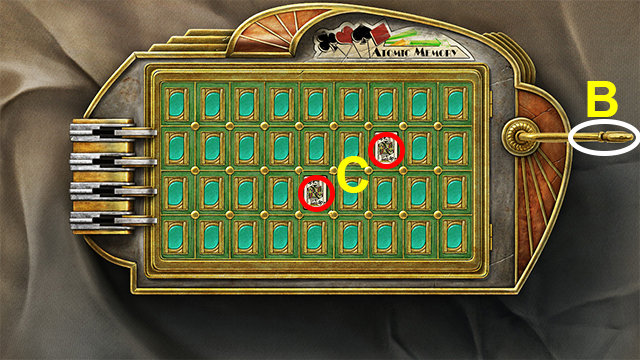
- Touch the GAME HANDLE to wind up the game (B).
- Eliminate pairs of cards by touching them (C).
- The solution is random.
- Touch the carnival ticket to add it to the journal.
- Unlock the safe by entering the code 1984 (V).
- Take the FIRST TAPES (V).
- Take the FISH HOOK (V).
- Move back six times, forward twice, then right.
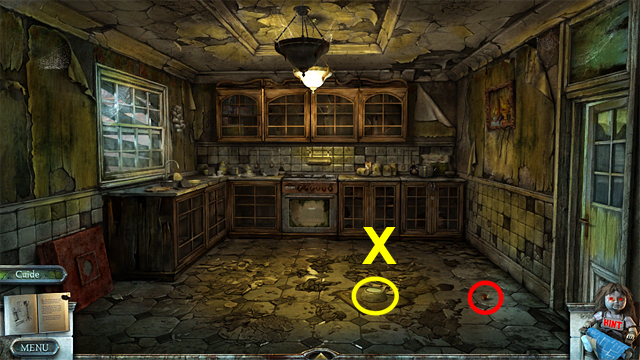
- Put the FIRST TAPES in the tape player (B).
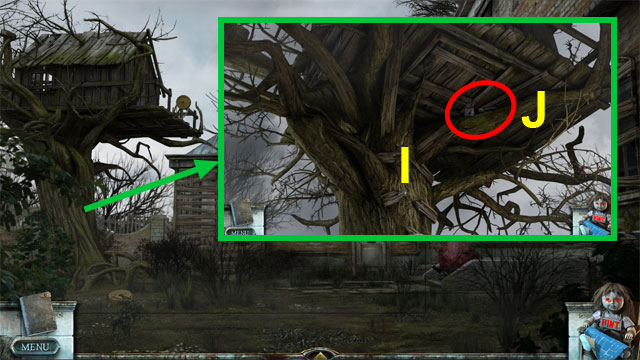
- Touch the tape case to open it; take the TREE HOUSE KEY (O).
- Move back twice.
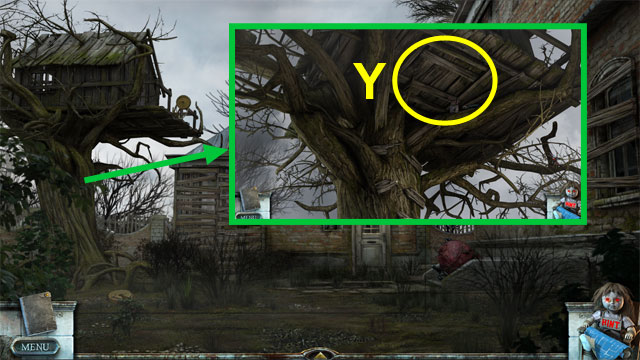
- Use the TREE HOUSE KEY to unlock the trapdoor (Y).
- Enter the tree house (Y).
- Push the rope to drop it to the ground (A).
- Enter the tree house to play the HOP (B).
- Play the HOP to obtain the SHELL EMBLEM.
- Throw the dart at the dart board (H1).
- Oil the knight armor (H2).
- Put the necklace on the doll (H3).
- Clean the shoe with the brush (H4).
- Close the chest to reveal more objects (H5).
- Use the WIRE CUTTERS on the nails to receive the FIRE EMBLEM (C).
- Insert the WEIGHT (D).
- Insert the WEIGHT (D).
- Take the MONKEY WRENCH (E).
- Touch the rope to attach it to the cistern (F).
- Move back twice.
- Use the MONKEY WRENCH on the pipe to turn it (G).
- Take the SKULL (G).
- Move forward; move right.
- Insert the FIRE EMBLEM to unlock the fire box (H).
- Touch the fire box to open it (H).
- Take the FIRE HOSE (I).
- Move right, left, forward twice, then right.
- Insert the SHELL EMBLEM to unlock the closet (J).
- Touch the doors to open them (J).
- Take the SOLVENT (J).
- Pick up the Collector Figurine (CF).
- Move back twice.
- Use the SOLVENT on the glued weight (K).
- Take the WEIGHT (K).
- Move back four times; move forward.
- Insert the WEIGHT (L).
- Push the weights off the edge (L).
- Enter the basement (B).
Chapter 6: Into another age
- Attach the FIRE HOSE (M).
- Place the FAUCET STEM (M).
- Touch the tap to fill the cistern with water (M).
- Set the BROKEN ELEPHANT on the table (N).
- Insert the GAS KNOB (O).
- Take the FISHING LINE (P).
- Take the HACKSAW (Q).
- Move back twice, right twice, left, then forward.
- Attach the FISHING LINE (R).
- Attach the FISH HOOK (R).
- Take the FISHING ROD (R).
- Move back four times; move forward twice.
- Use the FISHING ROD to obtain the CISTERN WHEEL (S).
- Move back; move right.
- Put the CISTERN WHEEL back on the cistern (T).
- Touch the block to let the cistern roll (U).
- Move forward.
- Insert the BOLT into the cracked statue’s head (V).
- Use the HAMMER on the bolt to crack the head (V).
- Take the SCOOP (W).
- Take the SKULL (V).
- Pick up the Collector Figurine (CF).
- Take the LIGHT BULB (X).
- Move forward.
- Use the WINCH to turn the stone around (Y).
- Take the CORK SCREW (Z).
- Move back; move left.
- Use the LIGHTER to light the candle (A).
- Insert the CERAMIC EYE to obtain the CHEST KEY (B).
- Move back three times.
- Use the CORK SCREW to obtain the CORK (C).
- Take the SKULL (C).
- Insert the LIGHT BULB (D).
- Pick up the Collector Figurine (CF).
- Move right.
- Place the CORK on the table (E).
- Move back twice, right twice, then left.
- Use the CHEST KEY to open the chest (F).
- Take the SIEVE (F).
- Move forward.
- Use the SCOOP to obtain the GLUE POWDER (G).
- Move back four times, forward, then right.
- Pour the GLUE POWDER into the bowl (H).
- Use the LIGHTER to light the burner (I).
- Take the LIQUID GLUE (H).
- Use the LIQUID GLUE to obtain the GLUED ELEPHANT (J).
- Insert the GLUED ELEPHANT into the vise (K).
- Touch the vise handle to obtain the REPAIRED ELEPHANT (L).
- Move forward.
- Use the SIEVE to obtain the SKULL (M).
- Move back three times; move right twice.
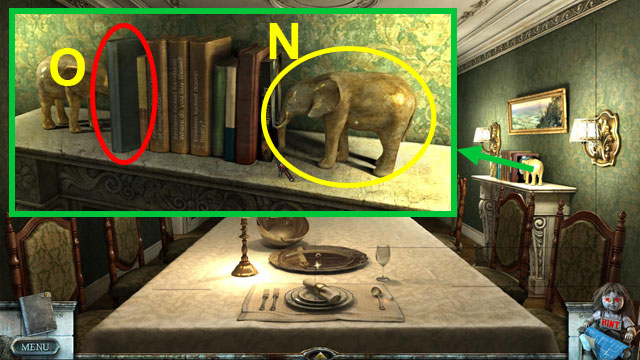
- Set the REPAIRED ELEPHANT on the shelf (N).
- Take the DICTIONARY (O).
- Move back twice, forward, right, then forward twice.
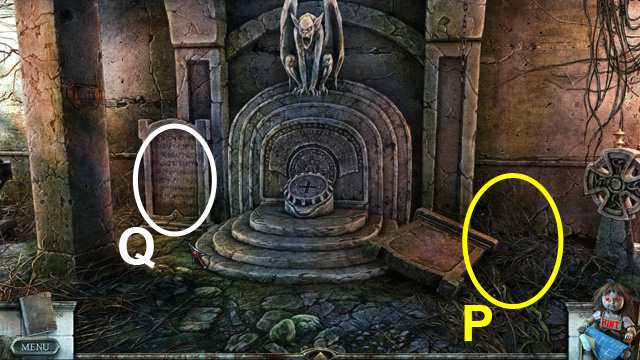
- Use the DICTIONARY on the stone (P).
- Use the DICTIONARY on the other stone (Q).
Chapter 7: Follow the breadcrumbs
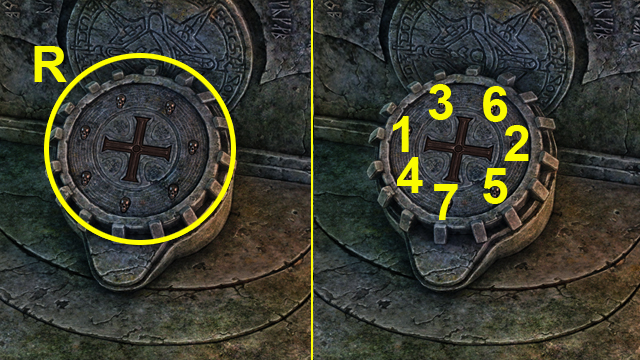
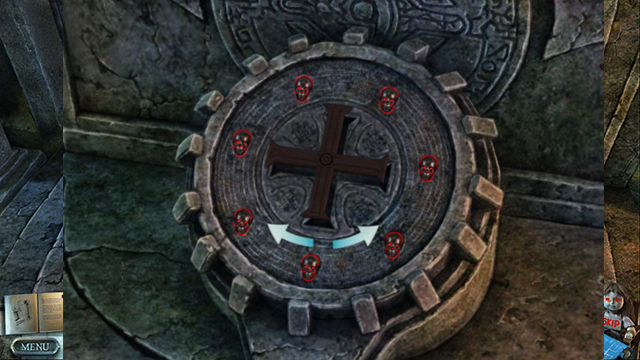
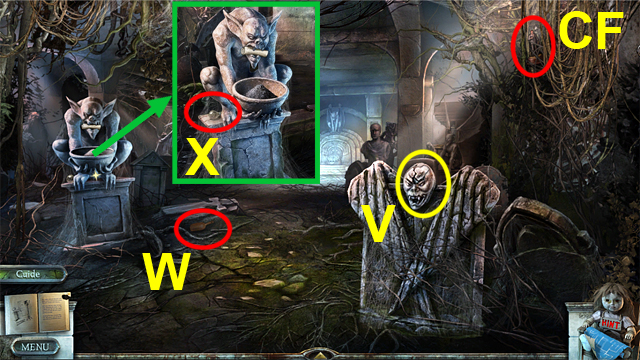
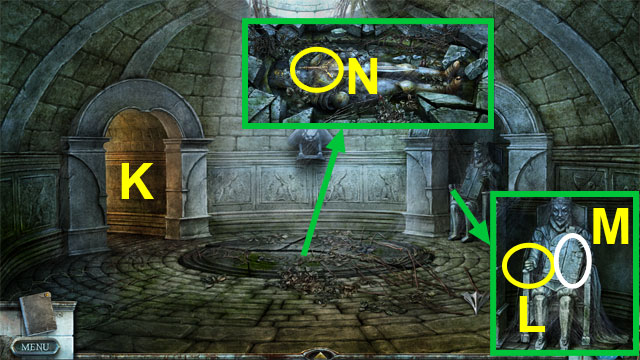
- Use the SKULLS on the stone.
- Touch the skulls in the order indicated on the image.
- Turn the cross following the indications you have found on the pillars.
- LEFT, LEFT.
- RIGHT, RIGHT.
- LEFT, LEFT.
- RIGHT.
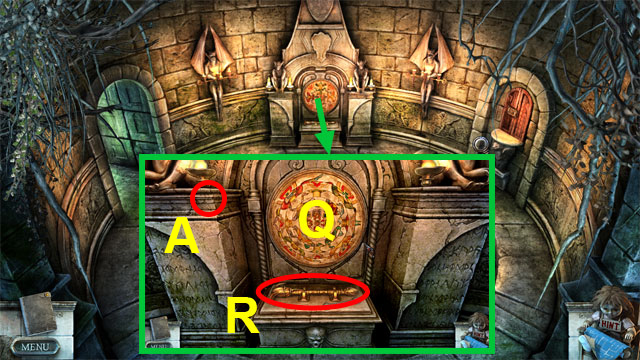
- Move forward.
- Take the GRANDFATHER’S KEY (A).
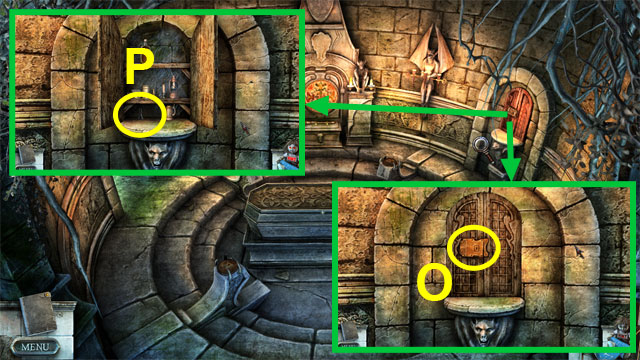
- Touch the lock cover three times to remove it (S).
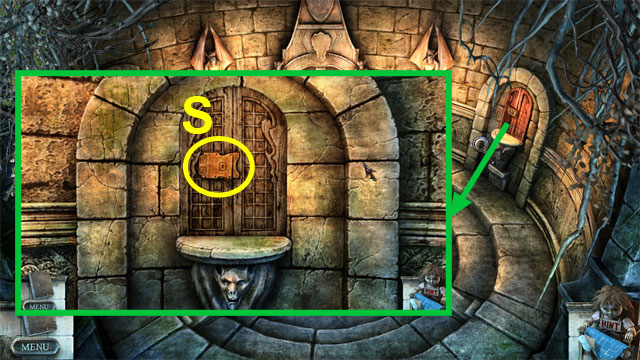
- Move left.
- Enter the passage to the left to play the HOP (T).
- Play the HOP to obtain the ARCHAEOLOGICAL BRUSH.
- Use the feather on the blank paper (H1).
- Move back.
- Take the WRENCH (U).
- Move back four times.
- Use the ARCHAEOLOGICAL BRUSH to unearth the CABINET KNOB (V).
- Take the CABINET KNOB (V).
- Move forward; move right.
- Open the door with the GRANDFATHER’S KEY (G).
- Take the GLASS (G).
- Pick up the Collector Figurine (CF).
- Move back three times; move right.
- Use the GLASS to obtain the GLASS OF WATER (W).
- Move right, left, forward, then right.
- Look under the bed to play the HOP (A).
- Play the HOP to obtain the DUMBBELL.
- Paint the airplane (H1).
- Use the knife to open the can (H2).
- Use the WRENCH to unscrew the CROSS (B).
- Take the CROSS (B).
- Insert the CABINET KNOB (C).
- Touch the drawer to open it (C).
- Take the FUSE (C).
- Move back five times; move forward.
- Look inside the tree house to play the HOP (D).
- Play the HOP to obtain the METALLIC ARROW.
- Throw the dart at the dart board (H1).
- Oil the knight armor (H2).
- Put the necklace on the doll (H3).
- Clean the show with the brush (H4).
- Close the chest to reveal more objects (H5).
- Move forward.
- Insert the FUSE (E).
- Touch the switch to turn the electricity on (F).
- Throw the DUMBBELL down the well (G).
- Move right.
- Use the METALLIC ARROW on the magnet to obtain the MAGNETIZED ARROW (H).
- Move back twice.
- Touch the shapes on the lamp to write down their order (I).
- Move right.
- Set the GLASS OF WATER on the workbench (J).
- Put the MAGNETIZED ARROW on the workbench (J).
- Touch the compass parts to assemble them and obtain the COMPASS (J).
- Move forward three times; move left.
- Enter the passage to the left to play the HOP (K).
- Play the HOP to obtain the LOCK BITS.
- Use the feather on the blank paper (H1).
- Put in the CROSS in the statue’s hand (L).
- Use the DICTIONARY on the runes (M).
- Use the HACKSAW on the sword handle to obtain the KING PIECE (N).
- Move back.
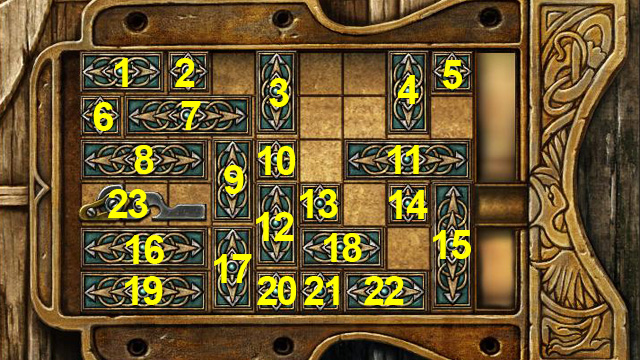
- Use the LOCK BITS to repair the lock (O).
- Move the parts around to move the latch (O).
- Slide each element in the indicated direction. Right(R), Left(L), Up(U), Down(D).
- 2(R), 1(R), 6(U), 7(L), 9(U), 10(R-U-R), 13(U-U-U-R), 18(R), 21(U-U-U-U-U), 20(R), 14(L-L-U-U), 12(D), 11(L-L), 5(D-D-L-D), 15(U-U-U), 5(R-D-D).
- Finally slide the element 23 all the way to the right.
- Take the QUEEN PIECE (P).
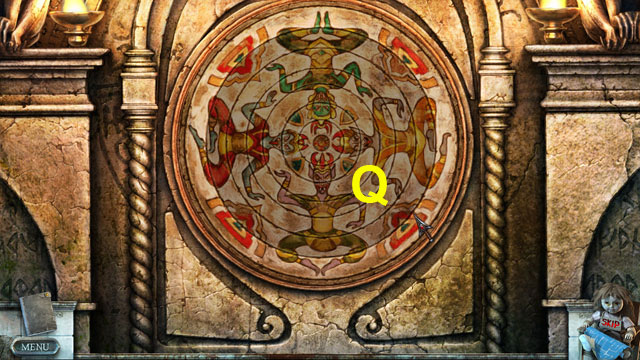
- Rotate the disks until the image matches the shapes in the Diary (Q).
- Take the MACE (R).
- Move back twice; move left.
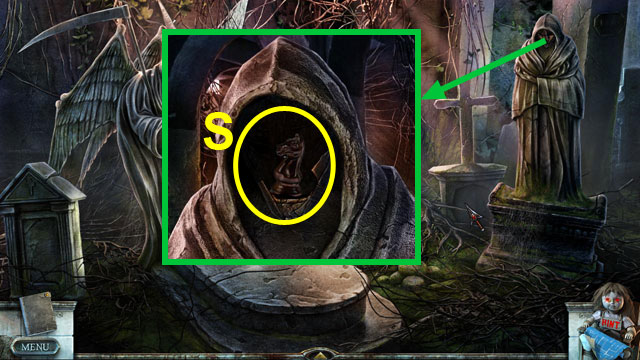
- Use the MACE on the iron mask to take it off (S).
- Take the KNIGHT PIECE (S).
- Move back; move forward twice.
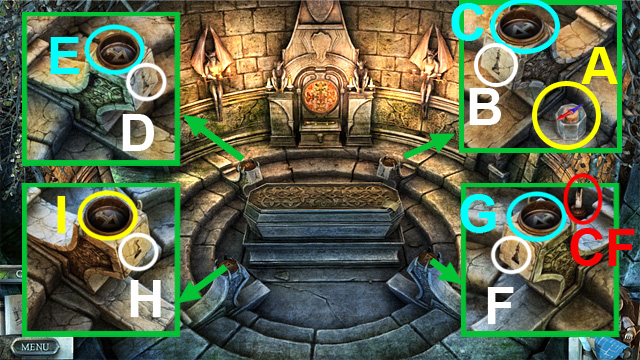
- Place the COMPASS next to the pillar (A).
- Insert the KING PIECE (B).
- Touch the arrow until it faces southeast in relation to the compass (C).
- Insert the QUEEN PIECE (D).
- Touch the arrow until it faces west (E).
- Insert the BISHOP PIECE (F).
- Touch the arrow until it faces east (G).
- Pick up the Collector Figurine (CF).
- Insert the KNIGHT PIECE (H).
- Touch the arrow until is faces north (I).
- Insert the KNIGHT PIECE (H).
- Touch the arrow until it faces NORTH (I).
- Collect the THIRD TAPE (A).
- Pick up the Collector Figurine (CF).
- Move back four times, forward, then right.
- Put the THIRD TAPE in the tape player (B).
- Congratulations, you have completed True Fear: Forsaken Souls!


 Murder, She Wrote Walkthrough, Guide, & Tips
 Nightmare Adventures: The Turning Thorn Walkthrough, Guide, & Tips
 Hidden Expedition: Smithsonian Castle Walkthrough, Guide, & Tips
 Penny Dreadfuls ™ Sweeney Todd Collector's Edition Walkthrough, Guide, & Tips
 Cursed Memories: The Secret of Agony Creek Walkthrough, Guide, & Tips