The Witcher 3 Guide: White Orchard Side Quest Guide, Hidden Treasures & Witcher Contracts
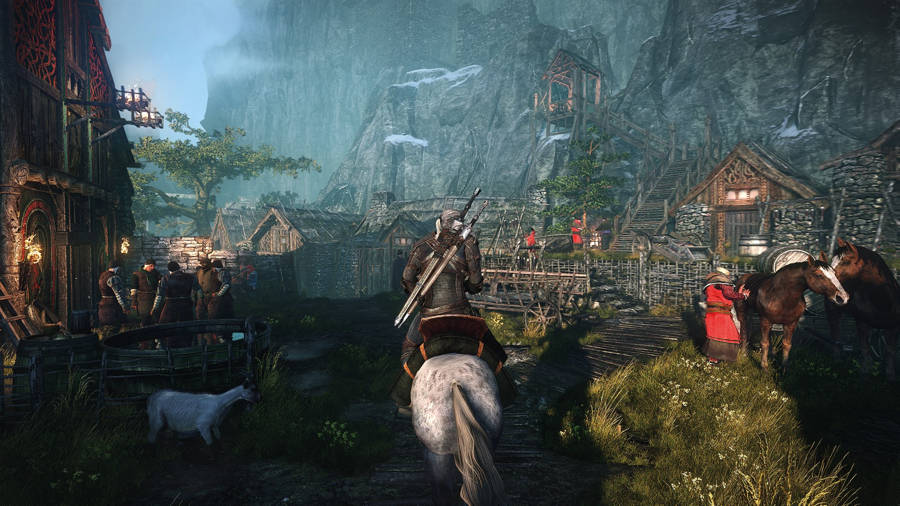
This The Witcher 3: Wild Hunt White Orchard side quest guide lists all quests located in the first area you can explore including Notice Board quests, Hidden Treasures with valuable items, Witcher Contracts and just about everything else you need to find. Below you will find a list of all the quests in the White Orchard area, the different outcomes for those that feature a choice, and any useful tips & tricks that may prove beneficial.
The Witcher 3: Wild Hunt Guide: Notice Board Quests
Missing In Action
You can get this from the Notice Board in the town. One of the guys in the area is looking for his brother who fought in a battle near here. Head back to the Ransacked Village and talk to the guy talking to his dog. Tell him you will help him out and follow him to the top of the hill. There is a lot to loot around the battle area if you are interested in making a bit of extra cash. Once you start go into the circle on the mini map and clear out any Ghouls near there.
There are three shields you need to check out before you can progress. Use your Witcher Sense and you can see them glow Red instead of yellow. I found two need dead soldiers and the third near a burnt corpse by the woods. After you check the third the Dog will run into the woods, follow him. Once you make it to the cabin you need to make a choice of helping the second guy or not. I told the quest giver his brother wouldn’t be alive if it wasn’t for the second guy. I don’t know if this messes something up later or not, I’ll check again later.
Contract: Devil By The Well
You get this form the Contract board in White Orchard. You will need to go to the Abandoned Village, south of White Orchard. Once you get there check the big house for a quest Journal, use your Witcher sense to help you find it. Once you have it read and use the sign post to warp back to White Orchard. I’m not 100% sure warping is needed but when I came back the ghost spawned.
Warp back after you have read the journal and a Noonwraith will have spawned and you need to push it back. Read you Bestiary on it and you will figure out to use you Yrden trap spell on it. Once you put down Yrden use your Silver sword to damage the ghost until it retreats. Once it is gone you can jump into the well. Once in the well use your Witcher sense to locate an item at the bottom of the pool. Once you grab that and resurface you will get a small cut scene about it. Use the under water cave on the other side of the pool to escape the area. After you escape check the Bestiary again and then return to the village.
Once you return to the Abandoned Village check the big house again with your Witcher Sense. Check the body in there and then follow the prints out to the well. Check the rope and you will get the next part of the quest. After that you will need to burn the body and kill the ghost to beat the quest. Make sure you use Yrden to trap her and then fight her. She will disappear at least twice and summon little ghosts to heal her back up. I just attacked the other ghosts to kill them and prevented her from healing. Once you bring her down to 0 HP, loot her and return to White Orchard.
The Witcher 3: Wild Hunt Guide: White Orchard Side Quests
Twisted Firestarter
The Blacksmith in White Orchard will give you this quest. He needs you to help him find the arsonist in town. Go behind the building and near the edge of the circle you can find some footprints with your Witcher Sense. Follow the foot prints down to the river and then go under the bridge to the other side. Here you will find more footprints and signs of Drowners. Follow the next set of foot prints to a house and go inside. Talk to the guy in the back of the house and you will have to make a choice. If you take the coin from him you will get 20 gold and you will lie to the Dwarf.
If you choose to bring him to the dwarf you can either beat him down or use the mind trick on him. I used the mind trick for a bonus 25 EXP. You also get 20 Gold for this, and the arsonist is killed. If you choose to just beat him down the end result is the same here.
Dirty Funds
To start the Dirty Funds Treasure Hunt quest you must first discover a document, Scrawled Notes, at a Bandit Camp. I found it at the point of interest marker (?) North East of the Mill in the middle of the woods. There are several Wolves at the location. Once you’ve discovered the Scrawled Notes, read them. You will then be given an objective marker to the East, directly North of Crackler Bridge. Several bandits in the area, treasure is in a small chest inside the main tent.
Deserter Gold
You begin this quest after finding the Spy’s Notes at a point of interest (?) to the North East of the Mill. It is the furthest North of the three ?’s in that area. Once you discover the Spy’s Notes read them and then head South West back towards the Mill. Once you reach the area head into the abandoned house and fall down between the planks. Open the door using a Sign or your sword and loot the chests.
A Frying Pan, Spick and Span
You can get this quest at a fishing hut north west of the village. There is an old lady there and once you talk to her the quest will start. Break the door down with Aard and use you Witcher Sense to find a body and some burned papers. After you find them grab the frying pan and return it to the old woman to complete the quest.
Precious Cargo
If you take the road South West road from the Nilfgaardian Garrison, North from the Sawmill, you will find a Merchant sitting near a fire near the marshes. If you talk to him you can get this quest. go to the marker and use your Witcher Sense to find the tracks leading into the swamp. Once you get to the cart check out the arrows in it and then the body near it. After that loot the box a little ways North West from the cart to get the lock box for the quest.
If you call him out on his lie you will have to chase him down and attack him from horseback. If you let him go with the medicine you will get 30 gold and he will be gone. My guess is this will change something later.
If you give him to the Nilfgaardians you will get 30 crowns.
If you let him go back keep the medicine you will get 50 Gold and some Alchemy plants and he will be free. My guess is all of these will have some of effect later in the game.
If you just give him the box you get 20 crowns and don’t have to chase him down.
On Deaths Bed
For this quest head to the Sawmill and investigate the small house to the East, the Herbalists house. You’re asked to provide a potion for a dying child. Simply make a Swallow potion if you haven’t already and deliver it to the Herbalist.
The Witcher 3: Wild Hunt Guide: White Orchard Witcher Contracts
Contract: Devil By The Well
You get this form the Contract board in White Orchard. You will need to go to the Abandoned Village, south of White Orchard. Once you get there check the big house for a quest Journal, use your Witcher sense to help you find it. Once you have it read and use the sign post to warp back to White Orchard. I’m not 100% sure warping is needed but when I came back the ghost spawned.
Warp back after you have read the journal and a Noonwraith will have spawned and you need to push it back. Read you Bestiary on it and you will figure out to use you Yrden trap spell on it. Once you put down Yrden use your Silver sword to damage the ghost until it retreats. Once it is gone you can jump into the well. Once in the well use your Witcher sense to locate an item at the bottom of the pool. Once you grab that and resurface you will get a small cut scene about it. Use the under water cave on the other side of the pool to escape the area. After you escape check the Bestiary again and then return to the village.
Once you return to the Abandoned Village check the big house again with your Witcher Sense. Check the body in there and then follow the prints out to the well. Check the rope and you will get the next part of the quest. After that you will need to burn the body and kill the ghost to beat the quest. Make sure you use Yrden to trap her and then fight her. She will disappear at least twice and summon little ghosts to heal her back up. I just attacked the other ghosts to kill them and prevented her from healing. Once you bring her down to 0 HP, loot her and return to White Orchard.
The Witcher 3: Wild Hunt Guide: White Orchard Treasure Hunts
Viper School Gear
This is a two part treasure quest that you can do. I got the first part in a chest at a bandit camp, West of the Ransacked Village. You will have to fight about 5 bandits up there to gain access to the chest. Loot the chest and find the Interrogation Report. Once you get the item be sure to read it to start the quest! After you read it then you will need to go to the White Orchard cemetery, north of the Mill. There, in a tomb, you can find the second part for this quest. You will need to fight a wraith for it so be ready!
Temerian Valuables
To begin the Temerian Valuables quest you need to discover one of the hidden treasures in the quest line. I found it via an underwater chest. Look to the Mill and you’ll see a small bridge to the West. On the far side of the bridge you will see an icon representing hidden treasure. Dive down below and open the chest to begin the quest. I must have completed this through exploring for other quests as it ended when I located a chest for Viper School Gear. If you complete all of the treasure quests in White Orchard, you will complete this one. You can grab the quest after doing specific objectives, they will still apply. South East of Nilfgaardian Garrison in an area protected by Wolves there is one piece of the quest. Another can be found under in a basement of a house near the Mill.

The Witcher 3 Wild Hunt Game Guides Collection
Posted May 19, 2015 by Captain Camper
in Game Guides, The Witcher 3: Wild Hunt Guides
The Witcher 3 Wild Hunt Guide: How To Re-Spec Your Character & Return All Ability Points
This The Witcher 3 Wild Hunt Guide: How To Re-Spec Your Character is the answer as you can pay to refund all of your Ability Points and choose to spend them in other skills entirely
Posted October 13, 2015 by Captain Camper
in Game Guides, The Witcher 3: Wild Hunt Guides
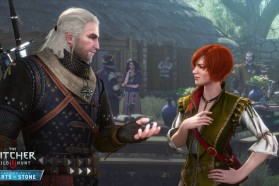
Witcher 3 Hearts of Stone – How To Romance With Shani
In the Hearts of Stone DLC for The Witcher 3 Geralt continues his devilish ways, this time having an opportunity to romance with the fiery red head, Shani. This Witcher 3 Hearts of Stone – How To
Posted May 18, 2015 by Johnny Hurricane
in Game Guides, The Witcher 3: Wild Hunt Guides
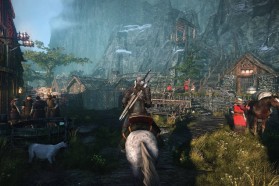
The Witcher 3 Guide: White Orchard Side Quest Guide, Hidden Treasures & Witcher Contracts
This The Witcher 3: Wild Hunt White Orchard side quest guide lists all quests located in the first area you can explore including Notice Board quests, Hidden Treasures with valuable items
Posted October 13, 2015 by Captain Camper
in Game Guides, The Witcher 3: Wild Hunt Guides
Witcher 3 Hearts Of Stone – Runewright Guide – Enchanting: Quality Has Its Price
The Runewright is one of the more exciting additions with the Hearts of Stone DLC for The Witcher 3: Wild Hunt. Check out our Witcher 3 Hearts Of Stone – Runewright Guide for all the information you
Posted May 22, 2015 by Johnny Hurricane
in Game Guides, The Witcher 3: Wild Hunt Guides
Where To Turn In Monster Trophies In The Witcher 3
Monster Trophies are items you get for doing Monster Contracts in the Witcher 3. All of them give you a minor buff but they are also worth alot of money to the right person. This guide will tell you

 Thief Walkthrough Chapter 2: Dust to Dust – How to Open the General’s Strongbox
 Eric Johnson: Being Sam Fisher
 The Evil Within guide: Chapter 10 – The Craftsman’s Tools
 Why Star Wars is dead to me
 The Evil Within guide: Chapter 8 – A Planted Seed Will Grow