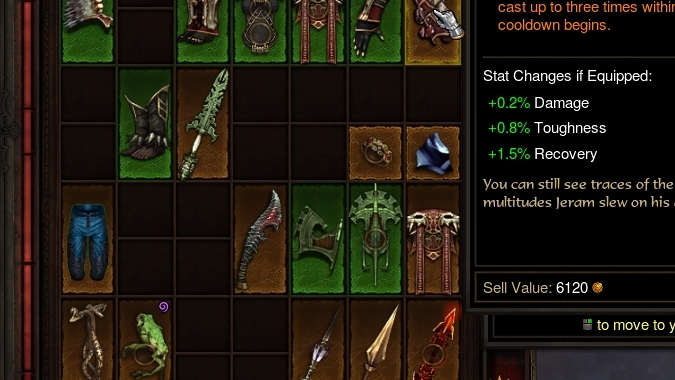
Bounties are one of the two gameplay features found in Adventure Mode. There are five random bounties available per act, and after completing all five for the same act you’ll receive a Horadric Cache along with gold and experience. Horadric Caches used to be important primarily to get a Rift Key Fragment for Nephalem Rifts, but with the rift system revamp in patch 2.3.0, Horadric Caches are a fantastic source of crafting plans, materials, and Blood Shards.
If you run a lot of bounties, you’ll start to recognize patterns. Many bounty objectives are phrased similarly, and even the bounties of a certain type share similar rewards and environments across their respective Acts. I could fill pages by detailing each bounty in every Act, but I can save time by talking about the six general types of bounties.
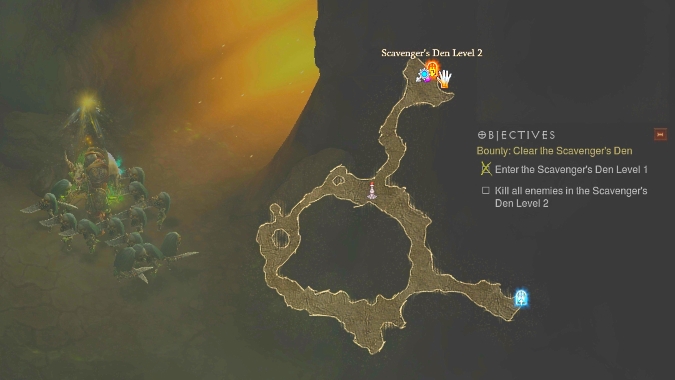
Since there isn’t a guaranteed boss to drop guaranteed awesome loot, there are similar rewards for this type of bounty that you have to find. To reward you properly with random chance chests and monsters, on the second level you’ll usually find:
Sometimes, if I explore the entire second level after killing everything and I can’t find a Resplendent chest, I can find it back on the first floor. This particularly tends to happen if the first floor is shorter and more straightforward than the typical twisting loop with more monsters. Finally, this bounty is most often done with caves. First floors of caves tend to consist of one loop with a single passage that splits off (other than the entrance). Find the split and you find the second floor.
You’ll have to fight your way through one floor before finding the boss room or its anteroom, depending on how the Act is structured — for example, the Butcher is available right off the end of Halls of Agony Level 3, but you have to find the super-short and monster-less Pandemonium Fortress Level 3 before you get to Malthael’s room.
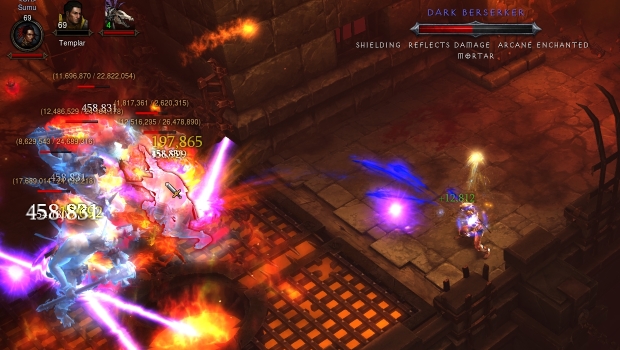
The boss rooms are where they normally are, so you can use your knowledge about map and floor tiles in Diablo 3 to quickly locate the correct path. The Skeleton King’s room is literally straight forward from the waypoint, and then hang a left at the end. Some bosses have events or special objects before the boss room entrance, like the Death Gates in Pandemonium Fortress Level 2. Sometimes, you just go by what the floor looks like or what direction you’re going — the dirt-and-brick turns and walkways in Caverns of Araneae before Queen Araneae’s room, or how the Butcher’s room is always off a northeastern-leading passage with stairs at the end in Halls of Agony Level 3. A checkpoint will trigger right outside the boss room so that if you wipe, you can try again without having to run the whole way.
Once you kill the boss, you get a Diabolic Hoard chest, which looks exactly like a Radiant or cleansed Cursed chest, and contains more chest-like loot. The Diabolic Hoard is somewhere in the boss room, but usually near where the boss starts the encounter. For example, you might kill Zoltun Kulle in the bottom of the ring or closer to the waypoint, but his Diabolic Hoard will spawn up top on the left side of where his left/northern golem stands at the beginning.
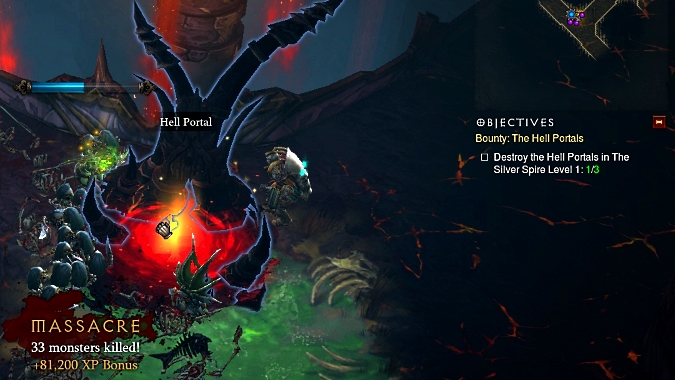
It’s not always portals; sometimes it’s about freeing prisoners, but there’s always an object that you have to open or interact with and you have that teleport or open object cast bar that happens. You’ll be asked to destroy or free 3 to 5 things spread throughout the zone.
Sometimes the guardians are standing around, and sometimes the guardians spawn from the object when you get near the objective. Either way, once you get close, the guardians will all have yellow highlights on their hitboxes and be marked on your minimap with skulls, so you can pick out targets if you’re also killing regular non-objective monsters.
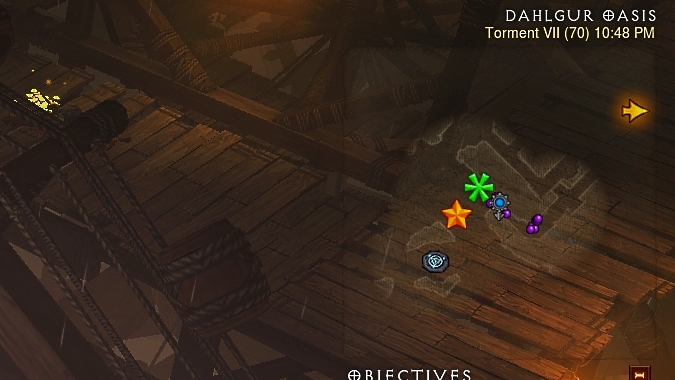
Fortunately, some zones are quite linear, which means this bounty is fairly mindless. For example, finding 5 catapults in the one-way rooftop street that is Stonefort is not hard at all. Unfortunately, sometimes this bounty occurs on massively sprawling maps, such that you want to stab your eyes out any time you have to find 5 guys in the whole of Dahlgur Oasis.
Sometimes you will find a second cursed chest or shrine in the zone, so there’s a trick to this bounty. To trigger bounty completion, the cursed shrine or chest will always be a fail-safe curse. That is, the shrine will always ask you to kill 5 waves for a chest in addition to the shrine’s effects, and the cursed chest will always ask you to kill 100 or more monsters for a second chest. While you can resurrect at checkpoints to try again for bosses, you can only try to cleanse a shrine or chest once, so the game gives you one that you can strive for a second reward, but that you can’t outright fail.
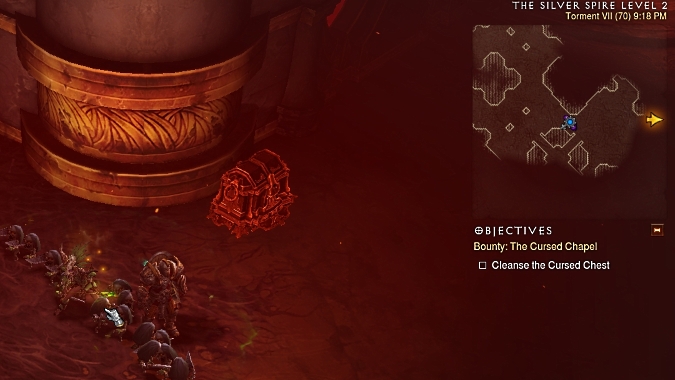
Check out the minimap! This is not the chest I am looking for.
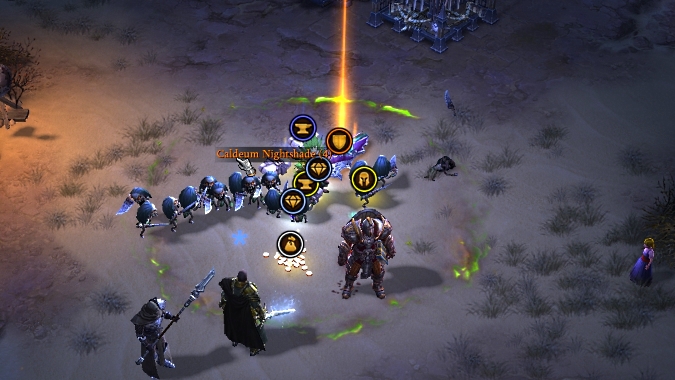
This is as daily quest as you can get in bounties. I like to go after the named elite first, then clean up whatever number of monsters I have left. This way, I can leave for the next bounty because I can kill a majority if not all of the enemy threshold while I look for the named guy.
Beware: this is incredibly sub-zone specific, which can lead to problems when the bounty occurs in two or more zones that share a waypoint. For example, in Act 5, you can waypoint to Paths of the Drowned, but you need to go kill monsters in the Blood Marsh for any of them to count. This gets particularly annoying when the elite guy shows up in the non-counting zone, so none of the mobs that come with him count! The number also doesn’t always match the zone as well as you might like. Killing 100 things in Northern Highlands is a casual romp through maybe half the zone, but I swear there’s only 160 mobs total in the Blood Marsh, so you have to explore every inch to get your 150.
This is the widest variety of bounties, but if you’re a veteran player or achievement hunter, you’ll know a zone event bounty when you see it. If you haven’t completed the event before, you’ll get the event achievement, so this can be a way to finish out random events that just won’t spawn for you in campaign/quest mode. Sometimes it’s a simple event like Rescue Merhan from the iron maiden in the Halls of Agony, and sometimes it’s more lucrative for you, like pulling the lever to get into Sardar’s Treasure room. If you know what the event does, you’ll likely complete it quickly as you know what you’re looking for; events that you’ve never done before might take longer as you figure them out.
A bonus bounty rewards an extra Horadric Cache, which is filled with more crafting plans, materials, and other rewards. In patch 2.3.0, there’s only one bonus bounty available, but the bonus bounty jumps to another available Act when you complete it. This means if you only complete bonus bounties, you will complete all five Acts with bonus bounties instead of just two. The starting bonus bounty and the order of Acts in the bonus bounty jumps are both random, so while you can leave and restart games to spawn a favored Act first, it’s probably more efficient to just do the five Acts in whatever order you are given.
An Act-specific legendary crafting material will be included in the Horadric and bonus caches. On Torment 6, the each cache was rewarding three of each Act’s legendary material; on Torment 7, each cache rewarded four. So a full five-Act bounty completion done on middling Torments will reward you with enough Kanai’s Cube legendary materials to either re-roll one legendary, or extract a handful of powers.
Blizzard might change up the types of bounties or even how bounties work, but one thing remains universal: your minimap will always help you out. You might use it for tracking important mobs or dropped legendaries, but the minimap helps out the most by displaying the affectionately-called “This way, stupid” arrow for your objective if you wander around in the wrong direction for too long.
 Know Your Lore, Tinfoil Hat Edition: The Nephalem rises
 Finishing the seasonal journey in Diablo 3
 Introduction to artisans in Diablo 3Know Your Lore: The Burning Hells
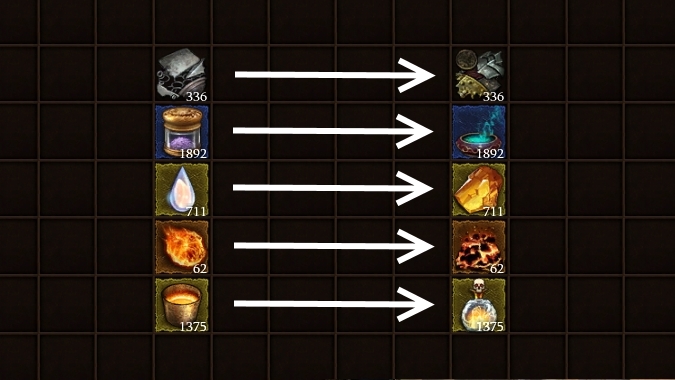 Crafting materials for Diablo 3's patch 2.3.0