The tier 3 rare premium Russian light tank BT-SV is a funny looking tank that combines blazing fast speed with a surprising amount of armor for a tier 3 light tank. The BT-SV has a lot of sloped armor that gives it very good effective armor and can be difficult to damage for non-tank destroyers at tier 3 since it is very fast and some might not know where its weak spots are. This World of Tanks BT-SV weak spots guide will break down the BT-SV’s armor into specific groups and show you where its strong and weak armor is. Green areas are the easiest to penetrate followed by yellow areas, red areas are the strongest sections of armor, and purple sections are either track armor or have no hull armor behind it.
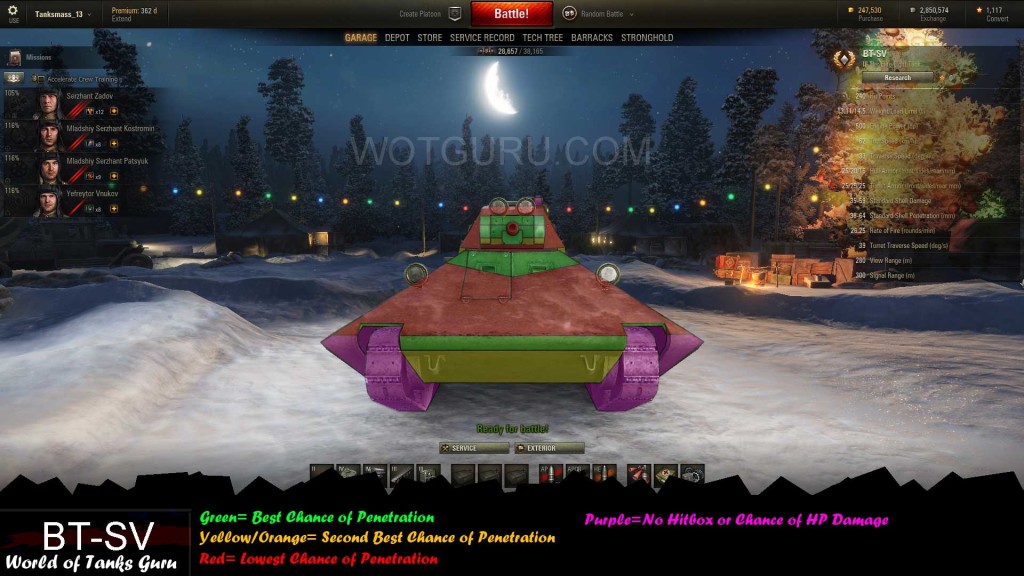
Green Sections = 0mm=29mm Effective Armor
Yellow Sections = 30mm-40mm Effective Armor
Red Sections = 49mm-67mm+ Effective Armor
Frontally the BT-SV is a large target considering it is a light tank since its hull is an odd trapezoid shape. This odd shape can be confusing for players facing a BT-SV since the lower section of the hull is spaced armor around the outside next to the tracks which will cause no HP damage from the front. Your best bet to damage the BT-SV if you do not have a ton of penetration is to stick to the upper hull below the turret and also the green sections around the gun. The gun mantlet is only 25mm thick and is poorly angled making it very weak since it has zero armor behind it. The upper section of the hull is angled less than the rest of the frontal hull armor which also makes it very easy to damage. There are also two zero armor view ports on the upper hull which are easy to get through.
The lower glacis is a weak spot to many tanks the BT-SV faces if you are not close to the BT-SV, in that case you will be firing “down” at it and thus making it difficult to penetrate. Otherwise the lower glacis has 40mm of effective armor in the yellow section and a mere 25mm on the green strip above it.
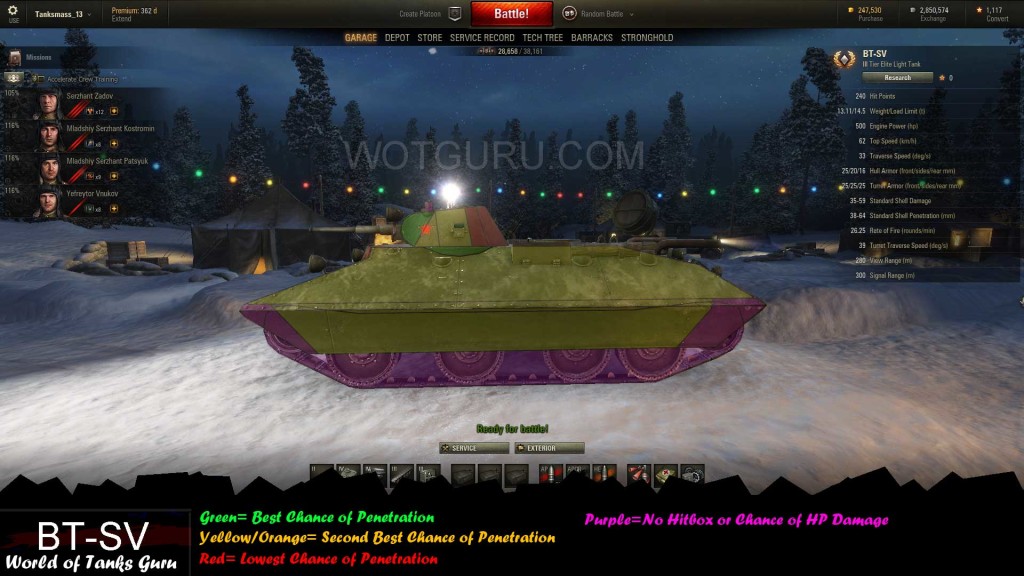
Green Sections = 0mm-25mm Effective Armor
Yellow Sections = 29mm-37mm Effective Armor
Red Sections = 38mm+ Effective Armor
The side armor of the BT-SV is much easier to deal with than the frontal armor but it can still pose a challenge to tier 2 tanks with low penetration. This is because the side hull is slight angled on the upper section and the lower hull is covered by spaced armor and tracks over the vast majority of it. This brings the side hull armor to 37mm across the top section and the section of the hull lower that is covered by spaced armor(20mm) and tracks(10mm) that sit over the 6mm armor on the lower hull. The backside of the turret should be avoided since it can be difficult to penetrate due to its angle. The weakest areas are the zero armor view port on the side turret, the 20mm strip of armor below the turret, and the 25mm flat piece of armor behind the gun.
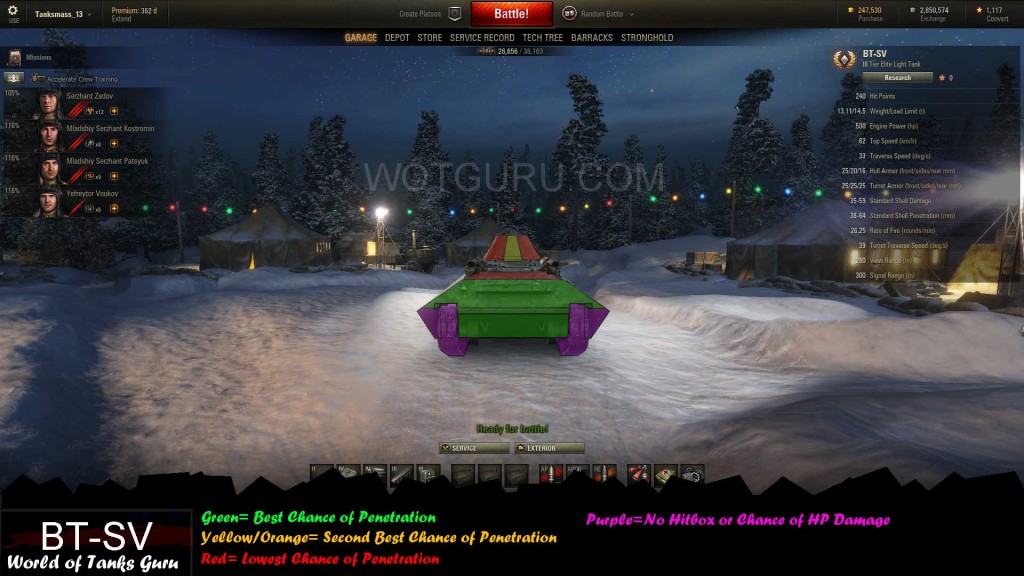
Green Sections = 16mm-27mm Effective Armor
Yellow Sections = 29mm Effective Armor
Red Sections = 49mm-84mm Effective Armor
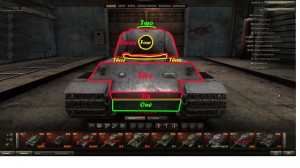
The rear of the BT-SV is the easiest part of the tank to damage since the armor is very thin and although it is still angled well it isn’t enough to make up for the armor thickness. The entire rear hull is weak except for the heavily angled section on the engine deck that becomes very strong with 84mm effective armor. Otherwise there is a 29mm effective armor portion on the rear turret if you cannot hit the rear hull for whatever reason.
 Weak Spot Guide: Lowe - World of Tanks Guru
 World of Tanks Guide - T1 Cunningham
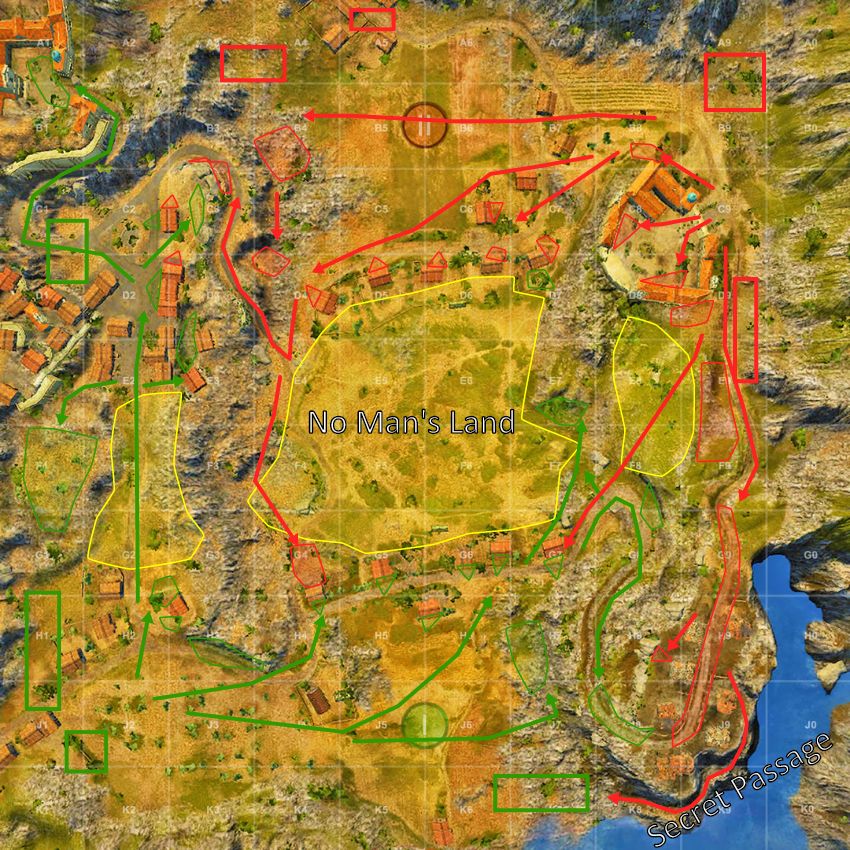 Map Strategy: Province - World of Tanks Guru
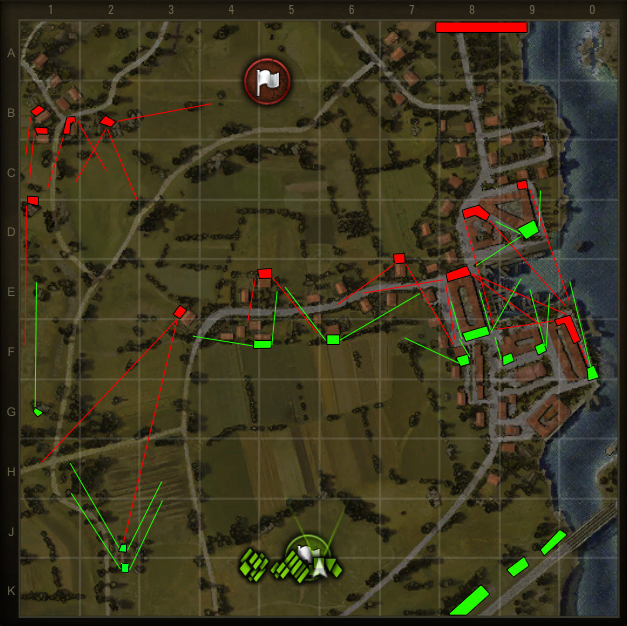 Map Strategy: Fisherman's Bay - World of Tanks Guru
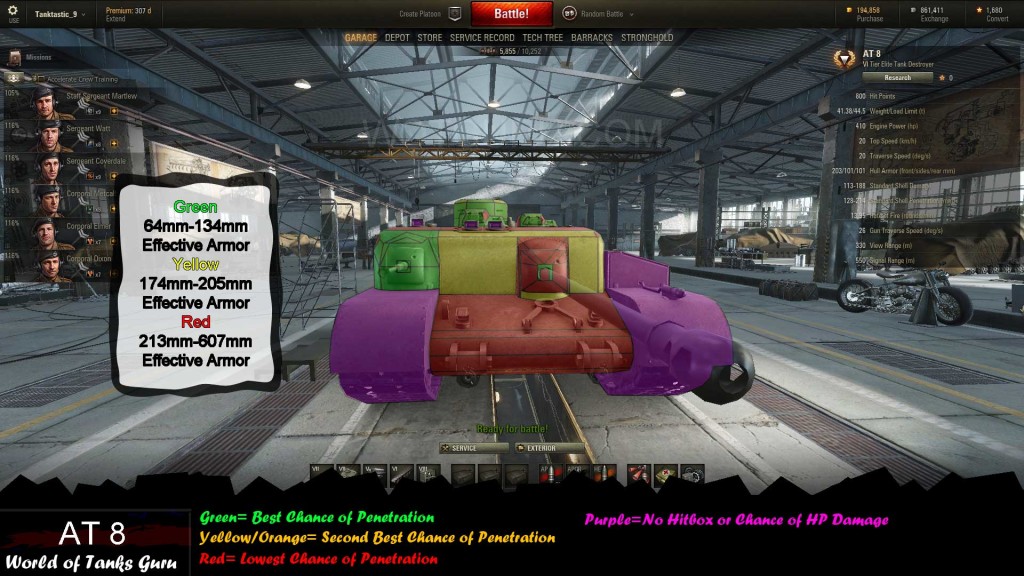 Weak Spot Guide: AT 8 - World of Tanks Guru