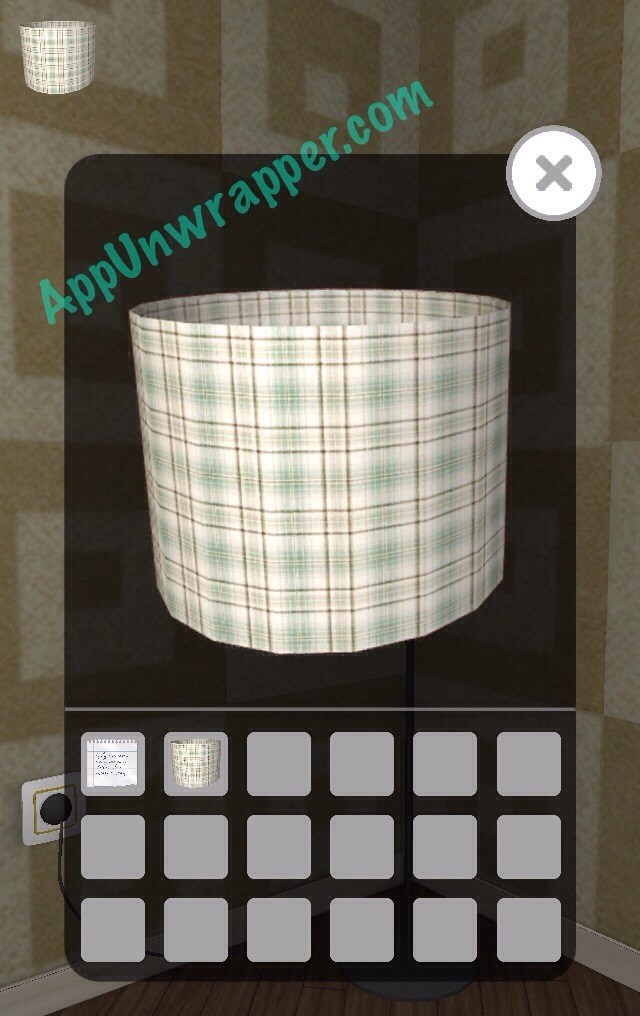
1. Get the lampshade from the lamp in the corner.
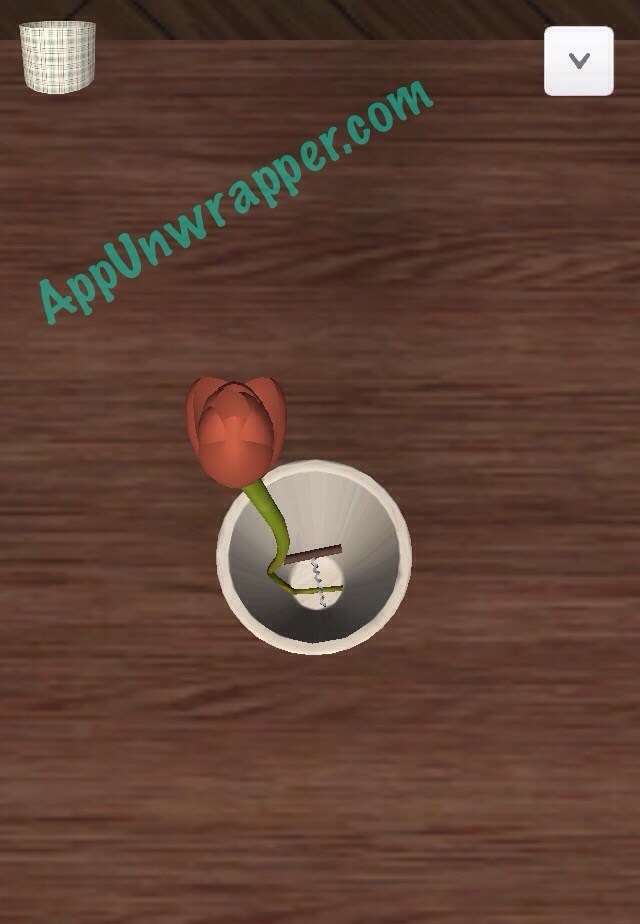
2. There’s a corkscrew in this vase, but not sure how to get it.
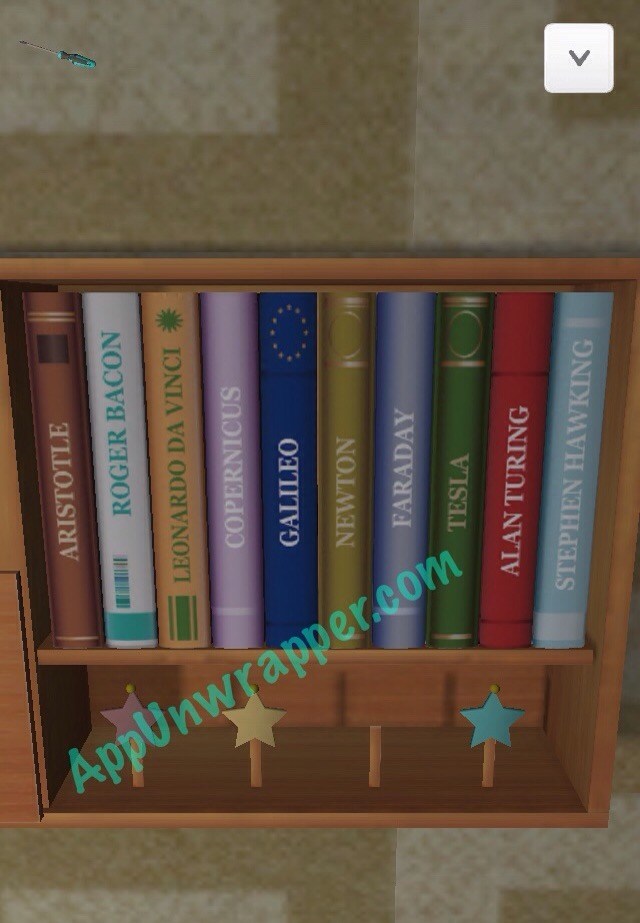
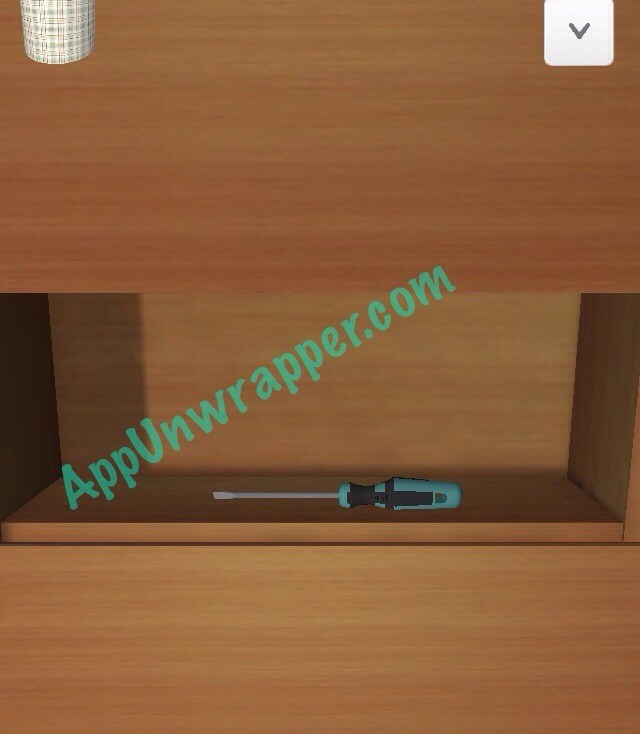
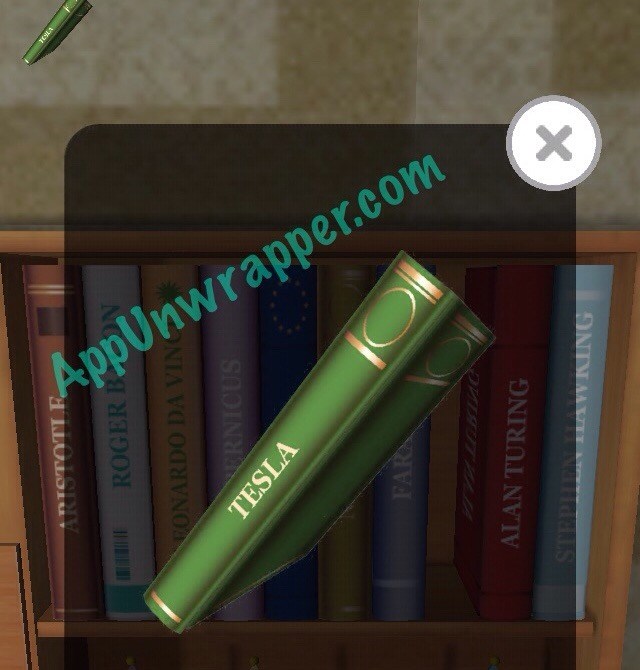
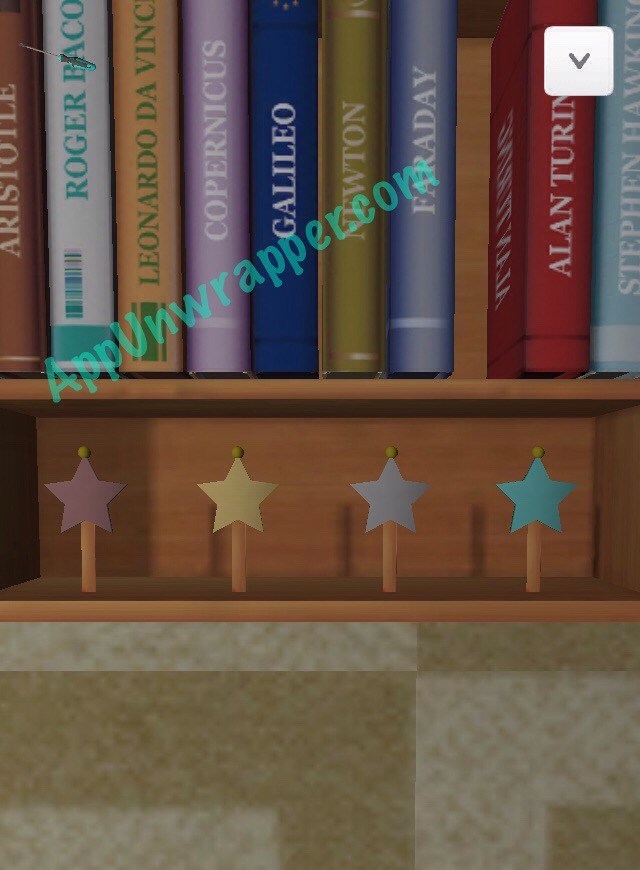
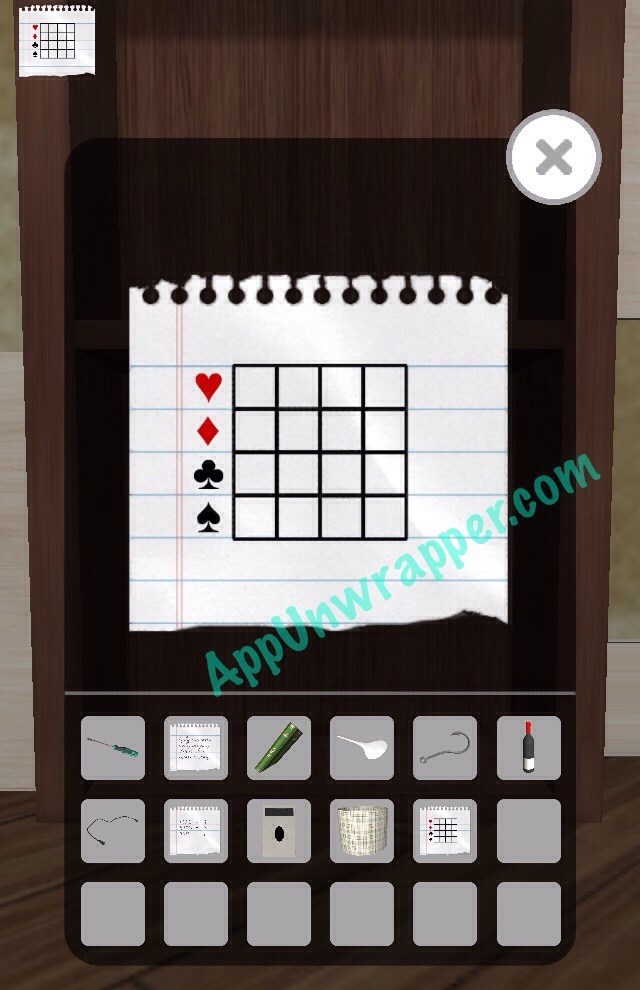
3. Go to the bookshelf and organize the books based on the years they were all born, from earliest to latest. Then get the screwdriver. Also, pick up the Tesla book. Then look behind the open door for a clue.
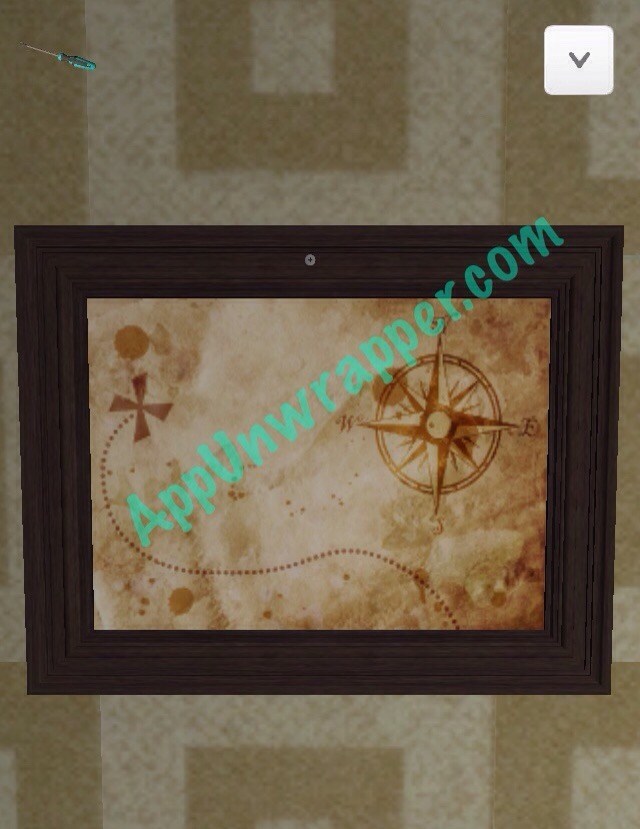
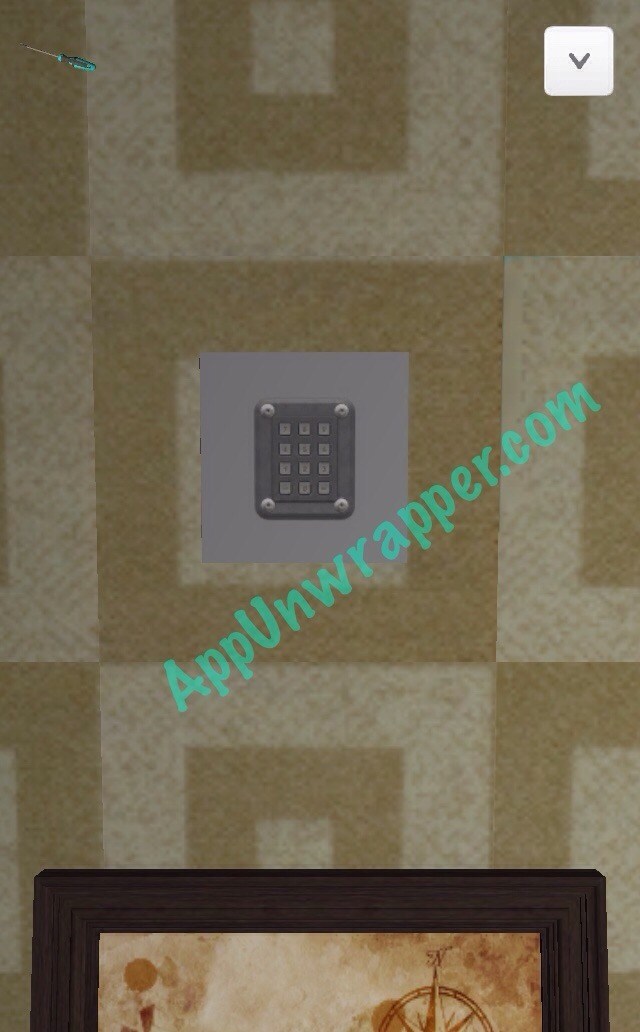
4. Use the screwdriver to remove this painting and find a locked safe.
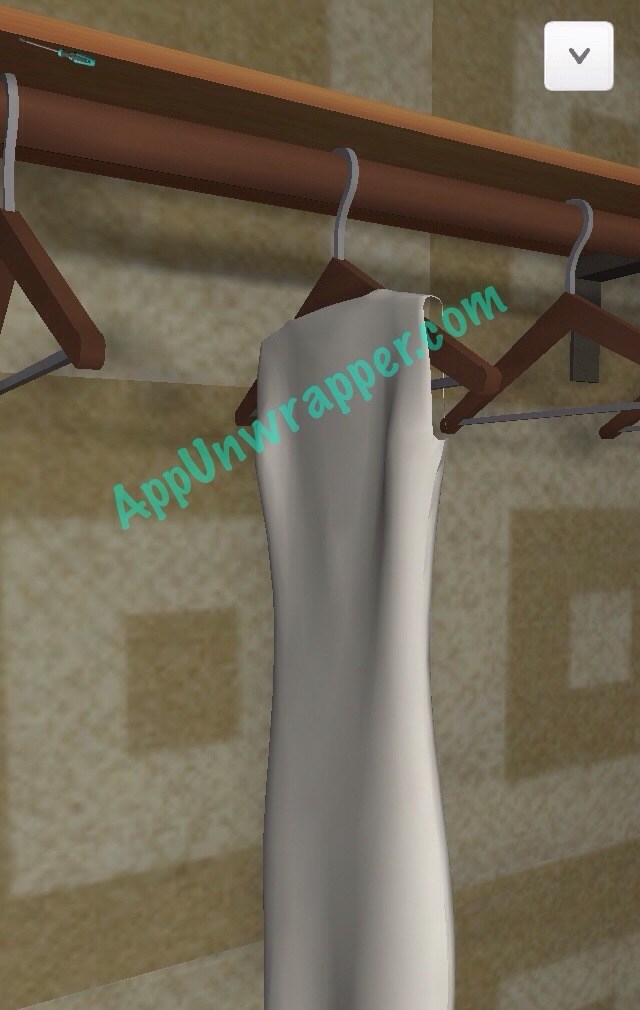
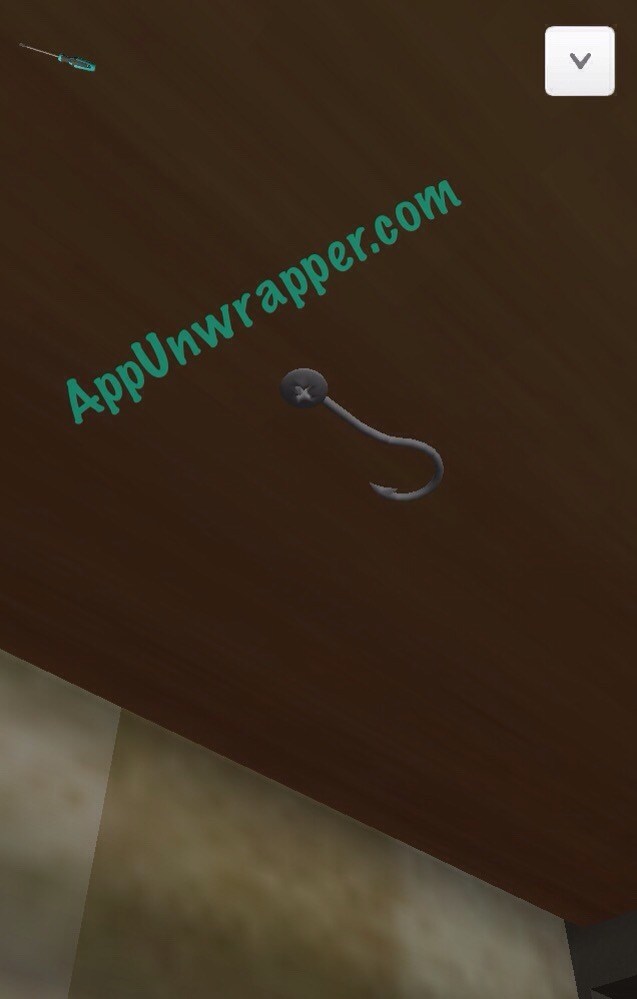
5. Look under the shelf holding up the dress to find a fishing hook. Use the screwdriver to get it.
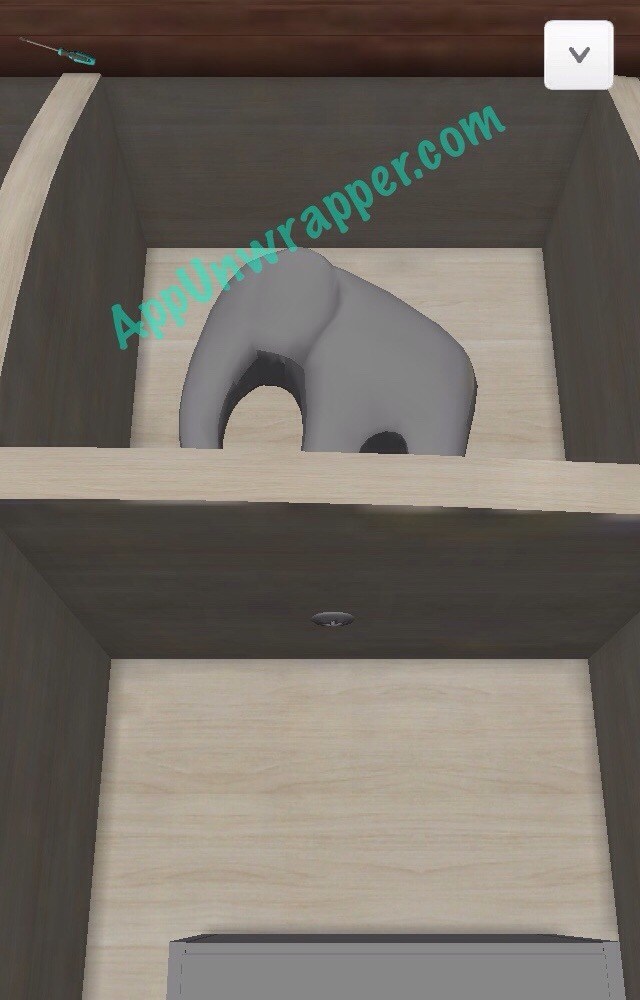
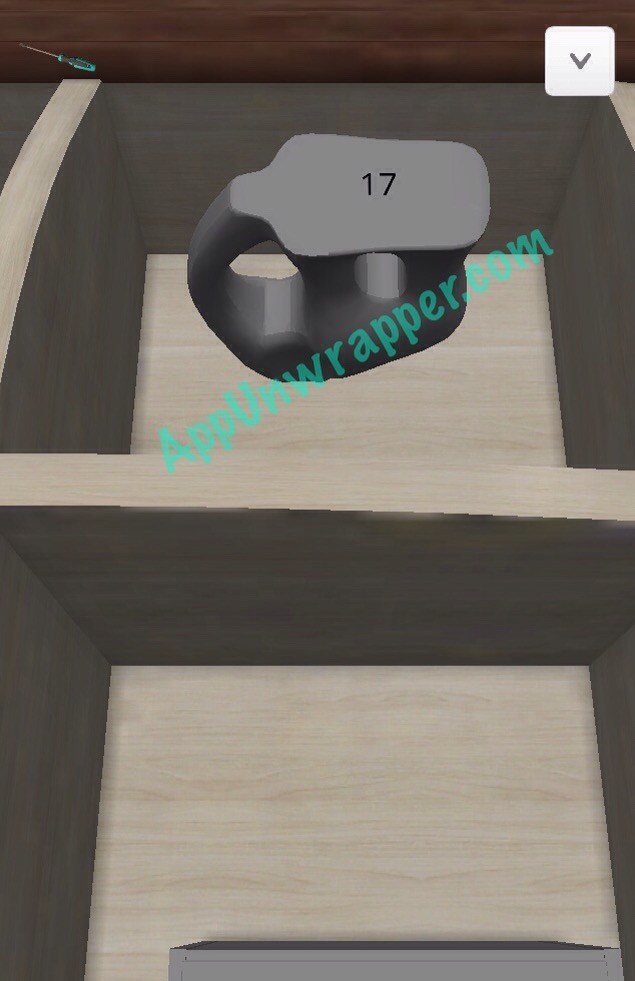
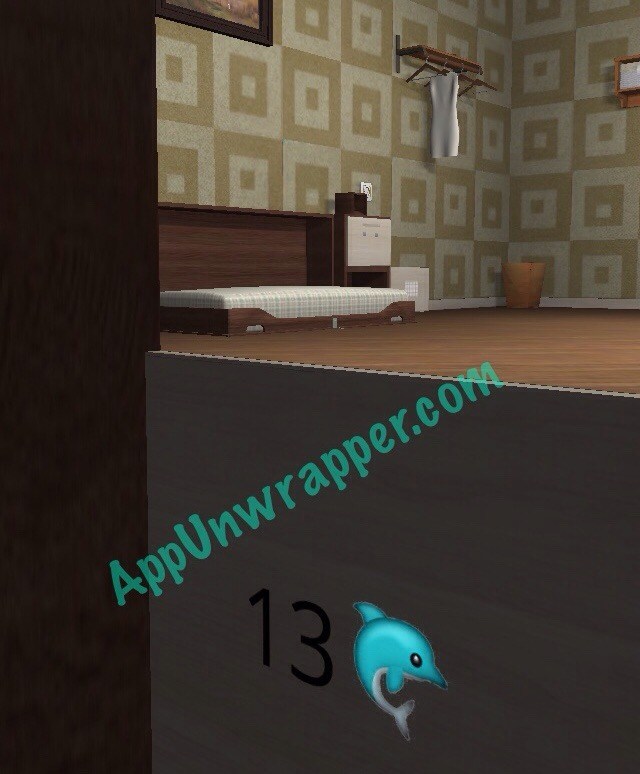
6. Look under the elephant for a screw. Use the screwdriver to unscrew it, then pick up the elephant for a clue, “17”.
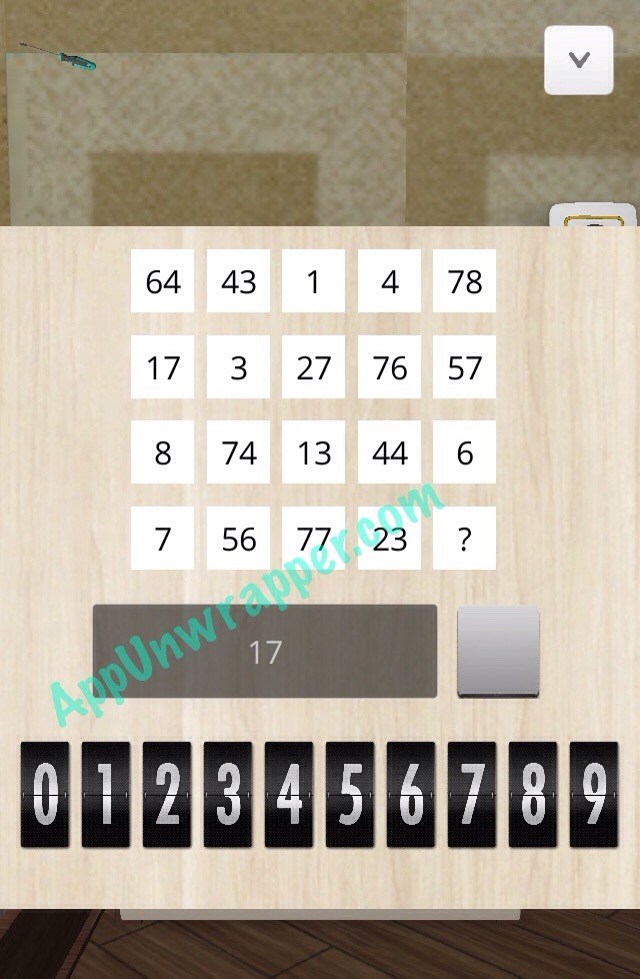
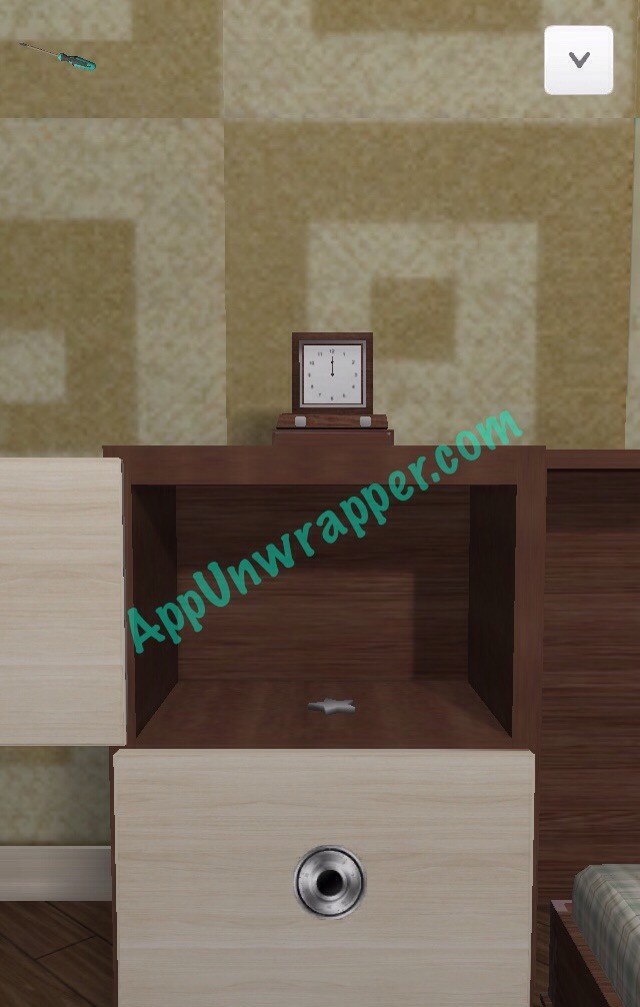
7. This lock to the right of the bed changes if you get it wrong. But I finally got it to unlock using the number 17. Take the item from inside. It appears to be a remote that’s missing batteries. Look behind the door for another clue.
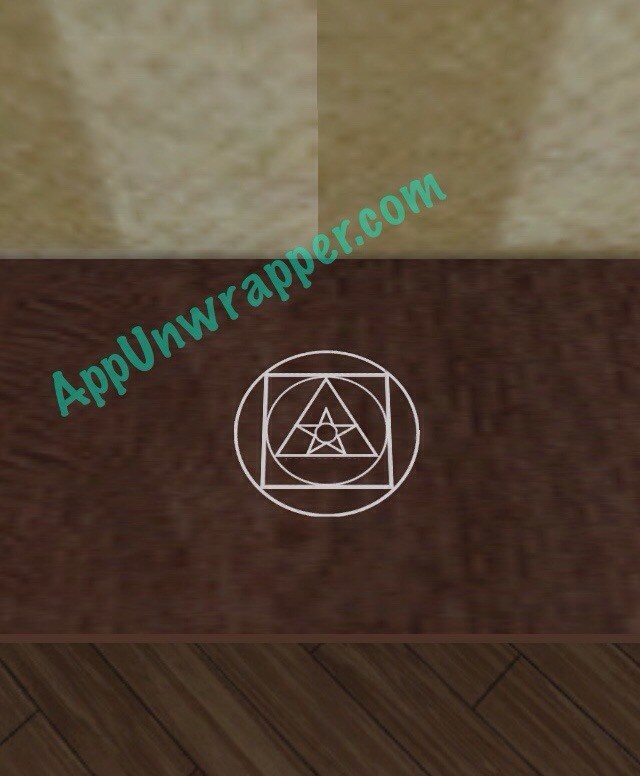
8. Find this clue above the bed:
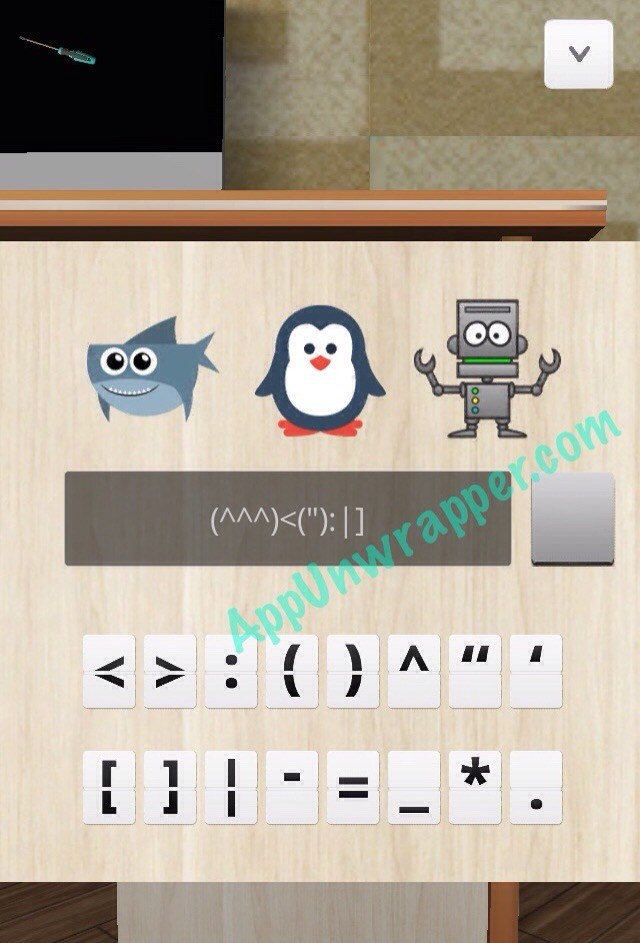
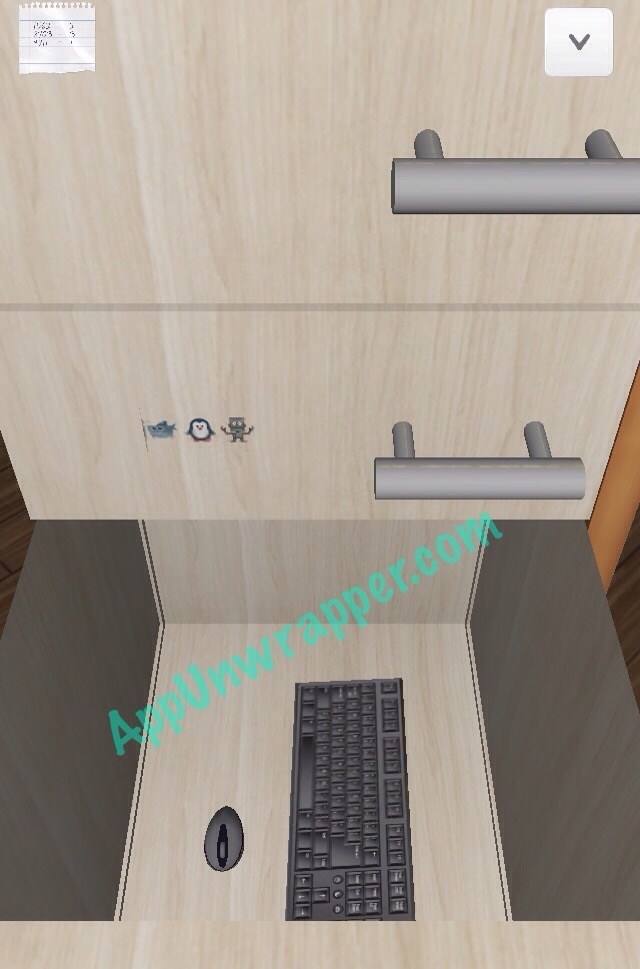
9. There’s a drawer on the computer desk with three emojis on it — a shark, penguin, and robot. Enter the Facebook shortcuts for those emoji to unlock the drawer and get a USB cable.

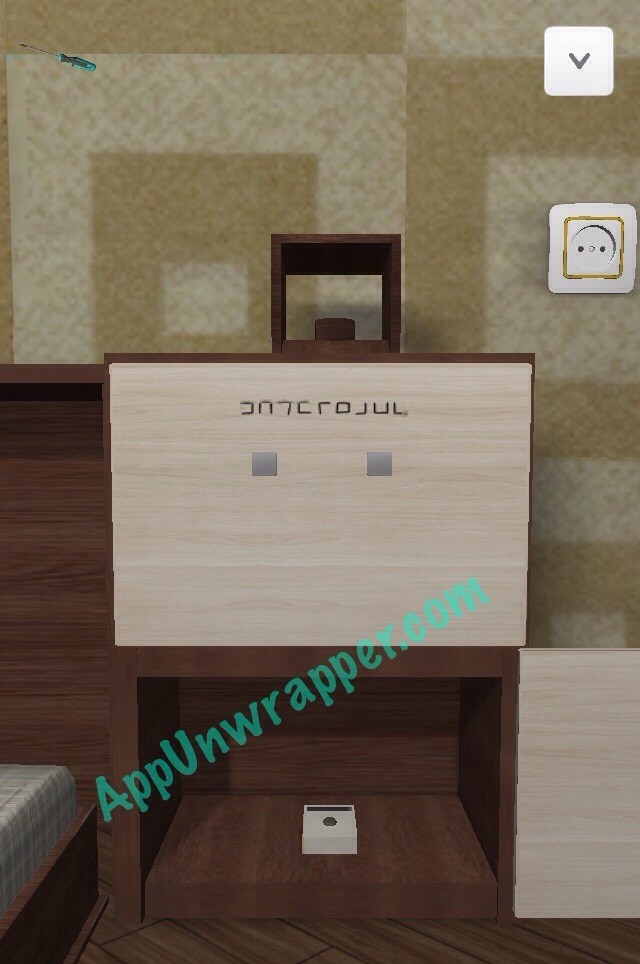
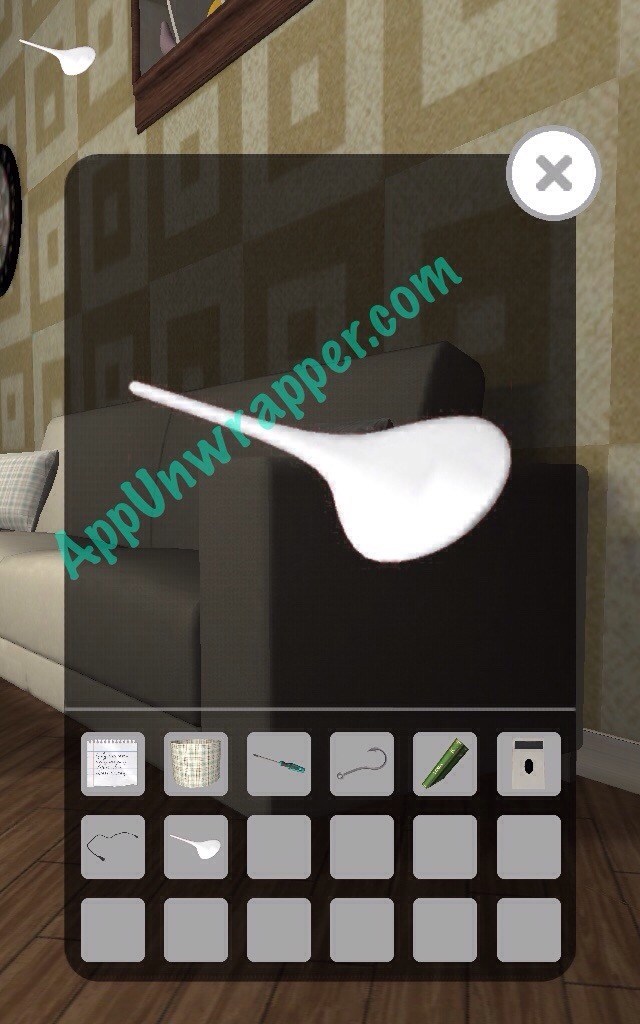
10. Find this object under the sofa:
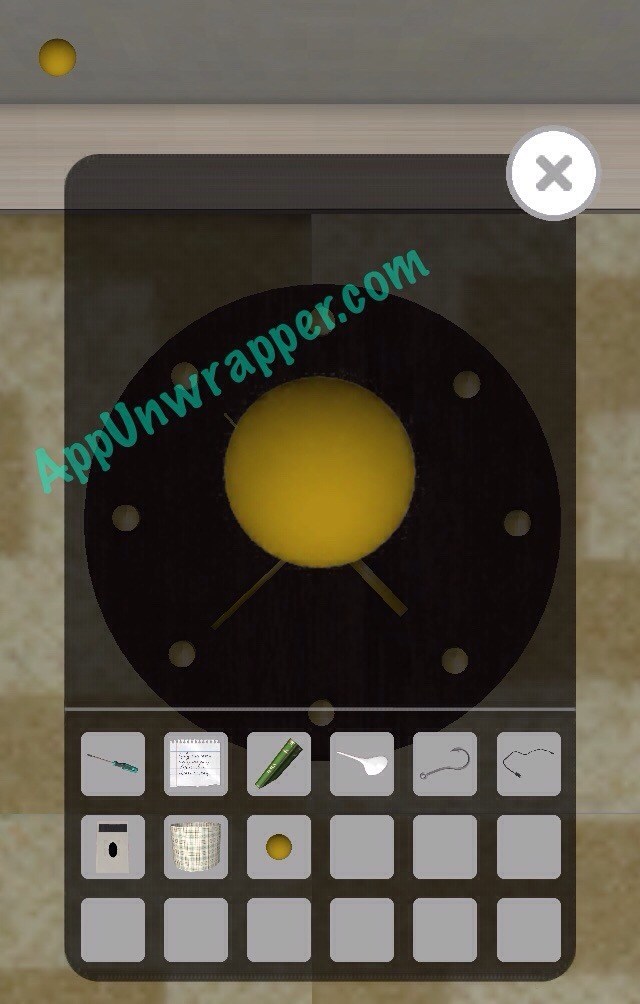
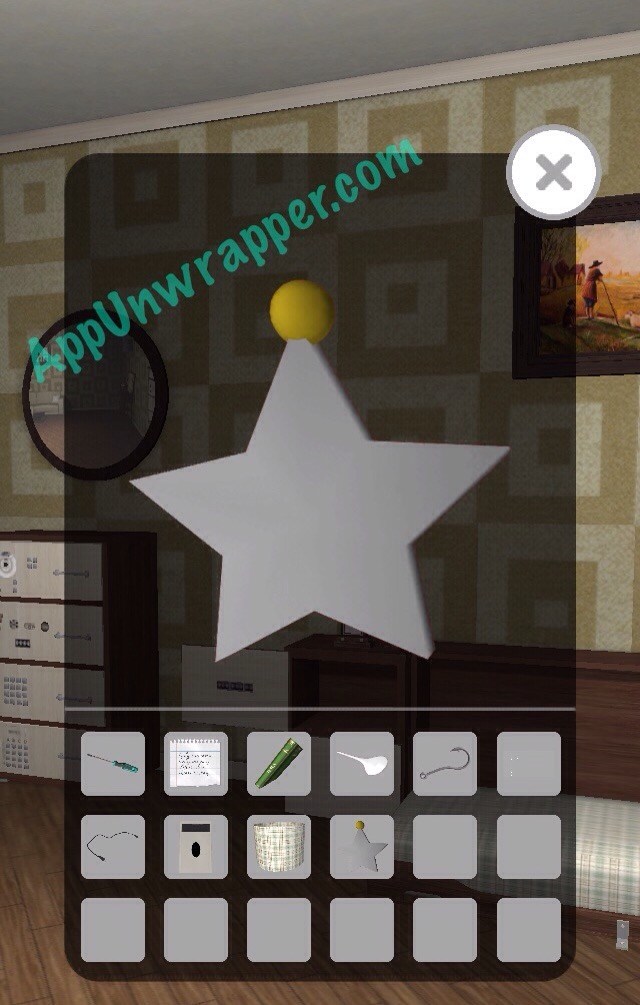
11. The little gold ball in the center of the wall clock comes off. I assume this will be used on the missing star once we find it.
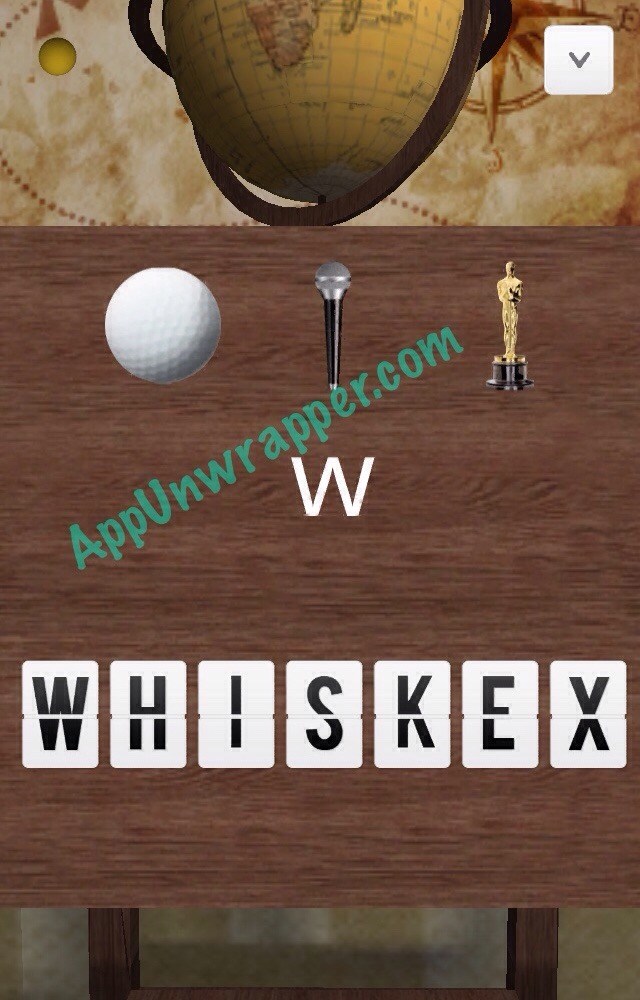
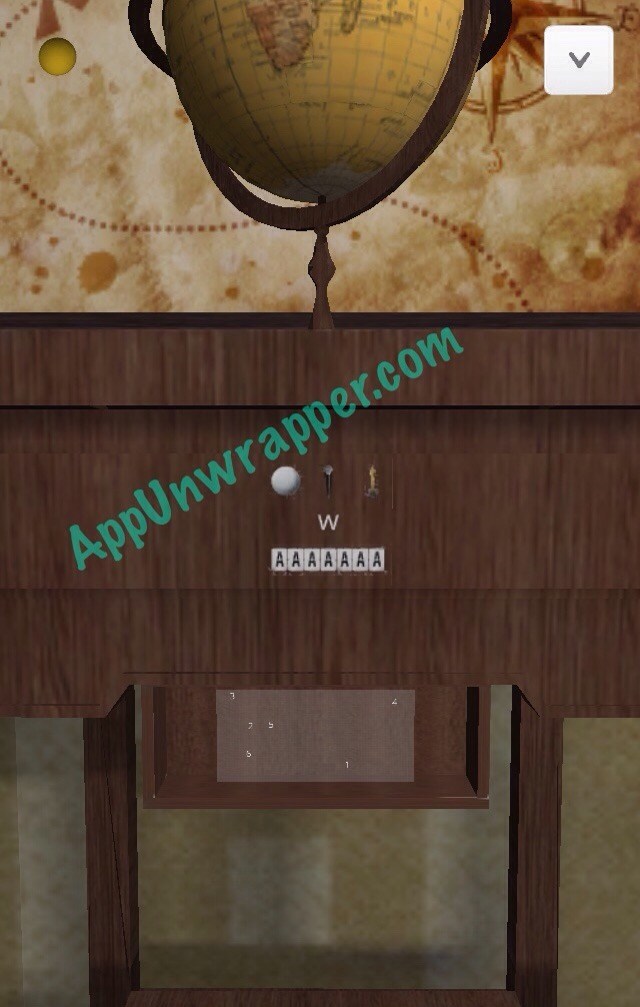
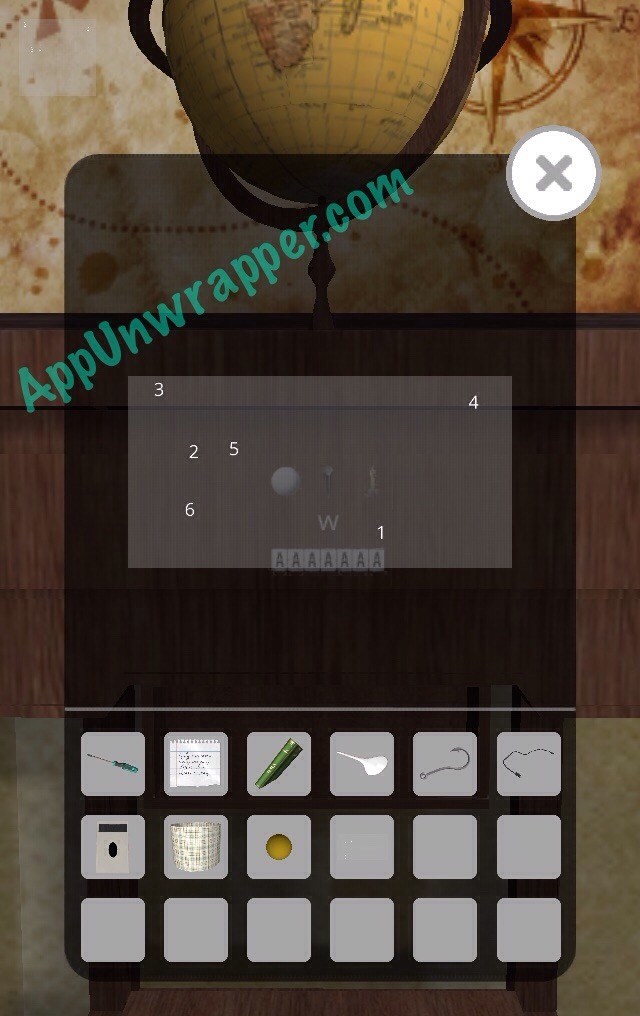
12. To open the drawer under the globe, you need to use the phonetic alphabet. Enter “WHISKEY” (change the last letter in the photo below) and then take the clear plastic sheet from inside.
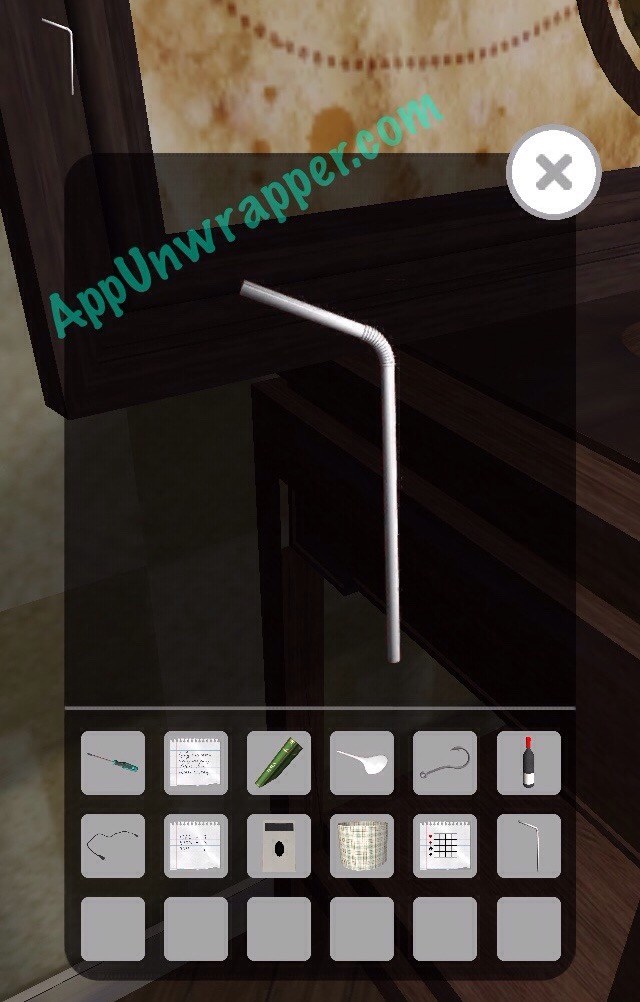
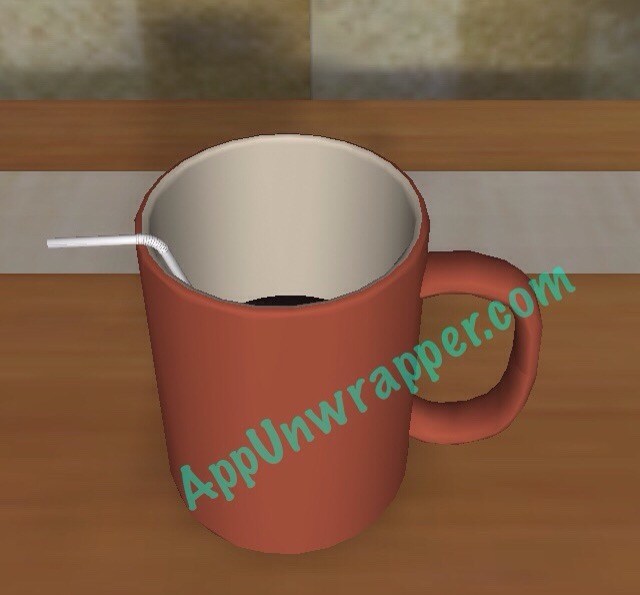
13. Get the straw from the left side of the globe. It was hard to find! Then use the straw to drink the coffee from the mug on the computer desk. There’s a clue inside!
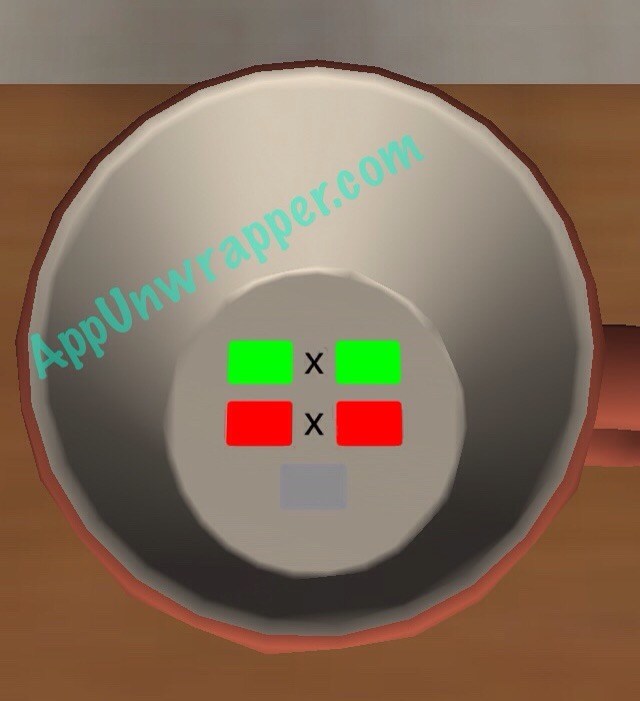
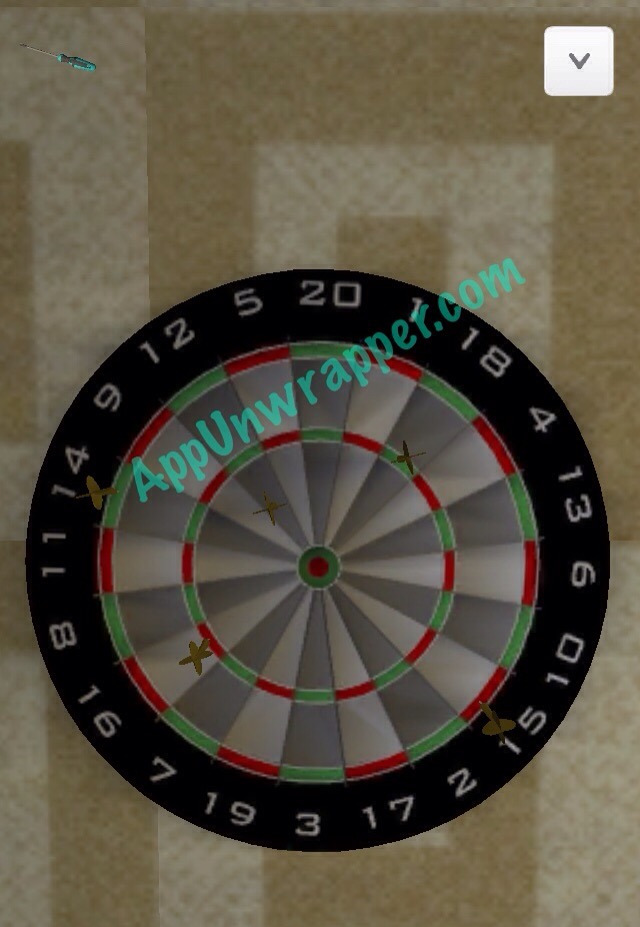
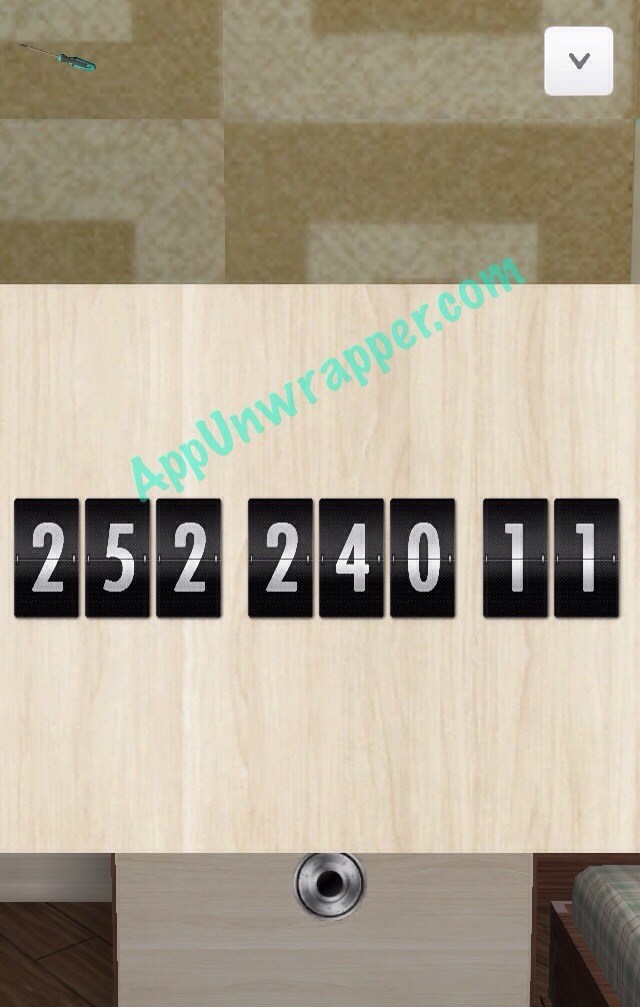
14. The clue from the mug is referring to the dartboard. Look at the darts on the dart board.
Then do the math:
14*18=252 (green)
15*16=240 (red)
12 (grey dart)
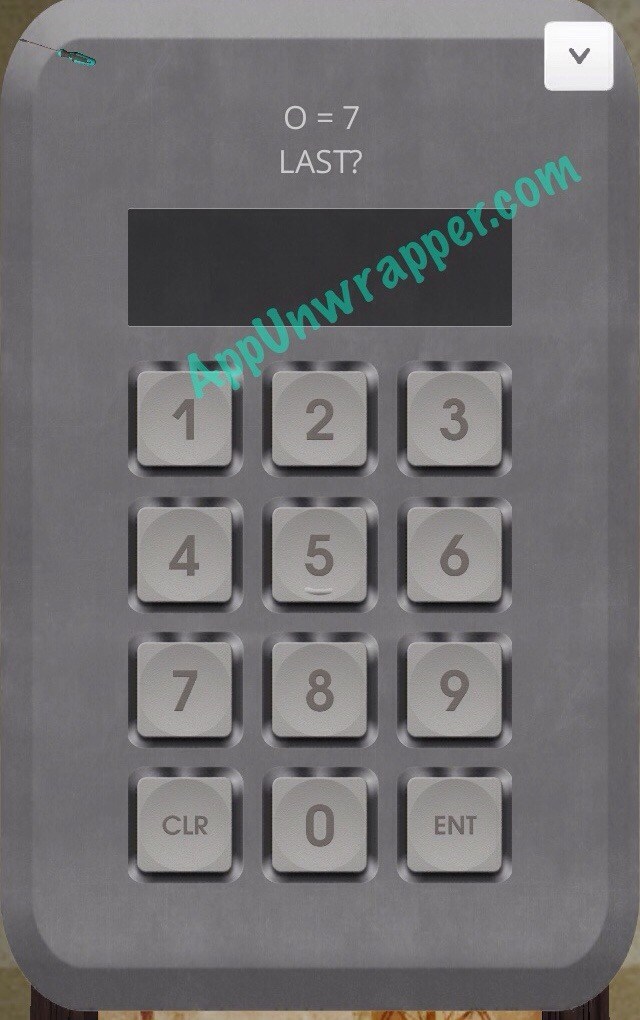
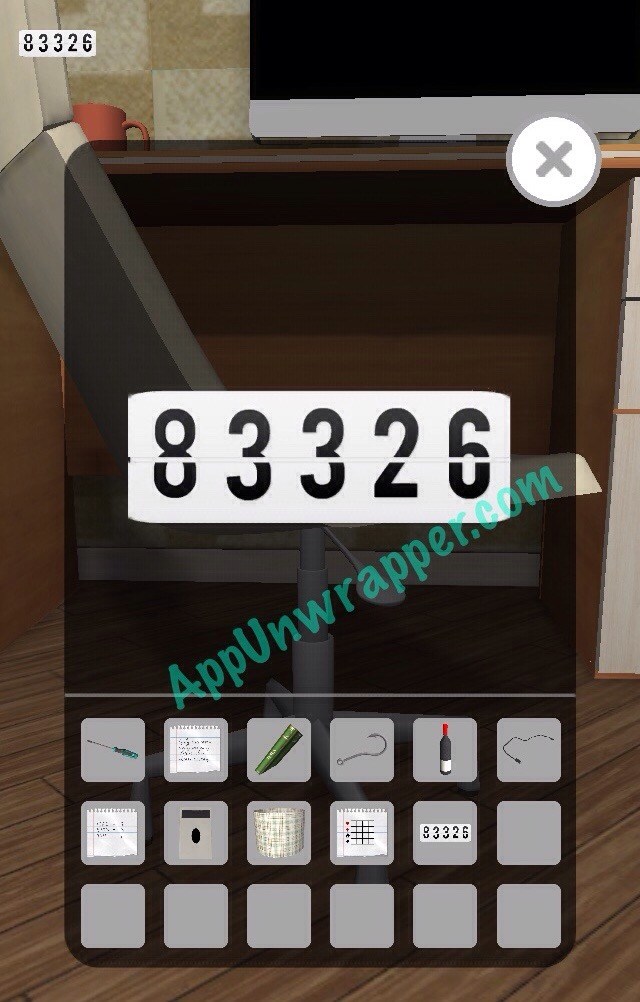
Enter a number 252 240 12 on the upper left lock next to the bed (change the last number in the photo) to get a grey star. Also, look behind the open door for a clue.

15. Place the gold ball on the star and place the star with the others on the shelf.
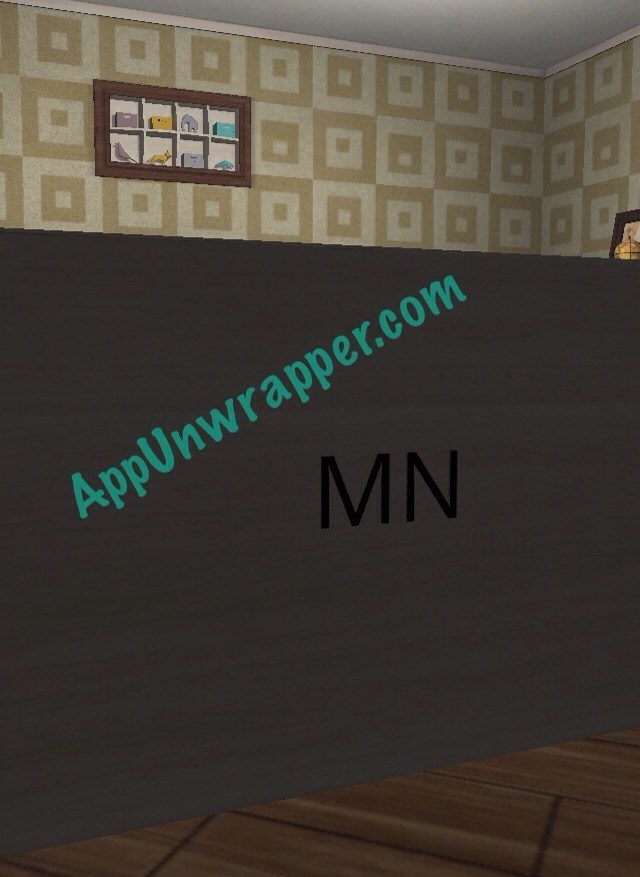
16. Use the clue from the back of the door we just found:
A A C
B A B
C B C
The numbers show the the sums of the letters, both horizontal and vertical. Solving the equations, the results are:
A=47
B=23
C=19
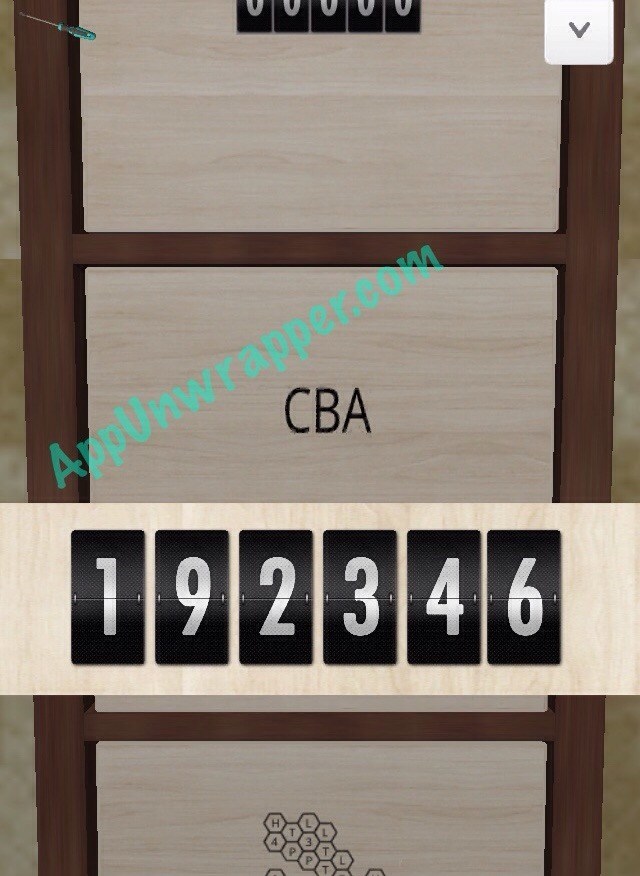
Find the lock under the birdhouse that says “CBA,” then enter 192347 to get a piece of paper with some numbers scribbled on it. Also, check behind the newly-opened door for another clue.
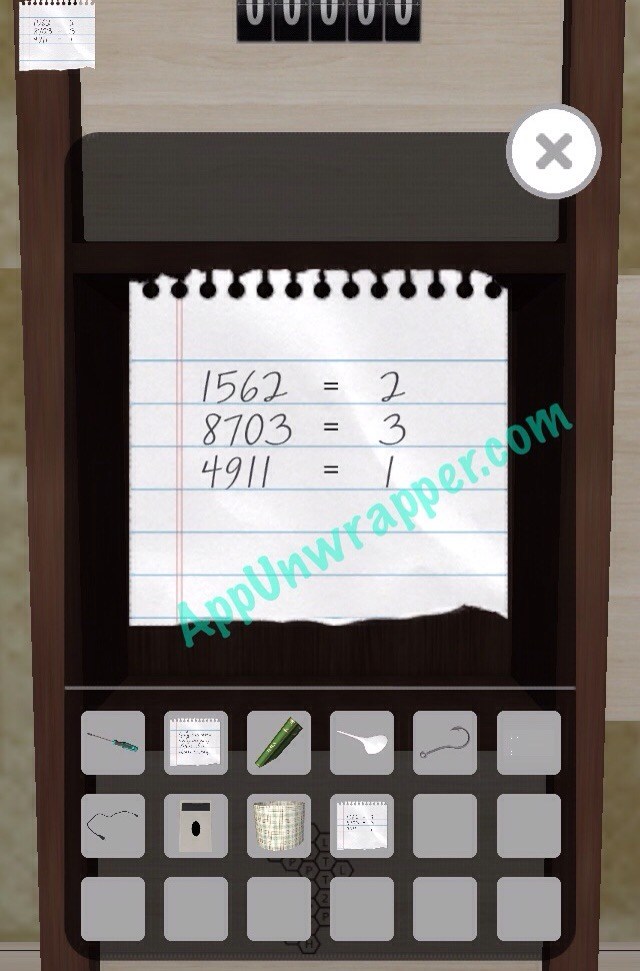
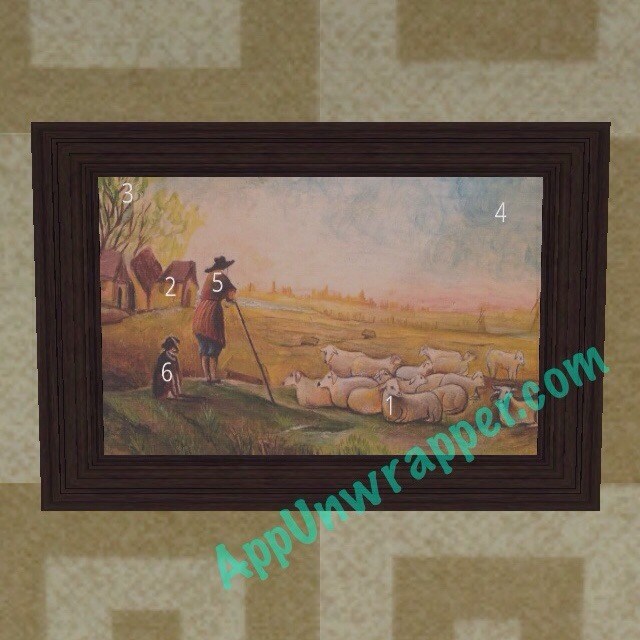
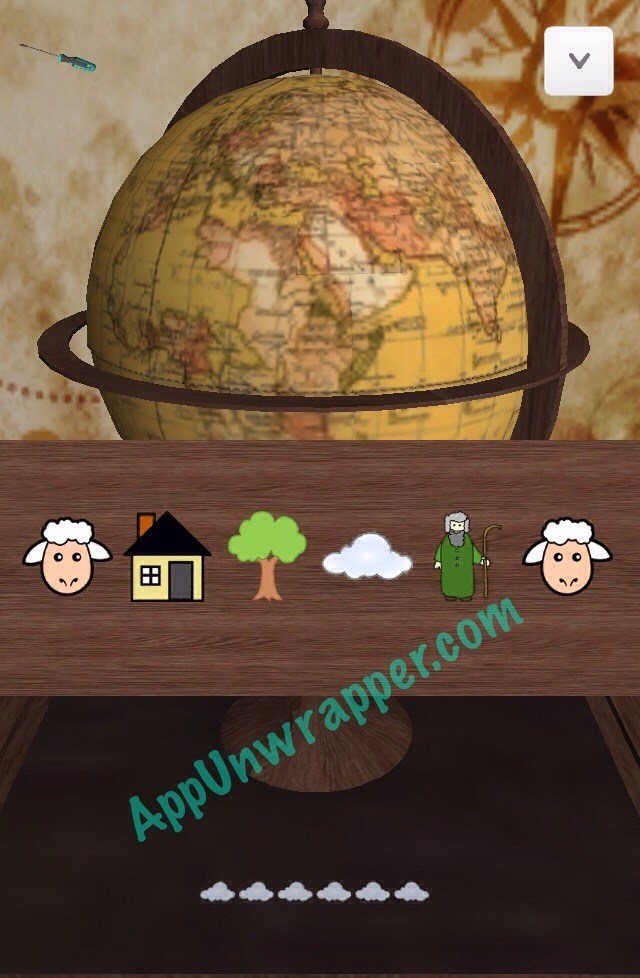
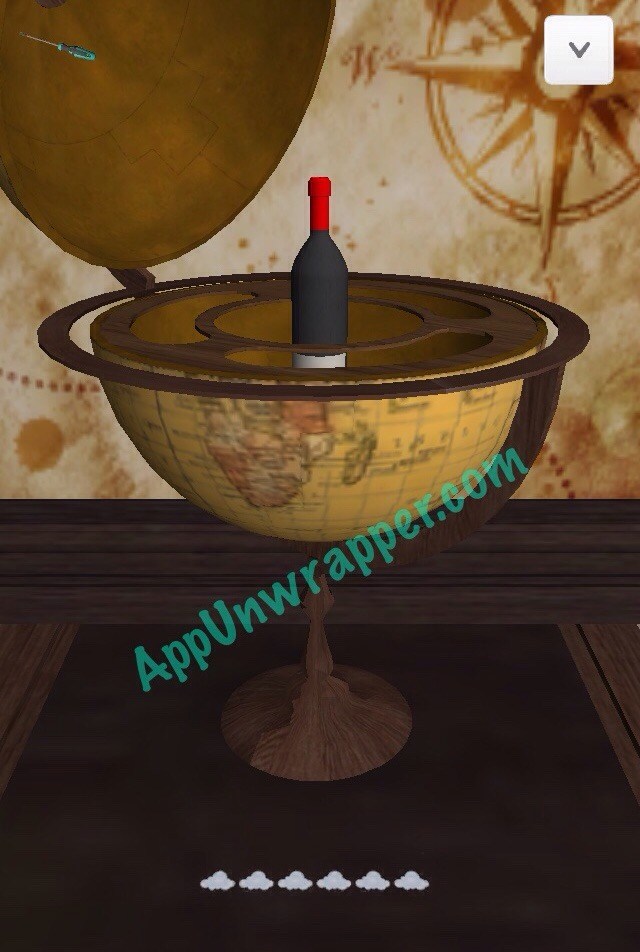
17. Remember the clear sheet with numbers on it? Place it on the painting of the sheep herder to see the solution for the puzzle in front on the globe. (Just change the last one to dog in the photo below.) Get the bottle of wine.
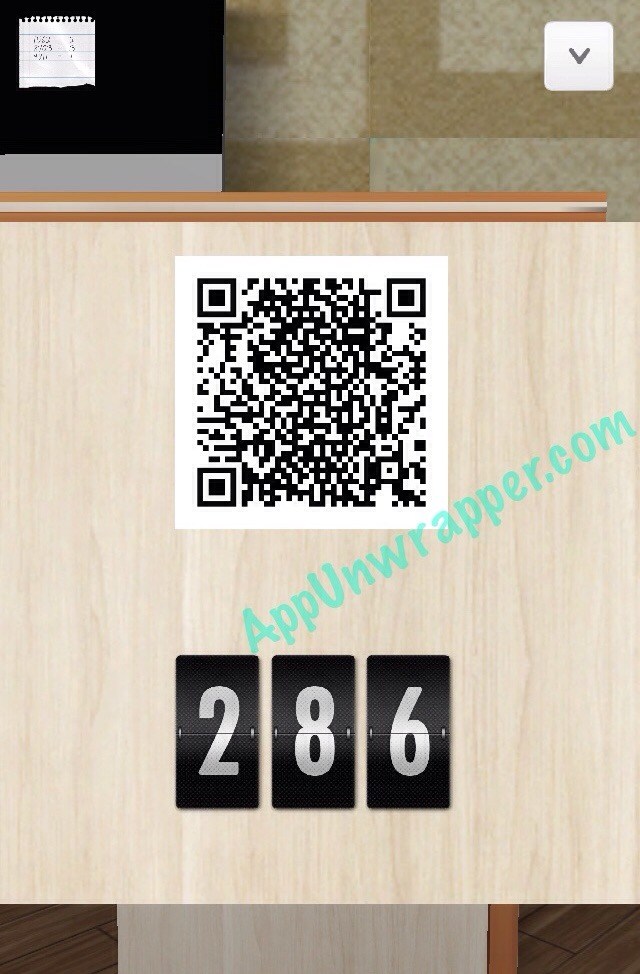
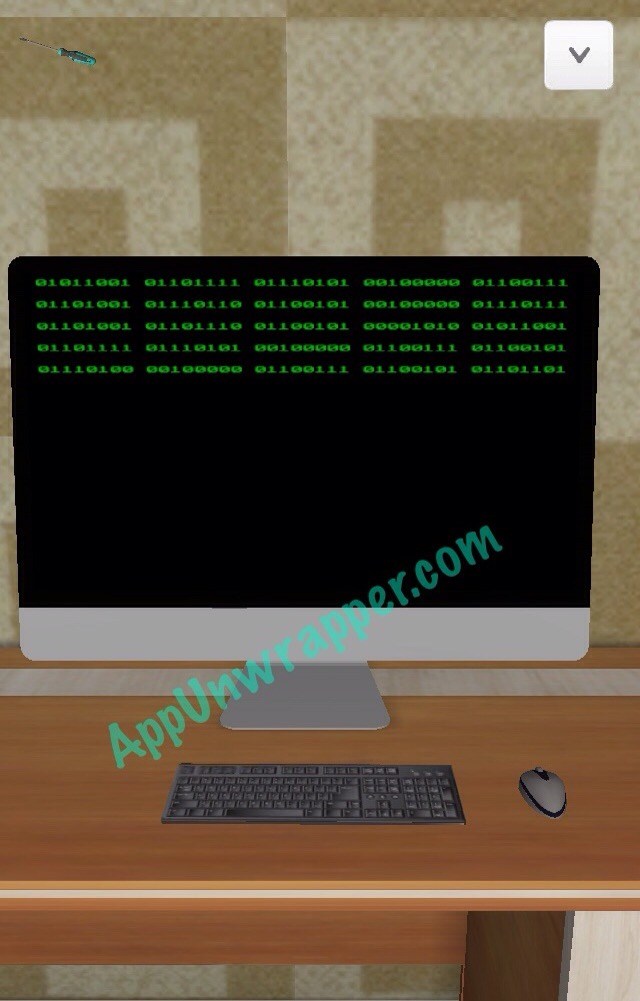
18. There’s a QR code on one of the computer drawers. Enter “287” to unlock it (not sure why. Might be related to Twitter followers.). Take the keyboard and mouse and connect them to the computer. The binary on the computer gives you a clue:
“You got wine,
You get gem.”
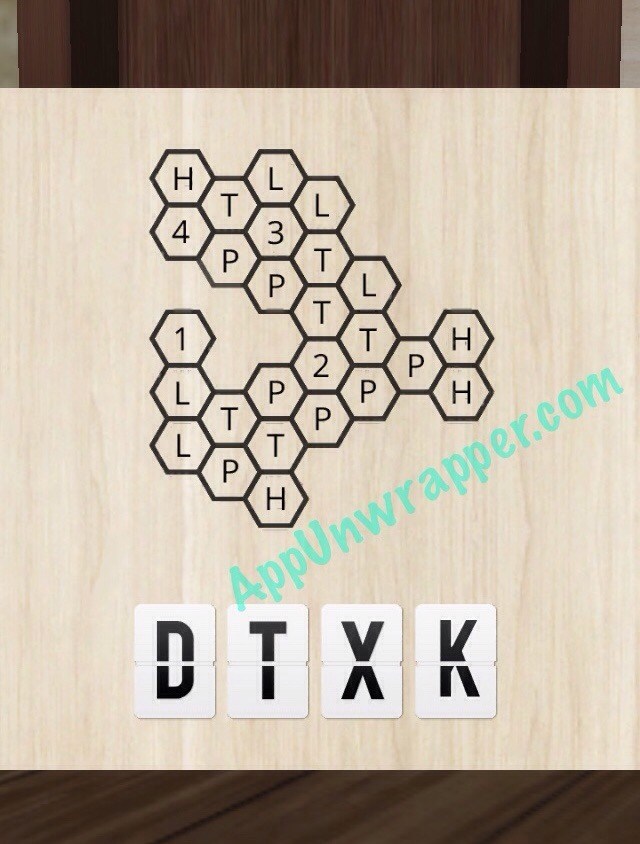
19. Now to solve the hexagon puzzle. Thanks to Myst for this solution!
The correct hint is :
The ABC :
A B C D
E F G H
I J K L
M N O P
Q R S T
U V W X
Y Z
See the cell with the number 1 inside and count the adjacent cells. The same with numbers 2, 3 and 4.
So: The cell number 1 have 1 cell adjacent. The cell number 2 have 5 cells adjacent. The number 3 have 6 cells adjacent and the number 4 have 3 cells adjacent.
The combination for the clue is “1234” but the cells adjacent at the numbers cells not just the numbers.
So : 1 = 1 ; 2 = 5 ; 3 = 6 and 4 = 3
Now just apply numbers at the last letter of the end of each line of the above ABC. So : D = 1 ; H = 2 ; L = 3 ; P = 4 ; T = 5 and X = 6.
And now solve it.
1 = 1 = D
2 = 5 = T
3 = 6 = X
4 = 3 = L
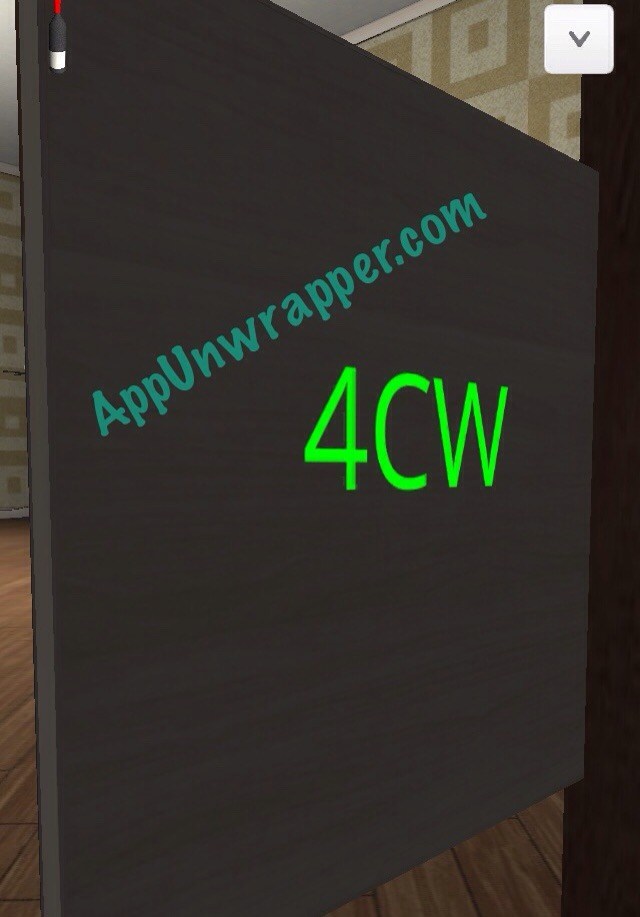
So the answer is DTXL (change the last letter in my photo). Get the piece of paper with a grid on it. And make sure to get the clue from behind the door.
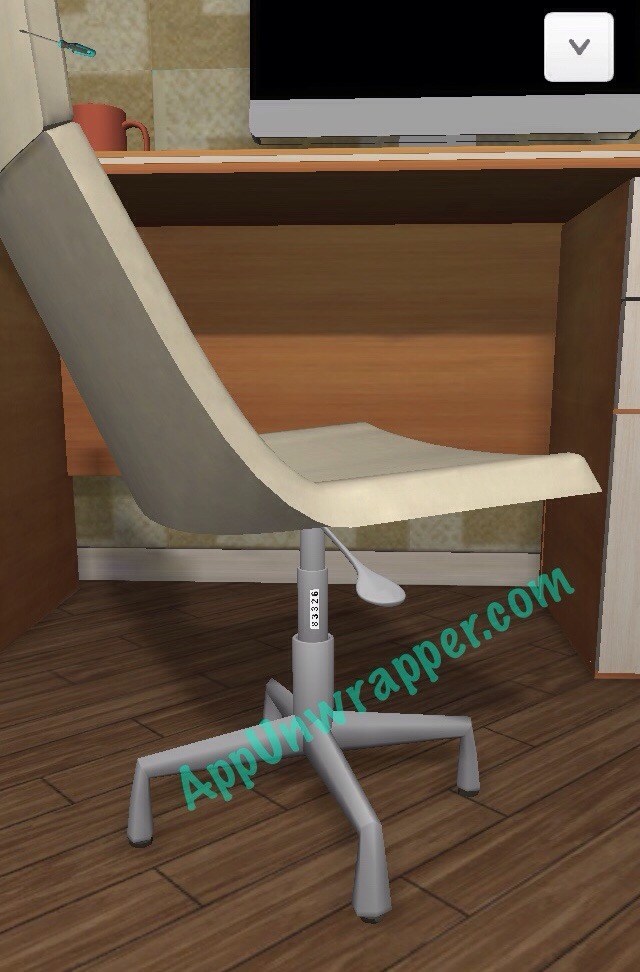
20. Use the lever you found under the sofa on the computer chair to get another clue.
Continue to part 2 of the walkthrough.
Looking for part 3 of the walkthrough?
Looking for the list of in-game hints?


 100 Toilets Level 47 Walkthrough Guide
 Big TV Quiz Level 6 Answers and Solutions
 Picasso Pop Level 3 Answers and Solutions
 Break Bricks Tips, Hack, & Cheats for Coins & Lives - New Cheats Available - AppGameCheats.com
 Infinite Pics Celebs Pack Level 0-99 Answers