You can watch my complete walkthrough video for the full game here, or use the step-by-step text/photo walkthrough below:
Chapter 1:
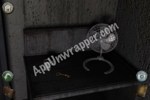
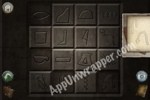
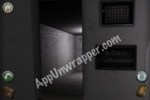
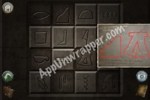
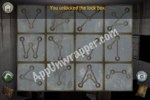
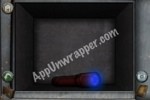
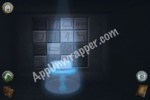
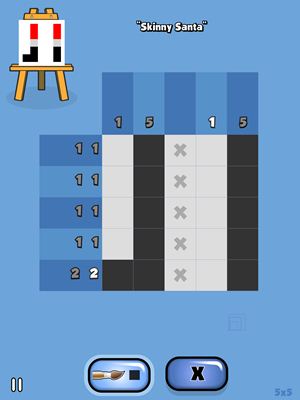
1. Look inside the box and solve the tile puzzle to get a camera:


2. Tap on the desk on the it side of the room and pick up the key.
3. Use the key to open the door to the left and enter the bathroom.
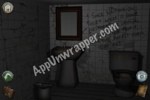
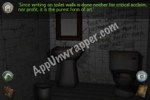
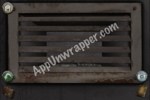
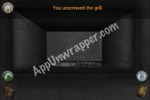
4. Take the screwdriver. Leave the bathroom and use the screwdriver to open the vent. Take the knife.
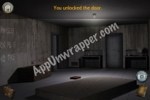
5. Use the knife to slash open the mattress and get another key.

6. Use the key on the door to the right and go through it.


7. Take the right path and then tap on the door to the right that says “Staff Only”. Scan your thumbprint and the door will open (are you hospital staff??).
8. Tap the desk lamp so it highlights a key. Take the key. Then turn the lamp to face the room.
9. Zoom out and you can see the rest of the room now. Turn on the computer and look through the files. You need a keyboard.
10. Exit the computer and open the file cabinet with the key you found. Look through the files.
11. Look at the poster on the wall.
12. Leave that room and enter the Nursery. Pick up the two cards from the table and read through the book.
13. Leave that room and enter the Waiting Room. Look at the picture of the radio and take a photo of it. Then pick up the iPad on the table and play the game (looks like Zelda?). Go into the house and pick up the key.
14. Leave the house and pick up the lantern. Follow the path to the trees and then find lantern oil. walk around and find a red person. Talk to him.
15. Then go back to the first screen and use the lantern to enter the cave. Follow the arrows until you find a chest and use the key to open it and get a puzzle piece.
16. Go back to the middle of the hallway and take the left path towards the library. Enter Patient Room 2. Pick up the banana from under the couch and look at the symbol on the other one (same as from the iPad game).
17. Pick up the mirror. Pick up the token from the table. Look at the writing on the couch.
18. Leave that room and enter the Library. Look around, then leave.
19. Enter Patient Room 3. Pick up the painting. Pick up the keys and the etching pencil from the desk. Leave that room.
20. Enter the Storage Room. Pick up the wrench. Read the book then leave the room.
21. Go back to the other end of the hallway until you see a door that asks for a token. Put the token into the slot.
22. Choose the far-right door and enter. Take the puzzle piece from the table, then leave.
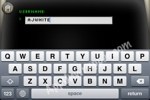
23. Go to the desk with the computer and use the etching pencil on the piece of notebook paper to get the username and password for the computer:

24. Enter the username and password into the computer an read through the files. Then unlock the electronic door and enter it.
25. Go back to Patient Room 2 and use the wrench to remove the loose tap.
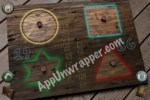
26. Go back to Patient Room 3 and match the puzzle on the floor to the drawing you saw earlier:
27. You’ll get the dial for the radio. Attach it to the radio near the computer and match it to the photo of the radio:

28. The radio will start playing chimes. You need to repeat this tune on the xylophone in the Nursery. The sequence is (from left to right), first, third, first, last. Once you solve it, you’ll get a ball card, a key card and the square puzzle piece.
29. Go to the other end of the hall and swipe the key card in the key reader to open the door.
***Like this game? Try “In Fear I Trust.”***
Chapter 2:
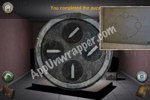
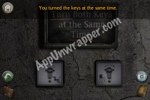
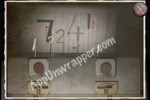
1. There’s a clock in here. There’s also a clock back where we came from near the radio. Set both clocks to the same time (I chose 7:00). Then press both keys at the same time to unlock the door:

2. Don’t enter the room yet. Tap in the corner to the left and there will be a table with a pair of glasses on. It. Take the glasses and open the book on the ground. Put the glasses on to see this:

3. Go back and take the stairs up. There are some hieroglyphs but you can’t solve this puzzle yet so go back down.
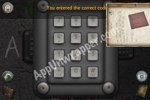
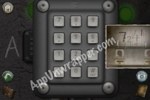
4. We have some clues for the keypads on the wall. Here’s A:
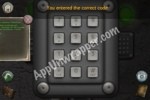
And here’s C. Still missing B.
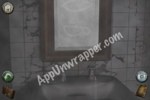
5. Go back all the way to the first room and enter the bathroom. Place the tap on the sink and turn on the hot water to get hieroglyphs in the mirror:
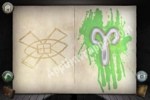
6. Go back to Patient Room 3. Place the mirror on the wall where the painting was and rotate it until it makes these words:

7. Go to the Library and open the book “This Cold World” and turn to page 798 to see these symbols:

8. Go to the hieroglyphs wall and press the hieroglyphs we’ve seen so far:
9. Go back down to the Staff Office and look at the files again. Put on the glasses to view the folder and you’ll see another symbol:

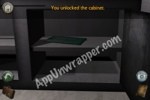
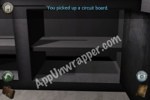
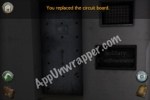
10. Go to the desk with the radio and computer. Use the keys to open the locked cabinet and take the circuit board. Place the circuit board by the Solitary Confinement door and complete the circuit to open the door:

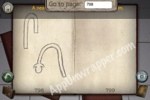
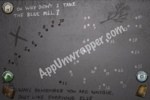
11. Enter and pick up the keyboard. One of the walls has a connect-the-dots. Take a photo of it and draw on it to connect the dots and get two more hieroglyphs:
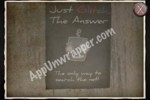
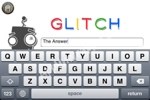
12. Go back to the Staff Office and place the keyboard by the computer. The poster in that room tells you to “Glitch” (Google) “The Answer”. So type that into the search bar and you’ll get a couple of the books that need to be pressed in:


13. Press the new hieroglyphs we found:
14. Go back downstairs. Enter the room ahead with the buttons and switches. Hold down the buttons to see what B =. Flip the switches below the buttons until you get the answer:
15. Enter the numbers into keypad B and enter through the doorway that just opened:

16. There’s a lock here that looks familiar. Match it to the painting from earlier:

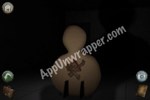
17. Continue ok and through the door. Pick up the book. Take the stairs up and take he puzzle piece off the cardboard person:
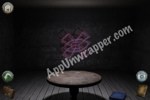
18. Go back downstairs and go to the room on the right to see some constellations:

***Check out Glitch Games’ new game, Ferris Mueller’s Day Off!***
19. Go back to the nursery and place all the puzzle pieces in the puzzle. Two more book titles are uncovered.
20. Put the library book back on the shelf.
21. Make sure you’ve seen all the Zodiac symbols with the glasses.


22. Make sure you’ve seen all the constellations in the planetarium:


23. Go to the Storage Room and solve the constellation puzzle to get a UV torch.
24. Go to the room behind the reception desk and use the UV flashlight on the wall to see two more hieroglyphs:


25. Go back to the hieroglyph puzzle and complete it:

26. Now you get two more names of books:
27. Go back to the room where you found the book and put on the glasses. Match the zodiac symbols to the background colors of the symbols you found, and you’ll get the names of two more books:
28. Go back to the library and push in all the names of the books you found to open the exit:


Chapter 3:
1. Go down and then take the elevator up. Follow the path to get out.

Congratulations! You made it through Episode 1!
Click here for the walkthrough for Forever Lost: Episode 2!
Also, check out the new games by the same developers, Ferris Mueller’s Day Off and Cabin Escape: Alice’s Story.
Looking for my Forever Lost Episode 3 walkthrough?
If you liked this game, try these other escape games and adventure games. You might also like Adventure Escape Murder Manor.
Also, make sure to check out my little preview and teaser for Forever Lost Episode 3!


 Zombie Smasher Cheats & Hack for Brains & All Items - AppGameCheats.com
 What am I? Riddles Answers Level 21-40
 Escape Game: “Strange House” Walkthrough
 Strawberry Shortcake: Berry Rush Hack for Coins & All Characters - AppGameCheats.com
 City Quiz Guess the city Answers Level 101-120