Few years ago I played Warhammer Fantasy Battle, particularly Chaos Warriors. Because of that I think that quality is better then quantity, so in every single camp I rather upgraded higher level units then bought new ones. Sergeants are most important, musicians and bannerbearers are needed only when your troops have weak morale (especially Skaven). I tried to buy best weapons and armour possible, but when I didn't have enough money I were buying only weapons for shooters.
In my missions' descriptions I tried to write, what abilities were learned by my heroes, but now I know that I would spend some points in a different way. I won't describe now all skill sets, but I will only mention about most important ones and ways of development.
First of all - there is no active pause in this game, so it is hard to use too many skills that need activation, especially when they need a target. So I decided to invest in passive abilities as often as I could. Besides, they don't use our magical power.
Secondly - five spells that you must have (if it's possible): Fireball, Father of thorns, The undying servant, Favoured minions and Steal soul.
Thirdly - it's good to invest in passive skills from command tree (but such as Pathfinding or increasing gained experience are rather useless in my opinion - buy them only, when you need them for better skills). By looking at skills hero has you can decide which regiment add a hero to.
 Demon vs. dragon...
Fourthly - most of the time you don't need to spend points on skills from Duel tree. Our heroes will probably have higher level or better equipment then their opponents and we can harm them enemy with our troops first. Thorgar or Stefan can have some points in those skills, because they will have many occasions to duel.
Fifthly - order. In most cases mages should start from combat and fighters from command tree.
Sixthly - if you have problems with transferring items between heroes, just apply newest patch - it repairs that bug.
In this part of the guide I will tell you something about troops you can have in this game and give you some advices how to use them effectively. I won't describe every single unit, by I will mention the most interesting ones.
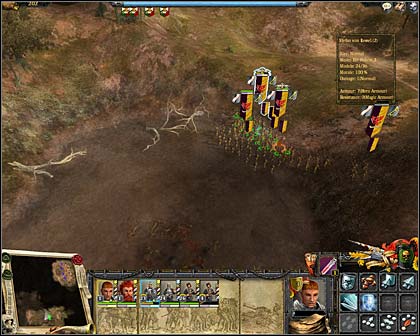
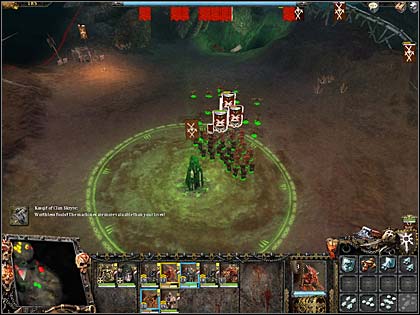
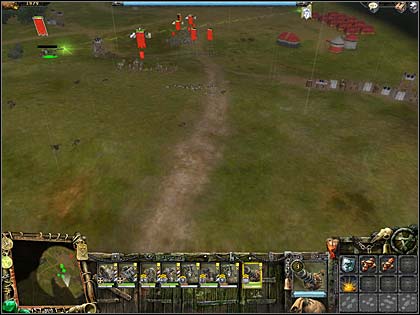
 Small argument between Skaven and Imperial forces
Most important units in every army:
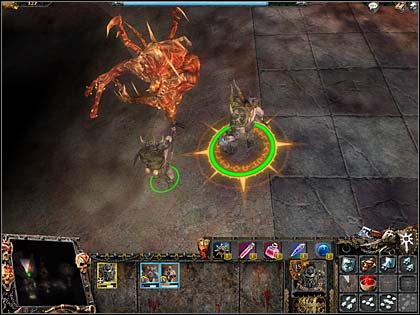
 Projects of Nurgle's hero
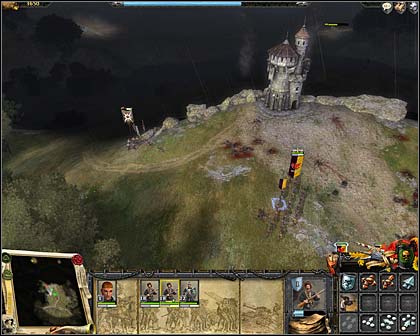
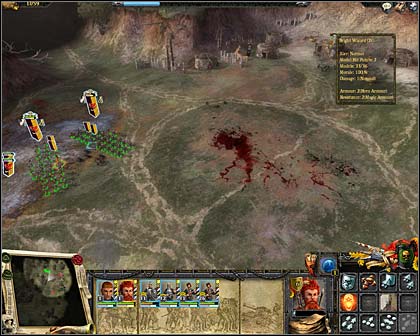
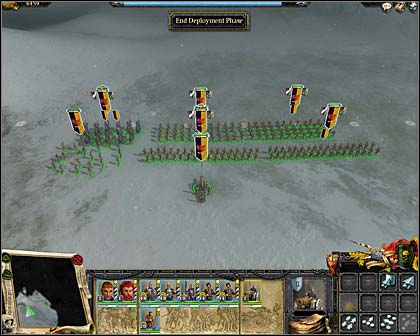
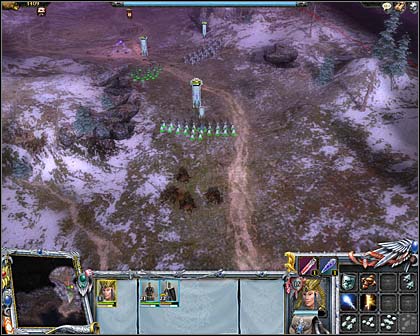
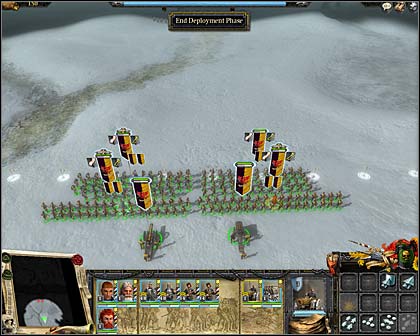
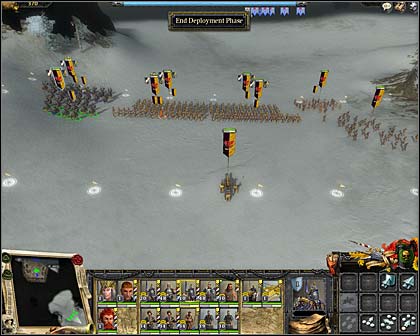
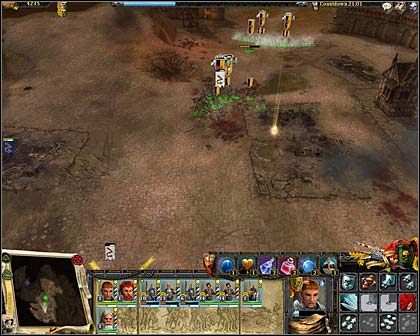
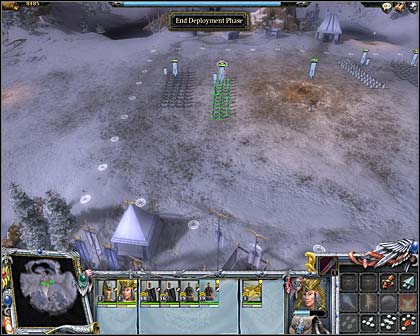
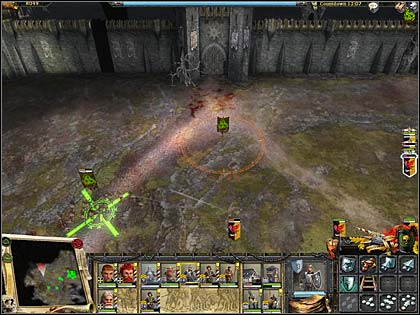
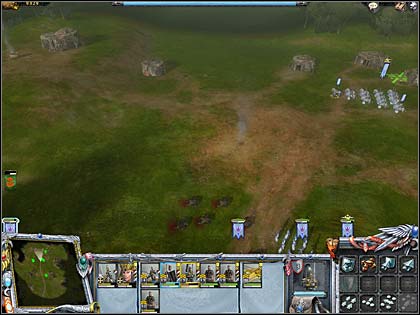
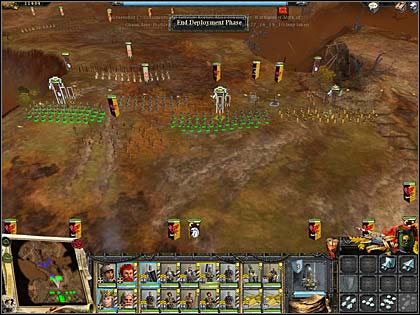
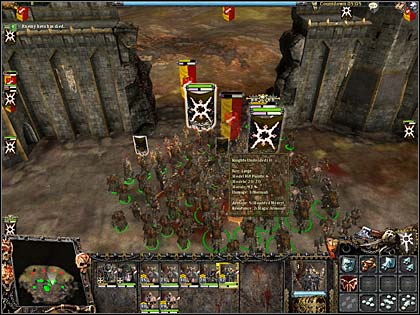
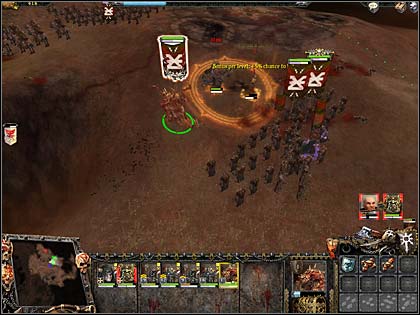
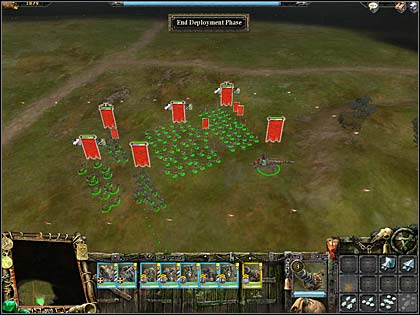
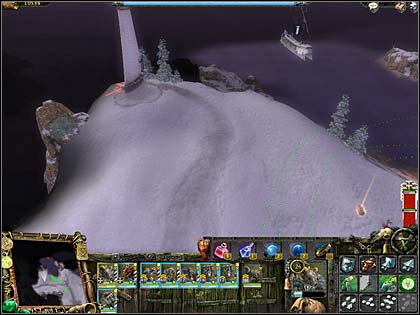
This mission is very easy - we have to capture and secure a hill, from which our cannons will be able to bombard the enemy. First we must deploy our troops. There are not many of them, so it shouldn't be hard. I placed them as below - swordsmen with hero shield handgunners.
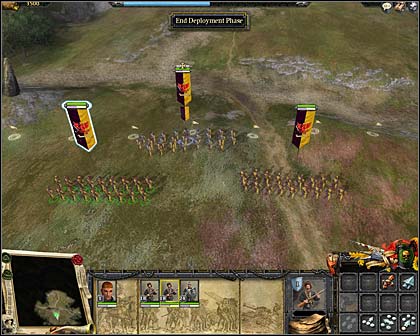 Deployment of our troops
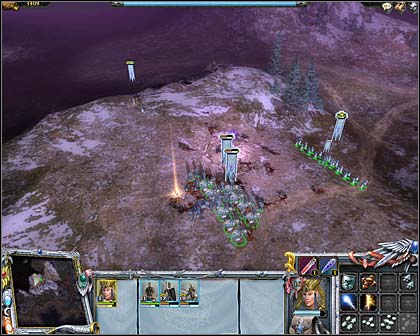
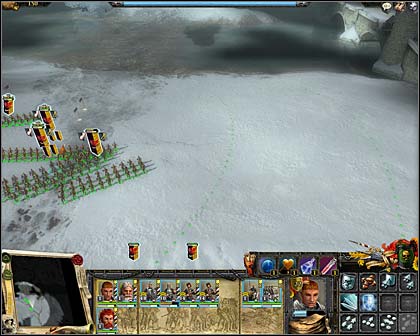
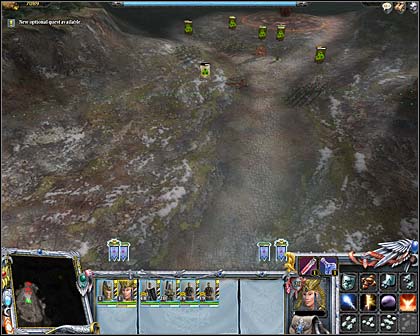
We should march north in this order, to the hill, where we will oppose one regiment of marauders. After short fight, we continue our trip until we face two units of marauders (one of them includes axe-throwers) defending a tower. Left handgunners' squad should start firing at throwers and the rest of our forces should attack melee ones. After short arguing we should choose one of shooting regiments and place it in the tower. The rest of our troops should go down from the hill and support battle mage fighting enemies. If we are fast enough, mage will survive and he will join our forces.
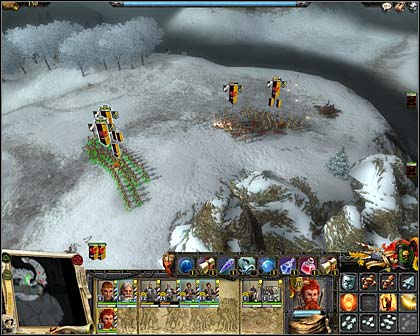
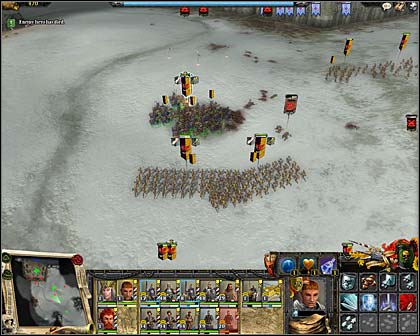
 Remains of enemy's troops flee from the battlefield
Only thing we have to do now is to kill the rest of foe's units and destroy their tower at the bottom of the hill. Then we must wait for cannons to reach the top and that's all - first mission is won. Meanwhile my brave Stefan and the wizard have both achieved second level. I chose Tenacity skill from command tree for first one and Fireball from combat tree for second one.
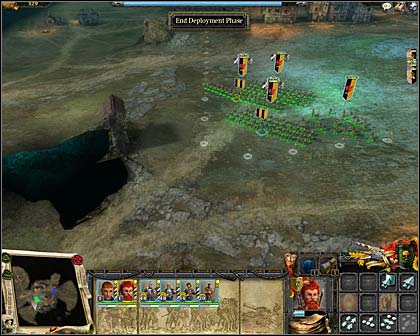
After short movie we are placed on strategic map, when we get halberdiers regiment. South from our position there is a camp, where we can heal our troops, buy sergeants, musicians and bannerbearers. I also bought some new magic items and better weapons and armours for my units.
This task is a little bit harder - we've got to aid ally troops in their fight with greenskins. But before we start mission, it is good to deploy our forces. I advise to put melee units at the front, shielding handgunners. Stefan should lead swordsmen and wizard one of shooters' regiments.
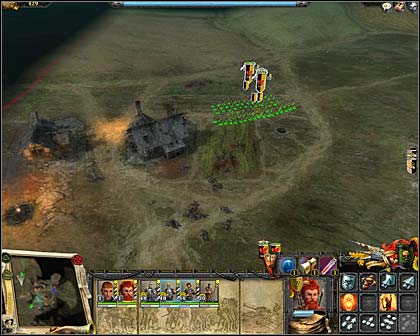
If you're in haste, you can just run to the defenders' camp. But it is good to turn right first and go to the swamp. When we reach it, we should stop and wait for two Orcs' units, which will come from behind a hill. If we rush, we will be ambushed. When we kill the attackers, we're free to continue our march and strike two regiments of Goblins. After that fight we can destroy few tents and collect some items.
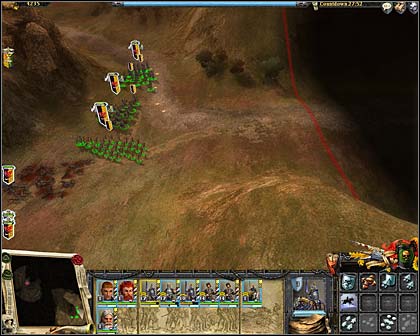
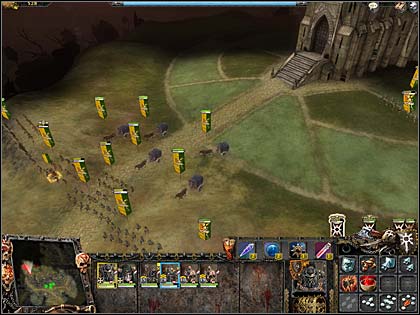
 To the left there where Orcs, to the right - Goblins
When we come back to the main road, we will reach two barricades after short time, one at each side of the path. Now it is best to deploy one handgunners regiment at each barricade, and the rest of troops between them. Now, for few minutes, we will be attacked by some greenskins' forces. We shouldn't strike with melee troops until the enemy is very close or there is some shooters' regiment we are willing to destroy. The last group will include troll, who is toughest foe in this mission. We should kill him as fast as possible.
 After the battle...
The last thing we are to do is to reach defenders' camp and help them fight off the rest of enemy's troops. It's rather easy, because most of work is done by our allies. When foes are fleeing, we have time to gather treasures. Meanwhile our heroes gained new levels, which should be spent on completing previously started skills.
After this mission I entered my camp to heal troops, buy weapons and armour for them and a mount for Stefan.
After completing second mission we get to know, that there is Orcs' camp nearby. Following check everything you can rule, I decided to destroy it. Soon it appeared to be really good idea - I found many treasures there.
I deployed troops in a standard way, and, after that, I marched ahead. After awhile I saw first group of Goblins - they died really fast. When you kill them too, you will see a crossroad. Stop near it and wait for few next greenskins' regiments. When all enemies bite a dust, turn left. Don't bother a camp that you will se in front of you. Because it is guarded by a giant, it is good to find another way in.
 Mentioned crossroads. To the left you can see my troops marching west.
You will reach to next crossroad after a short march, stop on the moment here, because Goblins' remains can attack you from the pit - as usual they're not a challenge. After quick extermination, it's the time to go in the northern direction. I advise now to slow down. As soon as you will see first green regiment, stop and throw on him wizard's Fireball. Such tactic allows destroying every squad in the camp one by one. In one of Orcs' regiments you will find the commander of hostile armies - if you want, you can challenge him on for a duel, though I wasn't fast enough to do this - my halberdiers just slaughtered him.
 On this picture you can see part of a race called: "Who will reach greenskins' wrecks first"
After cleaning the camp we must do two things. First: slay that lonely giant and second: destroy all tents. In total whole mission appeared to be very profitable - I found a lot of gold and first of all both heroes earned 6th level. I finished the development of Tenacity in the Stefan case and began to invest in Warmonger. The sorcerer became the master of Fireball and began the master of Agsha training.
After the battle I moved to hunters, thanks to what I received additional squad of 20 archers. I replenished losses in the camp, I bought von Kessel a mount and weapons and armours of the best quality for archers. Unfortunately, as skirmishers, they can not possess the class three.
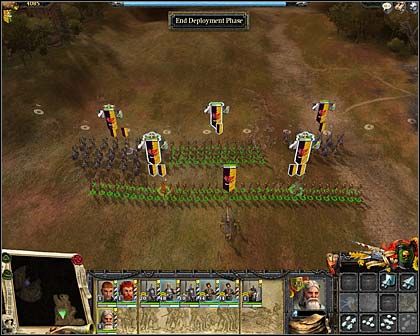
This mission is typically defensive one. We begin it surrounded by urban buildings, which we have to defend. I recommend initial setting, such as on the picture below. As you can see, I decided to take hunters instead of one of handgunners' regiments, though they were surely weaker. I simply wanted to raise their level of experience.
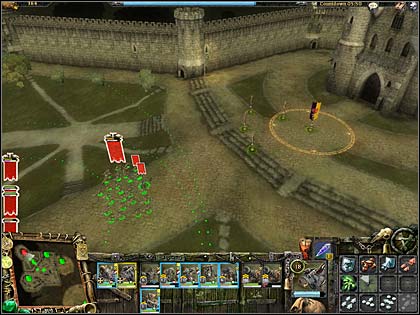
 Initial troop deployment. But as I see it now, I should place halberdiers in front of handgunners :)
First we march in the south-western direction, where we will encounter marauders. A quick fight and we are free to move north. It is proper tense good to make haste and turn on the running mode, because two hostile groups attack two lonely buildings. Crush them quickly and then distribute your armies on two groups. Halberdiers and handgunners under the lead of the wizard leave near chalets, but send back the Stefan with swordsmen and archers to the place, near which we began the battle. Meanwhile allied squads, protecting the eastern part of the city, will be attacked by two groups of marauders - we don't have to bother of this, because enemies will be trod into the ground very quickly. Each of our groups will be attacked a moment later by other hostile troops. When we deal with them, we should gather our army in the town quickly.
 Those two lonely buildings, which should be defended, but is this possible?
Hurry is advisable, because more and more large groups of Chaos' servants will begin to approach from the east - our allies will soon be massacred without our help. I recommend the following tactic: move forces east, destroy enemies attacking from that direction and then return to the west part of the town in aim of dealing with two other waves of foes. Now several squads will approach from the south-east, together with a chaos spawn which is the heaviest enemy in this mission. After that, the last group, including hero and another beast will appear. I challenged the champion, but I would not say I defeated him without problems, in spite the twice higher level (10:5). That is why it is better to let our squads to finish him off. From the other hand slaying him gives our hero a bit of experience. The mission is finished after destruction of last Chaos' servant. Don't be concern, if you did not manage to collect some objects from the ground - they will hit to your rucksack anyway. Heroes won a bit experience in a lap time. The wizard developed in Master of Agsha further, in the Stefan case, after reaching by him 11th level, I decided to invest in the duels tree, and concretely in Deadly strike - it later turned out to be a good investment.
We hit to the city, after finishing the battle, where we can arm ourselves. We, as usual, should replenish personal lacks, and then look to barracks - we can purchase cavalry squadron there. Then it is good to buy them the sergeant, musician and bannerbearer, the best weapons and armours.
Before I will pass to describing the attack on the fortress I will say about the small quest which we can make before. Once you reach crossroads you can move east where the blockade prepared by Orcs is. This time you don't have to slay all greenskins, but only their boss. It is good to mount Stefan before this duel. The fight is not difficult, and my hero received 12th level. I decided to spend the captured point on the further development of deadly strike.
I moved north after the victorious duel. Before the proper battle the game asks us to choose army which we will take to part in the battle. It is good to rely on her recommendation and leave the cavalry in the camp, it is not suitable to the assault of the fortress. Besides, you'd better equip your regiments with kegs of powder and ladders to climbing on walls worth. When we are ready, we can deploy our troops.
 Assault on the gate. To the left you can see our goal - checkpoint
After looking on the visible part of the battlefield one can notice two paths leading to the castle, eastern and western. Cannons and regiment of greatswords stand near the first. We place archers nearby and the rest of units as far to the left as we can. End of deployment phase.
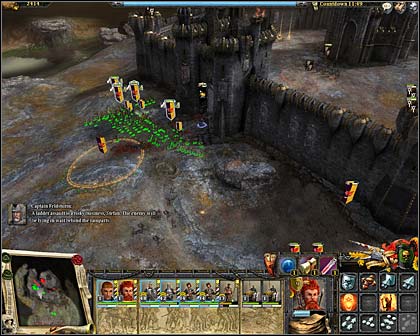
We take main forces and go ahead, straight on the gate of the hostile fortress, destroying several squads of Chaos' servants meanwhile, until we reach first checkpoint (we should stand near it for a moment, to take it over). Marauders squad will move in a lap time on allied cannons. When greatswords see them, they will move to the fight. It is good to support them with our archers and to chase the enemy survivors together. When both of our groups come near the gate it is time to assault it. The enemy will help us with this task, opening to make a counter-attack on us. The only thing we have to do after defeating foes is to capture another checkpoint behind the walls. Battle is won.
During the assault, my sorcerer gained tenth level, finishing learning in Master of Agsha field at last. After cut-scene first act is done, and we are transferred, together with received cannon, to the new land. Unfortunately we have only field camp here, where one can only replenish losses. Fresh and rested we can continue our path of glory.
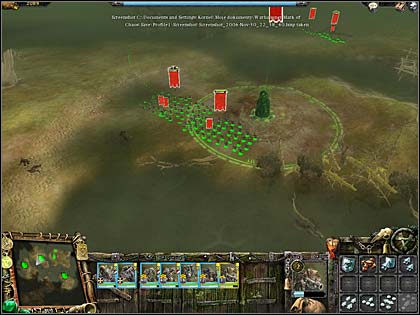
This mission is more difficult than all previous - it took four times to me to do it properly. Ok, we begin preparations. Before the battle, in the camp, put the Stefan on the horse. When it comes to deployment phase, add von Kessel to the cavalry and the wizard to shooters. Place troops as on the following picture and switch to the run mode.
 Troops' deployment
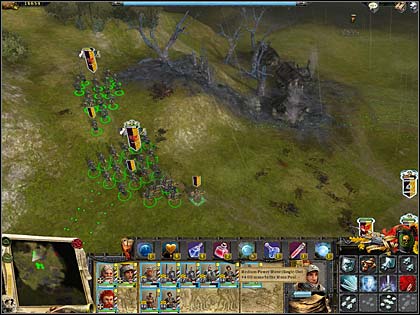
We move forward after beginning the battle and place all armies, with except of the cavalry, near the edge of the slope seen before us. Knights go down from the slope, at its bottom they turn left, and soon right again, to have the cloud of the green gas to right side. Cannon shooting green rays will stand before them, order them to attack and destroy it. Don't bother the squad standing next to it - it will not move on you. However cavalry, as soon as it finishes smashing the cannon, should withdraw to our main forces, which, in a lap time, were attacked. Rats in this mission are able to pull themselves together after breaking down morale very quickly. This reason and large quantity of attacking enemies draws us to continuous defence and quick change of targets. Do not chase defeated hostiles, neither distract strengths excessively. Manoeuvring the cavalry and using the wizards' Fireball is very important. First thing is especially significant for the efficient leadership in this battle. Do not throw it alone in the enemy, because it will most probably stick and be massacred. Some Skaven regiment will appear on your backs and attack cannon in a certain moment - it is good to destroy it using cavalry. If some of your units take large losses during the fight, withdraw it - it is important to have at least one man in each regiment.
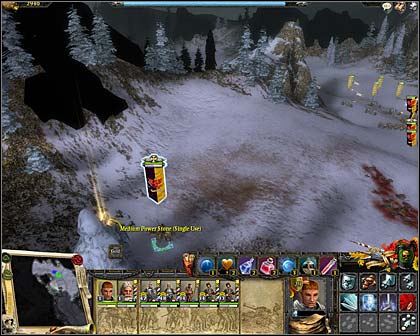
 Regeneration shrine. The Reinforcements' Horn lies ahead.
When rats' wave weakens a bit, it's time to move ahead. Go in the direction of the shrine visible on the picture above. Do not enter clouds of gas and fight off rodents. When we reach the altar, we have to destroy it and build up new one (this happens automatically). When it's done, put nearby the most damaged unit - best the cavalry, because there is a large chance that it earned new level which would enlarge its knights' number above the initial state. After the regeneration of strengths (attention, the power of the shrine is not infinite - use her with judicious) we head in the direction of the horn. It is best to divide a little our forces in this moment. Put archers and handgunners with the wizard near the hill. Leave halberdiers insured by knights near the shrine, and remaining troops on the right side of the hill with the horn.
Prepared we wait for the enemy. Fortunately reinforcements will come from the eastern direction and support us very effectively on the main front. Rats' squad will approach in a lap time from the left side - attack them with halberdiers first and then charge from the side with the cavalry. When enemies' morale breaks down, shift the infantry to the main front, and let knights chase survivors to the edge of the map. Some of rodents' squad probably waits there. Break it down and come back to the shrine.
 Our main goal in this mission
Order the defence for the main forces, until you do not defeat the Skaven hero. The horn, which helped rats restoring their morale, will fall out from him. When you already deal with boss, move all accessible troops (leaving behind regiments, that are decimated strongly) and attack the altar seen above. The battle is won after its destruction. During this battle Stefan earned 19th level, spending 5 points in Tenacity, Warmonger and Battle cry and 4 in Deadly strike. The wizard climbed on 17th level, putting 5 points in Fireball, Master of Agsha and Burning icon and 2 in Divine sight. The last two abilities belong to the command tree.
After this mission we still have only a field camp. We should regenerate strengths and then march forward. Now we lose the control over Imperial forces and we start leading Elven mage. She does not have any troops with her, but she is level 15, which should be spent on following skills: Khaine's wrath, Master of Hoeth, and Magic mastery - all from the Combat tree.
We begin this mission having only Aurelion. The task can seem very easy from the beginning, but you will have to make a lot of efforts to not lose the whole squad at the end. This time there is no deployment phase.
At the beginning some marauders' group will jump up from behind trees, one shot from Khaine's Wrath and they fight much worse. There is no problem with them generally. Knock out them and move in the direction of the totem. There a clash with another regiment waits for us, after which we should destroy those bindings. We have first, very effective, squad of archers after a short moment. We add Aurelion to it and march left. We will encounter one more hostile regiment which will not even manage to come to us before its morale breaks down. Pick up gold and come back to the main road.
 First totem with archers. At the top of the screen there are crossroads. To the left - gold, to the right - another regiment.
When we continue wandering in the direction of the right part of the map we will come across on imprisoned spearmen. Marauders and Chaos hounds squads stand near. Because we already have shooting unit, it is good to destroy the totem from a distance. Right after we break down that stick, Chaos' servants will attack that freed regiment. That is why you should aid spearmen as fast as you can. This fight does not make many problems fortunately. Soon after the victory we march north. The Chaos' knights stand on the hill to the left. Use Khaine's Wrath first, then approach with archers and, when the enemies move closer to us, charge at them with the infantry. The next totem stands together with an imprisoned cavalry a little further. Crush marauders, free colleagues and move east.
 Third totem along with Silver Helms.
We should modify our tactic a little from this time. Spearmen with archers go ahead and Silver Helms at their side. When we encounter the enemy, charge with infantry, and when the opponent sticks in it, finish him off with riders. After elimination of several next squads, we will reach a hill, where last totem with imprisoned ballista stands. It is protected by demons of Khorne - this enemy is much tougher. Apply checked tactics: Khaine's wrath, shot with bows, charge of the infantry, and charge of the cavalry. Unfortunately we can bear certain losses here, that is why you should be very careful. When we settle matters with bloodletters, free the ballista and prepare to the most difficult part of the mission.
 The hill, we will defend
North of the hill there is large group of Chaos' servants, along with a champion, who must be killed. Deploy your army in the following way: ballista lightly to the right from the place in which it stands, spearmen where shooters on the picture above, cavalry a bit behind them at their right side and archers next to ballista. First we shoot with Khaine's wrath, ballista and archers at the Chaos' warriors and marauders group. This will cause the whole enemy's group will start moving. Hounds will reach us first. If we have still dozen or so spearmen, we can risk leaving the cavalry in the reserve. When warriors and marauders with the champion group come to us, move Silver Helms near the enemy's main forces and fall on his backs in aim of destruction of two regiments of axe throwers. After killing them all, attack the rest of foes from behind. Don't forget using ballista. If we have little spearmen at the beginning of the clash, fight off only hounds, and attack Chaos' main forces with the cavalry, as soon as they will be interested in our infantry. The champion makes up the largest problem. I decided to kill him with the help of troops, though he gave me large losses. Because Aurelion did not invest in the Duels tree, I preferred not to risk the fight one-on-one with this tough guy. The fight is heavy, but you will win it, though you should be very careful not to lose even on of your units. Remember to withdraw regiments which have been suffering heavy losses. The mission is finished as soon as you kill last enemy.
During this task Aurelion reached 17th level. I intended to spend gained in this way points on the development of Divine sight skill from the Command tree. After mission we can go to the city, where we should buy another archers and spearmen, second hero with mount and sergeants for all units. Unfortunately the next mission forced me to switch from the quality to the quantity tactic, but I will tell about this in a moment.
Remember archers are most important troops and main damage-dealers in this army. Cavalry and ballista are only support, and spearmen should be a wall which has to protect shooters. Deploy the army as on picture below and begin the game. Move spearmen a bit forward and turn them to the Wall of shields and archers to the Burning arrows formation. Do not move the cavalry during next few minutes. You can charge with them only if there are no other hostiles on the horizon. It is important to have at least five riders at the end of first wave of Skaven. Do not change position until enemy hero appears. It's best to kill him from a distance. If he approaches too close, then we can challenge him with our fighter. When we already deal with that boss it's time to start the second phase of the mission.
 Positions of our troops
Now we have two roads to choose between: to the upper left or bottom right corner of the map. Probably our melee units suffer many losses, so it is good to use the small steps tactic. As I've already said shooters are our main strength. Restore the mode of normal shooting on the stronger of our archers' regiments and march left slowly. You should be very careful, because of rat-ogres coming from the northern direction. Concentrated fire supported by a bit of magic generally will be enough to drive them off. Do not play in chases in any circumstances. Additionally from our front there will be attacks of other Skaven regiments. Be careful when you approach the crystal - single unit will suddenly attack us from behind. That is why we should keep melee troops whole time near archers and to defend them in the case of a threat.
 Few seconds before, there was first of crystals we have to destroy.
After destroying first crystal it is time to go to the second one. Until this moment most of hostile troops should be dead. But this doesn't mean we can stop being cautious. Near the target of our mission we will meet few last Skaven regiments (including stealthy one) with a hero. Fortunately our archers should be able to kill most of them before they reach our lines. During this battle my heroes reached 22nd level. Aurelion finished Divine sight and started Inspired leader. Fighter continued developing command tree buying all passive skills he could.
 One of the last Skaven regiments defending second crystal.
My losses were so heavy, that despite 5000 gold earned during a battle I had to sell few items to regenerate my troops and buy them some upgrades. After visiting the camp we can freely march forward until we reach Imperial castle. At that moment we will gain control on von Kessel's troops.
If you can, buy third hero before this task. I bough this Jade Wizard after this mission - he had 21st level and I spend his point on following skills: Herald of storm, Stormlord, Father of Thorns from combat tree and Howler wind, Freezing mist from command tree.
Only heroes (max. 3) can participate in this mission. It is fairly easy. If you follow this rule: mounted Stefan shielding wizards, you won't have any problems. Our goal is to acquire 3 artefacts. The problem is that they are guarded by few undead troops that appear when you approach those items. Because of that it is better to destroy everything in sight range and then pick up treasures. If your fire mage has ability Master of Agsha, you should wait with his Fireball until targeted unit stops - it will burn nicely then.
It's all for this mission. As with all optional tasks it also provides fine amount of treasures to find. I spent earned gold buying next Knights of the Panther and upgrades for all units that hadn't already had them. If you don't want to spend too much money - don't buy any new regiments, because you can only take 4 to next mission.
This is a rather difficult battle, so I advice to move very carefully, fighting in melee only when there's no other way. First we should deploy as on picture below. For first few minutes don't move, but only wait for enemy to attack. Chaos' warriors should be main target for our siege weapons and shooters. Then attack with infantry and slay all remains. When we are done with it it's time to change position. Place your troops alongside the road which is seen to the left. There wait for Chaos' knights and, after killing them, move in north-western direction.
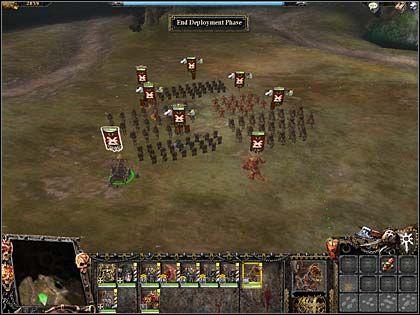
 Deployment of our troops
Soon we will reach a ford which will allow us to cross the river. When we do this we will see a hill with Chaos' hellcannon on its top. We must be fast to not allow this artillery to fire at our troops.
 Bridge to the right, ford leading to enemy's cannon to the left
After conquering the hill it's time to deploy our troops once again. Our cannon should take place of destroyed one, infantry block entry to the hill and handgunners behind them. If you are fast enough you will be able to shoot at hostile forces standing on the right side of the hill. From this point our artillery will be able to shot at almost everyone on the map. Meanwhile our troops will be attacked by enemy. A group with Chaos' champion will soon approach. You can challenge him, but be careful - he is tough.
 Here was a hellcannon, soon will be Chaos' graveyard
When we kill all hostiles, it's right time to go back to the main road. We leave our artillery on the hill and move the rest of troops across the bridge. Meanwhile our cannons should destroy marauder axe throwers' regiment defending it. It stands near another hill, which we should occupy. When we do this it's time to attack evil sorcerer. He's a chicken and he will flee leaving 3 Chaos' spawns behind. It's easy to kill them, especially when we charge with Stefan at them.
When those beasts are dead we can shoot at the rest of Chaos' forces. If you use Father of thorns spell on warriors, they will stop moving and will be nice target for our handgunners. When every single enemy is dead, mission is over.
During the battle my heroes gained few new levels. Stefan and jade wizard continued the path they had chosen before. Fire mage learned Eagle eye skill from Command tree. After this mission we don't have to enter the camp, but only move forward to a village where we will get regiment of flagellants.
When we reach crossroads we should turn left and march toward a group of Chaos' servants. Its leader will challenge Stefan (remember to mount him before the fight). You shouldn't have any problems with killing the enemy. As a reward you will get two items and some gold.
Now it's time to regenerate. First we switch to Elves and buy upgrades for ballista and archers. Then move back to Imperial forces, buy second regiment of knights (if you don't already have them) and upgrade all units except hellblaster (if you don't have enough money, don't buy bannerbearers and musicians).
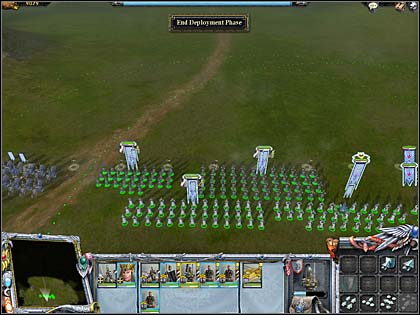
First I will tell what we have to take to this mission. I propose 2 regiments of handgunners, 2 of Knights of the Panther, 2 of Elven archers and one regiment of swordsmen, halberdiers, flagellants and hunters. Besides I recommend taking ballista, cannon, Stefan, Aurelion and fire mage. Let's deploy troops as on the picture below and group them into 5 formations: first - flagellants with hunters, second - the rest of infantry, third - cavalry, fourth - handgunners and fifth - cannon. Elves make separate formation - we don't have to bother them if we move fast enough - they will defend themselves.
 Deployment of Imperial troops
This battle consists of two phases - getting to the fortress and slaying foe's remains. Infantry with handgunners and cannon are our main force. Two other groups should attack enemy's units marching on us from our sides - trust me, it's not difficult. During whole mission I didn't encounter any serious problems. In fact it was so fast, that I wasn't able to give all orders I wanted.
 Down there Chaos knights are dying
After driving off hostiles attacking the fortress we only have to defeat the last of Chaos' groups defending their cannon. And that's all. If you concentrate on killing foes one by one, you will easily win. After this battle we will see short movie and then the third act of Imperial campaign will begin.
For this mission I chose following units: all heroes, cannon, both handgunners' and cavalry regiments and swordsmen. I didn't take halberdiers, because I wanted to level up my second knights unit, though infantry would have been better. Because of that let's assume, you will take halberdiers. We deploy our forces as on picture below switching weaker horsemen for halberdiers. Now it's time to rock.
 Deployment of troops with two Knights' regiments
We have 30 minutes to reach priest - don't worry - it took me 15 minutes, so you don't have to hurry. During this time cleric will defend himself from all forces attacking him. First we march right - there is a small valley where three regiments of Skaven hide. They're no match for our troops so defeating them should be easy. After that our secondary task is done.
 Skaven camp... was here...
We move in the north direction trough second exit from the valley - be careful, just behind it hides another ratmen unit, which can strike us from behind. When we kill enemies we move a little bit further, to the plain space, and take up standard position. For next few minutes we will have to defend ourselves, because great numbers of Skaven will come. If you have 2 infantry regiments - avoid melee fights as much as you can. Your shooters should damage most of foe's units enough to make them flee. Look out for your cavalry, because it may stick in ratmen units and be slain very fast. If you have two such regiments - manoeuvre them very carefully - strike and withdraw. Also spells are very helpful, especially Father of thorns. When you kill two groups with rat-ogres it's time to move on.
 Town's ruins
On the picture above you can see another place where we will have to stop for awhile. When we kill all Skaven troops we can move on until we meet last 2 foe's regiments with their leader. After short battle it's time to move close to the priest and the mission is over.
During that task my heroes achieved few levels. Stefan learned Blade of death skill, fire mage Conflagration of doom and jade wizard Earthlord. After the battle we can regenerate and spend all 25 point which brother Gunther has. I thought him the following ones: Tenacity, Warmonger, Implacable abhorrence, Unshakable faith and The undying servant.
Once again we can earn some bonuses. This time we've got to defend four Dwarven catapults until they reach the end of the map. I advise to take all infantry and shooting troops (no cavalry) and Stefan with jade wizard. It is good to mount Stefan for this mission - he won't be able to join any regiment, but trust me - it will be helpful.
 Brave Stefan leading our forces
Only thing we must do in this mission is to be in front of the catapults all the time and kill all enemy units. It wouldn't be hard if caravan waited for us. But don't worry, probably at least three will survive. You must be careful, because there are some points, where enemies can hide and be seen only when you are very close to them. Look on minimap to be aware of ambushes. Remember to use both heroes - Stefan is great tank, you can charge with him at foes and then strike with infantry. Jade wizard can use Father of thorns to stop some of attacking forces.
 A place, where you can find some treasures
The hardest part of this mission is at the end, where some archers are standing above the road and in front of us there are main Orc's forces. The other problem is that our troops will probably have no stamina and won't be able to run. Because of that melee fighters should move forward and shooters should destroy archers on both sides of the road. Fortunately in critical moment some Dwarven units will support us, so there should be no problem with completing this mission.
Grateful beardmen will give us one of their catapults and melee units. Because next task can be only made by three heroes, you should concentrate on equipping them. Of course it is also good to regenerate harmed units.
As most of other mission this also is hard only near its end. It consists of two phases: first we must destroy all graves and troops guarding them and then destroy the vampire lord.
 First of four chambers where we have to destroy some graves
During whole mission we should destroy all sarcophaguses we meet. It's better to destroy them as fast as it's possible - they produce new hostile troops from time to time. When we reach the chamber showed on the picture above we will face few skeletons' regiment. After cleaning this room we have three ways to follow. The upper one is the last where we will go. No matter which of other two you choose, you will approach one of two chambers very similar to the centre one. You must destroy all troops and graves you will encounter there. After that it's time for our main target.
 A hidden camera recorded few vandals destroying ancient tomb...
When we come back to first room a group led by the vampire lord will attack us. We have to kill everyone except him. When we do this we should go to last chamber and destroy all sarcophaguses there. Only then we will be able to slain vampire. It's not too easy and takes few minutes, but it's possible.
Meanwhile my heroes earned few next levels which were spent on previously started skills. After this mission we should march forward until we see short movie after which we will take control over the Elves.
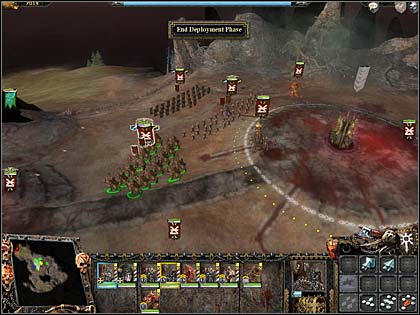
In this mission we must defend our camp. Let's deploy as on the picture below - as you see I didn't take any cavalry - it's almost useless in defence.
 Troops' deployment
Enemies can come from three directions - only north is safe. Spearmen should stand in Wall of shields formation. Key to success is to manoeuvre with archers so that foes can't reach our infantry. In most cases it's easy, so it's possible to end this mission with very few losses. In some moment there will be plenty of items on the ground. It's best to gather them with our fighting hero, of course he should leave his unit first. Additionally he can be a kind of wall on southern front, especially when Chaos' knights come from that direction. Enemy's forces will soon end and we can feel a winner once again.
After this battle we don't enter the camp but move forward to crossroads, where we turn left and challenge Skaven boss in a duel. Aurelion shouldn't have any problems defeating him if you don't forget using her abilities.
After that it's time to visit a town. At this moment you should have plenty of gold, so you can buy some upgrades and items for your troops. I decided to buy new regiment - swordmasters of Hoeth. They proved useful in next missions.
This mission is rather easy, so idea to buy swordmasters of Hoeth proved to be good one. But don't make my mistake - I used them only few times, so they didn't even reach second level. At the beginning we deploy as usual and then move forward until we can see the barricade showed on the picture below.
 First barricade with obelisk
In this moment it's good to use our bows to destroy barricades only - without attacking enemy's troops. When they're destroyed we can shot at units. It's up to you whether you use your infantry or not. Be careful, because evil sorcerer will place a wyrdspawn between our soldiers, so I advise to leave at least one melee regiment near archers. Because there will be a regeneration shrine on our way it's no use to save swordmasters. After destroying all hostile forces and their obelisk we should move right, where similar group waits for us.
 To the left - second obelisk, to the right - shrine of regeneration
With this roadblock we should do the same as with previous one - kill'em all :) After that we should heal mostly damaged units at altar. Now it's time to move in south direction.
This time we can make use of barricades but there's no need to do this - it will take time for our archers to reach them, which could be spent on supporting our infantry. As usual this fight is the hardest one in this mission, but still not hard enough for us. If we keep killing enemy's units methodically, there should be neither problems nor high losses. If our fighting hero has Dragon slayer ability it should help greatly defeating wyrdspawns. When we kill all foes we're once again victorious.
Meanwhile my heroes gained few levels. Aurelion started learning Flames of the phoenix skill and commander ended Dragon slayer. In the camp it's good to buy second ballista and some powder kegs for infantry. Next we will retake control on Imperial forces. In their case it's also good to buy siege equipment, because we have another fortress to capture on our way.
For this mission I chose all Imperial forces except cavalry, flagellants, hellblaster and priest. I deployed troops in ordinary formation and started the battle.
In the beginning it's good to move all forces forward except siege weapons, which should be placed a little bit right and ordered to start shooting at foes standing near altar. Meanwhile some hostile regiments should attack us. When we kill them go to the mentioned shrine to regenerate. Now our artillery should start firing at Chaos' hellcannon which stands on a tower on the right side of the gate. When this one is destroyed, the other one, on the other side of the gate, should be a target. Remember to right-click directly on a cannon, not a tower or you will mark wrong target. Meanwhile all our troops should be healed - this shrine has a lot of power.
 Shrine of regeneration
When we're ready, and hellcannons are destroyed, it's time to crumble walls. You can do this using cannons or powder kegs. First method is longer, but safer one. If you use kegs, remember to draw back after deploying them, or they will damage your troops. It's good to destroy at least two fragments of walls to have wider path to the fortress.
 Fortress' gate and marauders regiment a second before being hit by cannonballs
When desired fragment of walls is crumbled, it's time to move inside. This part is tough - many hostile units come from few directions, along with two heroes. Both of them were challenged by Stefan, who killed them easily. If you manage to shield your archers and cast some spells, there should be no critical losses.
During the fight my heroes gained few levels. Stefan ended Storm of steel, fire mage started learning Flaming shield of Andor and jade wizard Magical ward. After the mission we will see a movie and be transferred near Talabheim city. There we will once again control Elves.
We should take 3 archers' regiments, two ballista, both heroes and as much infantry as we can. If you still have some free slots, take great eagle, not cavalry. For this guide purposes I will assume, that you have 3 units of archers, 4 infantry, 2 ballista and 2 heroes
This time we deploy our troops in different way: all infantry as close to the corner, near which it stands, as possible. Ballista, heroes and archers at the left end of deployment field. It's time to rock. First we move only ballista. We move them in the left fortress' corner direction. After few seconds we should be able to see a tower with hellcannon on it - it's our firs target. When we destroy it, two units of Chaos furies will move toward us. We should kill them with our archers, in the same time moving artillery right - to the next cannon. Where furies and second cannon are destroyed it's time to move back to place where infantry stands. Then we take our fighting hero and send him along right side of the map to the next of its corners. When he reaches it, move him toward walls until he sees the last tower with third hellcannon on it. Meanwhile the rest of our troops should move in the same direction until our ballista can shoot at those cannon.
 The gate and first checkpoint
In this moment regiment of Chaos knights should appear near the gate. Infantry should guard our artillery. When both cavalry and cannon are destroyed ballista should start firing at a part of the walls to the right from the gate, while Archers should kill two units of axe-throwers, you can see on the picture above. When some part of the wall is destroyed, it's good too shoot with artillery at marauders standing on it. When we're ready, it's time for the last phase of that battle.
 Heavy damaged, but victorious Elven troops
Right behind the gate there is a large group of Chaos' servants. Because it includes another Chaos' knights' regiment, it's good to place spearmen at the front of our forces. You must be careful to not damage your units with ballista. If some regiments are suffering heavy losses - they should be withdrawn. When the last enemy is dead - victory is ours.
During the battle Aurelion gained 35th level, and the other hero 30th. They both ended learning skills they started previously. After that mission you can regenerate and go to crossroads, next mission awaits.
This mission is fairly easy - we have to destroy all tents in Orcs' camp. To this battle you can take whatever you want - probably units that need levelling. Deploy as usual with cavalry on the left and ballista on the right side of our main forces.
 Deployment of troops
First we move forward. After short time we will engage two groups of greenskins marching on us. We can attack them with all units except Silver Helms, they should rotate 180 degrees and wait until Goblins' regiment appears near our back. When we kill them, cavalry should move to the right. Meanwhile main forces should destroy all enemies.
When riders come to their position, some hostile units will march from upper-right corner of the map. Order ballista and archers to fire at them, then cavalry should destroy remains. In short time two greenskins' bosses will appear - it's good to challenge them both. Meanwhile our troops should finish off enemy's regiments. When there's no foe around and we gather all items, we can strike on camp.
 Here you can see some Orcs biting a dust and some tents not destroyed, yet...
On this stage the only hostile troops you will see, are probably heavily damaged, so there should be no problem with killing them. When the last tent is destroyed we're done with this mission.
During this battle my heroes gained few levels. Aurelion started learning Blessing of Ashuryan skill form command tree, while fighting hero started studies on Phoenix shot spell from combat tree. After this mission we can regenerate and move to the next point, when we will regain control on Imperial army.
Another easy mission. I take catapult, Dwarven infantry, swordsmen, all shooters and cavalry with me. Riders and hunters formed one group and the rest of forces second one. I advise you to do the same.
We move main forces forward and cavalry group to the right. We can see a small canyon there with a valley behind it. Charge in there and destroy a single unit of axe-throwers and then Chaos' hounds. Short after that Chaos' furies will appear - they're target for our hunters. When all foes are dead we can move back to rest of our troops.
Meanwhile there will be a lot of entertainment on the main front. There will come some regiments of axe-throwers, Chaos' warriors and knights. If we concentrate fire, use wizards and catapult we can survive without any losses. Both groups should end their fight in the same time - connect them and move in the north direction.
 On the riders' right side we can see remains of hellcannon
Near the top of the map we can see one unit do Plaguebearers walking near the bottom of a hill. Hellcannon stands on its top, which should be target for our catapult. Attack demons with the rest of our forces. When we're close to them, regiment of Chaos' knights will strike on us from the hill - it's best to stop them using Father of thorns spell. We will move to them when we finish first group off. When there are some of our units free, we can order it to support destroying hellcannon. When there are no foes nearby, we take cavalry and move along the road to the left. At its end marauders' regiment waits - they're no challenge. Meanwhile the rest of the army should march to the upper-right corner of the map.
 Stefan after second victorious duel in this battle.
Now it's time to fight another two groups. If we don't rush, we should be able to crush them one by one. First one includes chaos warriors, champion and wyrdspawn. Beast is target for infantry, warriors for father of thorns and some spells followed by knights, while champion can be challenged by Stefan. In short time there is no enemy alive. Second group can be killed in the same way, but this time we have to face two regiments of demons and one sorcerer - all servants of Nurgle.
After this mission we move to next crossroads, where we should turn south and fight a duel with Nurgle's champion. Once again he's no match for von Kessel.
 Good vs. Evil
After both tasks it's time for great preparations - final battle awaits. My advice: let's take 2 Elven ballista, Dwarven catapult and Imperial cannon. In addition to them it's good to take 3 regiments of Elven archers, 2 handgunners, 2 spearmen, 1 swordmasters of Hoeth, halberdiers and swordsmen, Stefan, Aurelion and both human mages. All these troops should be upgraded as much as we can.
It's time for final battle. When I tried to do this mission for the firs time, I was easily destroyed. Remember: attack is the best defence, or at least partial attack :) First we have to deploy our troops - it's best to place whole army, where units seen on the picture below are. Because you will spend most of the time fighting near this narrow passage, there will be a little space to manoeuvre. Remember - take all shooters you can (but don't buy new ones) and no cavalry - only Stefan should be mounted. Ok, time to rock.
 All your forces should stand near this place
Just at the beginning of the battle let's move to the first line of defence. You will notice a hill in the north direction soon. A hellcannon stands there and shoots at our troops. It's target for our artillery. Meanwhile first group of Chaos' servants will strike on us from the left - we should kill them as fast as possible and then send Stefan near previously mentioned hill, so that we will be still able to see the hellcannon. When demons guarding it suffer some damage - we can charge at them with our brave hero and destroy them easily. At this moment our siege weapons should switch target to other two hellcannons which will appear from the east direction.
My first battle - I allowed enemy to crumble part of walls. This didn't end nicely.
For some time there will be enemy's forces attacking us only from the right direction. All the shooters you have should be enough to make foes change their mind. In some moment there will be a lot of Chaos' servants marching on us from both directions - don't worry, if you concentrate your fire, use spells and finish them off with melee troops, there will be no problems defeating them. But remember: artillery should only target hostile ranged units.
If your allied troop fighting near first line of defence die, withdraw to second one. Narrower pass is easier to defend. Shield your siege weapons all the time. In some moment Nurgle's sorcerer will appear. First attack him with infantry and then challenge him with Stefan. Right after his death next wave of enemies will appear. Fortunately narrow pass will help us crush them. Defend yourself bravely until you see the demon prince, which is your final target. Use on him the same tactics as on previous hero. One minute later you're victorious- congratulations!!!
This mission is easy and straightforward. We have to gather all Chaos' troops we can find. First we march north and kill two Imperial soldiers. Few seconds later we will encounter a little bit bigger group, but it's also no match for Thorgar Axe of doom and axe throwers help us greatly. Be careful - the mentioned skill is very powerful, but hams both friends and enemies. Use it only when you're sure, that there are no allied units in front of you. My idea for Thorgar: to be a tank.
Now we can choose between two paths: northern and western. Let's take the first one. Right after a turn we can see three items defended by another hostile regiment. Quick fight and treasure is our. Now we can go back to the main road, where, after short march, we will meet marauder's unit fighting swordsmen. We should help our allies and turn in the south direction, where another hostile regiment awaits. When there's no enemy around we can move west.
 First "secret place" with rewards
Further trip along this road will lead us to a small group, consisting of few marauders and sorcerer, being attacked by Imperial forces. It's good to move fast, because we want at least one man alive in allied unit. After that fight we move south where we can find some new items. When we gather them we can march north until we see regular battle. We should attack handgunners as fast as possible, because they can harm us greatly. Then we can destroy hostile infantry and mission is over
When we end that task we can move forward and enter a camp, where we will be able to regenerate our forces. In fact we don't have to invest in all troops - only four best units matter (probably 2 regiments of axe throwers, 1 of marauders and 1 of Chaos warriors. My heroes developed following skills: Thorgar Axe of doom and sorcerer Wind of death.
This is another easy mission - we have to only move forward and kill everything in front of us - no matter if it's Chaos' or Imperial servant. We add Thorgar to warriors and sorcerer to axe-throwers and we're ready to fight.
Right in front of us there are swordsmen and handgunners. Axe throw, charge of infantry and some more axes - and there's no problem at all. Further trip in the northern direction will take us near two fighting groups. We destroy them both and move to the right. Soon we will find another combat which should be ended by us. There's no finesse needed, just frontal attack.
Now is right time to come back to the main part of the town. We will meet some more troops, which don't like each other. Who could be able to stand still, when there's so beautiful fight? We engage and kill everyone who's not with us. At the end there's one champion, who must be defeated by Thorgar (if he has at least 15 health points) or just slaughtered by our units.
After this mission, we will be granted Chaos knights - there's no stronger ordinary unit in this game. Because of that it's good, after regeneration, to buy them sergeant and best weapon and armour we can. If we still have some money, we can do the same with warriors and axe-throwers.
It's rather unique mission - we have to claim five relics, which are transported by few caravans from Imperial temple. During it we can gain some nice items and experience, but you must be careful to not to lose too many soldiers - they're really expensive.
Unfortunately this mission is one of the longest, because transports move very slowly. There will be four caravans (two relics are transported in the last one) and each following is better defended then previous one. First two are easy to defeat, third includes some nasty handgunners and fourth is tough one.
 Source of our spoils
The best place for ambush is near position we start from. After moving north, leaving cavalry where it stands, we will come to crossroads leading west and east. Caravans will come from the western direction, so we should deploy all units except riders near the right side of the fork. Our tactics: we allow enemy to charge at warriors, then strike with knights at his side or at handgunners behind him. Flagellants should be attacked last, because they're unbreakable and it's better to make the rest of hostile troops flee first. With the last caravan a priest will come, who can be challenged by Thorgar.
After this battle we can move to another town, where we should buy three new units, especially at least one regiment of axe-throwers. If we still have money we can regenerate, starting from range units, but don't worry if you won't be able to heal everyone - there's regeneration shrine at the beginning of next mission.
Our task in this mission is to hold our positions for 15 minutes. First we deploy all marauders' troops on walls (both infantry and axe-throwers). Only damaged troops should stand near shrine to regenerate. Chaos warriors and knights should stay inside the fortress as a back-up.
We can divide this battle on two phases - before and after enemy units destroy walls or break the gate. Until this moment Imperial infantry will only use ladders to climb up the wall, and because of that we have to guard our throwers with own infantry. In some moment 2 hostile regiments will climb up on right part of walls. If we send there Thorgar with the strongest marauders' unit there should be no problem with them.
As you can see, somewhere there should be Imperial regiment
When our walls start collapsing we have to move most of our troops inside. Manoeuvring and strike at enemy's sides helps greatly. During the battle there will be two occasions to challenge hostile heroes, but it's probably better to crush them down with regiments. When time starts running out, it's good to heal mostly damaged troops at the altar, especially Chaos warriors and knights - they're most expensive.
 Some other Chaos champion tried to kill us... dreamer :)
During this mission my both heroes achieved 15th level. Thorgar learned Axe of doom, Unholy strength and warmonger, while sorcerer Wind of death, Steal soul and Call of the chase. After the battle we get a hellcannon and lots of gold, but we shouldn't enter the town, only move further to challenge some Chaos champion who tries to take our place. After his death we can repair our troops and make some reinforcements. Because to the next mission we can only take Thorgar it's up to you what you'll buy. I decided to acquire new regiments of Chaos warriors and knights, sergeants for all units and some weapons and armours for best troops.
In this mission we have to make few tasks, which will allow Thorgar to be true gods chosen. It's rather easy and the hardest part is right at the beginning.
Our first goal is to destroy three spiders' nests. Remember nests are our targets, not spiders - the fastest you destroy them the sooner you will get out of there. Arachnids are not very tough, but in group can make some damage, so hurry up. Fortunately we will be cured right after completing this task.
Second goal is to kill about dozen Plaguebearers. It's really easy, because only two of them attack us at once. We will get nice axe as a reward.
 Isn't that demon beautiful?
Third and fourth task we will do with two regiments of marauders (one infantry and one ranged) each consists of 30 soldiers. After entering next chamber we will have to slain few bloodletters. Unfortunately at the beginning we have to use Offering of blood to cure Thorgar from a curse, what will kill some of our troops. I advise to add him to infantry not ranged unit. When this task is done we move in the southern direction when another chamber awaits. We enter it with melee troops only - axe-throwers should stay in a passage. There will be 6 new demons of Khorne, which will probably kill most of our infantry, but don't worry, you don't really need them.
When we gather all items from southern chamber it's time to move north. Behind doors we will have to slain two Chaos spawns and one wyrdspawn one by one. After completing this task we will get good armour.
 Ok, this one is more beautiful
In the last task we're to kill our clone, but it shouldn't be hard. This time a magical ring is our reward. After short movie we will have to choose our patron god - Khorne or Nurgle. Forces of the first one fights better and hit enemies more often, but units of the second one are more resistant to magic. Besides after choosing one of them we will be able to buy only one type of demons - Bloodletters or Plaguebearers. Of course I chose Khorne, but it's hard to say which one is better. When you make your mind you'll be transported to the second act. We can use a town there, so it's good to upgrade four units you will take to the next mission.
This time we have to escort herald of gods to three altars, where he will perform rituals, which will grant us their favour. In this mission there are no hidden places where we could find some treasures - if we follow the herald, we will see everything we need. I took two regiments of Chaos warriors and 2 of knights and I lost only 4 of them during whole mission - so it must be easy :)
 Duel near second altar
After reaching each altar the herald must pray there for awhile. During this we have to guard him. Near first shrine we will get wyrdspawn, then Bloodletters and Chaos furies near the last one. As I said - there's no hard moment in this mission - if you block enemies with infantry and finish them off, or strike on shooters with cavalry you will win quickly. Meanwhile you will have to face two hostile heroes, who can be both challenged by Thorgar. If you want to be sure, that he will win those duels - harm his enemies a little first.
During this mission my heroes gained few next levels which were spent on learning Battle cry (Thorgar) and Swift command (sorcerer). After the battle we can regenerate troops and upgrade seven regiments we will take for the next mission, especially these new ones.
This time we've got to defeat one of Skaven clans to gain favour of the other one. This map is rather small and easy, and once again there are no side routes, where we would be able to find some treasures. All we need to do is to move from one warpstone to another. And something to remember - although Chaos knights are very powerful, when they get stuck, they can be easily damaged. So be careful - charge only when you're sure, that no other regiment will strike you from behind.
 First stone we have to destroy
Chaos furies are very helpful in this mission - Skaven almost don't have units that can harm them. What more can I say? Just don't split out, strike with all your forces at once and don't let cavalry get stuck and you should have really low losses.
After defeating all hostile rats and destroying all three warpstones the mission is done. From this moment we will command Skaven army lead by Kasgit from Clan Skryre. I invest his 15 skill point in following abilities: Warpbombs and Spell focus, from combat tree and Eagle eye from command tree.
First mission with Skaven and already tough one. We can take two heroes and six regiments. I advise to do following preparations: don't' regenerate troops after previous battle, but buy grey overseer, one unit of warplock jezzails and one warpfire thrower. Beside those two units let's take clanrats, stormvermins and both regiments of poisoned wind globadiers. Equip them with all you can, especially sergeants. Infantry needs also musician and bannerbearer, because their morale is rather weak. It's also important to buy the best weapon for artillery you can. My new hero developed following skills: Favoured minions, Tenacity from command tree and Crippling tortures from combat tree. Now it's time to siege.
Our cannons should be placed as much to the left as possible. Then we will see Imperial cannon on eastern part of walls. Deploy the rest of troops as close to map's corner they're nearby as you can. Just at the beginning move main forces a little bit closer to that corner - they will be out of a range of cannon seen just in front of our units. Meanwhile artillery should start firing at the eastern cannon. When it's destroyed let them do the same with that middle one. After that we will have to make some tricks. Move cannons in the western direction and main forces along the right side of the map until you see a regiment of handgunners hiding behind a barricade. They're target for artillery. When their morale breaks down some swordsmen and cavalry will move toward us. A moment later an archers' regiment will appear. Let them come as close as possible and charge with infantry. Shooters should be destroyed in ranged attack, because there's a third Imperial cannon nearby. When all hostile troops are dead we take Kasgit alone and order him to capture first checkpoint. When he do this the third cannon should be visible - destroy it with own artillery. Meanwhile use seer to regenerate most harmed units using Favoured servant. You can attach him to different units as long as this spell is active.
 Third checkpoint
When all enemy's cannons are destroyed it's time to crumble walls. It's best to start shooting at the part to the right from the gate. When our troops will be marching toward a breach, you can fire at units standing on the wall. When you capture second checkpoint move your cannons inside. Remember to heal regiments from time to time. When there's no enemy visible we can move to last two checkpoints. First will be that one seen on the picture above. It's surrounded by buildings, which can be destroyed by artillery. When we start shooting at units defending it, they will march on us. Strike them with all forces and they'll be dead in a short time.
 The last of mission's objectives
After that fight place cannons in front of the passage leading to the last checkpoint and fire at troops you can see near it. They will move on us, so charge at them and kill them all. Before you finish mission remember to regenerate your troops. During this battle my both heroes gained three new levels which were spent on Pestilence shield (Kasgit) and Magical ward (seer). When we come back to strategic map it's good to regenerate and upgrade five units you will want to take to the next mission.
Despite the title this map doesn't look like a town. Now it's a swamp for sure, with greenskins roaming around. Mission is very easy, because there are three regeneration shrines we can use. If you're lucky you can end mission having more forces than at the beginning. I advise to take same units as in previous mission, excluding warpfire thrower.
In front of us we can see a narrow passage with some Orcs behind it - charge at them, they're no match for you. Now turn right and slain another group of greenskins. As a reward we can regenerate forces near the first shrine - it's mostly useful when some of units have levelled up.
 The last of regeneration stones
When we're healed move to the previous glade and this time go in the western direction. We will soon see another hostile group, but with boss this time. You can just run through them and regenerate once again. To the north lies next glade with last altar. Of course it's defended by some enemies, but who would care? Now some advice: don't' pick up third artefact laying near that shrine. Strike at last group with final boss first. When there are no greenskins you can see, go back to the regeneration stone, heal yourself and then pick up that artefact - mission is victorious.
After the battle we can upgrade five units and one canon we will take to the next mission. Of course some items are also a good choice.
This mission is rather fast and it's possible to regenerate some losses. Deploy as on the picture below. Move a little bit forward, without changing the direction, and wait for enemy. After few seconds two Imperial and one Elven regiments should appear. Kill them fast and move along the road leading east.
 Deployment of our troops
This path will bring us near a hill, with a ballista (to the left - a target for a single melee unit) and archers (to the right - a target for the rest of our troops) atop of it. Another shooters' regiment can be so further so it's essential to reach it fast (after destroying previous targets). Remember of using Favoured servant. We place the cannon on the captured hill, as it's seen on the picture below, and we're ready to start the last part of this battle.
 The cannon shooting at Elven mage
Now we should be able to see following units: a mage and one regiment of swordsmen and one of handgunners. Those last ones should be shot by artillery. When they come closer charge at them. Last thing to do is to kill the mage - mission is won.
After this victory we regain control on Chaos' troops. First it's good to buy third hero for both Skaven and Chaos and shield with a mount for the second one. In my case he had 25th level. He learned three top skills from combat tree and Warmonger with Battle cry from command tree (development of Skaven hero will be described later). Now move Chaos' forces to crossroads and duel with Sigmar's priest. He's no match for Thorgar, so there should be no problems. As a reward you'll get a potion, a sword and 2500 gold.
Now it's time to spend our money. We can take six regiments to the next mission, so upgrade chosen ones. I advise also to buy magic banner for knights, which decreases damage suffered in melee.
Now we will face the last battle in second act. This time we have to defeat Elven mage, who knows where is the body of our precursor. For this mission you can take whatever you want, I decided on following troops: two regiments of Chaos' warriors and two of knights, one of bloodletters and one wyrdspawn. Deploy as on the picture below, as far to the left as possible. Remember to use Thorgar's ring - it can make a wyrdspawn every five minutes.
 Army's deployment
At the beginning a group of Imperial forces with a cannon will appear near the middle of the map. That cannon should be a target for our hellcannon. The rest of our troops should run along the left road. A unit of knights will attack as soon from the northern direction (they should be charged by infantry) and swordsmen from east - they're a target for cavalry, which, after killing them, should strike at the cannon's position.
Meanwhile we will get a secondary task - we have to destroy town buildings. Because of that, after defeating all those hostile groups, it's good to order our artillery to destroy houses. Small advice: two times during this mission I was attacked from behind by archer's regiments: once near rocks between roads at the bottom of the map and once in the middle of the town. So be careful and look at minimap to be sure, no enemy is on your back.
When you reach the town it's good to order infantry to destroy building, while the rest of troops should finish off enemy's remains. But don't go to close a group with Elven mage until you complete secondary task. When you do this, you can easily defeat "army of good". Second act is done.
This time we have to find a passage trough an old Dwarven fortress. Mission is fairly easy and you can find some nice items there. Don't rush and remember to use grey seer's abilities, and you will be able to survive without heavy losses. Deploy as usual and start the game.
First we will encounter single Dwarven unit - no problem at all, then turn left and enter large chamber. In one of its corners you will see enemy's cannon - it's a target for our artillery. It's good to reach it with our forces as fast as possible, but you must be aware of hostile troops coming from different sides. Remember: Favoured servant - your best friend :)
 Last moments of Dwarven clan
After clearing this chamber it's good to go south for a second. There's a small room with some treasure inside. Now we can move north until we reach a fork. First move in the eastern direction and defeat three Dwarven regiments. After that you can pick up some more items. Now it's time do end this game - move west and reach the last hostile group with clan's leader. His bodyguards make no problems, but he is a though guy. It's good to weaken him with infantry and then challenge him with one of your heroes. After this fight you must move closer to a tunnel which was defended by those Dwarves and that's it - mission is completed.
After the battle you can go to a town and regenerate your forces, buy new troops or equipment. Unfortunately I bought my third hero just here. He had 26th level so I thought him following skills: Whirling doom, Blade storm (combat), Unquestioning loyalty, Warmonger, Battle cry and last point was spent on Magical ward. Kasgit learned Warpstone shower and seer Plague.
This time we will make a lot of destruction - we cave to crumble three lighthouses and kill every single Elven soldier we can find. Deploy as usual and move north, you will see first target defended by a hostile group there. Short fight and one third of mission is completed. Now move west until you reach another hill with second lighthouse and some more Elves to kill. Short advice: ships can unload enemy's troops behind you, so be careful and don't let them destroy your cannon.
 Second lighthouse. You can also see a ship, whose landing party destroyed my cannon
Now it's time to destroy the last target, which can be seen from the hill we stand on. Once again there should be no problem with doing so. As you see this mission is really easy and, if you watch your back and use Favoured servant, can be ended without losses.
After the battle we will command Chaos' troops once again. You can go to a town, regenerate forces and buy whatever you want - at this moment you should have lots of money. Especially invest in seven units you will take to the next mission.
Yes, yes, another fortress, but this time it seems to be easier. I decided to buy new regiments of Chaos' knights and warriors (both servants of Khorne). I took them for this battle, along with their higher level friends (one from each type), all heroes, two hellcannons, two wyrdspawns and bloodletters. I deployed them in the following way: cannons to the left, heroes to the right (Thorgar not attached to any regiment) along with new units and wyrdspawns, and the rest where they stand, but closer to the map's edge. Time to rock.
Move hellcannons a bit forward until you see cannon as on the picture below, which is your first target. Meanwhile move group with heroes to a hill seen nearby to the right. Stand at its left side and wait, until Imperial group with another cannon appears. Kill them all and move Thorgar only toward first checkpoint. The rest of that group should remain in place for a minute and wait for cavalry regiment marching from the eastern direction.
 First of three Imperial cannons we have to destroy
Let's look at our situation: main forces still wait near the lower-left corner of the map, striking forces near lower-right, Thorgar is close to the wall and hellcannons ended firing at first tower. Our champion should have uncovered another cannon, which must be destroyed. Meanwhile Thorgar will provoke some swordsmen's regiment with their captain to exit the fortress and strike on us. Captain should be challenged and his regiment crushed by striking group. In this moment we can start moving the rest of troops closer to the wall.
When hellcannons destroy their rivals it's time to crumble the part of walls to the left of the gate. A hill nearby is a great firing position. It's good to move all three heroes (only heroes) to the checkpoint meanwhile and use their skills to harm foes standing on walls. When the breach is wide enough we move Thorgar inside the fortress and add remaining heroes to some regiments. Our brave champion, entering the castle, provokes all hostile troops to strike on him leaving their positions on walls. First he will be attacked by silver helms - use his ring on them to produce a wyrdspawn. When enemy's forces are busy fighting Thorgar we can use full strength to capture the fortress.
Now hellcannons should start destroying ships in docks, while the main forces will be finishing off hostile units. When you win this battle, regenerate your troops and move on to the next mission.
As you have probably guessed, our guide had plans that were a bit different then ours. Because of that we will have to challenge troops of the god we didn't choose (in my case: Nurgle's). To this fight it's good to take 2 regiments of axe-throwers, 2 of Chaos' warriors, 1 of knights, 1 of bloodletters and 1 wyrdspawn. Deploy troops as usual and start the game. Move forward and destroy all enemies you'll meet. Be careful to not harm yourself with own hellcannon. Each time you will see Chaos furies use all your ranged units to kill them.
 Glade with a little bonus
When you defeat all troops in sight range it's time to move on. The path you can see leads up and down. Let's choose the second option, but be aware of troops coming down from the hill from time to time. After short march we will reach a small glade you can see on the picture above, where we will have to kill some more units. But don't worry, there's a reward - few items you can gather. Then climb up the hill to face the traitor. He will summon few more demons, but this won't help him. It will take some time, but he will be slain.
This one is rather interesting mission. For most time it's really easy - Elves just can't get trough Chaos' armour, but duel with dragon can be really tough. But don't' worry I will help you once again :) Take following units: 2 regiments of Chaos' warriors, 1 of axe-throwers, 1 of knights, 1 of bloodletters, 1 wyrdspawn, 1 cannon and all heroes. In addition give Thorgar all healing potions and be sure he has the axe, that he acquired during trial of gods, equipped, but ring, that makes wyrdspawns should be given to aspiring champion.
When the map is loaded you will see the place we have to defend. Fortunately there is a regeneration shrine in the middle, so we can end up this mission without any losses. Deploy troops as on the picture below: one infantry unit at each barricade, hellcannon a little south of the altar, cavalry, wyrdspawn and axe-throwers near upper barricade.
 Troops' deployment
First something new: order hellcannon to shoot at ground near upper barricade - we need a breach in it to be able to attack with knights. Now we will see hostile regiment in upper-left corner of the map - it's a target for our cannon. When we destroy it, two new units (archers and spearmen) will appear. Shooters should be shot by artillery, melee ones by throwers. When they come closer charge at them with cavalry (with fighting hero), make a wyrdspawn, and destroy their obelisk. From now on this side is safe - no other enemies will come from that direction.
Meanwhile some other hostile units will appear, moving toward two other barricades. Until the dragon will appear for the first time, only thing you have to do is to shoot at enemies with everything you have and finish them off with cavalry or infantry. In safer moments regenerate damaged troops. Only one infantry regiment on each barricade is needed, so third one can be use as an exchange, when one of the others needs healing. Good manoeuvring with riders and range units helps greatly. If you can, make another wyrdspawn.
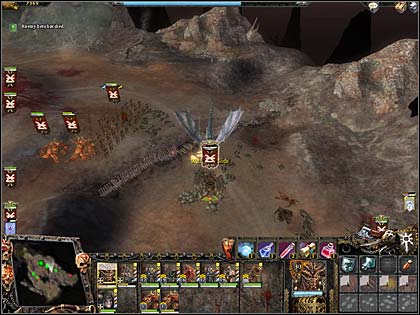 The dragon's moment of death
When the dragon comes for the first time, shoot at him and, when he loses 1/3 of his health, challenge him with the fighting hero. He should drive him off. Now we will have to fight off some more troops until Thorgar becomes demon prince. This will make the dragon to come back. Unfortunately as soon as Thorgar and beast come close to themselves, they will start a duel. So it's essential, to shoot at the dragon as long as it's possible. To slay that reptile you have to use all powers you can and drink healing potions when it's necessary. In addition we will still be attacked by foes, so defend yourself bravely and regenerate when you can.
After the fight we are transferred to a new location. It's time for act IV.
Now we will have to fight Imperial complexes - Imperial huge cannon must be destroyed. Mission is really easy, you have to only move forward and destroy every resistance you meet. Because of a regeneration shrine near the middle of the map, you can take whatever you want for this mission.
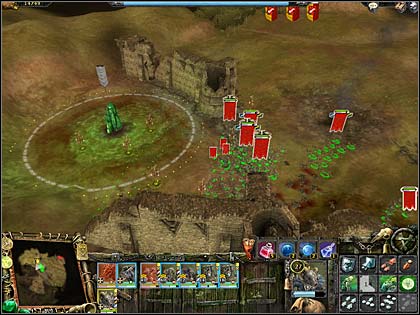 Somewhere there few Dwarves defend the regeneration shrine
Until you reach that altar you will encounter four Dwarven regiments. Meanwhile the canon will fire about three times, so leave the shrine right after one of its shots. Because there are no alternative ways on this map, you have to climb up the hill from the eastern side. Now destroy all hostile troops (Warpstone shower and Plague helps greatly). Meanwhile an enemy hero will appear - it's good to challenge him with the newest hero, because he can do some damage to our units. After defeating all foes and destroying the cannon you're victorious.
Some rich mission at last. Skeletons are no match for Skaven, so be careful to not harm yourself and you won't suffer high losses. At the beginning move forward. Soon we will see small path going left from main road. Stop near crossroads and destroy all skeletons you will see. When you're done with it, turn left and move to the valley from the picture below.
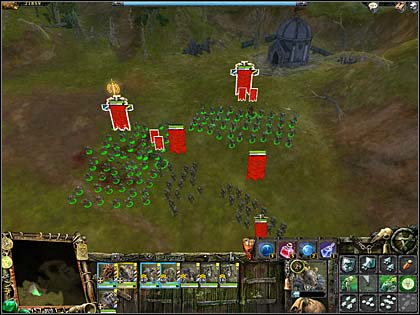 First of two bonus places
It's the first place when we will find those artefacts from the secondary task. In both cases we will have to destroy one regiment of skeleton archers, one of ordinary skeletons and two banshees. When you gather spoils, come back to the main road, move along it for a while and then turn right, when you see the place from the picture below.
 Once again I wasn't fast enough to make a photo of enemies :)
Situation is identical to that described above. When there are no undead troops around move toward upper-left corner of the map. We will have to destroy some more skeletons until we reach a crypt where vampire lord "lives". He is really tough and has a powerful area-of-damage spell, so remember to use Favoured servant. But before you start slaying him, destroy his coffin first, or he will resurrect himself each time you defeat him. When he's only a dust don't gather his drop, but regenerate first. When you're ready, pick up items and mission is done.
Now move forward and you will regain control over Chaos' troops. It's time for another battle.
In this mission we have to destroy two camps: Imperial and Elven ones. First is before, second behind the river. Take to this mission the same forces as to the last mission in third act (you can switch one infantry regiment for cavalry if you want). Deploy as usual and start the game.
Move all range units and hellcannon a little forward until you see an enemy, near the other side of the bridge. Shoot at them with artillery. At both sides of their position there are hills. To the left is ballista, to the right cannon - if you don't come too close, they won't fire at you. Meanwhile move melee units west until you reach Imperial camp. Thorgar should make a wyrdspawn and come back with it to shooters. The rest of troops should destroy Imperialists and their camp. In the same time great eagles will attack hellcannon one by one - axe-throwers and beasts should kill them quickly.
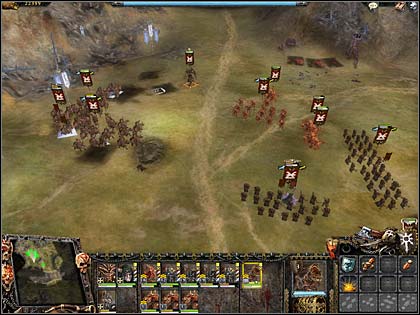 Elven camp was here...
When both birds and the camp are destroyed move Thorgar on the bridge, so that enemy's artillery will be seen. Hellcannon should fire at cannon, while rest of troops should fight their way to the ballista. Demon prince should kill Imperial priest meanwhile. When there's no foe near the bridge we can strike on Elven camp. There should be only small forces left with a single mage - let Thorgar eat him. Destroy all tents and mission is done.
On strategic map move south and slay Talabheim's count - he's no match for our demon and we will get three potions and some gold as a reward. Now it's time for final battle.
Let me tell you what to take for this mission. Four hellcannons, four best heroes and... that's all :) Ok, I'm joking but I bet it would be enough. Take whatever units you want, I chose following ones: 2 regiments of Chaos' knights, 2 of warriors, 2 of poisoned wind globadiers, 2 wyrdspawns and 1 regiment of warplock jezzails and 1 of bloodletters. Deployment - Thorgar with hellcannons as close to enemy positions as it's possible, the rest behind them.
First phase of this battle is to clean up that narrow passage in front of us. Use the following schema: all four hellcannons should fire at a single range unit, which will drive their melee guards to attack us. Strike them with prince, help him with shooters and that's all. In this way you can kill every single foe before the fortress.
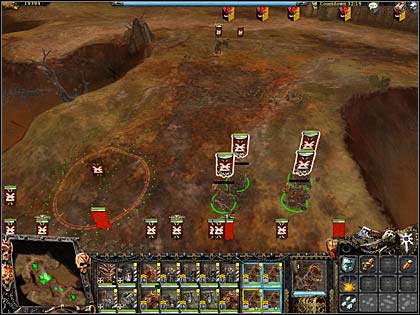 The passage is cleared
Now we have to destroy two Imperial cannons standing on towers on both sides of the gate. Move Thorgar right until you see first cannon - destroy it with own artillery. Do the same with the other one to the left. Meanwhile we will be attacked by a cavalry - prince with shooters will do fine (remember about the ring). When the path is clear we can move main forces closer to walls, which should be destroyed by hellcannons. Don't rush - make a wide breach for your big army.
When the breach is wide enough move Thorgar inside the fortress and the rest of troops right behind him. Soon Aurelion with Stefan will appear. First was slain by prince, second crushed down by units. But now I think that running trough them is faster then duels. Enemies should be fleeing now, so finish them off and that's all. Congratulations: you've just won Chaos' campaign.

 Wargame: European Escalation Game Guide & WalkthroughWarhammer: Mark of Chaos Game Guide & Walkthrough
 World of Warplanes Game Guide & Walkthrough
 Wolfenstein: The Old Blood Game Guide & Walkthrough
 Warhammer 40.000: Dawn of War - Soulstorm Game Guide & Walkthrough