Welcome!
I'm proud to present a guide to Warhammer 40,000: Dawn of War 2 - real time strategy game set in the world created by Games Workshop. This guide contains a walkthrough for the single player campaign as well as tips for multiplayer games. The most important parts of each mission were illustrated so that even casual players could find help they need.
I hope that this covers all possible issues you might encounter during your game. Enjoy your reading, and most importantly hours spent playing Warhammer 40,000: Dawn of War 2.
Maciej "Sandro" Jalowiec
Warhammer 40,000: Dawn of War 2 campaign consists of a large number of short missions that are quite similar to each other. This section is set to cover it as a whole.
Types of missions
Your missions are divided into three main groups. The most important ones (and the rarest ones) are those which move the story forward. These are also the most interesting and diverse missions offering you objectives like recon, sample collection or demolition of structures. Both maps and walkthroughs for these missions can be found in the section tagged Main Storyline.
Apart from the main plot the game will offer you defensive missions where your objective is to secure a certain point. These are very schematic and all can be completed in pretty much the same way. In order to learn how to deal with these missions check the section tagged Defense Missions.
The most common missions are the assassinations. The idea behind those is to get to the local commander of the opposing fraction and terminate him. The main difficulty of those missions is that that commanders have access to special attacks and are quite resilient - you can consider them a kind of a Boss. Each of those commanders requires an appropriate tactics: in order to know how to fight them check the Assassination section. If you don't know how to deal with infantry or vehicles have a look at the Counter infantry tactics and Counter vehicle tactics sections.
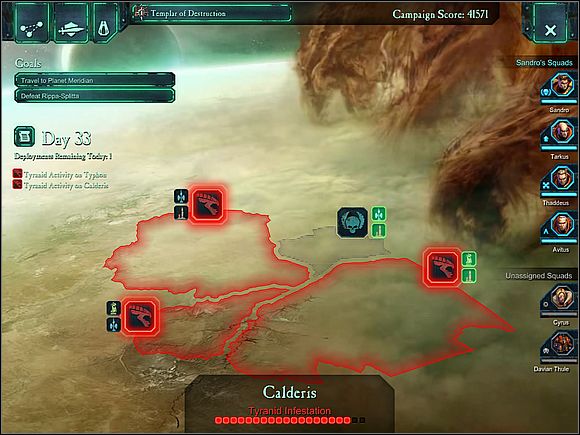
Place of action
The missions you get assigned take place on various planets - Calderis, Meridian, Typhoon Primaris, etc. Before embarking on a mission you can examine the surface of the planet and choose what to do next. The screen below shows a planet with four sectors three of which offer you a mission.
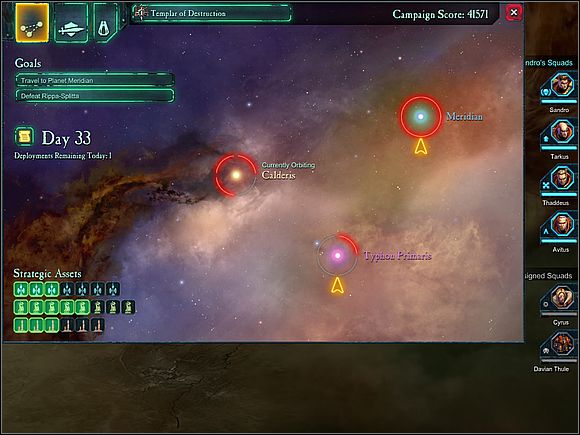
You also have the option of traveling between planets. The space screen allows you interplanetary travel.
Time of action
Each mission you take part in takes a certain amount of time. Many missions (all of the defense missions and many assassinations) have a time limit - if you won't manage to complete it within the limit you will suffer consequences (those include losing an important structure or Tyranid spread).
Completing a mission usually takes a day. The exceptions from that rule are situation when you do exceptionally well - you will be able to complete one or two additional missions during the same day.

What is the deal with Tyranid spread?
After few campaign mission a Tyranid spread meter will appear on the planet view screen. This meter fills up when you take no actions against the Tyranids and empties when you fight them. There are no consequences of filling the meter other than greater number of Tyranids, however when it's almost empty completing the missions is a bit easier as Tyranids start to fight among themselves.
Each time your troops gain a level you can distribute 2 (or 4 in case of the Drednaught) points among four categories:
1. Health;
2. Ranged damage;
3. Melee Damage;
4. Energy.
You should spend one point on health of each of your units. Upgrading it further depends on the type of unit.
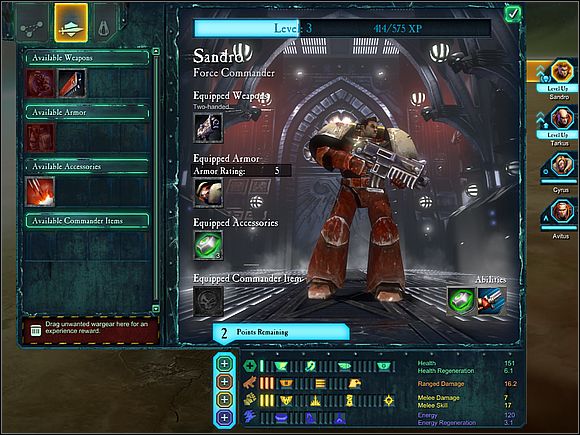
Spending points and picking the equipment is one of the most important aspects of the game.
Force Commander
You should focus on ranged damage from the very start. Thaddeus will focus on melee, and later in game new kinds of weapons, such as force guns, rocket launchers and flamethrowers will become crucial - in my opinion, he should focus on ranged combat.
Tarkus
Tarkus and his squad are focused on ranged combat and you should spend points to improve them further. Pick the best machine guns for him (both bolt and energy guns) and try to get the best possible equipment to improve his abilities.
Cyrus
I don't recommend taking Cyrus into the battle, but if you decide to use him, spend points both on ranged damage and energy. Equip him with rifles and other ranged weapons and make sure he knows how to use them. Energy is needed to use his special abilities such as Infiltrate and High Powered Shot.
Thaddeus
Thaddeus and his men are equipped with jetpacks which allow them to get right in the middle of an enemy squad. This is the main reason to improve his melee damage and provide him with the best chain swords, axes and energy swords. Pick his equipment so that it improves his health and melee damage. Improving his energy is also a good idea.
Avitus
Avitus should focus on ranged combat, and his starting focus on heavy weaponry should be maintained throughout the game. After reaching the maximum level in ranged damage and health focus on energy. His equipment should improve his movement speed and ranged damage.
Dreadnought
Bare in mind that taking Dreadnought for a mission forces you to take a repair kit for him. It takes up one slot in the inventory, which means that you will have to drop something - bombs, artillery, turrets or seals. In some cases it's a better idea to take him over Thaddeus - Dreadnaught is great at defense missions, especially if you equip him with assault cannon. Forget about melee combat, focusing about ranged damage. Improve his health, ranged damage (to get the Hail of Fury ability) and from time to time, the energy.
There are three kinds of strategic points located on the battlefield - Imperial Shrines, Automated Foundries and Communication Arrays.
Why do I need strategic points?
Taking over these structures has many pros. First of all, you can reinforce your units at these points, second of all they get you additional experience, and, last but not least, they allow access to certain kinds of support in your next missions.
There are usually two strategic points on each map. During your missions you will be able to secure only one of them, but since you're going to revisit most of the maps it shouldn't be hard to get both of the points in time.
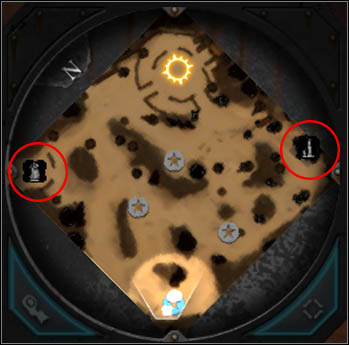
You secured the western point? No worries, on your next visit you will be able to secure the other.
Bonuses provided by strategic points.
As mentioned before, strategic points provide certain bonuses in your next missions.
Imperial Chapels allow the use of force fields which, for short periods of time protect your units from enemy attacks.
Communication Arrays allow you to call in artillery support, a perfect weapon against vehicles, large groups of enemies and some of the toughest enemies.
Automatic Foundries provide you with the most important kind of support - turrets that can be placed on the battlefield. The turrets are pure gold and make fighting bosses a lot easier. Whats more, gaining control of the turret grants you special experience bonus.
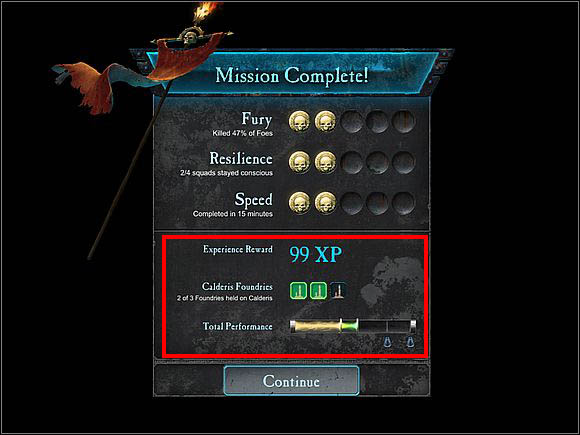
The number of turrets that can be called in, artillery strikes etc depends on the number of building controlled on a planet. The more you have under your control, the more bonuses will be available.
With Force Commander, Tarksus and Avitus at your disposal I recommend to use tactics described below.
1. Avitus leads the squad and when enemy appears within sight order him to set up the gun.
2. Thaddeus follows close behind Avitus
3a. If the enemy gets within Avistus' range wait for them to get pinned, then order Thaddeus to jump into the group - this will eliminate most of the enemies and knockdown or scare off the rest.
3b. If the enemies won't come close enough try luring them with Thaddeus (either by just moving ahead or jumping into the enemy group provided it's not too large). Then, the battle should proceed like in 3a.
3c. If you don't have Thaddeus make Tarkus do the luring - his grenades are quite impressive against large groups of enemies.
4. Tarkus and Force Commander should support Avitus in pinning down the enemies and dealing with the toughest enemies (as they can be equipped with energy weapons, flamethrowers and rocket launchers early on).
IMPORTANT: during the missions later in game you will encounter enemies equipped with rocket launchers and some kind of mortars. Those units have an incredibly long range and should be dealt with using Thaddeus jumping in the middle of the crowd using hit and run strategy.
What SHOULDN'T you do?
1. Avoid open areas so that you won't get surrounded.
2. Conserve your grenades - try to save as much as you can for the last minutes of the mission when you will be faced with some kind of a tough enemy.
3. Avoid taking Cyrus for your missions, despite his obvious pros he cannot match Thaddeus' jet packs, Avistus' heavy bolter or Tarkus and his accuracy.
Forcing enemies out of the building.
There are a few ways of doing that - you can attack the building with conventional weapons (the enemies inside will die sooner or later), throw in some grenades (not recommended, as you should conserve your grenades), torch the building using flamethrowers or use the explosives. You can also call in the artillery support, but that would be a waste.
You won't encounter many vehicles during your campaign, which doesn't change the fact that they require a special approach. When fighting against vehicles try to apply to these rules:
1. Find cover for your units, don't let them fight in the open.
2a. Energy weapons and rocket launchers are the best tools to deal with such enemies.
2b. Vehicles are susceptible to artillery fire - if you have it available, use it.
3a. If you don't have any energy weapons take a close look at the vehicle - if has light armor (Orc trucks, Eldar bipedal units) throw 1-2 grenades at them.
3b. If the vehicle is heavily armored pull back and look for an alternate route.

You will also encounter vehicles during the defense missions. For more info check the Defense Missions section.
From time to time you will be forced to defend certain strategic point - a chapel, communications array or automated forge.
Who to pick?
The best picks for this kinds of missions are Tarkus, Thaddeus and Avitus. Later in game you can replace Tarkus with Dreadnought. Cyrus becomes completely useless.
What kinds of weapons should I use?
Be sure to have the Tarantula turrets available, as well as grenades. If you have rocket launchers you can also take one along one of them (if you're planning on taking Dreadnought be sure to take the repair kit).
How to defend?
You will be attacked by waves of enemies, but before the first one arrives set up the turrets (both the ones you take along and the one you're granted for the mission). You need to place them in such a way that they can protect all paths leading to the building you're defending - there are usually two or three ways to get to you. Also be sure to place one near your building in case the enemy gets behind your lines using teleportation or jetpacks.
The image below presents the basic defense strategy with turrets marked red and land mines yellow.
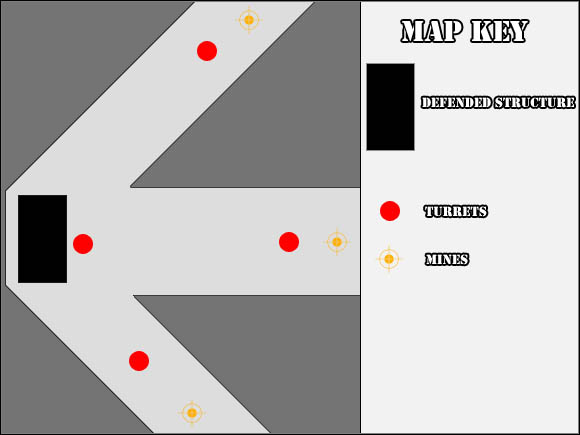
Each time an attack begins an arrow appears showing you the direction from which to expect the attack. Set Avitus so he can pin down the enemies and wipe them out using grenades or Thaddeus' jump attack. Repeat that for every incoming wave.
The last enemy to appear is always a vehicle or some monstrous creature - that's where the grenades and rocket launcher come in handy. Do your best to feed your enemy led.
Many missions involve breaking through to the enemy commander and eliminating him. This section covers the preparation for assassination missions, describing how to dispatch the commanders effectively and introducing aces up their sleeves.
Before going on a mission
...check what can hurt your opponent. The briefing screen has hints considering weapon types that affect your opponent. There are also few informations about his support, but those are mostly unimportant.
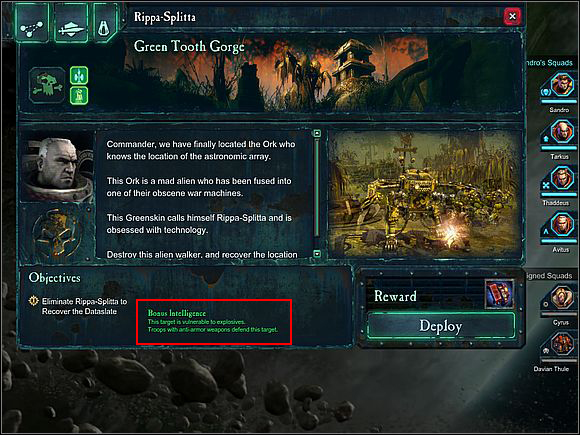
Always pay attention to tips at the briefing.
Once you get to know your enemy you have to equip adequately. If the commander is vulnerable to fire take flamethrowers. Energy weapons? Take plasma guns.
There's one thing you should bare in mind: be sure to take turrets along on your missions. They may not always be the best way to dispatch your enemies, but they draw fire away from your Space Marines.
If you're faced against a vehicle be sure to take Melta Bombs - they are incredible at fighting machines. Use: same as regular grenades.
Before getting into a fight...
...you must prepare for it. Look for supply crates so that you're full on grenades stims and all other stuff you might need. As I mentioned before, conserve your grenade supply so that you can bring as many as you can against the commander.
Move, move, move!
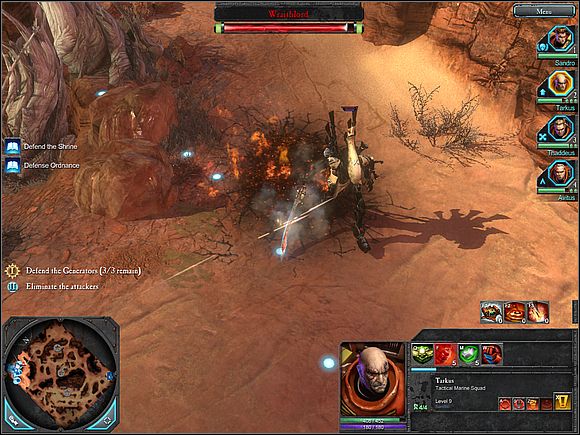
When fighting tough enemies it's important to keep your men moving. During campaign you will encounter loads of area attacks - it's target is always marked (using a circle on the ground) - try to keep away from it to limit your casualties.
Warning against area attack.

The scorched, glowing earth explodes after few seconds.

Orc earthquake - keep away!
When you're faced against a vehicle stay clear of the front bumper. Machines are able to perform a devastating charge attacks, so it's better not to stand in their way.
Equipment and support
Set up turrets on the battlefield, even if your enemy is resilient to their fire. They will draw attention away from your troops and may hurt reinforcements he might summon.
Turrets are extremely useful.
Grenades are quite an universal weapon. Most of the enemies are vulnerable to them. The explosives are less efficient as they are best at damaging stationary targets.
Reinforcements usually appear in small groups becoming a perfect prey for Thaddeus, who can jump in throw and crush them.
Healing
The fights may be rough so it's a good idea to bring along Recovery Stimulant Kit - it can reanimate and heal your heroes instantly.
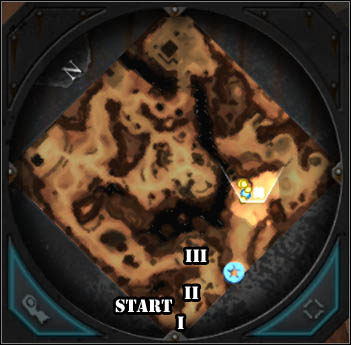
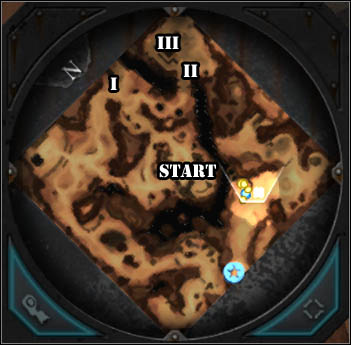
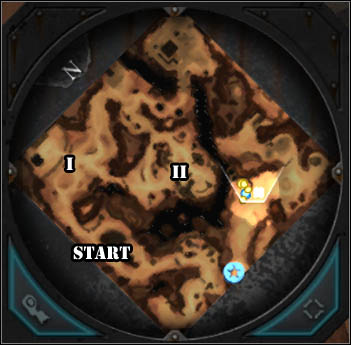
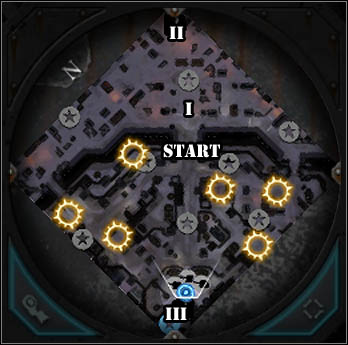
I - captain Thule;
II - ruins, Orc vehicle;
III - Orc base.
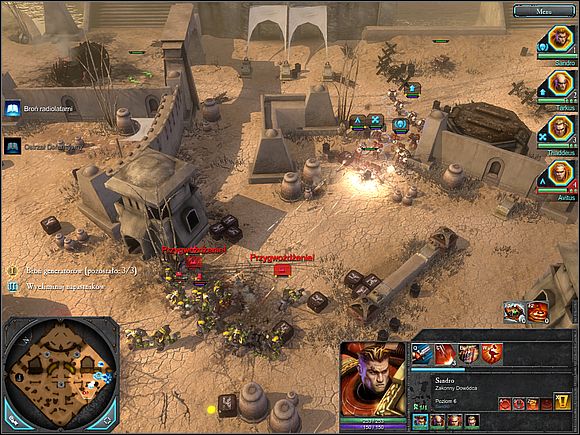
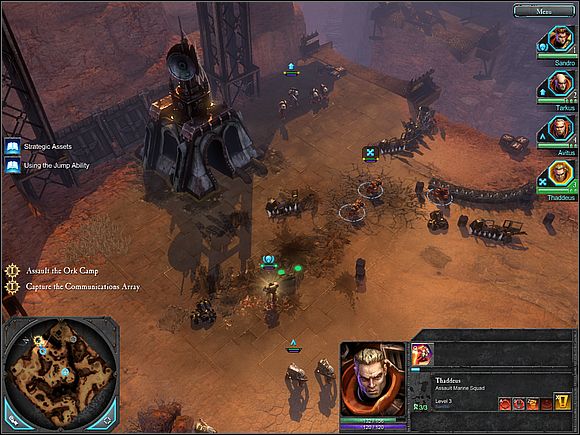
For starters you will receive a single unit lead by Tarkus and equipped with firearms. The hero wields a pistol and a chainsword. Send your men to the north, place the shooters behind the rock formation so that they have a decent cover against enemy fire. The hero should get in the middle of the enemy group - the saw is more then efficient at dispatching them.
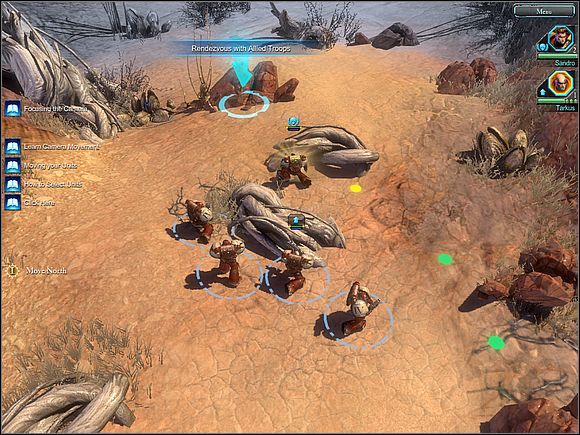
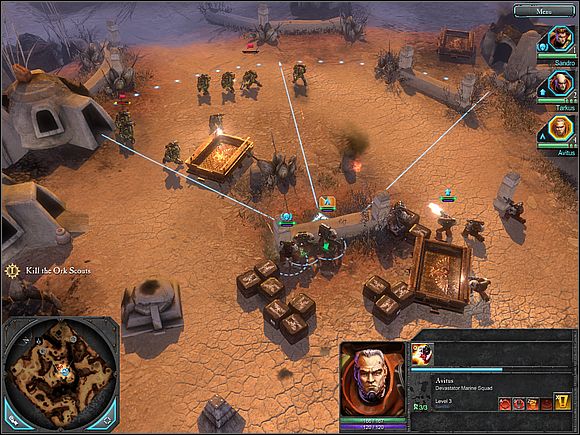
While the hero fights with his chainsword, the rest of the squad supports him with firepower.
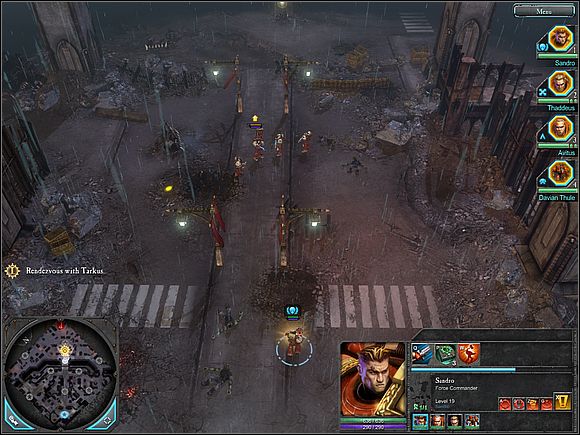
Continue your march to the north until you'll reach a spot where your allies lead by captain Thule fight a group of Orcs. Get your men behind the barricades and send in your hero to fight in a melee.
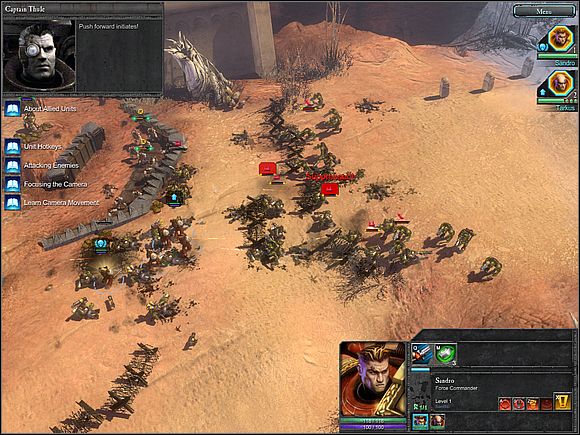
Barricades to the left can provide cover. The hero should use his chainsword. If things get bad, use grenades.
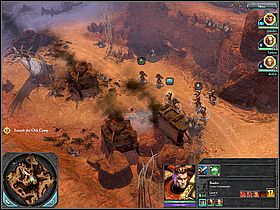
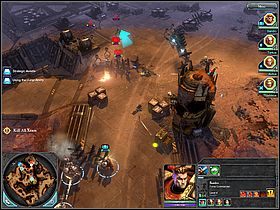
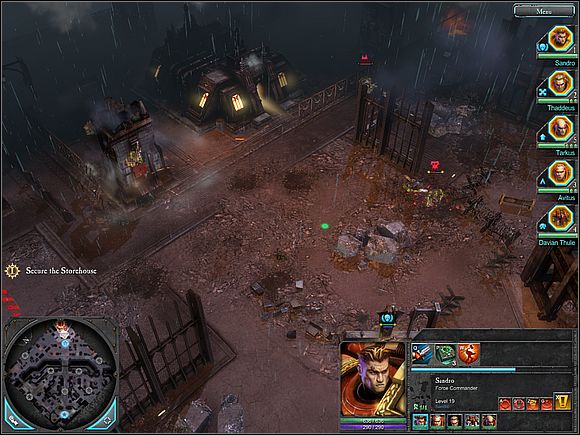
After pushing back the assault check the bodies for possible upgrade drops. After you're done head east. You will encounter another group of Orcs supported by a vehicle - you shouldn't have problems dealing with the infantry and the vehicle will ride off in a moment. After dealing with the enemies head north to Orc encampment.
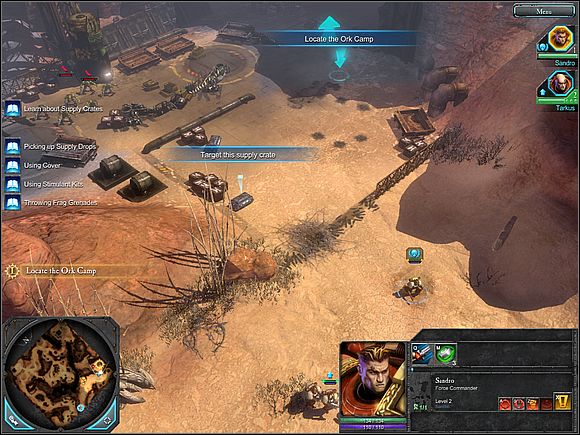
Shoot the supply crates and collect the supplies. The grenades you'll find will be of use soon.
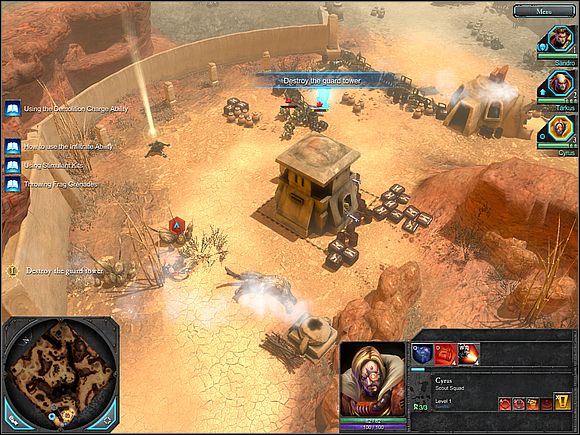
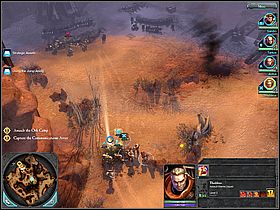
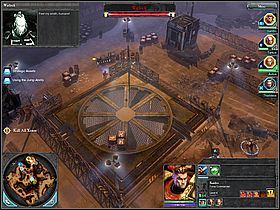
In the encampment an Orcish welcoming committee awaits - use the hero to dispatch melee fighters and attack the tower with grenade. Then throw a grenade at the pile of explosives near the subterranean entrance.
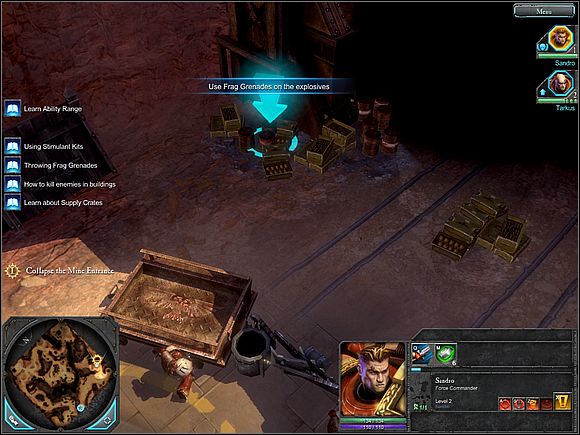
Throw a grenade at the highlighted spot to complete the mission.
I - Orc infantry;
II - communications array, sergeant Avitus;
III - Argus village.
Apart from the soldiers you had under your command during the previous mission you will receive support from Cyruses reckon squad. Order your men to head south east. You will encounter a group of Orcs - dispatch them trying to limit the damage to Cyruses group.
Your reckon squad has access to explosive charges. Use them to destroy the watchtower blocking your path. Meanwhile send the rest of your troops to deal with Orc infantry.
Cyruses men should easily destroy the watchtower with explosives.
After the fight heal sergeant Avitus and take over the communications array. Using it you will call in reinforcements for Aviatus, thus receiving a heavily armed squad.
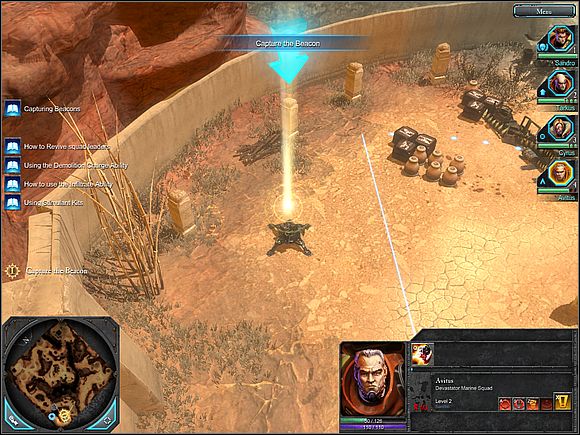
Communication arrays allow you to summon reinforcements.
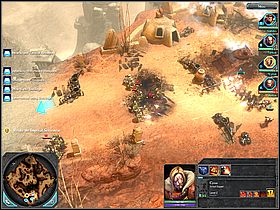
Continue on to encounter a civilian structure. Send Aviatus and Cyrus inside and place your hero and Tarkuses shooters near the structure. If you set your defenses properly, you shouldn't have problems dispatching the Orc group coming from the north.
After you're done with the Orcs head north to reach the Argus village. You will have to fight another groups of Orcs. Wipe them out using cover where possible (especially Avituses men could use some cover).
At the other end of the village you will find another communications array and a huge building. Take over the strategic point and send Avitus and his men inside the structure.
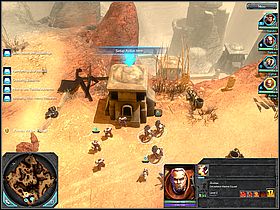
There will be loads of enemies coming in from the west. Avitus with his heavy weaponry shouldn't have much problem halting most of the enemies, but if the situation becomes tough order Tarkus to throw in some grenades. The end of this encounter marks the end of the mission.
I - communications array;
II - Eldar meeting;
III - Eldar leader, Warlock.
Note, that this mission doesn't allow you to use Cyrus and the grenade limit is a lower than before so you must focus on your firearms and bonuses received in previous missions (invulnerability, artillery, etc.). Start off by dispatching the scouts in the village.
Avitus can comfortably shoot at the Orcs from behind cover.
After dispatching the enemies head towards the communications array. On your way you will encounter scorched convoy vehicles. This is where Thaddeuses squad joins you.
After the cinematic secure the communications array.
Note that communications array is heavily defended by Orcs. You should use Thaddeuses ability to land on his enemies. Use it to attack the large groups. Use support from Avistuses squad and backup received in previous missions.
After dealing with Orcs you can take over the communications array.
Now follow the path to the east. You will reach the Hammer mine where a group of Eldars awaits. Deal with them using Thaddeuses ability and machine gun fire. Conserve your grenades, as they will come in handy when dealing with Eldar leader the Warlock. Throw all of your explosives at him, and if you have artillery strike available be sure to use it.
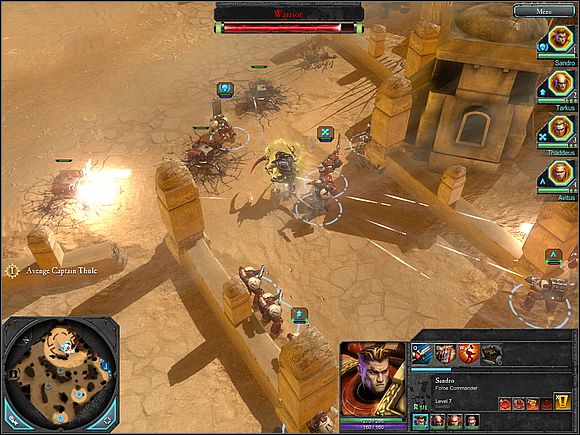
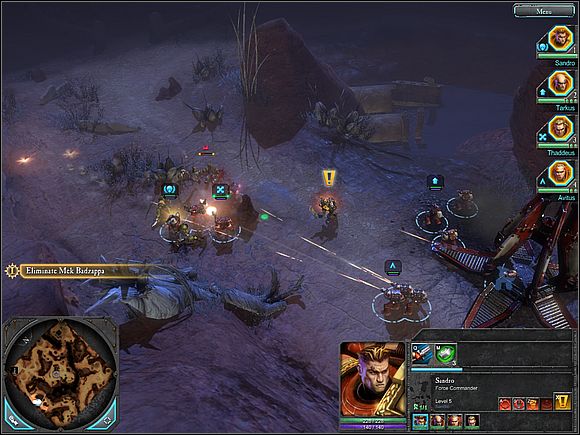
I - Calderis defense force/Mek Badzappa;
II - village/captain Thule.
Prepare for a fight from the very start. Dispatch the nearby Orcs and head north, to meat another group. Deal with them and chase Mek Badzappa - he has to die (for his name if nothing else).
During the chase head north west. You will encounter a few groups of Orcs which shouldn't be much of a problem using Thaddeuses jump attack. You will reach a spot where humans prepare to defend against Orcs. Slay the nearby Orcs and prepare to defend the outpost. You will be granted three turrets - place them in spots suggested by the game.
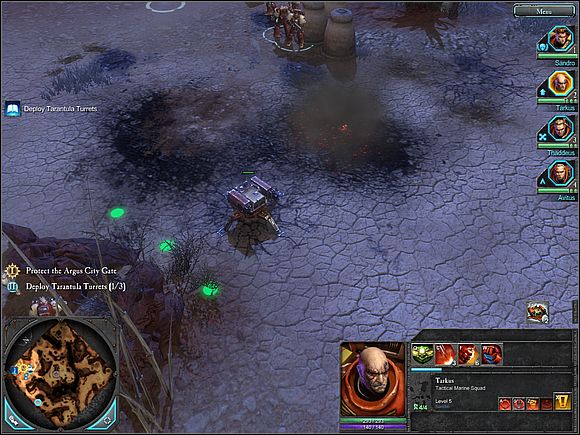
Order Avitus and your hero to watch the path in the northern part of the map and send Thaddeus and Tarkus to defend the southern passage. After dealing with the incoming Orcs Mek Badzappa will appear.
Orc commander can generate a forcefield around himself which makes him invulnerable to attacks. He also can send waves that stun soldiers around him. When you'll drop him below 50% he will start creating earthquakes - time to keep him on a distance.
If Thaddeuses squad has the ability to pin down enemies using jump you can try and jump on Badzappa. This will prevent him from fighting for a while eating lead you serve him. Be sure to use explosives.
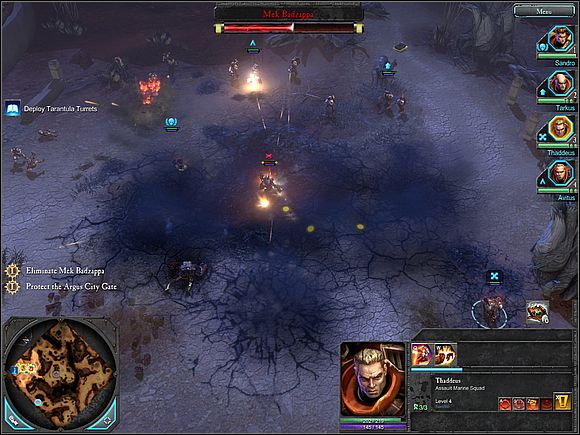
Broken earth marks the range of Badzappa's earthquake.
After Badzappa's gone. Send your squad to the center of the map and deal with the enemies standing in your way. And secure the communications array near the entrance to the village.
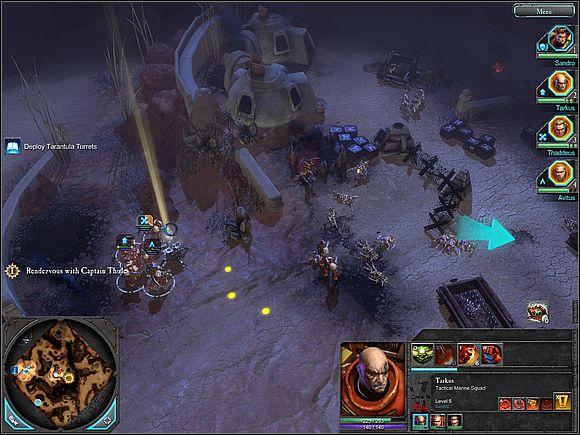
Hide Avitus and Tarkus behind cover (near the array) so that they can shoot at the xenos from safety. Send Thaddeus and your main character to captain Thule. This will spawn one of the mightiest xenos to appear. Despite your efforts he will manage to severely wound the captain. Shoot the alien and approach the dying Thule. You can now watch the bombardment turning both xenos and the village to dust.
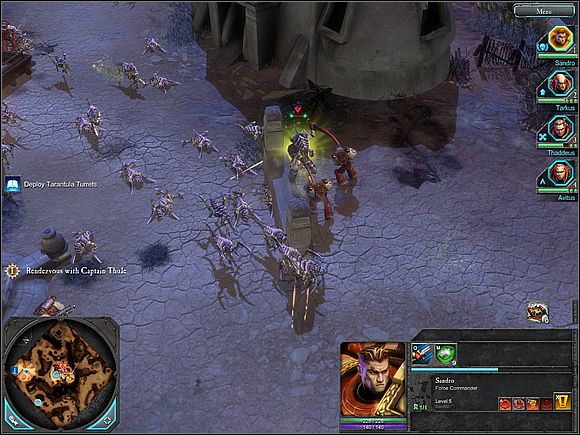
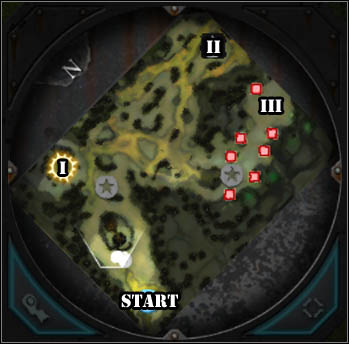
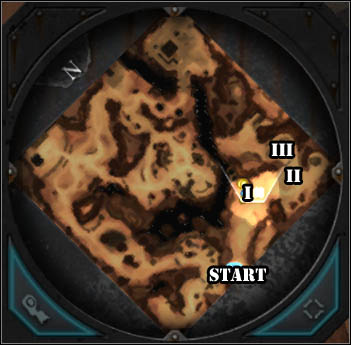
I - sample collection area;
II - imperial chapel;
III - mission end.
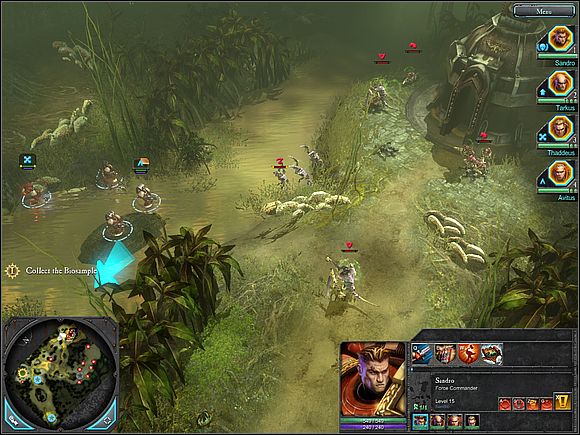
Be sure to equip Tarkus and your main hero with flamethrowers. Get the best available pistol for Thaddeus and a good melee weapon. Avitus should wield a heavy bolter. Bring along some grenades and explosives.
Head north west. You must secure the communications array, but it's surrounded with exploding xenos. Keep the enemies at a distance and dispatch them using flamethrower and Thaddeuses jetpacks.
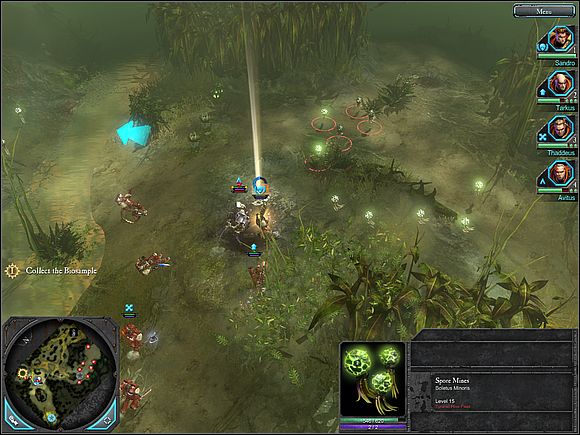
After securing the communications array stand by it and eliminate the enemies incoming from the north (one of the rocks over there holds a Hive Node - send Thaddeus to destroy it.
After securing the area collect samples from the toxic tank.
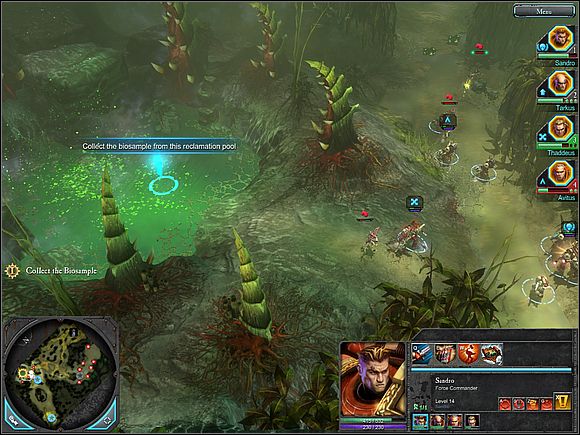
Toxins - your objective during the mission.
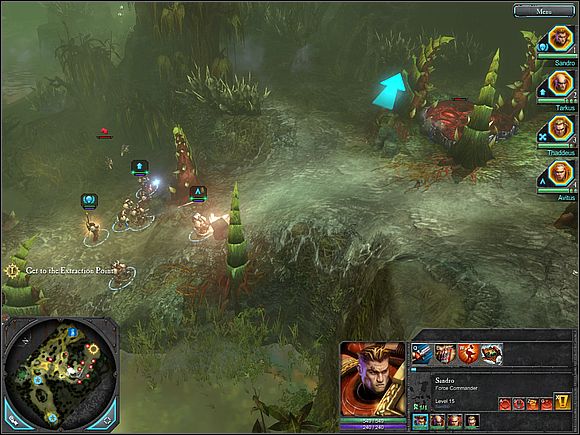
If you want to secure the chapel, head north. If you want to avoid fighting the Tyranid hordes stick to the edge of the map - this will allow you to encounter only a handful of marauders. By the temple you will encounter a larger group of Tyranids, but it's not a one you should have much problems with.
Time to get out. I suggest taking the path marked red on the map above. If you secured the chapel head back towards the toxins and from there towards the end of the mission.
You will reach a kind of Tyranid base camp. Secure the communications array near the entrance and continue north east.
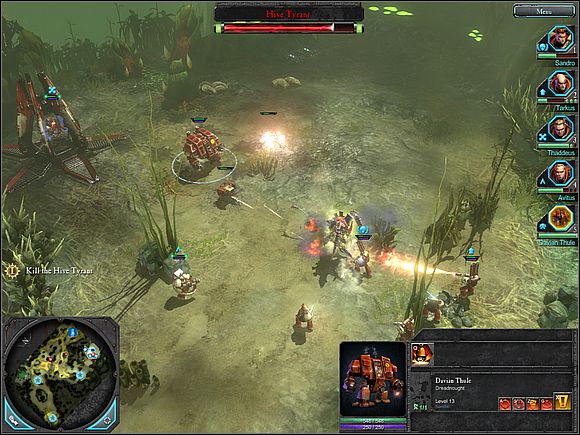
You will receive a secondary objective - destroy the nests within the base. They're not too resilient - a continued heavy bolter fire should be enough to destroy it.
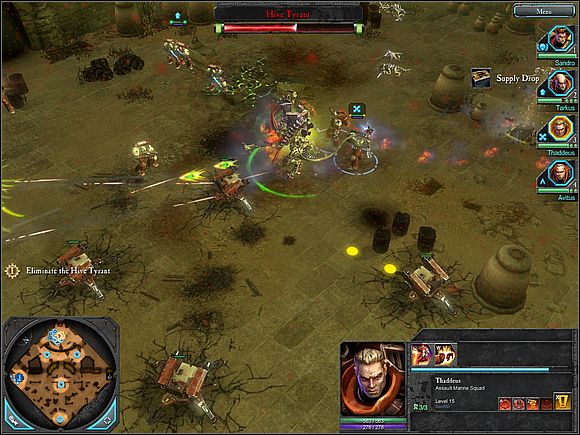
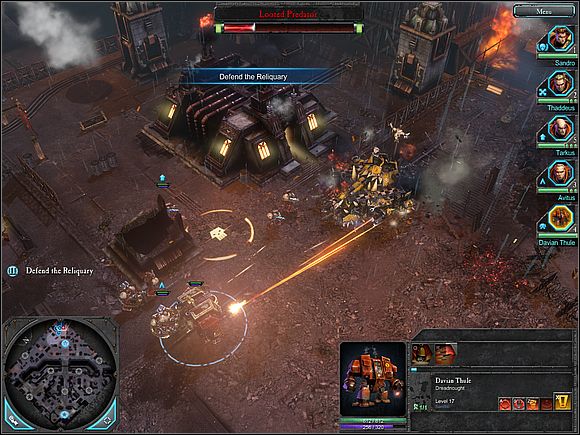
There aren't many tough enemies within the base - the exploding spores are the most dangerous. The situation will change dramatically when you'll reach your objective - a Hive Tyrant will appear. Set up the turrets and torch him with flamethrowers.
At some point a Dreadnought will join the fray - it's flamethrower will come in handy.
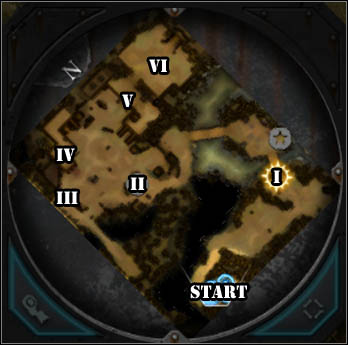
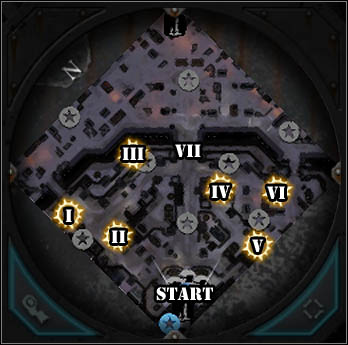
I - gate;
II - astronomic communications array;
III, IV, V - Orcs with array elements;
VI - Lictor;
IV - mission end.
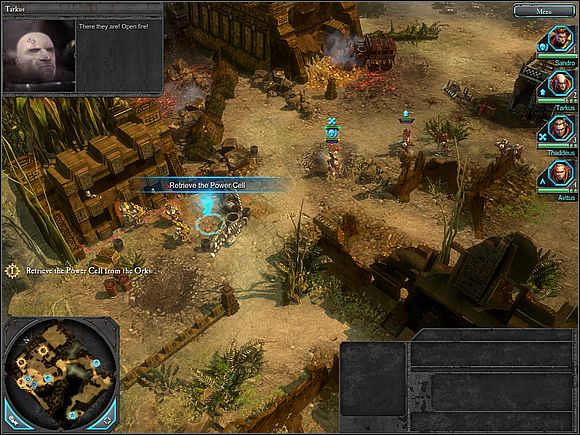
Bring along a rocket launcher and grenades - the rest is pretty much standard - turrets, bolters etc.
Head north - you'll encounter a group of Orc fighting against the Tyranids. Dispatch both groups and continue on - an Orc bipedal vehicle will attack you - grenades and rocket launcher should be enough to deal with it.
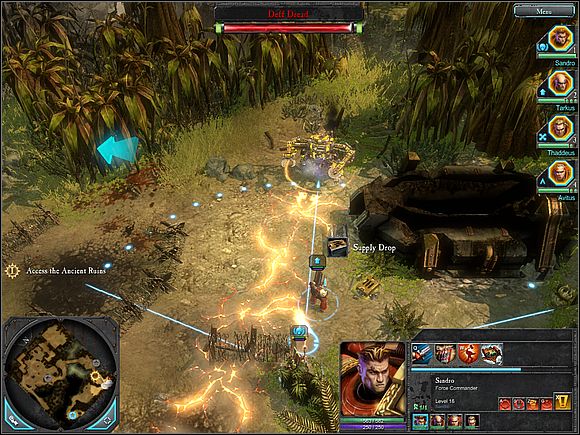
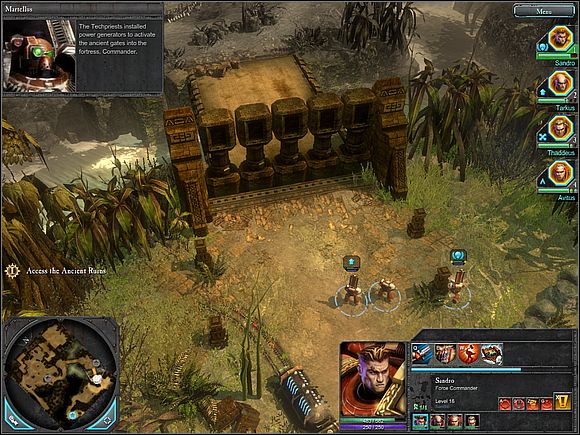
Approach the gate and use the generator standing nearby. You will watch a cutscene presenting one of the Tyranids.
Get through the gate and continue over the bridge. Another group of Orcs is fighting the Tyranids. Secure the array and join the fray.
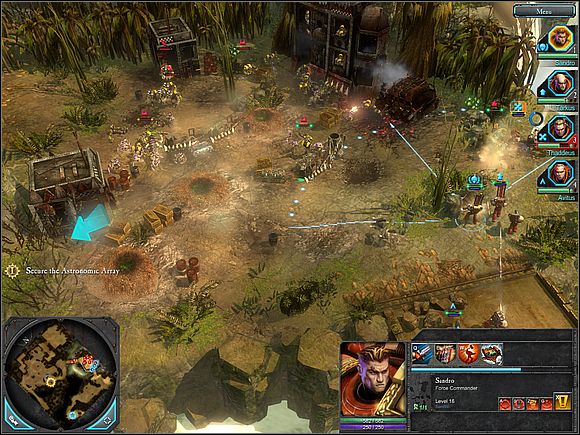
Another bridge awaits in the western part of the map. A small group of Orcs blocks your path to the astronomic communications array.
Gain control of it and start recovering its elements. Three Orcs stole the elements of the array - you must pursue them and get the pieces back.
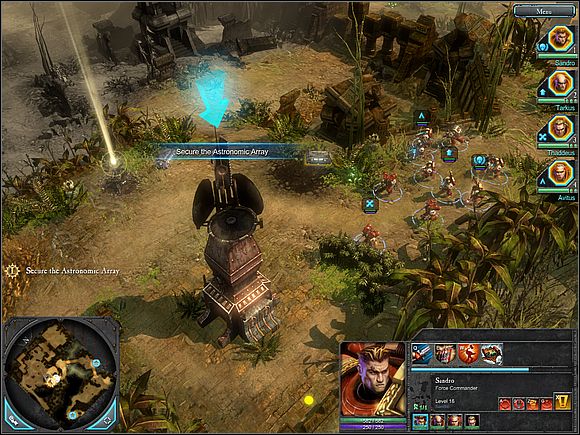
Dispatching the enemies shouldn't be much of a problem - it's just a regular infantry. Your object of interest are the three Orcs marked on the map. Take them out one by one and when you'll recover the pieces head back to the array.
After installing the recovered pieces you're given a choice - either head to the evac point or head north to kill the Tyranid Lictor.
Fighting Lictor
Use the generator to open the gate blocking your path to Liktor.
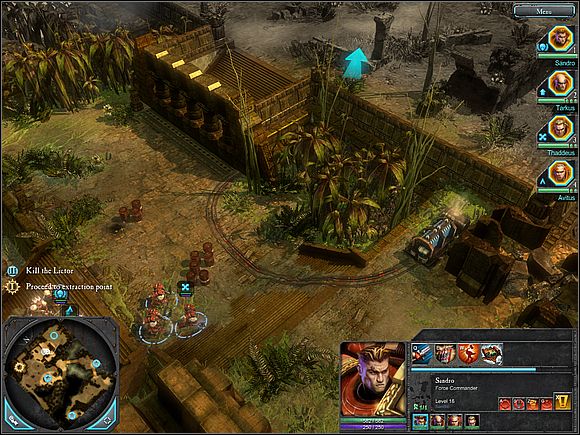
Enter the arena and set up the turrets. The enemy isn't too tough - his main strength lies in hiding regenerating. In order to prevent him from hiding destroy the bushes surrounding the arena.
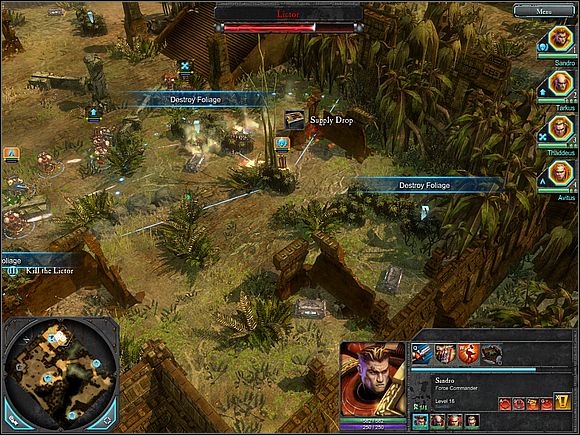
After you'll strip Lictor of hiding places killing him should take a few seconds. After he dies the mission ends.
If you prefer to avoid the fight head to the evac point and gain control of the array there.
I, II, III, IV, V, VI - generators;
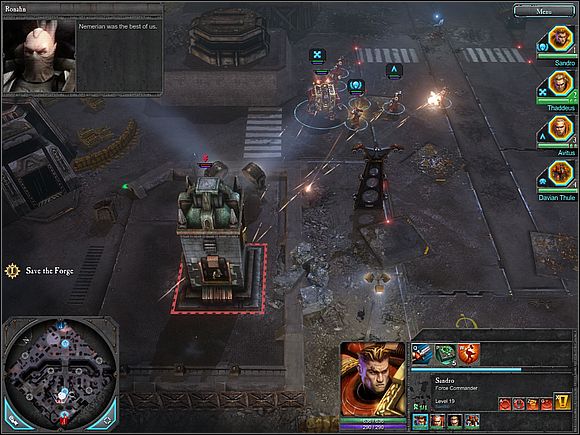
VII - forge doors
For this mission you'll need a rocket launcher, a flamethrower and some grenades. Stimulant Recovery Kit could also be of use. The rest should be pretty much standard. If you'll have a spare slot equip Signum to call in artillery support.
Map has two forges but they cannot be secured during this mission. At the very beginning of the mission head north east and save the Imperial soldiers.
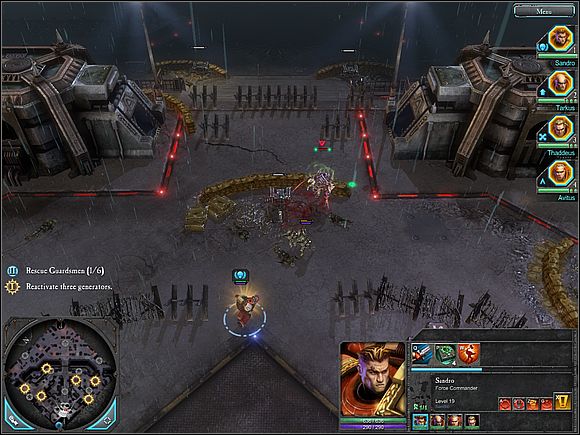
There are a few groups like that - you will find them near the generators you're supposed to secure. Despite the fact that you're only supposed to capture three of them it's worth to secure all - this will activate all of the allied turrets on the map.
There are groups of Tyranids all around the generators - they will crawl out from underground and attack your men. They aren't too tough though - a rocket shot with a little lead support should seal the deal.
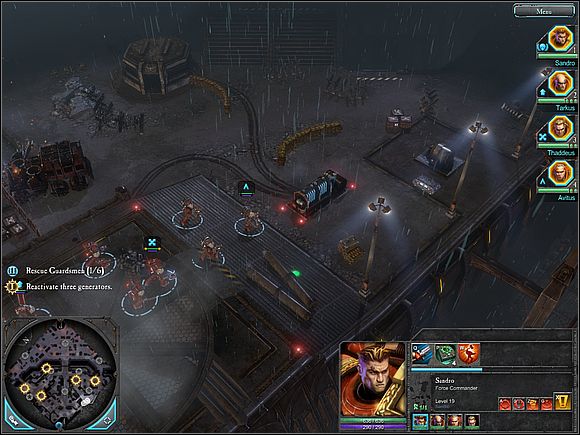
Generators are captured in the same way you capture other structures.
The Orcs securing the generators are a whole different deal - there are swarms of them and there are many supply crates around them. Use the grenades acquired this way to dispatch the large groups of Orcs. Apart from that feed them lead and use Thaddeuses jump attacks to make your offensive more efficient. Be sure to secure the arrays near the generators!
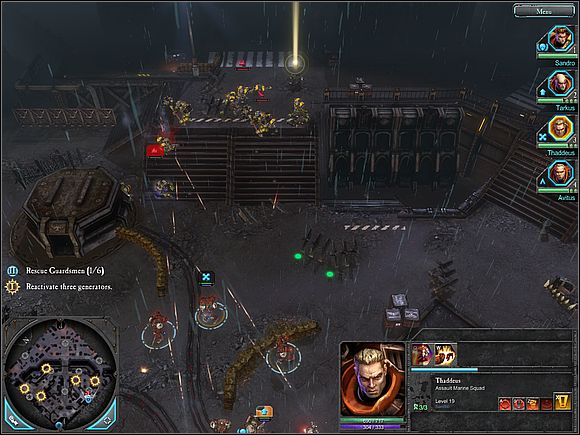
When the last generator comes under your control head to the Angel Gate. Before you start capturing the nearby structure set up your turrets. You can send Avistus to one of the nearby buildings.
Send Force Commander to capture the building. The others (Thaddeus and Tarkus) should stand nearby and protect him from the Tyranid onslaught - there will be a lot of them. Stimulant Recovery Kit will find much use here.
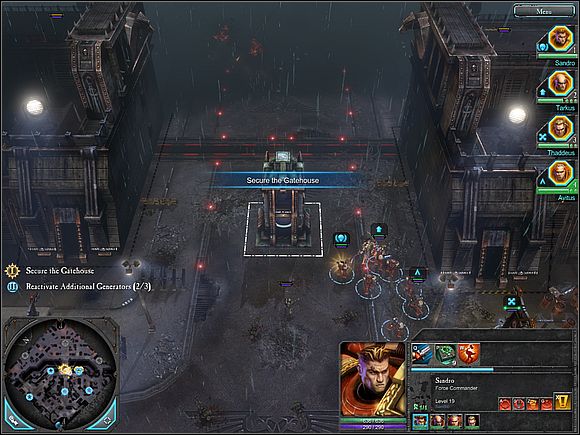
After securing the building the mission will be successful.
I - Tarkus;
II - automated foundry;
III - Idranel.
Be sure to take a rocket launcher and melta bombs. Notice that your army got thinned - Tarkus and his men are missing - replace him with Dreadnought.
When the mission begins, head north. Approach the Tarkuses team to gain control of it. Continue north and secure the nearby array.
Tarkus awaits you.
Time to regain the automated foundry - it's guarded by a bunch of Orcs that shouldn't pose a threat. Kill them and secure the foundry.
While you capture the buildings more Orcs will appear. Order the Force Commander to secure the building and send the rest of your men into the fray. After you capture the objective a tank will appear. Melta bombs and grenades with some rocket launcher support should be enough to deal with it.
After the fight rush south. Kill the Orcs in your way and head back to the Angel Forge gate. Deal with the Eldar stationed nearby.
Kill the enemies by the gate and head south. You will find another array on your path. After securing it more Eldar will appear, so prepare for a close encounter.
At the very end of the map Idranel awaits you. Throw at her everything you got. The fight will probably take a while so if one of your units suffers heavy damage send it to the nearest array and reinforce it.
Idranel will attack you with area attacks from time to time, so try to keep moving. She does call in reinforcements from time to time.
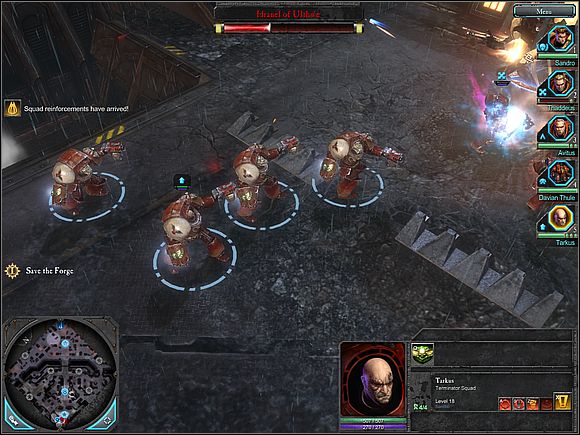
Your support will be Tarkus and a squad of Terminators. Use them to kill the witch and end the mission.
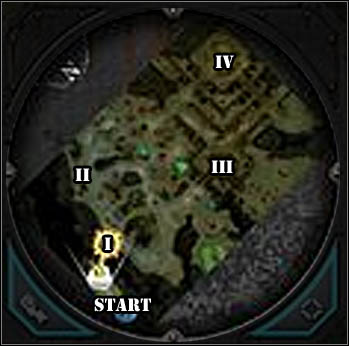
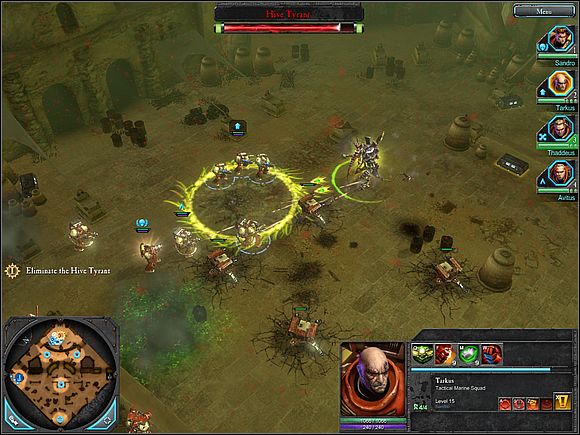
I - First Vein;
II - Second Vein;
III - communications array;
IV - Tyrant Alpha.
Grab some energy weapons, stims and turrets. Tarkus should equip a terminator armor and provide Avistus with something really heavy. Equip all your men for a tough fight as you'll have access to all of your squads.
After landing head north. You will meet up with a group of allies. Secure the nearby array near the Tyranid veins and poison one of them.
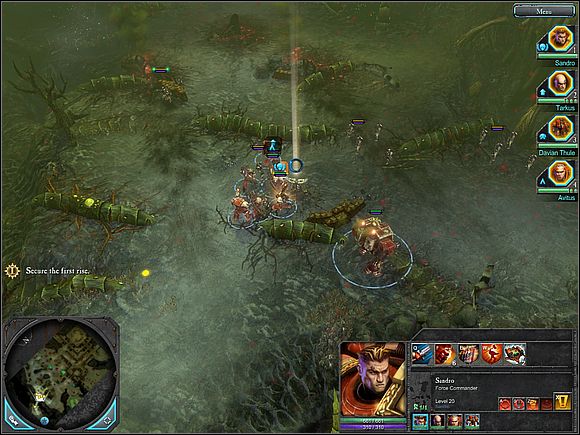
Tyranids will appear soon. You will be able to place two turrets - set both of the on the northern side, near the markers informing you about the route of Tyranid attack. Set your squads so that they can comfortably hold back the incoming onslaught.
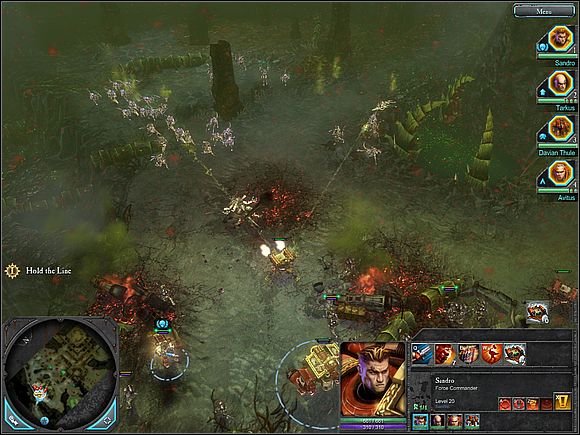
Poisoning will take some time, and when Tarkus informs you that he's done, head north. On your way you'll receive reinforcements - all the men you didn't initially pick for the mission. This will create quite an impressive firepower.
You've seen that before - secure the array and deal with nearby Tyranids. Place the turrets (3) in the north and east, then divide your squads into two groups to secure each of the directions. Send Dreadnought, Force Commander and Thaddeus to the north and Cyrus, Tarkus and Avitus to the east.
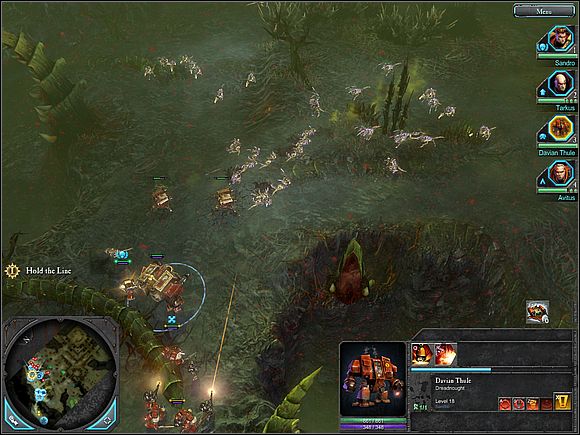
Though it may seem that you'll only need to defend yourself until the poison starts working in reality it will take a bit longer. If you'll use your turrets DON'T place new ones! You will receive reinforcements that will deal with the toughest of the enemies. The remaining forces should be dealt without much difficulty.
After talking to Angelos head east. You will have to reach the spot where the teleporter can be set up. Head up the stairs eliminating the Tyranids and their structures. During this march you will encounter rather weak resistance.
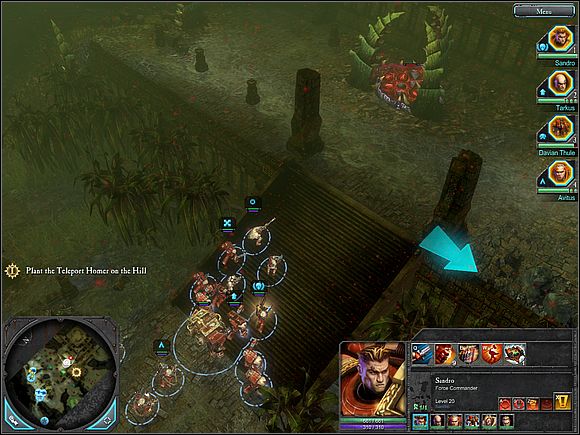
After securing the array (and thus, setting up the teleporter) Gabriel Angelos will appear. Send all your men to the north will Alfa Tyrant awaits. Space Marines will deal with units trying to follow Angelos.
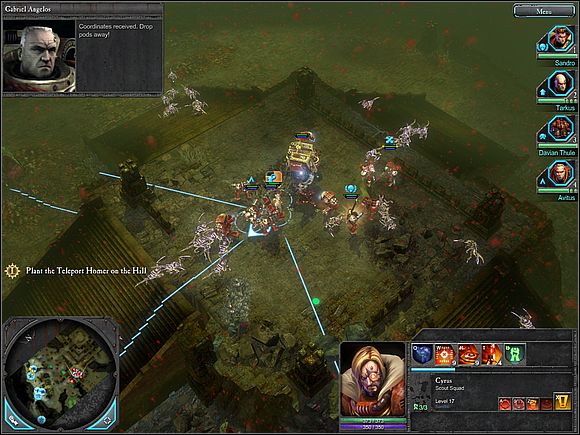
With all your men at your disposal fighting the Hive Tyrant should be quite easy. Place the turrets and throw everything you've got at the enemy. You can also add some grenades to the mix and use the assault cannon that should be found in Dendroth's Davian Thule inventory.
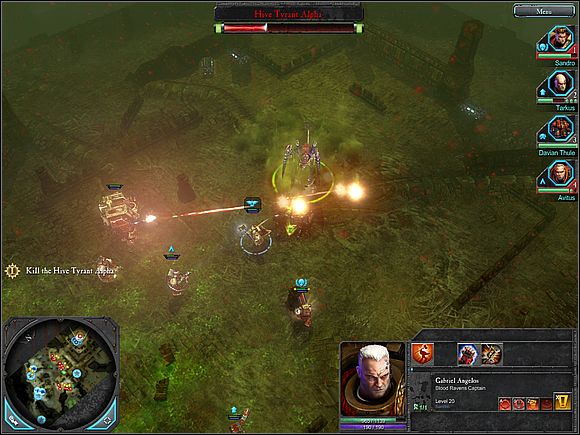
Defeating the Alpha Tyrant ends the campaign. Is that the end of all of the fighting? Surely not...
Space Marines
Force Commander - a great warrior. After equipping him with energy weapons he can deal with loads of infantry. He has a lot of health so he can stand even very heavy fire.
Apothecary - he's health is quite low, but he can heal his comrades. Equip him with a decent armor and use his regenerative abilities to heal the remaining troops.
Techmarine - an exquisite defensive character. If you're planning to secure the strategic points on the map Techmarine should be your man for the job. He's not impressive if you take into consideration his combat abilities, but he can lay mines and create anti-infantry turrets. He's the only character able to summon the Venerable Dreadnought.
Orc
Warboss - a pureblood warrior. All of the abilities granted by summoning the Warboss are set to improve the resilience and firepower of your troops. The Warboss himself doesn't have many characteristic abilities, but in return he offers great health and melee damage.
Kommando Nob - Kommando Nob seems to be a bit misplaced among Orc units - he's set on infiltration and use of explosives. He's pretty good at ranged combat and has pretty high health. I wouldn't recommend picking him as your hero.
Mekboy - he can repair the turrets and vehicles which allows you to skip the Slugga Boyz. Additionally he can create his own defensive structures and use teleportation. If you buy the appropriate equipment he can lay mines. He has quite an impressive firepower but his health is incredibly poor.
Eldar
Warlock - pretty good at melee combat, after buying the right upgrades he can heal nearby allies. Most Warlock upgrades affect his combat abilities. It is supposed to compensate for his low health. Apart from his few special abilities, Warlock cannot fight at a distance.
Warp Spider Exarch - a great distance hero with access to teleportation. Like the Warp Spiders, the Exarch can employ his teleportation ability to perform hit-and-run attacks. When needed he can teleport along with nearby units. He's efficient against the infantry and some of the upgrades make him efficient enough to deal with vehicles.
Farseer - pretty good at melee combat, can easily dispatch a lot of infantry, but her weakness is low health. She offers a few interesting abilities such as revealing portions of the map or summoning the Seer Council. Her upgrades increase her melee efficiency.
Tyranid
Hive Tyrant - a warrior type. Hive Tyrant has high health and is efficient when fighting infantry and his abilities allow him to summon additional units to the battlefield. Tyrant is completely useless at fighting vehicles.
Ravener Alpha - extremely fast, but low on health. He has a lot of upgrades that allow him to become efficient at fighting either the infantry or vehicles (you have the choice, but Ravenger is better at killing infantry). Additionally he can dig tunnels that can be used by allied units.
Lictor Alpha - this hero prefers sneak attacks. He can use temporary invisibility and what's more he can be upgraded so that his stealth becomes really deadly. Lictor has quite low health and is inefficient at fighting vehicles.
Assault Squad
If you like to use the jetpacks, assault squads should be your favorite units. They are quite efficient at disposing off large groups of enemies and vehicles - after providing them with Melta Bombs they can stand up to vehicles. My personal opinion is that tactical marine squads equipped with rocket launcher do a better job as anti-vehicle units.
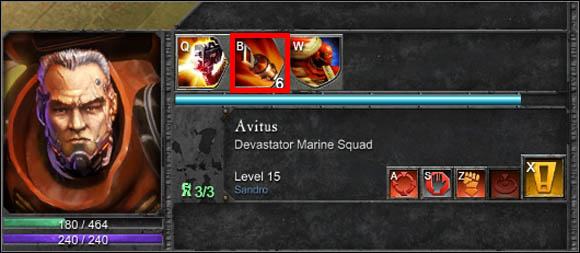
Devastator Heavy Bolter Squad
After securing a strategic point you can easily defend it by deploying this heavy bolter squad. Once placed in the enemy's path they're able to pin down enemy units allowing your troops to move freely about the map.
Devastator Plasma Cannon Squad
If you're high on resources pick plasma cannon squads over the heavy bolters. They're as good at holding enemies back and they deal more damage. They're also able to knockdown with one successful shot and are effective against vehicles.
Scout Squad
Without any upgrades this squad is pretty much cannon fodder, but when equipped with sniper rifles (one of the upgrades available) they become a decent support able to pick off enemies without getting into the heat of battle. Their additional perk is ability to repair vehicles and turrets - keep one of those units in your base in case you might want to repair your Dreadnaughts.
Tactical Marine Squad
Squad that's definitely worth your while - they don't stand out against enemy infantry right after training, but equipping it with rocket launchers and/or flamethrowers allows you to fit them to match your opponent's game style. Tactical Marine Squad is a great proof that Space Marines don't rely on the diversity of their units but their ability to adapt.
Terminator Squad
Incredible infantry squad. If you have enough resources summon them without hesitation. A lone Terminator Squad is able to face enemy infantry without any upgrades. Equipping them with assault cannon makes them almost perfect against infantry, while rockets make them suitable versus vehicles. One of the most important aspects of the Terminator Squad is however, the fact that they cannot be pinned down. The drawback of the Terminators is that they cannot withdraw.
Terminator Assault Squad
As mentioned above, the Terminators are near-perfect soldiers, so it's a good idea to have as many as possible. The Assault Terminators don't use firearms preferring energy hammers instead - this forces them to approach their targets. This can be still worthwhile because once they get close enough they deal enormous amounts of damage making them effective against infantry, vehicles and building. They also cannot be pinned down, but cannot withdraw.
Dreadnought
Dreadnoughts make a great weapon against enemy infantry thanks to the assault cannon. Without the cannon Dreadnought fares decently against vehicles. Dreadnoughts work best when supported by tactical squads with rocket launchers.
Predator
Very powerful unit that does great in the heat of battle (better than Dreadnought) but it doesn't do well without some kind of support - two tactical squads seem to be the best possible support. Predator doesn't have any upgrades so once it is built, you don't need to spend more resources on it.
Razorback
Razorback is rarely used even despite the fact that it can be effective against enemy infantry and reinforce allied units. Rather then building Razorback it is better to devote the resources to build Predators and Dreadnoughts.
Venerable Dreadnought
Despite the fact that it doesn't sport the assault cannon Venerable Dreadnought is way better than the regular one. It does better against enemy units and has higher health. The devastating charges it is able to perform are a huge asset of Venerable Dreadnought. Its main drawback is the price - if you manage to accumulate so many resources you'll probably do better building more of the cheaper units.
Kommando Squad
Quite effective long range unit. Kommando's are equipped with grenades which means that they are able to attack large groups of enemies. They're rather unimpressive in melee combat and are quite expensive - I don't recommend them.
Lootas
Very good defensive units, but you should bear in mind that it's an anti-infantry unit. It is able to stop the movements of enemy infantry but when vehicles appear Lootas quickly turn into dog food. Place Lootas near the captured strategic points and inside of the buildings.
Nob Squad
Incredible (though expensive) infantry, especially if you're able to afford the better hammers. Nob Squad is only capable of melee combat, but their damage output makes up for that flaw - they're able to tackle anything your opponent throws at you. High health is an added bonus.
Shoota Boyz
A decent anti-infantry unit. Their firepower can be upgraded twice. They're quite cheap so you should be able to amass them - large numbers compensate for their low (compared to space marines for example) health. They don't stand a chance against vehicles.
Slugga Boyz
Rather bad infantry that does well only against the weakest enemies. IT can be used to repair damaged turrets and vehicles.
Stikkbommaz
You're not going to use this unit to often - even though they're equipped with grenades, they're not as good as Shoota Boyz or Tankbustas at fighting infantry/vehicles. Training them is not the best idea.
Stormboyz
Anti-infantry unit that performs well as support. Stormboyz are equipped with jetpacks which means that they are able to get in the middle of enemy group and disrupt it. You can use Stormboyz to attack heavily defended positions. They don't do well against vehicles.
Tankbustas
Great anti-vehicle unit. One group of Tankbustas can deal loads of damage both among enemy vehicles and infantry (using mortar fire). Tankbustas do however require the support of other units - they quickly fall to assault squads and heavy bolter infantry.
Deff Dread
Deff Dread come in handy when fighting most of the vehicles - they deal a lot of damage with each hit. It doesn't however do well against large groups of enemies, has quite low health and moves slowly. Deff Dread are best at defending strategic points and your base.
Looted Tank
Even though it does fairly well against enemy vehicles and buildings it can easily fall pray to enemy units with anti-vehicle weapons. Send it to battle supported by Slugga Boyz and Shoota Boyz.
Wartrukk
If you can defend that unit be sure to add it to your army - it will provide great support and healing for your units. If you think that your opponent can destroy Wartrukk easily, you will do better without it.
Howling Banshees
Very fast melee unit. If you can't afford Warp Spiders, choose Banshee. They do a great job at fighting most infantry units but even when you upgrade them to deal more damage to vehicles they won't be very effective.
Guardian Squad
A great unit if you need to secure undefended strategic points. Later they can serve as a rather miserable support and repair vehicles - that last thing makes keeping a single Guardian Squad worth it.
Bright Lance Weapon Team
Rather Average anti-vehicle weapon. Does a decent job at defending strategic points and your base - in regular battle it doesn't do too well as setting it down takes some time and it is vulnerable to infantry attacks.
D-Cannon Weapon Team
Bad unit that's supposed to serve as eldar artillery. Fire Prisms and Falcons do a better job at fighting both infantry and vehicles and are more resilient then this cannon. Preparing it to fire takes some time which makes it even weaker.
Shuriken Cannon Weapon Team
Good defensive unit. As with heavy bolter units, Shuriken Cannon allows you to pin down enemy infantry - in situations where you have to defend your base or some strategic points on the map, this cannon does a decent job.
Ranger
Despite the fact that Rangers have only access to sniper rifles they're good at dispatching enemy infantry. They won't be effective versus elite units such as the Terminators, but against weaker but larger groups of infantry they are exquisite. They can gain temporary invisibility after the upgrades and are not effective versus vehicles.
Seer Council
This unit is truly incredible against enemy infantry - Seer Council can deal with regular soldiers and heroes with ease. They might require support when fighting the elite units such as the Avatar, Terminators or Carnifex. The main drawback of Seer Council is its price and the fact that you're limited to a single unit.
Warp Spider Squad
Decent anti-infantry unit. They are able to deal with nearly any infantry unit, even those equipped with heavy weapons. Using teleportation (which is the Eldar equivalent of jetpack jumps) they can appear behind enemy units and clean up. Teleportation can also be used to withdraw in situations, when Warp Spiders could be overwhelmed.
Falcon
One of the most important Eldar units. It can (and should!) be equipped with a force field. It regenerates nearby infantry and provides a decent firepower. It's quite weak against heavy vehicles against which it needs the support of Fire Prism tanks.
Fire Prism
Falcon variation - it offers two fire modes, one effective against large infantry groups, the other set to deal with heavy armored infantry and vehicles. It doesn't have a force field so it may require the assistance of a Guardian Squad. Fire Prisms are supposed to support Falcons in capturing strategic points and attacking enemy structures.
Wraithlord
Very good offensive unit. Wraithlord can be equipped with two kinds of weapons - one for fighting infantry, the other set to destroy vehicles. Try to send pairs of Wraithlords into the fray, so that one of them fights infantry and the other deals with the vehicles. Such duos are bound to deal heavy damage.
Avatar
Incredible, though expensive unit. It requires one thousand requisition points but if you'll manage to accumulate such number it will pay off. It's great against every kind of units and buildings, but it can use the support of health regenerating units - such combination makes him almost invulnerable.
Hormagaunt Brood
They can prove useful early in the game, but later they're worthless, due to low damage output and lack of ranged weapon. Hormogants are quite cheap, this doesn't however make them better than Termagants.
Lictor
Fast and strong anti-infantry unit. It fights only in melee and has the ability to knockdown enemies. This makes fighting easier for other Tyranid groups. Lictor is vulnerable to heavy firearms and vehicles.
Ravener Brood
Another great anti-infantry unit. They have the ability to pin down enemies, fight at a distance and are able to dig into the ground and flee the battlefield. Their main flaw is their price and their weakness against vehicles.
Ripper Swarm
Rather miserable unit that is worth noting only due to its low cost and large numbers. If you need to quickly secure an undefended strategic point these are the units for the job. Due to the fact that Tyranids don't use vehicles Rippers are less useful than their counterparts in other races.
Spore Mines
They're only effective in large groups - those suicidal units are only effective against enemy infantry. Rather than wasting resources on the mines save up to build Carnifexes.
Termagant Brood
Similar to Hormagants though better, as they are able to fight at longer range. Pretty effective against enemy infantry and quite cheap - those are the main assets of Termagants.
Warriors
Anti-infantry unit. Even though they have upgrades that should make them effective against vehicles they can't really fight them effectively. Their pin down ability is what makes them really useful.
Zoanthrope
Supposedly an artillery unit, though their low fire rate makes them rather miserable.
Carnifex
After buying the bioplasm upgrade Carnifex becomes the most powerful tyranid unit. What's important, you're able to create more than one Carnifex - this allows you to create quite a deadly force. High price is Carnifex's only flaw.
Name
Pts.
Description
There Is Only War
25
Destroy 500 enemy targets.
Death from Above
10
Kill 20 enemies using jump packs.
Sweeping Advance
10
Kill retreating enemies.
Emperor's Champion
10
Kill a boss using only Force Commander.
Lightning Assassin
10
Kill a boss in less then a minute.
Welcome to Calderis
15
Complete: "Stand with your brothers" and "Retake the hamlet".
Rant All You Will
30
Complete "The true enemy".
The Cleansing Begins
30
Complete "The Defense of Argus Gate".
Astronomical!
30
Recover the data from the Astronomic Array.
Even In Death I Still Serve
30
Complete "Into the Hive."
Heroes of Angel Gate
30
Complete "Secrets of Angel Forge."
Fight to Survive
40
Complete Campaign on Recruit difficulty.
Hold back the Xenos
40
Complete Campaign on Sergeant difficulty.
Win the War
40
Complete Campaign on Captain difficulty.
Allies to the Cause
10
Complete a mission in co-op mode.
Allies to the Chapter
25
Complete 15 missions in co-op.
Battle Brothers
50
Complete the Campaign in Co-op.
Dug In
10
Successfully defend 5 Strategic Assets.
Massacre
10
Complete 10 missions in a row without failing.
Not one inch
10
Defend a province without losing a single generator. a.
That's Close Enough
10
Complete a mission with only ranged weapons. .
Rush 'em
10
Complete a mission under five minutes.
Purge the Xenos
10
Earn a 5 star Fury rating.
Feel No Pain
10
Earn a 5 star Resilience rating.
Fleet of Foot
10
Earn a 5 star Speed rating.
The Book of Honor
10
Get 15 stars on one mission.
Fast Attack
15
Gain a second deployment in a single day.
Tireless warrior
15
Gain a third deployment in a single day.
Hero of the Imperium
25
Attain a Campaign Score of over 30,000 points. Earnable in Single Player and by the host in Co-Op.
Legend
25
Attain a Campaign Score of over 90,000 points. Earnable in Single Player and by the host in Co-Op.
In the name of the Emperor
20
Own all Strategic Assets in a Campaign. Earnable only in Single Player and by the host in Co-Op.
Elite
10
Max out a Combat Discipline on a squad. Earnable in Single Player and by the host in Co-Op.
Heavy Support
10
Reach Level 20 with one of your Squads. Earnable in Single Player and by the host in Co-Op.
Elite Strike Force
10
Create a 3 Player Party and Play a Ranked Multiplayer Game together.
Gladiator
25
Play 10 Ranked Multiplayer Games.
Wisdom of the Ancients
10
View a recorded game.
Veteran Victor
30
100 ranked wins.
Aspect Warrior
20
20 online ranked games completed with Eldar.
Angel of Death
20
20 online ranked games played with Space Marines.
A proper Waaagh!
20
20 online ranked games completed with Orcs.
Great Devourer
20
20 online ranked games completed with Tyranid.
Hail the Champion
25
Earn Champion rating 20 times during online ranked play
Master of the Apothecarion
30
Revive your teammates 50 times during online ranked play.
Winning rush
20
Earn a 5 game Win streak during online ranked play.
Flawless victory
20
Achieve an online ranked victory with 500 victory points remaining.
Red Ones Go Fastah!
5
Create a Customized look for any race in the Army Painter.
Crush the Enemy
40
Complete Campaign on Primarch difficulty.
The Warboss
30
Complete "Raid Against the Warboss."
The Avatar of Khaine
30
Complete "The Wailing Doom."


 Wolfenstein: The New Order Game Guide & Walkthrough
 WildStar Game Guide & Walkthrough
 Warhammer: Mark of Chaos Game Guide & Walkthrough
 World of Warplanes Game Guide & Walkthrough
 World of Tanks Game Guide & Walkthrough