
The guide to the Sword Coast Legends game contains a detailed walkthrough for the game and a full set of advices that will help you in completing the title in one hundred percent. The guide has been created mostly for players that are starting their adventure with RPG games and who have little knowledge of the universe of the Sword Coast. Here you will find detailed information about topics that will help you in getting through each quest and in facing opponents. Fans of the series and those who know the RPG genre well will find in this guide a more advanced walkthrough with the list of all secrets that can be found during the journey. This guide is divided into few chapters. First one is the introduction. There you will find controls, advices for the beginning of the game and the description of the interface. The second chapter contains a detailed description of the game mechanics. There you will find map descriptions, combat advices and the basics of exploring the game world. The following chapter focuses on the main character. Here you will find detailed descriptions of skills of various heroes and the differences between them. The next part of the guide contains a detailed description of the Dungeon Master mode in which you become the game master and you are creating levels for other players. Here you will find advices related to the mechanics and to all options that the mode offers. The next chapter contains the main element of the whole guide, which is a detailed walkthrough for all main and side quests. Here you will find hints related to the enemies you meet, locations and rewards given for completing tasks. Special maps with clear markings will help you in navigating. The final chapters of the guide contain descriptions of the technical aspects of the game. Here you will find detailed information about the graphic options, engine performance and PC version's system requirements.
The guide to Sword Coast Legends contains:
Jacek "Ramzes" Winkler ()

Hold to activate the tactic view

Shows items with which you can interact

Chat

Aiming at the ground

Moving the camera

Turn camera left

Turn camera right

Skip between party members

Quicksave

Quickload

Mark the whole party

Stop command for the whole party

Journal

Inventory

Hero tab

Skills

Map

Change weapon set

Trick

Hold to activate the tactic view

Shows items with which you can interact

Chat

Aiming at ground

Moving the camera

Turn camera left

Turn camera right

Locations

Quests

Monsters

Monsters sets

Combat in Sword Coast Legends is in real time, although you can activate tactical pause to assess the situation and issue precise orders to your party members. While in this mode, you can switch between your party members, select their abilities, or potions, from the bar and get back into action in real time mode and witness the effects. Depending on the difficulty level, you can engage in friendly fire (dealing damage to your allies). On the easy difficulty level, this has been disabled completely. On the medium level, you can deal to your allies only some damage, whereas on hard level, your allies receive 100% of AoE damage, effects of curses or shots from ranged weapons. Therefore, it is important to position properly your allies and keep space between them, or from the center of the battle. Below, you can find several useful hints on how to fight combats.
Tactical pause, assessment of situation - If you do not feel like using tactical pause, play on easy difficulty level. On higher levels, it is required to use this option. And it is not because of the difficulty level, but due to the complicated nature of the fight itself. The greatest downside, of course, is friendly fire, which cannot be avoided, if you decide that AI should take the charge of using abilities and settings. Also, tactical pause is useful in the case of encounters with stronger opponents, such as bosses or mercenary groups.
Friendly fire, the enemy of your allies - The medium and the hard difficulty levels introduce friendly fire to combat. This is an inseparable element of each battle, which needs to be embraced, whether you like it or not. To avoid friendly fire, remember to position your allies right after the battle starts, within appropriate distance of each other, and from the center of the battle. While in combat, try to forward your strongest/toughest character, which makes them take on damage from all the opponents. This not only focuses the battle in one spot, but also you avoid friendly fire to the less resistant party members. While playing as the wizard, pay attention to the resistance of the forwarded character to various types of damage and curses. After you decide to cast an AoE spell, the game displays the radius of its effect. To alleviate friendly fire, try to avoid encompassing your ally with the radius and cast the spell right next to them.
Your surroundings are your ally; use it - During your exploration, you find lots of opponents. Some of them are weaker and some stronger. If you spot a troll in a narrow passage, most probably, there is no reason to worry. Yet, if there is a group of opponents there (e.g. Wilgen from the sewers, during the Making an Entrance quest) the important thing is to answer one question - Is it the best spot to fight a battle? In Wilgen's case, this is not, therefore it is a good idea to take advantage of your surroundings. Before the battle, assess the situation and find out where it is best to fight the battle. Right after the battle starts, have the entire party take a step back, towards the nearest door and deploy the Paladin, or the warrior in the passageway. They will be taking damage. The archer and the cleric should ALWAYS be behind their back. By doing this maneuver, not only do you eliminate potential threat to the less resistant characters, but also you exclude some of the opponents from the battle, because in most cases, a big group will split into two smaller ones. This tactic works with all kinds of narrow passages, doorways and dead ends.
Opponents are also resistant to damage - While obtaining new items, you often face the situation, n which items offer bonuses to resistance to damage, e.g. From damage or from lightning. If this happens, you can be sure that this works both ways. Some opponents (e.g. Rhylfang) are completely resistant to various damage (in the case of Rhylfang, it's resistance to damage from poison). If an ally happens to have a weapon of this element, damage they deal with that weapon is naught. This is why it is important to carry two, or three different weapon sets. The above situation is especially true for mages, because there is no monster in the game to be completely resistant to physical damage dealt by rogues, archers or warriors. This is not the only case, because the majority of legendary weapons (which you will be, obviously, using) have bonuses to damage from elements. If, for example, your weapon provides a high bonus to damage from lightning, while fighting with Elder Black Pudding, you do not deal even a point of this type of damage, due to his resistance to lightning.
Not every opponent is just a rat that can be squashed - During your adventures, you be encountering a wide array of monsters, people or drows. Some of them are going to be easy to defeat and some are not. You need to take that into account, because you may encounter an opponent that is too demanding for you. Cultist Cyran may serve as an example here ((Side quest A Trader's Fate). You encounter him, for the first time, at level three, when you set your foot in Luskan for the first time. For low-level characters, this character is quite a problem, not because his level is too high, but because your equipment is too weak. If you encounter such an opponent, who kills your party within several seconds, give it up and return later, after you have progressed several levels up. You will then have stronger equipment and more skills.
 Larethar
The party is the basic element of Sword Coast Legends. During your adventures, you will be meeting various allies, who you can include in your party. Therefore, it is worth knowing about the most optimal make-up of the party.
Rogue (Izhkin, Larethar) - Rogue is an inseparable element of each party. His role is to deal maximum damage and swift elimination of threat. He should be targeting poorly-armored opponents, such as mages, archers or other rogues. There is no other character that would deal as much damage as rogue. Therefore, try to arm him with the best gear possible. When it comes to skills, focus on maximum damage and stealth combat. A good rogue should be able to enter between opponents without being seen, kill the enemy in one blow and escape, before the rest realize what happened. Rogue is, of course, not only about damage, but also about cunning. While leveling the rogue up, focus on the Search ability, because this is the character to search for all sorts of treasures, traps and secret passages.
 Hommet
Mage (Hommet, Dalanir) - Mage should focus predominantly on curses. Thanks to this, you will be able to disable some of the opponents, by means of putting them to sleep, paralysis or other controlling effects. Since the mage has all sorts of skills, you can also use one as the main tool for dealing damage, alongside the warrior. First of all, the mage should be wearing robes that list reduction of cooldown time on skills, among their features. This will remedy the problem of endless cooldowns.
 Illydia
Cleric (Illydia) - Illydia is an excellent cleric. Due to her race abilities, she can quickly heal the wounded. Her default weapon (the bow) has a special ability that restores health points to wounded allies. You should predominantly focus on developing all healing skills and skills that buff offense and defense. Cleric should be the character to support other allies. When it comes to equipment, pick items that allow you to limit cooldown times and increase health regeneration. A perfect element of arms is the Mask of Relentless Compassion. It is a headwear that provides a huge bonus to the restored health points. Unfortunately, you can obtain it from a side quest, as late as in act three - Speak No Evil.
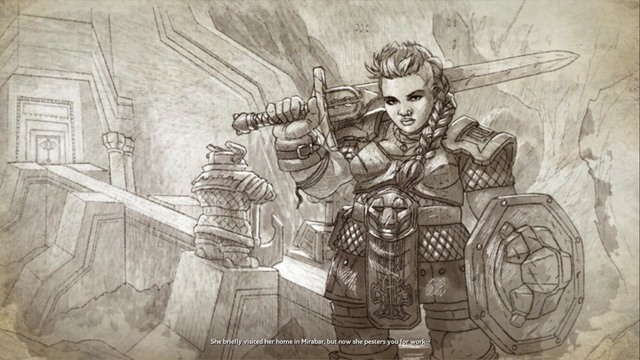 Jarhild
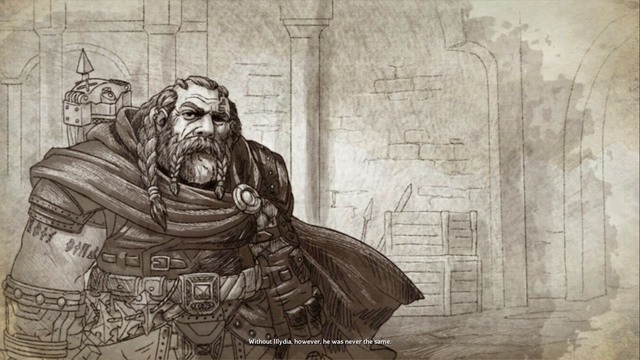
Warrior/Paladin (Jarhild, Javen) - The warrior should be the toughest character on your party. While leveling up, try to use up points on constitution (CON) and strength (STR). His armoring should provide him with various defensive bonuses and damage-taken reduction. His skills should focus on supporting the party and containing the battlefield. For that, however, you need to sacrifice damage taken, which is a perfect idea in this case. Of course, do not exclude him as a character to deal damage. Warrior can not only be resistant, but also strong and deal as much damage as a mage would. Warrior's role is to focus all attacks on himself. When coupled up with cleric, who is positioned far away from the center of the battle, the warrior can withstand even the toughest of attacks.
Exploring the world has one rule which applies to each class and allies. The rule is about constantly using the Search ability. Because of his natural wisdom attribute, the rogue is the best character for buying this ability. Wisdom increases perception, allowing the character to find hidden things in the game world. Exploring as rogue also allows you to disarm traps which you can find when searching through caves or dungeons. After reaching a newly discovered place, the map of the location will be completely clouded. The best way to uncover it is walking along the corners of the map and finishing the journey in the place where you started it. By doing so, you will avoid unnecessary uncovering the places which you will bypass. In such places you might find various treasures and riddles. Try to enter each cave. In each case, you can find something interesting inside. It can be a side quest, an elite opponent guarding a treasure or a riddle, after solving which you will get to a vault filled with valuables. Exploration and quickly getting rich is related to each other.
Sword Coast Legends is based on an equipment system. However, it's not a system like in other RPG games, where you must met the requirements related to character level in order to be able to use an item. All items found in the game can be equipped by every available character. The only requirement is having completed training in using items. For example, at the start, rogue cannot use hammers or spikes. If you want to use that equipment, you must buy a special ability that trains the character in using a specific weapon type. However, it's not a good idea, as during the game you will have a limited number of skill points and it is better to assign them to abilities related to your character's class. Remember - in Sword Coast Legends, if something is used for everything, then it means it is actually useful for nothing. Part of the default equipment is better than the one found during game. The bow of cleric Illydia is a good example. Her default weapon has a bonus that regenerates the health points of wounded allies. As you should focus on building this bonus for the cleric character, you shouldn't change this weapon to any other that would deal more damage.
Obtaining better equipment can be done in three main steps. First one is buying items from merchants. The merchants in the cities sometimes have very interesting items that cannot be found in the game world. If you will find a new merchant, remember about checking his offer. Second step is killing monsters and completing quests. Don't pass on any side quests, sometimes by completing them you can gain very interesting items. One of such items is a legendary head gear for the cleric - the Mask of Relentless Compassion. The mask makes the cleric deal 99% less damage but he also receives a 100% boost to the number of health points he returns to his hurt companions. Since cleric is a class that should focus on healing, the mask is the best item available for this class. The mask can be obtained during the Speak No Evil side quest.
The last step is crafting. In Sword Coast Legends, crafting is different than in other RPG games. You don't gather materials and diagrams like in Witcher. You don't train your blacksmith and armorsmith skills like in Skyrim. In Sword Coast Legends, crafting is about finding damaged equipment scattered across the game world and ordering the blacksmith from Luskan to repair it. The price for reforging is usually at level of tens of thousands of gold. However, for doing it you will receive legendary equipment which cannot be obtained in any other way.
The equipment has a limited number of slots which you can use. Actually, it's not slots, but the total weight of the items (around 300). After exceeding the weight limit, you will receive a penalty to movement speed, which will make exploring impossible. Remember about clearing the equipment of items you don't need each time when you're near a merchant. Heavy plate armors have the greatest weight (60).
Dialogues in Sword Coast Legends are inseparable element of the gameplay. During the dialogues with characters you will learn many useful facts related to tasks and side quests. In most cases, the dialogues will have assigned lines that allow you to use persuasion or intimidation. It is very important to develop at least one of these two for your character. Persuasion is related to charisma statistic in which mostly rogues, wizards and clerics should invest. The further in the game, the more charisma you will need when using persuasion. Intimidation is related to strength statistic, which should be developed by warriors and paladins. This division is natural for all characters. As a wizard, you should avoid investing in many strength points, which would be useful only for intimidation. Except for resistance to abilities related to strength, wizard will have no use for this statistic when dealing damage.
Charisma is required for using persuasion. It's the most important factor when talking with characters met in the game world. Thanks to persuasion, many times you can avoid fighting and receive large profits. With this statistic you can also bargain with questgivers, increasing the rewards for completing the missions. Sometimes you can even twice the basic size of reward. During quests, you can also obtain very valuable information related to missions. Without persuasion, that information would have been skipped.
Strength is required for intimidation. In difference to persuasion, using intimidation sometimes leads to a fight. In some cases, thanks to intimidation you can save some gold during quests or obtain parts of legendary equipment from the corpses of defeated enemies (for example, during The Blood Debt side quest). In most cases, intimidation has the same effect as persuasion. The only difference is in the attitude of characters and the dialogue line.
The strength and charisma are required for successfully talking with characters met in the game. In Sword Coast Legends you will also face many other factors when other character's statistics will become useful. First one is intelligence. Intelligence is not only related to the basic statistics of wizards, but to the way the character sees many secrets and surprises as well. During the exploration, many times you will find a secret that requires intelligence to be revealed. The best way to find it is switching the character to the wizard who has the most intelligence of all characters (or at least, he should have). It's ineffective to assign one statistic to each character. The whole team should supplement each other and be trained for specific parts of quests. Another statistic is wisdom. Wisdom is needed to locate the hidden secrets. It increases your perception when finding hidden passages or chests.
Crafting is considered only as a supplement to Sword Coast Legends. Because of that, you will not find here skills like blacksmith, armorsmith, enchanting or alchemy, that are focusing on crafting, like in other RPG games. Crafting in the game is done in two steps. First one is collecting damaged weapon or armor parts that are scattered through the whole game world. After collecting enough of such parts, you can go to the blacksmith in Luskan - Market District and order him to forge you a piece of equipment. The price for such action is ten thousands of gold, which is much more than you can afford early in the game. The crafted items are usually very good, but not the best. If you have trouble with finding a proper weapon for you or your ally, go to blacksmith and check whether he has an option to craft item you need.
Recommended items to forge include:
Gold is a great trouble at the beginning of the game, when the best equipment can be only bought from merchants. Crafting is even more troublesome, as the price for forging obtained materials is few times larger than the amount of gold you posses. So, how to quickly gather money? From where can you get the gold you need? Most of all, ask yourself the question whether you really need the items offered by the merchants. Usually they don't offer anything exceptional, just behind the corner you might find a chest with much better items. Due to that, you should ignore the urge of having everything, especially the items that after gaining few levels you will sell for a small part of the money you spent on buying them. This rule doesn't apply to crafting. Crafted item can be used by you during the majority of the game. You can find better equipment once you reach the third act. Because of that, instead of buying mediocre items from the merchants, you should rather focus on crafting legendary items. The equipment you craft is of course constant and it doesn't need to fit your game style. In that case, you can consider changing the skills of your character in order to maximize the profits from the item. Now, as you know the rules of spending and you know that money is hard to get, below you will find advices related to quickly gathering the gold:
Search each corner of the game world - Looting chests, trunks, corpses, catacombs or looking for secrets is the main way of quickly gathering gold. This is how you gain most of your gold, items and potions. Sell each part of the equipment that you aren't using. The same goes for potions and scrolls. In order to effectively search for secrets, you must buy the Search ability. Buy this skill for your rogue. Combined with large value of Wisdom statistic, this will allow you to find each chest or secret door. Remember that with higher level of Search skill not only your perception rise, but your movement speed as well. On fourth level of the skill you no longer receive any movement speed penalty.
Complete every quest, even the smallest ones - Completing jobs, side quests and main quests is another profitable development. Depending on the quest, you will receive various amounts of gold coins. During such quests, many times you will face an elite enemy who will have some unique or legendary equipment, which is worth much more than the reward for completing the quest.
Invest in charisma or strength - During dialogues, sometimes you can bargain when accepting quests. By doing so, with one click you can increase the reward for completing the quest. With charisma or intimidation you can also avoid unnecessary expenses on pushing the events forward.
Theft is profitable - When exploring cities and houses, try to break into chests and boxes that can be found there. The townsfolk hide quite some valuables there.
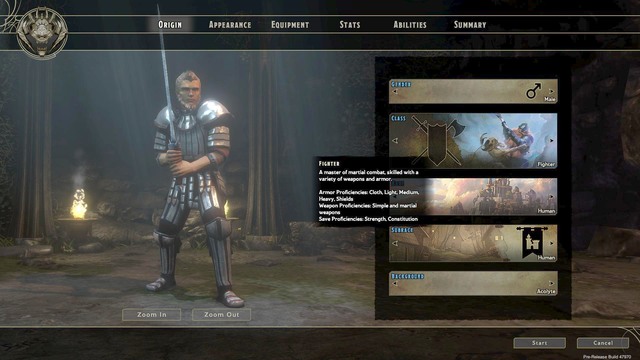 Character creation in Sword Coast Legends
Character creation in the Sword Coast Legends is done in few main steps. First one is the Origin tab. Here you can select hero's gender, his class, race, subrace and background. You can choose from few dozens of different combinations which can differ in the way various characters met during game will react to you.
The game offers few basic classes:
Selecting the gender and the class will determine your further choices. The next one will be race and subrace. Each race has different subraces (for example, human cannot become a merchant). Below you will find a list of all races and subraces available in the game:
The last option when creating character in this tab is its background. The game offers few completely different backgrounds which mostly differ in bonuses they offer. Below you will find a complete list:
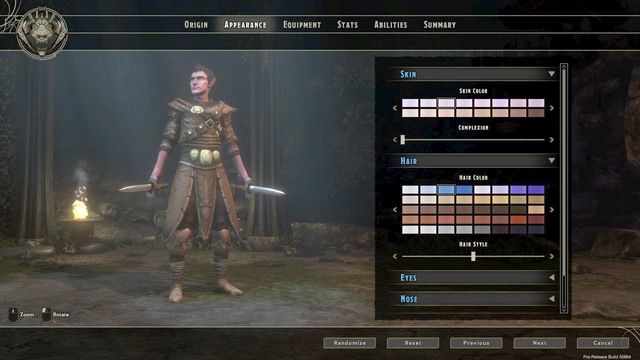 Change of the look of your hero
The next step after choosing the class is creating the look of your hero. It is done in the appearance tab. There you can modify the face, skin and hair color and change them as you want.
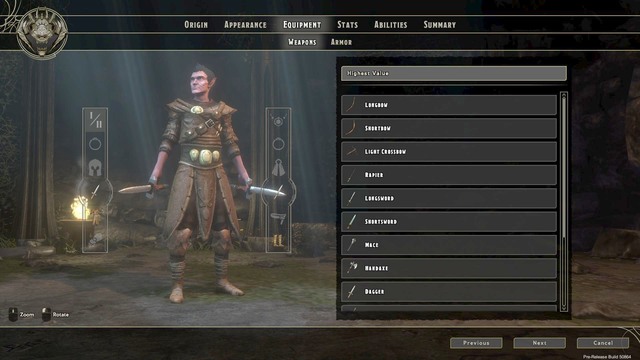 Selection of the weapons of the character you create
The equipment tab allows you to pick the weapons with which you will start the adventure. Each character has his own set of weapons from which you can choose. If you don't like the type of weapons that are available in the tab, then you should consider changing the class.
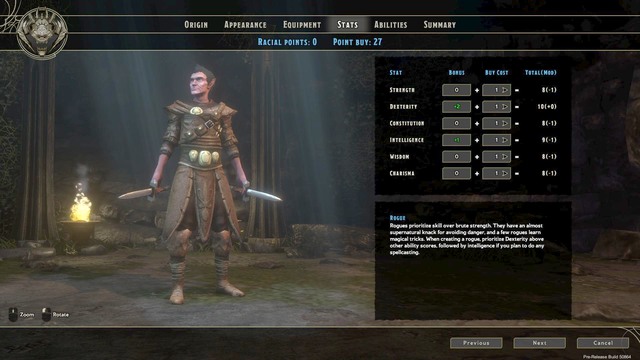 The window with the statistics of the character you create
The stats tab allows you to distribute the statistic points. It is important to select statistics which your class prefers (the basic stats of each class can be found in the list above).
After distributing the statistics of your character, go to the nearby abilities tab. Depending on the class you have chosen, you will have few ability points to spend. It is important to follow the path you have chosen. If you want to play as rogue, invest in skill trees that will be useful during battle. More about the skills of various classes can be found in the Characters' classes chapter.
Sword Coast Legends has an experience gathering system similar to other RPG games. The only difference is in a small but important aspect. This aspect is gathering smaller number of experience points by a character that during the battle was unconscious. If you are fighting with five monsters, from which each guarantees 100 experience points, every member of your party will receive 500 experience points. But, if one of the characters will die during the battle and will be resurrected after killing the opponent, the experience points that this opponent guaranteed will be removed from the total reward. Because of that, it is important to keep the whole party alive at all cost and, if someone dies, to resurrect that person as quickly as possible. The experience from the pot isn't transferred to other party members, it is lost forever. If they do not have any items that increases the amount of experience received, each party member is given the same amount of experience after the battle.
Experience is gained by killing enemies. It's one of the main ways of gathering experience points. The higher level you have, the more experience points you will obtain. You receive small amounts of experience for fighting typical opponents, such as merchants, bears, spiders or goblins. It's different when facing elite opponents and bosses. In that case, the number of experience points you receive is sometimes larger than rewards for completing jobs, side quests or even main quests.
The experience is also gained by completing quests - it's the second main way for this activity. Depending on the quest type and character level, you will receive from 100 to 19000 experience points. More experience can be gained by completing the main quests (few thousands of it). Monsters on level above twelve also offer larger numbers of experience points.
Another way of gaining experience is interacting with the game world. After removing a trap or opening a lock, your team will receive a small amount of experience.
Each time you gain new experience level, your character and allies receive few skill points to distribute. Better skills usually require more points to be invested in them. Bonuses from such skills are worth investing more points in them. By doing so, you can gain the maximum level of a skill faster. Usually it is few times better than its regular version. When distributing points, you must have at least a basic plan. Most of all, remember that each character should fill a certain role in the party and be a supplement to other characters. The development plan can be applied to any type of skills, attacks, weakenings or interacting with the world. Below you will find an example plan of distributing skill points on high difficulty level:
Rogue - In case of rogue, start with developing the Search ability, it will help you in finding traps, hidden passages and secrets. It's a vital part of gathering gold in the game and because of that you can't afford to ignore it. After obtaining the maximum level of Search skill, invest in Hide skill. It will allow you to quickly eliminate enemies with a surprise attack that has great chance for critical hit. Next skills should be: Hidden Dagger - thanks to this one, abilities of elite enemies will load longer. This skill is very useful during hard battles. Endanger - a skill that deals large amounts of damage and greatly reduces resistance to slashing and piercing damage. You should use this ability on strong enemies that have great resistance, such as bosses and elite opponents. During this curse you should use the last skill - Deathstrike. Due to the long loading time of this skill, use it only against bosses and elite enemies. Combined with the Endanger curse and the hide, the character can kill enemies with a single critical hit. As for the statistics, in case of rogue you should develop dexterity and wisdom.
Cleric - In case of clerics, skills that regenerate the health of hurt allies are the most important ones. It's not the only, but the most important advantage of this character. Remember that during the battle you must position your clerics far from the frontline and from the center of the battle. It is important for cleric to avoid direct confrontation with enemies. First, focus on buying the maximum level of Healing Word, Prayer of Healing, Cure Wounds, Disciple of Light and Restoration skills. Once you buy few healing skills, you can focus on buffs for your team and curses used against opponents. When distributing the statistic points, focus on wisdom and constitution.
Fighter/Paladin - Warriors should be versatile. Not only should they deal damage, but also focus all incoming damage on themselves. They are qualified in controlling the whole battlefield by using various weakening attacks. Warriors are the core of your party. The cleric and warrior are making an inseparable pair and if one of them dies, the other will follow. Don't focus on damage, but on securing advantage on the battlefield when buying abilities for warrior. Most of all, focus on cries that enforce the team and weaken the enemies. Buy the skills that focus on controlling large territory instead of dealing damage to a single opponent. When distributing the statistics, focus mostly on strength and constitution.
Wizard - Wizard should be like warrior. This character deals quite high damage, but his most important trait is skills controlling and weakening enemies. When distributing points, buy paralyze, disorientation, speed reduction, sleep and other weaknesses that will allow you to avoid fighting the whole group of enemies at once. After removing some enemies from the battle, simply use the rogue to eliminate them before they can understand what is actually happening. The base statistics for wizard should be intelligence and charisma.
Rogue is one of the character classes available in Sword Coast Legends. This class is qualified in quickly eliminating enemies while constantly remaining hidden. The rogue is dealing the highest damage of all available classes, but his resistance factor is not high enough. When playing as rogue, you must consider that one wrong move might end tragically. Playing as rogue is based on few principles:
Exploration depends on you - Rogues are qualified in disarming traps. Because of that, it is natural for rogue to search the territory and lead the whole team through long corridors of unfriendly caves and catacombs. Invest in maximum level of Search ability, this will help you in finding secrets and traps scattered across the world.
Light armors and daggers are your equipment - Wear only light armors. Their bonuses are mostly assigned to rogue. Light armors does not limit your character's movement, it is the base of moving in hiding. Your weapons should be daggers with high dexterity factor. Later in the game you can switch to a short sword (Torga's Pyre). If you don't have daggers, you can use short daggers or rapiers.
Armor only for increasing damage - Rogue is a killing machine that is falling apart after the wind blows slightly stronger. Use it to increase the damage even more. If you think that you don't have enough elements resistance during battle, drink potions that will increase it instead of investing in equipment with that bonus. Instead of damage (dexterity bonus), you can put on equipment that will reduce the loading time of abilities. Since the strongest skills are reloading for very long, invest in two-three items that will provide you with such bonus.
Dirty combat is your domain - When playing as rogue, you should use trickery instead of plain strength and constitution. You must be constantly moving, the only time you should stop is when you're behind enemy back, preparing to stab him in his back. Such attack will deal huge critical damage which is the key point of the whole battle. Your character will be the most important when it comes to dealing damage. Of course, it doesn't apply to every battle. Bosses and qualified assassins can notice you even if you are in hiding. If that happens, return to your position - close to the cleric - and wait for the hide skill to reload.
First, eliminate the lesser armored enemies - Eliminating wizards and other rogues should be the priority for this class. You must walk deeply behind enemy line and decimate his forces while the rest of the team is fighting on the frontline. It's a very risky but very profitable action. If the rogue will die behind enemy lines, neither the cleric nor any other character will be able to resurrect him, so it is very important to have large numbers of Potion of Self Resurrection, which returns the unconscious party member to combat.
When advancing to next level, try to maximize your dexterity. This factor is responsible for dealing damage in case of rogues. As for the skills, below you will find a description of one of many combinations available in the game:
Scoundrel
Hide
You hide behind enemy. After walking out of hiding, the character receives a bonus to critical hits. The fourth level gives you maximum effect. This ability makes Rogue a killing machine. Low reload time of the skill allows you to constantly remain hidden and deal critical damage to enemies that are unaware of your presence.
Sneak Attack
A passive skill. This skill adds additional piercing damage. If you perform an attack from hiding, the damage automatically becomes a critical damage. Level four is required for maximum effect.
Knave's Gambit
An ability that must be turned on. It greatly increases the chance for performing a critical hit. The disadvantage of the ability is reduction of the armor class. Third level for maximum effect.
Assassin
Hidden Dagger
You throw the dagger at enemy and deal small amount of damage. This ability greatly increases the loading time of enemy abilities if he is hit by it. Level four for maximum effect.
Endanger
You attack weak point of the enemy with the dagger, dealing great amount of damage. This skill also greatly reduces the resistance to slashing and piercing attacks. Level four for maximum damage and weakening effect.
Deathstrike*
The strongest ability of the rogue. If enemy doesn't have enough constitution, the ability will deal few times more damage to him. Level four required for maximum effect.
Misty Step
You teleport behind enemy back and deal small amount of damage.
After reaching a certain experience level, the game style will be based on the "hit and run" principle. Your basic ability will be Hide. On fourth level you will unlock a large boost to critical hit chance, making your character a typical assassin.
If you're fighting weak enemies, don't waste skills such as Endanger or Deathstrike. They have very long reload times and it is a waste to use them against enemies that will drop dead after one or two backstabs. Instead of that, try using Hide skill to walk the enemies from behind and simply hit them. With the Knave's gambit skill, this will guarantee you a critical hit that will greatly reduce the health of the enemy.
If you're fighting bosses and elite opponents, start with using the Hide ability. Just as you get behind the enemy, use the Endanger skill. This will not only hit the enemy with a critical attack that will deal large amounts of damage, but will apply weakness needed during the next attack as well. Once the attack is successful, use the Misty Step skill to escape to safe distance and wait for the Hide to reload. Once it is ready, activate the hiding, sneak up on the enemy and hit him with Deathstrike. If the boss doesn't have enough constitution, the damage you deal will greatly reduce his health (depending on equipment and the dexterity of character, the damage can range from 200 to 400).
Remember about using offensive and defensive buffs before each attack. Such synergy of whole party is required when fighting bosses and elite opponents. Not only will it maximize your damage, but will also increase the defense, lowering the damage you might receive.
Rogue is mostly using daggers, but you can also equip him with short swords and rapiers. Clan Solar'el Dagger is a perfect weapon, it can be obtained by finding three pieces of the legendary dagger and then forging it at the blacksmith. Second weapon can be Torga's Pyre. It's a legendary short sword which deals massive piercing damage and has a bonus that deals large fire damage. However, this weapon isn't effective against bosses and elite enemies which have immunity and resistance to fire.
As for the jewelry, find one that gives you bonus to dexterity. Using items that boost your ability reload speed is a good idea as well.
The rest of the equipment should be similar. Aim in having as much dexterity as possible. Drahkar Boots are the perfect item for your legs, it can be found at the corpse of Drakhar in Evermoors. Honorary Dead Rat Tunic is a good armor, you receive it for completing the Dead Rat Revival side quest.
Cleric is a character that has skills used for healing his allies and that is on what the player choosing this character should focus on. Since cleric is in most cases a backup for the team, try to avoid making him join the direct battle. Your place is far from the center of the battle, behind the back of the warrior. Sometimes, enemies are targeting the cleric in first order, so it is important to avoid standing still in such cases - you should run and wait for your allies to kill the opponents. As cleric, you are tasked with casting buffs on your party. Such buffs might increase the damage dealt by your party and overall defense, making the battle much easier. Invest mostly in wisdom and constitution when gaining new levels. Playing as cleric is based on few principles:
Cleric does not fight - Don't try to deal damage. Frequently, after receiving damage the enemy is targeting the attacker. You want to avoid that at all cost when playing as cleric. Remain at the back and help your allies during battle by casting various buffs, healing the wounded or resurrecting the fallen.
There is no definitive equipment type - You can make the cleric wear whatever you want. After buying the ability to wear heavy armor, you can make him into a resistant character. Focus mostly on increasing the wisdom statistics and reducing the reload time of skills. The latter is most important when selecting equipment.
You make an inseparable pair with fighter/paladin - As cleric, you are responsible for keeping the warrior that receives most of the damage alive. Very often, the warrior might be put to sleep or stunned. Your job is to clean him of any negative effects. If the fighter or paladin will fall, you can be sure that you are next to die. Sadly, you will never be as resistant as the warrior and the battle will quickly end in failure.
When advancing to next character level, in first order you should buy skills related to healing. The higher the level of ability, the more health points you will be able to restore. Once you will have two-three such skills, spend points on the ability that allows you to clean the allies of any negative effects. This ability is especially useful later in the game. Below you will find an example set of skills that work well with rest of the team:
Righteous Champion
Healing Word
This skill heals a single target. Level four required for maximum effect.
Light
Cure Wounds
This skill heals a single target. Level four required for maximum effect.
Prayer of Healing
This skill heals all allies on a limited territory. Level four required for maximum effect.
Disciple of Light
A passive ability that increases the number of restored health points and that gives bonus to resistance to radiant damage. Level four required for maximum effect.
Life
Bless
A blessing that increases allies' chance for receiving a resistance to spell. Second level required for maximum effect.
Aid
A blessing that increases the defense of all allies. The effect also adds small boost to maximum damage. Third level required for maximum effect.
Beacon of Hope
Marks an ally to become the central point of the effect. Each ally that is nearby will receive a bonus to the number of restored health points. Level four required for maximum effect.
Restoration
Removes the negative effects that affect your ally. Level two required for maximum effect.
Cleric is not participating in direct battle. His task is to stand behind the back of his allies, cast buffs and heal the wounded heroes. When the battle starts, cast Bless, Beacon of Hope and Aid buffs. This will aid your allies during battle, mostly by increasing their defense. Cast the Beacon of Hope only on your warrior. He will be the central point of each battle and he is the one who needs the most of regenerated health points.
When playing as cleric and fighting against the Illithids, have in mind that enemy can take control of the mind of warrior or rogue at any point of the battle. If it's the rogue that is dominated, you must quickly cleanse him of the curse with the Restoration skill. If you won't do it, you can be sure that you will be his first target. Since rogue is trained in quickly eliminating his opponents, you will drop dead before you know it.
Cleric doesn't specialize in one specific weapon type that would give him advantage on the battlefield as it is in case of rogues. You can always invest a point in heavy armor using specialization and wear plate armor. Cleric doesn't have a default weapon that he can use as well. It can be a staff, a bow or a sword. However, have in mind that it's not the damage that is important in case of clerics. The most important attributes are ability reload speed, wisdom and constitution statistics and damage resistance.
Cleric's jewelry should contain a reduction of skill's reload time. Later in the game you will obtain a ring that is healing your character and that has a bonus to overall defense - Cerric's Ring (available after completing Illydia's quest). Another aspect of the jewelry should be boost to wisdom statistic and to damage resistance.
As for the armor, focus on maximizing the effect of skill reload time reduction. When exploring the second act, you will find few pieces of Breakneck set which has that bonus. Cape of Eillistrae is a perfect cape for the cleric, it will increase the number of regenerated health points. However, the most important item for the cleric is the legendary head gear which you can obtain by completing the Speak No Evil side mission. This item is called the Mask of Relentless Compassion and it will reduce the damage you deal by 99% while increasing the number of restored health points by 100%.
Wizard is another character class available in the game. The wizard has many abilities that are useful on the battlefield. In addition to the regular curses and summoning spells, the wizard has also a set of elemental spells, such as cold, fire or lightning. The wizard, similarly to a warrior, can be played in two ways at once. This character is controlling the battle by casting various curses and dealing high damage to a single opponent and a whole group of enemies. As the wizard you don't have high defense, so remain behind the warrior who will focus all the damage on himself. The most important statistic when playing as wizard is intelligence which has a direct impact on the number of damage you deal. Below you will find a list of few principles which you should have in mind when playing as wizard:
Wizard is not a warrior - The wizard should remain at the back, next to the cleric. Don't use him in direct confrontations with the enemy, he isn't well armored. Your defense factor will not allow you to receive damage unless you use the abilities that increase resistance to damage. When playing as the wizard, try to help your team during breaks between dealing damage. By using such game style you will fully realize the potential of this class and the synergy between the members of your team will be on high level.
Your robes and staffs are your equipment - Try to dress your character in dresses and assign staffs to him as the main weapon. Such equipment is assigned to the wizard character by default. These weapons and clothes offer bonuses that are useful mostly for mages.
Wizard doesn't deal the greatest amount of damage - Don't use the wizard as a killing machine. He is more useful to control the center of the battle. Instead of buying various offensive abilities, consider some weakening spells and curses. One sleep or stun curse eliminates large numbers of enemies from the battle, allowing you to eliminate them much faster. Using the rogue in this tactic will increase the synergy between your characters even more.
Have at least two sets of weapons - Sometimes you will face an enemy that has complete immunity to your elemental attacks. This completely excludes your character as damage dealer and reduces the synergy between the party members. Because of that, you should have a spare weapon that deals damage of different type.
When gaining new level, try to maximize your intelligence, this will directly affect the number of damage you will deal. Below you will find one of many available combinations of skills for wizard character:
Flame
Fire Bolt
A continuous skill assigned to the staff. It deals fire damage. Level four is required for maximum effect.
Meteor Swarm
An ability that deals great number of damage to enemies and allies that are in its area of effect. This skill has a very long reload time.
Manipulator
Sleep
An ability that, if successful, puts enemies in its area of effect to sleep for a specific amount of time, eliminating them from the battle. The enemy will wake up if he is hit. Second level is required for maximizing the effect and increasing the chance for success.
Confusion
Ability with area of effect that causes confusion among enemy forces. Enemy that is affected by this curse is unable to think rationally and he is usually attacking the closest person available, including his allies. Level three is needed for maximizing the effect and increasing the chance for success.
Charm
Ability with area of effect that, after successfully affecting the enemies, will cause them to join your side and temporary fight against your enemies. Level two needed for maximizing the effect.
Transmuter
Haste
This ability increases the speed of actions of selected ally. Perfect synergy for the rogue. Level three needed for maximizing the effect.
Stoneskin
This ability increases the defense against piercing and slashing damage for a limited time. Level three needed for maximizing the effect.
Summoner
Conjure Animal
Summons an animal avatar to the living world. The avatar is fighting for you and your party. Level three is needed for maximizing the effect.
Hold Monster
A curse that creates paralyze on selected area. Enemies that are affected become helpless for 60 seconds, giving you a great advantage on the battlefield.
Wizard's game style is very similar to the one used when playing as cleric. The wizard should remain at safe distance from the center of the battle and he should cause chaos among enemy forces. You shouldn't also forget about offensive skills, which wizard has plenty of. The most important and the strongest ability is the Meteor Swarm. Since this ability reloads for a very long time, use it only against bosses. In synergy with rogue and his Endanger skill, after a success this skill deals similar number of damage as rogue's Deathstrike. Remember to avoid aiming this skill at your allies, as combined with damage dealt by enemies it could quickly kill them. Summoning the animals that are fighting on your side should be also considered as damage dealing. These animals, especially the bear, though not able to deal much damage, have great resistance. What's important, they can focus some enemy damage during battle on them.
In addition to damage dealing, the wizard specializes in controlling the center of the battle. The wizard decides who should be removed from the battle for a specific amount of time, who should be forced to join your side and who should be put to sleep. By casting such curses, you must watch out for friendly fire. Very frequently, the center of the battle will be focused on your warrior who can be also affected by the curse. Because of that, it is important to miss your allies when casting spells with area of effect.
During the battle, use buffs as well. Leave the Stoneskin skill for some urgent enemies, when your warrior will lose large numbers of health points or when the enemy will attack the cleric. This will help you contain the situation. Cast the Haste skill mostly on the rogue. The synergy between the two of you will be so strong that, combined with constant attacks from hiding, you will eliminate the enemies in few seconds.
As for wizard's equipment, give him robes and a staff. It is definitely the best possible combination available for this class. Robes of Archmagi is one of the best robes, it can be collected from the body of a killed Lord of Illithids. However, it is so late in the game, that first you should find something else for yourself. Since the armor can be used by you during the whole game, try to buy it once and for good. The rest of the equipment should have bonuses related to intelligence and reducing the reload time of your skills.
As for the jewelry, focus on intelligence and reducing the reload time of skills.
As for the weapon, you can obtain the legendary staff - Staff of Explosions - by collecting three pieces and forging them at the blacksmith. If you don't have enough money, Necromancy Staff which can be obtained by killing Cyrana will be good as well.
Fighter is the character that is controlling the battle zone. All damage coming from the enemies focuses on him, so it is important that this will be your most resistant character. When gaining new levels, assign points to constitution and strength. The fighter shouldn't be made purely for offensive, but more as a backup character. You don't need to use a shield for him as in case of paladin, he will work better with a two-handed sword or a halberd. It's not a typical tank class. Below you will find few principles which you should consider when creating a fighter character:
Fighter is the strongest link of your team - You are the most resistant member of your party. It means that your task is to control the battlefield and making sure that no enemy will pass through you. For that purpose, you must use the territory that surrounds you. Almost always there's a narrow passage near the battlefield. Retreat there with your party and stand in the passage. You will be sure that no one will get past you.
You become more resistant only after you wear proper items - It is important to wear equipment that will help you in your task. Look for heavy armors that have constitution and strength stars and that offer bonuses to damage reduction and elemental resistance. The better protection you have, the greater the synergy between you and the cleric. You can also add some damage reflection. Since you will be in the center of the battle and most of the damage will focus on you, it is wise to think about this bonus.
As the center of the battle, use buffs - Your next job is using the buffs for the party and negative effects against the enemies. Whenever you cast a battle cry, the synergy between you and the rogue becomes huge - use it.
Focus on buying strength and constitution statistics when gaining new levels. This will not only help you with damage and will add more health points to you, but will also increase the overall resistance to damage. Below you will find few useful talents that create synergy with other members of the party:
Battle Master
Second Wind
Second Wind is a skill that increases the maximum damage and heals you with a specific number of points. Level four is required for maximizing the effect.
Commander Shout
A cry that strengthens your whole party. The maximum damage of the party increases. Level fourth required for maximizing the effect.
Rally
A cry which increases the maximum damage of the whole party. Level three required for maximizing the effect.
Reign of Terror
A cry which disorients the enemy forces. It also reduces their defense level, making them more vulnerable to damage. Second level required for maximizing the effect.
Champion
Improved Critical
A passive ability that increases the chance for dealing critical damage. Level two is required for maximizing the effect.
Sure Strike
An ability that never misses and deals large number of piercing damage. Creates perfect synergy between you and the rogue. Level four is required for maximizing the effect.
Forceful Blows
Passive ability that increases the chance for throwing the enemy off balance. Level four is required for maximizing the effect.
When playing as the fighter, you are responsible for the survival of the whole party (unless you have a paladin in your team instead of a wizard/rogue). The fighter is responsible for focusing all enemies on himself and defending less armored allies. During the battle you will create synergy with the rogue who thanks to Rally and Commander Shout cries will deal even more damage. This synergy will work in both directions. If the rogue will use the Endanger skill, he will reduce enemy resistance to slashing damage. When that happens, Sure Strike skill becomes useful. During the game, you can select whether you want to fight with two weapons, a large sword, halberd or other tools. There are absolutely no requirements related to weapons. The only thing you must remember is a correct pick of skills. Don't assign points to Great Weapons tree if you are fighting with two weapons and vice versa. If you are fighting with two-handed weapon, invest in the Great Weapon tree, where you will find great skills such as Charge! that allows you to quickly change your location and jump towards the enemy before he finds out what happened. Such action will guarantee that you will become the first target of enemy attacks, which is what you want. You can also help your cleric by buying the Victorious Surge ability that will allow you to heal yourself in dire situations.
During the battle, use your surroundings for your advantage. Lure enemies to a small passage and stand there, blocking the way to the rest of your party.
The fighter is a class that should be heavily armored. Since all the received damage should be focused on him, he should have very high damage resistance. When selecting equipment for this character, select heavy plate armors with resistance to various damage types. You can also select one or two items that will reduce the time of skill reloading. As for the weapon, there is no specific type that suits the warrior best. It can be a two-handed weapon, it can be two weapons or a shield. Whatever choice you make, the fighter will be good in it, as he has great variety of skills.
As for the jewelry, Devil's Favor necklace will be a great choice. You can obtain it when searching through the house during the Heart's of Stone quest related to Bryn. The other jewelry should contain bonus for strength or constitution and skill reload time reduction. The armor should be heavy or medium, with large base statistics and resistances to damage.
Paladin, similarly to the fighter, is the strongest link of your team. His abilities create perfect synergy with the cleric. There's a bond between them based on healing abilities, dealing damage of the same type and, due to the skills that reduce Radiant damage resistance, both classes deal increased damage. If you have a paladin, you don't need to build your cleric as a typical healer. However, it is not recommended to build your paladin for dealing the maximum damage. The rest of the party must also use your offensive-controlling skills. Below you will find few rules of playing as paladin. Similarly to rogues, these rules aren't binding. You can change your paladin into a damage dealer any time you want.
Paladin is a typical tank - When playing as paladin, you must remember that you are focusing the damage of all opponents on yourself. You must have a shield which will block the incoming attacks and will work better than a typical fighter in this job. However, when being the tank, you must sacrifice the perfect job of a warrior which is controlling the battlefield.
Paladin can take care of himself without the help of a cleric - A well build and equipped paladin, thanks to his skills that restores lost health points, can survive the battle even without the help of a cleric. Of course, it's not as effective as in case of a cleric, but when combined with him you can consider changing the role of the cleric and build him into a damage dealing character that will backup your party in dire situations. However, in that case the whole build described previously must be changed drastically.
Only holy damage matters when it comes to paladin - Try to use items which increase the holy damage. The synergy between you and the cleric who uses the same damage type will be high.
When developing the paladin, remember that his base statistics are strength and charisma. Below you will find example skills which create synergy with the cleric and with the rogue. In this build, the paladin is mostly a tank and not a warrior.
Life
Bless
A blessing that increases the chance for your allies to obtain spell resistance. Second level is required for maximizing the effect.
Aid
A blessing which increases the defense of all allies. This effect also adds a small bonus to maximum damage. Third level is required for maximizing the effect.
Beacon of Hope
Marks the ally to become the central point of the effect. Each ally that is nearby will receive a bonus to regained health points. Fourth level is required for maximizing the effect.
Restoration
Removes any negative effects from the ally. Second level is required for maximizing the effect.
Revivify
Revives a fallen monster. The creature will fight for you and your party. Third level is required for maximizing the effect.
War
Divine Smite
This ability deals holy damage. Fourth level is required for maximizing the effect.
Arcing Smite
Releases a beam of holy energy which jumps from one enemy to another, dealing massive holy damage. Level four is required for maximizing the effect.
You should play as paladin in two different ways. One of them is typical taking great numbers of damage and healing yourself, second is dealing damage and healing. No matter the preference, your game style is based on standing in the center of the battle and focusing the attention of the enemies on you. Your direct companion in the party is the cleric with whom you create a synergy of damage and skills. Thanks to that you are almost invincible as not only are you the strongest link in the party, but, in difference to the fighter, you can heal yourself without the help of the cleric as well. During the battles, position yourself in narrow passages and focus the incoming damage of all enemies on you. Due to the fact that you have the Life skill tree, you can cleanse and heal other wounded allies, which give even more advantage to the rogue decimating enemy forces. Together with the cleric you can heal the weakly armored ally during boss fights, it is a great help for the rogue. Since the paladin has no effects that strengthens the party or control the battlefield in similar manner to the fighter, you must decide whether you prefer to be invincible or to quickly travel the game world and end the battles much faster.
When playing as the paladin, have his base abilities in mind. Because of them, it is best to equip him in heavy armor and a shield. Of course, you cannot exclude two-handed weapons as paladin has abilities related to that weapon type. As for the weapon, Sunblade is a perfect choice, it has a base statistic boost for holy damage.
As for the jewelry, paladin should focus on strength and charisma statistics. You can also think about a reduction to the skill reload time.
Paladin's armors should be heavy. He should have high defense and bonus statistics to resistance from various damage type and elements. As for the shield, Shield of Helm which can be obtained in the Gilded Eye Chapterhouse is a perfect choice.
Ranger is a class typical for a forest elf, which uses bow and is strengthened by the goods of the forest. This class, similarly to the rogue, is based on dealing damage. However, this time not dealing damage from close, but from far away. Ranger class can be switched with a wizard if you have a fighter controlling the battlefield. Together with the rogue, ranger can eliminate the enemies much faster by the cost of eliminating them from the battle for a limited amount of time. Below you will find few rules important when creating a ranger character:
Ranger isn't a melee fighter - Despite the fact that ranger has abilities useful in melee combat, he is much more effective when fighting from a distance. Use this aspect to create a character that is not vulnerable to enemy damage.
Cunning instead of strength - The archer is a good fighter because he has large number of dexterity points. When developing the character, try maximizing this bonus to increase the number of damage dealt.
Watch out for friendly fire - When standing in straight line to your ally, you can be sure that you will hit him instead of the enemy. Because of that, it is important to position yourself properly during the battle. You will feel most comfortable when positioned in an angle towards the center of the battle.
Ranger is most comfortable when using ranged weapons, mostly bows. Have that in mind when developing the character. Most of all, spend points on increasing the dexterity statistic. This will help you maximize the damage dealt with ranged weapons. Below you will find an example set of ranger skills that utilizes this idea.
Hunter
Favored Enemy
Passive skill that increases the damage dealt. Level four is required for maximizing the effect.
Combat Focus
Passive skill that increases the attack action during each round. Level two is required for maximizing the effect.
Hide In Plain Sight
You hide from the enemies. Your next attack will have increased chance for dealing critical damage. Level four is required for maximizing the effect.
Warden
Swift Quiver
Greatly increases character's action. Level four is required for maximizing the effect.
Lightning Arrow
An ability that deals lightning damage. Level four is required for maximizing the effect.
Splinter Armor
This ability deals damage and reduces the defense of enemies. Level four is required for maximizing the effect.
Archery
Arrow of Slaying
An ability that deals large number of damage. Level four is required for maximizing the effect.
Hunter's Mark
An ability that marks the enemy. Once marked, the enemy receives increased damage. Level three is required for maximizing the effect.
Split Shot
An ability that deals large number of damage. Level four is required for maximizing the effect.
As the ranger, you should position yourself in the corner of the center of the battle, away from the warrior, who also cannot be on the path of your arrows. At the same time, you should be near the cleric. Start the battle by hiding. Thanks to that, the next shot will have much greater chance for dealing critical damage. When fighting elite enemies and bosses, start by marking them with Hunter's Mark skill, this will increase the number of damage your party will deal. During the battle, keep using the hiding ability and Swift Quiver. This will allow you to attack much faster than without this ability.
As the ranger, use light armors that have bonuses to dexterity. Since you're not a melee fighter, you can ignore the defense. As for the weapon, the Bow of Hungering is a perfect choice. It can be obtained relatively early in the game, in the Maferil's Lyceum. At the end of the game you will be able to obtain even better bow, but you would be using it for so short time that it is not profitable to craft it.
As for the armor, select light equipment with dexterity and charisma. Drakhar's boots are a good choice, just as any other boots that increase the movement speed. Jewelry should provide bonus to dexterity, increasing the damage you deal.
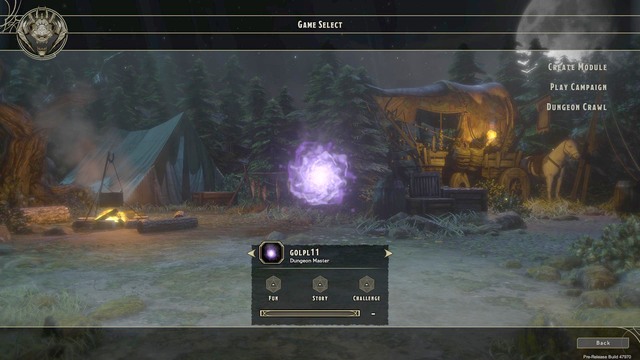 Game master
Dungeon Master is an additional mode in the game. This system allows you to become a game master similar to ones in board games. You can use a set of tools that allow you to create new quests, monsters and even whole locations and dungeons which then will be traveled through by other players. What's worth mentioning is that every, even slightest detail of the world you create can be modified as you want. At first you must start by picking a proper surrounding (city, dungeon etc). The location created as you wanted can then be placed on the world map to which other players will gain access. When creating the locations you can choose whether the place should be visible since the start or only when exploring.
After selecting the create module option, the game will show you various options of creating it. In this window you can check the previously created modules, download modules of other game masters or check the modules you downloaded previously. Select the New DM Module option in order to create a new module. After selecting this option, the game will move you to the starting location of the adventurers, the Adventurer's Camp. Now you can modify this location or ignore it completely and create your own instead. When activating the editor for the first time (Adventurer's Camp location), it is wise to learn about how it works and what are the keyboard controls. It is very clear and divided into special windows. By default you will find here a window that allows you to add items. It has been divided into traps, objects and weather. Since it is the default starting location for adventurers, the number of options is limited (more of them can be found when creating your own location).
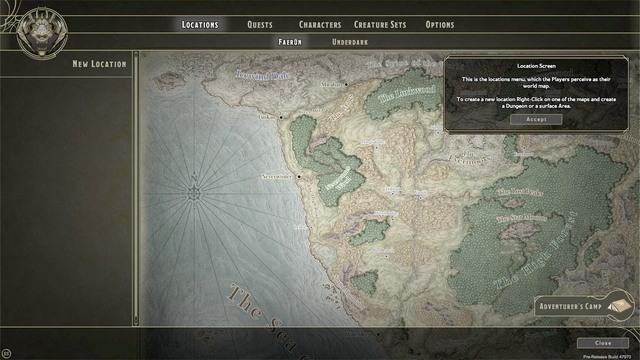 Creating your own locations on the world map
In order to create your own location, pick Locations from the menu. You will see a map of the world to which you can add new dungeons, cities, forests and other places (by selecting the new location option). All locations which can be created work similar to the example dungeon described below. Other options allow you to create quests, characters and creature sets. The things you create here can be freely modified, copied and moved among the modules you created. It means that you don't have to create the same character few times if you want to use it in various locations. A quest or character you created once will be saved and become available for all locations. Locations are divided into two main groups: Create Area and Create Dungeon. Area is a location created on the surface, such as cities, camps, forests. Dungeon is a location underground, such as catacombs, caves or prisons. After selecting your location, you can freely modify its location on the world map with the drag and drop interface. The world itself is divided into two parts as well - the Faerun and the Underdark.
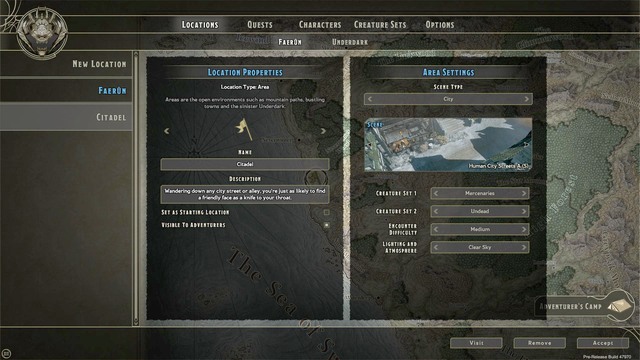 Selecting the way the location you create will look
After creating your own location (in this case, a dungeon) a window in which you can edit it will appear. You can create locations by clicking on the map and selecting Dungeon option. The first tab will allow you to change general preferences of the whole location. Here you can change its name (Bandit Caves by default) and description. Of course, you can leave the description as it is or change it completely, creating your own story of the place you are creating. The next option allows you to create the starting location for the adventurers. If you want to do it, you must select the Set as Starting Location option. Creating a starting location filled with enemy units is a bad idea since here you should place a camp where adventurers can replenish their supplies and rest. The next matter is the decision whether the location you create should be available on the map for the adventurers. If not, the location will be hidden and the only way to gain access to it is completing the quest assigned to it.
The second tab allows you to change the look and the type of the dungeon, enemy types, size and difficulty. Look and type of the dungeon can be changed with the Lightning and Atmosphere, Tile Set and floor number options. Lightning and Atmosphere allows you to manipulate the light and general atmosphere of the place you are creating. When creating a location, you can freely modify this factor and see how it impacts your level. Whether you will create a dark or light place depends only on you. Tile Sets are created previously by the developers texture packs that can impact the look of the place. You can select sewers, catacombs, caves etc. Add Floor allows you to add floors to your dungeons. By default the place you create has only one floor (of course, you can freely change its size, which has great impact on the time needed to complete it). After adding another floor you will be able to modify it similarly to the default floor. Further options allow you to change the size of the dungeons, its complexity and difficulty. The size determines the number of rooms between the entrance and the exit. The larger the dungeon, the more time it will take to complete it and the more enemies can be met while exploring it. The complexity determines the number of rooms-branches in the dungeon. When hunting in a complex dungeon, the player must remember which rooms he visited. This makes the difficulty higher. The option to add random generated enemies is marked as Creature Set 1/2. Here you can choose what sort of monsters the adventurers will face. The last option while in the main dungeon editing options is adding a boss at the end of the location. This option is a separate way of adding an elite monster without the need of adding a quest (defeat boss).
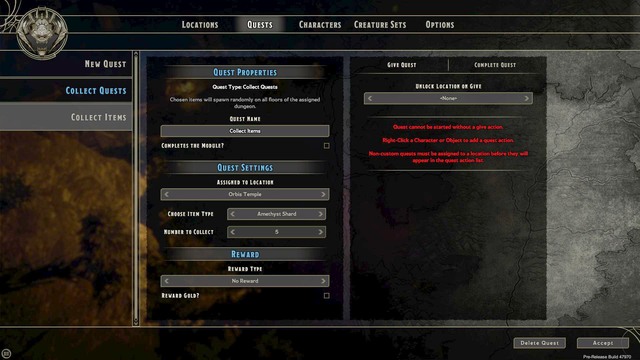 Creating quests
The third and final step when creating locations is assigning quests to them. There are few templates to choose from: Collect, defeat boss and defeat enemy. After selecting a quest related to defeating a boss, it is important to unmark the option in the dungeon edition menu that adds a boss to the last room no matter whether a quest is assigned to that dungeon or not. In each tab related to quests you can modify the number of items available to collect (during a Collect quest), their type and reward for completing the task. The last option (Complete the Module?) is responsible for showing a screen when an adventurer have fully completed the module you created. This information will be useful for players who are not sure whether there is something more in the dungeon to find. Defeat boss quest type allows you to set few options. First one is obviously the quest name which can be modified as you want. Assign Quest allows you to assign the mission to a specific location. Below you will find the Boss Type option which allows you to select the boss that you want to place in the dungeon. You can pick a predesigned template created by the game developers or create your own monster. Information about creating your own characters can be found in the next subchapter. The last option is reward for completing the quest. Here you will not have many options, you must select a template provided by the authors of the game. If you mark the Reward Gold? option, after completing the quest all adventurers will also receive gold.
IMPORTANT! Each quest must be assigned to a location. If you create a quest (for example, boss defeat), you must open the location edit window and assign the quest in the Quests tab. If you won't do it, the quest will not appear in any of the previously created locations.
IMPORTANT 2! No quest can be started without using the give command. You assign this command to a NPC or an item. In order to make it possible for adventurers to complete such quest, select the place where they will receive it. It can be, for example, the first room of the dungeon. After walking to such room, place any item on the ground (or a NPC) and, by marking the object, select the Quests option. From the window that will appear pick the quest that you want to assign. For it to be clear and intuitive, always change the quest name to one of your own design.
 Editing a location
After generating a location you have created, you will be able to edit its specific elements in real time. On the left side you will find a window in which there are interior decorations, enemy list, traps etc. As mentioned in the introduction chapter, you can also modify the lightning and atmosphere of the place. Objects are added with the drag and drop method. Each object you choose can be freely turned and placed. The only restriction is the lack of the possibility to place elite enemies in the first room of the dungeon. The objects are divided into following categories:
All objects can be secured with a trap. Placing a trap in a treasure chest is a great example. When placing traps you can modify difficulty of its disarming or noticing. Treasures can be also locked and you can set the difficulty of opening them.
Another thing that you will notice in the locations is dungeon master's totems. They have a form of glowing balls which you could select at the start of the module creation. Totems are located in each room and they allow you to manipulate the enemies that are inside. After opening the change window you will have an opportunity to change the difficulty level and type of a group of enemies.
 Creating your own enemies
In addition to objects, you can also add enemies to your location. Enemies are selected from the previously created creature sets. If you want to add non-standard enemy or a NPC, you must create it first. Creating your own characters is done with the Characters tab, where you must select the new Character option. Creating characters is done similarly to creating the main character of the game (more information can be found in the character creation chapter). Most of all, you must select the race of the monster. Below you will find a complete list of races:
Basically, after selecting the race, you have created the character. Now you can freely change its look, clothes, statistics or abilities. In order to modify the look, open the Appearance tab. There you can freely change the color of clothes or skin. Stats tab allows you to change character stats. You can freely (of course, only with the available points) modify the statistics of the character you create. In this tab you will also find a very important thing - the level of the character, or, more specifically, the difference between the character and the adventurer. If you set it on -5, then the level will be lower by 5. In the Abilities tab you can freely add or remove the abilities which the monster will use when fighting adventurers. In the Summary tab you will finalize the character creation. Here you can name the creature, set its behavior (whether it is supposed to be aggressive and attack the player or should it remain neutral). After creating and naming the character, you can return to the location view and place the creature anywhere you want.
Once you finish creating your own module, from the selection window you can share it with other players. To do it, use the Share button.
Speak with Jarhild in the encampment. You will learn, that her mother has come to the city of Luskan and is in need of help. Head to the Cutlass inn and speak with Jarhild's mother, who can be found on the first floor. During the conversation with Nysrin, you will be told that her family has been imprisoned by slave traders. Your task is simple - you need to rescue them. First things first, you need to go to the apartment in the northern section of the Market District. When you reach the location, speak with Erron. Erron himself won't have any information, but will direct you to someone who has it. That person is Felock the Elder. You will stumble upon him just outside the Erron's apartment. During the conversation you will learn, that the only place where the prisoners can be kept is the Slaver's Hideout. Afterwards, head leave the city via the nearest exit and set your destination to the Slaver's Hideout.
When you reach your destination, storm through the subsequent corridors, killing any enemies you stumble upon during your march, until you reach the corpses of Jarhild's family. After a short conversation Jarhild will tell you that she wants revenge for what the traders did. Head towards the main room and confront the culprits. Your task is to kill Foreman. Before you do so, however, take out his bodyguards - their damage is rather small, but as a group they can quickly get rid of your entire party. Pick up the key (Slaver's Key) from the Foreman's dead body and leave the canals. Go back to Nysrina - Jarhild's mother - and tell her what happened.
Reward: 1750 experience points.
Speak with Bryn in the encampment. You will be told, that she needs help with recovering her magical stone. In order to do that, you must first go to the Market District and speak with the merchant named Polek, standing near the entrance to the blacksmith. Ask him about the whereabouts of the said stone. During the conversation you will learn, that the stone might be hidden in a warehouse, in Luskan. To get there, head outside the city via the nearest exit and set your destination to the Luskan Warehouse. After arriving, speak with Pettlin. She will tell you, that you need to pay 400 gold in order to get inside the warehouse. Make the payment and start searching through the building. Inside you will find various interesting items, as well as a lot of gold. Additionally, there are chests located in the central section of the warehouse which can be looted. If your wisdom (WIS) stat is high enough, you will be able to extract quite a sum of gold from them.
After thoroughly searching through the building, you will learn that the stone you are looking for is not here. Head towards the exit, where a group of bandits will be waiting for you. Eliminate them and approach Pettlin (the guard that took gold for the passage from you) and demand the gold back. This way not only you will acquire a lot of interesting items and a nice sum of gold from the warehouse, you will be given all the gold that you paid for entering the building back.
Another step on your task to recover the stone will be the secret mercenary camp. Go to the Luskan's slums and search the residence near Miranda's shop. After using the Search ability a hidden trapdoor will appear, leading you to the said hideout. Go through the subsequent rooms and corridors, until you reach Keyros, the leader of the mercenaries. After eliminating him, search his body for a delivery note, which will tell you where the stone is hidden.
Go to the Market District and enter the apartment in the south-eastern section. There you will stumble upon an unconscious Thesian. After trying to talk with him, search the apartment. There's a secret casket, hidden under the bed - inside there's a magical amulet. After picking up the said piece of jewelry, a demon called Madelith will appear. After a short conversation you will have to fight Thesian and Madelith. Focus your attacks on Thesian, while casting crowd control spells on him. This way he won't be able to attack your party even once. After the encounter you will have to fight the resurrected Thesian and the demon. This time try to knock Thesian out and focus your attacks on the demon. When you deplete the health bar of the demon, the encounter will end and you will receive Bryn's stone.
Reward: 3000 experience points.
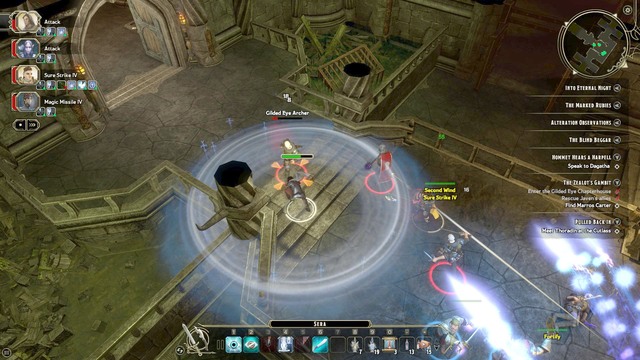
Note - this quest is available only after Javen joined your party. During your journey through the map, or to be more specific during the quick travel, after completing the An Eye For An Eye main quest you will stumble upon Javen and his Gilded Eye companions. During the conversation it's crucial to convince him to your rights. A high charisma (CHA) attribute is recommended during the conversation as well.
Head to the encampment and speak with Javen. During the conversation you will learn, that there was a schism in his guild and rebels are trying to take over the command. Set your destination to the Gilded Eye Chapterhouse and get to the prison to free the members of the Javen's guild held there (M9, Otiros). After the conversation with the prisoners, go to the exit of the Chapterhouse. During your march you will be attacked by the rebels. Your task is to get rid of their leader, Marros Carter. Aside from that, you have to eliminate his party as well.
Reward: 3000 experience points.
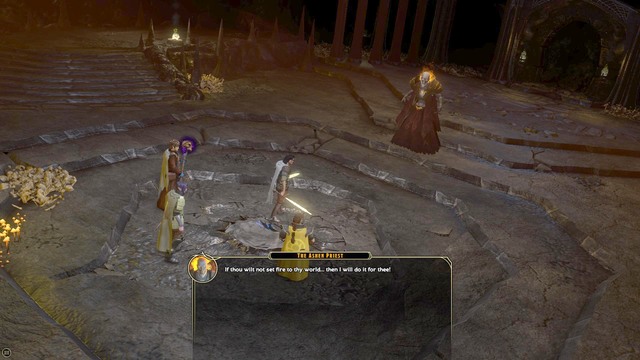
During your stay at the encampment, speak with Hommet. From the conversation you will learn, that he has received a strange message, which, according to him, is worth checking. In order to do so, go to the library in the Market District (it can be found near the blacksmith, Book Cache). In the library there will be an NPC called Dagatha. After talking with the woman, you will learn that there's a book of Ashen Priest, hidden in certain catacombs and your task is to retrieve the item. Head outside the city via the nearest exit and set your destination to the Tomb of the Ashen Priest.
The catacombs are filled with numerous traps, so you should tread carefully, with the Search ability activated at all times. In order to get to the Tomb of the Ashen Priest, you must collect three torn pages from his book, which contain verses required to open the secret doors. After collecting all the pages head towards the stone altar and ask Hommet to chant the proper password combination. After a short conversation with the Ashen Priest, head towards his tomb. Kill the skeletons along the way and enter the main hall, where the Ashen Priest will be waiting for your party.
Ashen Priest will try to recruit Hommet as his disciple. Do not let that to happen by selecting denying dialogue options during the conversation. As soon as Hommet comes to the conclusion that the whole ordeal is not worth it, the encounter with the demon will begin. Ashen Priest isn't the toughest enemy in the game, but remember about his immunity to necrotic damage and complete immunity to fire. After the combat ends, pick up the Staff of Eternal Torment from the body of the dead priest and go back to Dagatha in the Market District. During the conversation with the woman you will learn, that Hommet belongs to the Harpell family, and Dagatha is his relative. Afterwards, the quest will end.
Reward: 2000 experience points.
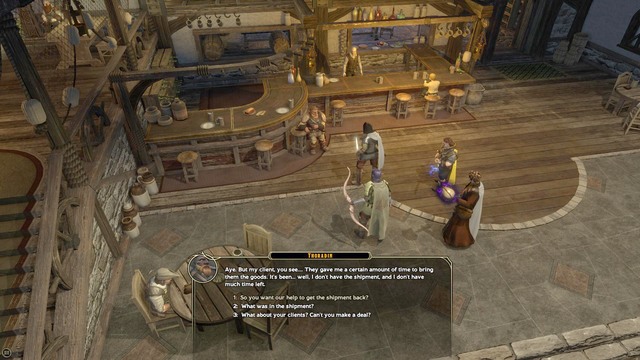
During your stay at the encampment, speak with Lorethar. From the conversation you will learn, that he owes some money to a thud and he will ask you for help. Head to the Cutlass inn in the Market District ad speak with Thoradin sitting by the bar. You will be told, that Lorethar's debt can be repaid if you help him recover a missing cargo. After the conversation ends, set your destination to the slums. After arriving, meet with Thoradin and continue your journey with a new companion. Your task is to track a bandit who attacked Thoradin. In order to do so, go to the mark placed near the Miranda's shop and use the Search ability to look for blood marks.
Follow the marks until you reach a bleeding mercenary (Elite Guard). After killing the man, search the nearby chest to find Thoradin's necklace. Afterwards, enter the mercenaries' hideout (Ruined Dragonblood Fort). Tread carefully while there, as there are numerous traps scattered around the area - remember to use the Search ability to detect them.
Move along the corridors until you reach a bigger room. Inside you will stumble upon several mercenaries, who can cause some serious trouble. First of all, use your sleep, paralysis and other crowd control effects - this way you will be able to eliminate at least a couple of them from the fight.
After eliminating the enemies, go to the adjacent room, where you will find a chest, containing a key required to get to the lower floor of the fortress (Downstairs Dragonblood Key). The lower level of the fortress is the place in which you will have to fight the leader of the mercenaries. This encounter is a lot easier than the previous one, so you should have no trouble dealing with the bandit. Collect the cloak (Dragonbloods Cloak of Office) from the body of the fallen captain. Afterwards, go to the adjacent room, where the Thoradin's stolen shipment can be found. Regardless of your choices in the upcoming conversation, the quest will be finished.
Reward: 1750 experience points.
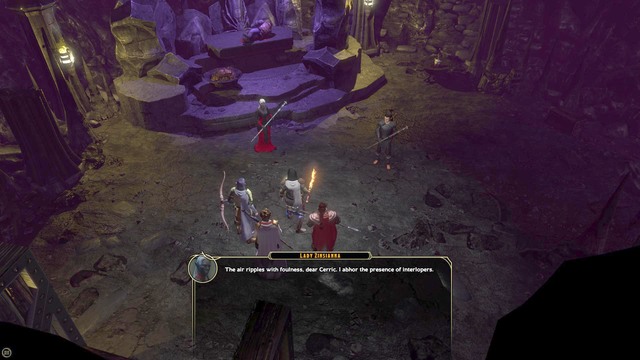
While in the encampment, talk to Illydia. After a short conversation, go to Dalanir and ask him about Lady Zinnsianna. Dalanir only has some information on that and, which is the most important thing, you learn the whereabouts of that character. Go, therefore, to the nearest encampment exit and set your destination to Shrine at Und'ok. After you get there, follow corridors of the cave to find Lady Zinsianna. After a short conversation with her, you learn that Cerric - Illydia's childhood friend is being controlled by Zinsianna. This is why, during the battle, you should focus all of your forces on Lady Zinnsianna. This way, Cerric will remain alive. Before you escort Cerrica to the exit, loot the chest, where you find a legendary one-handed sword. After the escorting mission, Cerric thanks you for your help and the quest ends.
For completing the quest, you will be rewarded with 2000 experience points.
Note! This quest becomes available AFTER you complete the Lair of Rhylfang/Into Eternal Night main quest.
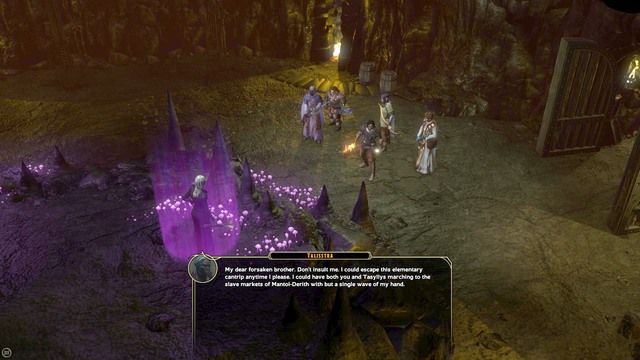
While in the encampment, approach Dalanir and talk to him. Your quest will be to find Valagh to obtain specific information. This is why, you need to go to Darklake District, to the inn. From Valgh, you learn the exact whereabouts of Dalanir's sister. Go to the nearest city exit and set your destination to Belwar Mine. Follow the corridors of the cave, and you will soon reach the first riddle which you need to solve to open the next door. For this, you need to collect two, out of three, required crystals. The green one is in the chest in the Western part of the cave (M13,5) and the turquoise one is in the Southern part of the cave (M13,3).
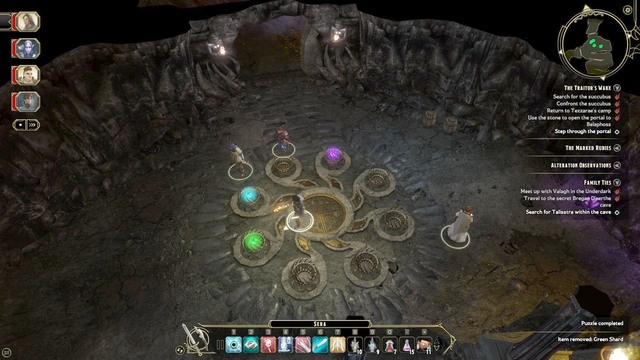
With both crystals on you, approach the circle in front of the door (M13,7) and arrange them in the way shown in the above screenshot. The violet one is, by default, already set in its place. Leave one spot free, in the left, and put the turquoise one in the spot next to it. The next slot is for the green crystal. There should be no gaps between the two crystals, without any gaps between the turquoise one and the free one on the left. This way, you open secret door to Bregan D'arthe. In the corridors up ahead, there are chests. Inside one of them (M13,8), there is the symbol required for the next riddle(Symbol of House Mizzrym). As soon as you approach the altar (M13,9), place the symbol onto it and the next door opens. At the end of the path, use the lever to open the next door. While killing monsters, you learn that all of this was just a trap.
Note! That this walkthrough leads you into the trap is done on purpose, because in the room with the monsters, there is another dusty volume (M13,10) that you need for the Alteration Observation side quest.
After you defeat monsters and collect the tome, use the lever to get back to the altar. After you get to the altar, collect all of the symbols on it and on the three pillars (Remove the symbol) to unlock secret passage to the next temple. After you make it into the next part of the cave, first talk to Jeggred and enter the room and talk to Dalanir's sister - Talisstra.
There are several endings to this quest and they are different from each other, in terms of the reward and the presented situation.
If you kill Talisstra, go to the mysterious stranger to claim your reward (M4,Mysterious Stranger), who will present you with a dagger - The Crescent Fang.
If you spare Talisstra's life, you need to lift the curse from her, by finding the priest that can do this. The first one is Corellon Larethian of Luskan (Market District), whom you can find in the house to the West of the city. If you choose him, Dalanir receives +2 to constitution (CON) and +2 to intelligence (INT). You need to pay the priest 8000 GP for that. Another priest is Priest of Lollth, whom you can find in Darklake District. His remuneration is 15000 GP, but this way, Dalanir receives +1 to dexterity (DEX), +2 to intelligence (INT) and -1 to constitution (CON).
For completing the quest, you will be rewarded with 3000 experience points.
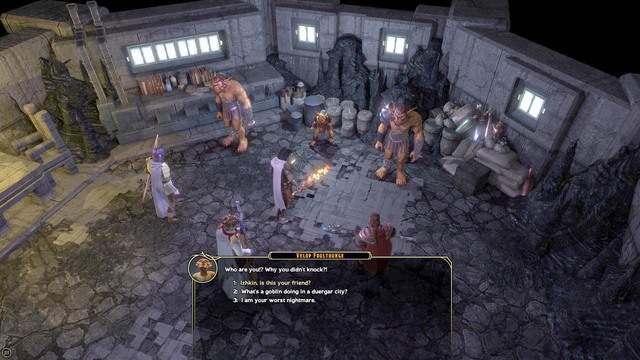
While in the camp, approach, the shop run by Izhkin and talk to him. This way you learn that you need to find a goblin who owes Izhkinowi money. For this, go to the Slum in Luskan to find someone with information on that. The first person that might know something is the villager standing in the South-Eastern part of the slum. After you talk to him, you find out that you need to talk to Ezra. You find Ezra to the North of the villager that you have just talked to. In return for his help, Ezra wants you to find a chalice. For this, go to the catacombs where you have found the crystal for the legendary staff. Next to the slot for the crystal, you find a sarcophagus with a secret passage, which you can open using Ezra's key. In the Northern part of the second level of the catacombs, you find Toka's remains with the chalice on it (Toka's Chalice). Take the chalice back to Ezra and in return, he tells you the whereabouts of Velop. To get there, exit the city and set your marker to Darklake District. Velop is in one of the tenements in the eastern part of the city. The conversation results in a fight. It is not too difficult, therefore you should be able to deal with it quickly. After the fight, collect items from the corpse, return to the camp and talk to Golgamann.
Reward for completing the quest: 3500 experience points.
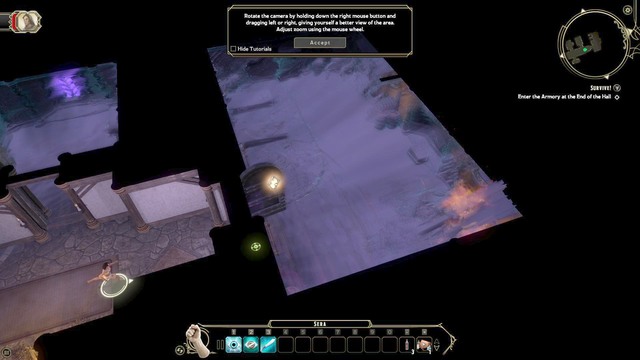
Talk with your allies after you regain control of your character. During the conversation you will learn that the guild was attacked and that you must meet with your allies below. The quest is a prologue that shows you the basics of the game mechanics. Here you will learn controls and basics of combat. Once you learn how to move, go to the right side of the location. In the last room you will find a chest with all items you need inside. Before going any further, examine the room in which you currently are. Under the window you will find a second chest with a health regenerating potion inside. Once you're done with exploring, open the inventory and put the items you collected on. The items will differ depending on the class you have. Once you're ready, leave the room and go to the opposite side of the location. You will face two enemies on your way. It's time to learn the basics of combat. Enemies won't be hard to defeat. Once you're done, go down to the underground.
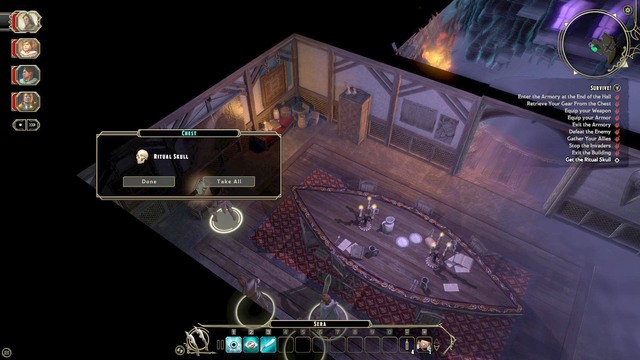
Once you get to the lower floor, walk towards Belamy and talk to him. After a short conversation you will be attacked by enemies. Now you will learn how to use the tactic pause. During such pause you can give orders to your companions. Once you eliminate enemy units, walk towards the main entrance. Once the entrance is buried, go to the other side of the location. Under the wall you will find a chest with magic skull. If you can't open the lock, use Ned character. Place the skull on the pedestal in the neighboring room, this will allow you to open the magic passage to the cave. While exploring the cave, use the "search" ability. It will help you find hidden objects, such as chests, passages and traps. Keep going through the cave and eliminate all opponents until you reach a demon.
The High Road is the first location available after the prologue. It contains many quests and jobs. Here you will gather your whole party for the first time in order to solve the mystery of mercenaries attacking the caravan. The location has two different entrances to the underground where you can complete side quests. First cave is the Bone-Strewn Burrow (quests A Fetching Fungus and Wagon Down). The second one is Mercenaries Cave (After Them! main quest and side quests: The Twin Crest, A Shady Deal and Wayward Trader).
Main quests in The High Road:
Side quests in The High Road:
Mercenaries Cave is the main dungeon of The High Road location. Here you will complete the After Them! main quest. In this location you will also complete such side quests as The Twin Crest (available in The High Road at Wilfred), A Shady Deal (available in The High Road at Burkins) and Wayward Trader (available in The High Road at Tollin). You will find many traps in the dungeon. It is easy to disarm them with the search ability. As for the opponents, be especially careful when fighting the Mercenaries Captain, the leader of goblins Trax and Sir Banagar the knight. The location contains few hidden secret passages. You can find them with the search ability. Behind each such secret passage you will find a chest with useful equipment. On the second level of the caves you will find a potential party member. Hommet is standing at the entrance to the third cave level. On the second level of the caves (M2,6) you will find a secret passage that leads to Martumal (needed for completing the Wayward Trader quest). In order to open the passage, you must position three party members at the mechanisms next to the entrance. Use the "stop" command so that they remain at the assigned positions.
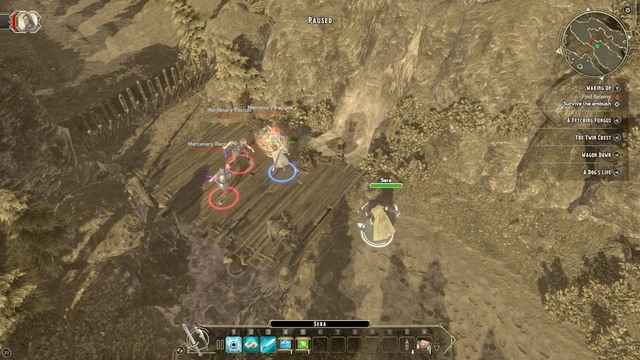
The first quest that you must complete is Waking Up. Walk towards Jarhild and talk to him. Use the nearby chest after the conversation. Inside you will find equipment that will be useful for your character. Once you put proper clothes on, go along the path until you find Belamy who is standing at the blocked bridge. You will be attacked by mercenaries during the conversation with him. Once you win the battle, return to the camp together. While searching for a new path you will be attacked by enemies again, but this time other allies will help you. After winning the battle you will meet your new allies, Larethar and Illydia. For completing the quest you will receive 210 experience points.
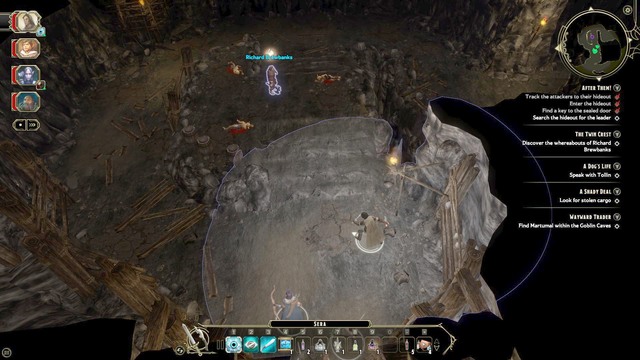
During the second quest, "After Them", you will explore the Mercenaries' Cave. To get there, walk through the bridge and turn right. Watch out for traps inside the caves. It is a good idea to keep using the Search ability. Not only will it help you in finding items and traps, but hidden passages as well. Your first objective is to find the leader of the mercenaries. From him you will also obtain the Copper Key which will allow you to get deeper into the caves. When traveling through the corridors, you will meet Hommet (you will find him at the end of the first level of the caves). If you want, during the conversation you can make him join your party. Hommet is a wizard which, if you want, can replace other party member. It is important to leave the cleric (Ilydia) in your team because that character will support you with healing abilities. However, if your character has healing skills as well, you can switch the cleric to Hommet.
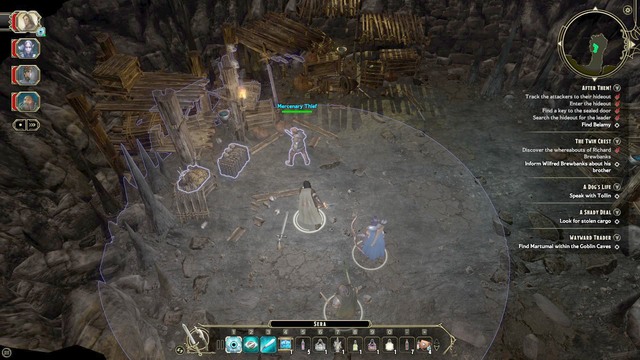
In the second level of the cave you will meet the Mercenary Thief. You can agree to his proposition (share the loot) or kill him and take all the loot. The second option is much more profitable due to the amount of gold stolen by the thief. The thief will also have a staff stolen from the goblin leader. After taking it, a new dialogue option will appear during the conversation with Trax.
Once you reach the last, third cave level, you will have to face Banagar. During the battle, most of all you should avoid any direct contact with Sir Banagar the knight. He is strong enough to knock down all your allies with a single ability. Try to keep your healer away from the heart of the battle, send the best equipped warrior to direct confrontation. Start with killing the backup of the boss, then focus on fighting Banagar. Once you reduce enough of his health points, a conversation will start. An option to capture and interrogate him will appear, but your ally won't be happy about that and will protest. The second option will be leaving him alive (none of your allies will agree on that). The last option, and the only one that all your allies will agree on, will be killing the knight. Once you kill him, look around through the cave. You will have to find evidence. In addition to the evidence, you will also find few useful items. Once you're ready, leave the cave and use the Goblin contraption mechanism in order to unlock the path for the caravan. Once you do it, go back to Jarhild for your reward.
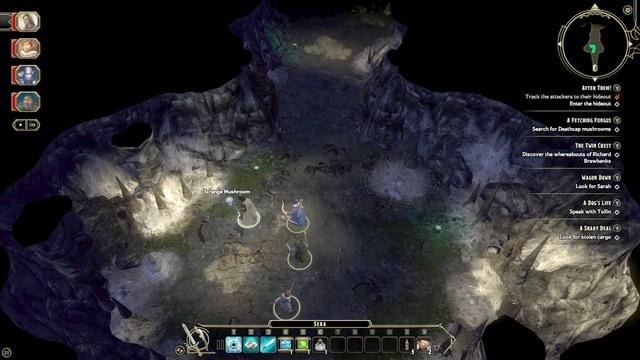
Talk with the alchemist, Aleema Meddlebrook. After you learn more about her, ask her if she need any help with looking for mushrooms - Mushrooms? Maybe I could look for them. Once the conversation is over, go with your companions to the Bone-Strewn Burrow. You will find the mushrooms in the first room. When searching this room, watch out for spiders. Once you collect the mushroom/mushrooms, go back to the alchemist for reward.
Reward: 25 experience points and 70 gold.
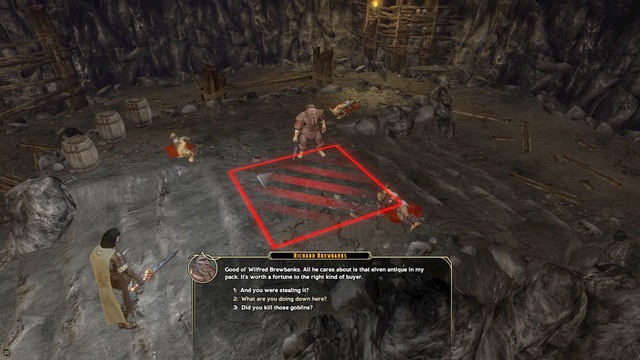
While in the camp, walk towards Wilfred Brewbanks the dwarf and talk with him. Your task will be to find his missing brother, Richard Brewbanks. You will find him in the second level of the Mercenaries Cave. During the exploration watch out for traps that surround you. Once you find Richard, you will learn that he doesn't intend to tolerate his older brother anymore. During the conversation you can change his mind with strength (STR) or charisma (CHA) attributes. If you don't have enough stats, you can simply kill Richard and take the required item by force. No matter the choice, once the conversation is over, go back to Wilfred and tell him about what happened. During the conversation you can lie by using an adequate attribute or tell him the truth.
No matter the choice, for completing the quest you will receive 125 experience points and gold.
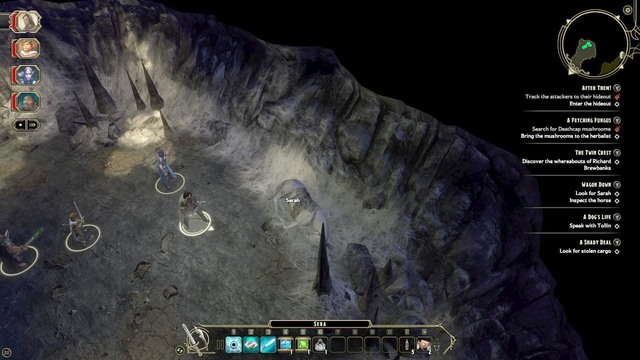
While in the camp, walk towards William Ray and ask if you can be of any help. He will tell you that Sarah is missing. You won't learn about what or who Sarah is, so go straight to the Bone-Strewn Burrow. At the end of the cave you will find a horse killed by spiders - Sarah. After winning the battle with a giant spider, walk towards Sarah's corpse and take the item. Go back to William Ray and after showing him the item you will receive 125 experience points, food and health regenerating potion.
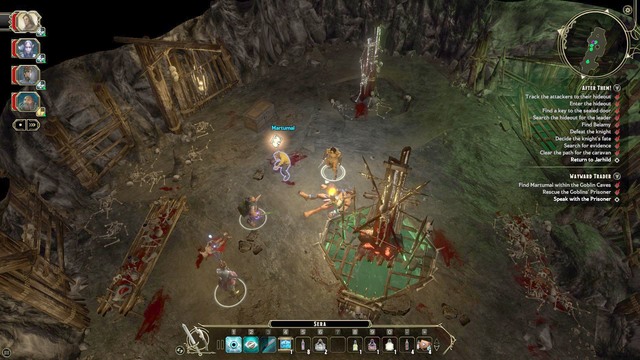
While in the camp, walk towards Jaena and ask if you can help. From the conversation you will learn that she is worried about her dog. You will also learn that the dog is said to bite Tollin. In order to solve this trouble, you must talk to him.
Important!
If you won't spoke with Tollin, immediately after returning from Mercenaries Caves you will learn that Tollin had killed the dog in order to protect other people from the camp. No matter which path you will choose, you will receive the same reward - 50 experience points.
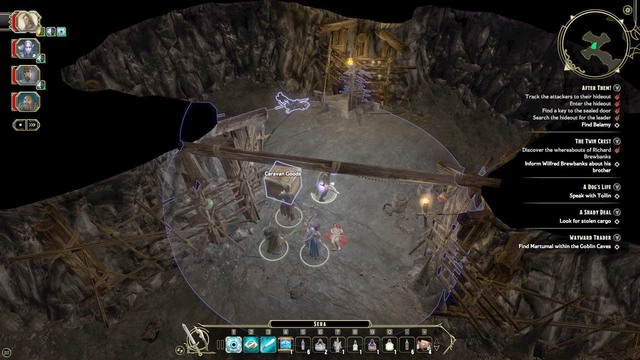
While in the camp, walk towards Burkins and talk with her. You will learn that goblins had stolen her cargo and she will ask you to help in retrieving it. The cargo can be found on the third floor of the Mercenaries Caves. Once you find it, go back to Burkins for your reward. It will be 100 experience points and 200 gold. Obviously, you will receive the reward only if you give the cargo back.
While in the camp, walk towards Tollin and talk to him. He will tell you that he met with all caravan members except for one. He thinks that the missing merchant had been kidnapped by mercenaries. Your task is to find him. You will find Martumal, the missing merchant, in the second level of Mercenaries Cave. In order to get to him, you must solve a riddle. On the picture above you can see door and mysterious mechanisms.
Use your party and position its members on the mechanisms. Use the "stop" command on your allies so that they remain where you placed them. After opening the door you will have to kill all the enemies who imprisoned Martumal. Once that is done, talk to him. While exploring the second level of the cave you will find a letter from which you will learn that Martumal betrayed his allies for gold. In this case you can forgive him for what you will receive a large reward or you can kill him. No matter the choice, go back to the camp and talk to Tollin/Martumal.
For completing the quest you will receive 100 experience points and a magic staff.
City Gates is the third main location which contains few activities available for the players. The location itself is just an introduction to the main city of Luskan. In this location you will find three dungeons. These dungeons are Sewers, the main dungeon where you will complete the Making an Entrance quest, Wolf Den related to the Howl at the Moon (available from Ranna) and Making an Entrance quests and Noxious Chasm in which you can complete the Fine Specimen quest (available in the Market District from Relona).
Main quests in City Gates:
Side quests:
Sewers is the main dungeon of the City Gates location. Here you will complete the Making an Entrance main quest. In this location you will also complete such quests as Sticky Samples (available in the City Gates from Apprentice) and Rat Race (available in the sewers from Rickel). You must be careful in the sewers when fighting Wilgen. What's important, you don't need to fight him. If you have high STR attribute, you can intimidate him, and if you have high CHA, you can persuade him. The last option is bribing Wilgen (the price is 500-700 gold). Use Search ability while exploring in order to find secret passages and stashes.
Important places in the Sewers:
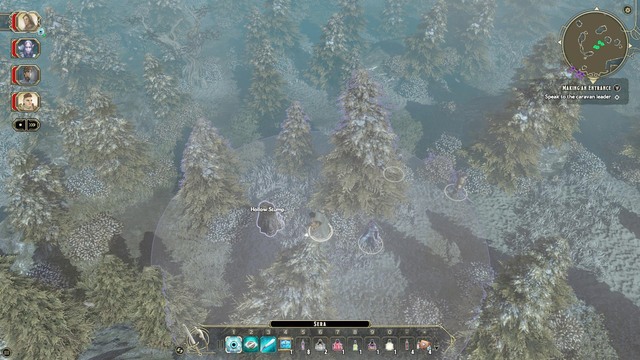
After having a nightmare, you will wake up in a safe camp. Now you can learn more about your companions and talk with each of them. Once you're ready, go to the nearby marking and select City Gates from the world map. The last thing that you should do is gather the party. Once you reach the destination, look around for many interesting items (M3).
Your task will be to get to the Luskan city. Walk towards the main gate and talk to the guard, Bosun Taddock. During the conversation you will witness as Bosun is giving an order to kill a woman with false documents. You can prevent it in two ways. Having high STR or CHA attributes is one of them. If you don't have enough of any of the two attributes, you can bribe the guard. 50 gold will guarantee that the woman will get into the city. 10 gold will allow her to walk away without losing her life. If you don't want to pay, you will witness the woman being killed by a guard.
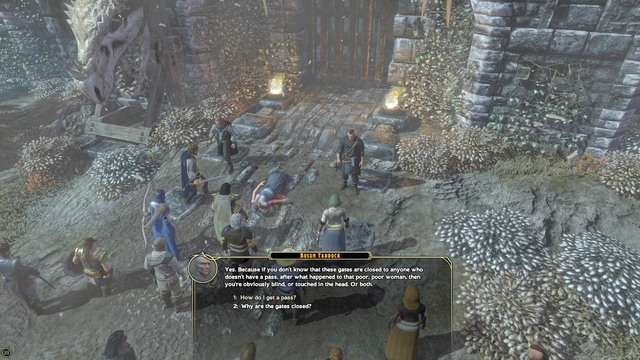
There are three ways for your hero to get into the city. One of them is intimidating the guard with your strength (STR), another is paying 50 pieces of gold for a free passage. If both options will fail, you must go to the Sewers. Entrance to the sewers is located in the northern part of the City Gates (M3, Sewers). Once you reach the destination, you will notice that the gate leading to the sewers is locked. The only way to open it is by using strength. If you don't have enough of it, you must complete a side quest in the Wolf Den (M3, Wolf Den).
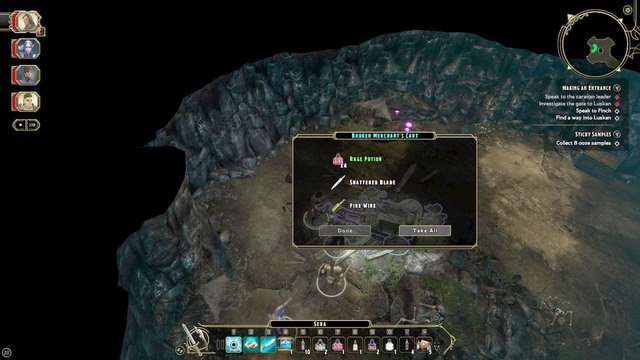
Take the Rage Potion from the damaged cart after completing the quest and go back to the gate leading to the sewers. During the interaction with the gate a new dialogue option will appear: "Drink a rage potion then attempt to pry the gate from its resting place". During the exploration of the sewers you must watch out for strong opponents (M4, Wilgen).
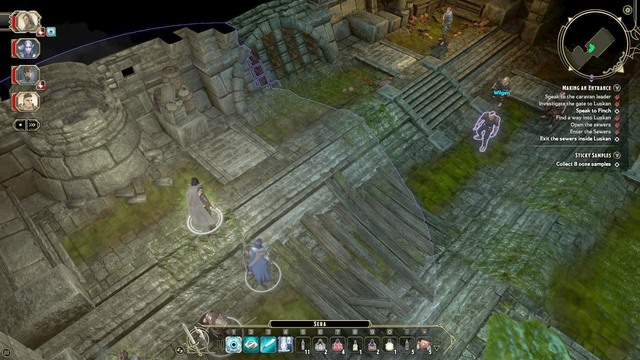
The first such opponent will be Wilgen who can be found at the entrance to the sewers. During the conversation with him you will have two main options. First is persuasion/intimidation. If you have enough charisma or strength statistics, you will be able to pass by the bandit without having to fight him. If this option will fail, you can pay him 500 pieces of gold. If you will try to persuade or intimidate him and fail, the price will increase from 500 to 700 gold. Of course, instead of paying you can simply kill all who stand in your way. However, the battle would be one of the hardest ones so far.
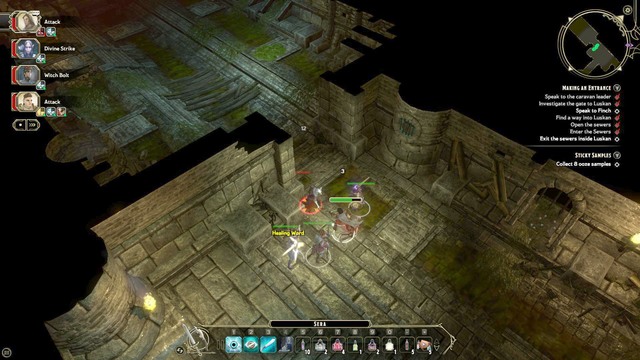
On the picture above a perfect place to fight is shown. Retreat with your companions to the small passage and place your toughest warrior in the door so that all the damage will be focused on him. If you have Illydia (or you're a cleric yourself), try to position the character behind the rest of your party. Eliminate the enemies one after another, focusing the damage of the whole party on a single opponent. Tactical pause will be useful option as well. Once the battle is over, collect what remain of your opponents and go forward. There is a great chance that half of your enemies will remain on their default positions (especially the archers), which will make it impossible for them to attack you and thus you will receive reduced damage.
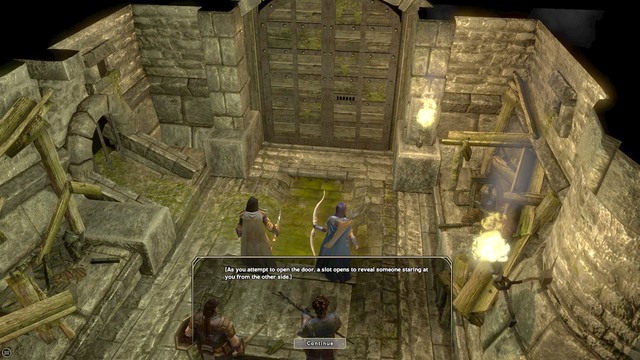
Keep going through the sewers until you reach the main gate leading to Luskan (M4, Rickel). Behind the closed gate Rickel will talk to you and inform you that he will not let you through unless you find his missing sword.
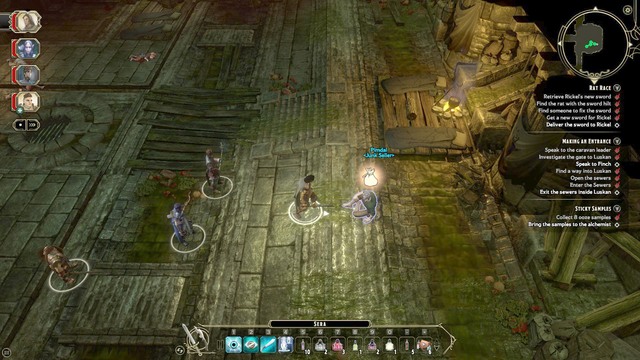
Go to the Mysterious Stranger (M4, Mysterious Stranger) and talk to him. After the conversation you will receive the first part of the sword. You will also learn that a pack of rats (M4, Rat Pack) has the second part. Go to them, kill the leader of rats and take Rickel Sword Hilt from its body. The next step will be repairing the destroyed sword. In order to do it, go to Pimdal (M4, Pimdal) who can be found in one of the rooms in the sewers. He will tell you that instead of repairing the sword, he will give you another one that looks similarly (Rickal's sword parts will remain in your equipment. You can repair it at a blacksmith in Luskan once you get to the surface). After repairing Rickal's sword, go back to him and give the weapon to him (The quest with the sword was a separate Rat Race quest for completing which you will now receive 500 experience points). After walking through the gate you will be able to attack Rickal and other mercenaries or walk away in peace. No matter the choice, go to the main gate of the sewers (M4, Market District) in order to get to the surface.
Reward: 1470 experience points. Availability of The Contract main quest.
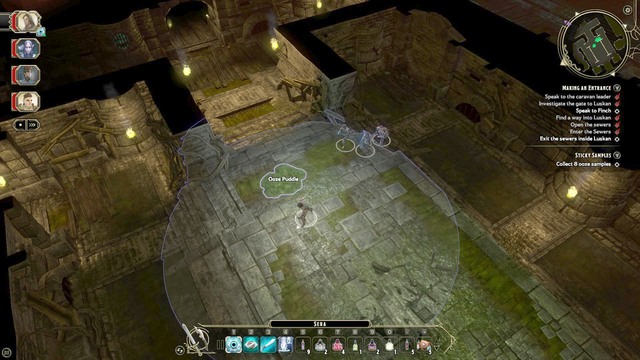
Talk to Relona's apprentice (M3, Apprentice). He will tell you that Relona needs some samples to her research. These ooze samples can be found in the sewers. You can complete this quest during the main quest Making an Entrance. When you're in the sewers, look around for green growth on the ground (M4, Ooze Puddle). You can also collect the samples by killing monsters called Small Ochre Jelly. After collecting eight samples, go to the market district in Luskan and talk with Relona (M5, Relona's Potions).
For completing the quest you will receive 400 experience points.
While in the City Gates, find Ranna (M3, Ranna). Talk to her and you will learn that the merchants are constantly attacked by wolves. Your task is to find their lair (M3, Wolf Den) and kill them all. Once you reach the destination (M3,8), you will also learn that one of the merchants had fallen into the den and you must investigate it. After killing few wolves in this territory, go to the den (M3, Wolf Den). During the exploration of the den you will have few fights to win. Once you defeat all opponents, go to the last cave and check what happened to the merchant.
For completing the quest you will receive 400 experience points.
Important!
The quest is a part of the main quest Making an Entrance, more specifically the option with getting to the sewers. After completing the Howl at the Moon side quest you must search the cart of the merchant. Inside you will find Rage Potion, an item that is needed for completing the main quest.
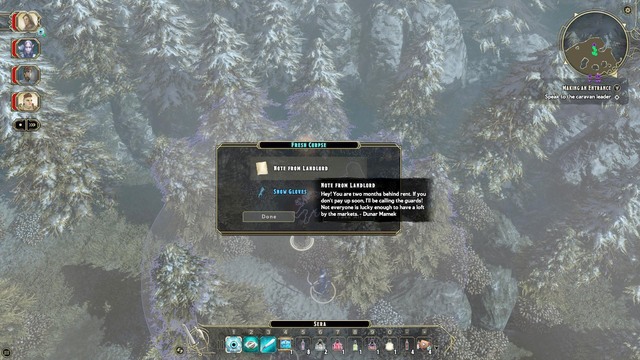
Go meet with Raiiel (M3, Raiiel). From the conversation you will learn that Raiiel and Shaelyn need to get to Luskan. You can help them by finding the pass that will help them get to the main city. False pass can be found at the corpse in the northern part of City Gates (M3,2). Go back to Raiiel after collecting the pass. He will tell you that once you get to Luskan you can visit him in order to receive reward.
Go to the Mysterious Stranger (M4, Mysterious Stranger) and talk to him. After the conversation you will receive the first part of the sword. You will also learn that a pack of rats (M4, Rat Pack) has the second part. Go to them, kill the leader of rats and take Rickel Sword Hilt from its body. The next step will be repairing the destroyed sword. In order to do it, go to Pimdal (M4, Pimdal) who can be found in one of the rooms in the sewers. He will tell you that instead of repairing the sword, he will give you another one that looks similarly (Rickal's sword parts will remain in your equipment. You can repair it at a blacksmith in Luskan once you get to the surface). After repairing Rickal's sword, go back to him and give the weapon to him.
Reward for completing the quest: 500 experience points.
Market District is yet another big location that offers many side and main missions. Market District is predominantly a big shopping district. Here, you find interesting equipment, potions and scrolls. In the market district, there also is a smithy, where you can craft interesting items. Unfortunately, the crafting system known from the other RPG games is absent from here. The only method to craft a piece of armory ids find parts of the broken one. Prices for the legendary equipment surpass several tens of GP per one crafted item, therefore you should pick gold wherever you can find it.
Main quests in Market District / Slums
Side quests in Market District / Slums
The Luskan underground is a sprawling area infested by cultists, zombies, rats and various types of the undead. The undergrounds include:
Sewers is an inseparable element of Luskan. Here, you complete both main and side quests. During your stay in the sewers, you should especially pay attention while fighting demons and cultists. Also, Keep using the Search skill, thanks to which you will find many secret passages. If, while completing Dead Rat Revival, you take too much damage, drink the potion from Titus Minton. The side quests are:
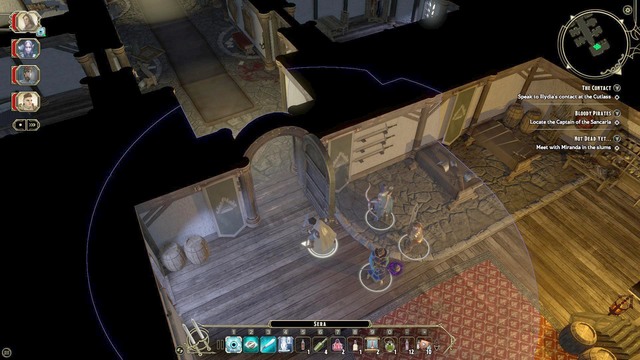
The first puzzle in the Market District is to find the key for the main armory of your guild, in the Guild Hall. Go, with your party, to the building and search it. In the first room on the right, there is a corpse of a man. The room at the other side of the counter, right behind it,. At the corpse, there are several items, but the most important one is the Broken Key Half. Before you leave the room, approach the counter and pull the lever, to open the door to the guild basement. To the left of the statue, there is another corpse. This one has the other half of the Broken Key Half . After you collect both of the halves, go to the local blacksmith. During the conversation, ask him whet you can craft with the elements that you have in your backpack. If you have weaponry elements, you can craft weapons for gold. However, this is not too cheap, because for some of the armory elements, you need to pay as many as several tens of thousands of GP. Each time you can't find the Key Repair option. For reforging the key, you need to pay 300 GP. After the repair, return to the guild, climb to the first floor and follow the hall to the end of the corridor. There, you find several bandits who should be no problem to you. If they are, use the area where you are. Lure the thieves into one of the side rooms and stand in the door, as your strongest warrior. The enemies will have to attack him, while giving you a free hand to act. After the fight, head to the metal door and use the key that you have just forged. Behind the door, there is the main guild armory. Here, you can find legendary items that are worth more than the key itself, for which you paid, and they are better than any items you have so far found.
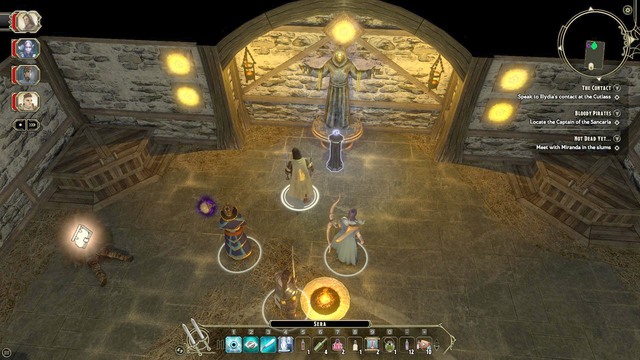
The second puzzle is a more difficult one. While exploring the basement, you must have notices a bell which, if used, lights up the first symbol on the wall, next to the statue. The puzzle is tightly connected with the acceptance ritual into the guild. First of all, you need to find the full version of the song. To do that, climb to the first floor of the guild house and Search all of the rooms. There are six rooms, there is a key information in each and you need to follow that information. In the first room, there is the first part of the song. In the second room, there is the second part of the song. In the third room, there is the third part of the song, and in the fourth one,- the fourth part. In the sixth room, there is a not unlike any other, which says F.A.I.L, which is an excellent message to the players, from the developers, who know that you fail to solve this puzzle. However, if you are observant, you notice that each one of the four parts of the song starts with an anagram of the word F.A.I.L. This is going to be your hint, while you will be celebrating the ritual. The next step is to collect the special drink. You find it at the ground floor, in the room with the corpse, right behind the counter. You imply need to approach the chests and select the Take a few bottles option. If you have prepared everything, you can now come down to the basement. The first step to make is hit the bell. If the symbol lights up, select the drink, you have just collected, from the inventory. After you drink that, another symbol will light up. Approach the statue and select the begin chant option. Speak all of the lines in the FAIL order:
1. From the Nine we come
2. As we live, we are bond
3. In the dark, we march on
4. Let none stand in our way
After you have spoken the lines in this order, the third symbol lights up on the wall. The next step is to drink another bottle of the drink. The final step is to hit the bell again. This way, the statue initiates a sequence and gives you the item.
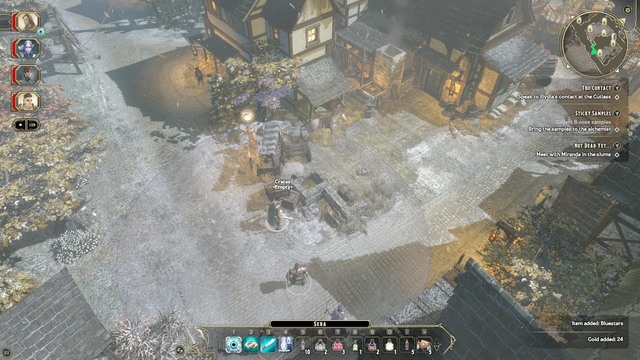
After you arrive in the market district of Luskan, it is a good idea to take a look around (M5). At that moment, it should be mentioned that there also is a blacksmith here (M5, blacksmith), who can craft arms for you, at any point. Unfortunately, the only element present in crafting ids collecting the weapon element. This means that there are no recipes, or other crafting ingredients. While exploring the map, always keep an eye out for items that seem to be useless )the icon that represents the weapon part often resembles a piece of junk). A good thing, on the other hand, is that such parts are stored in the Quest tab, so you do not need to worry that you sell them by mistake.
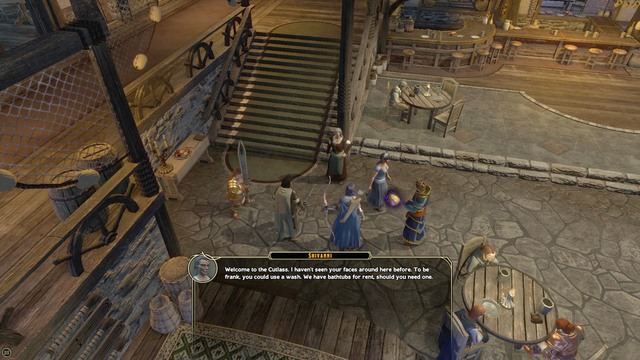
After you take a look around the vicinity, go to the inn, where you meet the Illydia contact (M5, inn). While in the inn, approach Shivanii, at the stairs, and talk to her. After you have talked to her, you find out that there is a man, in the inn, who can know more exact whereabouts of the Illydia contact. Head upstairs and walk over to the last room. Then, talk to the wounded guard. During the conversation, you can kill him, restore his health or ask Illydia to heal him. The choices here do not have too much impact on the story, because you learn exactly the same thing, either way.
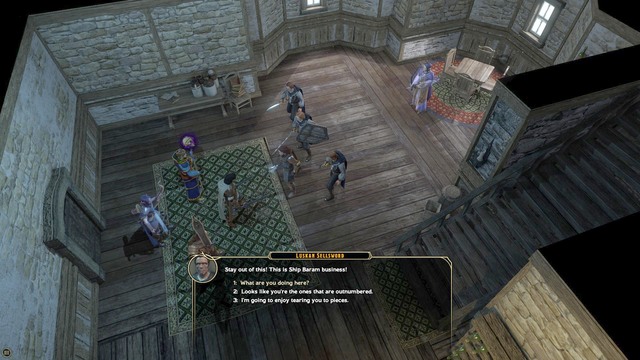
Illydia's contact breaks in one of the houses, in the merchant district (M5,Soronil). After you get there, you notice that Illydia's friend has been attacked by several bandits. Get rid of them, in the way familiar to you, and talk to Soronil. Remember to loot the house that you are in. In here, you find a chest with interesting items in. After you talk to Soronil this quest ends in a success.
Reward for completing the quest: 2100 experience. Next main quest Into the Dead City.
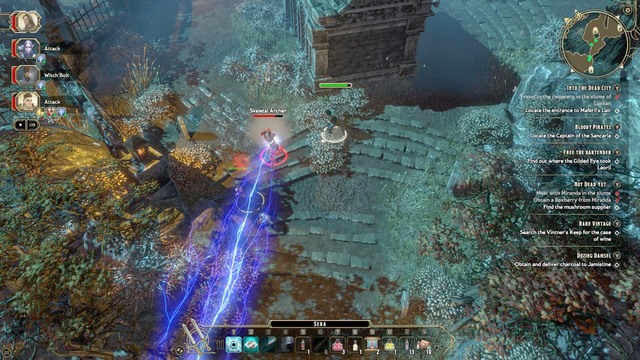
After you complete The Contact, the Into the Dead City appears In your journal automatically. After the conversation with Soronil the first thing that you need to do is go to the nearest city exit (to bring up the fast travel screen). The location that you need to travel to is the slums(M5,Slums). Your task is to find the way to cultist Maferil. Then, you will have to find the four items that you can use to get to the mage's hideout.
The items are: Black Candle, Crystal Jar, Grave Dust and Ogre Zombie Tooth. The first one, the Black Candle, is in the small cottage in the slums (M6, residence). The second one is the Crystal Jar and you can find it in the shop in the slums (M5, Miranda). The third one is Grave Dust that you obtain by destroying tombs on the cemetery (M5,1). The last item - Ogre Zombie Tooth- is by the zombie corpse (M5,2) at the cemetery (you first need to kill the zombie). After you have collected all of them, find the catacombs (M6,Mausoleum W), which will take you to the hideout. After you get there (M6,5), talk to Hommet about the rite and hand him all of the required items. As soon as Hommet performs the rite, you will be trapped by Maferil. Your task will be to make it into his hideout.
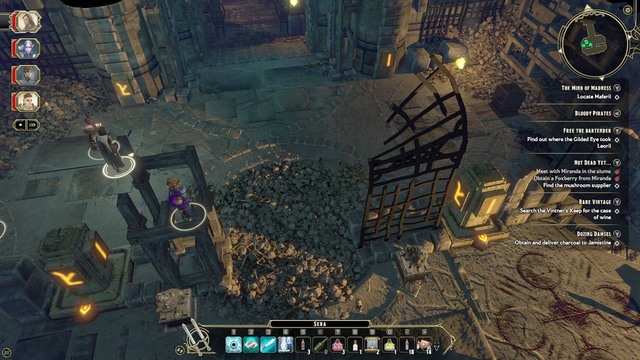
As soon as Hommet performs the rite, you will be trapped by Maferil. Your task will be to make it into his hideout. In that location, there are many various traps, so keep using Search on a regular basis. First of all, take a look around. There are two interactive pillars here (M6,6), which you can spin as much as you want. The correct combination opens the door and you will be able to walk deeper into the underground. To learn the correct combination, approach the statues shown in the screenshot and destroy them. Under the rubble, you can see the symbol, aligned with the pillar.
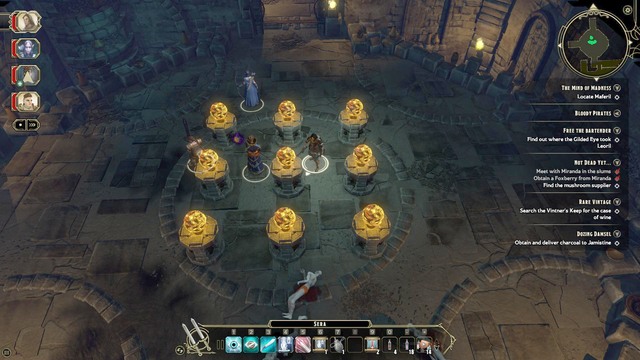
Walk through the successive rooms in the location and you will soon find a room, where there is another puzzle (M6,10). This puzzle is well known to all RPG players. It is the old, good combination from the algebraic equation that will open two doors for you, and the riches behind them. The first door opens when all of the orbs start glowing, and the second one at the moment at which the orbs go out. Since the game displays randomly lit orbs, it is impossible to describe the "correct" combination, where all of the orbs are lit. Another thing is that there also are orbs that are not lit. There is only one combination here (the fastest one) which is why you should try and perform the first combination first, and the second one afterwards).
If you are standing in front of all lit orbs (see the screenshot), you simply need to click all four orbs in the corners and the one in the center, to put all of them out. The order, in this case, does not matter. Of course, the order, in which you approach the puzzle also does not matter. If, instead of lighting the orbs, you accidentally put them out, do not panic. To light them all back, you need to employ the same technique as described above. As soon as all of the orbs go out, the door opens and you will be attacked by Ghouls. From the body of one of them, collect the Snapped Bow Half. Before you leave the underground, remember to take the treasure with you, from the room that you have just opened - here, you find the first one of the ten rubies that you need to complete the side quest Marked Rubies.
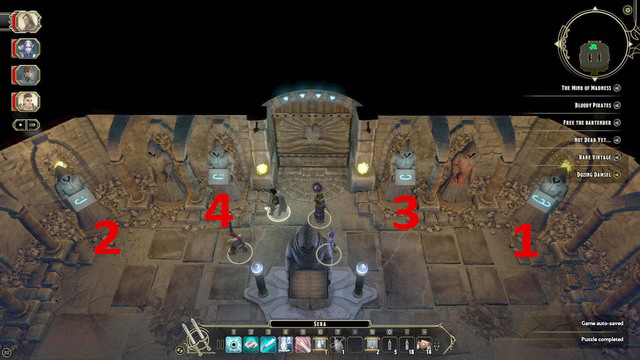
Head now towards the main exit. Here, you find another puzzle (M6,12), but it is much easier than the previous one. Your task is to light the four statues. To do this, you need to press the button on them, in the appropriate order/ The order has been shown in the above screenshot. If you start pressing the statues that are not holding the magic symbol, you will be attacked by monsters. After you get to the last chamber, you will fight Maferil's spirit (M6,Maferil). The fight should not be too difficult, but remember to focus on the correct opponent, at the moment wt which uses cloning. When you focus your forces on the clones, right after you kill them Maferil summons more. Your indication of which Maferil is the real one is the amount of his health. Clones have much less health. After you win the battle, collect your reward and head for the exit - the portal with symbols next room.
Reward for completing the quest: 2800 experience and Maferil's book (read it to receive an additional skill point).
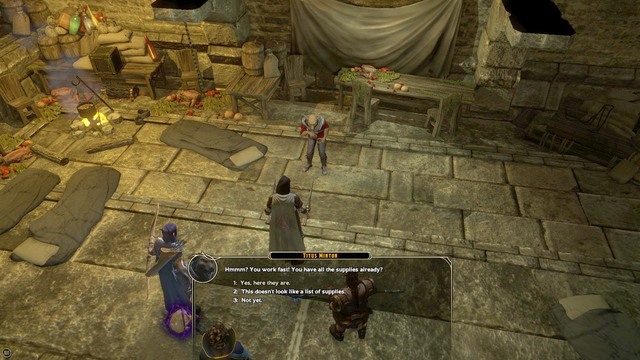
Talk to Titus Minton in the sewers (M4,Titus Minton) and you will learn that he needs help replenishing his supplies. After you accept the quest, go to Miranda in the slums (M5, Miranda) and buy supplies from her. Proving your CHA to her allows you to take the goods free of charge. If you do not have enough charisma, you need to pay the asking price for the Foxberries. After the shopping, your next step will be to buy mushrooms, i.e. to find the person who sells you that. For that, go to City Gates and talk to Aleema Meddlebrook (M3, Aleema). After you got all of the ingredients, you can return to Titus in the sewers (M4, Titus Minton). For this, you will be rewarded with 500 experience and 3000 GP.
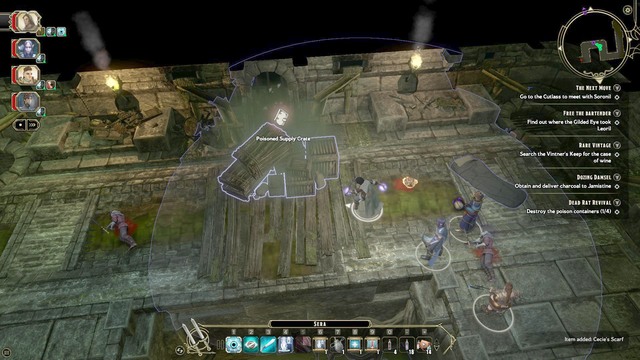
After you complete Not Dead Yet, you can return to Titus and help him again. This time, he tells you what is going on in the lower levels of the sewers. It is going to be your call to destroy the crates with poison that has been affecting rats. To do this, go to one of the locked doors in this room (M4) and go to the lower levels of the sewers. The mission is to destroy all four crates (M7,1/2/4/6). During the exploration, you should watch out for traps and poison clouds. If you have any problems maintaining your health level, use the special potion that you received from Titus during the conversation (Dead Rat's Antidote). After you destroy all crates, return to Titus for your reward.
Reward: 1000 experience and Honorary Dead Rat Tunic (medium blue rogue armor).
Note! During your exploration, you run into Wilgen's chest (M7, 3). It is locked and you cannot use lockpicks to open it. The only way to open it is to have Wilgen's key. You receive it only if you do not kill Wilgen during your first exploration of the sewers (M4, Wilgen).
You receive this quest automatically after you reach the market square of the market district, or directly through the conversation with Indra Lucere (M5). You learn then that her father has gone missing and she asks you to find him. In order to find out about the circumstances in which he went missing, go to Orina (M5) and ask about Bertrand. During the conversation you learn that a Sherm has recently bought a magic stone that may have something to do with the disappearance. Go to Sherm (M5, Sherm) and talk to him. Talk to him like a detective would so, accuse him of lie at the first opportunity. Sherm turns out to be a cultist and he attacks you. During the fight, he will reveal the passage under the floor. To open it, you need to hack the plants in the way. You can try using your strength (STR) but this will fail, which is why you should take the documents on the table and talk to Relona (M5, Relona's Potions). After you have talked to Relona, you receive a special potion (Icewind Mixture). Return to Sherma's house (M5, Sherm) and use the potion on the secret passage. Note that this completely freezes the plants, and only a single weapon swipe will suffice to destroy them. The passage leads to a secret cult underground. Kill all the opponents that you encounter there and finally, you will encounter Cyrana.
Note!
This is the most difficult fight yet. If you do not feel up to it, you do not have enough potions or scrolls, do not get into the fight. It is better to suit up properly beforehand and return to Cyrana. This quest is connected with the Serving Bregan D'arthe and The other Luskan Cult side quests.
If you decide you are not yet ready, enter the main hall, where Cyrana is and talk to him. Regardless of the result of this conversation, you will have to fight several strong demons commanded by an even stronger necromancer. The best spot to fight the battle is the narrow passage through the door. Position your strongest character there. Remember to keep the cleric away from the heat of the fight. As soon as you notice the necromancer cast a spell (the whirl on the ground) move away as quickly as possible. The spell is powerful and it will surely kill the party members. If this happens, backtrack to the previous narrow passage and repeat the tactic with the warrior. If you are playing as a mage, or there is Hommet on the team, cast spells that cause paralysis, sleeping or other effects that incapacitate at least some of the demons. After the battle, talk to the imprisoned Edwin. During the conversation, Edwin turns into demon Gruxhar, who is not too difficult to defeat, though. After you kill him, collect the relict from the table that you also need for Serving Bregan D'arthe . As soon as you search the room, return to Indra Lucere for your reward.
Reward: 1000 experience and Lucere's father's locker key.
This quest becomes available after you complete Sticky Samples. Go to Relona (M5, Relona's Potions) and talk to her. During the conversation Relona asks you to collect a sample for her alchemical research. To do that, go to Noxious Chasm (M3, Noxious Chasm) and destroy Elder Black Pudding (M6,Black Elder Pudding). To do this, you need to use a special potion that Relona prepared for you(Relona's Anti-Pudding Dissolving Agent). This is the only way that you can deal damage to the monster. Otherwise, he will remain invulnerable to all types of attack. After you win, collect the sample from the monster(Elder Black Pudding Sample) and return to Relona for your reward.
Reward: 500 experience, 140 GP, Alchemist Shoes and Alchemist Sleeves (blue items).
Go to the market district and talk to Ridrien (M5, Karsten Imports). You will learn that he is awaiting a package that was supposed to be delivered to him, by Captain Falcrow. O find the captain, you need to go to the slum and take the entrance to the mausoleum (M5,Mausoleum E). The captain is inside one of the rooms, in the Eastern catacombs (M6, Captain Falcrow). The captain himself turns out to be a vampire that you need to fight with. He is not too strong and you should be able to beat him quickly. From the corpse, collect the key to his locker (M6,1) where you find the cargo in question (A Vial of Dark Red Liquid)After you collect the item, return to Ridrien (M5, Karsten Imports) and get your reward of 1500 GP. If you prove your charisma, during the conversation (CHA), the reward will go up by another 500 GP.
Note! The captain also has a half of a legendary bow Glowing String .
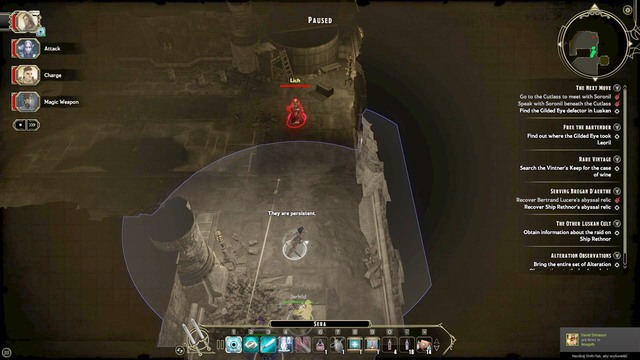
Go to the inn (M5, Inn) and talk to the cook in the kitchen. From the conversation, you learn that he needs you to help him find the right wine for his dish. For this, go to the nearest city exit that brings up the fast-travel screen and set the destination to The Vintner's Keep. Follow the corridors of the location, up until you run into the Lich (M6,Lich) guarding he treasure. Fighting him is not too difficult, therefore you should have no problems defeating him. From the nearby crate, take the bottle (Jasmarin Shadow Wine Crate) and return to the cook. Reward for completing the quest: 1000 experience and Rolling Thunder (blue weapon).
Note! During the exploration of the Vintner's Keep use the Search skill. In the Western part of the keep, there is a secret door to the treasure (M6,13). In there, you find a fine pink item of the value of thousands of GP.
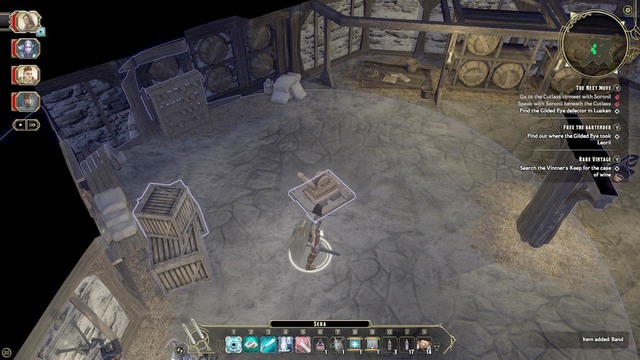
This quest becomes available during the A Next Move main quest. Go to the inn cellar and talk to Soronil. After the conversation, instead of leaving the cellar, use Search and find three buttons on the walls. Thanks to these buttons, you discover a secret sewers entrance. Your first opponent there is Joylal (M7, Joylal). You should collect, from his corpse, the legendary Clan Solar'el Dagger Handle. Follow the corridors and kill enemies. It is necessary to use Search to find all of the available secret passages that the secret stranger tool (M7,9/11) From the conversation with the mysterious stranger (M7, Mysterious Stranger) you learn that he needs cultist relics (you have already obtained the first one, in A Trader's Face). To obtain the second one, you need to complete The Other Luskan Cult.
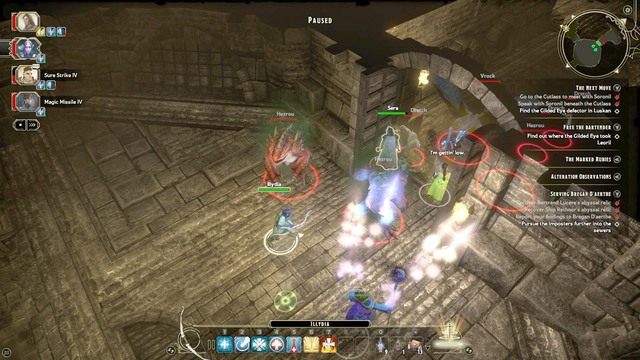
After you obtain two of the relics, return to the sewers (M5,Abandoned Sewers) and talk to the mysterious stranger (M7, Mysterious Stranger). During the conversation, the stranger turns into a cultist mage who took on the guise of the stranger to deceive you and to make you run his errands. You are up for a more difficult fight. First of all, do not fight the demons out in the open. Lure them into the nearby narrow passage and position your toughest warrior there. Keep eliminating demons, one after another, and go to the second level of the abandoned sewers afterwards. At the entrance, there is the actual mysterious stranger, who helps you fight off the cultists. Follow him into the main hall and talk with the enemies. The conversation ends in a fight. First of all, avoid the whirl spell cast onto your party. It deals lots of damage. Focus all of the party members on one opponent only. Since Vanenas has a weaker protection, kill her in the first place. After the fight, talk to the mysterious stranger. You will be rewarded with 800 experience.
Note! For completing the quest, you will be rewarded with 800 experience, but the mysterious stranger tells you that you need to visit him in the sewers to claim a special reward. This is the Bregan D'arthe symbol and a the blue Cloak of Evasion.

Start the quest by talking to Calantha, in the inn (M5, Inn) . During the conversation, buy him a drink for 5 GP, to make him talk and find out where are the rest of the cultists. He tells you that to learn more, you should see Baradithas (M5,Baradithas). From him, you learn that you need to get a drink for him, for this type of information. Return to the inn (M5, Inn) and buy a bottle of wine from bartender Arrhenish (24 GP). In return for the wine, Baradithas gives you a magic stone thanks to which you can get to the cultist hideout. Take the stone and go to Noxious Chasm (M3, Noxious Chasm). Interact with the green stone there (M6, 13). from the dialogue options, select Touch it with the polished stone, which will open a door next to you. Inside the hideout, there are several opponents, but they are not as difficult, as in the case of the first hideout. The important thing is to lure half of them out to the small passage, thanks to which you do not spring the traps in the cave, by accident. After you kill all of the opponents, collect the relic from the altar (Abyssal Statue).
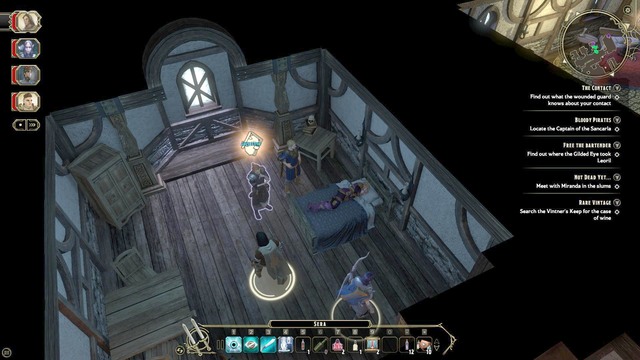
Go to the first floor of the inn (M5, Inn), where you find Janstin. He asks you to help him heal the woman on the bed. The ingredient that he needs is Charcoal, which you can find in the neighboring room, in the fireplace. After you collect it, return to Janstin for your reward of 200 experience and the blue Alchemist Headband .
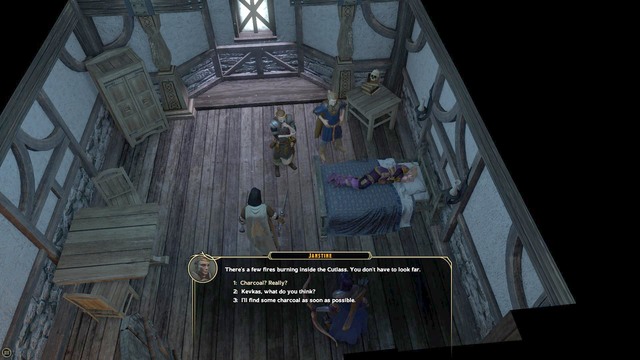
This quest becomes available after you complete Dozing Damsel. To receive it, you need to leave the inn and reenter. Go to Janstina and talk to him about the results of his healing. You will be interrupted by Kevkas, who demands answers to his questions. Regardless of how you answer, the quest ends and you receive a reward of 500 experience and the blue Alchemist Armor.
Evermoors and the Neverwinter Woods are another main locations in the Ferun world. In the Neverwinter Woods there's the Gilded Eye hideout, which killed members of your own guild without remorse. You can enter their hideout by using different methods. The first approach requires you to use force on the guards protecting the bridge. This methods may prove useful, thanks to all the experience points, items, as well as gold you will earn while doing so. The second method is to buy the Gilded Eye symbol from Hendrix. He can give it to you for free, provided that your attributes are high enough. The final approach requires you to go through the secret passage, located in the Bear Den.
In the Evermoors you will find numerous new foes, such as trolls, drows, or oversized spiders. During your exploration you will stumble upon multitude of chests, containing various goods. Additionally, the entrance to The Lair of Rhylfang, the queen of spiders, is located here as well. The Spiderbane and the Sticky Situation side quests are indispensable parts of The Lair of Rhylfang main quest. In order to complete it, you must speak with the main character of the Evermoors location, Adra. During the exploration of the area, near the trolls cavern, you will find a mysterious stone circle. If your wisdom (WIS) attribute is high enough, you will be able to uncover its secrets. The item required to do so - the Dwarven Skull - can be found in a chest, located in the trolls cavern. Below you will find a list of available quests in Evermoors and Neverwinter Woods.
Main quests:
Side quests
Gilded Eye Chapterhouse is the main location of the enemy guild. You can get inside from the Neverwinter Woods, by using one of the three methods. The most effective way of exploring this area is to acquire the builder's journal and to use the secret passage leading to the Gilded Eye. The journal can be found in the Bear Dean. While exploring the Javen's room, the leader of the Gilded Eye, search his chest, where a key required to open the door leading to the prison can be found.
The Chapterhouse is divided into four levels. The first level is where the Javen's room can be found. The second one holds the headquarters of the guild, as well as numerous chests to loot. The third level is the prison, where characters such as Morlesh - required to complete the Cult of Ghaundaur quest - and Leoril - the Free the Bartender quest - can be found. Additionally, a future companion, Bryn, is here as well. Bryn will be recruited automatically, after killing the main guard (Warden) of the prison. In order to leave this location, you must locate the secret passage leading to the catacombs. At the end of the location you will have to face Jessia, the leader of the Gilded Eye assassins.
A list of main quests in the Gilded Eye Chapterhouse:
A list of side quests in the Gilded Eye Chapterhouse:
Rhylfang's Lair is the main hideout of the spider queen. To get to this location, you must first complete a number of closely related quests in the Evermoors. Those are Spiderbane and Sticky Situation. Both quests are available from Andra, located in the village, in the northern section of the Evermoors. During the exploration of the spider queen lair, watch out for numerous traps scattered around the area - which is why you should be using the Search ability of your rogue all the time. There are sealed doors located on the first level of the Rhylfang's Lair. You can open the passage by killing the cultist performing some sort of ritual. During the exploration of the second level of the lair, there will be a merchant, Thoregg, located in the central part. A quite unusual merchant, because the only item he sells are spider eggs. For a small amount of gold coins you will be able to purchase an egg, from which, after some time, a Spiderling will hatch. The little spider will fight by your side for a short while, so it might be worth taking it for the battle with the spider queen.
It's important to find Thoregg with the Search ability, as otherwise he will remain hidden. After the encounter with the spider queen, during the conversation with Kerendor, he will ask you to finish him off. You can, as well, leave the man to suffer and die in agony, but this way you won't be able to acquire a piece of a legendary sword. The altar in the Rhylfang's Lair is the exit from the location, leading you to a place called Underdark.
After leaving the Maferil Lyceum, head towards the Market District, to the Cutlass inn (M5, inn). Afterwards, speak with Shivanni about your next assignment. Shivani will offer you the key to the basement of the Cutlass inn. Take it, go to the kitchen and use the trapdoor leading downstairs. There speak with Soronil, who will direct you to your next destination.
Note - At this very moment you will be able to complete a quest associated with the mysterious stranger, called Serving Bregan D'arthe.
After leaving the sewers (M6, Abandoned Sewers) go to the guild house (M5, Guild House). An NPC called Raissa will be standing in the first room. After the conversation with the woman, you will learn, that she needs to escape from Luskan and it will be your task to find someone who can help her with that. In order to do so, go to the slums (M5, Findail) and speak with Findail. During the conversation select the We do need someone smuggled out of Luskan option. Findail will tell you, that smuggling such an important person from the city will cost you 1000 gold. Now, as long as you have your STR or CHA attributes high enough, you can persuade Findail to lower the price to 600 gold. After making the payment go back to Raissa for further instructions. She will tell you that an individual named Javen Tarmikos ordered the murder of all your guild members. Additionally, you will learn that he can be found in his fortress, somewhere in the Neverwinter Woods. When the conversation ends, you will be given a reward for the quest completion.
Reward: 5600 experience points.
After the conversation with Raissa, leave the city via the nearest exit and set your destination to the Neverwinter Wood. After arriving, you will have to locate the enemy's hideout. In order to do so, head north, and you should reach a small bridge (M8, Watch Commander). To cross the said bridge, you can use three different methods. The first one requires you to complete a side quest called Big Game Hunting (there will be a secret passage at the end of the cave). The second needs you to buy a guild's badge, which will allow you to cross the bridge without initiating the fight. The badge can be purchased from an NPC called Hindryx, an elf standing right next to the bridge (M8, Hyndrix). The price for the artifact is quite high, being 1000 gold, but with a high enough charisma (CHA) attribute you can get it for free. The third, and the last method is to simply use force - you must eliminate all the members of the Gilded Eye. This approach is the best one, provided that you can handle those enemies. You will get a huge amount of experience points, and you will be able to loot some interesting items, as well as quite a sum of gold from the bodies. Regardless of your choice, hear to the main entrance of the Gilded Eye (M8, Gilded Eye Chapterhouse).
Note!
Right next to the entrance leading to the enemy headquarters you will be able to find a secret passage in the wall (M8,6). To open it, you must know the proper combination. It will be described in the builder's journal (M10, Remains), a book that can be acquired from the body in the Bear Den, associated with a side quest called Big Game Hunting. You must complete this side quest prior to entering the Gilded Eye Chapterhouse.
In the Javen's room, in a chest (M9,1) there will be a key (Gilded Eye Chapterhouse Key), which is required to open the doors leading to the prison. Acquiring and using the said key will reduce the amount of monsters you will have to face.
After acquiring the key, your task is to get to the underground prison. Make your way through the corridors of the chapterhouse, killing enemies along the way, and locate the entrance to the lower level. During your further march, you will reach a library, in which a secret passage can be found (M9,6). Your task is to acquire 3 books, which must be placed on the shelves (M9,7). The order in which it must be done is as follows:
A chest containing valuable items is hidden behind the secret passage.
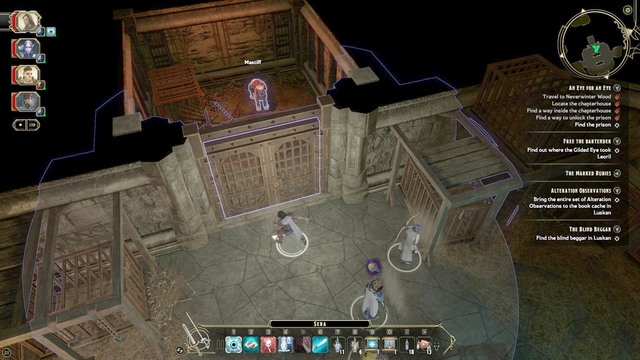
After completing the simple riddle, go to the catacombs. There will be hostile dogs, as well as members from the guild in one of the rooms (M9,8). As soon as you get rid of them, approach the trapped dog and try to set it free. If you open the cage right away, the dog will attack you. If you, however, give it some food (Feed the dog with some tender shortrib), the dog will be fighting at your side. The treat can be found on the first level of the Gilded Eye Chapterhouse (M9,4).
Note - the dog won't be accompanying you only during this mission. After completing the quest, it will go back to the camp with your companions and you will be able play with him whenever you are there, meaning that you will gain a permanent pet.
After freeing the animal, go to the adjacent room, where a next riddle awaits you. Your task is to set the pillars so that the symbols, visible on the wall behind them, are faced in your direction. After unlocking the passage, an encounter with the warden (M9, Warden) will await you here. At the beginning of the combat focus on the enemy dogs, and use your rogue character to eliminate the archers placed on the sides of the arena. The encounter is not that difficult, but remember to use potions and abilities that increase the damage output and defense of your team.
After the encounter ends, speak with Bryn. You've just acquired a new companion - Bryn. You can now summon the party customization window and let her join your party. When the conversation ends, search the bodies of the fallen enemies, especially the warden. During the conversation, other members of the enemy guild will close the main entrance and you will have to find an alternative route. There's a bartender (M9, Leoril) located in one of the cells, who must be freed to complete a side quest called Free the Bartender. The other cell holds an NPC called Morlesh (M9, Morlesh), from who you can acquire a side quest called Cult of Ghaundaur. The exit leading to the second level of the catacombs can be found between those two cells.
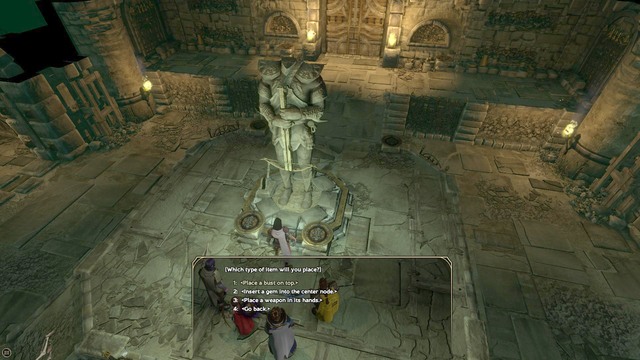
To leave the prison, you must first solve another puzzle. Approach the statue (M9, 16) shown on the above screenshot and interact with it. The statue will randomly present various heroes: a Wizard, a Fighter, or a Rogue. Your task is to assemble three elements that match with those three characters. The first one is the gem, the second one is the weapon, and the third one is the bust. Sets for each character are as follows:
All of the mentioned elements can be found in the neighboring rooms. After unlocking the passageway, continue with your journey. At the end of the passage, the leader of the Gilded Eye's assassins, Jessia (M9, Jessia), will be waiting for you. During the encounter try to focus on her companions and take the leader out once they are dead. When the encounter ends, you will be able to leave the catacombs.
Reward: 7700 experience points.
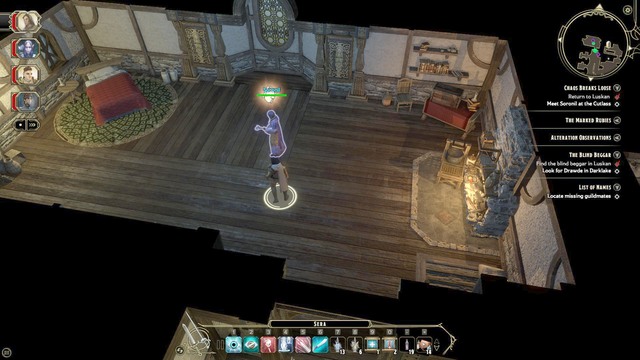
After leaving the catacombs, head towards the exit from the Neverwinter Wood and go back to the Cutlass inn, in the Market District of the city of Luskan. When you arrive, speak with Soronil, located on the first floor of the tavern. He will tell you, that demons have attacked the slums of Luskan. Go there immediately and storm through the subsequent sections of the location until you reach the main boss.
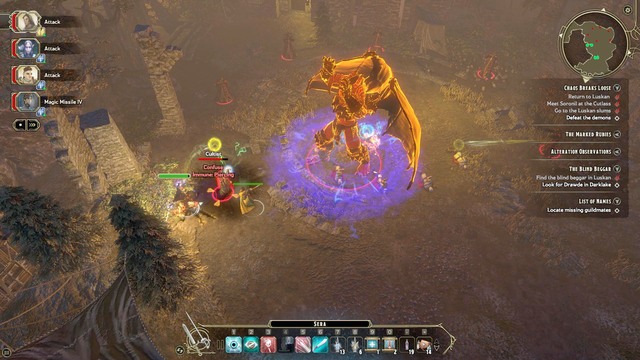
After speaking with Tassalys, you will have an encounter with a powerful demon - Shadow of Madness. As soon as the fight starts, attack the demon with your most durable character (such as Jarhild). As soon as the demon focuses its attention on your tank, take control over your rogue and start eliminating the cultists standing in a circle. The cultists are casting empowering spells on the demon, which is why you should take them out as quickly as possible. Don't forget to place Illydia (or your own character, if you are playing as a cleric) far away from the combat, but still in the range of your allies.
During the encounter you don't have to worry about any powerful area of effect spells coming from the demon, as the foe is extremely durable, but its attacks are quite weak. Try to cast spells that increase the damage output and the defenses of your allies and it won't be able to harm any of your characters. After the encounter with the Shadow of Madness, speak with the Drow lying on the ground. Afterwards, Soronil will teleport himself and your entire party back to the inn and will show you his real identity. Regardless of the course of the conversation with Soronil, the quest will be completed.
Note - if, during the After Them! Quest, you've spared Sir Banagar, you will meet him at the slums. He will be helping you during the encounter with the demons, while other members of the Gilded Eye won't attack you.
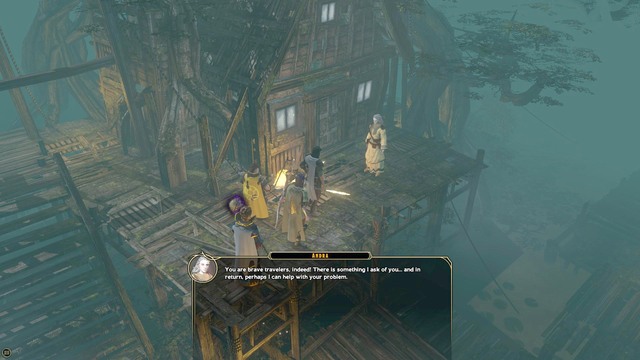
Note - the main quest Lair of Rhylfang contains two side quests, which are closely associated with the completion of the main quest. Those are the Sticky Situation and the Spiderbane.
After the conversation with Soronil ends, your task will be to find a way into the Underdark. In order to do so, go to the nearest city exit and set your destination to the Evermoors. After reaching the destination, you will have to face an enemy, Eilleel Solar'el (M8, Eilleel Solar'el). After taking care of the foe, collect the third, as well as the last part of the legendary dagger (Clan Solar'el Dagger) from his corpse. You can reassemble the weapon at the blacksmith in Luskan, for 8000 gold.
Your main task in the Evermoors is to find the lair of the spider queen, Rhylfang (M8, Rhylfang's Lair). Head towards that direction, while killing trolls and various spiders along the way. The entrance to the lair will be blocked with thick cobweb, which you won't be able to get through. To get rid of the obstacle, go to Andra (M8, Andra), who can be found in the northern section of the Evermoors. From the conversation with the woman you will learn, that she can prepare a special potion, capable of destroying the cobweb, allowing you to enter the lair. However, as you've probably guessed, she won't do it for free - she will ask you to free the citizens. Go to the area filled with spiders (M8, 17 / 18 / 19) and destroy the cocoons (Webbed Victim). From the bigger, rounder cocoons you will be able to free the civilians, while the smaller ones will release monsters, which you will have to fight. After rescuing three prisoners get back to Andra.
During the conversation you will be told, that the woman needs one more favor. You must collect ingredients for her potion. The first ingredient can be purchased from the merchant, standing near Andra (M8, Merchant). The item will cost 200 gold, but with high enough charisma (CHA) or strength (STR) attribute you can use persuasion or intimidation to get it for free. Regardless of your decision, go back to Andra with the ingredient to get information about the next item.
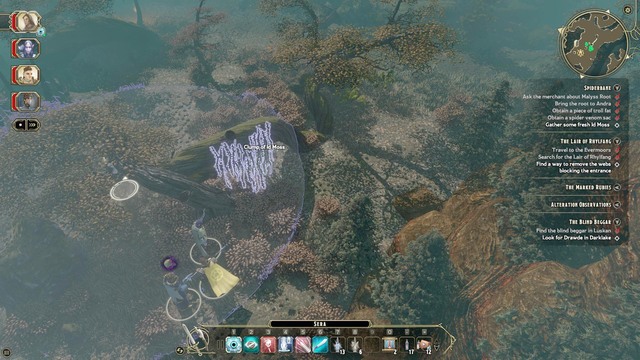
You must collect three ingredients: Venom Sack, which can be extracted from the bodies of dead spiders (M8, Spiders), Troll Fat, which, obviously, can be collected from the bodies of dead trolls (M8, Trolls) and a plant, Id Moss, which can be found near the trolls cavern (M8, Id Moss). After collecting all the ingredients, get back to Andra. You won't find her there, so just enter her apartment and look around. You will notice a blood trail, cultists recipes and other demonic magic. Leave the house and speak with Andra about what you've witnessed. Regardless of the course of the conversation, get a little lower and speak with Yenrry (M8, Yenrry), standing by the stairs. During the conversation you can use high charisma and / or strength to learn about the rituals performed by Andra. You will be told, that she sacrifices humans to prepare her demonic potions.
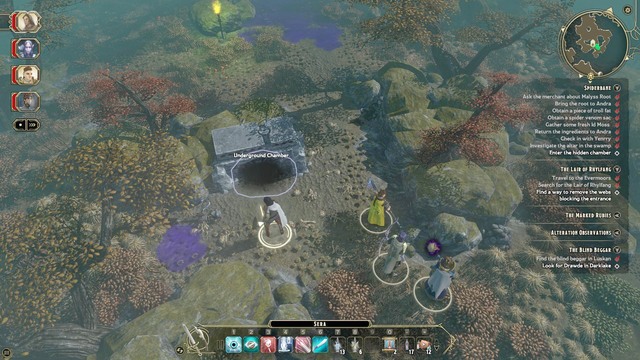
Yenrry will direct you towards a stone altar, standing in the swamps (M8,21). Interact with it and place a stone, given to you by Yenrry, on top of it. Afterwards, the altar will move apart, revealing a secret entrance to the witch's chamber (Underground Chamber). During the conversation with Andra, you will be told that she sacrificed the lives of the people you rescued and you will be able to kill her for that. Pick up the potion (Adra's Demonweb Mixture) from her dead body and head to the passageway blocked with the cobweb. During the interaction with the obstacle, select the Use Andra's Empowered potion on the web option to unlock the passageway to Rhylfang's Lair (M8, Rhylfang's Lair).
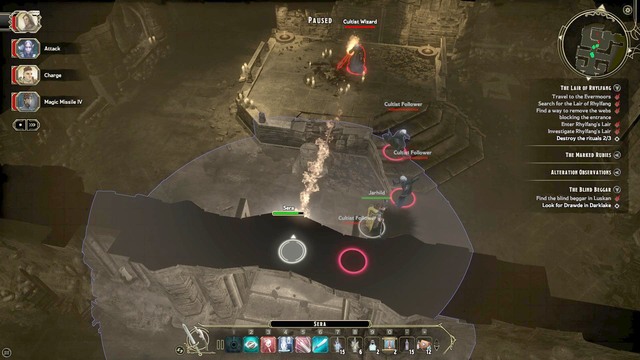
After descending to the catacombs, approach the cultists performing the ritual and kill them. Additionally, you will learn, that to open the next doors you will have to interrupt two more rituals. Explore the catacombs and kill the cultists blocking your way. The rituals needed to open the passageway can be found in (M9). After clearing the area, head towards the passage leading to the second level of the Rhylfang's Lair. Afterwards, go through the corridors of the catacombs, to get to the next doors (M10.1 /2 /3). After arriving at the main chamber, approach the prisoner, Kerendor and learn how to free him. The conversation will end abruptly and you will have to fight with the queen of spiders, Rhylfang.
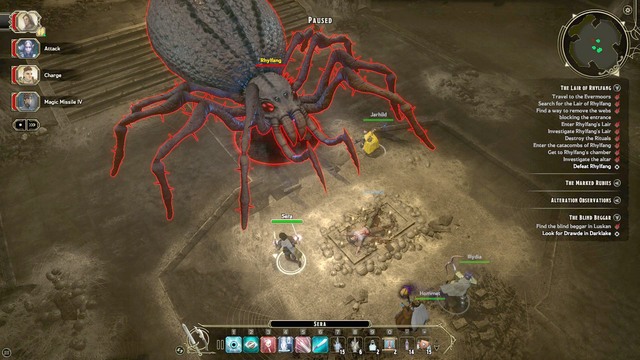
The encounter with the Rhylfang may prove to be extremely difficult, if you are unaware of her attacks. First things first, you must keep your cleric as far from the center of the fight as possible. Another crucial things is to constantly cast as many defensive spells and abilities (those are available to the cleric, the paladin and even the warrior) as possible. The third and final thing to remember is to focus all the enemy's attention on your most durable character (with the highest constitution - CON - attribute).
At the beginning of the encounter set three of your characters far away from the boss, and order your warrior to attack the spider. After several seconds order the rest of your party to join in the fight. Thanks to that, Rhylfang will be entirely focused on your warrior. Remember to use all the defensive abilities of your warrior as well.
The encounter is divided into a number of phases. The first one is obviously the one you begin at. Try to use your most powerful abilities only after you've reduced the defensive capabilities of the enemy with your spells. As soon as you accomplish this, try to deal as much damage as possible, until the boss retreats. The second phase requires you to get rid of the small spiders. Those should pose no threat, as long as you keep them away from your more vulnerable characters. Try to focus their attention on your warrior.
Note - the third phase of the encounter with the spider queen is the most difficult one as well. Rhylfang will cast area of effect spells, which deal poison damage over time. As soon as you notice a puddle of poison spreading from the boss, select your team and order them to retreat to a safe distance! After using the area of effect ability, the queen of spiders won't have any other ability at her disposal. The encounter itself takes quite a while, but given that you know all the enemy's tactics, this fight should be quite easy.
Note - The game has a bug, in which the loot from the boss disappears under the ground. If that happened to you and you can't access it, save the game and then load it afterwards. The loot from the boss should be now visible again and you should be able to pick it up.
After the encounter ends, approach Kerendor and he will tell you the combination to open the portal. He will ask you to ease his pain and finish him off. You can decide to leave him to die in agony, but killing him is the better option - by doing that, you will be able to pick up a part of a legendary sword from his corpse. Afterwards, approach the stone altar and chant the required words to open up a portal to Forlorn Cliffs.
Reward: 5600 experience points.
Speak with the bartender in the Cutlass in. You will be told, that the members of the Gilded Eye have kidnapped the old bartender and he will ask you to rescue him. In order to do so, go to the Gilded Eye Chapterhouse. If you want to free the bartender, you must get to the prison. It is recommended to complete this quest while you are in the process of doing the An Eye For An Eye main quest.
Reward: you will be given a part of the legendary sword (Snapped Sword Hilt).
As soon as you reach the Neverwinter Woods, go to Van-Hyde (M8, Van-Hyde) and speak with him. During the conversation you will be told, that he is hunting and that he needs some assistance. After accepting the task, use the Search ability to find the bear tracks. The trail will lead you to its lair (M8, Bear Den). After entering the lair, head along the corridor to the main room of the cavern. Your task will be to kill the enormous bear, Steel-Toothe. Afterwards, head to the secret passage (M10,13). Behind the doors there will be a corpse, from which you will pick up a journal, which is required to open the secret doors in the Gilded Eye Chapterhouse (M10,14).
Reward: you will receive 300 gold, Ballistus crossbow and 1000 experience points.
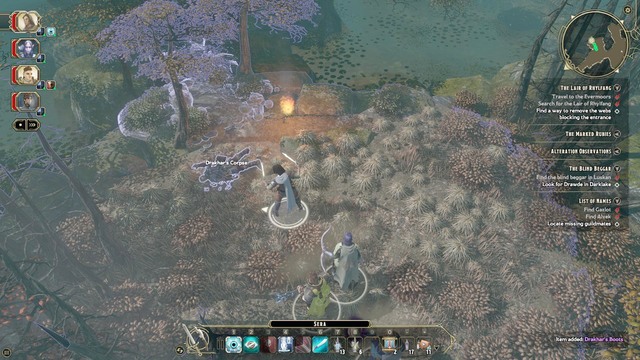
This quest will be given to you automatically after picking up the journal from the corpse in the Gilded Eye Chapterhouse (M9, Warden). From the journal you will learn, that some of the members of your guild are still doing quests and you will have to find them. The first one is Gazlot. His corpse can be found near the exit from the High Road. The second one is Alvek, whose body can be found in the Slums. The third one is Drakhar and his corpse can be found in Evermoors (M8, Drakhar). Additionally, Drakhar corpse contain perfect boots for a rogue (Drakhar's Boots). After finding the third person the quest will end, and you will be given 800 experience points.
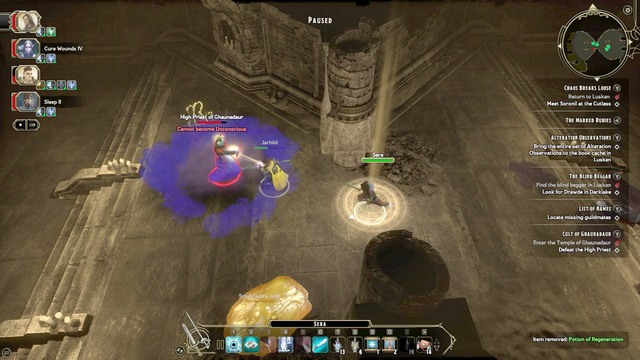
After reaching the prison the Chapterhouse, approach Morlesh (M9, Morlesh) and speak with him. You will be told that he needs help with reclaiming Sigil of Ghaunadaur. Head to the nearest exit from the city and use the quick travel option. Set the destination to the Temple of Ghaunadaur and start searching the temple. Your task is to get to the main chamber, where the High Priest of Ghaundaur can be found (M10, High Priest of Ghaundaur). After eliminating the priest, pick up the seal (Sigil of Ghaundaur) from his body and go back to Morlesh, standing at the entrance to the temple.
During the exploration you will be able to collect another Ruby (M10,8), required to complete the Marked Rubies quest, as well as the torn page (M10,11), required to complete the Alteration Observation quest. During the conversation with Morlesh you can disagree with his practices and kill him.
Regardless of your decision, the reward is the same, being 2500 experience points.

After reaching the Evermoors, head towards the bone altar (M8,8). After interacting with it you will be given a side quest, in which you must free the people kept by trolls as prisoners. Head to the northern section of the location (M8,11). After reaching the destination, you will have to fight the Troll Matriarch. Eliminate him and speak with the captured dwarves. Completing this quest will give you 800 experience points, as well as an access to a chest containing a legendary maul (Titan's Maul).
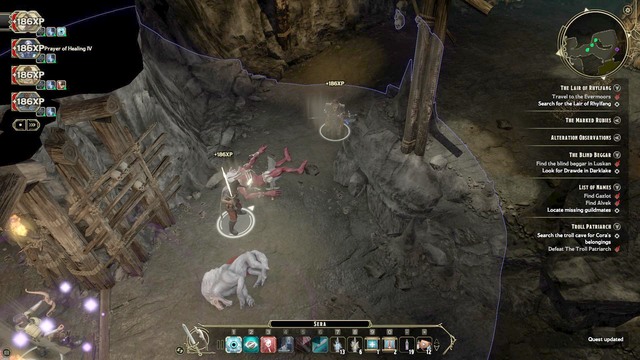
Go to the troll cave (M8, Troll Cave). Inside you will find Cora, who will ask you to reclaim her items and kill the troll. Go through the corridors and rooms of the cave, until you reach the said Troll. After killing him, what shouldn't be all that difficult, collect items (together with Dwarven Skull) from the main chest. The other chest will contain the items Cora asked you to retrieve (Cora's Belongings). Head to Cora standing by the doors and complete the quest, which will give you 1400 experience points and 500 gold.
After leaving the cave you should be able to see a stone circle on the ground (M8,14). After using the Search ability you will be able to interact with it. Provided that you have high enough wisdom (WIS) attribute, you will be able to place the skull you've recently found in the middle of the circle. If you do that, you will be given a permanent boost, increasing your gold gain by 25%.
Forlorn Cliffs is the first part of the sprawling Dreugar location - Underdark. Here, you find several side quests and the main quest - Into Eternal Night, thanks to which you gain access to a new ally - Izhkin. While exploring Forlorn Cliffs, focus first on solving the riddle with the inactive portal. After you activate it, you will have access to all the portals on the map, which lead to locations with riches. In this location, there also is the underground Abandoned Dig Site, where you find a riddle with the locked door. There is only one way to solve this riddle on your own. You simply need to find all the dead Duergars. Two of them are near the locked door in Abandoned Dig Site, and the next two are in the location that the magic portal leads to. The portal remains inactive until you repair its main part. For completing the quest in Abandoned Dig Site, you will be rewarded with a perfect short sword for the rogue - Torga's Pyre.
List of quests in Forlorn Cliffs:
Into Eternal Night - Main quest
The Blood Debt - Side quest
Puzzling Portals - Side quest
Speak No Evil - Side quest
Burning Ambition - Side quest
Darklake District is the center of a large city of Grackslugh, which is open to all the visitors. The Vibrant with life part of the city offers various side quests. You find a lot of merchants here, where you can stock yourself with potions or arms. Darklake District is also where you complete all sorts of main quests, such as City of The Grey Dwarves.
List of quests in Darklake District:
City of the Grey Dwarvers - Main quest
To Catch a Thief - Side quest
Grack in Black - Side quest
The Blood Debt - Side quest
Slave or Chief - Side quest
Return of the Chief - Side quest
Overlake Hold is the fortress by the main part of Grackslugh. Not only is it a prison and the living place of Duergars, but also the staying place of the Duergar high king - Horgar V. During the meeting with him, you learn that druegars are being controlled by a greater evil - Lord of Illithids. By controlling the minds of the greatest warriors and commanders of Illithid, he does the bidding of his master Belaphoss and it is your task to stop him. After you get into the prison, your first task will be to kill the keymaster, thanks to which you gain access to the next parts of the fortress. As for the king himself, you encounter him at the third level of the fortress in the last room - the throne room. The location houses many chests and caches, from which you can harvest gold and equipment. During your exploration, remember not to miss any hidden passage or secret.
List of quests in Overlake Hold:
Prison for the Mind - Main quest
The Traitor's Wake - Main quest
Blind Beggar - Side quest
Grack in Black - Side quest
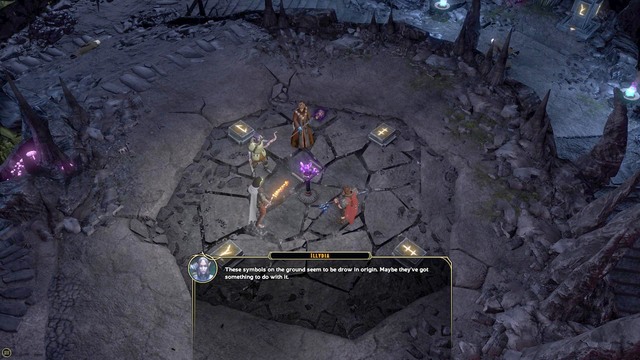
The portal in Rhylfang's Lair takes you to Underdark. To get to the main city, you need to visit Forlorn Cliffs first and solve a riddle. After you gather your party, start exploring the abovementioned location. The riddle in question is in the Northern part (M11,Portal). After you interact with the pedestal, you learn that it is inactive and it is being protected with four seals. The seals can be activated using the pillars in the four corners (M11,1/2/3/4). If you zoom out camera view, you learn that next to the pedestals, there are symbols corresponding to each pillar. Your task is to turn the pillars in the way that makes the symbols on them face the pedestal and the symbols on the ground. After you complete that, return to the pedestal and the symbols on the ground. This way, you have just repaired portals all around Forlorn Cliffs and the will be no longer teleporting you to random locations. You now need to find Tezzarae's camp (M11,Tezzarae's Camp).
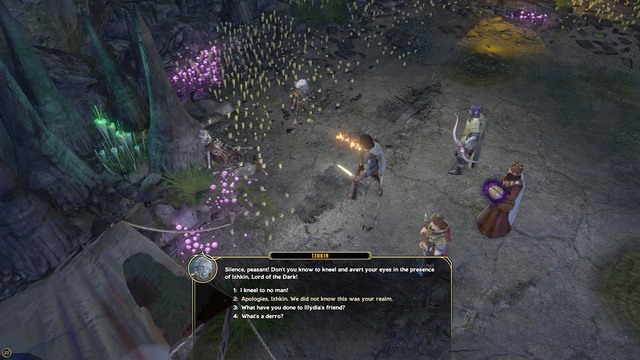
After you get there, search the camp. On Tezzarae's corpse, you find a journal (Tezzarae's Journal). Collect it and talk to Illydia. Meet your new ally. After the conversation with Izhkin, you can invite him into the party. Izhkin is a rogue. To make it over the pedestal, you require the magic stone hidden by Izhkin. To find it, leave the camp and go to another magic portal (M11,6).After you get there, you notice two more portals. The one that is the farthest away is the one to the Forlorn Cliffs (M11,6), and the one in the center takes you to there the magic stone is (M11,7). You find the stone at the corpse of Bolvisha (M11,8). After you collect the stone, you will be attacked by Umber Hulks. In themselves, the monsters are not too strong, but they cast a spell that eliminates you from the battle for a longer period of time. During the fight with them, keep your cleric away from the center. After you win, return to Tezzarae's camp and place the stone on the pedestal. This way, you open the portal to Underdark Descent. During the exploration, watch out for traps because they are plentiful here. A good idea is also to use Search and to collect Cave Moss, which you are going to need for the side quest with amulets, later on. Follow corridors of the cave and you will eventually reach the exit. Next to the exit, there is the corpse of a dwarf (M11,11), which you can loot for legendary axe half and a journal page. Reading the page activates side quest The Blood Debt.
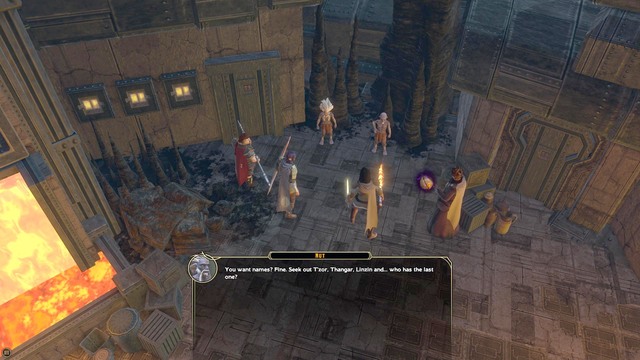
During the nightmare, explore the dreamworld and reach Belaphoss. After you talk to him, you wake up safe in your camp. After you replenish your supplies, use the world map and select Gracklstugh - Darklake District. After you get there, on the left you note a Duergar maltreating a slave. If you help him, you will be rewarded with what is in the cart. To help him, you need to have high dexterity (DEX) and kill the Duergar before anybody notices, or intelligence (INT) to make him believe there are no guards around. Your task, while you are staying in the Dreugar city, is to find Izhkin's contact. You find him in the central part of the city (M11,Omur). After you get there, search the nearby residence. N there, you find a legendary hammer half. From the conversation with Izhkin's contact - Omur, you learn that you need to obtain four amulets. These amulets change your and your companions' looks, thanks to which you have freedom of business on Druegaur soil.
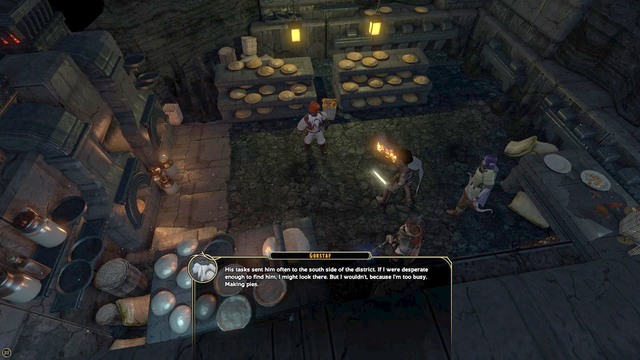
The Tended Amulet:
To obtain the first amulet, go to Gorstaf (M11,Gorstaf) and talk to him. Your quest is to find Linzin, and Gorstaf may have some information on his whereabouts. The information tells you that Linzin is somewhere in the Southern part of Darklake District. For this, go there (M11,Linzin) and talk to Linzin. From the conversation, you learn that he will gladly give you his amulet, after you deal with his problem with Gorstaf. After the conversation with Linzin, return to Gorstaf and talk to him. From the conversation, you learn that you can pay up Linzin's debt in two ways. The first one is to pay 3000 GP, and the other one is to accept the quest. The objective of the quest is to take the pie to Brumnum, to the inn in Darklake District. After you do that, return to Gornstaf, then to Linzin, who gives you the first amulet.
For completing this miniquest, you will be rewarded with 1000 experience points.
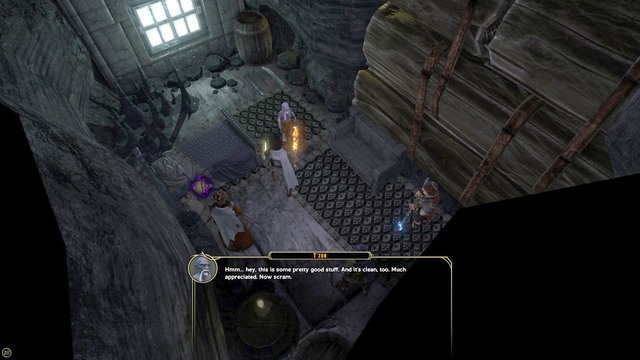
The Rusted Amulet:
For the second amulet, go to the inn in Darklake District (M11,Inn) and talk to T'zor in the last room. The conversation does not result in anything good, so go to the innkeeper and ask if he can help you, in any way. He asks you to collect several Cave Moss, which you could have already collected, while in Underdark Descent. If you missed them, return there. After you are back, the innkeeper brews a potion for you, which puts T'zor to sleep. For the potion, you need to pay 200 GP, but if you prove a high amount of charisma points, the innkeeper gives you the potion free of charge. The quest with the potion was also a side quest from the innkeeper - A Touch of Poison. Return to T'zor and talk to him. Serve him the wine from the innkeeper. As soon as T'zor drops down, run through his pockets to find the amulet. .
For completing this miniquest, you will be rewarded with 1000 experience points.
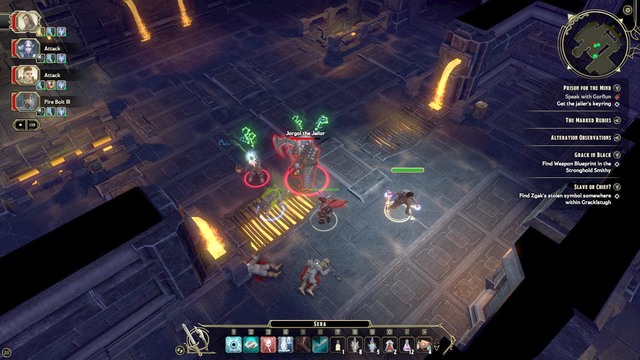
The Filthy Amulet:
You obtain the third amulet while exploring Thanagar's vault. Go to the tax office in Darklake District (M11,Tax Office), and search the room. There, you find scales and three weights (light, medium, heavy). Put the light and medium weights on the scales to open the secret passage into the vault. In the last chamber of the cave (Thanagar's Stash), you find Slimy Derro. After you try to retrieve the amulet from him, he turns into a monster that you need to kill. Loot the corpse for the third amulet (Amulet of Disguise). Also, remember to search the entire room. Here, you find another Marked Ruby that you need for the side quest - Marked Rubies. On your way back, you encounter several more opponents (Captain Grombash). It is important to start the battle with him, because he has one half of a legendary bow.
For completing this miniquest, you will be rewarded with 1000 experience points.
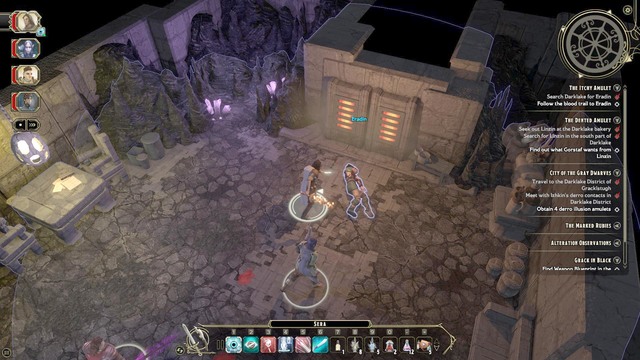
The Itchy Amulet:
Go to the Southern Darklake District (M11,Eradin) and use Search to find bloody marks left by Eradin. They will take you to the house, where there is Eradin all covered in blood. After you talk to your allies, you learn that most probably, he was sold a faulty amulet. Return to Omur and demand answers. After a short conversation, Omur gives you the actual, fourth, amulet. For completing this miniquest, you will be rewarded with 1000 experience points.
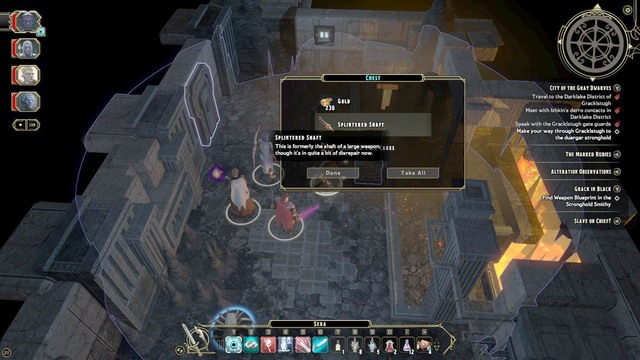
With four amulets on you, go to the main entrance to Gracklstugh (M11, Gracklstugh Gate Guard) and talk to the guards. After you get to the Business District, you need to get to the main gate. There are two ways to do this. You cant either walk around the guards or fight them. If you want to sneak, it is necessary that you avoid Duergar Spotters (they are marked in red, on the radar).
Note! In the Western building, there is a chest that you can loot for the second half of the legendary bow. It is necessary that you do that before you enter the gate area. After you exit the building, you will be automatically apprehended by the guard, who takes you to the prison.
Reward for completing the quest: 3800 experience points.
In the prison, approach the bars and talk to Gorflun (M12,Gorflun). You learn that Duergars are being controlled by a secret power and it is your mission to save the city. First of all, you need to find the prison warden. Thanks to his keys, you can move around the entire prison freely. Go there (M12,Jargol The Jailor), kill Jorgol The Jailor and loot his corpse for the keys (Stronghold Prison Keyring). After a short exploration of the prison, go North and get to the higher level in the keep. Keep using Search, during the exploration. In the location, there is a lot of gear, lots of chests and secret passages. On the second level of Overlake Hold you find a blacksmith (M12,Kowal). Next to him, there is a toolbox (M12,7), where you find the other half of the legendary axe. In the neighboring room, you find a Duergar schematics to complete the side quest (M12,8). After you do the shopping and explore the area, go to level three, in the Overlake Hold. Just like previously, you find here lots of chests to loot. Keep moving North and you will, eventually, reach the Duergar king. Before the conversation, you will be welcomed by the Lord of Illithids. After a short talk with the Illithid, talk to the Duergar king - Horgar V (M12, King Horgar V). The king opens a passage behind him. In the nearby chest, you find another ruby that you need for the quest - Marked Rubies (M12,12) and a half of a legendary weapon.
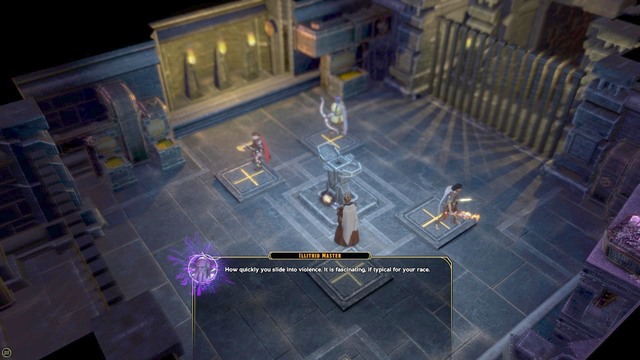
to unlock the passage, you need to deploy your party members on the floor buttons (use, Stop command to make them stay put). After the deadly poison cloud is released, approach the three blazing torches and click of the leftmost one to open the passage to the next location. After you make it over to Overlake Ramparts, go up. Along your path, you encounter Illitid, which you will have to fight with.
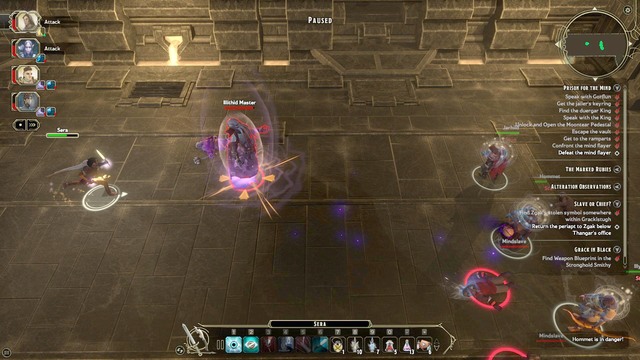
During the battle, keep in mind that Illithids can control minds. If you notice that a party member is under control, switch to the cleric quickly and lift the curse. Command the cleric to stay away from the battle center. In this case, not only is it to prevent the cleric from being cursed, but also to prevent him from being the first target that your allies attack, when they are possessed. If the Illithid gains control over the well-armed rogue, you can be sure that the cleric falls within several seconds. The battle with Illithid is quick. Cast all of your buffs, as cleric, mage and warrior, be it offensive or defensive. Also remember to use the Hidden Dagger as the rogue. This will increase the cooldown of the mind-control spell, by several hundred percent.
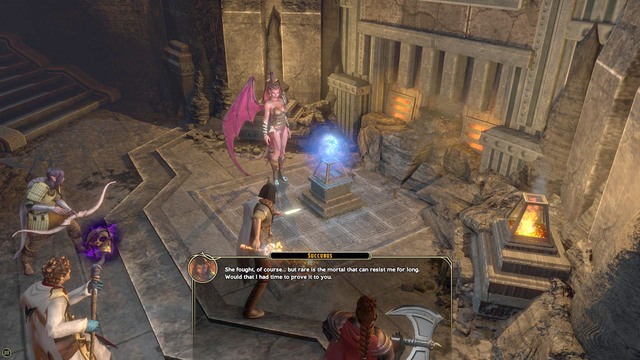
After you defeat Illithid, talk to dragon Themberchaud and be on your way. Remember to collect your reward from the corpse of Illithid. It is a legendary robe that is ideal for the mage. After you reach the destination, you see Moontear (M12,Moontear). During the conversation, you also learn that Bryn was a Succubus for the whole time. He grabs Moontear and escapes.
For completing the quest, you are rewarded with 11900 experience points.
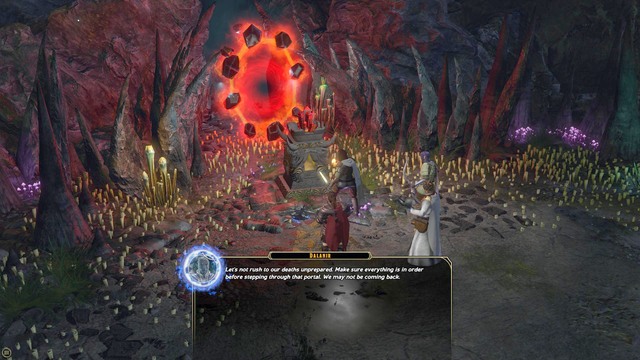
After the conversation with the Succubus, defeat the summoned demons. Head towards the lower parts of the Overlake Ramparts, and kill the groups of charging demons. At the end of the location, you notice a tunnel - Darklake tunnel, which takes you back to Darklake District. At the end of your path to the main part of the district, you spot the imprisoned succubus (M11,Succubus). Your task is to decide its fate. You can leave him to death in pain (select Celestial Stone) or banish him to hell, which will be an act of mercy (select Infernal Stone). Regardless of your choice, go to Tezzarae's camp in Forlorn Cliffs. After you get there approach the pedestal and put the Belaphoss' stone (replace it for the one thereto open the portal to his realm).
Note! The decision to cross the portal is irreversible. If you do that, you will no longer be able to return, so it is a good idea to tie up all of the loose ends and side quests, before you enter Belaphoss's portal.
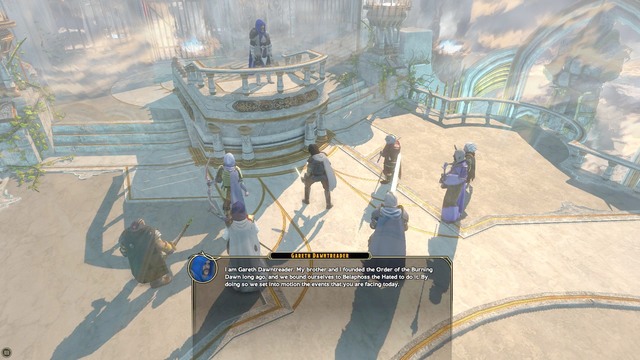
After you cross the portal, you start a conversation with Gareth Dawntreader. You learn that you will have to decide the fate of Moontear. You have two options. You either destroy Moontear and prevent Belaphoss from infusing his energy, or save him with the sacrifice made by Illydia. Now, you will be able to talk to your allies for the last time. After that, go to the red portal, to Belaphoss' hideout. After a short conversation with the demon, the battle starts. During the battle, try to cast spells that buff the entire party. The battle may prove long, but not too difficult. The only thing that you need to watch out for is the fire whirl cast by Belaphoss. This skill results in a tornado of fire surrounding the demon.
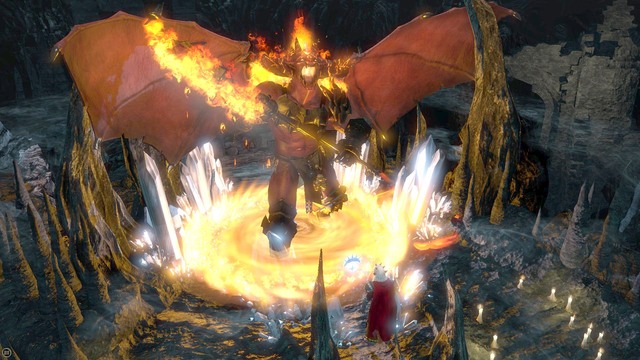
The warrior and the paladin, with the help from the cleric, should be able to withstand the effect of fire,, which is not the case with the rogue, which is why you should be utilizing the "Hit and run" tactic. This is unarguably the best tactic, given that Belaphoss will be summoning demons to the battle and there is no better character to eliminate them, than the rogue. Towards the end of the battle with Belaphos, he escapes to devour Moontear's energy. At this point, you need to decide whether you want to save Moontear and sacrifice Illydia, or destroy him.
Note! If you have Illydia on your current party and you decide to keep Moontear, Illydia makes the sacrifice of her life. You cannot revive her, nor save her, so you fight the battle with the final boss not with four characters, but with three of them. Since Illydia is a highly valuable party member - she is the cleric, the ensuing battle may prove too difficult.
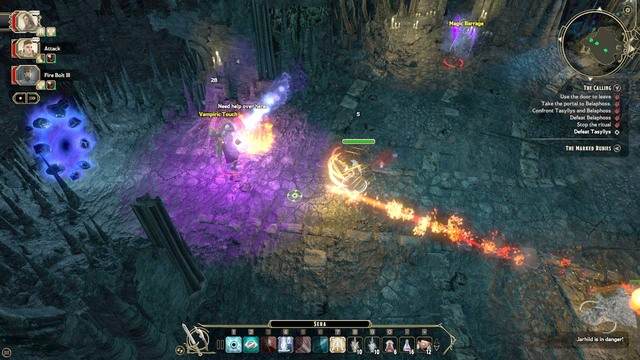
regardless of your choice, this is the last battle in the game. There are two main phases to the battle with Tasyllys. The first one lasts up to the moment in which he loses 50% of his health. The battle is long, but Tasyllys can't surprise you with anything, in the initial phase. First of all, use the strongest combo of the rogue's skills. Tasyllys has a very low factor of defense against piercing, which is why he will be taking additional damage from the rogue. When coupled with high dexterity (DEX) and increased chance of critical hit, while invisible, the rogue is capable of crushing Tasyllys. The second phase surprises you with the fact that Tasyllys summons his mirror reflections. They deal lots of damage from magic and they are very tough. The best method of eliminating them is dealing critical damage as the rogue. If Tasyllys dies, the same happens to his reflections.
Reward for completing the quest: 14000 experience points.
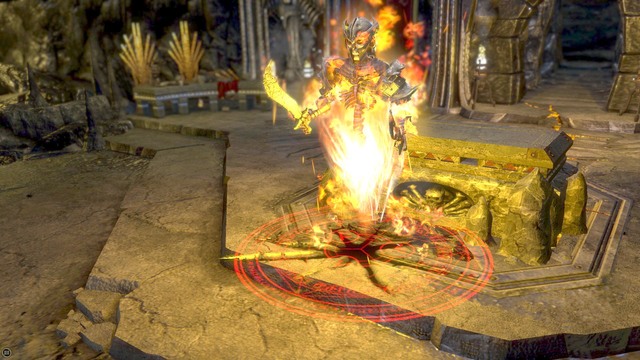
To receive this side quest, you need to go to Abandoned Dig site, in Forlorn Cliffs (M11,Abandoned Dig Site). To get inside the cave, you need to open the door with locking mechanism. You will be able to solve the riddle on your own, AFTER you complete the main quest in Forlorn Cliffs. You need to gain access to various portals with dead Duergars. You can loot the dead dwarves for notes that give you clues to the mechanism riddle. The correct combination for the mechanism is jest: left, left, right, left, right, right, left. The mane of the spirit that you can receive this quest from is Torga Burduum. The quest is to destroy demon Izzaxu, who controls spirits. For this, go to the main chamber and face him. The monster is completely resistant to damage from fire, but he is not too difficult to defeat.
Reward for completing the quest: 2200 experience points and a perfect legendary short sword for rogues - Torga's Pyre.
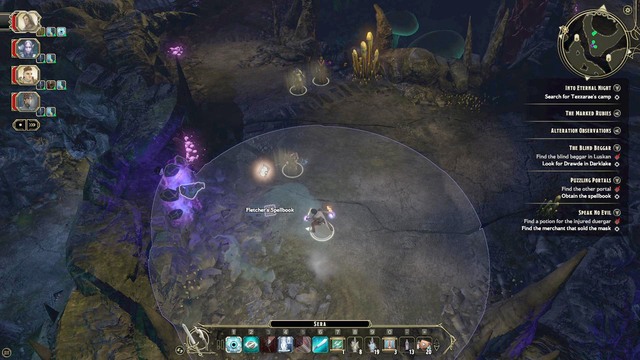
Right after you get to Forlorn Cliffs, go to Fletcher (M11,Fletcher) and talk to him. You learn that he is stuck in one of the portals and he can't get out. To fix the portals, you need to find Fletcher's tome (M11,Gelatinous Cube), hidden under Gelatinous Cube. After you kill him, you can see the lower part of Fletcher's body in the nearby portal. If your agility is high, you can steal 200 GP from him. Regardless of whether you do that or not, return to the upper part of Fletcher and return his spellbook to him.
Reward for completing the quest: 1400 experience points.
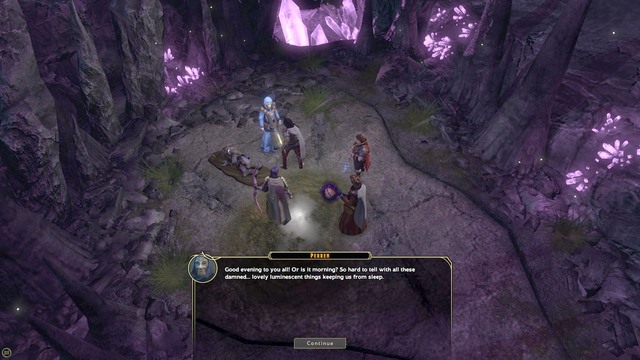
After you arrive in Forlorn Cliffs, go to Perren (M11,Perren) and talk to him. Your quest will be to find the merchant that sold him his faulty mask. For that, go to Darklake District, enter the housing near the location entrance (M11,Strumoru) and talk to Sturmoru. From him, you learn that he sold the other half of the mask to a man named Feinn. To find him, you need to go to Underdark Descent and cross the entire location, because he is right next to the exit (M11, Feinn). After you kill the opponents, collect The hooked nail of tempered empathy from the man's corpse and return to Perren in Forlorn Cliffs.
Reward for completing the quest: 1800 experience points and an excellent legendary mask for clerics - Mask of Relentless Compassion.
You receive the quest right after you leave the secret vault in the tax office (M11,Tax Office). Next to the entrance, there is a goblin named Zgak. Talk to him and you will learn that his past friend has seized the clan that he used to be in charge of. The quest ends here and you are rewarded with 1600 experience points and, if you decide to take the quest, you gain access to Return of the Chief. To help Zgak win his clan back, go to the nearest city exit and set your marker to Zgak's Grotto. After you get there, talk to Zgak and go retrieve his influence. Your target is the hobgoblin leader - Kazak. Zgak himself does not reward you for the quest, but you get 2500 experience points. However, you may feel rewarded with the satisfaction of having killed him and looting his storage. In the storage, you find various interesting items, including another ruby for the Marked Rubies quest.
Go to Darklake District and talk to Rivet (M11,Rivet). The mission is to get a Duergar schematics that will help her with her problems. For that, go to the second floor of Overlake Hold and collect the schematics from the chest (M12,8). The chest is near the blacksmith's. After you have retrieved the schematics, return to Rivet for your reward of 1600 experience points and 3000 GP. If you prove charismatic enough, the reward goes up to 4000 GP. If you prove your intelligence, the reward will be 5000 GP. If you prove your knowledge, the reward will be 6000 GP.
You receive this quest from Breg in the Northern part of Darklake District (M11,Breg). Your task will be to catch Derro, a thief. For this, go to Quaddo (M11, Quaddo) and talk to him. If you use your charisma (CHA), Quaddo gives back all of the stolen goods and promises to leave the merchant alone. In such a case, your only reward will be 1600 experience points.
This quest starts automatically after the conversation with "adventurers" that you meet right past the entrance to Underdark Descent. From the conversation with Lia (M11, 9), you learn that they take you and your party for rookies and they want you to carry an item for them, as porters. If you are charismatic enough, your reward goes up, from 2 to 3 GP. For completing the quest, you are also rewarded with 1900 experience points.
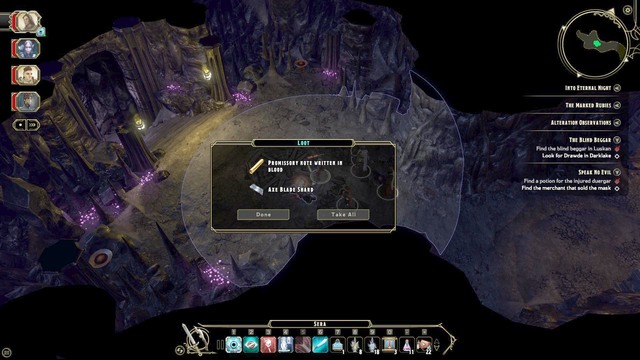
You receive the quest after you read the note you find on the corpse, at the Underdark Descent exit (M11,11). The task is to find the person that made a sort of a vow of blood. You find him in Darklake District (M11,Braenmora Surehand). During the conversation, you can prove your high charisma (CHA) ad convince the man to fulfill his oath. For completing the quest, you are rewarded with 1400 experience points. From killing him, you receive just as many experience points but on Braenmora, you also find a half of a legendary axe.
Sword Coast Legends is a classic cRPG developed by n-Space and Digital Extremes. The project has been supervised by Dan Tudge, who can boast his part in Dragon Age: Origins, and sound has been developed by Inon Zur. The game employs a top-down view and ensures tactical pause, during battles. Sword Coast Legends has been based on Unity Engine, which may not be the most popular around, when it comes to complicated and graphically advanced projects. Although the game looks decent, as for the genre, there are technical problems whose source lies in optimization, due to which what is happening on the screen is not properly reflected. The recommended requirements of GeForce GTX 750 1GB do not ensure high, or even medium-low image quality, if you hope for high FPS (45-60). In most cases, the problem is surface shading and resolution of shadows, although the ambient occlusion does not take up too much of your CPU. In the case of shadows, you can compromise them, which ensures decent-looking surroundings. If you have a graphic card lower than GTX 970/780 or AMD Radeon R9290x/390, you do not reach 60 FPS with shadow rendering on. As mentioned above, this compromise is impossible to reach, because if you go a notch lower, when it comes to shadow resolution, they look as if they were composed of several blocks of pixels. This, however, ensure a performance leap and it may turn out to be the last resort for you. Technical analysis ignores the CPU on purpose, because even a weaker unit (e.g. Intel Core i3 or AMD FX 6300) ensure sufficient performance. However, what plays the first fiddle here is the GPU. For the purposes of this walkthrough, a system with Intel Core i5 4460, AMD Radeon R9270x and 8GB RAM, has been used. In this configuration, the game had problems with keeping the steady 60 FPS. The FPS oscillated here around 30-40, where the component that with the most workload was the GPU. Fluent game of 60 FPS could be ensured by changing graphic settings to medium, minimum shadow settings and resolution of 1920x1080. In certain situations, performance dropped as low as to 15 FPS which, if subjected to scrutiny, has not been caused by any of the system's components. The Computer's consumption, in such cases, was as low as 15%, whereas that of the GPU barely reached 50%. Also, this has not been caused by problems of loading data from the SSD drive, nor by the lack of free RAM/ VRAM. Fluency drops occurred mainly during cutscenes rendered in real time. However, this was not too tedious and did not handicap the actual gameplay. What was annoying, though, is random game crashes and long locations loading screens. Long loading screens usually raise suspicion, because the game has been installed on an SSD drive and there is no way, in which this could be free space that could cause the problems.
To sum up: Sword Coast Legends is not the leader, when it comes to its technical aspects. Numerous FPS drops, crashes and long loading screens left a sour aftertaste that remains in memory forever.
Singleplayer - Yes
Offline co-op (Split screen/Hot Seat) - No
Online co-op- Yes
Multiplayer - Yes
This walkthrough for Sword Coast Legends has been prepared, basing on the PC platform, and the following specifications:
CPU - Intel Core i5 4460
GPU - MSI Radeon R9270x
RAM - 8GB
VRAM- 2GB
OS - Windows 7, 64bit
On the above specs, Sword Coast Legends did not work the way it was expected. Frequent drops in FPP effectively made reaching high comfort of playing impossible.
Minimum requirements:
OS: Windows Vista 64bit
CPU: Intel Core 2 DUO E6700 or AMD Athlon 64 X2 6000+
RAM: 4GB RAM
GPU: NVidia GeForce 8800GT or AMD Radeon HD 4850
Required HDD space: 20 GB
Recommended requirements:
OS: Windows 7 64bit
CPU: Intel Core i5 2500k or AMD equivalent
RAM: 8GB RAM
GPU: Radeon R9 270X or NVidia GTX 760
Required HDD space: 20 GB
DirectX - DirectX 11.0


 Scarface: The World is Yours Game Guide & Walkthrough
 Slender: The Arrival Game Guide & Walkthrough
 Smite Game Guide & Walkthrough
 Soul Calibur IV Game Guide & WalkthroughStarbound Game Guide & Walkthrough