Stronghold Crusader 2 guide contains detailed information about the single player, as well as online gameplay. Inside, you will find a complete description of all key aspects of the game, such as extraction of resources, food and weapons manufacture, as well as about the exclusive goods (ale and religion). Additionally, you will learn about each and every building in the game, grouped up with their costs and application, as well as a complete parallel of all the units available in the game, with their strengths and weaknesses, as well as their usage. Furthermore, the guide explains such mechanisms as popularity, taxation level, food ration and ale distribution, religious rites, as well as the process of automatic trade on the market. The guide contains numerous tips and tricks associated with creating and maintaining economy, army recruitment, as well as both defending against sieges, and performing one yourself. Besides the information concentrated on single player playthrough, the guide contains information about multiplayer gameplay, like selecting the proper tactic according to the situation on the map, the necessity to construct appropriate buildings, as well as different ways of attacking players. The guide is supplemented with a complete list of all the achievements available in the game, with tips on how to get them. Stronghold Crusader 2 is a real-time strategy developed by Firefly Studios, being another installment in the popular Stronghold Franchise, originally published in 2001.
The guide to Stronghold Crusader 2 contains:
Jakub Bugielski ()

Camera movement

Game menu

Select unit / building

Issue commands

Camera zoom

Camera movement

Interface on/off

Select Lord. Double tapping moves the camera to the target.

Select Granary. Double tapping moves the camera to the target.

Select Stockpile. Double tapping moves the camera to the target.

Select Armory. Double tapping moves the camera to the target.

Select Castle. Double tapping moves the camera to the target.

Select Siege Camp. Double tapping moves the camera to the target.

Select Barracks. Double tapping moves the camera to the target.

Select Mercenary Post. Double tapping moves the camera to the target.
In this section you will learn about the game interface in the Stronghold Crusader 2. The interface is fairly similar to other real-time strategy games - it does not cover the screen, it contains the most important information, scattered around the edges of the screen, leaving the center perfectly clear.
The top right corner of the screen contains all the required information a player must be aware of. [1] The top right corner shows the population - the color indicates the attitude of peasants towards the players and the number its intensity. A little to the left [2] there's an actual number of free peasants. Continuing to the left [3], you can see the total number of peasants in the castle / the maximum amount that can be housed. Further to the left [4], you can see the amount of gold stored in the treasury. Below [5], there's an information card containing all the important information, such as: level of taxes, food rations, ale and religion distribution. In the bottom left corner of the screen [6] there's a mini-map showing the actual situation on the map. Next to it [7] you can find the actual selected function - it can either be the list of buildings to construct, unit window allowing you to issue commands and change stances, etc.
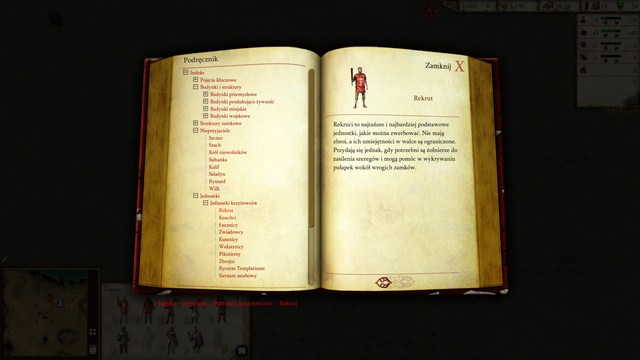 There's some help in the game, in the form of a manual, but it's mainly describing various units and buildings.
Stronghold Crusader 2 differs slightly from other games from the RTS genre, and while there is some help in the game in the form of a manual, it's not very detailed, which can make some of the players feel a little lost. With the help of this section you will learn about various gameplay mechanics, as well as about things you should and definitely should not do.
1. Before you start creation of your army, you should first make sure that you have sufficiently developed your economy. A huge army (which you surely won't be able to hire either way) won't be any good if you will run out of gold after a couple of minutes, or your granary will end up being empty - you won't be able to do much and you will be forced to wait for the enemy to finish you off. There are some exceptions to this rule, however - if you have huge amounts of hold from the very beginning of the game, or if you are planning a rush attack on the enemy.
2. As soon as the game starts, whether it's a single player or an online one, look around your starting position and locate key places, like oasis (or several of them), stone and iron deposit, or lakes and mountain gorges. Place your stockpile as close to the oasis as possible, and you should do the same with your Granary - it will allow you to speed up the food production process a lot.
3. Make sure that your stone and iron transportation is efficient. You don't have to build 4 Ox Tethers (which is max) from the very beginning, especially when iron / stone deposit is not far from your base. Place 1-2 of them by each Stone Quarry and Iron Mine and observe how the transportation works. If there are some deadlocks, when there are no boxes near those buildings and there are is no resource movement, build additional Ox Tethers until the transportation works flawlessly.
4. As far as food production goes, you can divide the buildings responsible for it into two groups - those which are effective in early game (when your population is under 50 peasants), and those which are effective when your castle is prosperous (i.e. when the population is exceeding 50 peasants). The buildings in the first group include apples, cheese and meat, and the second one is about bread production. Then your population is exceeding 50 peasants, there's no need to build additional buildings from the first group - it's better to just focus on bread production (as it is the most effective method of food acquisition), and leave the rest of the buildings and refrain from building more of them. You can also set automatic purchase of the remaining food types (apples, cheese, meat) so that you will get a popularity boost from food variety.
5. If you are planning on keeping a relatively high level of ale / religious distribution (x2 - x3), you should remember about a golden rule - build 1 Brewery and 1 Candler's Workshop for every 10 peasants present in your castle (by having a population of 50 you will need 5 Breweries and 5 Candler's Workshops). It will allow you to keep the distribution of those goods on a high level, and you should still be able to sell some of the surplus on the market.
6. Try to build in a neat and tidy manner - do not place your buildings randomly, scattering them around the whole map. Not only that it will slower your goods production (not to mention that you won't be able to find anything...), you will also waste a lot of precious space - and you surely will find about the fact that every centimeter counts in this game, especially when it comes to oasis.
7. Place your production buildings in appropriate places. Resource production, excluding stone and iron (which cannot be placed anywhere else but on deposits), or to be more specific wood producing buildings (Wood Camps) should be placed near trees - this will make your woodcutters' route a lot shorter, making their work more efficient. Food producing buildings should be placed as close to the Granary as possible - your peasants will carry the food a lot faster, allowing them to produce more food in general. Buildings turning one material into another (like Mill turning wheat into flour, or Brewery turning hop into ale), or those which "make something out of thin air" (like Candler's Workshop) should be placed near Stockpile. Buildings which produce armament should be as close to the Armory as possible. Placing your buildings in a proper way will allow you to boost your productivity - if your enemy won't be doing the same, you will have a huge advantage over him. A thing to remember - if you have the opportunity, you should always place every mentioned building between Stockpile, and the place from which your peasants extract various resources, or to where they are carrying a final product. Wood Camps will work the best when placed between Stockpile and a source of wood, Bakery will be most efficient when between Granary and Stockpile - this rule applies to armament producing buildings as well (Stockpile - Armory).
8. Do not place your buildings on top of one another. It's crucial to build in a tidy manner, without scattering construction around the map, but you should not build all your buildings on top of one another. There's one reason for that - the risk of fire. When one of your buildings catches fire (regardless if it was caused by natural means or by enemy's attacks), all the buildings in the closest neighborhood (those which "stick to it") will be set ablaze in a matter of seconds. This way, you can have dozens of burning buildings in a short while, which is almost impossible subdue, resulting in a loss of massive amount of wood and/or stone. If you don't want to make any space in between them, you should at least split different groups of buildings.
9. Regardless of whether you care about space in between buildings, you should always invest into wells. Building a few of them is an insignificant cost, and having them when a fire starts will allow you to rescue at least some of them, saving massive amounts of resources.
10. Don't build your Hovels in advance - if you need a few more peasants at most (to fill in some buildings, or to just increase the army recruitment comfort) build one, two hovels at most. Building several of them at once will increase your population by a huge amount, which will in turn increase the expenditure of food, ale and candles, which can collapse your economy in a matter of seconds.
11. If you need to recruit a massive amount of soldiers in a short span of time, you can use a little trick. Make sure that you have all the required materials, like weapons and gold (you should always prepare more gold that you are willing to spend), and a sufficiently large supply of food, candles and ale. Next, decrease your taxes to a level in which you are starting to give away gold (bribes - the bigger the better), increase your food rations (to max, if you are able to) and set the religion / ale distribution to maximum. This way you will be losing huge amounts of gold, food, ale and candles, but your popularity should significantly exceed +100. Thanks to that, you will have a rapid peasant inflow (about 2 peasants each second), which will allow you to recruit hundreds of soldiers in only a few minutes. Remember to make sure that you are well prepared for that. You can also use a "lighter version" of this maneuver, changing food, taxes, ale and/or religious ratios to your own preferences, but you should always opt to get at least +100 popularity. This method is extremely effective when you've just lost your entire army and you have huge supplies of resources and gold to spend.
12. Read the Units section to learn about various types of units, their strengths and weaknesses. It will allow you to counter your enemies easier - which is especially easy to do, as there is no fog of war in the game and everything is visible.
13. While building walls, try to do so in a way so that your walls are at least two-grid wide - so that you can post at least two rows of units on them. It will allow them to withstand a lot more attacks from enemy's siege equipment, and you will be able to set more units on the walls.
14. Additionally, try to build as many towers as possible, especially Grand Towers. They are more effective and resistant than even several layers of walls, and they give a huge height advantage, allowing your archers to get rid of most siege equipment before it even reaches your walls.
15. If you decide to build some "turrets" (Tower Mangonel / Ballista / Haybale Launcher), build them several grids behind the wall. Those buildings are extremely expensive, and at the same time very vulnerable to attacks (one spear from a Man-at-arms will destroy it), and given their extreme range (especially that of a Ballista), they will still be able to attack most of their targets, while being relatively safe.
16. Try not to leave gaps on the walls - try to mount them carefully. Each gap in the wall can lure an Assassin attack, who can climb up your walls and get past it without you even noticing (Assassins are invisible to the enemy, unless they are close to them) - they can make a lot of mess in your base, open a gate, or even kill your Lord if there is enough of them.
17. Placing a Sergeant at Arms and/or a Healer in between a group of Archers / Crossbowmen standing on a wall is a good idea. The first one will increase the armor of your troops, while the second one will heal any wounds sustained by them. It's quite a large, though one-time cost, but with a big attack intensity of the enemy forces it should return pretty quickly. Don't forget about their main appliance though - Sergeant at Arms are suited to be on the front lines, together with Swordsmen and Templar Knights.
18. Don't you ever attack with your Lord! He's the strongest unit in the game, it's true, but the moment he is killed is the moment your game ends. Keep an eye on him all the time, surround him with a wall (even if you've already built a wall around your whole base) and leave a few stronger units in his company to protect him from a surprise attack (performed by enemy Assassins, for instance).
19. Your most important buildings, like Granary and Stockpile should always be protected at all costs - try to build them behind a wall so that the enemy won't have an easy access to them. Losing the former one will result in a serious penalty to your popularity - you will have to deal with lack of food, and even if you build a new one, it will take a few moments to start gathering food again.
20. Don't leave your siege equipment without protection! Even the most basic, weakest and cheapest units in the game can make a short work of them, and most of siege equipment cost enormous amounts of gold. Your machines are especially vulnerable to enemy Macemen, Sassanid Knights and Whirling Dervishes, who all have the Charge ability.
21. While planning to attack the enemy defenses, send a squad of cannon fodder and "run around" the wall a little bit - this way you will be able to pick any traps (like Man Traps). After you've made sure that the terrain is relatively safe, send your heavy armored units (Swordsmen or Templar Knights) before you use any siege equipment. It will allow to focus at least some of the fire on your knights, increasing the time your machines will have to make short work of enemy walls and towers. Always try to send your armored units first, regardless of whether you have your siege equipment or you are planning on using a huge squad of archers to clear the walls of off enemies.
22. While sending your troops to the walls, make sure to mix them up, so that there's plenty of Archers, as well as Crossbowmen there. The former are excellent against swarms of fragile troops, and because of their huge range, they are especially good with dealing with the enemy siege equipment. The latter have shorter range, they take more time to fire their projectiles, but their attacks are many times stronger than those of Archers, meaning that Crossbowmen are extremely effective against armored targets. There's really no need to send melee units on your walls (besides Sergeant at Arms), because there are no units (besides Assassins) capable of climbing your walls, like it was in previous installments of the game.
23. Your Trebuchets, even when they are mainly used for offense, are extremely effective when used in defense as well. Placing several of them just behind your walls (from your side, obviously) will allow you to get rid, or at least severely damage enemy siege equipment before it even reaches your walls (one stone fired from it can destroy most siege equipment). You can also use them to fire carrion, so that enemy forces marching towards your walls will be weakened, if not killed.
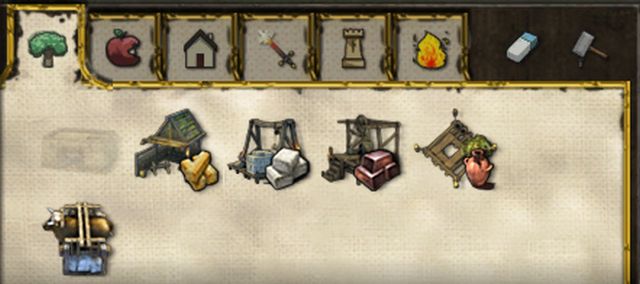 Industry buildings
Industry buildings are used for basic resource production, such as wood, iron, stone or pitch. From this building tab you can access buildings such as: Stockpile, Wood Camp, Stone Quarry, Iron Mine, Ox Tether and Pitch Rig.
One of the most important places in your castle. Stockpile is used to store all (besides food) resources you currently have. In contrast to the first installment of the game (and the Crusader expansion) you only need to build a single Stockpile, because it has infinite storing space. Most of the mission (and all the skirmishes) start with you placing the Stockpile.
Additionally, by selecting the Stockpile and a specific resource, you will be able to buy, or sell it on the market by clicking the appropriate button. In contrast to the previous Stronghold games, you can buy and sell resources without placing the Market first.
Cost: 20 wood, 1 peasant
Produces: 16 pieces of wood
A building allowing you to cut trees and then process it into wood. It's probably the most important production building in the game - without wood you won't be able to construct most of the buildings. Wood Camp is extremely cheap, so it's generally worth to build at least a few of them (from 3 to 6, or more, depending on the mission and your needs).
Remember to place your Wood Camps near trees - this way you will decrease the travel time of your woodcutter, increasing the production rate of the building at the same time. You can also place your camps near the Stockpile, which may not be the most efficient way in terms of production, but it will allow you to protect your buildings, as well as woodcutters, from the enemy attacks.
Cost: 50 wood, 3 peasants
Produces: 32 pieces of stone
This building allows you to extract stone. Stone is mostly used to construct base defenses - walls, gates, and towers. Those buildings require enormous amounts of stone, so it's a good idea to invest in and build your quarries as soon as possible. You should opt to avoid buying stone on the market - given the astronomical amounts of stone required to construct certain buildings it's not very profitable.
Stone Quarries can only be placed on 'special places', or to be more exact, on stone deposits - they are easy to locate (green color on the mini-map). You will also need Ox Tethers to transport the stone to your Stockpile. You should construct several of them for each Stone Quarry you have, as it can take more than a minute to transport the stone to your Stockpile, depending on the distance - during the time there's no free Ox Tether near a Stone Quarry, the building won't be producing any stone. Each Stone Quarry can support up to 4 Ox Tethers, but most of the time you won't need so many of them (2 will suffice in most cases).
Placing a Stone Quarry (or a few of them), along with Ox Tethers, will cost you hundreds of pieces of wood and several peasants, but stone production is way more profitable than buying stones off the market.
Cost: 50 wood, 2 peasants
Produces: 8 pieces of iron
A building which is very similar to the previously described - the only difference is that it produces iron instead of stone. Just as with Stone Quarries, Iron Mines must be constructed on iron deposits, which can be easily located (reddish color on the mini-map). You will also need Ox Tethers to transport iron to your Stockpiles - you should build them in accordance to the distance to your Stockpile, but 2 of them for each Iron Mine is more than enough.
Iron is required to produce most of the weapons (and the only type of armor) in the game, which will be needed to hire troops, so a proper iron production is crucial. In extreme situations (being under siege, for instance) you can buy iron from the market, but it's price is quite high. Remember to sell any excess iron on the market, as it's one of the best ways to gain lots of gold.
Cost: 40 wood, 1 peasant
Pitch Rig is probably the least useful building from this category, as the pitch produced by this building can only be used to construct defenses. Pitch can be used to construct Pitch Ditches, which can be lit by your Archers (with the help of a Brazier), or to build an Oil Smelter, which allows your engineers to spill boiling oil on your enemies.
Pitch Rig can only be placed on swamps, which are hard to locate and access to them is extremely limited (most of the time they are on the enemy troops route and will be constantly attacked). If you can't afford a constant inflow of pitch, you can hire Oil Pot Throwers from the Mercenary Camp - those units aren't as effective as engineers, but they are cheaper and more reliable.
Cost: 15 wood
Ox Tether, as it was previously mentioned, is used to transport stones from Stone Quarries and iron from Iron Mines to your Stockpile. It's a very useful building, without which you wouldn't be able to produce both resources.
Ox Tethers are cheap and they do not need peasants, meaning that you should build as many of them as possible, to maximize the stone and/or iron production rate.
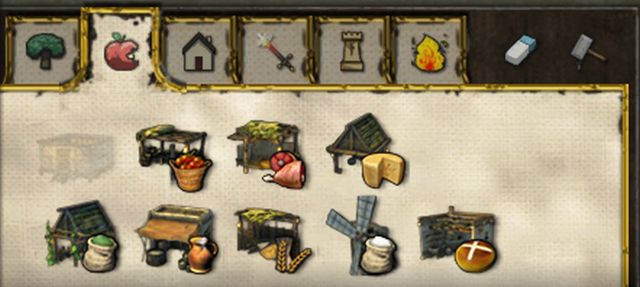 Food-production buildings.
One of the most important groups of buildings in the game. Without an efficient food production, you practically won't be able to run your castle - a sudden but temporary shortage of food isn't a problem, because you can counteract it by lowering taxes or increasing ale / religion distribution, but a long-term deficiency of food is brutal to your economy.
From this building tab you can access buildings such as: Granary, Apple Orchard, Pig / Sheep Farm, Hop Farm, Brewery, Wheat Farm, Mill and Bakery.
An equivalent to the Stockpile described in the last section, with only a slight difference - it serves the purpose of food storage only. It's the second building (immediately after the Stockpile) which must be built before you can continue expanding your castle. You should locate it as close to the oasis as possible, to decrease the distance your workers need to cover in order to deliver their goods.
Given the fact, that all the food is stored in this tiny building, you must protect it at all costs. If the enemy destroys it, or if it's burned to the ground, you will be charged with a huge popularity penalty because of shortage of food. More on the food topic and its distribution can be found in the proper section of this guide.
Cost: 20 wood, 1 peasant
Produces: 8 apples
The first food production building available, and at the same time being the cheapest of all. After construction and then some time, the peasant working at the orchard will start gathering the apples, which then will be transported back to the Granary, making them available to all your people. Apple Orchards can only be placed on fertile ground - in other words, in an oasis.
Apple Orchard requires the least amounts of resources, it starts to give fruits the fastest, but it has one major drawback, as it produces the least food from all the food production buildings - the peasant working at the orchard will deliver 8 apples to the Granary. Apple Orchards are the most effective as a startup building, at the beginning of the mission / skirmish, when you need a fast, remotely reliable food source, and you lack the resources to build more advanced buildings. In the 'late game' it's more profitable to just buy apples off the market instead of building additional Apple Orchards.
Cost: 50 wood, 1 peasant
Produces: 12 meat
Both of those buildings are mostly the same - the only difference is that the Pig Farm is available to the 'Crusader' side, while the Sheep Farm is reserved for the 'Arabic' side. Both of those buildings manufacture the same good - meat. After placing the building you will need to wait several dozens of seconds until it reaches its 'peak', and then the peasant working inside will start transporting meat to the Granary.
Pig Farm / Sheep Farm is more expensive than Apple Orchards, but at the same time is more efficient - it produces 50% more food during roughly the same time. However, just like the previous building, Pig Farms / Sheep Farms should only be constructed at the first several minutes of the mission / skirmish - when your population goes beyond 100 they won't be able to keep up and building additional farms won't change that situation. It's better to just buy meat off the market and focus on bread.
Cost: 60 wood, 1 peasant
Produces: 10 cheese
Dairy Farms allow you to make cheese. As usual, you will have to wait a certain amount of time after you've placed the building before it starts its production. Afterwards, a peasant will carry cheese to the Granary. In contrast to the previous building, Dairy Farms produce slightly less food while the building is more expensive, but they need less time before another delivery can be made, making this building more effective in a long run.
Dairy Farm is, like all the previous buildings, only effective during early game, when you need a quick and cheap source of food - like apples and meat, cheese's production effectiveness drops significantly with the increase in population. By then you should just focus on buying cheese off the market and make more bread instead.
Cost: 25 wood, 1 peasant
Produces: 4 hop
One of the two buildings allowing you to manufacture "exclusive" good - ale (the other being the Brewery). Hop Farms, like the name suggests, allows the production of hop, which is then transported to Breweries, ending up as ale. As most of the buildings from this group, Hop Farms must be placed on fertile grounds (oasis).
Hop Farms are mandatory - the prices of hop on the market all way too high for you to be able to buy enough of them, and the ale itself is a perfect way to increase your popularity. Each one of your Hop Farms can maintain up to 4 Breweries, provided that your peasants won't have to walk through the whole map to deliver hops.
Cost: 50 wood, 1 peasant
Produces: 1 ale for 1 hop
Breweries, as it was previously mentioned, allow you to 'convert' hops into ale, which has a huge impact on the popularity in your castle.
Breweries can be placed anywhere on the map, but the best place for them is near your Stockpile, to minimize traveling distance, thus maximizing the efficiency. The amount of ale you need depends on your own preferences, but if you want to keep ale distribution on a relatively high level (+2 or even +3), an unwritten rule states that you need 1 Brewery for each 10 peasants in your castle (5 Breweries with a population of 50, 12 with 120, etc.), which should allow you to keep the distribution relatively high and you should still end up with some surplus, which can be sold on the market.
Cost: 60 wood, 1 peasant
Produces: 4 pieces of wheat
Wheat farm is one of the three buildings (together with the Mill and Bakeries) which form the most efficient food production chain in the game. Wheat Farm, as the name suggests, allows you to grow wheat, which is transported to the Mill, and then, in the form of flour, ends up in a Bakery, where it's processed into bread. Wheat Farms can only be placed on fertile grounds (oasis).
You should consider building Wheat Farms as soon as you have the proper wood production set up, as well as a couple of Apple Orchards and Pig / Sheep / Dairy Farms constructed. The reason for that, is that it takes some time to set up an efficient bread production, not to mention that it will require you to spend several hundred pieces of wood to construct the required buildings, which isn't the easiest things to achieve at the beginning of a mission / skirmish (you can change that by buying wood off the market). Each Wheat Farm is able to support 3-4 Bakeries, provided that you set them up near your Stockpile (wheat and flour is delivered to the Stockpile, not to the Granary).
Cost: 200 wood, 1 peasant
Produces: 1 piece of flour for 1 piece of wheat
The Mill serves the purpose of turning wheat into flour, which is then used in Bakeries to make bread. The Mill is one of the most expensive buildings in the game, so it's crucial to set it up as close to the Stockpile as possible, to maximize its efficiency. A single Mill should be able to support 3-4 Wheat Farms. It will be able to provide flour to about a dozen of Bakeries. If you are planning to set up more Bakeries (10+), you should consider constructing an additional Mill.
Cost: 50 wood, 1 peasant
Produces: 36 bread
Without a doubt the most effective food producing building in the game - it can generate up to 36 pieces of bread in one single go. It requires you to build several expensive buildings, on which you will be forced to spend hundreds of pieces of wood, but it's definitely worth the pay.
Bakeries should be located either near the Granary, or the Stockpile (the best solution would be close to both of those buildings) to maximize production. Bakeries are effective during the whole mission - it's the only food type which is profitable to manufacture even when you have hundreds of peasants in your castle.
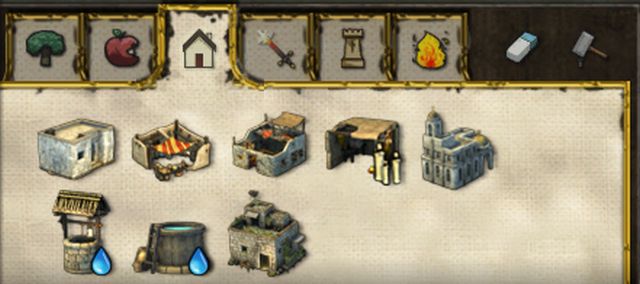 Town buildings.
This group of buildings allow you to increase the maximum population in the castle, as well as offer a great deal of functionality buildings, such as the Inn, which purpose is to distribute ale, or the Church / Mosque, which 'distributes' religion in your castle - both of those buildings affect your popularity significantly.
From this building tab you can access buildings such as: Hovel, Market, Inn, Candler's Workshop, Church / Mosque, Well, Water Pot, Apothecary.
Cost: 20 / 35 / 50 / 65 wood
Produces : increases population by 2 / 4 / 6 / 8
The Hovel is one of the most important buildings in the game. Each time you build one increases your maximum population in your castle, allowing you to man more buildings, or offering an easier army production.
Depending on the amount of wood spent, you can build Hovels of different sizes, which offer a different amount of space for peasants. Remember to restrain from building too many of those buildings in one go when you do not need any excess of peasants, because each new peasant in the castle increases food / ale / religion consumption. When a Hovel is destroyed or sold, you will lose the additional space it offered. If you happen to lose several buildings this way, you may be loaded with a negative overpopulation modifier.
The size of the Hovel is dependent on the distance from your main building - if you build it next to it, it will offer the biggest space (8), but if it's built far away, it will be reduced to 2.
Cost: 200 wood
Function: automatic purchase / sale on the market
The Market, in contrary to the previous installments of the game, isn't required to purchase or sell resources on the market - it will only allow you set those processes automatically, under specific conditions. More on this topic can be found in the appropriate section of this guide.
Cost: 200 wood, 1 peasant
Function: ale distribution
This building serves the purpose of ale distribution in your castle. In contrast to the previous installments of the game, in Stronghold Crusader 2 you will only have to build a single Inn to achieve the full effect. More on this topic can be found in the appropriate section of this guide.
Cost: 50 wood, 1 peasant
Produces: 6 candles
Candler's Workshop allows you to manufacture candles, which are then uses in religious rites. This building can be compared to the Brewery - it creates a different product, but the function is fairly the same. Candler's Workshops can be placed whenever you want them to be, but should be near the Stockpile to maximize the production rate. The amount of candles you need depends on your personal needs, but if you want to keep religion distribution on a relatively high level (+2 or even +3), an unwritten rule states that you need 1 Candler's Workshop for every 10 peasants in your castle (5 Candler's Workshops with a population of 50, 12 with 120, etc.), which should allow you to keep the distribution relatively high and you should still end up with some surplus, which can be sold on the market.
Cost: 300 gold, 100 stone, 1 peasant
Function: performing religious rites
Those buildings are fairly the same, but each of them is available to different side of conflict - Church for 'Crusaders', while Mosque is Arabian-only. They serve the purpose of performing religious rites in your castle. In contrast to the previous installments of the game, in Stronghold Crusader 2 you will only have to build a single Church / Mosque to achieve the full effect. More on this topic can be found in the appropriate section of this guide.
Cost: 20 wood, 1 peasant / 100 wood, 2 peasants
Function: fire extinguishing
Both of those buildings are used to combat one of the most annoying aspects of the game - fire. Doesn't matter if it was caused by the enemy (Slaves, for instance), or from natural causes, you don't want to be dealing with it no matter what - but if you are forced to, it's a good idea to have a way of fighting it.
Both of those buildings come in handy if such a situation rises. The first one is manned by a single peasant, while the second with a duo, meaning that Water Pot is more effective, but a lot more expensive. The choice is yours, but you should have at least a few of them built in strategic positions (near some important buildings, like Bakeries).
Cost: 200 wood, 1 peasant
Function: preventing diseases
The last building from this category, but of equal importance. The Apothecary offers you the services of a physician, allowing you to prevent, or heal off diseases, be them of natural causes, or when the enemy decides to swarm you with carrion. If such a thing happens, the physician will heal any infected peasants and get rid of that negative popularity modifier as soon as possible.
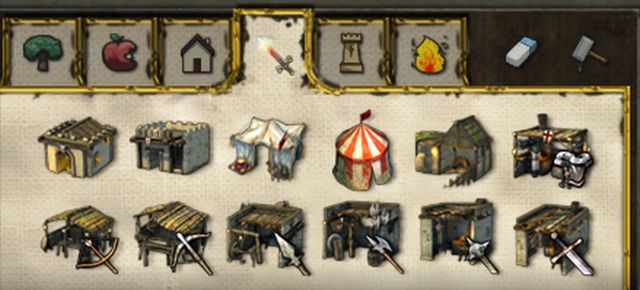 Military Buildings.
Military buildings are used to recruit your troops and to manufacture and store elements of attire. From this building tab you can access buildings such as: Mercenary Post, Armory, Barracks, Fletcher's Workshop, Artillator's Workshop, Poleturner's Workshop, Forge Workshop, Blacksmith's Workshop, Weaponsmith's Workshop, Armourer's Workshop, Stable and Siege Camp.
Cost: 20 wood, 20 stone
Function: weapon stockpile
The Armory is the equivalent of the Stockpile - it stores all your soldiers' elements of attire. Just like your Granary, you should protect it at all costs - when your enemy manages to destroy it, you will lose all the weapons inside, which can be compared to thousands of gold coins.
It should be placed as close to the Stockpile and weapon production buildings as possible.
Cost: 25 stone
Function: Crusader units recruitment camp
Barracks are used to recruit units from the Crusader side, provided that you have the required elements of attire, gold and peasants to hire the troops. From this building, you have access to troops such as: Conscript, Man-at-Arms, Archer, Ranger, Crossbowman, Maceman, Pikeman, Swordsman, Templar Knight and Sergeant at Arms.
Apart from recruitment camp, the Barracks can be used defensively - you can connect it to a part of your wall and send Archers / Crossbowmen at the top of it.
Cost: 120 gold
Function: Arabian units recruitment camp
The Mercenary Post is the counterpart of the Barracks - it allows you to hire mercenaries, provided that you have enough gold and peasants to do so. From this building you have access to troops such as: Slave, Slave Driver, Arabian Archer, Horse Archer, Oil Pot Thrower, Healer, Arabian Swordsman, Assassin, Whirling Dervish and Sassanid Knight.
Cost: 300 gold
Function: siege equipment recruitment camp
Siege Camp allows you to construct various siege equipment, provided that you have enough gold and peasants to do so. From this building you have access to equipment such as: Burning Cart, Mantlet, Hussite War Wagon, Battering Ram, Fire Balista, Catapult, War Wolf, Trebuchet.
Cost: 150 gold, 100 wood
Function: horse breeding
This building allows you to breed horses, which are then used as a mount for your Templar Knights. Every Stable can have a maximum of four horses - the ones used as a mount must be killed in order for the building to "create" new ones.
The building is very expensive, and providing a sizable squad of Templar Knights with horses requires a number of them. Additionally, horses are extremely vulnerable in combat and can be killed in a few shots from enemy Archers / Crossbowmen, making this building unprofitable.
Cost: 50 wood, 100 gold, 1 peasant
Produces: 1 element of attire for every wood or iron spent
A group of buildings allowing you to manufacture elements of attire, which are required to hire most of Crusader units. Those buildings are as follows:
There are two resources required to manufacture weapons:
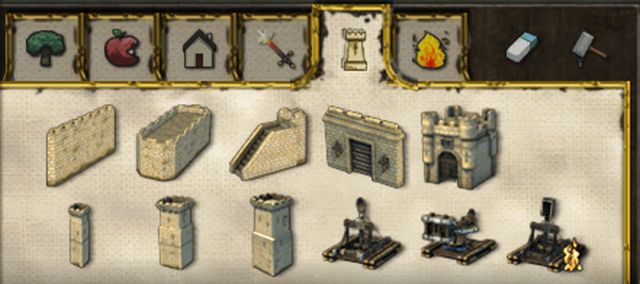 Castle buildings.
All of the buildings from this group are used in a defensive manner, increasing your defenses and preventing the enemy from entering your castle. From this building tab you can access buildings such as:
Cost: 3 stones / 7 stones
Function: restriction of enemy movement
Both of those buildings serve the same purpose - they allow you to separate a section of your castle, preventing the enemy from accessing it. The difference is that the Stone Curtain Wall does not allow you to mount it with your army - it only acts as a barrier. The regular Stone Wall, although more expensive, can be mounted by your army, provided that a staircase is connected to the wall.
Cost: 10 stone
Function: allows access to the walls
Stairs can be connected to a wall and/or a tower, which will your troops access to those constructions - without them you won't be able to send them there, or get them off walls / towers if the situation requires it.
Cost: 25 stone/ 50 stone
Function: accessing the other side of the wall
The gate allows your troops to access the other side of the wall - without it, your army and/or peasants wouldn't be able to access the part which was surrounded by a wall. There are two differences between those buildings - the Curtain Gatehouse is cheaper and less durable and you can't send your troops at the top of it. The Gatehouse has higher resistance and can be mounted by your troops.
Cost: 60 stone / 100 stone / 180 stone
Function: can be mounted by your army to gain height advantage
Towers allow you to increase your castle's defenses. They can be mounted by most of your units, but the most desired ones are Archers / Crossbowmen - thanks to the height advantage those buildings give, they will be able to get rid of a much more numerous enemy invasion.
There are three types of towers:
Cost: 300 gold, 100 wood
Function: increases the effectiveness of the defenses
There are three buildings in this group:
Buildings from this group are used as a supplement to your defenses. They have one of the longest ranges in the game and each serve different role. Given their extreme costs you should think twice before setting them up - also, remember that they aren't the most durable buildings in the game and should be build behind the walls.
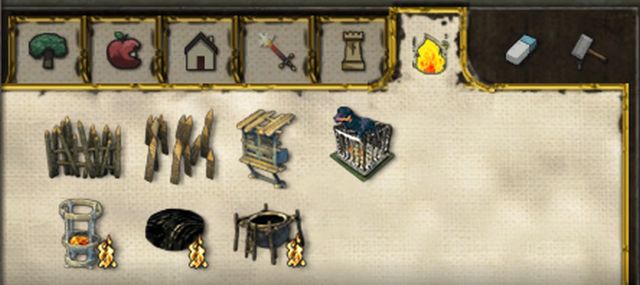 Castle Defenses.
The last group of buildings, which, like the previous one, focuses on increasing the defenses of your castle. From this building tab you can access buildings such as:
Cost: 15 wood
Function: preventing access
Barricades are used to prevent enemy access to a certain area - they will be forced to either burst through them, or to bypass them - the latter can be used to force the enemy to move in a certain way.
Barricades prevent the melee units from attacking anything that's behind them, but they don't offer any protection from ranged attacks.
Cost: 15 gold, 2 iron
Function: a deadly trap
Man Traps are an extremely effective defensive mechanism, which can decimate dozens of enemy troops in a matter of seconds. In contrast to "Pits" which were available in the previous installments of the franchise, a single Man Trap can kill more than a single unit - their numbers can go over a dozen per single trap! Excluding the most durable units in the game, the Man Trap will kill every unit in a split second. A line of them built in key locations (by the gate, for instance) will surely save you on numerous occasions. Another advantage of this building is the cheap price.
Cost: 50 wood
Function: protection of units stationed on the walls
Hoardings can be built on Stone Walls only. After placing them, they will protect nearby allied troops from enemy fire, significantly decreasing the amount of damage they will sustain. It's an effective defense mechanism, especially when you can't afford a line of Grand Towers and you still want to protect your troops.
Cost: 40 gold, 40 wood
Function: releases war hounds to attack nearby targets
War Hounds, just like in the previous installments of the franchise, allow you to release hounds upon your enemies. There are 4 war hounds in each cage, and they will be released the moment a unit approaches them, whether it's an ally or an enemy. Upon release, the hounds will attack their nearest target - it means that your troops can easily be caught by your own dogs. A good way to release the dogs without suffering any casualties is to use Assassins - hounds seem to be unaware of their presence and will not attack them.
Unfortunately, this construction is more of a curiosity - despite the quite low price, the hounds released from the cages are extremely weak, especially when they are forced to fight a huge squad, or even a single heavy armored swordsman.
Cost: 20 gold
Function: allows your Archers to use fire arrows
The Brazier allows nearby Archers to ignite their arrows before firing them. It's required to ignite Pitch Ditches - otherwise they won't be able to do it. You can't place them one atop of another, but they have a relatively wide reach (which defies logic). Remember, that Crossbowmen won't be able to use it. If you don't plan to use Pitch Ditches, you can just forget about the existence of this building.
Cost: 6 pitch
Function: the possibility to ignite an area
Pitch Ditches are the nightmare of anyone who have played any strategy game - after ignition, they will set a large area ablaze, inflicting huge amounts of damage (most of units will burn to death in a matter of seconds). Pitch Ditches are invisible to your enemies (and you can't see theirs) so it's relatively easy to surprise your enemies.
Unfortunately, despite their effectiveness, the game itself limits their functionality - each map allows you to build defenses in a small square around your castle, where you can place your defensive buildings (Pitch Ditches included). If you want to place them in front of your walls, so that the enemy troops will burn before they even reach your walls, you will have to sacrifice a part of that terrain. Remember to keep a distance of 6-7 spots between them, so that they won't ignite from each other.
Cost: 100 gold, 3 peasants
Function: manufactures boiling oil
Oil Smelter allows you to manufacture boiling oil. You will need pitch for that, which can be gathered from the swamps. After placing the building you will have to wait several seconds before the cauldron is filled with oil and then boiled. Afterwards you will be given two engineers carrying huge cauldrons filled with boiling oil - they can empty their container at the heads of your enemies.
It works in a similar manner to a Pitch Ditch - after pouring out the contents of the cauldron, the ground will be set ablaze for several seconds, severely wounding anyone unfortunate enough to be standing there. Afterwards the engineer will go back to the Oil Smelter to refill his cauldron.
 Popularity indicator, which can be located in the top right corner of the screen.
Popularity, as in all of the previous Stronghold installments, is one of the key aspects of the gameplay. It directly influences the development of your castle, because it affects your peasants behavior - if you want to recruit any troops, or fill your buildings with workers, you will have to keep it above 0.
The popularity is influenced by a number of different factors, such as:
The popularity is described with three different icons:
As you can see, the popularity has a huge impact on the gameplay, because without new peasants you won't be able to hire any army, nor fill your production buildings. Mastering this mechanic is crucial in critical situations - when you have a huge surplus of food, gold, ale and/or candles, you can increase the distribution of those resources (while lowering the taxes - or even give your peasants a bribe) to significantly increase your popularity. It comes in handy in situations where you need to quickly hire (or simply rebuild) your army - with a huge, positive popularity rating, you should be getting up to 2 new peasants each second! In other scenarios (when you are not pressured), all you have to do is to keep your popularity above 0 - prevent it from going below 0 at all costs, as well as do not keep it much higher than 0 if you don't need peasants at the moment, as you will simply be losing resources.
Apart from that, the popularity is affected by the amount of free space in your Hovels - if there are any free spots, you will gain a slight increase. Additionally, some accidents, like enemy invasion, may decrease your popularity, not to mention random events, which can both yield positive, as well as negative effects.
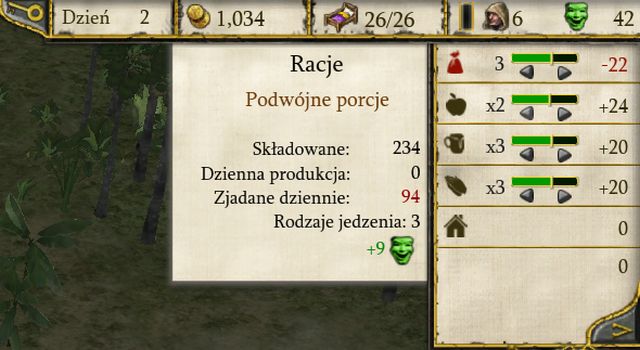 Food rations window.
Food is one of the most important resources in the game, given its huge impact on the popularity rate in your kingdom. Depending on the size of rations you decide to set, the influence of food will be different:
Food rations settings have an impact on the speed of food consumption. If your people consume 50 pieces of food in 'normal' rations, they will consume 100 in double, 150 in triple, and 25 pieces in 1/2 a day. Depending on the abundance of food in your Granary you can influence the level of effect it has on the popularity - if you have a huge surplus of food, instead of selling it on the market, you can just increase the rations (the bigger the popularity, the less time you need to wait for a new peasant).
Additionally, the amount of food types also influences your popularity. This looks like this:
It means, that sometimes it's more beneficial to decrease the size of rations when you are instead able to get a bonus for food diversity - it will significantly decrease the food consumption, the influence on the popularity will be similar, and the food surplus can be sold on the market.
 The tax system in the game.
The gold is without a doubt the most important resource in the game. With it you can buy everything - food, building materials or weapons, not to mention that it's used in army recruitment. It also comes in handy in critical situations - if you are left without food and don't have enough candles / ale, you can give your peasants a bribe. It will cost you some gold, but your peasants will still come to the kingdom, enabling you to stabilize your economy faster.
Gold is a factor which has the greatest influence on the popularity. You can do so by managing the level of taxation in your kingdom - your peasants can be charged with taxes, which will decrease the popularity but is one of the most important sources of gold inflow, or you can decide to give a bribe, which will cost you gold but significantly increases your popularity. The table of influences is as follows:
It's obvious, that you won't be using 'Generous bribe' at all, because despite the huge bonus to popularity, it will cost you immense amounts of gold. The same problem is with the 'diabolical taxes' - they offer insane amounts of gold, but the negative impact on your popularity is so large that you won't be able to keep it on such a high level for extended periods of time. You would have to set your food rations to maximum, not to mention similarly high levels of ale / religion to be able to generate new peasants - the problem is, that it would be cheaper to just set the taxes, food, ale and religion on lower levels and sell the surplus of resources on the market and you would probably still get more gold out of it.
There are two ways of gold acquisition: taxation, which was described above, and selling resources on the market. The second option comes in handy in 'late game', when you have a well-functioning economy and an excess of resources which can be sold on the market for some gold.
 The food rations window also shows the amount of food you produce.
Food is divided into four primary types - Apples, Cheese, Meat and Bread. Each of those buildings require different buildings to manufacture (Bread requires a group of them). Because of the importance of this resource, it's extremely important to make sure that you have a sufficient food production chain set up.
Contrary to the previous installments of the game, buildings from this group can only be built on fertile grounds, i.e. oasis. As you will soon notice, there's always not enough space in oases, which forces you to make some difficult choices: do you want to stuff your buildings close to one another and risk an uncontrollable fire, or set them apart from one another but waste the precious space.
In case of three out of four food types - apples, cheese and meat - you will only need a single building for each of them to manufacture them. Those are Apple Orchard, Dairy Farm and Pig / Sheep Farm (depending on your side). After building any of those buildings you will only have to wait a set amount of time and your peasants will automatically start producing the appropriate resources and will transport them to your Granary.
It's a different matter with bread - to bake it, you will need Wheat Farms, Mills to convert wheat into flour, and Bakeries, which in turn make the final product, bread, out of the flour. It's the most expensive solution, but it awards you with the biggest food inflow. Fortunately, there's no difference in quality between food types, as each and every one of them has the same impact on your peasants.
At the very beginning of the mission it's worth to build a couple of Apple Orchards (the closer to the Granary the better, as it will decrease the delivery time) and 1-2 Dairy Farm and Pig / Sheep Farms. You won't be able to start up food production from scratch, as it requires hundreds of pieces of wood to build the required buildings. There's an exception to this rule - if you start a mission (skirmish or a multiplayer one most probably) with thousands of gold coins, you can simply buy the wood on the market to begin bread production.
A proper food production level is crucial in achieving success, as it has the second highest influence on your popularity (taxes being the most influential). In 'late game' (when your population exceeds 100), you shouldn't worry about making meat, cheese and apples anymore - you won't be able to keep up with the consumption, and those goods can be bought on the market to get the food diversity bonus. Instead, you should focus on bread production.
Ale and candles are both 'exclusive' goods - you will be able to live without them, but the availability of those resources makes one's life easier. Thanks to them, and with the help of an Inn, as well as Church / Mosque, you will be given a huge positive bonus to your popularity - additionally, lack of those resources won't have a negative effect on your peasants, like food does.
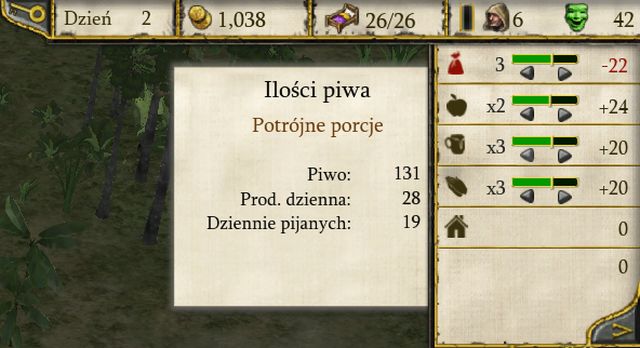 Ale production and consumption...
Food production (and consumption) requires you to build three buildings - Hop Farms, which, as the name suggests, grow hops, Breweries, where the hop is turned into ale, and finally an Inn, where ale is distributed to your peasants. In contrast to previous installments of Stronghold, you do not need to build ' an army of Inns' to satisfy the needs of your peasants - all you have to do is to construct a single one. An efficient ale production requires you to build 1 Hop Farm for each 3-4 Breweries.
 And the same thing with candles.
Candles are easier to manufacture than the previously described ale - all you need to built is just a single building, Candle's Workshop, to be able to manufacture the good. Another advantage of candles is that they are 'made out of nothing' - you do not need any resource to be turned into candles. In fact they are a free (if you don't take building cost into consideration) and effective way of providing yourself with a popularity boost.
Similar to the case with the Inn, you will need to build a Church (or a Mosque, depending on your side) to be able to perform religious rites. In a way it's similar to the Inn - you will have to build a single Church / Mosque (in contrast to the previous installments of the game, where you needed several of them) to be able to satisfy the needs of your peasants.
Of course, there's a little catch - you won't be able to manufacture enough ale / candles by building a single Hop Farm + Brewery or Candler's Workshop, especially if you intend to keep their distribution on a higher (x2, x3) level. The influence is as follows:
As you can see, by using both of those goods you can give your kingdom a huge boost to popularity. It's hard to tell how many of them you will be able to manufacture. If you want to keep their distribution on x2, or x3 levels, remember to build one Brewery and one Candler's Workshop for every 10 peasants in your castle and you should be able to sell some surplus on the market.
 Most of the buildings from this group is used for weapon production.
Weapon production is of equal importance to the previously described mechanics - unfortunately, you can't win a mission (except of a few campaign mission) without defeating and killing the enemy Lord. To do so, you will need a strong army, and to recruit it you will need the appropriate elements of attire.
The problem is, that the buildings are relatively expensive (especially at the beginning of the game when you lack gold) and you won't be able to build all of them right off the hook - each one of those buildings cost 50 wood and 100 gold, which can be a problem in the first minutes of the mission. However, you should still build them, as buying the resources they manufacture is several times more expensive than those buildings - some of the elements of attire cost more than half of the building's price for a single item!
To manufacture weapons, you will need one of those resources:
As you can see, after you've spent the resources to construct a specific building, you won't have to (almost) spend additional resources to manufacture weapons - the case is simplified even more because of the fact, that Wood Camp produces 12 pieces of wood at a single time, and Iron Mines net you 8 iron with a single ox transport. It means, that you will get the investment back relatively quickly - unused (or simply unwanted) elements of attire can be sold on the market, and those items have one of the highest prices in the game! It's one of the most important gold sources when you have weapon production set up.
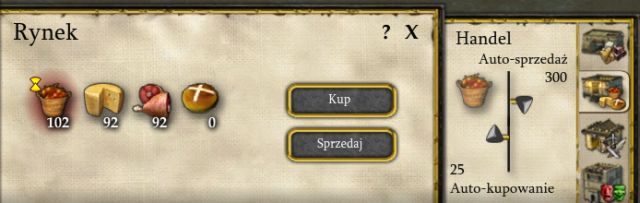 The market window, allowing you to set up the automatic purchasing and/or selling process.
Like with all the previous installments of Stronghold, this one gives you the access to market, which will allow you to purchase and sell items. In contrast to other games from this franchise, you won't be forced to construct a Market building to trade resources - you can do so from the very beginning. Constructing the Market enables you to set up an automatic purchasing / selling process, which will be described in this section.
Unfortunately, the market is extremely unintuitive - the fact, that buying wood costs 10 gold, while selling it will give you 5 (2:1 ratio) does not mean that it will be the same with other resources, and very often the differences are extreme. The best example can be flour - you can buy it for 240 for 10 pieces of the good, while the same 10 pieces can be sold for 10 gold only (24:1 ratio!). It means, that you will have to learn the prices of all the goods before you decide to buy / sell them off the market.
Below you will find a table representing all the resources in the game, together with their buying and selling prices:
Good
Purchase price
Sell price
Typical amount
Wood
10 gold
5 gold
10
Stone
40 gold
10 gold
10
Iron
40 gold
20 gold
5
Pitch
40 gold
25 gold
10
Wheat
180 gold
5 gold
10
Flour
240 gold
10 gold
10
Hop
40 gold
4 gold
10
Ale
60 gold
20 gold
10
Candle
60 gold
12 gold
10
Apple
12 gold
6 gold
10
Cheese
22 gold
6 gold
10
Meat
18 gold
6 gold
10
Bread
26 gold
6 gold
10
Bow
80 gold
40 gold
5
Crossbow
80 gold
40 gold
5
Armor
160 gold
80 gold
5
Sword
160 gold
80 gold
5
Mace
160 gold
80 gold
5
Pole
80 gold
40 gold
5
Pike
120 gold
60 gold
5
To make it simpler to understand the table, I will give an example. To be able to sell a specific good, you will need the required "'typical amount" (listed in the last column) - you won't be able to sell a fraction of it for a smaller price. Selling, for instance, 5 Poles will give you 40 gold, while buying them will cost you 80 (again, you can buy the multiple of the amount stated in the last column, which in this case is 5). You can buy (or sell) "4 packs" (20 Poles, 40 Wood pieces, etc.) of a given resource by holding the Shift button and clicking the specific good.
As you have probably guessed by now, some goods are more beneficial to buy from the market, because they are quite difficult to manufacture (like apples, cheese and meat, or even wood), whereas some of them should never be bought on the market (like wheat and flour).
As far as buying Wood is cheap and quite beneficial, you should never buy Stone on the market, especially when you are trying to build a wall. The problem lies with the quantity of the resource required to construct them (not the price of the stone itself) - to construct walls you will need hundreds, if not thousands of pieces of Stone. In this case it's way more profitable to just construct additional Stone Quarries and wait for stone delivery.
One of the most profitable goods you can buy on the market is food. In the 'late game' you won't be able to keep up with apples, cheese and meat production, meaning that you won't be able to keep a diversity bonus (+15 with 4 food types) on all the time. Instead of building 10 buildings for each food type, you can just set an automatic purchase order on the Market.
After constructing this building, activate it by left clicking on the Market. An additional window will appear - inside, you will be able to set the process of automatic purchase / sale of a given good. All you have to do is to select one (apples, for instance) and with the help of two arrows on the right side set:
Automatic sale and purchase can be used to each and every good in the game - in 'late game' it allows you to focus on building and commanding army, and it's one of the main sources of gold income in your castle.
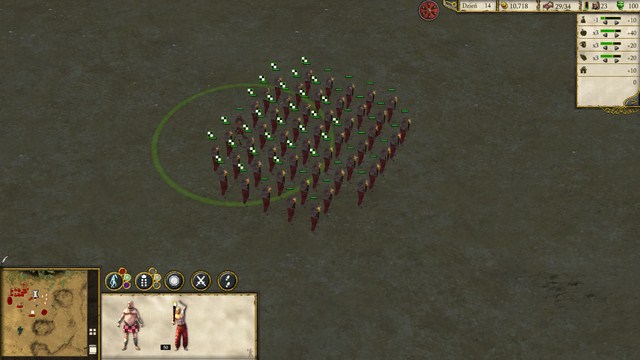
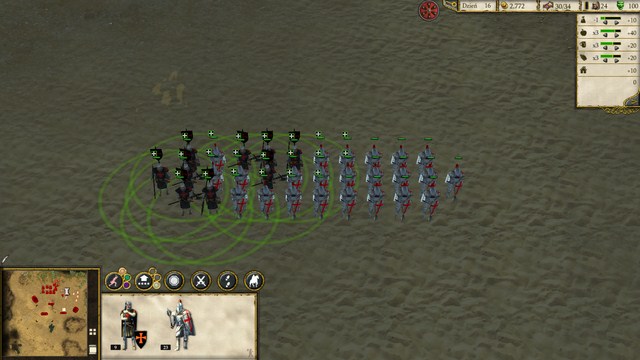
 Crusader units.
Crusaders are one of the two "sides" of conflict in the game (together with the Arabic side, which only has access to mercenary units). They are composed of the best known units in the franchise and of the medieval era. In contrast to mercenaries, you will need weapons, apart from gold, to hire them. It means that those units are harder to hire, but at the same time they are way stronger than those from the Mercenary Camp.
Crusaders have access to 10 types of units: Conscripts, Man-at-Arms, Archers, Rangers, Crossbowmen, Macemen, Pikemen, Swordsmen, Templar Knight and Sergeant at Arms.
Cost: 4 gold
The primary Crusader unit, which is the only one which does not require a weapon to hire - all you need is a tiny amount of gold. It's, unfortunately, connected with the fact, that the unit is one of the weakest in the game - it won't be able to kill anything on its own, and even sending a huge group of them won't be able to deal any significant harm.
However, because of the fact that this unit is so cheap and does not require any weapon, it comes in handy in the beginning of the mission / skirmish, to make a small group which will be able to push back enemy advances. After several minutes, however, you will forget of its existence - especially because you can use that gold (with a little addition) to hire cheap mercenaries, which are way more effective.
Cost: 6 gold, 1 Pole
Still a relatively weak unit, but definitely stronger than a Conscript - unfortunately, it's significantly more expensive and it requires you to have a weapon (pole) to hire it. Men-at-Arms are hardly of any threat to most units in combat, unless it's another Man-at-Arms, a Conscript, or a Slave.
They, however, have an interesting ability - before they engage enemy in melee combat, they are able to hurl a javelin, dealing quite a lot of damage before the fights starts for real. Javelins have a relatively short range, but because of bugs in the game, they are able to hurl them even at the highest towers - additionally, they are able to deal surprisingly high damage, compared to an arrow from an Archer.
Cost: 12 gold, 1 Bow
The first long-distance fighting unit in the game, as well as the one you will probably be using the most. The cost of recruitment of an Archer is relatively low and those units are splendid against lightly armored enemies - sending them on the walls / towers will give your enemies a really hard time to burst through your defenses.
There are two flaws of Archers - the first one is that they are extremely ineffective in melee combat and most of units (even Conscripts and Slaves) can easily kill them if they manage to get close enough. The other thing is their low damage against heavily armored targets - they have problems with every unit equipped with any armor. Fortunately, they make up for that flaw with their incredible firing range - excluding some of the siege equipment, there's no unit in the game that can outrange them.
Additionally, Archers (like Arabian Archers and Rangers) have a special ability called Volley. It allows them to fire upon a specified area until the order is canceled. What is important about that ability, is the fact that they are able to shoot at places normally beyond their reach, like behind walls - in normal scenario their arrows would just hit the wall. It's not the most accurate and dangerous attack in the game, but it certainly may come in handy.
Cost: 8 gold, 1 Bow, 1 Sword
The ranger is a hybrid between a Man-at-Arms and an Archer - it's quite effective at a long-range combat, while still being able to hold his own in melee range. Unfortunately, those abilities come with a relatively high recruitment price - to make a single Ranger, you will need both a Bow and a Sword, which makes this unit quite unprofitable, especially in 'late' game, when the battlefield is flooded with armored targets.
Additionally, Rangers (like Arabian Archers and Archers) have a special ability called Volley. It allows them to fire upon a specified area until the order is canceled. What is important about that ability, is the fact that they are able to shoot at places normally beyond their reach, like behind walls - in normal scenario their arrows would just hit the wall. It's not the most accurate and dangerous attack in the game, but it certainly may come in handy.
Cost: 12 gold, 1 Armor, 1 Crossbow
Crossbowman is the Archer's "older brother" - equipped with a better weapon, dealing several times more damage. What is the most important about this unit, is the fact that it can easily break through heavily armored targets. The armor allows the Crossbowman to withstand quite a beating, making them harder to eliminate when stationed on a wall / tower.
Unfortunately, every unit has some flaws. The first one is shorter firing range (compared to an Archer), which makes them effective on a medium range only. Shorter range makes this unit ineffective at sieges - before your Crossbowmen manage to get into firing range, enemy Archers will deal significant damage to them. The second thing is their movement speed - Crossbowmen are one of the slowest units in the game, meaning that you must protect them from enemy melee attacks at all costs, because they won't be able to get away like Archers can. Their last flaw is their attack speed - they have several times the damage of an Archer, but they take more time before they can attack again.
Cost: 10 gold, Mace
Macemen are the iconic unit in the Stronghold franchise. It's one of the strongest offensive units in the game, especially if you want to employ a hit & run tactics. The main reason behind that is their special ability - Sprint Attack. After selecting Macemen and issuing an attack order, they will begin a short charge at the enemy, during which they have significantly increased movement speed and the first attack after a charge deals additional damage. It works especially well during sieges, when you want to get rid of dangerous enemies (Archers, Crossbowmen), as well as in the defense of your castle - you can send a group of Macemen, destroy the enemy siege equipment and quickly retreat them behind your walls again. Sprint Attack requires several seconds to be ready again, which is signaled by a 'lightning' icon next to their health bar. Apart from their mobility, they can inflict quite large amounts of damage - only the most expensive units in the game can deal with a group of Macemen - provided that they can keep up with their movement speed.
As with every units in the game, they have their flaws. The first one is their durability - they do not wear any armor, meaning that even a small group of archers can inflict serious damage. The second one is the recruitment cost - you will require Iron to manufacture Maces, which are required to recruit them, and iron can be difficult to acquire on some maps.
Cost: 10 gold, 1 Pike, 1 Armor
Pikemen are the best defensive units in the game - they have the highest durability from all the units. The only units that can deal with them are Templar Knights and Sergeant at Arms (because they have several times higher damage, while still being less durable), but they are several times more expensive. Pikemen, with their Set Spikes ability are extremely effective against mounted units, as well as against units with the Sprint Attack (Macemen, Sassanid Knight, Whirling Dervishes). After selecting "Hold position", Pikemen will dig their pikes into the ground and stay still, awaiting the arrival of enemy. Every enemy charging at them will be dealt huge damage.
Set spikes ability is extremely effective against mounted units, as well as those with the Sprint Attack ability.Unfortunately, Pikemen are extremely slow, making them effective only in defense. Despite their huge durability, they deal moderate damage, so they should be used to defend the castle, by blocking key positions (like a narrow passage, or entry to your Lord).
Cost: 40 gold, 1 Sword, 1 Armor
Swordsmen are one of the strongest units in the game - the only units stronger than them are Sassanid Knights, Templar Knights and Sergeant at Arms, but all of those units are several times more expensive. This unit is extremely durable, and, contrary to Pikemen, is still able to dish out a lot of damage. They are perfectly suited as the first line of your offense, as even a huge group of enemy Crossbowmen will have problems with killing them. If you lack the resources to recruit Templar Knights and/or Sergeant at Arms, it's the best unit in the game, both in offense and defense - although the latter one should still be given to Pikemen, given their lower recruitment cost.
Swordsmen have a single flaw - their movement speed. Similar to Pikemen, they are extremely slow, meaning that they will take a serious beating before they reach their destination. But after they managed to do so, they will show what they are capable of. They are also extremely vulnerable to hit & run tactics, as they are unable to keep up with most of units in the game.
Cost: 150 gold, 1 Mace, 1 Armor
Without a doubt the strongest unit in the game, second only to the Lord himself. It's basically an upgraded version of a Swordsman - it has even greater durability and can deal more damage. This unit is not threatened by almost anything in the game - even enemy Crossbowmen will have to fire hundreds of belts to take a single one of those tanks, while Archers are completely ineffective. Even Tower Ballistas won't change that fact - they would be able to kill a small group of them, but they won't be able to keep with a larger group. Unless the enemy floods you with troops, the only thing that can fight on equal grounds is another Templar Knight or the Lord itself.
Templar Knights have the same flaw as their 'cheaper' version, Swordsmen - movement speed. It can be nullified by building a stable and mounting the Templar Knight. Each Templar Knight can mount a horse, making this unit several times more deadly and eliminating the only flaw it had. The only real drawback of this unit is the recruitment cost - it's gigantic and you won't be able to recruit a lot of those units, until you've established a really strong economy.
Cost: 150 gold, 1 Armor, 1 Pike
The last unit from the Crusaders camp is closely related to the Templar Knight. Their recruitment cost is very similar, aside from a difference in weapon they use. Sergeant at Arms is a little weaker and deals slightly less damage.
 Sergeant at Arms is able to increase the defenses of nearby allied units.
What makes this unit so special is its ability - Buff Units. Every allied unit standing near the Sergeant will have its armor doubled - it should be obvious how that can change the outcome of a fight! Similar to Templar Knights, Sergeant at Arms are sluggish and can be easily outmaneuvered by most units in the game - unlike their fellow knights, they can't mount horses.
Sergeant at Arms are extremely effective when paired with Templar Knights - extreme durability of knights is doubled, meaning that those units are practically unkillable. Remember, that Sergeant at Arms won't increase his own defense - you will need a second one to do so.
This unit is extremely versatile, performing both in offense, marching together with Templar Knights, as in defense - you can set them up on walls / towers to increase the durability of your Archers and Crossbowmen.
 Mercenaries units.
Mercenaries are the only units available to the Arabic side of the conflict. The biggest difference between them and the units available to Crusaders is the fact that they don't need weapons for recruitment - all they need is gold, but they need it several times more. In one way it limits the player, who does not have enough gold, but it also allows you to recruit huge armies in a matter of seconds, provided that you have enough gold in your treasury.
Mercenary units are relatively weaken than those of Crusaders (especially the most expensive ones), but they are easier to recruit, because you don't have to manufacture weapons for them. It means that you will have more numerous, though weaker, armies at your command.
There are 10 different mercenary units in the game. Those are: Slave, Slave Driver, Arabian Archer, Horse Archer, Oil Pot Thrower, Healer, Arabian Swordsman, Whirling Dervish and Sassanid Knight. Mercenary units are hired at a Mercenary Post.
Cost: 5 gold
The cheapest unit available at the Mercenary Post. Alone, Slaves can't do anything - their nonexistent durability makes them die from a single attack. In high numbers, which is easy to achieve, given their extremely low costs, they can cause some turmoil, if the enemy won't be able to stop their advances. The reason is simple - they are able to set fire to buildings. All you have to do is to force your way through and watch as the enemy buildings burn to the ground.
Slaves are made to make the lives of your enemies miserable - most of the maps in the game won't let them protect their whole bases with a wall (especially Stone Quarries and Iron Mines, very often oases too), meaning that a small group of Slaves can cause some huge resource losses to the enemy. If the enemy is cramping his/her buildings tightly, setting them ablaze can end the whole match - there's nothing more demotivating as watching dozens of buildings burning and being unable to do anything about that.
Cost: 80 gold
Slave Driver on his own is relatively weak - he's fairly expensive, and he can't hold his own in combat even against weaker units. However, he has a very interesting special ability - Buff Units. It allows him to increase the armor of Slaves (only Slaves, unlike Sergeant at Arms who can buff every unit) in his close vicinity, making them harder to kill.
Slave Driver increases the durability of nearby Slaves.Sending a Slave Driver together with several dozens of Slaves to attack the enemy is extremely effective, especially in the beginning of the game, when enemy has not yet surrounded his whole base with a wall. Thanks to increased durability, Slaves will have an increased chance to get to the enemy buildings and set them under fire.
Cost: 18 gold
The equivalent of an Archer from the Crusader side. The biggest merit of this unit is the extremely low recruitment cost - it requires almost the same amount of gold to hire as the Archer, while the latter requires bow as well.
There are two flaws of Arabian Archers - the first one is that they are extremely ineffective in melee combat and most of units (even Conscripts and Slaves) can easily kill them if they manage to get close enough. The other thing is their low damage against heavily armored targets - they have problems with every unit equipped with any armor. Fortunately, they make up for that flaw with their incredible firing range - excluding some of the siege equipment, there's no unit in the game that can outrange them.
Additionally, Arabian Archers (like Archers and Rangers) have a special ability called Volley. It allows them to fire upon a specified area until the order is canceled. What is important about that ability, is the fact that they are able to shoot at places normally beyond their reach, like behind walls - in normal scenario their arrows would just hit the wall. It's not the most accurate and dangerous attack in the game, but it certainly may come in handy.
Cost: 30 gold
Horse Archer can be simply described as a normal Archer mounted on the back of a horse, with all the disadvantages and most its advantages. This unit is extremely mobile, being one of the fastest in the game, meaning that most enemies won't be able to keep up with them. The other one, and probably the biggest virtue of this unit, is the fact that Horse Archers can fire at their enemies while moving, making them ideal in hit & run tactics to harass your enemies.
Unfortunately, this unit has more flaws than good points. First things first, lack of armor penetration. It does almost zero damage against heavily armored units, making this unit effective only against weaker ones. The second one - firing range. Horse Archers have significantly lower attack range (which is similar to that of a Crossbowman), making them extremely vulnerable to enemy Archers, which is in turn what makes them ineffective at sieges. Another thing is their recruitment cost - if you are planning to make a small squad to harass your enemy, it may work. If you, however, want to make a huge striking force, their recruitment cost make that extremely ineffective - you can hire almost twice as many Arabian Archers. The last and the most important thing is their durability - or lack of thereof. Horse Archers are only effective against lightly armored melee units - even a smaller group of Archers, not to mention Crossbowmen, can make a short work of them.
Cost: 50 gold
An interesting, but quite dangerous unit. Oil Pot Throwers are able to hurl a cask filled with oil, which sets a small piece of land ablaze, inflicting serious damage to any unit standing on it. This weapon is lethal against lightly armored units - it can burn them to death in a matter of seconds - but it can also be used against the most durable units, still dealing quite a lot of damage, especially because the most durable units in the game are also the slowest one, meaning that it will take some time before they can get away from the burning ground. Oil Pot Throwers are effective when stationed on the walls - they can get rid of those pesky soldiers who managed to get under your walls and are now hacking their way in.
This unit has a couple of flaws. The first one is their short range - Oil Pot Thrower must get really close to the target before he can hurl his cask, exposing himself to attacks (not to mention that Archers will rip them to shreds). Additionally, there's a high risk of attacking your own units, as the pots have quite a wide range and are hard to control. Another serious drawback is the fact, that those units aren't very good in groups - the fact that you throw a single oil cask, or 50 of them at once, doesn't change much and units standing in the fire will still take the same damage.
Cost: 80 gold
Definitely one of the most original units in the game. Healers lack any combat ability, they cannot attack any units or buildings. Instead, they have a special ability called Healing Radius. It allows the Healer to restore lost health of a unit in his close vicinity. Given the fact that there's no way to regenerate health in any other way, it's the only method of restoring the health of your units. This makes the Healer one of the most interesting defensive units in the game - it can be stationed on a wall, near Archers / Crossbowmen to negate the wounds they sustain, or simply be placed deep behind your walls to heal your units (which, for instance, were just used in an attack or defense).
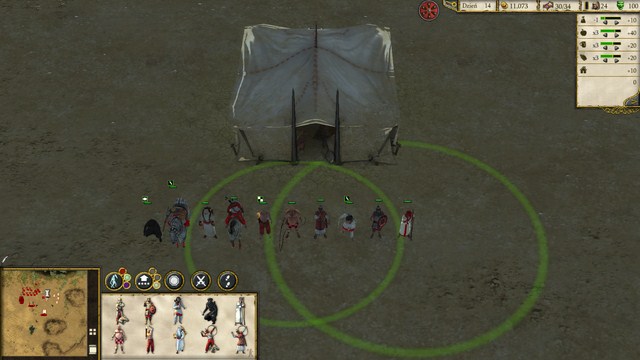 Healers will heal single unit in a circle around them.
Healers are not suited for sieges. There are couple of reasons behind that. First things first - they have low movement speed, making them vulnerable to attacks, which is even more problematic as they have one of the lowest durability in the game. The last flaw is the healing itself - contrary to the name, or the animation around the Healer, it's not a healing circle, as it allows the Healer to heal a single unit, not a group of them. The healing is also quite slow, which is especially severe when you are trying to heal stronger units - it may take over a minute to heal a single one!
Cost: 60 gold
Arabian Swordsman is the Crusader counterpart. He moves with the same sluggish speed, but he's slightly less durable and weaker than a normal Swordsman. It's compensated with lower recruitment costs - it requires slightly more gold, but you don't need a Sword and an Armor to hire one.
Arabian Swordsmen are the backbone of the Arabian army - they are practically the most durable unit from that side. The only flaw is the mentioned movement speed and slightly lower stats than a 'normal' Swordsman, which makes them quite vulnerable to enemy Crossbowmen, as well as Tower Ballistae.
Cost: 60 gold
A very useful unit, but not because of its combat ability. The effectiveness of this unit lies in its special ability - Stealth. It allows the Assassins to remain undetected and invisible to the enemy unless they get very close to their troops. The process of "unstealthing" is represented by an appropriate icon near the health bar of an Assassin - a closed eye means that the unit is invisible, partially opened means that the enemy is starting to notice it, while a fully opened eye means that the Assassin has been spotted. They can enter stealth again if they are able to get away from the enemy.
Their stealth ability would be nothing without their another ability, which allows them to climb enemy walls. You can order them to climb enemy walls - after a few seconds they will open the gate, allowing your troops to enter the enemy castle. Given the lack of Ladderman, who were present in previous installments of the game, they are the only way to get past walls without bursting through them with siege equipment, especially when the wall is not protected by Archers and they are able to climb it up without betting noticed.
Assassins, unfortunately, aren't very useful in combat - they are overshadowed by quite a number of units and should not be used in open combat. Their best purpose is to sneak past enemy defenses. They can also be used to Assassinate the enemy Lord - a group of over 10 of them can easily bring a Lord down in a matter of seconds.
Cost: 140 gold
One of the offensively strongest units in the game, especially when dealing with a large group of moderately armored targets. This is due to their special ability - Area Attack. After issuing an attack order, Dervishes will start whirling (hence their name) with their weapons, inflicting serious damage to every enemy around them. Thanks to this ability they are able to defeat a group of enemies several times stronger than them - provided that the enemies will be close to one another.
Another ability of Dervishes is the Sprint attack, the same available to the Macemen. After selecting Dervishes and issuing an attack order, they will begin a short charge at the enemy, during which they have significantly increased movement speed and the first attack after a charge deals additional damage. It works especially well during sieges, when you want to get rid of dangerous enemies (Archers, Crossbowmen), as well as in the defense of your castle - you can send a group of Dervishes, destroy the enemy siege equipment and quickly retreat them behind your walls again. Sprint Attack requires several seconds to be ready again, which is signaled by a 'lightning' icon next to their health bar.
One of their drawbacks is their recruitment cost - 140 gold for a single unit is a lot and you won't be able to make a huge group of them, unless you are able to generate insane amounts of gold. Their main flaw is their durability - despite the damage they are able to deal, they are extremely vulnerable to ranged attacks, as well as melee, if the enemy is able to force them to use their area attack before the combat starts.
Cost: 300 gold
Without a doubt the most expensive unit in the game. Additionally, it's the fastest unit available, as they are mounted on horses. Their mobility is further increased because of the Sprint Ability - the same as with Macemen and Whirling Dervishes. In their case, it allows them to move at astonishing speeds, enabling them to cover extreme distances in a matter of seconds. It comes in handy when you want to make a lightning fast attack, to, for instance, get rid of a group of unprotected Archers, Crossbowmen or siege equipment - if the enemy won't react in time, there's no chance that he will prevent you from killing them off.
They are also quite formidable in open combat - regular Crusader Swordsman won't stand a chance and only Templar Knights and Sergeants at Arms will be able to defeat them, but they won't be able to catch them. There are two major drawbacks to this unit - the first one being the absurd recruitment cost. Unless you have huge amounts of gold stored in your treasury or you are able to generate vast quantities of it in a short time, you won't be able recruit many of them. The other one is their vulnerability to Pikemen - they can literally kill themselves off Pikemen if they charge at them when the latter have their pikes set up.
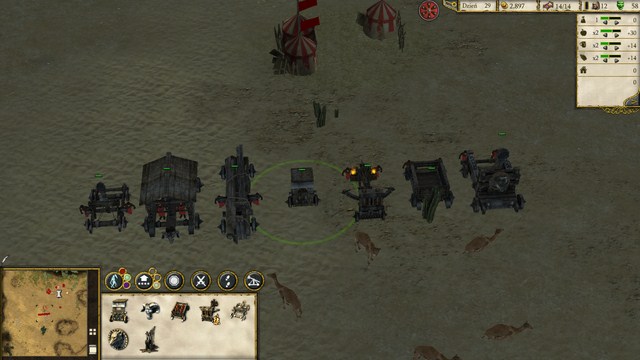 All of the siege equipment available in the game.
Siege equipment, like in any medieval strategy game, plays a crucial role, as it allows the player to break through the enemy defenses, which regular units are incapable of. Constructing siege equipment is a lot easier in Stronghold Crusader 2, as you don't have to build engineers beforehand - all you need to do is to have enough gold and peasants and you are ready to go.
Cost: 80 gold, 1 peasant
Mantlets are the equivalent of mobile shields from the previous installments of the game. They lack any offensive capability, but they are serving another role - they provide cover from projectiles to units around them. All the troops in a circle around them are completely protected - they won't sustain any damage from ranged attacks, as the Mantlet is absorbing all the damage. Once the Mantlet is destroyed, the units will lose their protection.
Their only drawback is the vulnerability to close combat - even the weakest units can easily destroy them in a matter of seconds. Mantlets are extremely effective at sieges, as they allow you to protect your more vulnerable units (Archers and Crossbowman in most cases) from enemy ranged fire.
Cost: 200 gold, 1 peasant
A unit which can be simply called a troop-carrier. It allows a small group of units enter itself, which can then be moved safely to another place. All the troops inside are protected from enemy attacks - if the wagon is destroyed, all the units will jump out of it unharmed.
It would be a boring unit if it was all about it. Units stationed inside that have ranged attacks - Man-at-Arms, Archers, Arabian Archers, Rangers, Crossbowmen and Oil Pot Throwers - can fire at will from the inside of the wagon while it is moving! This way you will be able to create a fairly durable unit of great firepower, which is extremely effective at clearing enemy walls off troops - several wagons filled with Archers / Crossbowmen can easily take out a bigger group of enemy shooters.
This units has two flaws - the first one being vulnerability to melee combat, which is even more evident because of their low mobility, making them unable to run away from all but the slowest units. Another one is the vulnerability to Ballistae attacks - a few bolts from those machines can turn a wagon into a pile of wreckage.
Cost: 150 gold, 1 peasant
Battering Rams are an ideal choice if you are just planning to burst through the enemy gate and swarm the enemy castle with your troops, instead of dealing with all the defenders stationed on the walls first. Those slow-moving siege machines are brutal against enemy gates and walls - they only need a few seconds before they can break through enemy defenses. They are also one of the cheapest siege machines in the game, with a price of 150 gold.
Their main drawback is their movement speed - it's practically the slowest unit in the game. It makes Battering Rams vulnerable to enemy fire, as well as to quick attacks, performed by Macemen, Whirling Dervishes or Sassanid Knights.
Cost: 200 gold, 1 peasant
Fire Ballista is the equivalent of the ones that are stationed on the walls (Tower Ballista). They can fire their deadly bolt over a long distance, offering pin-point accuracy - even the most mobile units won't be able to avoid getting shot by them. Additionally, this unit does immense damage - even the most heavily armored targets will lose a huge portion of their health with each shot. Last but not least, their bolt are able to set enemy buildings on fire (if they won't destroy it in one shot). They are effective at sieges, as they can easily take out Archers from a relatively safe distance.
Their only flaw is their durability, which isn't high - a few shots from enemy Ballista, or a concentrated fire from Archers and/or Crossbowmen can turn a Fire Ballista into a pile of rubbish in a second.
Cost: 100 gold, 1 peasant / 500 gold, 1 peasant
Catapults are well known to almost anyone. They are the low-budget siege equipment, allowing you to burst through enemy defenses. They aren't as effective as Battering Rams in terms of power, but they are able to fire from a relatively long distance, staying safe from most attacks. Additionally, they are extremely cheap, so you will be able to construct large quantities of them, making their job a lot easier.
Catapults have a couple of flaws, of course. They are ineffective in smaller groups (below 3 units) and on their own can't do anything at all - a single Catapult won't be able to destroy a single wall. The second one is similar to all siege equipment - vulnerability to melee combat.
War Wolf is basically an upgraded version of a Catapult. This unit is bigger, stronger, more durable and able to destroy defenses faster, but at the same time is 5 times more expensive, making it quite unprofitable.
Cost: 400 gold, 1 peasant
Without a doubt the most effective siege machine in the game. Trebuchet has extremely long attack range, able to outrange almost anything in the game (only a Tower Ballista can hope to reach it), not to mention its firepower - a single boulder hurled from a Trebuchet can destroy almost any building, dig a huge hole in a wall or severely damage a tower. Additionally, it's the only machine that allows you to fire carrion at your enemy - when it hits the ground, it releases a gas cloud, inflicting damage to anything in its range, which is extremely lethal to enemy units. Additionally, they are effective in defense - a Trebuchet set up just behind your wall will be able to destroy enemy siege equipment before it can be used, or severely wound enemy army with the carrion it fires.
This effectiveness comes with a price - except for the War Wolf, it's the most expensive unit in the game. The second thing is the lack of mobility and the need to set it up before it can fire. They are also less accurate than Catapults and may need a few shots before they can hit their target.
 Main menu of the game offers a variety of game modes.
The game offers various single players modes, as well as online skirmishes, with other players. As far as the single player modes goes, they are as follows:
Playing Stronghold Crusader 2, especially during online matches, you will have to think of an action plan, you will have to think fast, anticipate movements of your enemy and so on. In short, you need to choose a tactic.
Your choice should be depend on a couple of variables:
As you can see, there are different criteria which may affect the tactic you've decided to choose. If there's a peace timer set, each player starts with huge army and a small amount of gold, no one will be able to rush attack the other one. On the other hand, if the game is set in a way that every player starts with low amount of goods and no army, and no peace timer was set, you can easily build a small army and rush attack your adversaries.
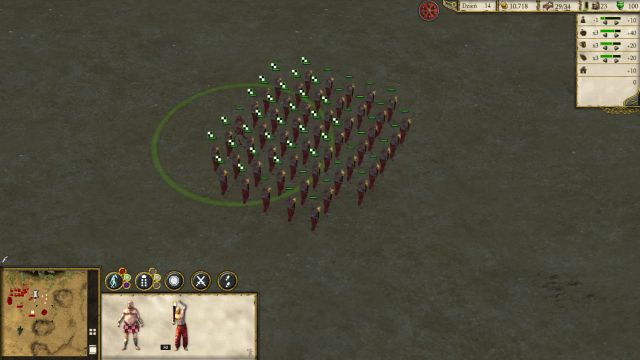 Those units can be used in a rush attack.
A tactic relying on performing a quick, sudden attack, using a small, cheap and very mobile group of units, at the very beginning of the game. You will also need to remember about expanding your castle, as the rush attack may prove to be ineffective and the enemy may want to take revenge. Those conditions should be met in order to employ this tactic:
You should decide if you want to use this tactic depending on the amount of points stated above, which turned out to be true - the less there are, the bigger the chance that a failed rush attack can cost you a whole game.
After the game starts, set your Stockpile and Granary. Construct a Mercenary Post and set your food rations to a maximum (and give a slight bribe, if needed). Now recruit 2 Slave Drivers and several dozens of normal Slaves (from 30 to 50). After you've done it, set your rations to normal levels again and send your army in the direction of your enemy's base.
Before the army reaches the base, build:
If you have the required wood:
Use the stones to build your castle - you can first surround your Lord with a single wall and a small gatehouse, to prevent your enemies from what you are doing - a rush attack.
Your army should now be getting closer to the enemy defenses. If the enemy managed to surround his base with walls, use your Slaves to set fire to his buildings - all you have to do is to ignite it and move on to another one.
If you've received some units at the beginning of the mission, you should have taken them with you - use them to kill enemy Archers, who should be standing on the walls. Get rid of all the resistance - the enemy shouldn't be expecting a rush attack, so there's a chance that he won't be prepared and his army will be scattered. After you've set the enemy buildings on fire, order your troops to attack the walls surrounding the castle. You can also try to destroy the enemy Granary, but it's very hard to do so with fire alone.
Depending on the outcome of your actions, you should:
In the meantime, try to finish building your walls, so that you have most of your base surrounded by them, and try to set up bread production - build 2-3 Wheat Farms, a Mill and 3-4 Bakeries. Build additional Bakeries and Wheat Farms if needed. Try to set up higher taxes to get that gold income.
If you managed to burst through the enemy walls and you've gained access to the enemy Lord, send your Arabian Swordsmen to kill him off, which will end the game (or just one of the players). If you couldn't finish him off, you can either continue harassing him with smaller groups of soldiers, supported by siege equipment, or to just slow the pace down and move on to the second strategy in this section.
 A good, prosperous castle is the basis of this tactic.
A totally different approach from the one described in the previous section. It employs the focus on setting up your economy and defenses first - you shouldn't think about attacking enemy before that happens. This tactic is less risky than the last one and it assumes that the "peace timer" was turned off.
Depending on the amount of starting resources, as well as gold, your first constructed buildings will differ slightly - maybe not differ, but it will simply take more time to set them up. You should start with:
Afterwards, as you start to get wood deliveries:
The buildings should be built in the exact same order. Of course, if you've started with a huge amount of gold, you can use it to buy a few hundred pieces of wood from the marked and place them all in an instant - it will surely speed up the expenditure of your castle. Remember to build walls as well - if you don't have the required amount of stone, try to at least surround your Lord, and don't forget to build a gate so that your peasants can move in and out.
You should also build Barracks and an Armory - you should've started with the basic amount of weapons, allowing you to hire a small group of Archers.
Do not buy stones! They are extremely expensive because of the fact that buildings need huge amounts of them - surrounding your whole base with a single line of wall will cost you hundreds of stone, which will turn out to be thousands of gold. It's better to just buy some extra wood and construct additional Stone Quarries.
After you've constructed the mentioned buildings, you should start ale / candle's production. Construct:
After the production starts, try to collect enough resources to build a Church / Mosque and an Inn. With the increase in your population, remember to build additional Breweries / Candler's Workshops.
Now it's the time to construct weapon production buildings. Construct:
Those are the basic buildings which will allow you to recruit Archers, Macemen and Crossbowmen. You should now build other buildings according to your own preferences, as everyone likes to use different units and tactics. Try to at least recruit over a dozen of Archers / Crossbowmen and send them on the walls to protect yourself from smaller attacks.
After you've set up a working economy, your castle is surrounded with walls and your Armory gets frequent deliveries of weapons, it's time to make your army. The choice of units depends on the amount of gold and weapons in your possession, as well as your personal preferences. Below you will find 'a way' which is the most effective to attack with, but probably the most boring one.
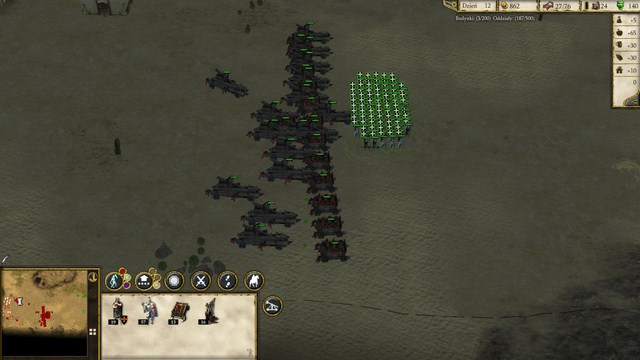 After seeing an army like this everyone will turn into a chicken...
It focuses on a couple of strongest, as well as the most expensive units in the game. It's an unstoppable attack force, but it requires tremendous amounts of gold, weapons and other goods to prepare.
The backbone of your army will consists of four units: Templar Knights, Sergeant at Arms, Archers (or Crossbowmen, or even a mixture of both) and Trebuchets (or Catapults / War Wolves).
Of course, the more army you manage to accumulate, the better the effect, but you should stick to this proportion. For every 10 units in your army, hire:
For instance, if you have an army consisting of 100 units, the most optimal composition would be: 30 Templar Knights, 10 Sergeant at Arms, 40 Ranged units and 20 siege units. To make it even stronger you can use Hussite War Wagons to protect your ranged units.
If you don't want to spend so much resources, or you want to be playing more tactically, you can use this formation: Arabian Swordsmen, Assassins, Arabian Archers (in Hussite War Wagons), supported by Catapults / Ballista / Battering Ram. This way isn't that expensive, and in some cases it may prove to be more effective. Additionally, you won't have to manufacture / buy a single weapon, as it only uses gold to hire units. Afterwards, you should:
As you can see, there's a whole lot different approaches to sieges - the only limitation is the imagination, the amount of resources you can spend and the state of enemy's defenses.
Win:
The first mission of the campaign, which gently introduces the player into Stronghold Crusader 2 gameplay mechanics. It's also the only mission in the game in which you won't have to fight anyone or anything, so you can relax.
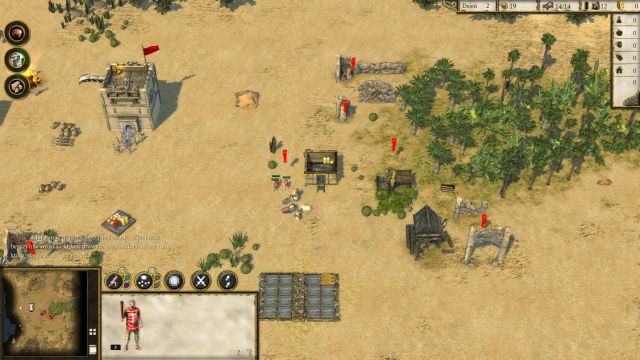 Exclamation marks mark the ruins that you need to destroy.
As this is the very first mission, the range of buildings you will be able to construct is very limited - not mentioning that you are unable to recruit any units during it. Start the mission by building three Wood Camps - try to build them as close to the woods and/or Stockpile as possible, to increase the production rate.
Before your woodcutters return with lumber, select your 3 Conscripts and start destroying ruins in the neighborhood of the oasis - it's one of your objectives, but it will also let you build more Apple Orchards. Your woodcutters should have already delivered some of their resource - build 2 more Wood Camps. Don't mind food production at the moment - you should have plenty of it, not to mention that you're going to collect some free food soon enough.
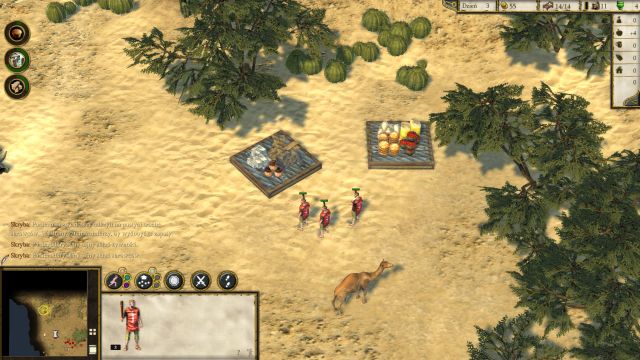 Two out of several treasures hidden on the map.
Start exploring the map now. There are hidden treasures scattered around the map - one example can be seen on the above screenshot. As soon as your forces get closer to the treasure, the hidden resource will be revealed. During this mission it will be food or wood, but during the others you can find almost anything, even weapons or gold, so it's really worth to scan around the map. Run around the map with your Conscripts and collect all the treasures - it's not required to do so, but it will speed up the completion of this mission. Each treasure is easy to find so you shouldn't have any trouble doing so.
If you've destroyed all the ruins, build a few Apple Orchards in the oasis - remember that you have a limit of 14 peasants, so by having 5 Wood Camps you can build as many as 9 Apple Orchards. That quantity is certainly not required - 5-6 of them should be more than enough. Of course, the more Apple Orchards you build, the faster you will accumulate the fruits, but you will be wasting a lot of wood, which is also required to complete the mission.
After destroying all the ruins all you have to do is just wait patiently until you've accumulated the desired quantity of wood and apples. The mission will be then complete and you will gain access to the next one.
Win:
Lose:
During this mission you will have to fight your first enemies - fortunately, they are only lions, which will rarely even attack you. You begin the mission with only your Castle - place your Stockpile on the right side of it, close to the trees, but leave enough space between trees and Stockpile for a line of Wood Camps. This way they will have a very short route, which should greatly boost their production rate. Afterwards, place your Granary near the oasis - do it in such a way that the building won't touch the grass.
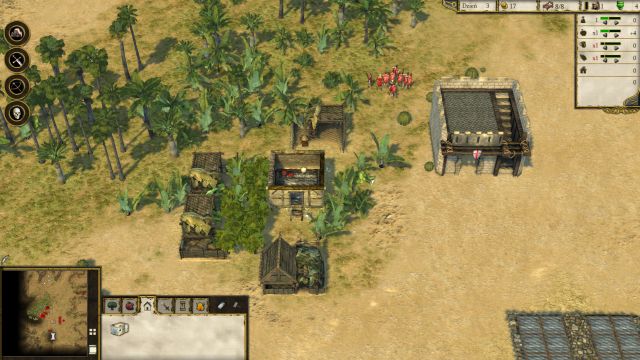 Placing your food production building near your Granary will boost up the production rate.
Now, build 4 Wood Camps in between the Stockpile and the trees. Use the gold you have from the very beginning and buy 40 pieces of wood. With the help of newly acquired resource, build 3 Apple Orchards as close to the previously placed Granary as possible. Wait for more wood and build Barracks, Armory (place the Armory close to your Stockpile) and build one additional Apple Orchard. Afterwards, start recruiting your Conscripts - you will need over a dozen of them at least. Use your Man-at-arms and send them to the East from your settlement, into a small mountain pass - at the end you will find a food treasury.
At the next wood delivery, provided that you have at least 10 Conscripts, build two more Wood Camps. After you've accumulated enough wood, build a Hovel for 8 peasants (by placing it right next to your castle). Afterwards, build 3 Dairy Farms and 2 Apple Orchards - don't forget to recruit your Conscripts constantly, as they are extremely cheap. In the meantime you can also set your food rations to x2, while at the same time rising your taxes to x2 as well. If you've done that, remember to keep an eye on your food reserves - if it goes below 30 units, decrease food distribution and taxes to x1. If you want to, you can build additional 1-2 Apple Orchards and/or Dairy Farms.
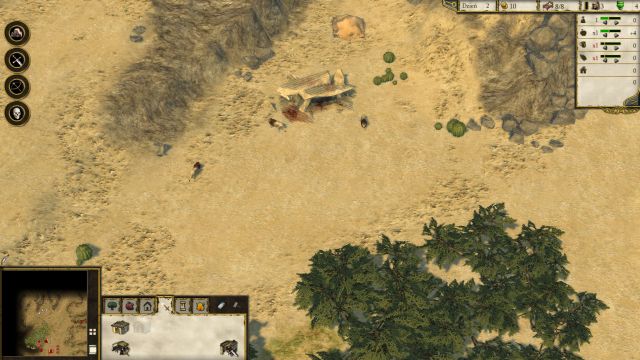 Lion's den.
By now you should have 6 Wood Camps, 3 Dairy Farms and 5 Apple Orchards - it should be enough to support your settlement. If you haven't done that already, set food distribution and taxes to x2. As soon as you collect 100 gold and 50 wood, build Fletcher's Workshop - build it right next to previously constructed Armory, which should be near your Stockpile. As soon as you have an army consisting of 2 Man-at-arms and 25-30 Conscripts, you can head out north to kill of the lions.
After you've destroyed the lion's den, build one Iron Mine (to the East from the Lion's den) as well as 2 Ox Tethers - it should be more than enough. Afterwards, build several Blacksmith's Workshops - the more you build the better, because you will be able to make the required swords faster. As soon as you have accumulated enough swords, you can sell Blacksmith's Workshops to preserve your iron, which you must collect as well. After you've collected enough bows, swords and iron, the mission will be completed.
Win:
Lose:
The third and the last mission in the "Preparations" learning campaign. The goal of this mission is to accumulate 200 stone (on normal difficulty level). Additionally, a time limit appears during this mission - you have to complete the mission before 25 days have passed.
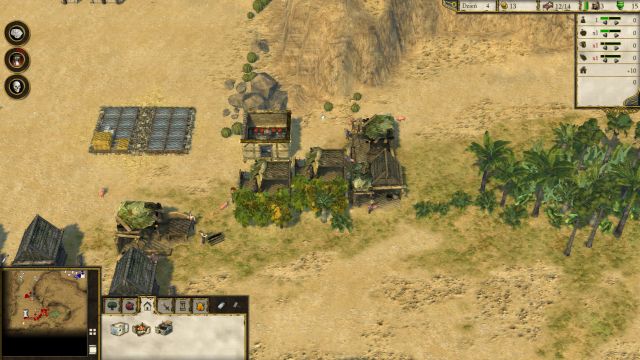 Do not build your Wood Camps and Stockpile like that - it will decrease the productivity of Wood Camps.
At the beginning of the mission place your Stockpile next to the trees, to the East from your castle. Afterwards, place your Granary in such a way so it is close to the oasis, but not on the grassland. Now build 6 Wood Camps as close to the trees as possible - the best method is to build them close to the trees and at the same time not far away from Stockpile. Now place 2 Apple Orchards near your Granary and wait for more wood.
Select all your troops and place them in the Northern entrance to your base - Archers should be stationed on top of your Barracks, so that they will have increased firing range. Do not build any wall at all - at the beginning of the mission you will have 30 stone, 20 of which needs to be spent in order to build the Armory. As soon as you have enough wood you should construct it.
After you receive your first wood from Wood Camps, build a Hovel for 8 peasants. Afterwards, build another 2 Apple Orchards, 2 Pig Farms and 2 Hop Farms. After several minutes has passed since the beginning of the mission, you will get some reinforcements, which should help you defend against lion's attacks. Build another Hovel for 8 peasants, 3 Breweries and 2 Fletcher's Workshops - the last one may take some time, as it needs a considerable amount of gold to be build. Poleturner's Workshops can be completely omitted - Conscripts and Archers should be more than enough to finish this mission. After you've accumulated a sufficient amount of wood (remember that you can also buy it from market) build an Inn and set ale distribution in accordance to your capabilities.
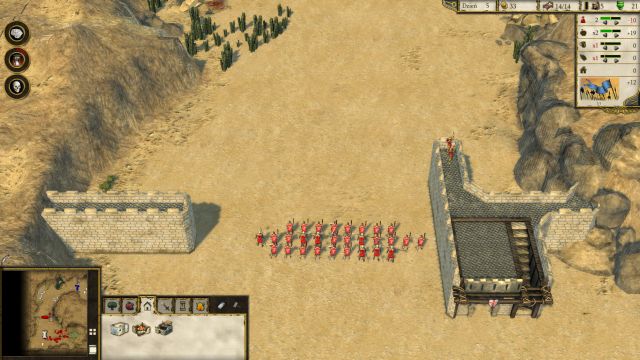 Block the entrance to your base with your footmen and place the Archers on top of Barracks.
As you start accumulating bows, remember to recruit Archers and don't forget about Conscripts - if you've built Poleturner's Workshop(s), you can also recruit some Man-at-arms. As soon as you have an army consisting of at least 10-15 Archers and about 50 Conscripts, you can get on with the elimination of lion's dens - this army is a little exaggerated, but it's better to have more troops than get most of them killed and be forced to retreat.
Lions are easy, but kind of irritating (as every swift unit in the game) enemy - they move quickly and tend to attack your Archers if you have them along with Conscripts when attacking their dens. A good tactic is to have two rows of troops - the first one, placed closer to lions, consisting of Conscripts and Man-at-arms, and the second one, just behind the first one (or "inside of it"), made out of Archers - both of them with the "line" formation. It will allow you to lure the enemies from afar (Archers), while your melee troops will finish any lion off, keeping your Archers safe. Start off with getting rid of the lone den on the right side. Afterwards, attack the dens on the left side.
Now it's the time to clear out the stone deposits - send your troops to storm the enemy walls, to the Easy from former lion dens. Send your melee troops to get rid of Arabian Swordsman, and order your Archers to clear out the walls. Get rid of all enemy troops in the area and start the construction of Stone Quarry - the more you can build the better, as you will accumulate stone faster. Remember to build 2-3 Ox Tethers near each of your quarries, as there's quite a distance between your base and them. Some enemy troops may appear on the map from time to time and they will attack your Stone Quarries - leave your forces between them and the enemy walls to prevent that from happening. After you've collected 200 stone the mission will be completed.
Win:
Lose:
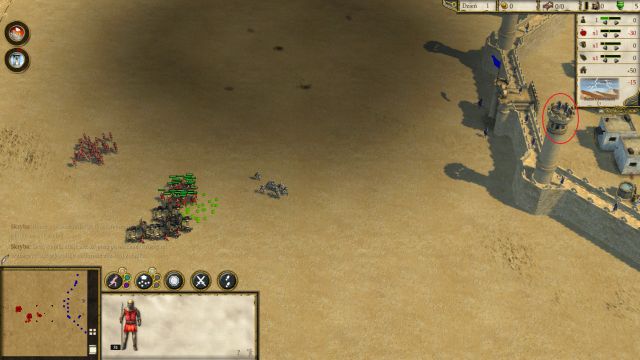 Send out your Catapults to destroy the enemy tower.
This mission is your baptism of fire, as you will have to siege an enemy castle. You have to break through the enemy walls and kill their Lord. At your disposal, you will have: Man-at-arms, Conscripts, a couple of Swordsmen, as well as Catapults. You can read about any new unit in the proper section of this guide.
This mission, like the previous one, has quite a short time limit, but the map is very small and there's really no need for you to rush things. This is your first siege (at least from the campaign) so the mission will be fairly simple, as well. Start by grouping up your units - you can do that by selecting a specific group of units and, while holding the CTRL key, press any number from 0 to 9. The selected squad will be assigned to that number - to quickly select it, all you have to do is to press the number again, this time without holding the CTRL key.
Send your Swordsmen ahead, so that they can focus the attention of enemy Archers - given their heavy armor, they will sustain marginal damage. Send your Catapults right behind them - order them to shoot at the tower located to the South from the gate (there should be 2 Arabian Swordsmen standing there). After they've completed the request, order them to besiege the wall until there is a hole in it, through which your units can pass.
As you lack any Archers (or Crossbowmen) in this mission, your Man-at-arms will have to suffice - remember, that they can throw their spears on a short distance, but they can attack enemies even when they have a significant height advantage. While the Catapults are bursting through the walls, send your Swordsmen to deal with their Arabian counterpart, and order your Man-at-arms to go North, along the wall - they will automatically mark their target and start eliminating the Archers. After most of enemy troops are gone, order your Man-at-arms to retreat - there's no need to get them killed, as they can come in handy.
 Clear the walls with your Conscripts and Man-at-arms, and send your Swordsmen towards the enemy Lord.
As soon as your Catapults burst through the wall, locate 2 Whirling Dervishes standing near the Well - do not send your Conscripts, or Swordsmen directly to engage them in combat, as they will sustain enormous damage. Instead, use your Man-at-arms - order them to attack one of the dervishes, and as soon as the enemy is down get them back a little bit so that their spears "regenerate". After several seconds do the same with the second foe.
Afterwards, send your Conscripts squad to the Southern wall - they should have no trouble clearing it from enemy Archers. Do the same with your Man-at-arms, but this time send them to the Northern wall, so that they can finish their previous task. The walls should now be cleared and all that's left for you to do is to send all your units to kill the enemy Lord. After several seconds the enemy will bite the dust and the mission will be completed.
Win:
Lose:
The roles are reversed - your task will be to defend the castle from Arabian attacks. You will be attacked from every side, but you should be aware of the fact that attacks from each side will consists only of given units. Those are:
As you can see, you will have your hands full, but despite the first impression, the mission is trivial. Along with it, you've gained access to your most efficient food source - bread. You start the mission with 300 units of Wheat in your Stockpile, which is way more than enough to finish it. That is precisely why you shouldn't even bother with your buildings in the oasis, in the North - if the enemy Slaves set them on fire, just sell them and never rebuild them.
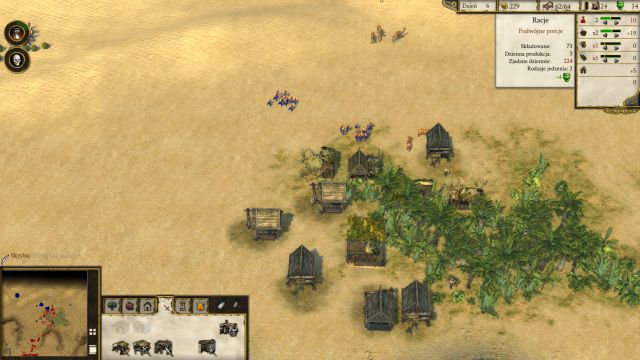 Those buildings can be totally omitted - you have a sufficient supply of Wheat from the very beginning.
At the very beginning, use your whole gold to buy wood. Afterwards, build 3 Bakeries and 2 Stone Quarries (Eastern part of your castle) - don't forget to build about 5 Ox Tethers next to them. Use the rest of your wood to build 5-6 Wood Camps, but not near the trees in the oasis, but next to your own Stockpile - this way, despite quite a long walk, your woodcutters will be relatively safe, and their workplace won't be burning all the time. If you even run into any problems with wood, you can just simply buy it on the market.
Afterwards, focus on sending appropriate troops to specific sections of your walls:
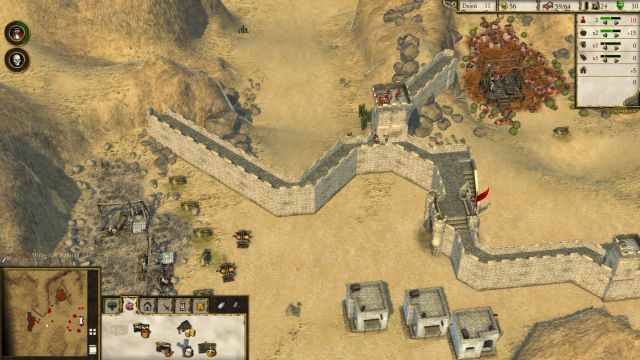 Build a wall on the North-Eastern side of your settlement to prevent the enemy from attacking your Stone Quarries.
Apart from all things mentioned, there is still a risk of enemy attack from the North-Eastern side - a group of Slaves can split up and attack your Stone Quarries. To prevent that from happening, build a wall there and send a small squad of Archers on top of it - this way, your troops will get rid of any pesky troops trying to "backdoor" you. The same goes with the enemies coming from the South - some of them can split up and attack your quarries there. Build a single wall to prevent movement from that side.
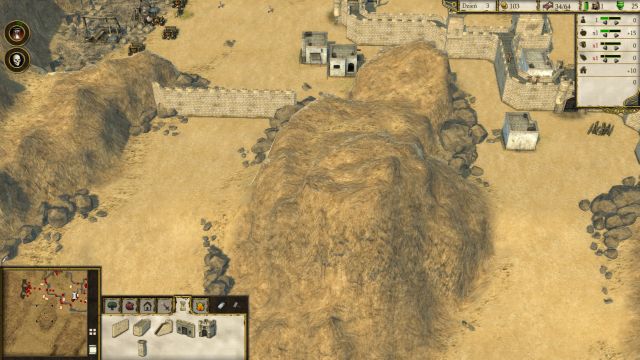 The same goes with the Southern side - build a single wall to block the Southern entrance to your Stone Quarries.
Remember to raise your taxes (and/or food rations) as soon as you start generating large amounts of bread - gold will be needed to recruit your troops. During the mission, you should also build another Mill, 3-4 Bakeries, and after that focus solely on armament production - build 3-4 Fletcher's Workshops, and 1 Armourer's Workshop - if you want to recruit more Crossbowmen, you have to build 1 Armourer's Workshop and 1 Artillator's Workshop, as they require both a crossbow and an armor. If you want to recruit more Macemen, build 1-2 Forges - if you happen to have insufficient amount of iron, you have to build another Iron Mine. During this mission you won't be able to buy any weapon, so proper production is even more important.
Recruit your troops all the time and send them to previously mentioned sides of your wall, and you should have no trouble with defending your castle. Nearing the end of the mission, your enemy will send a massive attack from the Northern side only. Send all your forces to the Northern walls and wait for enemy troops to attack. You can also send your Macemen to get rid of enemy siege equipment.
Win:
Lose:
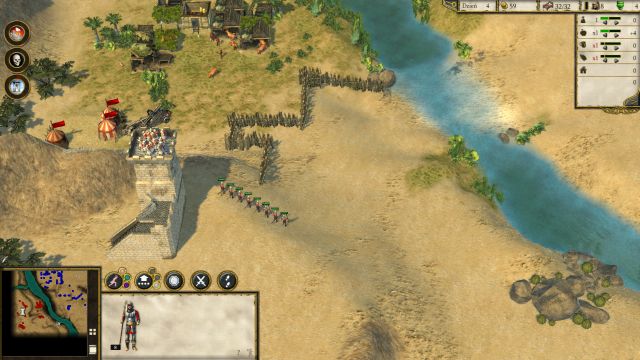 Placing your Barricades and tower like that will prevent your peasants from being attacked.
A mission in which you will have to build your castle (and later on your army), while simultaneously defending from the enemy.
Start the mission by spending all your gold to buy wood - this way you should have 700 wood. Using the newly acquired resources build: 8 Wood Camps, 3 Stone Quarries (with at least 2 Ox Tethers for each), 2 Hovels for 8 peasants, and then place (near your Granary - it's located in the lowland) 2 Apple Orchards, 2 Dairy Farms and 1 Pig Farm. After you've received your first wood delivery, build 3 Wheat Farms, 3 Hop Farms and place a Mill next to your Stockpile. With the next wood delivery build 3 Bakeries, and then another 3.
As soon as your Stockpile start receiving hop deliveries, start your ale production - build 1 Brewery for every 10 peasants in your castle, and as soon as you start producing any ale, build your Inn. The moment when you have your economy running, with plenty of food, stone and ale, is the moment in which you can start preparing your army. Start off by building 2 Iron Mine - given the short distance between it and your Stockpile, 1 Ox Tether should be enough for each.
Build a Medium Tower in the entrance to your castle, build stairs leading to it and place your Rangers and Archers on top of it. Additionally, use the new toy you now have at your disposal - Barricades. Build them in such a way to block the entrance to your oasis, so that there's only a narrow, 1-grid entrance just below your tower, so that your peasants can travel freely (look at the above screenshot). Building it this way should limit the enemy movement and ensuring that you have a smooth resource production in the oasis. Position your Pikemen at the end of the Barricades (at the "entrance"), so that they can stall enemy Swordsmen trying to barge into the oasis.
Now it's the time to start recruiting your army. Build 4 Forges and 4 Fletcher's Workshops - you can't recruit Swordsmen, nor Crossbowmen during this mission, so your army will consist of Macemen, Archers and siege equipment. If you want to, you can swap your Archers with Rangers - they are less efficient at ranged combat, but they can hold their own ground against some of the weaker melee units. If you plan on using Rangers, you must build 1 Armourer's Workshop for each Fletcher's Workshop. This mission also allows you to use Trebuchets, which will make your attack a lot easier.
Recruit 30-40 Macemen, 30-40 Archers (or Rangers), several Trebuchets (3-4 are more than enough, but the more you bring, the easier it will be burst through the enemy defenses) and a few Mantlets - the last unit will allow you to protect your Archers from enemy ranged attacks. After you've accumulated enough units, you can start your siege.
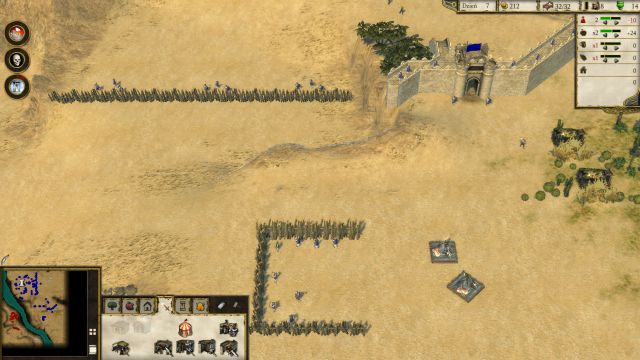 Take care of Archers standing by the Barricades first, and then order your Trebuchets to fire at enemy walls.
After you've crossed the lake, you will stumble upon first enemy resistance - Archers hiding behind Barricades, who are stationed to the East. Use your own Archers (albeit with Mantlets' assistance) to get rid of them swiftly, and then use them to clear the Northern Barricades as well. At the same time order your Trebuchets to fire at Archers stationed on the nearby wall - after a few hits there will be no resistance there.
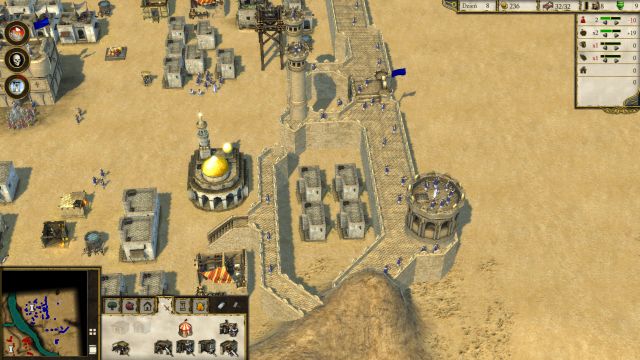 Get rid of the enemy Archers with your Trebuchets - what is left from them can be finished by your own Archers.
After you've bashed through the first line of defense, you will have to destroy the enemy wall. Use your Trebuchets again to get rid of most of enemy Archers stationed on the walls and towers. After you've killed most of them, focus their fire in a single spot to knock a hole in the wall, which will allow your forces to break into the enemy castle. Before you do that, however, locate Whirling Dervishes stationed near a group of Archers, a couple of Hovels and a Well. Kill them by using your Trebuchets and/or Archers - do not attack them with your Macemen, as they will kill most of them in an instant. After Whirling Dervishes are down, you can order all your troops to attack the enemy Lord - there should be a squad of Archers and Arabian Swordsmen on your way there, but your Macemen should make a short work of them. After the enemy Lord is down, the mission will be completed.
Win:
Lose:
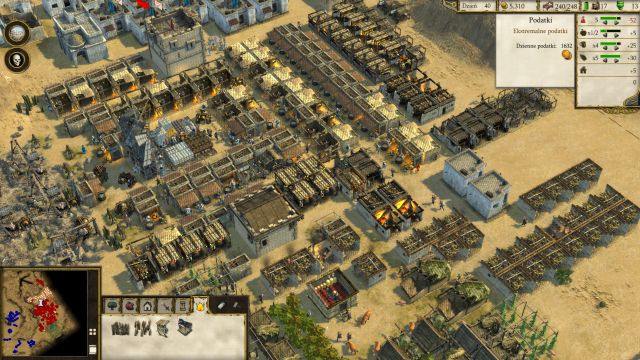 You can build a huge castle...
The last mission of this campaign, which gives you another popularity-affecting mechanism at your disposal - religion. You will also have access to all the Crusader units. There's no time limit in this mission, you have an extremely easy access to resources and your castle is conveniently located, so defending it is a piece of cake - all those things will allow you to build an enormous and prosperous castle.
Start with buying wood for all your gold - afterwards, build 9 Wood Camps, 3 Apple Orchards, 2 Pig Farms and 1 Dairy Farm. With the first wood delivery build 2 Stone Quarries and 2 Ox Tethers. After that focus on food production and build 1 more Pig Farm, 2 Dairy Farms, 3 Wheat Farms and 3 Hop Farms - it should be sufficient for a long time. With the next wood delivery build a Mill and 3-4 Bakeries - Bakeries should be built near the Granary. As the mission goes on, build more food production buildings - but you should focus mainly on bread production.
Now, you should build 4 Breweries and 4 Candler's Workshops - if you don't have enough peasants, remember to build more Hovels. You have a Church from the very beginning, but you still need to build an Inn. Thanks to those two goods (Ale and Religion), you can set your taxes on a high level, while still maintaining a proper level of popularity. It will allow you to recruit an enormous army later on. As you begin to gather stone, remember to build your defenses - you can now build Grand Towers, so you should definitely do so. They are extremely expensive, but they provide the best cover for units on top of them
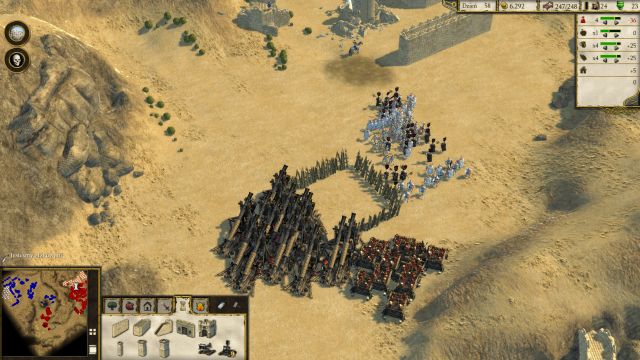 ...and hire a respectively large army.
After you've established a working economy and built defenses, start your weapon and army production. You can now recruit both Templar Knights and Sergeant at Arms - they should be the main part of your army. Read the "Tips and Tricks", as well as "Units" sections to learn about the different aspects of particular units and train an army suiting your needs. There's no time limit during this mission, so you can spend us much time as you want to create a gigantic attack force. After you've breached the last line of enemy defenses, you just have to reach a place marked by a flag. After you've managed to do so, the mission will end.
Win:
Lose:
The third learning campaign focused on Saladin introduces a significant change - you will be now commanding the opposing, Arabic, forces. During this and latter missions you will only have access to the mercenary forces.
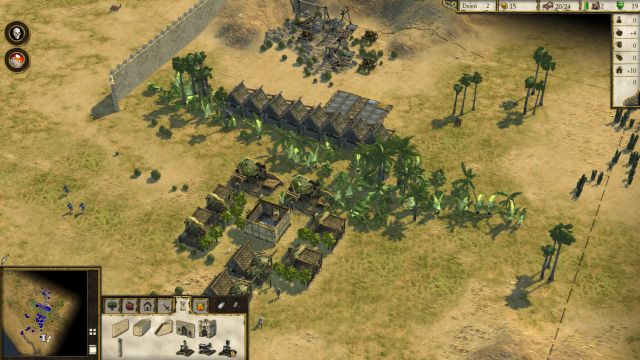 As always, you should think about a proper layout for your buildings, to maximize the production.
Start the mission by setting up a Stockpile between the oasis and the stone reserves. Afterwards, build the Granary on the oasis, surround it with 3 Apple Orchards, 2 Dairy Farms, 2 Sheep Farms and construct 2 Stone Quarries with a single Ox Tether near them on the stone reserves - in case of a wood shortage, remember that you can buy them off market, and if you need some extra manpower, build additional Hovels. With time, as your population grows, remember to build additional food production buildings - you will have to make it through without the aid of Bakeries.
As soon as you start accumulating stone, you should finish up your walls - you can only build the smallest towers, but the Arabian equivalent, even though the weakest of the towers, offers the biggest height advantage. You can't make any weapons, so you will be forced to hire mercenaries - all the information about each one of them can be found in the "Units" section of this guide. Remember to build a couple of Candler's Workshops and a Mosque to increase your popularity rating.
First things first, you should hire a couple of Arabian Archers and send them on the walls (or towers). Next, it's worth to make several Horse Archers - their defense is almost nonexistent and they can be easily defeated by a smaller group of regular archers, but they are extremely effective against enemy siege equipment, as well as slow, heavy melee units, which can't keep up with them.
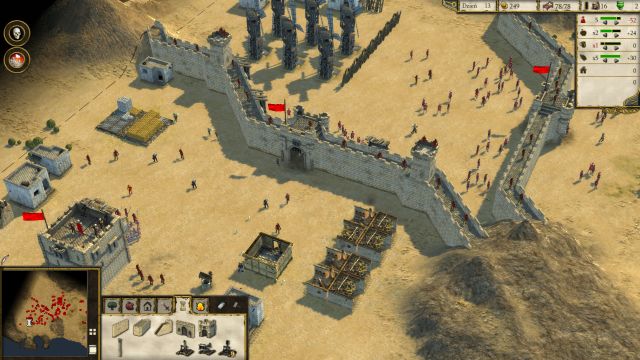 Breaking through the enemy defenses isn't all that hard.
When you have your walls and defenses finished, you should start preparing your strike force. To attack the enemy castle, you will need Arabian Swordsmen, Arabian Archers and Catapults - all the units are made solely by using gold, so you will need quite a lot of it. Build at least 10 Catapults - it will allow you to destroy the enemy defenses without breaking a sweat. As far as the rest of your forces go, you have a great deal of freedom - remember that Arabian Archers are extremely cheap, so you can easily hire dozens of them fairly quickly. Arabian Swordsmen will come in handy while dealing with armored targets, not to mention that they are the your only unit (during this mission) able to attack and kill the enemy Lord.
Win:
Lose:
Another survival-like mission - or, to be more precise, a mission to keep your Lord alive. You will have access to two new units - Whirling Dervishes and Oil Pot Throwers. All the information you need about them can be found in the "Units" section of this guide.
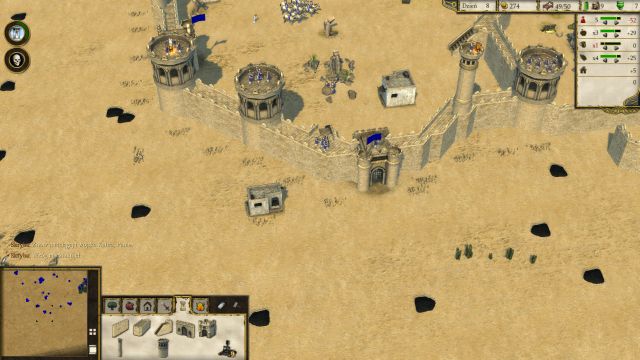 Proper placement of towers, archers, pitch ditches, as well as man traps will allow you to storm through this mission with ease.
Begin this mission by building several Wood Camps - given their low cost, it's worth to build about 10 of them. Build them just by the bridge, near the Stockpile - your woodcutters will have a relatively short walk to their workplace, and you won't block the oasis. Afterwards, build 3-4 Apple Orchards, 2-3 Sheep Farms and 2-3 Dairy Farms in the oasis, as close to the Granary as possible. Build additional Stone Quarries and make sure that they have at least 2 Ox Tethers near them. Build a couple of Candler's Workshops - Mosque is already pre-built, so you will get the religion popularity benefit as soon as you start the production of candles. Don't forget about Hovels if you need more peasants.
After you've finished your expansion (or you are waiting for wood delivery), use your troops to destroy all the ruins inside your castle - especially the ones that are blocking the entrances in your walls. Try to patch all the holes in your walls, build gates if needed, and, what is most important, construct as many towers as possible, be it Watch or Grand Towers (the latter choice is better, but way more expensive). Naturally, mount the walls and towers with Arabian Archers. You should hire several Whirling Dervishes and Horse Archers to be able to destroy the enemy siege equipment before it reaches your walls. Also, don't forget to finish the wall near your Stone Quarries, to prevent the enemy from destroying them.
Remember, that you can also set up Pitch Ditches, as well as Man Traps - you should read about both of those constructions in the "Buildings" section of this guide. Set layers of traps around your castle, build and mount towers with your archers, hire more Whirling Dervishes and Horse Archers and you should have no problems with this mission.
Win:
Lose:
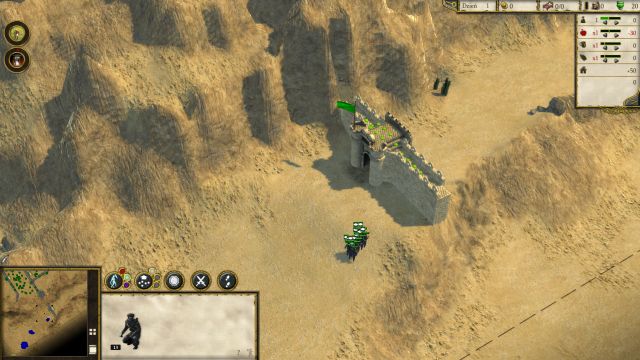 Assassins are crucial to the completion of this mission.
Another siege mission - at the same time being one of the hardest missions in the game. You will take command over Arabian Swordsmen, Arabian Archers, Mantlets, Slaves, Horse Archers and your new acquisition, Assassins - you won't have access to any siege equipment.
To get through the first obstacle - a gate protected by Archers and Swordsmen - use your Arabian Swordsmen. Order them to get closer to the wall to provoke the enemy soldier - as he is fighting with your troops, order your Archers, covered by Mantlets, to approach the wall and get rid of archers stationed there (you can set them close to the mountains so they will also get rid of enemies at the top of them). After you've gotten rid of the enemy troops, back away your Swordsmen and Archers and order the Assassins to climb up the walls - after a short while they will take control over the gate.
Another obstacle awaits you - 2 Arabian Swordsmen and 3 Arabian Archers, protected by a Barricade. Use the same tactic as before - use your Swordsmen to get rid of the enemy equivalent and use your Archers and Mantlets to kill all of the enemy's. Afterwards, order your Arabian Archers to approach the mountains to get rid of those pesky enemy shooters. Retreat all your troops apart from your Swordsmen - use them to destroy the Barricade.
The next blockade is mostly the same as the last one - the only difference is that there's a Oil Pot Thrower hiding behind a Barricade, which you must take out with your Archers before he can hurl his oil cask at your Swordsmen. Clear the Barricade and proceed.
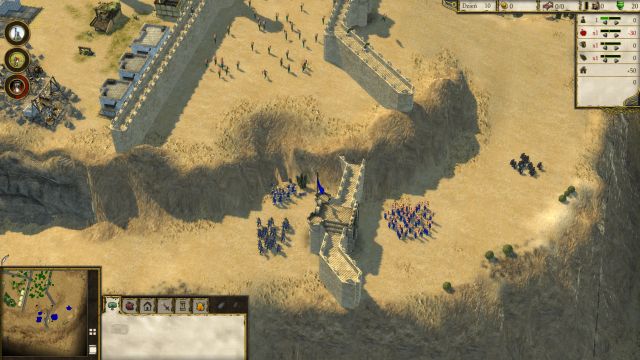 With the proper placement of your archers, you will be able to kill off most of the enemy troops stationed on the walls.
Another stop is a group of Arabian Swordsman and Horse Archers - easy, considering the fact that you won't be under fire from the enemy Archers. Use your Archers to take out the Horse Archers and your Swordsmen to get rid of the enemy ones. You should now be in front of a gate, with swarms of Archers in the area. You can get rid of them fairly quickly - do as you were doing in the past, send your Swordsmen first to focus enemy fire. Afterwards, send your Archers hidden under Mantlers and kill all the Archers in the area. Now take over the gate with your Assassins.
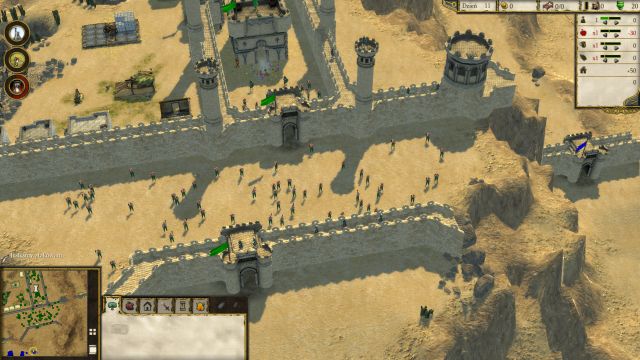 The last pair of walls - the more units you managed to bring here, the easier your job will be.
Now you will face the final encounter - the last pair of walls, which separates your army from the enemy Lord. Send your Swordsmen to attack the walls. Use all your remaining Archers to kill enemy shooters - the more you manage to kill off the better. Now use your Assassins, climb up the walls and open the gate - after you've done it, retreat them as soon as possible to not lose them. Kill of the enemy Slaves swarm and use all your remaining melee units to destroy walls. If you have any Assassins remaining, send them on the walls and try to open the gate - as soon as you managed to get to the other side, send your forces to kill the enemy Lord.
Win:
Lose:
Another siege mission - this time you will be able to rebuild some of your army, provided you have enough gold. It's a good idea to set the highest taxes from the very beginning - you can also increase food rations, as you will collect it a few times during this mission.
During this mission you will be given access to a new unit - Sassanid Knight. It's a very powerful unit, but extremely expensive, meaning that you will most probably refrain from hiring it during this mission. Another novelty is the Hussite War Wagon - a siege unit. Both of them were described in the "Units" section.
The gold income is very low during this mission, because you only have 8 peasants. The starting gold should be invested in Catapults and/or Mantlets. From time to time you will also receive reinforcements.
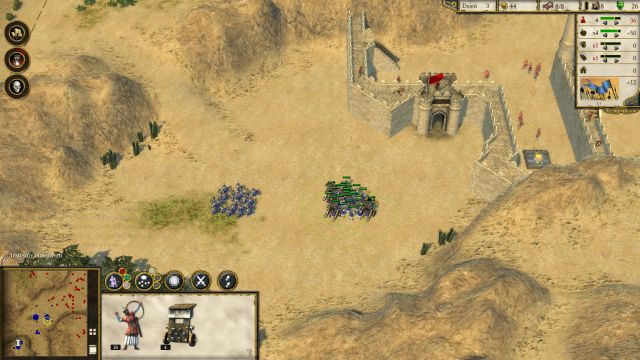 If you have Mantlets, you can easily get rid of enemies stationed on the walls.
This mission is a lot easier than the previous one, because you can use siege equipment here. Buy a couple of Catapults and start getting through into the enemy territory. Clear all the Conscripts blocking the entrance to the castle and clear the walls from the Archers - you can use your Swordsmen to focus their attention, while you finish them off with your Archers.
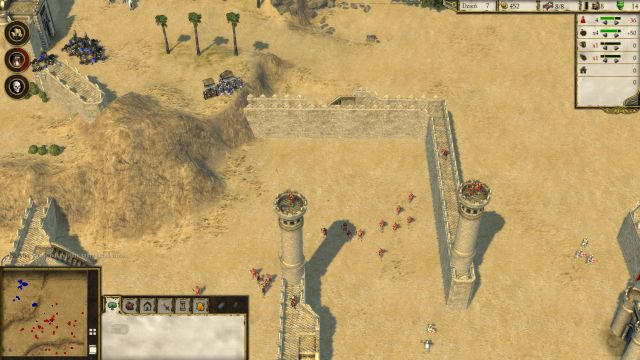 Catapults should make a short work off this wall.
After getting to the top, you should see a treasure on the left side. It's gold, with which you should buy more Mantlets, or Catapults. Kill all the enemies under the wall, burst through it and send all your Archers and Mantlets on the hill (like in the above screenshot). This will allow you to clear huge part of the map and make the whole mission a lot easier. Also, destroy the ruins near the gate, where you should find more gold.
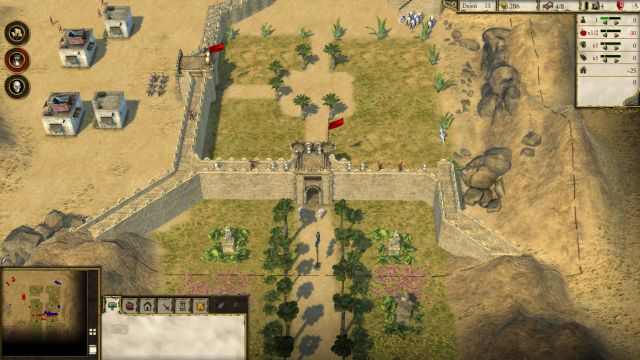 The last obstacle in this mission.
Send all your forces further, into the North-Western section of the map - you will receive reinforcements, in a form of Healers and Arabian Archers. Use your gold and buy additional Catapults. Get through the Eastern wall - clear it from all the enemy Archers and get rid of the infantry approaching you from the South. All you have to do now is to push South and finish the mission.
Win:
Lose:
Probably the most difficult mission in the learning campaign, especially if you want to get the achievement associated with it. You will again control the Crusader side. Your goal is to protect a supply delivery - you need to prevent the enemy from killing more than 4 donkeys. If the enemy manages to kill 5, the mission will be aborted.
 The enemy will be attacking from the North...
Start the mission by building several Wood Camps, 3 Apple Orchards, 2 Pig Farms, 2 Dairy Farms, 3 Wheat Farms and 1 Hop Farm. Afterwards, you should invest in additional Stone Quarries - the stones will be needed to build towers used to protect the donkeys. Start the production of ale / candles and build Church / Inn.
During this mission you will have to deal with the enemies from two sides:
 ...as well as from the South.
Your main goal is to build a wall from the Northern side, together with a couple of Grand Towers, which should be mounted by Archers and Crossbowmen. Additionally, you should remember about making additional troops, which must be sent to the East - your towers won't be able to reach there, so you should must rely on infantry. You should build Macemen, Crossbowmen, Archers, Templar Knights and Sergeant at Arms; all the other units aren't that effective.
Protect the donkeys at all costs - it's especially important with enemy Archers, who can attack them from a long distance.
Win:
Lose:
A trivial siege mission, mainly because of the amount of types of units at your command - at the beginning you will be given a big group of Templar Knights and a Sergeant at Arms, Catapults, Assassins, Archers, Crossbowmen, Mantlets, Man-at-Arms and Conscripts.
 This mission is definitely too easy - you have been given way to strong army.
Start off by sending your Templar Knights, together with Sergeant at Arms, towards the enemies standing behind the Barricades. When your infantry is in firing range, send your Archers, Crossbowmen and Mantlets to get rid of all the enemy shooters in the area, and your heavily armored troops should get rid of anything easily.
Do a two-point hole in the Barricades so that your troops can easily get pass them instead of circling around. Before you reach the next wall, you need to proceed with caution - there's a Man Trap hidden by the corner of the wall. Use your Conscripts and activate the trap. Clear the second wall off the Archers, kill the infantry in front of it and open the gate with your Assassins.
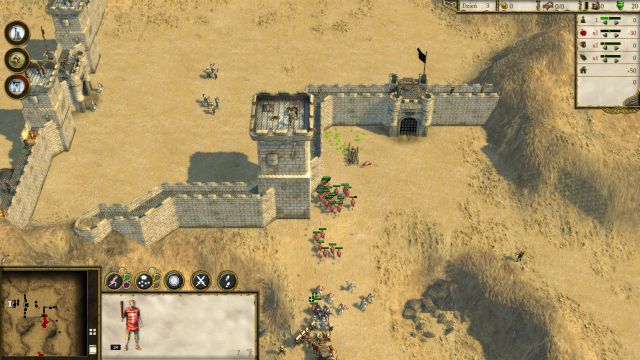 Sometimes the enemy can surprise - this time a Man Trap hidden near the wall.
It's time for the last wall - given the size of your army, you would be able to destroy it with only your Swordsmen. Send your heavily armored troops to get rid of the infantry at the gate, order your Catapults to fire at the walls and send your Assassins to open up the gate, if you don't want to wait for the Catapults to finish their job. Get inside, use your Whirling Dervishes to get rid of a large group of enemies stationed there and proceed to kill the enemy Lord.
Win:
Lose:
This mission is very similar to the one you've already did (Jerusalem). Again, you will be given command over the Arabian camp, and your task is to kill the enemy Lord. You have a perfect place set for your castle - diversity of easy-to-access resources and the only entrances to your castle are narrow river passages.
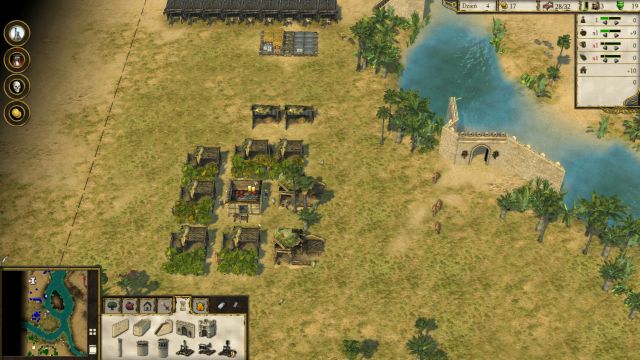 You will be given a place with an enormous oasis - you can build an ideal castle.
You should start off with construction of Wood Camps - you should build 10 of them. Afterwards, construct 5-6 Apple Orchards, setting up the Granary in the middle of a huge oasis. With the newly acquired wood, construct 3 Stone Quarries with 2 Ox Tethers each. Now build 4 Wheat Farms, 3 Sheep Farms, 3 dairy Farms and 2 Mills. After you've received your first flour, build a couple of Bakeries - if you have a surplus of flour, build more of them.
After you've established a functioning economy, start your ale and candles production - you need as much gold as you can get, because all your units will be gold-only. Build a wall with Grand Towers and mount them with Archers - if you want to, you can also build a couple of Tower Ballista. It's time to recruit your army. You can now access mercenary units only, but it doesn't really matter. You have immense amount of time to gather the required gold.
Enemy walls are swarming with troops, but the castle is trivial to conquer.I would recommend building Hussite War Wagons and filling them with Archers - for additional protection you can still create lots of Mantlets. The backbone of your army should consists of: Arabian Swordsmen, Whirling Dervishes and be supported with Assassins and siege equipment.
Enemy walls are swarming with troops, but the Kerak Fortress is trivial to conquer, because of the time you can spend to create your army. Remember, that you can gather 1000 gold, which will be then sent to your ally. In return, he will send a lot of reinforcements - the troops he sends you would cost several times more than the amount you paid for them, so it's extremely profitable.
Win:
Lose:
You must get rid of the enemy on the walls as fast as you can.The last mission of the learning campaign. The map is unique because of the fact that you won't be able to create practically any units - your Mercenary Post lacks more than half of them. You must focus on all those you can buy (Arabian Swordsman and Archers) and on frequent reinforcements.
Start off by building 6-8 Wood Camps, 3-4 Apple Orchards, 1 Hovel for 8 peasants. Wait for reinforcements, bring your Archers, Swordsmen and clear the wall to the North of your base. You should clear only the 'left' half of the wall, the one you are able to shoot at with your Archers. In the meantime you should build Dairy Farms, Sheep Farms and set up bread production. Also, start candles' production and build a Mosque- you don't have access to ale during this mission.
After you've established your economy, start preparing your forces. You can use practically the same striking force as you did in the last mission - Hussite War Wagons with Archers, Catapults, Arabian Swordsman. Don't forget about your reinforcements and use all Assassins, Whirling Dervishes and/or Sassanid Knights you get.
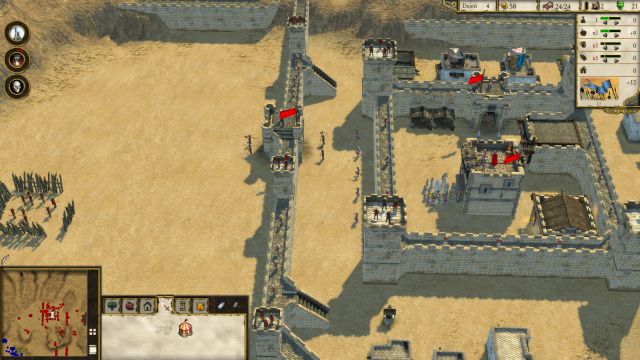 Enemy castle in the last mission is a pure disappointment...
In comparison to the previous mission, the castle in this mission is ridiculous - it has almost no defensive units and it can be attacked "from the front", instead of circling around. Prepare an appropriate army (Archers pay a significant role in this mission) and about 10 Catapults - with this you will get through the enemy defenses in seconds.
Campaign "Preparations"
Description: Complete "Preparations" campaign.
Campaign "Lionheart"
Description: Complete "Lionheart" campaign.
Campaign "Saladin"
Description: Complete "Saladin" campaign.
All Knight Long
Description: Have 100 Mounted Knights at your command.
Animal Air Strike
Description: Throw 100 animals.
Explanation: Throw 100 animals with a Trebuchet.
Arms Dealer
Description: Send 500 weapons to allies.
Assassin's Deed
Description: Kill the enemy Lord with an Assassin.
Clear Passage
Description: All trade caravans survive in "Robber Baron" within "Delivering Justice" campaign.
Conqueror
Description: 5 multiplayer wins.
Demolition Man
Description: destroy 1000 buildings.
Farmer King
Description: Deliver 100,000 food to the granary.
Forge lord
Description: Deliver 10,000 weapons to the Armory.
Industry Baron
Description: Deliver 100,000 resources to the stockpile.
Iron Will
Description: Win a skirmish trial mission only recruiting melee troops.
Explanation: You must win a skirmish trial without the usage of ranged units and siege weapons - melee units only.
Let None Stand in my Way
Description: Kill 50 enemy Lords
Lion Tamer
Description: Kill 5 lions with a Slave Driver.
Loyal Companion
Description: Complete "Alliance" within "Breath of the Infidel" skirmish trial without your ally dying.
Explanation: you must complete this trial without your ally getting defeated.
Medic!
Description: Heal your lord to half health from the brink of death.
Millionaire
Description: Generate 1,000,000 gold.
Not So Magnificent Seven
Description: Win a multiplayer against 7 other lords with no alliances.
Skirmish Baron
Description: Complete "Desert Heat" skirmish trial.
Skirmish Duke
Description: Complete "Way of the Warrior" skirmish trial.
Skirmish King
Description: Complete "Hell's Teeth" skirmish trial.
Skirmish Knight
Description: Complete "Breath of the Infidel" skirmish trial.
Skirmish Prince
Description: Complete "A Trail of Tears" skirmish trial.
Skirmish Yeoman
Description: Complete "Baptism" skirmish trial.
Speedrun
Description: Complete "Antioch" within "Lionheart" campaign in less than 10 minutes.
Stealth is our Defense
Description: Complete "Justice" within the "Saladin" campaign without losing any Assassins.
Tactician
Description: Complete "The Lion's Den" within the "Preparations" campaign on hard without training any units.
Take the Bull by the Horns
Description: Complete "The Horns of Hattin" within the "Freedom Fighters" campaign in less than 10 minutes.
The Killing Joke
Description: Kill a Jester.
Warrior 1st Class
Description: Kill 50,000 troops.
Warrior 2nd Class
Description: Kill 100,000 troops.
Warrior 3rd Class
Description: Kill 1,000,000 troops.
Welcome to the Family
Description: Sign up to the mailing list.
You win or die
Description: Kill an enemy Lord with your Lord.


 Spore Game Guide & Walkthrough
 Sid Meiers Civilization V - Gods & Kings Game Guide & Walkthrough
 State of Decay Game Guide & Walkthrough
 Shadowrun Returns Game Guide & Walkthrough
 S.T.A.L.K.E.R.: Call of Pripyat Game Guide & Walkthrough