
This guide to StarCraft II: Wings of Liberty contains a detailed description of the single player campaign mode, as well as verified solutions to Achievements connected with them. Additionally you can find some basic information concerning the game as well as a throughout challenge guide.
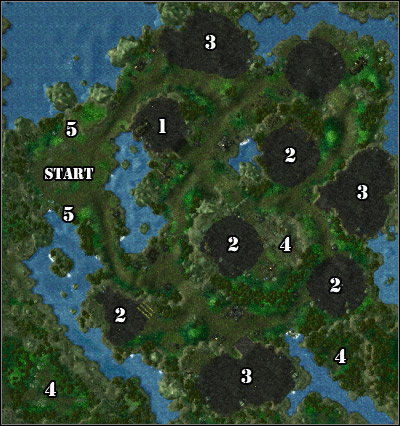
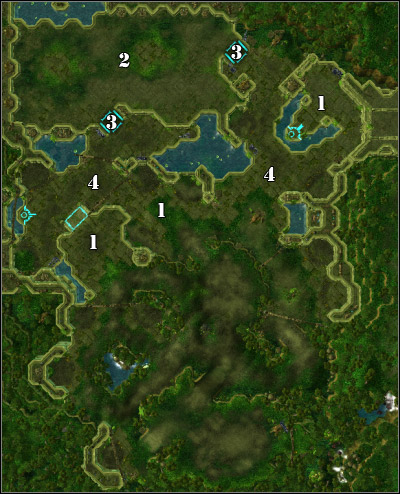
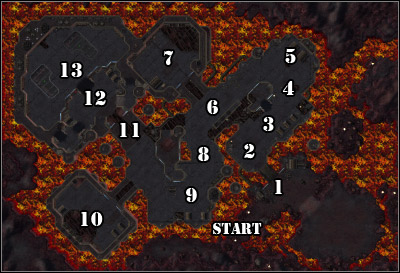
[#1] symbols refer to screens associated with the descriptions, while [1] symbols point out places marked on the maps.
Below you will find a list of StarCraft II: Wings of Liberty missions. Finishing most of them unlocks a certain unit, which then will be available in all the scenarios. You can have a look at the Terran (and other races) units and technology tree by pressing F12. I've also places the most important information on them in the descriptions of specific missions.
The money you gain can be spent on modifying units and some buildings. You can do it on the Hyperion, to which you'll gain access after completing the Zero Hour mission. The armory located there is worth checking after each level, to see what new upgrades are available.
You can also use credits to buy mercenaries. They can be found at Graven Hill, who resides at the Cantina on the Hyperion. By investing it this type of soldiers, you can be sure to receive soldiers with extended health and better attack. The mercenaries can be found at their base, which is in fact one of the buildings you can construct. Throughout the whole campaign, you will be able to gain access to Mercenaries, Firebats, Marauders, Goliaths, Siege Tanks, Vikings, Banshees and Battlecruisers. Once you complete a mission dedicated to a certain unit (normal), a corresponding Marine will appear at Hill's.
Researching Zergs and Protoss at the laboratory is also very important. In order to be able to gain some upgrades or even discover new units, you need to collect research points. You can gain them by finding Relicts of the enemy races or different types of Samples. You can learn everything from the mission briefings as well as from this guide, of course.
Be careful before activating the Gates of Hell mission. Afterwards, you won't be able to return to the Hyperion's bridge and all the unplayed missions will be lost (the game usually gives you the choice of the next one). The campaign, as seen below, has been divided into seven chapters.
Mission
Unit
Credits
Research
Previous Mission
Mar Sara Missions
Liberation Day
Marine
-
-
-
The Outlaws
Medic
45 000
-
Liberation Day
Zero Hour
-
55 00
-
The Outlaws
Colonist Missions
The Evacuation
Firebat
100 000
+3 Zergs
Zero Hour
Outbreak
Hellion
110 000
+2 Zergs
The Evacuation
Safe Haven
Viking
125 000
+3 Zergs
Outbreak, 8 missions
Haven's Fall
Viking
125 000
+3 Protoss
Outbreak, 8 missions
Covert Missions
The Devil's Playground
Reaper
110 000
+3 Zergs
Zero Hour
Welcome to the Jungle
Goliath
120 000
+3 Protoss
The Devil's Playground
Ghost of a Chance
Ghost
125 000
-
Welcome to the Jungle, 8 missions
Breakout
Banshee
125 000
-
Welcome to the Jungle, 8 missions
Rebellion Missions
The Great Train Robbery
Diamondback
110 000
+3 Zergs
After completing 6 missions
Cutthroat
Vulture
120 000
+3 Protoss
The Great Train Robbery
Engine of Destruction
Wraith
120 000
+3 Zergs
Cutthroat
Media Blitz
Thor
120 000
-
Engine of Destruction
Piercing the Shroud (secret)
-
125 000
+3 Zergs/+4 Protoss
Media Blitz (secret)
Artifact Missions
Smash and Grab
Marauder
110 000
+4 Protoss
Zero Hour
The Dig
Siege Tank
120 000
+3 Protoss
Smash and Grab, 8 missions
The Moebius Factor
Medivac
120 000
+3 Zergs
The Dig, 11 missions
Supernova
Banshee
120 000
+4 Protoss
The Moebius Factor, 14 missions
Maw of the Void
Battlecruiser
125 000
+4 Protoss
Supernova
Prophesy Missions
Whispers of Doom
-
-
+3 Zergs/+3 Protoss
The Dig
A Sinister Turn
-
-
+3 Zergs/+3 Protoss
Whispers of Doom
Echoes of the Future
-
-
+4 Zergs/+2 Protoss
A Sinister Turn
In Utter Darkness
-
-
+3 Zergs/+3 Protoss
Echoes of the Future
Final Missions
Gates of Hell
-
-
-
Maw of the Void
Shatter the Sky
-
-
-
Gates of Hell
Belly of the Beast
-
-
-
Gates of Hell
All In
-
-
-
Shatter the Sky/Belly of the Beast
Main objectives:
Additional objectives:
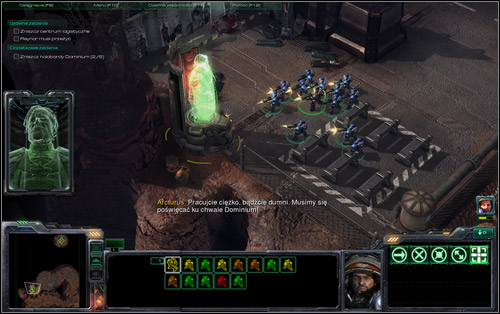
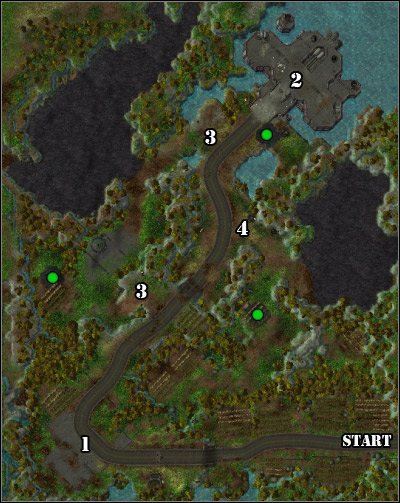
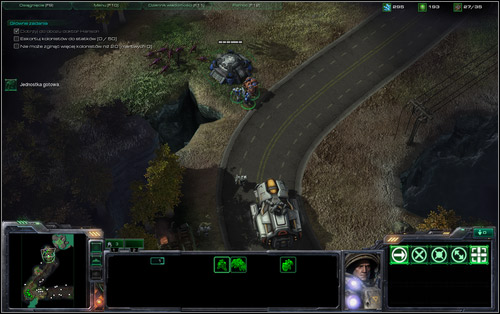
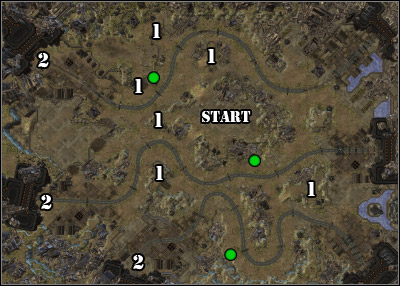
Mar Sara is the planet on which the original StarCraft began. As you see, in the continuation you return to globe in order to execute the first attack on Dominium Mengska. The goal is the nearby enemy base, which holds an iron hand over the locals.
![[#1] - Liberation Day - Campaign - Mar Sara missions - StarCraft II: Wings of Liberty - Game Guide and Walkthrough](https://game.lhg100.com/Article/UploadFiles/201512/2015121709524688.jpg)
[#1]
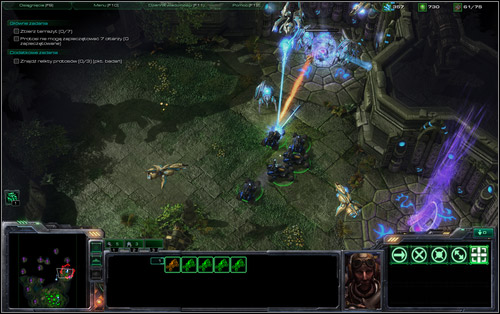
There's not much of a choice, so follow the only possible path. The first enemy group is in the lower corner right of the map [1] - deprive them of their hopes of catching the world's biggest rebel [#1]. A bit further you will see... Arcturus Mengsk - however only as a holograph - calling to work for Dominion (that is, for example, reporting on your neighbour). An additional mission objective will be activated - you have to destroy six such holoboards. You can find their locations on the map - they are marked with green dots.
![[#2] - Liberation Day - Campaign - Mar Sara missions - StarCraft II: Wings of Liberty - Game Guide and Walkthrough](https://game.lhg100.com/Article/UploadFiles/201512/2015121709524691.jpg)
[#2]
Once you meet a civilian remembering his family [2], get ready for a bigger fight. After you men notice [3] a concentration of enemy forces in the downtown, Raynor's reinforcements will arrive. Help them by taking the enemy into crossfire, so that as many Marines as possible survives [#2]. Move on end eventually you will see Mengsk squads forcing people to work. Approach the post showed in the cutscene [4]. It's quite well protected. After you free the civilians, some more will join he action. They will even take care of the nearby holoboard.
![[#3] - Liberation Day - Campaign - Mar Sara missions - StarCraft II: Wings of Liberty - Game Guide and Walkthrough](https://game.lhg100.com/Article/UploadFiles/201512/2015121709524714.jpg)
[#3]
Now all that's left is attacking the targeted Dominion buildings. In case Raynor's forces are badly hurt, you can send out the civilians, who equipped with Molotov cocktails will happily rush into the base and draw the Viking's attention. After devastating the logistics headquarters [5] [#3], you can celebrate your first victory in StarCraft II: Wings of Liberty.
Liberation Day:
Destroy the logistics headquarters, Destroy Dominion holoboards, Raynor must survive.
Raynor's Back:
A very easy achievement, which you will probably complete at the beginning of the mission. Just make Jim lead the group of Marines, which is useful, as thereby he's protecting his less resistant companions. The body count of each character can be seen clicking on it on the lower panel.
Down with Mengsk:
Another easy task. In order to complete it, just follow Mensk holoboards trail (screen), as that way you won't miss any Dominion soldiers. The location of all the six holoboards can be found on the map added to the main mission description.
Main objectives:
Additional objectives:
In the cutscene before this mission you will meet Tychus Findley, Raynor's old buddy, who has an offer he can't refuse. It turns out that Mengsk on Mar Sara is conducting excavations of a mysterious alien artefact. The ex-prisoner showed in the introduction knows how to earn good money on it.
![[#1] - The Outlaws - Campaign - Mar Sara missions - StarCraft II: Wings of Liberty - Game Guide and Walkthrough](https://game.lhg100.com/Article/UploadFiles/201512/2015121709524755.jpg)
[#1]
This is the first typical building mission, but you should rather consider it as a not very complicated introduction. You have only Barracks and Marine units at your disposal. The Marines can be aided by Medics (Tech Lab attach required). So if you create a group of soldiers, be sure to have at least one (more are recommended) Medic with them. You will have the chance to see the spirit with which they're doing their job during the first enemy attack, who will not refrain from attacking you base.
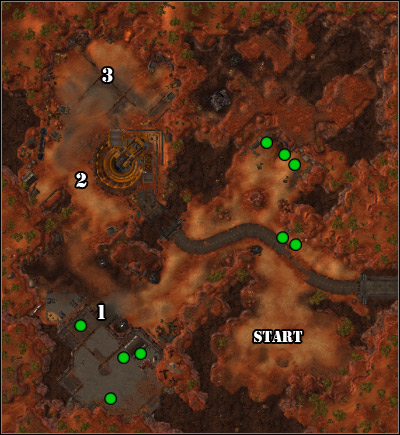
Exploit the resources, train Marines an eventually you will learn about a Rebel base [1], which is under constant attack of Dominion forces [#1]. Tychus thinks that it's a way to distract the enemy forces, while Raynor says the Rebels need help. It's an additional task, but as the base is right next to the main path, you should probably check it out. Note that the defenders are doing quite a good job, so you don't need to rush right there. Gather your forces slowly.
![[#2] - The Outlaws - Campaign - Mar Sara missions - StarCraft II: Wings of Liberty - Game Guide and Walkthrough](https://game.lhg100.com/Article/UploadFiles/201512/2015121709524702.jpg)
[#2]
After leaving your base, you will find some abandoned resource caches (gas, minerals) [#2]. If you find all of them, you will earn one of the achievements. I've marked them with green dots on the map and you can go collect them at the very beginning of the game, to patch up your budget.
![[#3] - The Outlaws - Campaign - Mar Sara missions - StarCraft II: Wings of Liberty - Game Guide and Walkthrough](https://game.lhg100.com/Article/UploadFiles/201512/2015121709524709.jpg)
[#3]
Once you get close to the Dominion base [2] you will get attacked by a pack of Hellions, about which your adjunct will inform you. Afterwards you'll have to face a Bunker [3] [#3], the deconstruction of which will delight Tychus. The camp itself is being protected by Marines and some more dangerous Hellions. Try to destroy the enemy barracks first and then focus on the factory, which are the biggest threats there. Deconstructing the enemy encampment afterwards shouldn't be a problem [#4].
![[#4] - The Outlaws - Campaign - Mar Sara missions - StarCraft II: Wings of Liberty - Game Guide and Walkthrough](https://game.lhg100.com/Article/UploadFiles/201512/2015121709524874.jpg)
[#4]
The Outlaws:
Destroy the Dominion base, Raynor must survive.
Cash Reward:
All the deposits have been marked on the map with green dots. Once you want to collect northernmost ones, be ready to face a couple of enemy Marines stationed there. The rest is lying without protection.
Be Quick or Be Dead:
The first real challenge. Get a minimum of two SCV to collect, without forgetting about consistently building more depots. Start training Marines from the very start, buying the tech add-on as some point. It will allow you to train medics, without which you don't stand a chance in the given time. Collect the closest resources and place another barracks, but this time maybe without the attachment.
After about 4-5 minutes, once the rebel base in the east is discovered, move towards the Dominion. The attack squad should consist of a dozen Marines and as many lovely medics as possible. Look out for the enemy concentration before the Rebel base. Afterwards add them to your team. Keep on training reinforcements and send them towards the enemy encampment.
During the attack on the enemy base, remember about the Hellion welcoming party and the bunker. After eliminating the main defence, firstly attack the barracks and factory producing new units. Finish the destruction by destroying the other buildings (the workers can be left aside).
Main objectives:
Additional objectives:
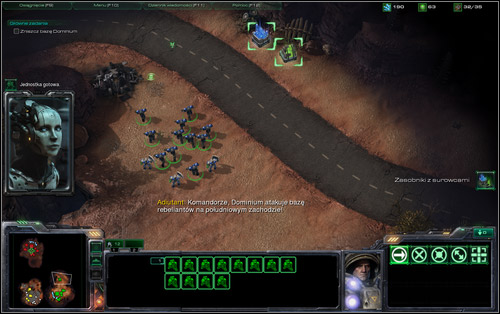
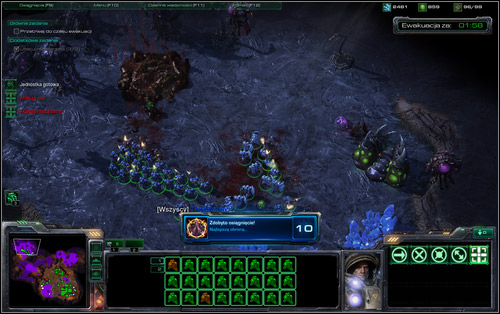
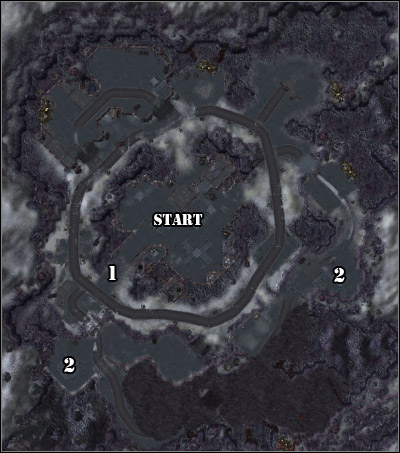
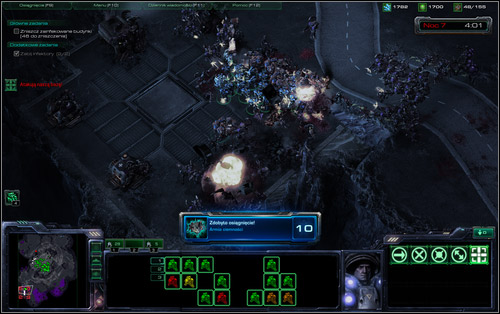
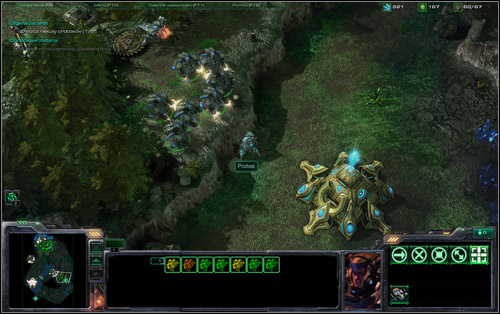
During this mission, you will meet the Zergs for the first time - a race of bloodthirsty creatures which suddenly began the invasion on Mar Sara. Raynor and Tychus are waiting to be evacuated together with the retrieved Artifact [#1], so the only thing they can do in face of the incoming enemy forces is trying to survive until transport arrives.
![[#1] - Zero Hour - Campaign - Mar Sara missions - StarCraft II: Wings of Liberty - Game Guide and Walkthrough](https://game.lhg100.com/Article/UploadFiles/201512/2015121709524894.jpg)
[#1]
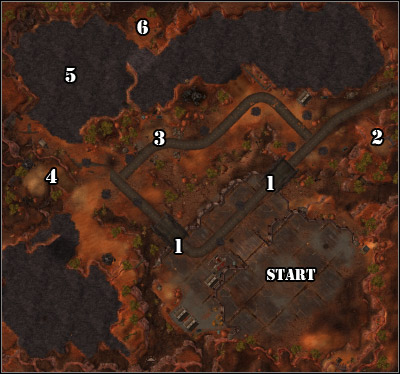
The base is located in quite a smart place. The access to the main platform is provided by two bridges [1], which are already secured with bunkers and Marines at the beginning. Holding those positions is the key to success [#2].
![[#2] - Zero Hour - Campaign - Mar Sara missions - StarCraft II: Wings of Liberty - Game Guide and Walkthrough](https://game.lhg100.com/Article/UploadFiles/201512/2015121709524833.jpg)
[#2]
Send a couple SCVs to the bunkers, so they can take care of building and repairing possible damage. Send out the rest to crystals and refineries. Also do pay a visit to the Engineering Bay, where you should buy some weapon upgrades, above all else. Keep on building new bunkers and training Marines in the meantime (send them down to strengthen the defence).
![[#3] - Zero Hour - Campaign - Mar Sara missions - StarCraft II: Wings of Liberty - Game Guide and Walkthrough](https://game.lhg100.com/Article/UploadFiles/201512/2015121709524901.jpg)
[#3]
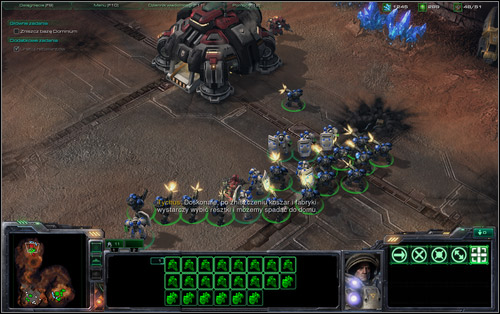
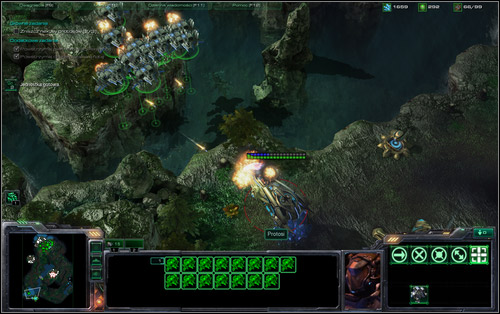
Build reactors by the barracks to be able to train two soldiers simultaneously. By the way I'd recommend giving up on medics completely, that is if you don't intend to try out your units in a direct fight against the fast Zerglings, which isn't a very bright idea. Focus on building bunkers, as you will be attacked by bigger and bigger waves of enemy forces [#3]. Apart from the mentioned Zerglings, Hydralisks, who attacking from a distance will also appear.
At some point the flying Mutalisks will also come in, but the basic Turrets should take care of them without a problem [#4]. As a matter of fact, the Marines also know when to raise their heads and make use of the Gauss riffles. During my game at least, I didn't need to place any new Turrets.
![[#4] - Zero Hour - Campaign - Mar Sara missions - StarCraft II: Wings of Liberty - Game Guide and Walkthrough](https://game.lhg100.com/Article/UploadFiles/201512/2015121709524960.jpg)
[#4]
The additional challenge of this scenario are three escapades into the infected terrain to rescue a group of lost Marines [2, 3, 4] [#5]. They will appear in the order presented on the map and you will learn about their presence with a couple minutes interval. Thanks to rescuing them, you will strengthen your army and also gain some resources in the form of gas and crystals. Each time getting to them will connect with the need to confront some Zergs (they are buried in the ground), so keep alerted.
![[#5] - Zero Hour - Campaign - Mar Sara missions - StarCraft II: Wings of Liberty - Game Guide and Walkthrough](https://game.lhg100.com/Article/UploadFiles/201512/2015121709524918.jpg)
[#5]
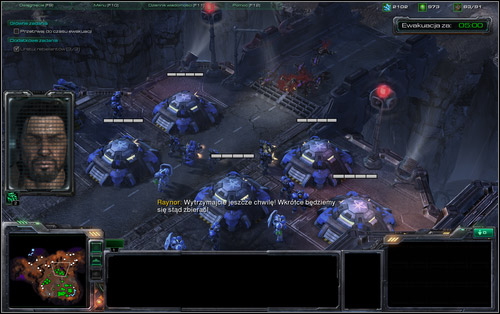
As for the main objective, make sure not to let the bridges defences fall, as things can get nasty then. Keep workers there at all times, so that they can react when needed. In case of losing the positions, you can also head deeper into the base, with only one passage leading inside. Of course expect the last seconds of the fight to be the toughest.
After finishing this mission, you will gain access to some of the functions on the Hyperion - Raynor's Battlecruiser, on which you can for example head to the armoury and buy some useful upgrades. Take a look on the star map, where you can choose two missions.
Minisecret: Behind one of the Zerg bases [5] you can witness a quite extraordinary scene. If you decide to go to the north-west corner of the map and eliminate the enemies there, you will meet a peculiar soldier, who will hide in the toilet upon seeing you [6] [#6]. Click on the toilet three times.
![[#6] - Zero Hour - Campaign - Mar Sara missions - StarCraft II: Wings of Liberty - Game Guide and Walkthrough](https://game.lhg100.com/Article/UploadFiles/201512/2015121709524974.jpg)
[#6]
Zero Hour:
Hold out for evacuation, rescue the rebels.
Hold the Line:
The achievement description says everything. It's of course not only about bunkers, but also anti-air Turrets, which are prone to being attacked especially by the end of the mission, when the Zergs keep on charging with pretty much no end. By then, look out for a small fleet of Mutalisks, which will destroy a single Turret with no problem. That's why you should also place them in pairs and have a worker nearby, who will start repairing them when needed.
The Best Defense (is a good offence):
An achievement well worth its name. Now you not only have to defend from Zergs on hard, but also... attack them. My strategy is to concentrate on one of the enemy bases, with the one in the upper-left corner being the least protected (marked on the mission description map with [5]).
Begin with preparing good defences, capable of holding off the incoming Zerg waves. In the meantime, keep on training Marines and medics. Additionally build another barracks and place a reactor by at least one of them - training units will go faster. Also don't hesitate from going out for the rebels, but keep in mind that on hard there's quite a lot of Zergs creeping out there (Hydralisks). It's also wise to have upgrades from the engineering bay.
Once there's about 10 minutes left, survive another attack on the left bridge and head out from there towards the mentioned base. You should have at least a dozen Marines and a whole hospital of medics under your command. Look out for spine crawlers on your way and also in the base itself. To minimise the damage, don't attack the base all-out from the front, but try to draw out the moving defence out. Destroy the two hatcheries WITHOUT killing the workers. Retreat to your own base and then return after a couple minutes. New hatcheries - this time defenceless - should appear in the place of the destroyed ones. It's also a good chance to take a further trip and discover the secret I mentioned in the main description.
Optionally, after the first attack, you can head to the base located in the lower-left corner of the map, but you would need to have a very powerful army at your disposal to get to the main buildings in one piece. The north-east Zerg base is completely out of the question - it's protected too well.
Main objectives:
Additional objectives:
It's one of the two scenarios after Zero Hour. The peripheral Agria planet suffers from a massive Zerg attack and the locals are in big trouble. The Dominion has centralised their forces upon learning about the invasion, leaving worlds such as these defenceless. Dr Ariel Hanson's distress call has been received by Jim Raynor.
![[#1] - The Evacuation - Campaign - Colonist missions - StarCraft II: Wings of Liberty - Game Guide and Walkthrough](https://game.lhg100.com/Article/UploadFiles/201512/2015121709525040.jpg)
[#1]
This mission is about evacuating the civilians towards the space port. The Zergs, who have broken through the planetary defence, keep on roaming the area and will soon conquer the whole planet. Begin with the Firebat duet, who can fight against the fast Zerglings pretty well, unlike the Marines. Clear out the way [#1] to the nearby settlement together with the medics [1].
![[#2] - The Evacuation - Campaign - Colonist missions - StarCraft II: Wings of Liberty - Game Guide and Walkthrough](https://game.lhg100.com/Article/UploadFiles/201512/2015121709525059.jpg)
[#2]
From now on, every couple minutes, a transport with colonists supported by some Agria Marines will take off [#2]. They can't be controlled, just like the vehicle itself - your role is to make sure they get to the spare port in one piece [2]. Basically, you should protect at least 5 trucks, which will fill up the meter in the upper left corner. There you can also see how much people you can lose (which can prolong the mission).
![[#3] - The Evacuation - Campaign - Colonist missions - StarCraft II: Wings of Liberty - Game Guide and Walkthrough](https://game.lhg100.com/Article/UploadFiles/201512/2015121709525058.jpg)
[#3]
The path is secured in two spots with bunkers [3], which you will discover during your first walk. They are Dominion survivors, who have fled together with Agria. Those bunkers are key defence points, so I'd suggest placing your squads there, extend and send some SCVs there - they will surely have things to repair [#3]. The place marked with [4] is also a key location. Each time the civilians are nearby, the filthy beasts will try to attack them [#4]. So those are three spots that you should avoid at all costs.
In order to prevent loses at the beginning, create a small squad which will accompany the first truck during the long road. During this trip, take over the bunkers, place new ones (there are resource caches lying around) and keep sending new soldiers there. Also keep on investing in the infantry following the transporter. After successfully escorting them, return to base and repeat the process. Alternatively, you can also consider building bunkers around the unprotected middle part of the map.
![[#4] - The Evacuation - Campaign - Colonist missions - StarCraft II: Wings of Liberty - Game Guide and Walkthrough](https://game.lhg100.com/Article/UploadFiles/201512/2015121709525085.jpg)
[#4]
As for expanding your own base, I'd suggest beginning with building additional barracks together with a reactor and training as much Firebats as you can. Also don't forget about medics, priceless here, if those you get at the beginning won't survive the fights. Train Marines as well, as after a while you'll get attacked by flying units (Mutalisks). The Terran pyromaniacs unfortunately can't attack such targets. At the end of the mission you will additionally receive information about Nydus Worms appearing. Zergs will come out of the sewers [#5] one after another and attack immediately. You should be pretty close to winning, although keep that fact in mind.
![[#5] - The Evacuation - Campaign - Colonist missions - StarCraft II: Wings of Liberty - Game Guide and Walkthrough](https://game.lhg100.com/Article/UploadFiles/201512/2015121709525052.jpg)
[#5]
While escorting the first transporter, you will see an alien chrysalis by the space port entrance. This will activate an additional mission, which requires you to collect three such samples. The location of the others is marked with green dots on the map. Each chrysalis is protected by a small group of Zergs [#6]. It's not a difficult mission, you just need to find some time to complete it. Thanks to it you will gain your first research points, ready for the Hyperion laboratory to open.
![[#6] - The Evacuation - Campaign - Colonist missions - StarCraft II: Wings of Liberty - Game Guide and Walkthrough](https://game.lhg100.com/Article/UploadFiles/201512/2015121709525044.jpg)
[#6]
The Evacuation:
Reach Dr. Hanson's Settlement, Escort colonists to the colony ships, Do not let 20 colonists die, Collect chrysalis DNA (3).
Handled With Care:
A fairly easy task, if only you follow the hints from the mission description. Have a squad accompany each truck and patrol the terrain in front of the convoy. Most of the problems await for you in the central part of the map.
Leave the colonists on the platform leading to the ports and make sure there are no Zergs following them. Otherwise the colonists might be in for an unpleasant surprise.
Sacrifice Nothing:
Above all you have to organize a strong defence in the places where you discover the Dominion bunkers. Look out especially with the fortifications by the port of destination. Zergling hordes always appear there in advance and the empty fortification (at beginning) will easily fall into their hands if you don't do anything about it.
Afterwards start gradually developing the two spots, building at least one additional bunker, although I'd suggest placing three in total. Throw a Firebat to the furthest (and thereby, more prone to being attacked) and Marines elsewhere. Place two SCVs in both defence spots - they will take care of fixing the damage done by Roaches and other enemies.
The Zergs attack once the truck gets close there, so you can use the squad that's accompanying it, if there are no other threats around. During the last transport, Nydus Worms will appear by the fortifications and you might need to get rid of them (depending on the state of the bunker defence).
Oh and of course don't even think about destroying some add-ons or buildings not fitting with the feng shui.
Main objectives:
Additional objectives:
The doctor Hanson plot, who already feels at home on the Hyperion, continues. She once again asks Raynor for help, this time regarding the refugees moved to planet Meinhoff. Apparently a mysterious virus which is even infecting buildings has attacked them. Our hero already knows that it's a Zerg infection.
![[#1] - Outbreak - Campaign - Colonist missions - StarCraft II: Wings of Liberty - Game Guide and Walkthrough](https://game.lhg100.com/Article/UploadFiles/201512/2015121709525104.jpg)
[#1]
After landing on Meinhoff, you will be surrounded by infected refugee camps and in fact themselves, as they underwent a terrible mutation. During the day they're hiding from the devastating ultraviolet light and hunt during the night. That's why you have to act differently depending on the daytime. During daylight, you can freely destroy the infected buildings [#1], as there's nothing to disturb you, apart from some small creatures and a bunch of blood suckers. The situation chances dramatically after sunset. A horde of Terrans comes out of the ground and you better stay inside your base, behind a wall of bunkers [#2].
![[#2] - Outbreak - Campaign - Colonist missions - StarCraft II: Wings of Liberty - Game Guide and Walkthrough](https://game.lhg100.com/Article/UploadFiles/201512/2015121709525171.jpg)
[#2]
You have two pathways to seal, but during the third night the mutants will break through the barricaded southern path [1]. Thereby you should bunker it in advance [#3]. I'd suggest sending Firebats to the most exposed bunkers, as the basic type of infected Terrans prefers direct fights. However don't forget about Marines, as they're strong against Abominations, massive Zerg units (they will appear during the third night) and have quite a good range. You will also have the quick but not very powerful Hellions at your disposal for the first time. Swann will send them, together with a factory, at the beginning of the mission. Also note the observation Turret - thanks to it you will learn about the enemy attacks in advance thanks to it.
![[#3] - Outbreak - Campaign - Colonist missions - StarCraft II: Wings of Liberty - Game Guide and Walkthrough](https://game.lhg100.com/Article/UploadFiles/201512/2015121709525148.jpg)
[#3]
That's in fact everything as far as preparations go. Raid the structures during the day and defend in the base at night. Only one additional mission (and one achievement) can make you go out after sunset, which will activate during the second night. That's when the scanners will sniff out two peculiar Zerg types [2]. If you intend to hunt them down - as Horner suggests - I'd suggest going to the indicated area during daytime and waiting till sunset. After eliminating the creature [#4], you'd better quickly return to base.
![[#4] - Outbreak - Campaign - Colonist missions - StarCraft II: Wings of Liberty - Game Guide and Walkthrough](https://game.lhg100.com/Article/UploadFiles/201512/2015121709525187.jpg)
[#4]
According to my observations, the number and power of the attackers isn't influenced by how many structures you've destroyed. That's why even if you have just a couple structures left, you have to be ready for a strong attack. Horner will make destroying the structures easier by marking them on the map.
Outbreak:
Cleanse the infestation (destroy 144 infected buildings), Kill the Infestors (2).
28 Minutes Later:
On normal, you won't have any problems with this mission. Train anything you can and once the sun comes up split your army into two squads and go hunting. Let one of the squads clean the left side of the map and leave the right side to the other one. Return to base and man the bunkers before the sun falls down again. You should also train new units during the day. Repeat this scheme until you succeed. I freed the region before the 4th night began, so there's no need to haste.
Army of Darkness:
It won't be as easy this time. The level went up and additionally you have to act on open terrain during the night, which is equal to being annihilated. You'd need to have a powerful military force at your disposal to overpower the enemy and complete the mission in a classical way.
Above all, once you find yourself nearby an infected structure during the night, infected Terrans will immediately surround you. More will keep on coming and eventually you will be ripped to shreds. You can however, use a certain trick.
Don't destroy the buildings during the day - attack them until their health reaches the red level and one shot is enough to destroy them completely (you need to have full control over your units). Infected buildings don't recover or lose health, so you can return to destroying them anytime, even on the next day.
Once the sun sets down, you should be right in the middle of the deteriorated base to quickly destroy the buildings - the locals will start appearing instantly and your units may get annihilated (take many medics). Plan the action precisely, as you can try to complete the achievement in one night (hard, but possible) or split the whole thing into a couple phases. In the second case, be sure to keep an eye on the defence of your own camp.
The achievement can be completed during the mission, you don't have to finish it. The demolition-oriented Reapers can make your life much easier. You gain access to them after completing The Devil's Playground mission.
Main objectives:
Additional objectives:
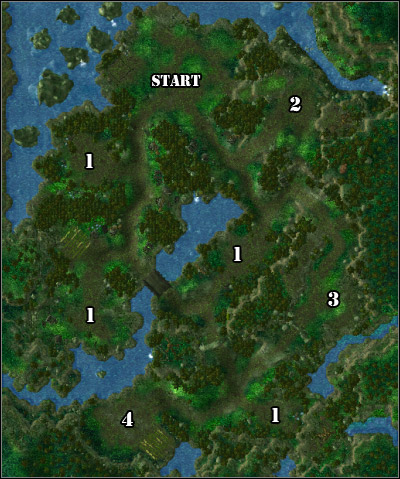
The end of Dr. Ariel Hanson and her refugees plotline. They moved from the destroyed Meinhoff to planet Haven, where they face yet another threat of extinction. Some of them have been infected with the Zerg virus, which is pretty clear to the neighbouring Protoss colony. They of course react with total annihilation to any sign of the virus.
You will fight for Safe Haven if you choose Dr. Hanson's side over Selendis', during the cutscene before the mission. That means you have to fight against the Protoss, who've send a Purifier to destroy the colony.
![[#1] - Safe Haven - Campaign - Colonist missions - StarCraft II: Wings of Liberty - Game Guide and Walkthrough](https://game.lhg100.com/Article/UploadFiles/201512/2015121709525230.jpg)
[#1]
The impunity of the spaceship is guaranteed by the three nexuses, which power its hermetic force field. So before you even think of attacking the Purifier, you have to destroy three Protoss encampments. As you're building up your military force, the Purifier will move from one refugee camp to another [1], leaving behind only ruin and a big hole in the ground [#1].
Even though most of the colonists were evacuated to Raynor's base, some of them are still in their villages. The biggest threat to them will be the Protoss fleet, which will appear each time the Purifier manages to destroy a colony. It will then call in Carriers and later on additional flying units, which will be sent towards the next camp. Their task is to massacre the local defence and the space shuttle, which will let the Purifier do its job freely
![[#2] - Safe Haven - Campaign - Colonist missions - StarCraft II: Wings of Liberty - Game Guide and Walkthrough](https://game.lhg100.com/Article/UploadFiles/201512/2015121709525257.jpg)
[#2]
However those people can be saved. Reinforce your Viking squad with new units and look out for such a threat. It will first appear after the destruction of the first village. The villagers will leave you some minerals and gas for each destroyed enemy fleet [#2]. It's also an official, additional task, the completion of which will rewards you with an achievement. As for the new units, keep in mind that they can transform into an assault robot with Gatling guns and attack ground units.
Also don't forget about expanding your base, as the Protoss won't look kindly to the presence of hostile Terran forces on these lands. Keep training new units from the start (focusing on Vikings), planning your future operation.
![[#3] - Safe Haven - Campaign - Colonist missions - StarCraft II: Wings of Liberty - Game Guide and Walkthrough](https://game.lhg100.com/Article/UploadFiles/201512/2015121709525292.jpg)
[#3]
I'd suggest going out for the nexuses not later than when the Purifier starts moving towards the third (out of four) colony. You should however begin your action earlier on, as the enemy's command Centers are rather poorly protected [#3], though when looking from a bird's-eye [2], the defence keeps on getting better and better. There's a Colossus in the middle one [3] and in the southern one [4] - two Archons and a Carrier, among others [#4].
You will also come across Photon Cannons and Warp Prisms in ach base. Destroy the Prisms first to cut off the power from the buildings. Use Vikings to eliminate them quickly.
![[#4] - Safe Haven - Campaign - Colonist missions - StarCraft II: Wings of Liberty - Game Guide and Walkthrough](https://game.lhg100.com/Article/UploadFiles/201512/2015121709525279.jpg)
[#4]
Destroying the third Nexus will render the Purifier vulnerable to attacks [#5], so send a swarm of Vikings onto it. The powerful Battlecruiser can defend itself, so keep an eye on the state of your troops. It has a more irritating than dangerous ability of creating a vortex, which will make some of your units literally vanish into thin space, however they will come back after a while. The unprotected Purifier also calls in Protoss units to aid. If you want to avoid most of the damage, attack it once it hangs over a colony, gathering energy for an attack. It's almost defenceless then.
![[#5] - Safe Haven - Campaign - Colonist missions - StarCraft II: Wings of Liberty - Game Guide and Walkthrough](https://game.lhg100.com/Article/UploadFiles/201512/2015121709525304.jpg)
[#5]
Safe Haven:
Destroy the Protoss Nexus, destroy the Purifier Mothership, stop the first, second and third terror fleet
You Shall Not Pass!:
You need to save three colonist encampments, including the one in your base. Some simple calculations lead to the conclusion that you can sacrifice two. You can complete this mission while depending on the power of the Viking alone, however you do need to be fast about it.
Start building those all-around airborne units from the start, adding a Reactor to the Starport in the first place. Place two or so Bunkers to protect the base and fill them up with Marauders and cheap Marines. Such a set should be quite enough, however you will probably have to face some hard moments. You can increase the defence later on, once you're rich enough.
Having a couple Vikings ready, head on to the nearest Protoss Nexus (they power the force field of the Purifier, which is the main target here). Destroy the two Prisms which power the Cannons, defending from a pair of Phoenixes beforehand. Land on the nearby cliff [1] and destroy the headquarters from up high, while in assault mode. Repeat the process with the middle base [2], looking out for the Colossus and Stalkers.
The lowest encampment has the strongest defence, with an Archon, Carrier and a Void Ray. Try to precisely eliminate the defendants, while avoiding an open fight. Attacking from the north-west seems like a good idea [3], as from there you can lure out the enemy airborne units into a one-on-one fights.
Overall, try not to get involved in unnecessary fight during the three invasions, but try to focus on attacking the Nexuses. Keep on adding new ships to your squad, while investing in upgrades in the Armory. Return to base from time to time to repair your machines (or keep SCVs somewhere behind).
Also don't hesitate from helping the colonists in chasing the attackers away, as this way you will receive resources, helpful in the process of producing new Vikings. Keep in mind that in the end you also have to destroy the Purifier, which will probably welcome you with a vortex (your units will temporarily disappear).
My Precious:
The above description pretty much fits this achievement as well. You just need to act a bit faster and keep in mind that on higher difficulty settings, there's a bit more units in the Protoss bases. An additional Archon is waiting for you in the south, or a Templar which will summon a Psi Storm on sight.
The key to victory is the first phase of the mission. Try to lose as few units as possible during destroying the first two Nexuses, while assembling a squad to attack the third base and fight the Purifier.
Main objectives:
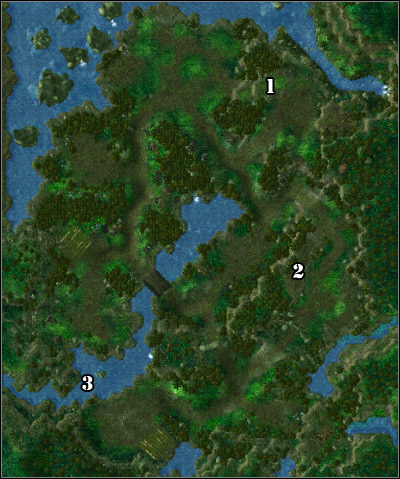
An alternative mission, ending Dr. Hanson's theme. Haven's Fall will activate if you agree with Selendis during the briefing and decide to attack the infected colonists. Zergs have already begun infecting the Terran camps and you have to hurry before all inhabitants of the planet get infected.
![[#1] - Haven's Fall - Campaign - Colonist missions - StarCraft II: Wings of Liberty - Game Guide and Walkthrough](https://game.lhg100.com/Article/UploadFiles/201512/2015121709525320.jpg)
[#1]
Zergs will keep on sending virophage with some other units to destroy the colonies [#1]. Your task is not to let that happen, not only from humanitarian motives, but also because not doing so will increase the enemy's power (more units will march onto your base). You will be attacked by mutated Terrans, though Zergs will also come by visits.
![[#2] - Haven's Fall - Campaign - Colonist missions - StarCraft II: Wings of Liberty - Game Guide and Walkthrough](https://game.lhg100.com/Article/UploadFiles/201512/2015121709525437.jpg)
[#2]
As you begin the mission, one of the colonies is already infected [1]. You can try out the Vikings' new ability provided by Swann on it. Those units can attack airborne units from afar, while being able to land and shoot at ground units when needed.
You only have three Vikings at your disposal, but that's quite enough to eliminate the source of infection of the mentioned colony [#2]. Start off by shooting down the Mutalisks and then take care of the Brood Lords (they're deadly to ground units). Afterwards transform you Vikings at the edge of the colony and start eliminating the Zergs and other defendants, eventually taking care of the virophage.
![[#3] - Haven's Fall - Campaign - Colonist missions - StarCraft II: Wings of Liberty - Game Guide and Walkthrough](https://game.lhg100.com/Article/UploadFiles/201512/2015121709525469.jpg)
[#3]
Repeat the process during each colony infestation attempt [#3]. There are five more colonies in total [2]. All of them will be attacked one at a time, but systematically. If you fear you might not make it with just three Vikings (there's always a probability) at the starting one, postpone your intervention and build a few more units of that type.
![[#4] - Haven's Fall - Campaign - Colonist missions - StarCraft II: Wings of Liberty - Game Guide and Walkthrough](https://game.lhg100.com/Article/UploadFiles/201512/2015121709525417.jpg)
[#4]
It's an interesting fact, that once a colony stays under Zerg influence for too long, it will start summoning Aberrations - quite tough, direct-fighting mutants [#4].
Three main Zerg bases [3] are quite heavily protected, so I wouldn't suggest going there with just your Vikings. The assault mode is rather an addition and works with smaller groups of enemies, so use also other units that you have at your disposal [#5].
![[#5] - Haven's Fall - Campaign - Colonist missions - StarCraft II: Wings of Liberty - Game Guide and Walkthrough](https://game.lhg100.com/Article/UploadFiles/201512/2015121709525434.jpg)
[#5]
Thought there's no bonus connected with it, there are several vespene gas canisters spread throughout Haven. You will find them in lovely places marked with [4] and they're worth visiting for that fact solely [#6]. From the strategic point of view, two viewpoints located near your base should interest you [5]. If you place an infantry or build a Turret there, you will gain a nice picture of the area and will be able to detect enemy attacks early on.
![[#6] - Haven's Fall - Campaign - Colonist missions - StarCraft II: Wings of Liberty - Game Guide and Walkthrough](https://game.lhg100.com/Article/UploadFiles/201512/2015121709525446.jpg)
[#6]
Haven's Fall:
Destroy the Zerg infestation.
Outpatient:
If you will follow the scheme shown in the above description, you will get this achievement easily. In short: create a squad of Vikings, which you will send to the infected colonies. Firstly take care of the Mutalisks, then the Brood Lords and afterwards land beside the colony and clear the area with Gatling guns.
House Call:
The same as before, but start making Vikings at the very beginning. The virophage have much larger protection than on normal difficulty, so you need to have enough forces during the first attack. There are exactly five colonies in total, so you can't lose any.
Also prepare good defence at your base. In order to lower the Zergs' power, send your three Vikings to the nearby infected colonists at the beginning.
Main objectives:
Additional objectives:
The Zerg attack caused a real panic amongst the Terran on the marginal planets of the sector. One of the worlds has been abandoned by The Kel-Morian Combine, which was noticed by Gabriel Tosh. He's offering Raynor a joint exploration of the abandoned resources, which should significantly increase both heroes' budgets. However the place is quite dangerous, with common volcano eruptions and Zergs lurking around.
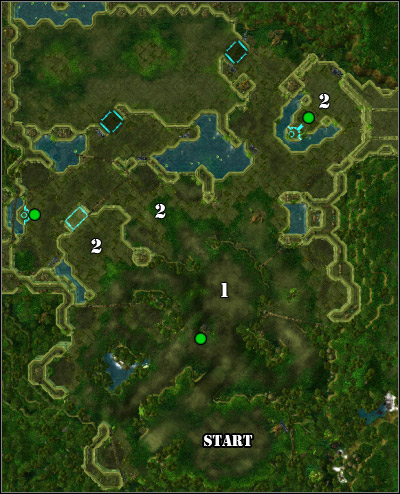
![[#1] - The Devil's Playground - Campaign - Covert missions - StarCraft II: Wings of Liberty - Game Guide and Walkthrough](https://game.lhg100.com/Article/UploadFiles/201512/2015121709525570.jpg)
[#1]
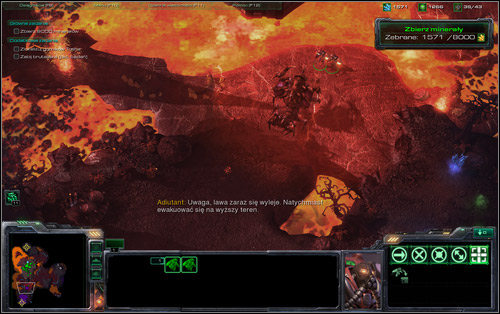
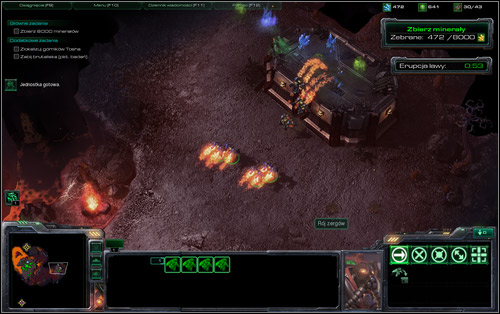
Your goal is to collect 8000 minerals, which is made harder by the fact that the deposits are placed in areas endangered by lava. It will keep on appearing periodically and you'll always be warned about it by the adjutant. That leaves you with enough time to gather the working SCVs and move them to higher ground. That will be your tactic at the beginning, once you discover the rich (a specific, yellow colour), but few in numbers deposits in the west [#1]. The only problem is that they use up fast.
![[#2] - The Devil's Playground - Campaign - Covert missions - StarCraft II: Wings of Liberty - Game Guide and Walkthrough](https://game.lhg100.com/Article/UploadFiles/201512/2015121709525577.jpg)
[#2]
Once that happens, you will have to make use of the mobile properties of your buildings. The Command Center, as most of the Terran buildings, can fly and move to a new spot. Tosh will soon reveal the localization of new deposits, out of which only the southern one seems safe [1]. You can place 5 workers inside the Command Center and I'd recommend beginning the new mining with that exact amount. In case of an incoming eruption, just move them into the building and fly up [#2]. Once the lava is gone, you can continue the operation. You will mine of all the nearby deposits in an identical way.
![[#3] - The Devil's Playground - Campaign - Covert missions - StarCraft II: Wings of Liberty - Game Guide and Walkthrough](https://game.lhg100.com/Article/UploadFiles/201512/2015121709525580.jpg)
[#3]
The Zergs are of course another problem. There are four Nests in the area [2] and they will let you know of their presence quickly. You will be attacked by a regular army, later on supported by flying Mutalisks. Protect the two entrances to your base with bunkers. However I'd recommend moving the defence points to places marked on the map [3]. If you don't have the military potential needed to attack the Zergs, fortify with Bunkers in those places [#3] (also send a worker to repair them), so that the monsters won't bother the miners working by the minerals. Eventually you will have to search for new sources and by leaving the Zergs a free hand, you will endanger yourself with constant attacks. It's very hard to protect the lower parts of the area because of the lava, so bunkering the two spots mentioned above seems like a good choice.
![[#4] - The Devil's Playground - Campaign - Covert missions - StarCraft II: Wings of Liberty - Game Guide and Walkthrough](https://game.lhg100.com/Article/UploadFiles/201512/2015121709525588.jpg)
[#4]
Soon after beginning the mission you will be familiarised with the Reapers, quick units capable of flying onto otherwise inaccessible platforms and throwing mines at buildings. There are lots of lost Tosha units spread throughout the area and there's an achievement connected with them. You have to find them all to earn it, which shouldn't be very hard after you take a look at the green dots on the map. Thanks to collecting those units you can also earn additional minerals and gas, as some containers are accessible only by using their jetpacks [#4]. If you're low on resources, to a quick reconnaissance of the area and you should find something.
![[#5] - The Devil's Playground - Campaign - Covert missions - StarCraft II: Wings of Liberty - Game Guide and Walkthrough](https://game.lhg100.com/Article/UploadFiles/201512/2015121709525687.jpg)
[#5]
The Devil's Playground scenario offers two additional objectives. One consists of rescuing the Tosh crew in the north [4] and truth be told - it's not very hard. The terrain is being protected by a small group of Zergs and in exchange for the trouble, you will be rewarded with a Command Center and a few SCVs [#5]. Te Brutalisk which will be discovered by your research team is a whole other story [5]. The beast is huge and can cause quite the damage to your Marines, but bringing a large enough squad should do the trick [#6]. Both missions will activate not long after the start of the mission.
And that's basically all there is to it. If you feel the need, destroy the three Zerg bases (check out the achievements) and gain the required amount of minerals. The mission will then end.
Minisecret: If you will a bit of free time, fly with whichever building to the lower right corner of the map. You will discover a characteristic character connected with Blizzard's works.
![[#6] - The Devil's Playground - Campaign - Covert missions - StarCraft II: Wings of Liberty - Game Guide and Walkthrough](https://game.lhg100.com/Article/UploadFiles/201512/2015121709525649.jpg)
[#6]
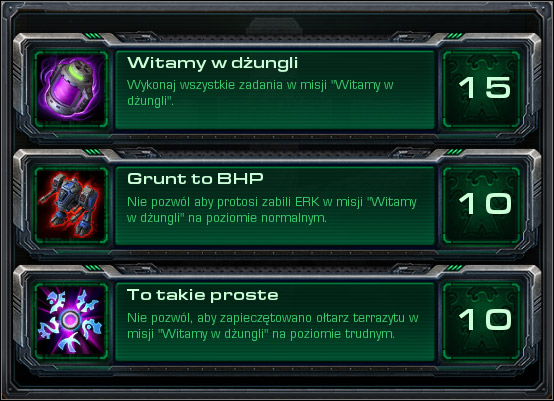
The Devil's Playground:
Gather 8000 Minerals, locate Tosh's miners, kill the Brutalisk.
Red Lobster:
An interesting achievement requiring good synchronization with the time shown on screen. Take a few units and get rid of the Brutalisk's defence (a few Zerglings and Hydralisks). Now you have to lure the beast out from its lair onto a terrain which is being flooded by lava. However don't do it with all your army.
Take one of your Reapers and provoke the Brutalisk so that it starts chasing him north (in the direction of your base). The Terran commando is very quick, so you'll be able to play cat and mouse with the monster with ease. Just be sure to constantly have it in your sight.
The whole problem is that the monster will retreat onto the platform upon setting foot on the endangered area. You should have the Brutalisk begin chasing the Reaper about 18-20 seconds before the lava appears. You will probably lose your unit in the process, but let's say it's a devotion to science.
You can of course try to block the Brutalisk with buildings, but I think some quickloads should do the thing.
Reaper Man:
Well, it's all about the Reapers, who I have marked (with green) on the map.
The Scenic Route:
One of the unique achievements, which won't be shown in the mission summary. To complete it, you have to kill every Zerg and destroy all their buildings on the map. Once you do it, a proper announcement will be displayed onscreen. Just be sure not to gather those 8000 minerals, or it will be over.
Main objectives:
Additional objectives:
Gabriel Tosh has now set his eye upon planet Bel'Shir, with precious Terrazine gas deposits. It's guarded by Protoss, to whom it's a gift from the gods. They surely can't be convinced to share a bit, so you'll have to fight your way to it.
![[#1] - Welcome to the Jungle - Campaign - Covert missions - StarCraft II: Wings of Liberty - Game Guide and Walkthrough](https://game.lhg100.com/Article/UploadFiles/201512/2015121709525644.jpg)
[#1]
The jungle of Bel'Shir is filled with the enemy's airborne units, so Raynor wisely took Goliaths [#1] - powerful anti-air machines, though capable of attacking ground units as well.
![[#2] - Welcome to the Jungle - Campaign - Covert missions - StarCraft II: Wings of Liberty - Game Guide and Walkthrough](https://game.lhg100.com/Article/UploadFiles/201512/2015121709525777.jpg)
[#2]
The local Protoss tribe called Tal'darim will quickly notice your presence, even if you won't do anything flashy. Overall the challenge is to take the SCV to the altar, where he will begin the mining work [#2]. Once it does though, you have to be ready for a reaction from the locals, who will try to interrupt you (the SCVs take a while to finish). So if you choose a deposit to mine, absolutely take some guards with you. Protecting the workers is also important when it comes to one of the achievements, so it's worthwhile.
![[#3] - Welcome to the Jungle - Campaign - Covert missions - StarCraft II: Wings of Liberty - Game Guide and Walkthrough](https://game.lhg100.com/Article/UploadFiles/201512/2015121709525782.jpg)
[#3]
The Protosses' behaviour is a bigger problem, as once they notice what you're up to, they will keep on sending units to seal off the altar [#3]. A sealed altar is then deactivated, which makes gaining one of the achievements (hard) impossible and brings you closer to losing (check out the Main objectives). If you're thinking about completing the mission, you can't stay hidden inside your base too much and react to Tal'darims' actions. The Protosses seal altars with simple probes, usually assisted by Scouts, Void Rays and Stalkers. That's why I'd recommend adding Marauders or other unlocked units (as long as they're not Firebats) to your team of Goliaths. A diversified will finish off the enemy forces faster. Also don't forget about defending the base, which will be constantly under attack.
![[#4] - Welcome to the Jungle - Campaign - Covert missions - StarCraft II: Wings of Liberty - Game Guide and Walkthrough](https://game.lhg100.com/Article/UploadFiles/201512/2015121709525791.jpg)
[#4]
The Protosses have set up a small camp very close to your base [1], the conquering of which [#4] will give you additional materials and reduce the distance between the Terrazine deposits. From a strategic point of view, taking it over is extremely important. It'd also be wise if you wouldn't try to take over two deposits at the same time - the Protoss will react in correspondingly to the threat, increasing their effort in attacking and sealing the altars.
![[#5] - Welcome to the Jungle - Campaign - Covert missions - StarCraft II: Wings of Liberty - Game Guide and Walkthrough](https://game.lhg100.com/Article/UploadFiles/201512/2015121709525716.jpg)
[#5]
There are three Relicts waiting for you in the jungle (as always, marked with green dots). You can collect the closest one with no problems, while the other two are a bit more troublesome. They are protected by Photon Cannons and lesser defence points [2], with which you shouldn't have much problems. Additionally you will come across an active Warp Prism around the treasure in the north-east [#5], so take care of it before it functioning.
Additional objectives:
Welcome to the Jungle:
Gather Terrazine (7), Protoss Can't Seal 7 Altars, Find Protoss Relics (3).
Appetite for Destruction:
OSH is essential. You must protect your SCVs from the Protoss intervention while they're extracting Terrazine, just like while completing the mission normally. You should also keep an eye on them during their way back and remember that even though they're automatically headed towards the Command Center, you can always stop them - he's under your command all the time.
You better not use SCVs to repair your machines, it's too risky.
It's So Easy:
No, it's not really that easy. In fact, in my opinion, it's the hardest achievement in the game. I went through many solutions and the best seems to be using quick units to sabotage. The targets are of course the probes sealing the altars.
In order to do this, you should have Hellions or Vultures at your disposal. You unlock both of them by completing the Outbreak and Cutthroat missions, on the same level that the jungle expedition. Once you have them, create a small squad and send them to action when only your Adjutant informs you about an attempt to seal the altar. Target only the Probe, ignoring the other units. After destroying it, retreat to your base for necessary repairs.
This way you can quickly eliminate the threat without having to engage your main forces (Marines, Marauders, Goliaths etc.), in which you should keep investing all the time. They will come in handy once the Protoss will try to capture the altars located hidden behind their distant bases [1]. Hellions or Vultures would have problems with fighting their way through, unlike your main forces. Clear those three locations quickly, to have free access to each Terrazine location.
You won't have too much free time, as the Protoss will keep on sending squads of Colossuses and Void Rays to attack your base. In order to minimize the losses, go deeper into the jungle only after fighting off such an attack, while the Tal'darims will be forming a new attack. Also don't attack the units accompanying the Probes - they will peacefully return to base after you destroy it.
If you don't have Hellions or Vultures at your disposal, you can alternatively produce Reapers. They aren't much slower than the above two, but of course lack in health, so you will probably have to often send in new ones. If you do happen to have Banshees, you can use them here as well. Alternatively you can think about the Bunker method described below, though it's a very time-consuming way.
You'ze So Crazy!:
Another special prize. It will be awarded to whoever manages to destroy all Protoss buildings on normal. It involves invading the main enemy base located in the north [2], which is quite the challenge.
The Protoss base is a real production Center (8 Stargates, amongst others!), with two roads, both highly protected, leading to it [3]. The place is great to defend, as it's located on higher ground and the paths are very narrow and give great opportunity for the aerial units to shoot you. You will really need to try hard and have a large army at your disposal to destroy this place.
![You should consider placing bunkers (and Turrets) below the entrances to the enemy base [4] which will stop new waves of enemies and probe expeditions - Welcome to the Jungle (Achievements) - Campaign - Covert missions - StarCraft II: Wings of Liberty - Game Guide and Walkthrough](https://game.lhg100.com/Article/UploadFiles/201512/2015121709525891.jpg)
You should consider placing bunkers (and Turrets) below the entrances to the enemy base [4] which will stop new waves of enemies and probe expeditions. You're playing on normal, so it won't be so bad and at least you won't have problems with chasing the Protoss away from the Terrazine.
After getting to the base itself, start off by destroying Pylons powering the buildings and cannons. Take some SCVs (for the Goliaths) and medics to heal the infantry. Also remember that you can always postpone playing this mission until obtaining some heavier units. Things would be much easier with, for example, Siege Tanks. It'd be also good to have Vikings (Safe Haven or Haven's Fall).
Main objectives:
Additional objectives:
The last mission of the Gabriel Tosh plotline. He convinces Raynor to attack the famous New Folsom Prison and free the Dominion enemies being held there. There are also many common criminals and murderers amongst them, about which Nova, one of Mengsk's Ghosts informs you. You will play a Ghost if you choose her side during the briefing.
The scenario consists of three levels and you won't be building anything in it, just using the given units. Your goal is to destroy the Jorium Stockpile, the Terrazine Tank and the Psi-Indoctrinator. Tosh is using these to produce Phantoms - an upgraded version of traditional Ghosts.
![[#1] - Ghost of a Chance, part 1 - Campaign - Covert missions - StarCraft II: Wings of Liberty - Game Guide and Walkthrough](https://game.lhg100.com/Article/UploadFiles/201512/2015121709525859.jpg)
[#1]
Nova is permanently cloaked, which lets her kill while staying hidden. She is only threatened by Missile Turrets and Ravens, who can detect cloaked units. Move right and make use of the sniper rifle once you see the Marauder [1], as the game suggests to [#1]. You can only shoot biological targets like that, with a 10 second interval.
![[#2] - Ghost of a Chance, part 1 - Campaign - Covert missions - StarCraft II: Wings of Liberty - Game Guide and Walkthrough](https://game.lhg100.com/Article/UploadFiles/201512/2015121709525841.jpg)
[#2]
Afterwards start attacking with the regular units and send them onto the Bunker [2]. You have four medics at your disposal, so none of your units should die [#2]. To ensure good healing, you can mark them and right-click on the soldiers. From now on they will follow them. Attack once more by the Turret, which prevents Nova from moving on. Afterwards destroy the control room [3], which will open a path for the infantry [#3].
![[#3] - Ghost of a Chance, part 1 - Campaign - Covert missions - StarCraft II: Wings of Liberty - Game Guide and Walkthrough](https://game.lhg100.com/Article/UploadFiles/201512/2015121709525892.jpg)
[#3]
Leaving more Marauder bodies and destroyed Turrets behind, you will eventually come across a Siege Tank [4]. This will unlock another of Nova's abilities, which will allow you to take control over the tank's crew [#4]. Look out for the nearby Raven, approach close enough to be able to take it over and the nearby defendants will soon be history. Use the Marines to destroy the defenceless Raven. You can turn the tank to dust with a forced attack (the A button).
![[#4] - Ghost of a Chance, part 1 - Campaign - Covert missions - StarCraft II: Wings of Liberty - Game Guide and Walkthrough](https://game.lhg100.com/Article/UploadFiles/201512/2015121709525868.jpg)
[#4]
Nova will notice Spectres on the next platform, which will automatically activate an additional task. If you destroy 10 such units, you will gain 50000 credits (5000 for each). At the current part of the level, you will find two of them, marked by the invincible green dots. While approaching the Jorium Stockpile [5], keep your eyes open for a Battlecruiser protecting it. Of course take it over with Nova [#5]. Begin the destruction from the nearby Turrets and end with the main structure, which will automatically move you to the next map.
![[#5] - Ghost of a Chance, part 1 - Campaign - Covert missions - StarCraft II: Wings of Liberty - Game Guide and Walkthrough](https://game.lhg100.com/Article/UploadFiles/201512/2015121709525881.jpg)
[#5]
Out lovely Ghost will begin the next level all alone, though in just a moment she will be accompanied by a hostile group of Marines backed up by a Raven. Take over the airborne unit which will let you take care of the soldiers with ease. After clearing the airstrip [1] [#6], Raynor will provide you with some additional units.
![[#6] - Ghost of a Chance, part 2 - Campaign - Covert missions - StarCraft II: Wings of Liberty - Game Guide and Walkthrough](https://game.lhg100.com/Article/UploadFiles/201512/2015121709525901.jpg)
[#6]
It will surely be merrier with the two Tanks, Raven and a group of Reapers. Use them to move to the other side of the gate [#7] and destroy the control room [2], previously attacking the Tank and the Marines accompanying it (from up high).
![[#7] - Ghost of a Chance, part 2 - Campaign - Covert missions - StarCraft II: Wings of Liberty - Game Guide and Walkthrough](https://game.lhg100.com/Article/UploadFiles/201512/2015121709525950.jpg)
[#7]
Move on to the end of the platform. Don't move your troops onto the rocky ground, but send forth Nova and take over the Tank on one of the ramps [3] [#8]. Unveil the area with you Raven and use the taken over artillery's range to its full on Tosh's men standing there. Afterwards look for a platform on the right [4] and jump onto it with your Reapers. Eliminate the soldiers, Turrets and the Tank found there.
![[#8] - Ghost of a Chance, part 2 - Campaign - Covert missions - StarCraft II: Wings of Liberty - Game Guide and Walkthrough](https://game.lhg100.com/Article/UploadFiles/201512/2015121709525967.jpg)
[#8]
Move on and Tosh will decide to use a nuclear missile [5], to which you should react with an immediate retreat. Return after the detonation, destroy the Spectres and go left, taking over the building on the side [6] [#9]. Thanks to it you will have the nuclear missile which the Phantom leader tried to hit you with at your disposal. Afterwards move the Reapers through the rocks towards the distant enemy encampment [7] where you will find more Spectres (if you're hunting them down).
![[#9] - Ghost of a Chance, part 2 - Campaign - Covert missions - StarCraft II: Wings of Liberty - Game Guide and Walkthrough](https://game.lhg100.com/Article/UploadFiles/201512/2015121709525995.jpg)
[#9]
The Terrazine tank area [8] [#10] can be taken over in a traditional way or use a nuclear missile - it's up to you. In the second case, just keep an eye on the detection area on the Turrets.
![[#10] - Ghost of a Chance, part 2 - Campaign - Covert missions - StarCraft II: Wings of Liberty - Game Guide and Walkthrough](https://game.lhg100.com/Article/UploadFiles/201512/2015121709525912.jpg)
[#10]
Last phase of the attack. You of course have Nova at your disposal, accompanied this time by a quad of Vikings and Banshee. The first ones can change from airborne to a ground unit so they're universal. Banshees are used for rather tactical attacks, tempting with the ability to cloak.
![[#11] - Ghost of a Chance, part 3 - Campaign - Covert missions - StarCraft II: Wings of Liberty - Game Guide and Walkthrough](https://game.lhg100.com/Article/UploadFiles/201512/2015121709525914.jpg)
[#11]
Start off by going north-east and taking over the tank there [1] [#11], using it to cause as much destruction as possible. You will surely notice a nuclear reactor in the east, to which you should go a bit later, once getting rid of the enemy units from the hill on the right (a Siege Tank and Banshees, amongst others).
![[#12] - Ghost of a Chance, part 3 - Campaign - Covert missions - StarCraft II: Wings of Liberty - Game Guide and Walkthrough](https://game.lhg100.com/Article/UploadFiles/201512/2015121709525954.jpg)
[#12]
I'd recommend beginning the operation from sending airborne units to the indicated place [2] [#12], which will quickly take care of the Marauders and Viking stationed there. Afterwards successfully keep on clearing the area of enemy forces, heading up towards the mentioned building [3]. Take over the outpost and return south. Tosh will drop a nuclear missile on you in the north [4], but that's not all there's to it. By taking the lower path, you will get the chance to control some interesting units.
![[#13] - Ghost of a Chance, part 3 - Campaign - Covert missions - StarCraft II: Wings of Liberty - Game Guide and Walkthrough](https://game.lhg100.com/Article/UploadFiles/201512/2015121709530089.jpg)
[#13]
The first opportunity will appear once you get to the powerful Ultralisk's prison [5]. Don't kill it - take it over with Nova's telepathic power. Send it quickly east and slash through Marines and anything that comes in your way [#13]. Do the same with Thor [6] - a powerful machine, which will do massive damage before falling down [#14].
![[#14] - Ghost of a Chance, part 3 - Campaign - Covert missions - StarCraft II: Wings of Liberty - Game Guide and Walkthrough](https://game.lhg100.com/Article/UploadFiles/201512/2015121709530036.jpg)
[#14]
You can destroy the Psi-Indoctrinator [7] just like the target on the previous level - with a nuclear missile [#15]. Just be sure to avoid getting into the sight of many Turrets and remember about the Spectres, if only you're hunting them down.
![[#15] - Ghost of a Chance, part 3 - Campaign - Covert missions - StarCraft II: Wings of Liberty - Game Guide and Walkthrough](https://game.lhg100.com/Article/UploadFiles/201512/2015121709530094.jpg)
[#15]
Ghost of a Chance:
Destroy Jorium Stockpile, Terrazine Tank and Psi-Indoctrinator, Kill 10 Spectres, Nova Must Survive.
Dominate Tricks:
Piece of cake. You will come across a few Siege Tanks, which will turn the local defendants into dust after being taken over. Additionally you have the powerful Ultralisk and Thor from the 3rd part of the mission at your disposal.
Total Protonic Reversal:
Contrary to some popular opinions, this achievement doesn't require you to destroy the problematically placed Turrets. Remember that apart from Tosh's conventional army, you also have to get rid of the Spectres, which are formally an additional task. Act carefully around the target buildings, especially with the nuclear missiles. Destroying them will automatically end the current phase of the mission and leave you with no chance of destroying the survivors.
Main objectives:
Additional objectives:
Welcome to New Folsom brother, a strongly protected prison where Dominion enemies are being held, together with the Spectres trained by Tosh. During the briefing he will explain what he needed the resources for and if you continue to work with him, you will attack the mentioned prison.
The mission is very interesting and fully unveils Tosh's abilities as a Spectre. His cloaking ability doesn't use up energy so he can stay hidden with no end. Raynor's forces will also play a role in the mission, though not interactively.
![[#1] - Breakout - Campaign - Covert missions - StarCraft II: Wings of Liberty - Game Guide and Walkthrough](https://game.lhg100.com/Article/UploadFiles/201512/2015121709530033.jpg)
[#1]
The beginning is quite slow - you have to execute three guards. There's however a whole bunch of them by the main entrance [1] [#1] and once you close in to them, you will learn about Tosh's first ability - the Mindblast. It's an AOE psionic explosion and besides damaging the enemy units, it also stuns them for a short while. Of course test it out right away.
![[#2] - Breakout - Campaign - Covert missions - StarCraft II: Wings of Liberty - Game Guide and Walkthrough](https://game.lhg100.com/Article/UploadFiles/201512/2015121709530178.jpg)
[#2]
Afterwards a few Marines will cross your way, this time aided by a Turret [2] [#2]. It has a detection function, which can expose Tosh. You should probably use Mindblast and quickly eliminate the confused Marines.
![[#3] - Breakout - Campaign - Covert missions - StarCraft II: Wings of Liberty - Game Guide and Walkthrough](https://game.lhg100.com/Article/UploadFiles/201512/2015121709530104.jpg)
[#3]
The next problem is another Siege tank accompanied by another Turret [3] (you've probably guessed that it's not the last one). You will deal with this threat by activating yet another of Tosh's abilities, the Psi Shield. It lasts for 10 seconds or until it absorbs 300 damage, so don't worry about attacking the tank wearing it [#3].
Right afterwards, Raynor's soldiers will join the action. They will systematically attack New Folsom's defence, mainly drawing their attention, as I wouldn't hope for any big successes if I were you. Don't worry about them dying all the time, new ones will quickly replace them.
![[#4] - Breakout - Campaign - Covert missions - StarCraft II: Wings of Liberty - Game Guide and Walkthrough](https://game.lhg100.com/Article/UploadFiles/201512/2015121709530117.jpg)
[#4]
By the next fortification [4], get onto the platform on the side and disassemble the Tank and Bunker without being seen by anyone [#4]. Take care of the second bunker with a Turret above as well, accompanied by Raynor's Marines. Use the cover provided by the constantly appearing reinforcements and destroy the nearby position [5], always attacking the detector as the first.
![[#5] - Breakout - Campaign - Covert missions - StarCraft II: Wings of Liberty - Game Guide and Walkthrough](https://game.lhg100.com/Article/UploadFiles/201512/2015121709530138.jpg)
[#5]
As you approach point number [6] Tosh will point out his third ability after a Ghost attacks. It allows converting an allied unit's health into energy. It's also worth noticing that if the Spectre leader falls short on health, you can always move him towards Raynor's medics for a quick healing. As always destroy the fortifications using the Marines and others as human shields [#5]. The terrain is protected by two Tanks, amongst others.
![[#6] - Breakout - Campaign - Covert missions - StarCraft II: Wings of Liberty - Game Guide and Walkthrough](https://game.lhg100.com/Article/UploadFiles/201512/2015121709530197.jpg)
[#6]
You will also learn about Cell Block A [#6], located in the north [7]. If you free the prisoners held there, they will aid you in your fight against Dominion by hopping into the nearby Diamondbacks. Firstly however, you have to eliminate the local guards, consisting of a group of Marines and a tank. Just keep an eye on the movements of the first ones and use the Mindblast and Psi Shield at the right moment.
![[#7] - Breakout - Campaign - Covert missions - StarCraft II: Wings of Liberty - Game Guide and Walkthrough](https://game.lhg100.com/Article/UploadFiles/201512/2015121709530165.jpg)
[#7]
Further on you will have to deal with the fortified entrance [8] leading to the next area [9], which can be done by going onto the hill on the left [#7]. This time a mechanical Raven can detect you. Destroy him together with the nearby tank. The metal Raven tells your position to the Tank and lets it shoot. Finally take control over the whole area, through which Hellions like to roam.
![[#8] - Breakout - Campaign - Covert missions - StarCraft II: Wings of Liberty - Game Guide and Walkthrough](https://game.lhg100.com/Article/UploadFiles/201512/2015121709530181.jpg)
[#8]
In return you will have a clear way to the second Prison Block [10]. One more time the sentenced will take steer of the nearby vehicles (tank) and will help you in your fight against the Dominion. However there are guard patrolling the area, this time aided by z Raven. Wait for the Raven to fly east and sneak to the other side of the location [#8]. His scanner won't reach you there. Eliminate the guard step after step, retreating once the Raven closes in.
![[#9] - Breakout - Campaign - Covert missions - StarCraft II: Wings of Liberty - Game Guide and Walkthrough](https://game.lhg100.com/Article/UploadFiles/201512/2015121709530188.jpg)
[#9]
A frontal attack on the main New Folsom base will be easier than you think. Approach the first fortifications [11] and you will earn five nuclear missiles - use them to level the nearest defensive structures. You should deal with the Thors [#9] [12] protecting the access to the Command Center [13] and other unit-producing buildings in the same way. Only after destroying everything in sight you can consider New Folsom conquered.
Breakout:
Destroy the Main Prison Base, Kill Guards at Cell Block A and B, Tosh Must Survive.
Cool Hand Tosh:
Adapt to the conditions on the battlefield, planning your moves thoroughly and you should be alright. Once your health drops, look for Raynor's medics.

Jailhouse Rock:
On hard, the prison is protected by some more guards, but assuming you've already completed this mission on a lower difficulty, you should know the locations and weaknesses (like platforms on the sides) of the defence points. Don't hesitate to free the prisoners from both Blocks, as they will considerably help you in the fight.
Even though you theoretically should hurry, do aid Raynor's soldiers in their fight. Once you notice an incoming group of Marines use Mindblast on them, eliminate heavy machines like Tanks which will squash your allies firstly and help them in destroying Dominion bases - Raynor will build his own in their place. Mainly thanks to such behaviour you will end the mission in less than 25 minutes.
If there are some building left to destroy after the nuclear attacks - take care of them first.
Main objectives:
Additional objectives:
We return to Tarsonis, a planet destroyed in the first game, to take a closer look at what the Dominion is looking for here lately. Matt Horner discovered that the enemy forces are conducting some excavations there, digging to something particularly precious. The mysterious item is supposed to be transported in one of the trains which we will now hunt.
![[#1] - The Great Train Robbery - Campaign - Rebellion missions - StarCraft II: Wings of Liberty - Game Guide and Walkthrough](https://game.lhg100.com/Article/UploadFiles/201512/2015121709530299.jpg)
[#1]
The mission's purpose is to familiarise you with the Diamondback tank - hovercrafts capable of attacking while moving. Their properties will prove very useful in the oncoming train (which will be speeding like crazy) raids. You will see the first three tanks marked on the map in the game. You can go for them [#1] and take them back to the base - there's nothing there to threat you. The location of every single one of them [1] (five in total) is marked on the guide map. Intercept them at the very beginning, as only the two most distant Diamondbacks are protected by a small, easy to eliminate protection and on your way you will find many resources.
![[#2] - The Great Train Robbery - Campaign - Rebellion missions - StarCraft II: Wings of Liberty - Game Guide and Walkthrough](https://game.lhg100.com/Article/UploadFiles/201512/2015121709530257.jpg)
[#2]
Dominion sends trains [#2] every three minutes through one of the three tunnels in the west [2]. The clock is additionally visible on the screen. As the train appears, his route (always consisting of going through the Center of the map towards the east) will appear on the minimap. There are guard posts placed by the original Dominion stations, so you probably shouldn't get too close and look out for the trains from a safe distance. It's exact the same in the east, but you probably won't venture there. The Center of the map is in fact yours and you can roam it freely, at least until a certain moment, about which I'll tell you soon enough.
![[#3] - The Great Train Robbery - Campaign - Rebellion missions - StarCraft II: Wings of Liberty - Game Guide and Walkthrough](https://game.lhg100.com/Article/UploadFiles/201512/2015121709530214.jpg)
[#3]
You have to destroy eight trains and let three pass, at most. It's easy to guess that each next train will be protected better than the last one and first soldiers will appear with the second one. Not long enough after it derails, you will be warned about an incoming counter-attack, so quickly hide in your base and fight off the incoming (rather small) enemy forces. Before the fourth train appears, Matt will inform you that the enemy has begun securing the track with bunkers. It's indeed a threat, but as long as you don't scatter your forces, you shouldn't have problems with destroying such fortifications [#3].
![[#4] - The Great Train Robbery - Campaign - Rebellion missions - StarCraft II: Wings of Liberty - Game Guide and Walkthrough](https://game.lhg100.com/Article/UploadFiles/201512/2015121709530268.jpg)
[#4]
Dominion will become wiser only after you demolish the fifth train and will send a quite numerous squad of Marauders to patrol the tracks [#4]. They will begin walking in circles round your base and you should of course try to avoid them. If you want to fight them, you should mainly use light units.
The sixth train will move on boosters, so make sure your tanks don't lose it. After the eight one, Dominion will give up on boosters in favour of a strong defence (look out for the tanks) [#5].
![[#5] - The Great Train Robbery - Campaign - Rebellion missions - StarCraft II: Wings of Liberty - Game Guide and Walkthrough](https://game.lhg100.com/Article/UploadFiles/201512/2015121709530327.jpg)
[#5]
Making new Diamondbacks should be your priority in the base. Overall you won't be attacked too often, but doo keep some heavy duty units here (a bunker would come in handy too) to be ready for fighting off the enemy forces. Apart from the hovercrafts, invest in other units, infantry for example. This way you will get rid of the protection and the trains faster.
The second additional task, next to collecting the old Diamondbacks is Defiler Bones. They allow further Zerg research and can be found in the places indicated on the map.
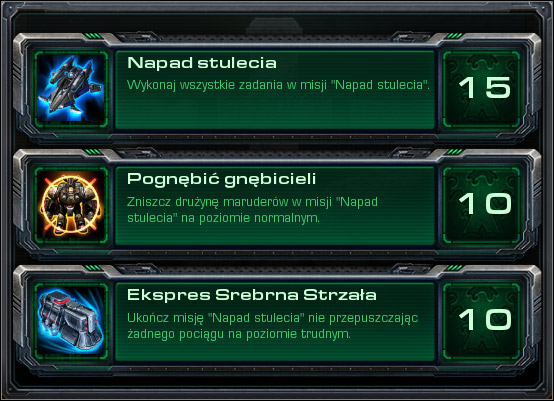
The Great Train Robbery:
Destroy 8 Dominion Trains, don't Miss 3 Trains, locate 6 Diamondbacks, collect 3 Defiler Bone Samples.
Bully the Bullies:
The group of Marauders which will start patrolling the tracks are quite tough, though Marines, on which you should focus your strike force, do very well against them. You'll need to train quite a bit (around 20) of them though, accompanied by medics. That's why you should start producing them from the start of the mission. If you want to minimise the losses, firstly attack the Marauders with Marines and after a while move in with Diamondbacks, Goliaths and other heavy troops. They will deal with them in no time.
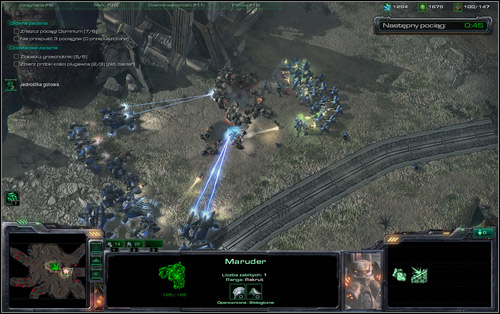
The achievement doesn't require you to complete the mission, which means you can also use another, quite dirty trick - loading the game. Don't hesitate to attack the Marauders with the team designated to stop the train, as long as it's numerous. If the Diamondbacks and other vehicles take too much damage, load the game after completing the achievement.
Silver Streak:
If you have some experience from the normal level, gaining this achievement shouldn't be too hard. How you start and do at the end is most important. I'd suggest taking over 5 out of the 6 Diamondback, as you probably won't make it to the last one before the train arrives. The locations of the abandoned tanks are marked on the map added to the mission description. Only the two in the south have slight protection.
Afterwards act just like normally during the mission. Build up your army and move once he train appears on the horizon. Remember that Dominion will at some point start buildings bunkers round the tracks and will send a lot stronger and faster Marauder (compared to normal) squad.
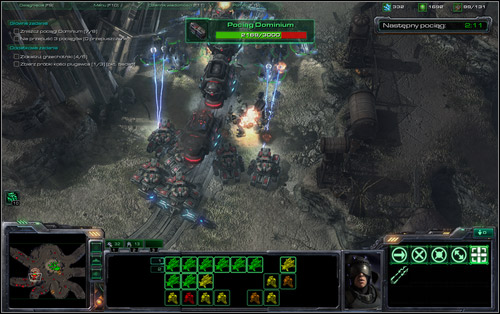
I suppose you shouldn't have problems with the sixth and seventh train (they will only be faster this time), but the last one can cause some problems, as it will have a strong protection, which includes a Goliath a five tanks, amongst others. Look out for them.
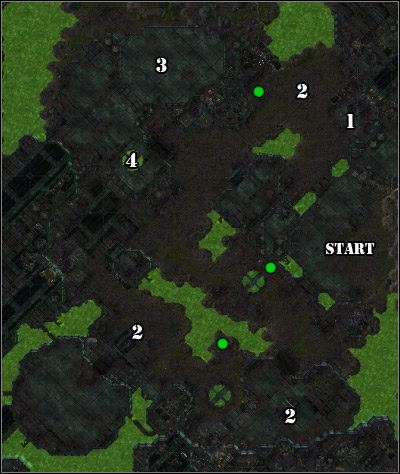
Main objectives:
Additional objectives:
The Confederate Adjutant gained in the previous scenario is unfortunately encrypted and only colonel Orlan can gain access to it. The place is roaming with pirates and mercenaries, though Matt Horner has some memories connected with it (ask him).
Orlan, after decrypting the Adjutant, will however come up with a better idea. He wants to sell it to the Dominion and Mira Han - the local mercenary chief - is to stop you from getting the device back. She will however offer Raynor a deal. If he can deliver as much money as the colonel has offered, but before him, she will change sides and work with you.
![[#1] - Cutthroat - Campaign - Rebellion missions - StarCraft II: Wings of Liberty - Game Guide and Walkthrough](https://game.lhg100.com/Article/UploadFiles/201512/2015121709530307.jpg)
[#1]
You have to collect 6000 minerals. On the right you can see the meter for you and Orlan, who is in a better situation as he has three additional Command Centers, compared to your poor one. Luckily the area is filled with scrap metal which can be turned into something more valuable. Right above your base there's a shredder [1] [#1], which will pop out some metal from time to time. As Horner suggest, you can drop by from time to time to gain some additional minerals.
![[#2] - Cutthroat - Campaign - Rebellion missions - StarCraft II: Wings of Liberty - Game Guide and Walkthrough](https://game.lhg100.com/Article/UploadFiles/201512/2015121709530402.jpg)
[#2]
Apart from that you should take some time and explore the platform, with scrap metal in every corner. Additionally focus on destroying Orlan's three Command Centers [2]. They aren't protected too well, so when Han sends you some Vultures as a gift, go out for a hunt. Of course do leave some forces back at the base, but don't overdo it as the enemy attacks won't be too dangerous. Also note that you can mine both passages with the Vultures' mines. Once you eliminate the three Centers, you can be the one in Han's favour.
![[#3] - Cutthroat - Campaign - Rebellion missions - StarCraft II: Wings of Liberty - Game Guide and Walkthrough](https://game.lhg100.com/Article/UploadFiles/201512/2015121709530403.jpg)
[#3]
In result you will also gain a powerful army, consisting mainly of various mercenaries and technically advanced units [#3]. Having them, you can immediately storm Orlan's base [3] or train some more units. The colonel's base is built of two highly protected platforms and it would be wise if you'd attack the first one [4] from both sides, flanking the soldiers there. However that's of course only a suggestion. Before you begin the invasion, be sure you've collected the three Protoss relics.
![[#4] - Cutthroat - Campaign - Rebellion missions - StarCraft II: Wings of Liberty - Game Guide and Walkthrough](https://game.lhg100.com/Article/UploadFiles/201512/2015121709530473.jpg)
[#4]
Once Orlan sees what's going on, he'll try to hit you with a nuclear missile [#4]. Luckily you'll get a proper warning early enough to be able to retreat your troops. Continue devastating the base after the explosion [#5].
![[#5] - Cutthroat - Campaign - Rebellion missions - StarCraft II: Wings of Liberty - Game Guide and Walkthrough](https://game.lhg100.com/Article/UploadFiles/201512/2015121709530458.jpg)
[#5]
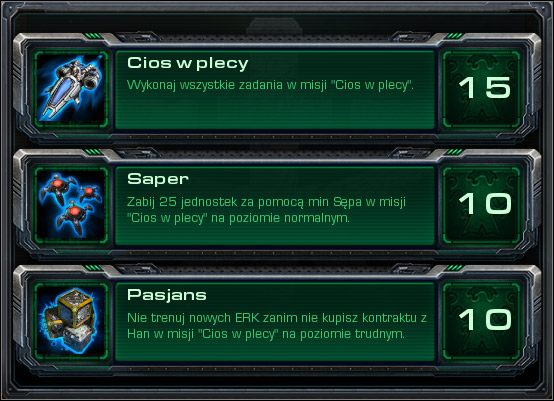
Cutthroat:
Buy Merc Contract Before Orlan, Destroy Orlan's Mercenary Forces.
Minesweeper:
You can begin planting the mines at the very beginning, using them to secure your camp. If you have to, you can continue placing them after paying for the mercenaries, just at Han's encampment. Don't attack Orlan until you get a message telling you've completed the achievement.
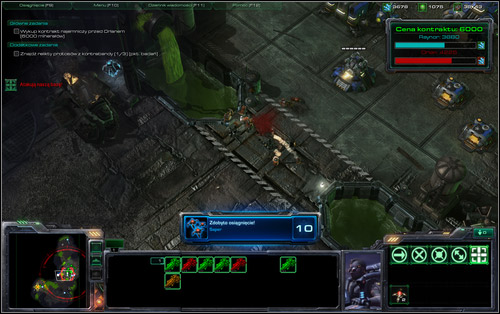
Solitaire:
Above all, you have to quickly get rid of Orlan's three encampments, as thanks to them he's gathering minerals much faster than you. Get every worker you have to collect crystals, ignoring all else for now. Get one to build a bunker for the Marines on the southern side and wait for Han to send you the Vultures. They're the strategic units here.
Mine both camp entrances. Buy a full round of new Vultures and go for the northern base without waiting for them. While attacking the colonel's forces try not to attack a single unit with all your Vultures at once. Reloading does take some time and a Marine falls down after two or so shots. After clearing out this area, repair your Vultures at the base and pace a second bunker, this time from the northern entrance. Place some new mines as well.
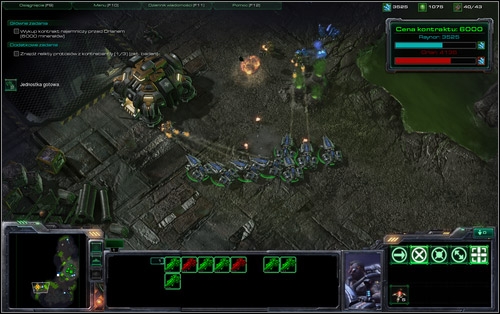
Strengthen with new Vultures, attack the other two enemy bases. If you have problems with the Goliaths or the large number of Marines, try to attack by surprise and then quickly retreat. This method will allow you to limit the losses and confuse the enemy a bit. Alternatively, once you see a large enemy group, you can plant mines, wait for them to arm and force the enemies to come their way.
In the meantime you should place new mines around the base, as Orlan's attacks will intensify as you play through the mission (Siege Tanks will appear, for example). Of course don't forget to collect the scrap metal while you explore the plant, which should boost your earnings drastically. You complete the achievement after paying the mercenaries. You can use the SCVs.
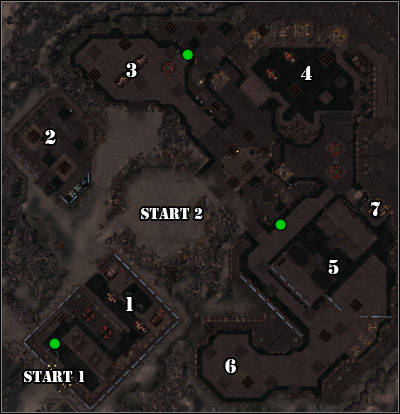
Main objectives:
Additional objectives:
You find yourself in a secret Dominion research facility, where various types of experiments are conducted. The newest Terran wonder - the Odin, due to be shown at planet Korhal - can also be found here. If you could intercept it, hacking into the network and broadcasting the embarrassing material would be quite possible.
![[#1] - Engine of Destruction - Campaign - Rebellion missions - StarCraft II: Wings of Liberty - Game Guide and Walkthrough](https://game.lhg100.com/Article/UploadFiles/201512/2015121709530509.jpg)
[#1]
Tychus will be chosen for this mission and he will give proof of his lack of discipline quickly. He'll rush into the enemy base, ignoring the danger. Your part is to protect him. Tychus cannon be controlled, so have a Medic follow him all the time. You can send the second one to the normal Marines, which you have to use to support the heroic trouble-maker.
Once you get inside the complex, on the left you will notice a container with yellow stuff in it. It's a Devourer sample, one of three here which you have to complete to satisfy Stetmann [#1]. You can also return for it later on. Help Tychus in taking over the place and he will eventually reach the first Odin [1] [#2]. The real mission begins now.
![[#2] - Engine of Destruction - Campaign - Rebellion missions - StarCraft II: Wings of Liberty - Game Guide and Walkthrough](https://game.lhg100.com/Article/UploadFiles/201512/2015121709530582.jpg)
[#2]
Raynor will send some reinforcements to help hot-headed friend. Tychus will soon head out to destroy the five local Dominion bases [2]-[6]. He'll rush to the first one after a couple minutes, once he becomes bored of waiting for Jim and his forces. Some Battlecruisers will attack you along the way, but you can bring them down with the excellent Wraiths sent by Swann [#3].
![[#3] - Engine of Destruction - Campaign - Rebellion missions - StarCraft II: Wings of Liberty - Game Guide and Walkthrough](https://game.lhg100.com/Article/UploadFiles/201512/2015121709530557.jpg)
[#3]
Before Tychus heads out onto his crusade, have one or two SCVs follow him all the time (right mouse button) so they'll repair the damage he'll inevitably receive. You can also attach other units you find in the base ore produce later on to him. This way you will provide him with defence and with some luck all you'll have to do is watch the ongoing destruction.
![[#4] - Engine of Destruction - Campaign - Rebellion missions - StarCraft II: Wings of Liberty - Game Guide and Walkthrough](https://game.lhg100.com/Article/UploadFiles/201512/2015121709530520.jpg)
[#4]
Tychus will rest for a while after destroying each base [#4], which will let you send some more units to cover him. Don't forget about manufacturing Wraiths with their wonderful Cloak ability. They will do great not only fighting against the Battlecruiser, but mainly will allow you to catch the prototype Battlecruiser - Loki [#5]. You will find him by the fourth base [7] and I'd suggest having as much units as you can (tons of Wraiths or Vikings) if you want to try destroying it and gaining the achievement. Also keep your eyes open for the other two Samples. In the meantime you should also remember about protecting your own base. It will be attacked from the north and afterwards from north-east, so surround with Bunkers and Turrets.
![[#5] - Engine of Destruction - Campaign - Rebellion missions - StarCraft II: Wings of Liberty - Game Guide and Walkthrough](https://game.lhg100.com/Article/UploadFiles/201512/2015121709530550.jpg)
[#5]
Each next Dominion camp will have better defence and once you're by the fifth, Matt will warn you of the numerous Battlecruisers. Overall it's rather hard to suggest too much of a strategy here - Dominion has very varies troops in their bases and in fact so should you - have everything in your army, beginning with Marines and ending with Tanks.
![[#6] - Engine of Destruction - Campaign - Rebellion missions - StarCraft II: Wings of Liberty - Game Guide and Walkthrough](https://game.lhg100.com/Article/UploadFiles/201512/2015121709530510.jpg)
[#6]
Check out if the SCVs by the Odin are still alive from time to time and send in new one if needed. As you're destroying the final base [#6], Tychus will send down a nuclear missile on the Command Center.
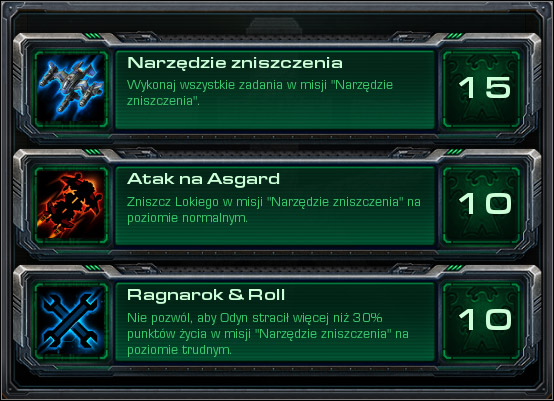
Main objectives:
Additional objectives:
Engine of Destruction:
Escort Tychus to the Odin, destroy the Dominion Bases, find and Destroy the Loki, find Devourer Tissue Samples, Tychus Must Survive, Odin Must Survive.
Kicking Asgard:
Loki is the local Battlecruiser prototype, with a fast-shooting cannon and lots of HP (1500 HP). He's in the middle-east part of the map and there's no way to lure him to the Odin. In return you have to use anti-air units. The best time to attack would be after the destruction of the fourth base.
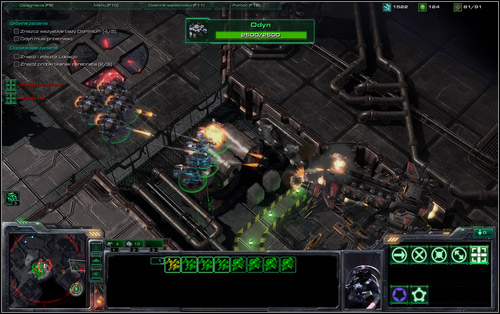
You do get Wraiths in this mission, but help yourself with Vikings as well, especially that Cloaking isn't really useful against the Loki. Note that you can also produce Goliaths. Just make sure your squad is large and will shoot the Loki down, before it manages to turn your units to dust. Around 10 units should do the trick, though the more the better.
This achievement doesn't require you to finish the main mission.
Ragnarok & Roll:
Not much different from the basic mission described above. Make sure the Odin gets regular repairs by selecting the SCVs and then clicking on it with the right mouse button. Do the same with each newly made soldier or vehicle. You can even set the building's flag on Tychus.
The army which will be accompanying the Odin should be built of various units, so that it's capable of eliminating any threat. However try to produce more Wraiths or Vikings than other units, as they will come in handy in the last part of the mission. The two first bases are in fact quite easy, but it will get harder staring with the third one. The two last ones are filled with Banshees, Vikings and Battlecruisers (especially the last one) and the Odin should definitely be aided.
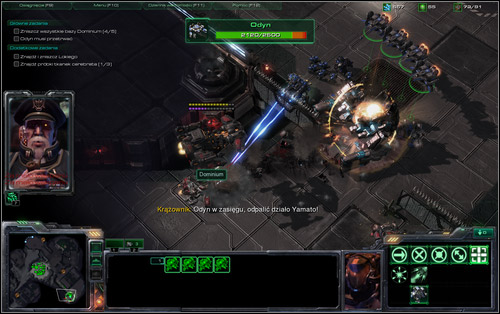
Check if your SCVs haven't died from time to time and send in new ones if needed. 2-3 SCVs following the Odin ins enough, plus they will also repair the normal units. If you have a Science Vessel, you can also use it. From calculation, it appears that the Odin's health can't drop below 1750.
Just one more word about defending the base. Be sure to build a solid defence on the north, as the Dominion attacks will keep on getting stronger and stronger.
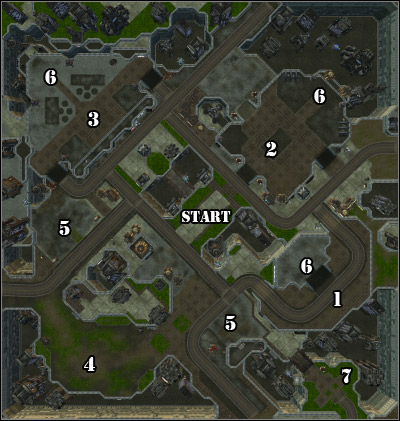
Main objectives:
It's time to end with Arcturus Mengsk's image of a statesman. Thanks to the stolen Odin, you can get close enough to the UNN station (you've surely been watching it all along) to broadcast the compromising material. It's of course his conversation with Tarsonis, during which he unveils himself as a man capable of anything for the sake of authority.
The plan is pretty straightforward. Tychus inside the Odin is to attack the local defence forces during the parade and cause as much havoc as possible. Before the Dominion sees what's going on, you will have a few precious minutes.
![[#1] - Media Blitz - Campaign - Rebellion missions - StarCraft II: Wings of Liberty - Game Guide and Walkthrough](https://game.lhg100.com/Article/UploadFiles/201512/2015121709530609.jpg)
[#1]
Once in control of the machine, note that it has a powerful attack (requiring energy), which tears buildings to pieces [#1]. Before performing the first shot, take a good look round the bases unveiled by Matt. The eastern [1] is swarming with infantry and Hellions, the northern [2] is being protected by heavy machinery (Siege Tanks), while the one in the west [3] is famous for the air force built in the Starport.
I'd suggest going straight with the Odin and attacking the middle base first. Afterwards, if you have enough time, cause as much havoc as possible in the one to the left. Attack with caution, because as you will probably notice pretty soon - the Odin isn't indestructible [#2]. Once it's destroyed, Tychus will catapult himself and the mission will keep on going normally. However it's definitely worth making use of every second you have. Try to destroy the key buildings like Barracks or Command Centers in the first place. For example in the middle one, you should destroy all the Factories, so that you won't have to fight with tanks afterwards. Beware of the Banshees, as the Odin is quite vulnerable to them. Eliminate them one by one.
![[#2] - Media Blitz - Campaign - Rebellion missions - StarCraft II: Wings of Liberty - Game Guide and Walkthrough](https://game.lhg100.com/Article/UploadFiles/201512/2015121709530686.jpg)
[#2]
You can't control Raynor's base [4] until Tychus finishes his mission. Afterwards, the mission turns into a pretty straightforward one. To make your life a bit easier, Swann will send you a Thor - a big waking robot, which is smaller than the Odin, but doing great on the battlefield.
![[#3] - Media Blitz - Campaign - Rebellion missions - StarCraft II: Wings of Liberty - Game Guide and Walkthrough](https://game.lhg100.com/Article/UploadFiles/201512/2015121709530627.jpg)
[#3]
Expand your camp step by step, securing the left and right sides, at the enemy forces will keep on coming from there [#3]. What types of units will come exactly, depends on the choices you've made with Odin. Also take care of the northern part of your base. Dominion air forces (if there are any left) and Reapers might come from there, for which the hills surrounding your base are no problem.
![[#4] - Media Blitz - Campaign - Rebellion missions - StarCraft II: Wings of Liberty - Game Guide and Walkthrough](https://game.lhg100.com/Article/UploadFiles/201512/2015121709530626.jpg)
[#4]
Keep gathering your forces and if you run out of minerals or gas, take those possessed by the small enemy encampments [5]. Remember that you have the Odin at your disposal, so once you go to destroy the leftover, you won't need a very big army [#4].
![[#5] - Media Blitz - Campaign - Rebellion missions - StarCraft II: Wings of Liberty - Game Guide and Walkthrough](https://game.lhg100.com/Article/UploadFiles/201512/2015121709530748.jpg)
[#5]
Your goal is to take over the three Broadcast Towers [6], which can be done with any infantry unit, even a plain Marine. However the broadcast process does take some time and general Warfield will definitely try to take over the tower by sending in reinforcements [#5]. That's why you should always be ready to defend, for example by switching the Tanks into siege mode.
![[#6] - Media Blitz - Campaign - Rebellion missions - StarCraft II: Wings of Liberty - Game Guide and Walkthrough](https://game.lhg100.com/Article/UploadFiles/201512/2015121709530719.jpg)
[#6]
Secret mission: During Media Blitz, you can unlock a secret mission. In order to do that, you have to destroy the science complex [#6] in the south-east corner of the map [7]. The mission will be then visible on the Hyperion map, after you finish the current one. Contrary to some popular opinions, you don't have to finish the campaign first.
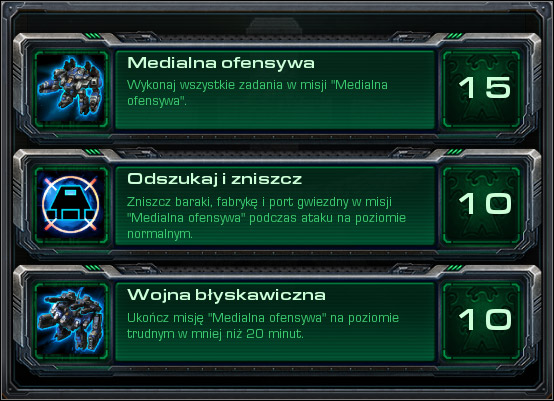
Media Blitz:
Destroy Dominion during surprise attack, Access 3 Broadcast Towers.
Seek and Destroy:
You can locate all three types of buildings in the north-west air force Dominion base. You will receive the achievement after destroying them.
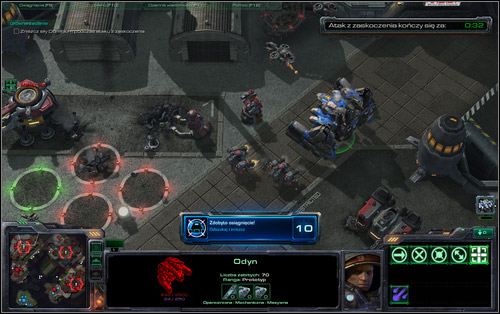
Blitzkrieg:
Another seemingly impossible achievement. You have 20 minutes, out of which you spend 4-5 during Tychus' section. However you can use the method below and with some luck, you'll be able to praise with your Blitzkrieg achievement.
You of course begin inside the Odin. Turn around and fire at the enemies in the back. Clear the area and head to the middle base [1] - destroy all factories and Siege Tanks. Afterwards move on to the west base [2] and cause as much damage as possible.
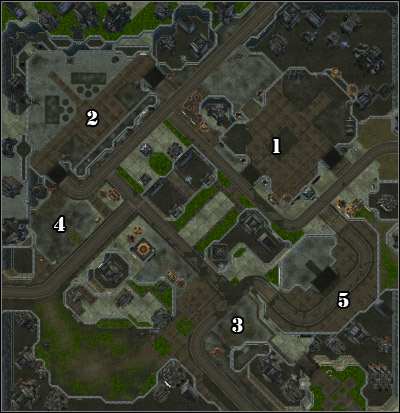
After moving on to the second phase of the mission, send two SCVs to repair the Odin and start expanding your base, placing a bunker on the right side. In the future, try to defend this spot with one or two more Siege Tanks (or something equal). Wait for Swann to deliver you the Thor, which you should send together with Tychus to one of the enemy Centers (they can cause trouble later on). Choose the one north-east from your base [3]. Of course aid the heroic duo with three SCVs, so they repair the robots. After getting rid of that Command Center, move on to the little more demanding mini-base to the west [4].
In the meantime, you should already be manufacturing Goliaths and Siege Tanks (if you have them). Alternatively you can invest in new Thors, but Goliaths are a necessity - they'll come in handy while fighting airborne units. I wouldn't suggest building a Spaceport, as there's lots of Turrets around. Also buy appropriate upgrades at the Armory.
![Destroy the Dominion's economic encampment and go onto the upper base, without waiting for Goliaths and others [2] - Media Blitz (Achievements) - Campaign - Rebellion missions - StarCraft II: Wings of Liberty - Game Guide and Walkthrough](https://game.lhg100.com/Article/UploadFiles/201512/2015121709530705.jpg)
Destroy the Dominion's economic encampment and go onto the upper base, without waiting for Goliaths and others [2]. You'll have an easier task if you've destroyed at least one port before, but keep in mind that Banshee can do much damage to walking machines. That's why you should have the more resistant Odin up front.
Take over the area while systematically moving units from the base here. They're needed to protect your position by the Broadcast Tower, as once you begin your transmission, Warfield will call in his men. Have at least a couple Goliaths + some other powerful units so you can fight them off. Think about ordering one of the units to hold position. Otherwise it can leave the tower area in the heat of the battle, which will cost you precious seconds.
Keep on sending in new troops and move to the abandoned (as I presume) base at the very top [1] and take over the transmitter. The last one won't be as easy, as the area is crawling with Reapers, Vultures and Hellions [5]. Individually they're no match for Odin and the others, but things change once they're in a group. Especially the Reapers on the platform behind the tower can be troublesome, as they'll start shooting at your units from up high. Provoke them to come down (approach them and then retreat) or take some airborne units with you to be able to attack.
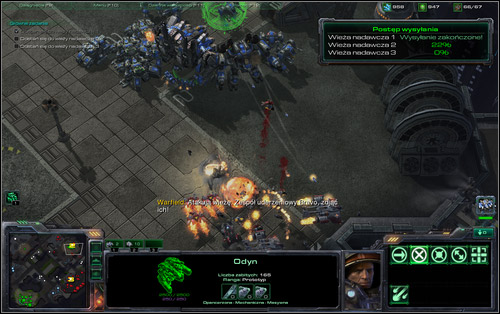
Save often and load the game in case you mess something up. You'll eventually get the hang of it. Alternatively you can try to change the attack order, though I think the one shown above is optimal and above all, verified.
Main objectives:
Additional objectives:
A secret mission during which you find yourself on the surface of an asteroid revolving around planet Castanar. The stolen documents suggest that there's a secret Dominion lab here.
Raynor participates in this mission himself, aided by a group of Marines and Medics. Blow the door [1] just like the game suggests [#1]. By the way I'd like to note that during the mission you might come across doors, which after being blown up can damage or even kill the units standing too close (a system of traps). Just stand aside before the detonation.
![[#1] - Piercing the Shroud, part 1 - Campaign - Rebellion missions - StarCraft II: Wings of Liberty - Game Guide and Walkthrough](https://game.lhg100.com/Article/UploadFiles/201512/2015121709530766.jpg)
[#1]
After eliminating the enemy units in the first room, approach the computer terminal [2], which will allow you to take over the nearby Turrets [#2]. Surprise the guards standing nearby by activating the ones on the right and you'll have less work with eliminating the survivors. Move on to the first laboratory.
![[#2] - Piercing the Shroud, part 1 - Campaign - Rebellion missions - StarCraft II: Wings of Liberty - Game Guide and Walkthrough](https://game.lhg100.com/Article/UploadFiles/201512/2015121709530893.jpg)
[#2]
You'll discover that researches on a Zerg-Protoss crossover are being conducted here. The door will lock behind you and you'll get attacked by a group of Zergs. Have the Marines shoot at the attackers and Raynor plant a bomb beneath their nest [3] [#3]. Leave the room and kill the Ultralisk if you want.
![[#3] - Piercing the Shroud, part 1 - Campaign - Rebellion missions - StarCraft II: Wings of Liberty - Game Guide and Walkthrough](https://game.lhg100.com/Article/UploadFiles/201512/2015121709530821.jpg)
[#3]
You will collect a pack of grenades, which will come in handy for the enemies in the corridor (though I'd recommend keeping it for the end of the mission). It's one of three weapons which Raynor will find in the lab. Additional ammo for all types has been marked on the map with orange dots.
Eventually you will reach the next terminal [4], which will allow you to open the pen. I'd suggest choosing Zerglings [#4] from the ones available, as not only will they eliminate the Dominion forces, but there won't be much of them left for you to get rid of afterwards. Also destroy their cell to discover a Protoss relict.
![[#4] - Piercing the Shroud, part 1 - Campaign - Rebellion missions - StarCraft II: Wings of Liberty - Game Guide and Walkthrough](https://game.lhg100.com/Article/UploadFiles/201512/2015121709530809.jpg)
[#4]
A bit further to the right you will see a locked door [5], with a plasma weapon inside. Use it in the location [6], overwhelmed with heavy units. There's also another camera waiting for you, which will this time let you take over an armed assault robot. You will face various threats in the next corridor (infantry, tanks), though I'd suggest choosing anti-armour ammo for the mech [#5]. You can eliminate the infantry quickly with Raynor and the Marines and the flammable barrels will surely come in handy.
![[#5] - Piercing the Shroud, part 1 - Campaign - Rebellion missions - StarCraft II: Wings of Liberty - Game Guide and Walkthrough](https://game.lhg100.com/Article/UploadFiles/201512/2015121709530869.jpg)
[#5]
The fourth terminal [7] will let you call in reinforcements, which you might want to use on the locked Brutalisk [8] (additional mission). Generally, Marauders would do well against them (they can hit an armoured units pretty hard), but the Marines and Medics will be more useful throughout the mission. It's up to you.
Minisecret: before the Brutalisk room, where the reinforcements will arrive, head north to the landing zone. Reach the end of the rocks and you'll witness an interesting scene.
![[#6] - Piercing the Shroud, part 1 - Campaign - Rebellion missions - StarCraft II: Wings of Liberty - Game Guide and Walkthrough](https://game.lhg100.com/Article/UploadFiles/201512/2015121709530810.jpg)
[#6]
In case you fight the Brutalisk, I'd suggest focusing his anger on Raynor [#6] (remember about the plasma bullets) and healing him. Just in case, you might leave someone by the first-aid kit beside the right wall and take it in when needed (it will cure all your units). Alternatively, you can try to lure the Brutalisk there. Even more sophisticated ways to deal with him are described in the Achievements section. As you see, there are various methods here. Be sure to collect the nearby relict.
Afterwards you will easily reach the reactor room [9] and learn of the hybrid in the laboratory.
After destroying the core, the whole complex will start burning and the Zerg-Protoss crossover will be freed. As for now you don't have to fear or hurry, though you will eventually meet it for sure. Note that the lab's scheme has changed and you have to follow a different path now. Two additional relics will also appear.
![[#7] - Piercing the Shroud, part 2 - Campaign - Rebellion missions - StarCraft II: Wings of Liberty - Game Guide and Walkthrough](https://game.lhg100.com/Article/UploadFiles/201512/2015121709530892.jpg)
[#7]
Go left, clear the room and take the Chrono Rift Device [#7], an experimental weapon which lets you slow down time on a given terrain. Fight your way through the ruins towards the next room [1] and you will notice the hybrid. You shouldn't fight it - it has a deadly attack and can slow down its victims.
![[#8] - Piercing the Shroud, part 2 - Campaign - Rebellion missions - StarCraft II: Wings of Liberty - Game Guide and Walkthrough](https://game.lhg100.com/Article/UploadFiles/201512/2015121709530844.jpg)
[#8]
Listen to Matt and rush towards the exit. The monster can be stopped for a little by stepping onto the green marker [2], which will activate the drone. Don't watch the fight [#8], as it won't end well for the Terran machine, just move on. The corridor will be blocked by debris in several places. The fastest way of getting rid of them is using a grenade. You will come across enemy units fairly often, but react only if you really must. Also collect the weapons scattered throughout the area, replenishing your supplies.
![[#9] - Piercing the Shroud, part 2 - Campaign - Rebellion missions - StarCraft II: Wings of Liberty - Game Guide and Walkthrough](https://game.lhg100.com/Article/UploadFiles/201512/2015121709530985.jpg)
[#9]
You will encounter a big group of enemy units at location number [3], where you will witness a small fight between the Zergs and Protosses [#9]. Kill the ones left alive, collect the relict and continue the evacuation. If the hybrid happens to catch up with you, use the Chrono Rift. With the fourth Protoss Artifact in hand, move to the room filled with biomass and Zerg eggs [4]. The hybrid will vanish into this air.
![[#10] - Piercing the Shroud, part 2 - Campaign - Rebellion missions - StarCraft II: Wings of Liberty - Game Guide and Walkthrough](https://game.lhg100.com/Article/UploadFiles/201512/2015121709530949.jpg)
[#10]
Move through the contaminated area and eliminate each cocoon you see, as sooner or later roaches will hatch from them. Look out as you'll be going out of the room, as an Ultralisk will attack you [5] [#10]. Move to the corridor and the hybrid will appear once again.
![[#11] - Piercing the Shroud, part 2 - Campaign - Rebellion missions - StarCraft II: Wings of Liberty - Game Guide and Walkthrough](https://game.lhg100.com/Article/UploadFiles/201512/2015121709530984.jpg)
[#11]
Run forward, ignoring the enemies on your way if possible. Go past the Dominion forces [#11] getting ready to evacuate [6] and you'll be out of the lab [6].
Piercing the Shroud:
Investigate the Dominion Lab, Destroy the Fusion Reactor, Find Protoss Relics, Kill the Brutalisk, Escape From The Facility, Raynor Must Survive.
Not So Brutalisk:
You can achieve this in at least two ways. Clear the room of guards, place the Marines and Medics behind Raynor and let out the beast. Preferably use the plasma gun. The Zerg will surely damage Jim several times, but he'll eventually fall down.
You can also use the prototype A.R.E.S machine in this fight. For details, head to the Monster Mash! achievement description.
Lock and Load:
As you have probably noticed, Piercing the Shroud is divided into two parts. There are six additional weapons pieces in the first one and seven in the second one. There are grenades, Plasma Gun and Chrono Rift ammo. They're all marked on the map (orange circles).
As you're running from the Hybrid through the lab, don't waste time on picking up the items. Get to the eggs region for the creature to disappear and then return to the corridor and clear it of any weapons.
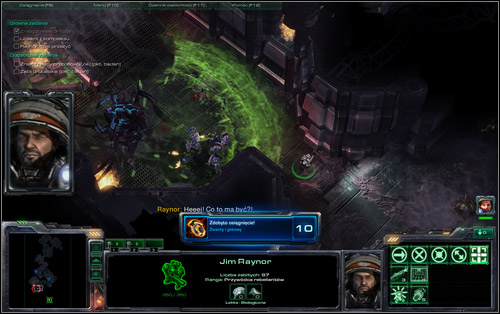
The Hybrid is very quick on Hard and there are additional Dominion units in the building (a Thor, amongst others). I'd suggest saving the grenades for the second part of the scenario, as while you're running away from the Hybrid, the road will be blocked with debris in three spots.
Monster Mash!
One more prestigious achievement. Despite of its connection with the mission, you can't learn of it from the summary. The challenge here is to defeat the Brutalisk with the A.R.E.S. robot, which you've been using to clear the corridor of enemies. As the prototype machine tends to self-destruct after a certain time, you'll have to deal without it in that area (use the Plasma Gun on the vehicles).
After you take over the Brutalisk room, send the Medics and Marines back to the robot activation panel. Set free the Zerg monster with Raynor and start running away deeper into the corridor. Around the middle of the road, activate A.R.E.S. with anti-armour missiles and you'll witness a clash of titans, which will end with your win. Raynor will probably need some medical care.
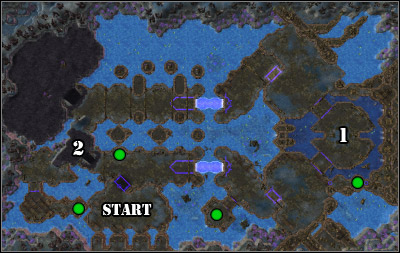
Main objectives:
Additional objectives:
Tychus has his eyes set on yet another Artifact. It's located on planet Monlyth, guarded by a group of fanatic Protosses. The mission seems fairly easy at first, but unfortunately as Raynor and the gang are getting ready to attack, they witness z Zerg invasion. That makes things a bit more complicated.
![[#1] - Smash and Grab - Campaign - Artifact missions - StarCraft II: Wings of Liberty - Game Guide and Walkthrough](https://game.lhg100.com/Article/UploadFiles/201512/2015121709531053.jpg)
[#1]
There's no doubt that the Protoss won't be able to handle the Zerg invasion. As fighting both of them isn't really an option, you will have to get to the Artifact [1] before the Zergs do. During the mission you will be able to see how both races are doing and how much time you've got left to attack. The Protosses will build a couple encampments with Photon Cannons and send their troops there. It will stop the Zergs for a while, but they won't last forever [#1].
![[#2] - Smash and Grab - Campaign - Artifact missions - StarCraft II: Wings of Liberty - Game Guide and Walkthrough](https://game.lhg100.com/Article/UploadFiles/201512/2015121709531012.jpg)
[#2]
Keep observing the situation and train your army. The Protosses will be focused on fighting off the Zergs and will send just a couple of Stalkers to your base. Besides it will be more of a presentation of the Marauders' abilities, which specialise in eliminating armoured units. Swann will send you a couple of them for tests at the beginning of the mission. Zergs will be definitely more problematic here, as besides attacking the Protoss camp, they will also come visit yours from time to time [#2]. Protect yourself with Bunkers and a Turret from the west. Be prepared for the attacks to get heavier with time.
![[#3] - Smash and Grab - Campaign - Artifact missions - StarCraft II: Wings of Liberty - Game Guide and Walkthrough](https://game.lhg100.com/Article/UploadFiles/201512/2015121709531051.jpg)
[#3]
Note the Protoss relict on the left. There are four such treasures in total spread throughout the map (green dots) and once you gain them, you will earn the same amount of research points. This will help you develop new technologies and improvement, which will help you in further scenarios. To reach the seemingly closest one, you will have to follow a longer path, which will force you to eliminate a few Spine Crawlers [2] [#3] and Protoss relict defence. As for the other ones, just remember about them as you move to the natives' camp.
[#4]
As for the Protoss defence itself, note that it's being powered by Pylons. Is you destroy one, all nearby building will cease to function. It also applies to the Photon Cannons, which just can't shoot without the Pylons. Take advantage of this of course. I'd especially suggest Reapers with their mines (The Devil's Playground mission) if only you have them, but Marauders will also do fine [#4].
Generally assemble a strong army and head to the Protoss camp before the Zergs in the north break through their main defence. Remember that you have to reach the Artifact as the first. Be prepared for a difficult fight in the Protoss base, as the defendants won't let go easily [#5]. Also don't forget about the relict, located in the far east, nearby the entrance to the worship place.
![[#5] - Smash and Grab - Campaign - Artifact missions - StarCraft II: Wings of Liberty - Game Guide and Walkthrough](https://game.lhg100.com/Article/UploadFiles/201512/2015121709531001.jpg)
[#5]
Desecrating the Artifact will draw yet another threat. Your vile deed will awaken two Stone Zealots, which will immediately start attacking. If only your army hasn't been decimated by the Protosses, you shouldn't have problems with them. However their attacks are in fact very dangerous [#6].
![[#6] - Smash and Grab - Campaign - Artifact missions - StarCraft II: Wings of Liberty - Game Guide and Walkthrough](https://game.lhg100.com/Article/UploadFiles/201512/2015121709531077.jpg)
[#6]
Smash and Grab:
Get to the Artifact, Destroy the Stone Zealots, Find Protoss Relics.
Rock Solid:
To even start thinking about succeeding, you have to move aside the Marines, as the Stone Zealots can kill them fairly easy. You'll have to use the most resistant unit you have, probably the newly-introduced in this mission Marauders.
Form a normal army at first (Marines) and take over the Protoss base. Afterwards form a group of at least a dozen Marauders aided with Medics. Having such a group, you will smash the Zealots without many losses.
Of course if you have a unit stronger than the Marauders, use it instead. One of the options is also building Bunkers nearby the Artifacts and stepping onto the marker afterwards.
Hit and Run:
I'd say you have around 10 minutes for preparations. It's not too much, so start building your economy from the very start and rely on both minerals and gas.
Organise yourself a nice Zerg defence and send a group of Marauders to clear the nearby bridge in the meantime. If you get attacked by the Protosses, you can always retreat to the base and have your bunkers take care of the pursuers.
Continuously keep on training new units, maybe with the exclusion of Firebats (if you have them), as they won't be able to show their full potential against the Protosses. Invest in the available mercenaries in the first part of the mission, so you can by more after the cooldown. Without them, attacking the Protoss base is very risky.
With a varied infantry and Medics, conduct the final invasion. Target especially the Pylons, which will deactivate the Cannons and factories producing new units. Don't destroy the whole base, focus on the essential buildings. Remember you have three Stone Zealots left to destroy.
Of course don't waste any time on collecting relics during this fifteen minutes long operation.
Main objectives:
Additional objectives:
The Moebius Foundation inform about another planet with Xel'Naga Artifact. It's Xil, onto which a team of specialists has been sent, but any contact with them is lost. They only left a giant laser behind, which apparently wasn't able to protect them...
![[#1] - The Dig - Campaign - Artifact missions - StarCraft II: Wings of Liberty - Game Guide and Walkthrough](https://game.lhg100.com/Article/UploadFiles/201512/2015121709531180.jpg)
[#1]
The mystery behind their disappearance will become clear right after you land. Your units will encounter a group of Tal'darims, fanatic Protoss fraction, which you've robbed of ancient treasures twice already. Deal with the threat an you will receive Siege Tanks, which will take care of the next line of defence, this time consisting of Photon Cannons [1] [#1]. Move on until Raynor suggests placing the artillery on the slope [2], which you of course have to do. The incoming Stalkers will be practically defenceless and you'll take over the Moebius base with no problems [3].
[#2]
From now your task is to defend the Laser Drill, which is drilling a path to the monumental temple with an Artifact inside [#2]. The Protosses are of course trying to prevent it, but you happen to be on a hill, which provides you with great defence position. Just be sure to have some Bunkers and Tanks on the cliffs, which will shoot at any heroic Protoss. Such are also Raynor's directives and you should follow them.
![[#3] - The Dig - Campaign - Artifact missions - StarCraft II: Wings of Liberty - Game Guide and Walkthrough](https://game.lhg100.com/Article/UploadFiles/201512/2015121709531221.jpg)
[#3]
Tal'darims will attack from attack from both ways [#3], so you have to systematically strengthen each side. While you're at it, keep developing your base, most of all placing two Refineries, as you'll need lots of gas to construct tanks. You can also place some additional Turrets by the edge where the Laser is - they will come in handy later on.
![[#4] - The Dig - Campaign - Artifact missions - StarCraft II: Wings of Liberty - Game Guide and Walkthrough](https://game.lhg100.com/Article/UploadFiles/201512/2015121709531207.jpg)
[#4]
Once the temple entrance's health drops to around 75000, the Protosses will send out the powerful Archons, which you shouldn't try to fight directly. Matt will let you steer the Cannon manually, with which you'll be able to discharge the blue killers' power [#4]. The Archons' (and other dangerous units') location can be seen on the minimap.
![[#5] - The Dig - Campaign - Artifact missions - StarCraft II: Wings of Liberty - Game Guide and Walkthrough](https://game.lhg100.com/Article/UploadFiles/201512/2015121709531297.jpg)
[#5]
10000 points later the Tal'darims will attack from the air [#5], although it's hard to it an offensive in the full meaning of the word. They will send a couple transporters to your base. If they manage to get through the defence, they can cause quite a mess inside, but the first group shouldn't be able to achieve that. The Protosses will repeat this manoeuvre several more times, with increasing power.
Eventually you will learn about three altars, containing precious relics (research). The ancient buildings can be destroyed only using the Laser [#6], so you have to be nearby the building to "point" it. You can head to each building with just a bunch of units, as their protected by just a single Photon Cannon (and some more units on higher difficulties).
![[#6] - The Dig - Campaign - Artifact missions - StarCraft II: Wings of Liberty - Game Guide and Walkthrough](https://game.lhg100.com/Article/UploadFiles/201512/2015121709531271.jpg)
[#6]
Focus on destroying the Xel'Naga Temple door, aiming the Laser on Archons or Colossuses (they will appear later in the mission) from time to time. Once the door is left with a couple thousand hit points, the Protosses will throw everything they've got on you, but I'm quite sure they won't be able to stop you from gaining the third artifact.
The Dig:
Recover the Laser Drill, Destroy the Xel'Naga Temple, The Laser Drill Must Survive, Find Protoss Relics.
Drill Hard:
You will complete this by simply playing through the mission. At some point, Matt will let you control the Laser manually, so you can use it to destroy the more dangerous enemies (like Archons or Colossuses). You must do it to simply survive and you will hit 20 victims quite fast.
The Achievement doesn't require you to complete the mission.

Yippee-Ki-Yay:
In order to be able to shoot the enemy buildings, you have to first of all see them. The snag is that the Protoss buildings are on hills. You don't need (even can't, as you wouldn't have time for it) form squads and send them there. Instead, use the Drill, which however has to know where to shoot.
Airborne units would be useful for pointing the Laser at the buildings, though I doubt you have any. Instead, you can use... a building, like the Command Center which I'd suggest (build a second one). The structure is quite resistant and can survive many attacks. Move once you're sure your base is protected enough with Bunkers and Tanks.
I'd suggest packing a few SCVs onto the Center, which will be able to repair the building in case it gets damaged badly. Afterwards they can return onboard and you will be able to continue discovering the area.
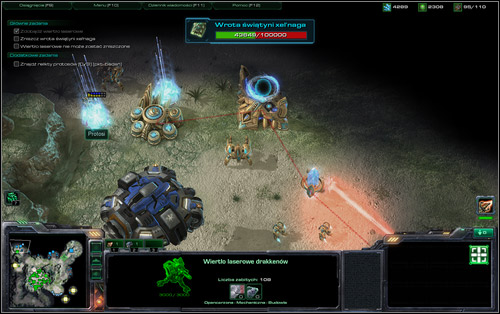
Use the Laser to destroy anything that can damage the building, which includes Photon Cannons, Void Rays and Stalkers. Take out the buildings afterwards. I'd suggest targeting the main, northern base, as the Probes there will be very persistent about repairing any damage dealt to the buildings, unlike the one in the east.
Queuing actions comes in handy here. You can mark a series of targets for the Laser by holding down Shift. While you're destroying the enemy buildings, keep on checking the minimap for any incoming Archons or Colossuses.
The achievement is rewarded during the mission.
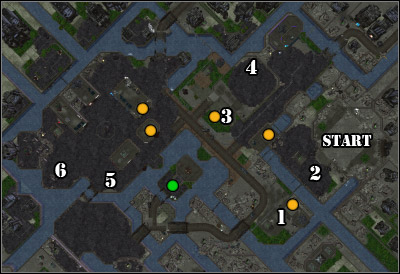
Main objectives:
Additional objectives:
Kerrigan has learnt that the Moebius Foundation has been supplying you with info on the Artifacts' locations. The queen has departed for their home planet with a mission of slaying the eggheads and gaining valuable information. You naturally have to stop here.
![[#1] - The Moebius Factor - Campaign - Artifact missions - StarCraft II: Wings of Liberty - Game Guide and Walkthrough](https://game.lhg100.com/Article/UploadFiles/201512/2015121709531332.jpg)
[#1]
Doctor Narud and the personnel are ready to evacuate, but can't till the cores aren't destroyed. If left behind, they would provide too valuable information to Kerrigan, who personally takes part in the search. You have to act quickly.
During this scenario, the Medivac Dropships will be introduced. In these circumstances, they will come in handy for sure. They can not only move units, but also heal all biological units. The map is filled with biomass and Zergs, not mentioning the Spine Crawlers. That's why you should focus on staying airborne, but not even that will keep you completely safe. You can always come across Mutalisks, Hydralisks and Spore Crawlers. You must keep your eyes opened and use the multiple ramps - whoever's higher, wins [#1].
![[#2] - The Moebius Factor - Campaign - Artifact missions - StarCraft II: Wings of Liberty - Game Guide and Walkthrough](https://game.lhg100.com/Article/UploadFiles/201512/2015121709531384.jpg)
[#2]
Kerrigan will begin her march at once. Luckily she will stop by every abandoned building and search it [#2], which will take some time. How much exactly can be seen onscreen. Fortunately you know the Cores' locations, so all that's left is destroying them. In total, there are 3 structures to demolish.
![[#3] - The Moebius Factor - Campaign - Artifact missions - StarCraft II: Wings of Liberty - Game Guide and Walkthrough](https://game.lhg100.com/Article/UploadFiles/201512/2015121709531346.jpg)
[#3]
The first building isn't too far away [1] or heavily protected. Just place all the units you received on start onboard and fly to the spot. Together with the saved Moebius Marines, you will easily destroy the Core and all nearby Zergs [#3]. The saved group of soldiers is by the way one of many sent by Narud with the mission to destroy the structures. Those who survived have bunkered themselves in the places marked with orange dots and can surely come in handy if only you save them (plus, it will give you an achievement).
[#4]
Before you head to the second core, focus on extending your base a bit. The Zergs will start systematically raiding you with small forces and a few times a Nydus Network entrance will appear before the attack [2] [#4]. You should of course destroy it as soon as possible. Protect the entrance with bunkers and additionally place some Turrets in the west.
![[#5] - The Moebius Factor - Campaign - Artifact missions - StarCraft II: Wings of Liberty - Game Guide and Walkthrough](https://game.lhg100.com/Article/UploadFiles/201512/2015121709531398.jpg)
[#5]
Armed with new units, head towards the second core. Destroying it won't be as easy as the first one, as there's a small Zerg nest in the area. I'd suggest beginning the attack where some lost Marauders are [3], where you will have time and place to unload your units [#5]. Afterwards rush up [4] and destroy the core.
The third core is a different story. It's surrounded by a Zerg base and a tight network of Spore Crawlers. Their numbers seems to be the lowest by the Brutalisk (green dot), which Raynor will discover soon after the beginning of the mission. If you only didn't yet kill him, land north of him and earn some new research points [#6].
[#6]
From around that spot, head to the west, follow the edge and reach the location marked as [5]. Although you'll have to deal with some Crawlers, but your Medivacs should be able to unload the units before getting destroyed [#7]. Be sure to have a numerous army, as the base surrounding the target building [6] is heavily protected. Destroy the core to win.
![[#7] - The Moebius Factor - Campaign - Artifact missions - StarCraft II: Wings of Liberty - Game Guide and Walkthrough](https://game.lhg100.com/Article/UploadFiles/201512/2015121709531348.jpg)
[#7]
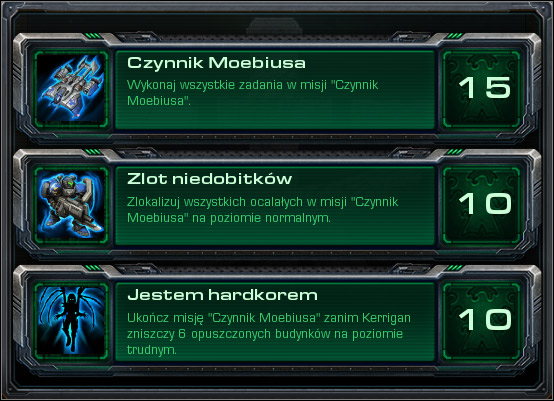
The Moebius Factor:
Destroy the Data Cores, Kerrigan Must Not Access a Data Core, Destroy the Brutalisk.
Alive Inside:
You must save five groups of mercenaries. They're well worth it, because of the experience they have. Their locations have been marked, three of them can be gathered on your way to the second core. The two others require you to travel a bit more.
Note that one of the groups has hidden in one of the side-buildings and their presence is marked by an appropriate sign. For them to leave the hideout, you have to fly there.
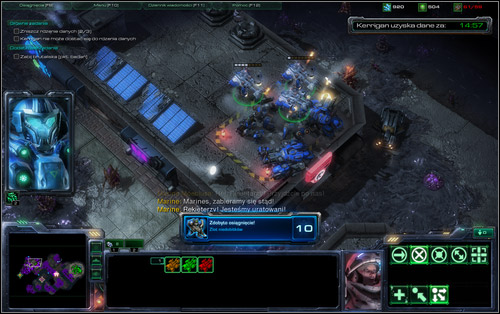
Hard Core:
Despite the name, it's not a hard achievement, though you'll probably have to load the game a couple times. Your biggest enemy is once more time, as you have around 16 minutes to destroy all three cores.
Begin extending your base. Save the first group of mercenaries with the Medivacs you received and destroy the nearby Core while you're at it. Move them all to the base as the Zergs will attack soon, including a Nydus Worm. The Spartan Goliath will be able to shoot it down without having to worry about Spine Crawlers'' attacks, so don't put any smaller units to risk.
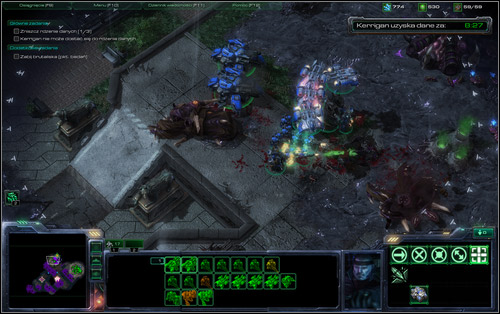
Mobilising your units for the next core should last, more or less, until Kerrigan start searching the third building - by waiting longer, you risk not making it in time. Until then, place two bunkers and aid them with a couple tanks. Also try to buy as many upgrades as possible in the Engineering Bay and Armory. Be sure to invest in more Mercenaries. Don't leave elites in the bunkers, swap them for normal ones and take with you. Have two or three empty Medivacs (to save the experienced survivors) and head towards the second core.
On your way, collect two additional groups of mercenaries by landing by the Marauders. There's a problematic swarm of Zergs round the building and they certainly won't let go easily. You should however focus on getting to the core as fast as possible, eliminating the irritating Infestor and Spine Crawler (I'd suggest Siege Tanks). Have Medivacs heal your units, but avoid the Spore Crawlers at the same time. Right after destroying the construction Nydus Worms will appear, so be ready to destroy their arrival.
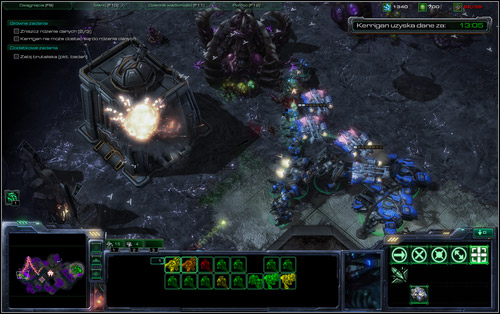
Get to the third core on foot or fly a bit in the Medivacs. Just stick to the right side (fewer Zergs) and approach the Core from the south-east side. Earlier, collect only two groups of mercenaries from the roofs, as a Nydus Worm will appear by one of them.
Once beside the Core, don't attack the neighbouring Hive and focus on the target itself and your own defence (lower priority). Once the building is damaged enough, you will be attacked by an enormous wave of Zergs, but the destruction of the Core will be very close.
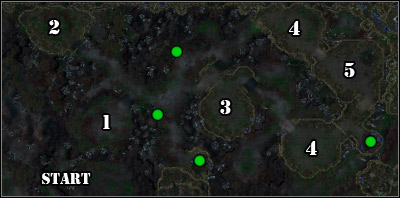
Main objectives:
Additional objectives:
The Moebius Foundation has given you more directives on the location of another Artifact. This time you will land on planet Typhon, known for the low minerals resources and of course the presence of an old friend - Tal'darims. As you're preparing to land, the crew onboard the Hyperion will witness a supernova of a nearby star. As a result, the whole planet will start burning.
![[#1] - Supernova - Campaign - Artifact missions - StarCraft II: Wings of Liberty - Game Guide and Walkthrough](https://game.lhg100.com/Article/UploadFiles/201512/2015121709531416.jpg)
[#1]
The time is running out, as the wall of fire is spreading throughout the planet and burns everything in its way. Luckily the Terran buildings can fly and this ability will surely come in handy now. In order to survive and get ready for attacking the Protoss base, you'll have to move a couple times. Fortunately you don't need to build Supply Depots in this mission.
Begin innocently with a few Banshees, which you should use to eliminate the single Stalker (activate cloaking) and clear the landing zone [1]. Note that the Photon Cannons have the detection ability, so if you don't want to fight them, fly through the middle and destroy the Pylon that's powering them [#1]. Afterwards, the proper mission begins.
![[#2] - Supernova - Campaign - Artifact missions - StarCraft II: Wings of Liberty - Game Guide and Walkthrough](https://game.lhg100.com/Article/UploadFiles/201512/2015121709531476.jpg)
[#2]
The fire slowly spreads from west to east [#2]. Its speed is in fact constantly changing, so keep on checking how far from you it is. Systematically keep on expanding your base by training new Banshees and a more conventional army as well. To even think about winning, you have to conquer three (out of five) Protoss bases, so heavy units highly advisable here. One of the bases [2] will be eventually consumed by fire, so don't bother about it.
![[#3] - Supernova - Campaign - Artifact missions - StarCraft II: Wings of Liberty - Game Guide and Walkthrough](https://game.lhg100.com/Article/UploadFiles/201512/2015121709531446.jpg)
[#3]
Tal'darims, as always, don't intend to take your actions lightly and will send their troops [#3]. At first the attacks won't be too fierce, but will increase in strength with the mission progress. Eventually you will be attacked by the Immortals (just from the name) and Archons. You can consider building bunkers, but remember to destroy them (to regain some resources) as you're leaving the spot.
![[#4] - Supernova - Campaign - Artifact missions - StarCraft II: Wings of Liberty - Game Guide and Walkthrough](https://game.lhg100.com/Article/UploadFiles/201512/2015121709531520.jpg)
[#4]
While examining the area, you will fairly often encounter enemy fortifications, usually consisting of a few units, Pylon and Photon Cannons. Such sets are also protecting the four Relics [#4] found here. The first two are very nearby, so don't hesitate to collect them right at the beginning.
![[#5] - Supernova - Campaign - Artifact missions - StarCraft II: Wings of Liberty - Game Guide and Walkthrough](https://game.lhg100.com/Article/UploadFiles/201512/2015121709531573.jpg)
[#5]
Once the fire draws near, Matt will suggest taking over the middle Tal'darim base [3], which should provide you with enough time to prepare the next strike. In the camp, there's a Colossus and some Immortals, so you can have a hard time taking it over [#5]. Once there, focus on destroying the Pylons and Warp Prisms, which can be very nasty. Also look out for the Banshee-detecting Cannons. Execute precise attacks and retreat when it gets too dangerous. Afterwards move all your buildings here, destroying everything that can't fly.
![[#6] - Supernova - Campaign - Artifact missions - StarCraft II: Wings of Liberty - Game Guide and Walkthrough](https://game.lhg100.com/Article/UploadFiles/201512/2015121709531588.jpg)
[#6]
Now the pattern repeats. Add side-buildings, invest in new units and fight off the increasingly powerful Protoss attacks. Once the fire closes in, you can choose which base you want to take over now [4] [#6]. Both represent a similar level and have similar defence to the middle one, for example Photon Cannons.
![[#7] - Supernova - Campaign - Artifact missions - StarCraft II: Wings of Liberty - Game Guide and Walkthrough](https://game.lhg100.com/Article/UploadFiles/201512/2015121709531537.jpg)
[#7]
After you settle in the new place, you won't have a choice but to prepare an army and finally attack the enemy [5]. Have in mind that the wall of fire certainly won't wait for you to deal with the Protoss defence, so the sooner you attack the better [#7]. The Tal'darims will send everything they have to stop you, including simple Zealots as well as mighty Archons. Once you get to the Artifact Vault, you still have to destroy it before safely evacuating.
Supernova:
Clear the Landing Zone, Destroy the Artifact Vault, Find 4 Protoss Relics.
Cool Running:
I can't imagine you leaving any units behind to burn in the fire, well, unless you completely forget about of them while moving your base. Contrary to some opinions, the buildings (including side-buildings) don't need to be saved - it's just about the units.
Shock and Awe:
Start training as much Banshees as you can from the very beginning, completely forgetting about any other types (or just make some for the sake of defending your base). I'd suggest moving the beginning infantry to a Bunker, as they stand no chance against the mighty Protosses. Remember that the counter increases only when your Banshees are cloaked, which you can overlook in the heat of the battle.
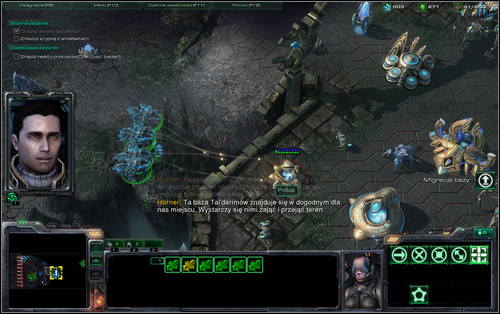
Keep increasing your fleet, while fighting off the increasingly difficult Tal'darim attacks. Between the attacks, you can head deeper into the map and eliminate enemy groups, for example by the relics. If you want you can also check the north-west part of the map, with one of the Protoss bases. However try to defend your own base above all, as it will also bring additional victims onto your account.
Wherever you go, eliminate the Photon Cannons (detection) or the Pylons which are powering them in the first place. Without them around you will be safe and the numerous Stalkers and Sentries won't be able to see you. The Protosses are almost sure not to use any other detection methods. Also keep an eye on the Banshees' energy, as they can't stay invisible forever.
As you probably know, you will have to run away after some time and settle in the Protoss base indicated by Matt. Of course use the Banshees. Firstly be sure to destroy everything that can harm you in case you run out of energy. Afterwards eliminate the Nexus, Pylons (the base will cease to produce units), the Probes and only afterwards the other, defenceless Zealots and Colossuses. That way you will provide the others with a safe passage.
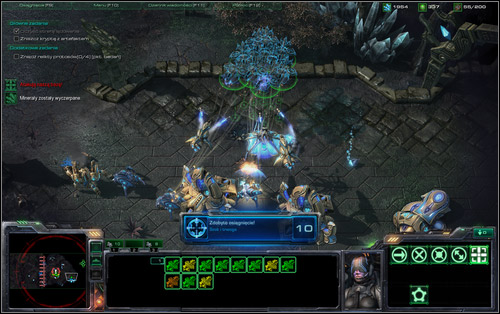
Afterwards systematically raid the other enemy bases. I think you won't have to move for the second time and you'll complete the Achievement before the fire gets you. You don't need to complete the whole mission.
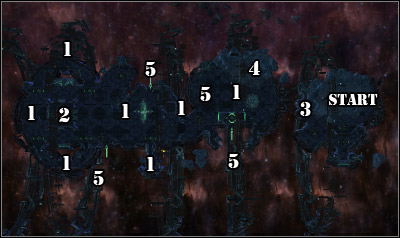
Main objectives:
Additional objectives:
Prince Valerian already knows where the last, fifth Artifact is. You will head to quadrant Sigma, where Tal'darims are protecting their precious treasure on an abandoned ship of an ancient race. It definitely won't be easy, mainly because of the Rip-Field Generators. Whoever enters it, and doesn't have proper protection like the Protosses, is being slowly destroyed.
![[#1] - Maw of the Void - Campaign - Artifact missions - StarCraft II: Wings of Liberty - Game Guide and Walkthrough](https://game.lhg100.com/Article/UploadFiles/201512/2015121709531683.jpg)
[#1]
Luckily you have the mighty Battlecruisers at your disposals, and they're quite resistant. You will test out their abilities right at the start, when you'll have to clear the area for your base. As for the generator [#1], use your Battlecruisers' powerful Yamato Cannons. Three shots will get rid of the troublesome Rip-Field. Keep that in mind for later on.
You will learn of more generators [1] once Raynor's men settle a base on the cleared platform. all the generators are protecting access to the Xel'Naga Vault [2], which you of course have to destroy. Overall the mission awards using the newly-gained Battlecruisers and you should focus on making them.
![[#2] - Maw of the Void - Campaign - Artifact missions - StarCraft II: Wings of Liberty - Game Guide and Walkthrough](https://game.lhg100.com/Article/UploadFiles/201512/2015121709531610.jpg)
[#2]
As for defence, note that you're in an almost isolated location. The enemy however will try to surprise you from time to time by sending some transporters towards your base [#2]. Place a couple Turrets and maybe a bunker at the western edge of the platform [3]. Also move the Battlecruisers there and that way you will quickly shoot down the enemy units.
[#3]
Additionally there's quite a bit of Gas and Mineral Pallets in the starting area, which will definitely aid you from the economical side in the beginning. Just look out for the local Tal'damirs, who will surely defend their goods. You will find more Pallets throughout the whole ship [#3] and they will definitely come in handy considering the rather low natural resources.
![[#4] - Maw of the Void - Campaign - Artifact missions - StarCraft II: Wings of Liberty - Game Guide and Walkthrough](https://game.lhg100.com/Article/UploadFiles/201512/2015121709531617.jpg)
[#4]
Eventually it will become clear that the only thing that can save you from a financial crash is taking over the nearby Protoss base [4] [#4]. It will require destroying at least one generator (use Battlecruisers), which will also activate the additional mission. It will turn out that the Tal'damirs have imprisoned many Dark Templars who rebelled against them. If you free them from the prisons [5] [#5], they will gladly join you. You will receive research points in return the help.
![[#5] - Maw of the Void - Campaign - Artifact missions - StarCraft II: Wings of Liberty - Game Guide and Walkthrough](https://game.lhg100.com/Article/UploadFiles/201512/2015121709531628.jpg)
[#5]
Basically you should focus on producing units in the Starport. Besides Battlecruisers, you can also invest in Banshees or Vikings, though those units won't last too long inside the Rip-Field. You can however use them to neutralise the enemy transporters and other units produced in the Stargate, which will systematically keep attacking you from the west. The local Protosses will send out Void Rays and later on even Carriers. A large number of Battlecruisers will deal with such a threat, but it wouldn't be bad to aid them with other air units.
If you built a base in the place of the mentioned enemy mini-base, be ready for likely visit of Archons, Immortals and Colossuses. Despite that, don't waste money on infantry. Instead, keep investing in your Battlecruisers fleet - their Yamato Cannons can work miracles. Additionally you will have the powerful Dark Templars at your disposal (if you've saved them), who will bring shock and awe to the battlefield thanks to their invisibility.
![[#6] - Maw of the Void - Campaign - Artifact missions - StarCraft II: Wings of Liberty - Game Guide and Walkthrough](https://game.lhg100.com/Article/UploadFiles/201512/2015121709531675.jpg)
[#6]
I'd suggest using a similar combination while devastating the enemy infrastructure [#6]. The Templars are vulnerable to the Field, so use them to destroy the Protoss defence, retreating if you see any Photon Cannons (detection). When you do come across some, send the Battlecruisers into action - one shot from the Yamatos will solve the case. The enemy bases are dominated by air units, though you will also encounter ground units. Take over the area step by step and retreat from the Rip-Field from time to time in order for the needed repairs. It's good to have a team of SCVs or Science Vessels nearby.
![[#7] - Maw of the Void - Campaign - Artifact missions - StarCraft II: Wings of Liberty - Game Guide and Walkthrough](https://game.lhg100.com/Article/UploadFiles/201512/2015121709531605.jpg)
[#7]
It won't be long before the Tal'darims call in a Mothership [#7]. Its main advantage is the ability to cloak nearby friendly units and temporarily send the attackers to another dimension. The huge units will patrol the area round the target Vault, however a condensed Battlecruiser attack (you can also consider some Vikings) should do the job [#8].
![[#8] - Maw of the Void - Campaign - Artifact missions - StarCraft II: Wings of Liberty - Game Guide and Walkthrough](https://game.lhg100.com/Article/UploadFiles/201512/2015121709531770.jpg)
[#8]

Maw of the Void:
Clear the Landing Zone, Destroy the Xel'Naga Vault, Rescue the Protoss Prisoners.
I Have the Power:
It's a very time-consuming mission, but medals aren't given for free. The generators'' locations are no secret, so I may just wish you happy hunting.
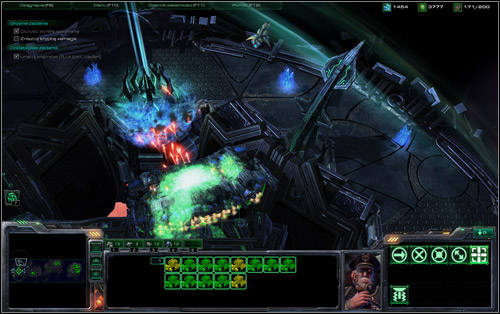
Master of the Universe:
The description might not give a full view of this achievement. From what I've learned, you can't let the Field itself kill any of your units, if any gets killed by an enemy unit while in the field, it doesn't count.
The sole fact of establishing whether the units were killed by the Field or the enemy is quite problematic. The Field drains little health but does it systematically and fast, so you never will be completely sure if the last health points were taken by the field or an enemy attack. Overall it's best to avoid any fights inside the field, though if you lose some units that way, you may still have hope (or saves).
On hard, the enemy has a powerful fleet at his disposal (every units from the Stargate), though his ground units are also dangerous (Archons, Colossuses and High Templars, amongst else). In return, build a large army of Battlecruisers, buying all upgrades for them in the Armoury. Their high endurance and firepower make them ideal for fighting your way towards the Vault. Have some SCVs or Science Vessels nearby, outside the Field for sake of quick repairs.
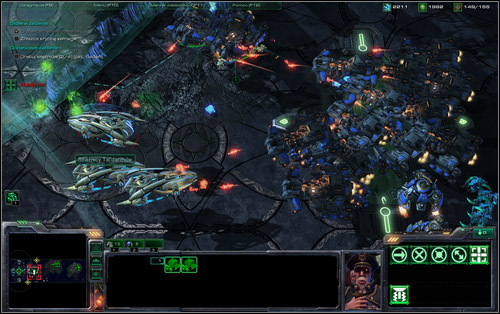
Note that your resources are very limited, even more than on normal. Don't hesitate from quickly taking over the nearby Protoss base and collecting the numerous mineral and gas tanks. Additionally secure not only the middle, but also the southern part of the map with a line of Turrets (vertically), as the Protosses will probably want to surprise you with an attack from there. If you command a group of Battlecruisers and come across several enemies at once (for example, Carriers), it would be advised to queue the Yamato Cannon shots by holding down Shift.
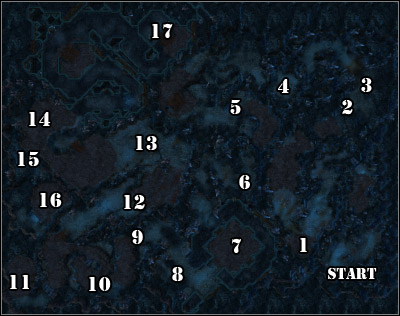
Main objectives:
Additional objectives:
The first mission from series dedicated to Zeratul, who will one day pay a visit to Raynor on the Hyperion. Thanks to the Ihan crystal, the main hero of Wings of Liberty can relive the things that had happened to the Templar. In the first interactive memory, you will land on planet Ulaan, where the knowledge-hungry Protoss discovers parts of the prophecy, foretelling the coming of Xel'Naga. Apparently Kerrigan has also landed here.
After an attractive intro movie, Zeratul will head out with an intention of collecting all the prophecy fragments. You can't build a base in this scenario. At some point a few Stalkers will start accompanying you and whenever you arrive at the target shrines, all your units will be cured.
![[#1] - Whispers of Doom - Campaign - Prophesy missions - StarCraft II: Wings of Liberty - Game Guide and Walkthrough](https://game.lhg100.com/Article/UploadFiles/201512/2015121709531742.jpg)
[#1]
Zeratul uses constant cloaking and out of all Zergs, he may fear only Spore Crawlers and Overseers. However there aren't any in the first group you meet, so just slaughter them. Afterwards you will be introduced with the Blink ability, which in fact allows you to teleport. Use this power to get to the other side of the chasm.
Move on until you reach a rock blocking the passage and smash it to pieces. In a moment you will encounter the first real obstacle, in form of the mentioned Crawler [1] [#1]. The stationary unit is a detector, who you can block for a couple seconds with the Void Prison. During the charm, firstly eliminate the Crawler and then all the blinded Zergs. Remember to always eliminate the detectors in the first place, as that way you will be untouchable while fighting the other enemies.
![[#2] - Whispers of Doom - Campaign - Prophesy missions - StarCraft II: Wings of Liberty - Game Guide and Walkthrough](https://game.lhg100.com/Article/UploadFiles/201512/2015121709531781.jpg)
[#2]
Repeat this manoeuvre two more times until an Overseer appears [2]. Zeratul cannon kill flying units, so catch it into the Void Prison [#2] and kill the nearby Hydralisks. The first Shrine is open [3].
Not long afterwards you will be surrounded by Zerg forces [4] (including an Overseer), but luckily a group of Stalkers under the command of High Templar Karass [#3]. Kill the Zergs and move on. Note that the Stalkers can also use the Blink ability.
![[#3] - Whispers of Doom - Campaign - Prophesy missions - StarCraft II: Wings of Liberty - Game Guide and Walkthrough](https://game.lhg100.com/Article/UploadFiles/201512/2015121709531847.jpg)
[#3]
With help from your new units, destroy two more groups of Kerrigan's followers and you will reach a patrol of Brood Lords [5]. Those units spit little, irritating broods which you should try to avoid. Carefully watch the opponents' movement, catch one of them with the Void Prison and send in the Stalkers [#4]. Repeat the pattern with the second Lord.
![[#4] - Whispers of Doom - Campaign - Prophesy missions - StarCraft II: Wings of Liberty - Game Guide and Walkthrough](https://game.lhg100.com/Article/UploadFiles/201512/2015121709531856.jpg)
[#4]
You will come across another trap in location marked as [6] [#5]. Follow Zeratul's hints, don't lose faith in winning when a group of Roaches and other smaller beasts attack you, but at the same time don't think about it too much (let the units defend themselves) and you will surely win.
![[#5] - Whispers of Doom - Campaign - Prophesy missions - StarCraft II: Wings of Liberty - Game Guide and Walkthrough](https://game.lhg100.com/Article/UploadFiles/201512/2015121709531826.jpg)
[#5]
Eventually you will reach the first Zerg Hatchery [7] [#6]. There are three of them in total in the planet. Two others are hidden, but you will learn of them further in the guide. It's definitely worth the try, as destroying them all will grant you with additional research points. Having destroyed the first one, you can enter the second Shrine [8].
![[#6] - Whispers of Doom - Campaign - Prophesy missions - StarCraft II: Wings of Liberty - Game Guide and Walkthrough](https://game.lhg100.com/Article/UploadFiles/201512/2015121709531814.jpg)
[#6]
On your path to the third one will be disrupted by a group of Zergs with a couple of Mutalisks [9], while when visiting location number [10] you will be faced with a quite difficult challenge which will require you to quickly place your Stalkers at the rocks. Only then will you be able to cut down the legion of Banelings [#7], who squirt acid once they die, which of course isn't very healthy.
![[#7] - Whispers of Doom - Campaign - Prophesy missions - StarCraft II: Wings of Liberty - Game Guide and Walkthrough](https://game.lhg100.com/Article/UploadFiles/201512/2015121709531880.jpg)
[#7]
After winning, you can follow the main path or go a bit to the west, having the additional task in mind. Moving along the chasm, you will eventually reach the second Hatchery [11], with which you shouldn't have problems [#8]. As always, firstly get rid of the detectors and eliminate the rest afterwards.
![[#8] - Whispers of Doom - Campaign - Prophesy missions - StarCraft II: Wings of Liberty - Game Guide and Walkthrough](https://game.lhg100.com/Article/UploadFiles/201512/2015121709531876.jpg)
[#8]
Back on the main path, you will witness a quite unusual sight. A few Spine Crawlers [#9] will try to reach the near biomass, settle in it and ready for an attack [12]. Destroy as many of them as you can and get rid of the rest having the Overseer patrolling the area in mind.
![[#9] - Whispers of Doom - Campaign - Prophesy missions - StarCraft II: Wings of Liberty - Game Guide and Walkthrough](https://game.lhg100.com/Article/UploadFiles/201512/2015121709531832.jpg)
[#9]
A few steps forward you will meet Karass [13], with whom you will attack the main Zerg base. Note that the yellows have only Zealots (you can't control them), so when only the enemy's flying units appear, send your Stalkers to fight them [#10]. As you're moving towards the temple [14], Nydus Networks will start appearing and if only you decide to listen to Karass, move your Stalkers to the nearby hill, where they will have a better position.
![[#10] - Whispers of Doom - Campaign - Prophesy missions - StarCraft II: Wings of Liberty - Game Guide and Walkthrough](https://game.lhg100.com/Article/UploadFiles/201512/2015121709531898.jpg)
[#10]
When the dust falls down, enter the temple or go to the western chasms [15], jump along the stone path and eventually you will reach the secret Zerg Hatchery [16] [#11]. It's the third and last one. If you're having problems moving your units, try teleporting them one at a time.
![[#11] - Whispers of Doom - Campaign - Prophesy missions - StarCraft II: Wings of Liberty - Game Guide and Walkthrough](https://game.lhg100.com/Article/UploadFiles/201512/2015121709531865.jpg)
[#11]
As you reach out for the third fragment, the map will be flooded with Zergs, under Kerrigan's command. Karass will heroically declare his devotion and will try to stop the wave for as long as possible. In the same time, you should run to the destination point [17], ignoring any Zergs on the way [#12]. Once you reach the stone barricades, use Blink which will save some time and probably your life too.
![[#12] - Whispers of Doom - Campaign - Prophesy missions - StarCraft II: Wings of Liberty - Game Guide and Walkthrough](https://game.lhg100.com/Article/UploadFiles/201512/2015121709531975.jpg)
[#12]
Whispers of Doom:
Bring Zeratul to the 3 Xel'Naga Shrines, Destroy the 3 Zerg Hatcheries, Escape To The Void Seeker, Zeratul Must Survive.
Stalker Delight:
First of all, you have to keep at least three Stalkers alive up to the moment when you have to return to the Void Seeker. It will start after reaching the third Shrine.
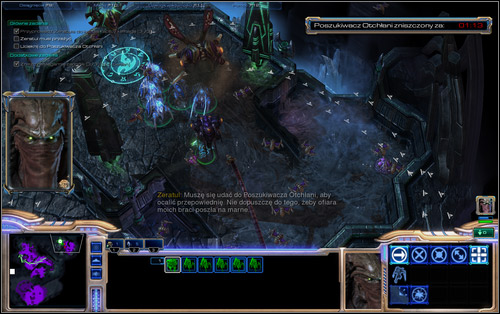
The risk of losing a Stalker is at that time quite high, as Zergs will keep on attacking and chasing you. The next obstacle are the rocks - don't try to destroy them, use Blink instead to gain an advantage over the Zergs. However be sure to do it while close to the barrier, as Blink has a limited range and you can land before the barrier instead of behind it. There will be three in total, with the third one needed to be destroyed (Blink won't have time to cool down). You can however use Blink to avoid the Spore Crawler and Spine Crawler, located right before the turn leading to the Void Seeker.
Merely a Flesh Wound:
Before attempting to complete this mission, I'd suggest firstly completing the mission on normal to get to know the level and the dangers waiting for you. Having that knowledge, basically all you have to do make sure not to make any mistake, keeping Zeratul's health above the demanded 300 (the cover can of course be damaged).
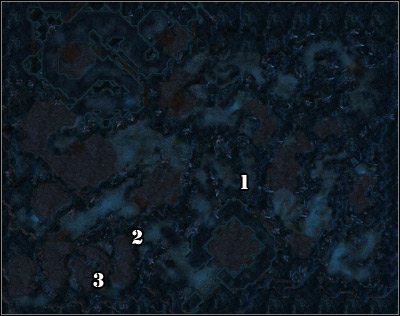
Wounded units will be healed once you visit a Shrine, so check out if Zeratul is okay before entering, as it can turn out you've completed the mission for nothing. The Protoss Hero can't be physically damaged even once, as even if you enter the Seeker at full health, you won't gain the Achievement if you've received any damage during the mission.
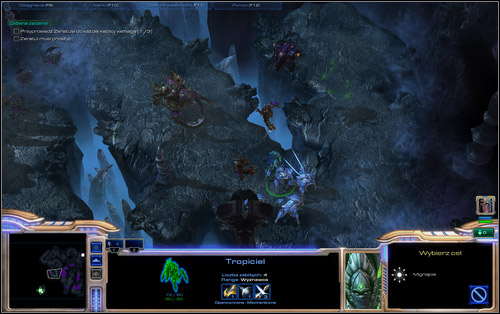
During your journey, you will face similar dangers to the ones mentioned in the description (normal level), however I'd like to warn you about some situations. In locations [1] and [2] you will have to face a powerful Ultralisk, which can seriously threaten not only Zeratul (use Void Prison on him), but also the Stalkers accompanying him. In the first location, he will be a part of the trap mentioned in the description and in the second he will come out of the ground once he sees the Stalkers.
At point number [3] you will meet Banelings, who will want to cover your units with their acid. Just as I've described it previously, get as close to the middle as possible to be able to shoot at them. However contrary to the description of the lower difficulty, the monsters won't be as easy to eliminate. Once they get close, teleport your whole team to where the Banelings were before. The survivors will go back - you should wait for them to get close enough and return to the middle. They won't stand a chance then.
Save often during the exploration of the map.
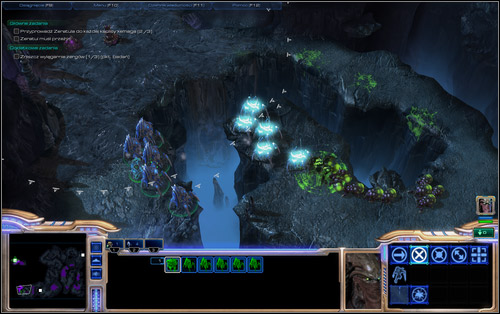
Main objectives:
Additional objectives:
Zeratul arrives to the forbidden world of Zhakul, where a sacred archive is being protected by three immortal Preservers. They can help out to decipher the gained prophecy, but there will be of course some complications along the way.
You will learn of then not long after establishing your base. The Probes will bring in a Nexus and you will have to skillfully place the Pylons. It's the first time you have to build a Protoss base during the campaign, so feel free to read about the race by pressing F12 if you feel confused.
![[#1] - A Sinister Turn - Campaign - Prophesy missions - StarCraft II: Wings of Liberty - Game Guide and Walkthrough](https://game.lhg100.com/Article/UploadFiles/201512/2015121709532020.jpg)
[#1]
Once you get acquaintance with the Protoss technology, the peace will be interrupted by the local Stalker, who before hitting your Photon Cannon, will unveil that the Preservers now serve a much greater force, which you will soon meet. It's a powerful... Protoss and Zerg hybrid (those of you who had played the secret mission in the original StarCraft have probably jumped through the roof by now) called Maar. She draws energy from the enslaved immortals [#1] and will rush onto you after charging up.
![[#2] - A Sinister Turn - Campaign - Prophesy missions - StarCraft II: Wings of Liberty - Game Guide and Walkthrough](https://game.lhg100.com/Article/UploadFiles/201512/2015121709532092.jpg)
[#2]
The hybrid is exceptionally strong and only a very numerous Protoss squad can stand a chance against her [#2]. That's why you should start training units right away. The creature can teleport and pick up its enemies to damage them. After you slay him, he will respawn and systematically keep attacking you. It can decide to attack your base from the east or west, so both sides should be protected. Usually after his attack, normal units of the local Protoss will also attack, who however are far less dangerous.
![[#3] - A Sinister Turn - Campaign - Prophesy missions - StarCraft II: Wings of Liberty - Game Guide and Walkthrough](https://game.lhg100.com/Article/UploadFiles/201512/2015121709532061.jpg)
[#3]
Before you even learn about the hybrid, Zeratul will discover three abandoned buildings in the area. With their help you will be able to train new units, as in the beginning you have only a Zealot and Stalker at your disposal. In the east there's a Robotics Facility [1] [#3] (immortals), a bit to the right a Dark Shrine [2] (Dark Templars) and the Templar Archives in the north-east [3] (High Templar).
![[#4] - A Sinister Turn - Campaign - Prophesy missions - StarCraft II: Wings of Liberty - Game Guide and Walkthrough](https://game.lhg100.com/Article/UploadFiles/201512/2015121709532098.jpg)
[#4]
The first two mentioned buildings aren't protected and you can take them over by placing a Pylon nearby. In order to maintain the Robotics Facility, you will have to build some fortifications around it, however even if you lose it, the plans won't be a secret anymore and you can build yourself another one in your base. Dark Templars can prove very useful at this point, as they can destroy the Protoss base [#4] [4] protecting the archives with High Templars [#5] (two give an Archon) without anyone's help thanks to their invisibility (there are no detectors there).
![[#5] - A Sinister Turn - Campaign - Prophesy missions - StarCraft II: Wings of Liberty - Game Guide and Walkthrough](https://game.lhg100.com/Article/UploadFiles/201512/2015121709532053.jpg)
[#5]
If you want, you can pay a visit to the side base [5], this time protected by Photon Cannons, amongst others. It has sense only if you're hunting down one of the Achievements.
Eventually you should build a strong army and head for the main fortifications [#6]. Attack the main base [6] right after getting rid of Maar, as fighting it alongside the local defendants might not end too well. You have to destroy the three stones which are keeping the Preservers imprisoned [7]. Once they're free, they will immediately interpret the Xel'Naga prophecy.
![[#6] - A Sinister Turn - Campaign - Prophesy missions - StarCraft II: Wings of Liberty - Game Guide and Walkthrough](https://game.lhg100.com/Article/UploadFiles/201512/2015121709532068.jpg)
[#6]
A Sinister Turn:
Power Up The Encampment, Power Up Protoss Buildings, Free the Preservers.
Out for Justice:
There's not much to say here, you just need to clear out the whole map of Protosses. They had split into three bases. Apart from the main one, there's also a smaller one hidden on the western hill and that beside the abandoned Templar Archives. As I've mentioned above, you can feel free to send Dark Templars to the last one, as there are no detectors to disturb them.
Maar-ked for Death:
A rather easy task, if only you manage to play through the last part efficiently. Thanks to the below solution, you'll end the mission with a couple minutes before the time ends.
Start off with training a few Zealots (even two will do), send them towards the Dark Shrine and activate it with a Pylon after a short fight. It shouldn't draw anyone's attention, so place it somewhere above. Return to the base and begin training the newly discovered Templars, amongst others. You will use them in your attempt to set the hybrid's hostages free.
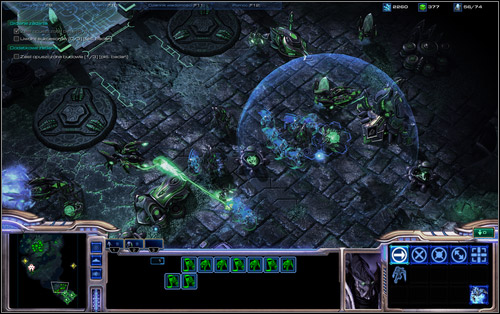
The mutants will keep attacking almost non-stop, aided by conventional Protoss units, so be sure to quickly produce strong defenders capable of fighting back. Surround yourself with Cannons and be sure to invest in improvements. Ignore the rest of the abandoned buildings, though nothing stand in the way of placing a Pylon by the Facility to learn the plans. Sit fortified inside your base and train around 10 Dark Templars on the side.
Once you have them, head onto the main enemy base. Under no circumstances should you fight the constantly moving hybrids, as you should leave it to your base's defence. Stand beside the main bridge, wait for another Maar to pass and head towards the imprisoned Preservers.
Don't destroy the enemy infrastructure or units, just blindly rush forward. You will get out of the detector's sight once you reach the further part of the prison. The Protosses will then cease to chase you, which will let you take care of the chambers freely.
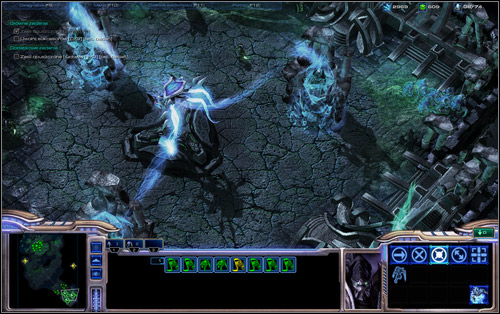
Save the game, as from now you will have to act very carefully. Place the Templars at the very edge of the prison location, as the respawning hybrid is sure to notice the intruders and react quickly. The Zerg-Protoss crossover will also immediately re-appear on the platform once a chamber holding a Preserver will be destroyed. Having that in mind, hit the crypt from the outer side and afterwards retreat to the corner, as far as possible. Tell your units to hold positions. Get rid of the three target chambers one by one.
Alternatively you can risk and rush onto the enemy base with all your forces, going only through the middle. Success depends on the size of our army, however such an action is sure to draw attention away from the Dark Templars' doings.

Main objectives:
Additional objectives:
Following the prophecy, Zeratul return to Aiur - the Protoss capital, destroyed in the first game. The remains of Overmind, who has once commanded the whole Zerg swarm can be found there. Of course the race stayed on the planet, tightly surrounding and feeding on the remains. The Dark Templar, if he hopes to learn anything, needs to have direct contact with the Overmind, even dead.
![[#1] - Echoes of the Future - Campaign - Prophesy missions - StarCraft II: Wings of Liberty - Game Guide and Walkthrough](https://game.lhg100.com/Article/UploadFiles/201512/2015121709532162.jpg)
[#1]
After landing on Aiur, follow the path to discover an Observer, who's been waiting on duty for many years [#1]. It's a small unit, capable of detecting hidden units, including Zergs buried in the ground. With his help, you won't have any problems with getting to the old base [1].
![[#2] - Echoes of the Future - Campaign - Prophesy missions - StarCraft II: Wings of Liberty - Game Guide and Walkthrough](https://game.lhg100.com/Article/UploadFiles/201512/2015121709532166.jpg)
[#2]
Once you set foot on the target marker, you will summon powerful Colossuses from the depth of the sea, which will from now stand on the cliffs and guard you from the Zergs. Those units attack only ground units, but once they do, they do it very efficiently, ripping the ground with deadly beams [#2]. Unfortunately they are very vulnerable to air attacks - such the fate of a giant.
You will be attacked from the north and east, systematically every four minutes. You won't see the clock only during the first natives' invasion. They will always move through Nydus Worms, which will grow out in two random spots (in the north and east). It's hard to predict what type of units will attack you, as it also appears to be random. Generally be ready for a confrontation [#3] with a swarm of Zerglings, Mutalisks, Roaches and later also Ultralisks. Basically the Zergs will throw everything they have at you.
![[#3] - Echoes of the Future - Campaign - Prophesy missions - StarCraft II: Wings of Liberty - Game Guide and Walkthrough](https://game.lhg100.com/Article/UploadFiles/201512/2015121709532185.jpg)
[#3]
You can leave the Colossuses on by the cliff, as they will do their job perfectly, especially while burning the Zerglings. You can at least send one to protect the base from within, mainly in the beginning when you won't have many units to defend with. Dark Templars seem to be a good investment (they're invisible), as well as High, who can call forth a powerful Psi Storm. In further perspective, you can consider hunting the Nydus Worms directly, which will require building two teams and sending them in the proper directions.
![[#4] - Echoes of the Future - Campaign - Prophesy missions - StarCraft II: Wings of Liberty - Game Guide and Walkthrough](https://game.lhg100.com/Article/UploadFiles/201512/2015121709532225.jpg)
[#4]
Of course it's not hard to guess that the whole area is swarming with Zergs (there's also quite a lot of abandoned materials). There are a couple bases round the Overmind and they mostly rely on ground units. The one a bit to the west [2] distinguishes itself from the others, as you can meet Mutalisks there [#4]. In the lower right corner of the map [3] there's another infected Terran base waiting to be destroyed [#5]. Keep your eyes opened for any free-roaming Ultralisks. I decided not to mark any other bases, as basically everything around is swarming with Zergs and looks like a one, big Biomass.
![[#5] - Echoes of the Future - Campaign - Prophesy missions - StarCraft II: Wings of Liberty - Game Guide and Walkthrough](https://game.lhg100.com/Article/UploadFiles/201512/2015121709532239.jpg)
[#5]
If you think about sight-seeing, be sure to take an Observer with you, who will examine the area beforehand and reveal any buried Zergs. How much helpful that will be, you will discover very quickly. Look out if you're using Zealots or Templars - they like to rush forward to attack and often end up surrounded by enemies. If you're afraid you won't make it back in time to the base in case of an attack, leave another squad there. The offensive one should definitely consist of some Colossuses and absolutely something anti-air, because of the mentioned Mutalisks.
![[#6] - Echoes of the Future - Campaign - Prophesy missions - StarCraft II: Wings of Liberty - Game Guide and Walkthrough](https://game.lhg100.com/Article/UploadFiles/201512/2015121709532223.jpg)
[#6]
Nearby the Overmind there are two obelisks with Warp Gates [4], which once activated (with Pylons) [#6] will not only let you complete the additional mission (research bonus) but also gain some Stalkers and two Templars. There are also two abandoned Robotics Facilities on the map [5], which you can consider taking over.
The Overminds' Tendrils have been marked with [6] and you need to lead Zeratul to each of them.
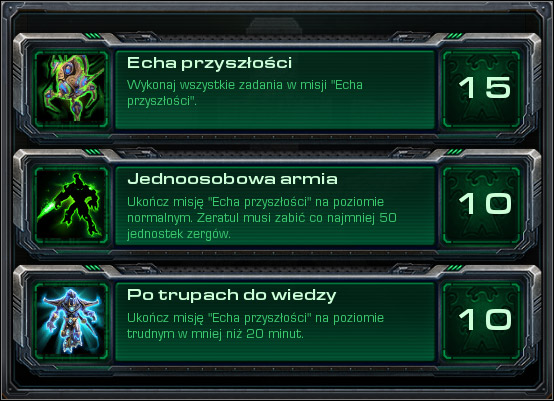
Echoes of the Future:
Reach the Nexus, Bring Zeratul to each of the 4 Overmind Tendrils, Power the 2 Obelisks, Zeratul Must Survive.
Army of One:
I think you will complete this achievement without even having it in mind. If you're in a hurry, you can head out for a hunt with the Observer. The kill counter will quickly increase and the current number can be viewed in the character panel.
Overmind Dead Body:
Another difficult raid. You have to get to all four Tendrills in as few as 20 minutes, the area is swarming with Zergs and you don't even have a base to start with. Curiously, you can complete this achievement in as much as 3-4 minutes, but luck pays a big role in that case. That's why I'll first show you the more time-consuming, but certain method. The mentioned faster solution can be found at the end.
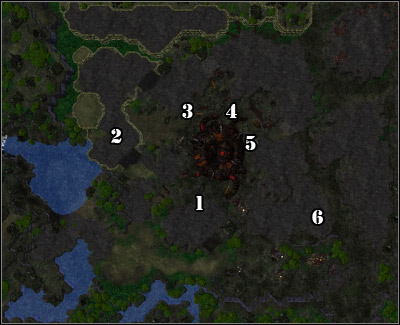
After getting to the Nexus, start building a strong economy so that you won't be short on crystals or gas in the future (two Assimilators absolutely needed) and Pylons. Move your Colossuses right away to the nearest marker [1]. Aid them with an Observer and begin training new units in the meantime.
Once Zeratul mentions the Zerg attack, retreat the Colossuses back to the cliffs and fight off the first wave. Afterwards continue killing the natives round the first obelisk and build a Pylon which will activate the Warp Gate. They can bring in new units, which you can of course use during the mission (you can also turn your own Gateway into one of them).
![Collect all your forces and move up towards the next Gate [2] and Tendrils - Echoes of the Future (Achievements) - Campaign - Prophesy missions - StarCraft II: Wings of Liberty - Game Guide and Walkthrough](https://game.lhg100.com/Article/UploadFiles/201512/2015121709532220.jpg)
Collect all your forces and move up towards the next Gate [2] and Tendrils. Cause as much destruction as possible and retreat to your base to protect it from the Zerg attack. Afterwards take your whole army to destroying the nearby nests in order to get to the second obelisk [3]. This is a very important part of the mission. You have to accomplish the goal as fast as possible, while being troubled by local Brood Lords and Mutalisks. Counter them with Stalkers and don't forget that you also have your High Templars' Psi Storm (they will pass through the activated Gates).
You will probably have to retreat to the base once again, but you can also risk, place many Cannons and invest in more Colossuses. Additionally you should also train Dark Templars - they are great against the blind Zergs. You should also consider having them in the first line, as they're very effective even despite the detectors.
Once you get to the second Tendril, don't start fighting for the third [4] - there's a lot of ground units and Spine Crawlers there. Once Zeratul reaches each of it, his health will recover - use this fact. Run with the hero along the edge (without fighting), towards the new marker, avoiding bigger obstacles with Blink.
![Now you can choose if you want to continue going right to the last Tendril [5] (risky) or return to your troops and attack the final Tendril from the infected Terran base's side [6] - Echoes of the Future (Achievements) - Campaign - Prophesy missions - StarCraft II: Wings of Liberty - Game Guide and Walkthrough](https://game.lhg100.com/Article/UploadFiles/201512/2015121709532329.jpg)
Now you can choose if you want to continue going right to the last Tendril [5] (risky) or return to your troops and attack the final Tendril from the infected Terran base's side [6]. It's not a big challenge. In this case, once you're nearby the Tendril, you can speed things up by raiding with Zeratul and using his Blink ability.
The quicker method consists of using Zeratul's Blink ability and jumping from one Tendril to the other. Each Tendril replenishes the hero's strength, so why not try? The distances aren't too big, but you probably will have to load a few times.

Main objectives:
Additional objectives:
A very interesting mission, from the story point of view. Zeratul has a vision in which he travels to the future. Accordingly to the prophecy, the galaxy is at the brink of destruction and the Terrans have been exterminated. As for the Dark Templar's countrymen, they have formed a last bastion, which you will have to defend to the last Protoss, which is the goal of the mission.
The mission will in fact end in failure in terms of the plot. Before that however, you will be forced to desperately defend from the Zergs, commanded by a mysterious force (Kerrigan is long gone by now), aided by powerful Hybrids.
![[#1] - In Utter Darkness - Campaign - Prophesy missions - StarCraft II: Wings of Liberty - Game Guide and Walkthrough](https://game.lhg100.com/Article/UploadFiles/201512/2015121709532324.jpg)
[#1]
The map is small, and the area is divided into the main base [1] and the courtyard [2], where the defenders are already awaiting the enemy. The Zergs and hybrids [#1] will be coming in from three passages [3], with small Observers above. They play a quite important role here, as they inform beforehand from where the attack will come. If the robots get shot down (which is possible later in the mission) it's worth sending new ones to the same spots.
On the screen there is also a counter which shows how much Zergs you've killed. You have to deal with 1500 units, which clearly suggests that the fight here will be dramatic and memorable, I assure you.
![[#2] - In Utter Darkness - Campaign - Prophesy missions - StarCraft II: Wings of Liberty - Game Guide and Walkthrough](https://game.lhg100.com/Article/UploadFiles/201512/2015121709532378.jpg)
[#2]
The first attacks will be based on basic units (a flood of Zerglings) [#2], but new types will also appear rather soon and you can expect visits from Ultralisks and Brood Lords. Similarly with the hybrids, which will come in several different types (read more about them under F12).
Airborne units will be a big threat - in the beginning Mutalisks, attacking the outer fortifications [#3]. The best way to get rid of them is sending a squadron of Phoenixes, which will arrive under the command of admiral Urun. Later on you can send them to the Brood Lords, but look out for Corruptors.
![[#3] - In Utter Darkness - Campaign - Prophesy missions - StarCraft II: Wings of Liberty - Game Guide and Walkthrough](https://game.lhg100.com/Article/UploadFiles/201512/2015121709532308.jpg)
[#3]
All-together, there will be five heroes involved in the fight throughout the mission. Apart from the mentioned Urun and of course Zeratul, there will be also Mohander (Void Ray), Selendis (Carrier) and Artanis (Mothership) [#4] - probably known to the players from the first game. They will keep on appearing systematically, aiding you with the units they're accompanied by (you will also be able to start producing them).
![[#4] - In Utter Darkness - Campaign - Prophesy missions - StarCraft II: Wings of Liberty - Game Guide and Walkthrough](https://game.lhg100.com/Article/UploadFiles/201512/2015121709532344.jpg)
[#4]
The Probes are mining rich gas and mineral reserves, so you won't have to worry about running short on them. Begin investing in new troops and upgrades from the very beginning. Basically the only obstacle here will be the population limit (200). In case the starting Photon Cannons get destroyed, don't hesitate to replace them with new ones, even placing them throughout the whole base (you'll be able to afford it). It's very important, as once the number of corpses reaches 600, Nydus Worms will start spawning inside your base [#5], which can be quite problematic. If they fall into a network of Cannon, they won't be able to do much and you won't have to move your forces from the courtyard, compromising the line of defence.
![[#5] - In Utter Darkness - Campaign - Prophesy missions - StarCraft II: Wings of Liberty - Game Guide and Walkthrough](https://game.lhg100.com/Article/UploadFiles/201512/2015121709532416.jpg)
[#5]
As for the defenders, make sure you create a varied team, as only such stands a chance against the Zergs and hybrids. Personally I'd place Dark Templars in the first line, as they have the advantage of being cloaked. The Zergs won't be accompanied by any detectors for quite long, so they will easily handle with numerous enemies. Once Overseers start appearing (at around 1000 killed), try attacking them with for example, Phoenixes.
![[#6] - In Utter Darkness - Campaign - Prophesy missions - StarCraft II: Wings of Liberty - Game Guide and Walkthrough](https://game.lhg100.com/Article/UploadFiles/201512/2015121709532487.jpg)
[#6]
Protecting the Archive located at the courtyard [2] is a bonus objective, but basically you will protect it by having your units stationed in the area. Settling the record will take the High Templar 25 minutes.
As for the strategy, I made two strong teams and placed them on both sides of the Archive [#6]. This way you will be able to fight at two frontlines. The Zergs will try to surprise you that way as well, but you will be to also able to join the two groups into one, big army [#7]. Also keep in mind the beneficences of the attack command. If you give it by clicking somewhere behind the enemy, your units will move there and kill everything in the way. It makes fighting much easier.
![[#7] - In Utter Darkness - Campaign - Prophesy missions - StarCraft II: Wings of Liberty - Game Guide and Walkthrough](https://game.lhg100.com/Article/UploadFiles/201512/2015121709532440.jpg)
[#7]
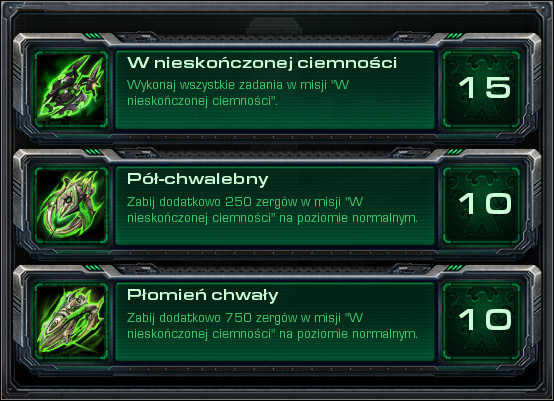
In Utter Darkness:
Destroy 1500 Enemies, Protect the Protoss Archive for 25:00, Defend Until the Last Protoss Falls.
Semi-Glorious:
Read the main description of the mission and I'm sure you will make it. Basically, start upgrading and producing various units from the very beginning, to have a strong and varied army. Though you might want to look at the Dark Templars more favourable.
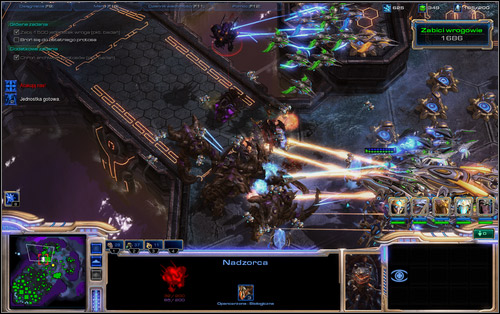
Just as I suggested before, it's good to split your forces into two groups and place them on both sides of the Archive, thanks to which you'll be able to quickly react to enemies coming from both sides. Search for the enemy's air units with your Phoenixes and shoot them down once they reach the outer Photon Cannons. Once you have more than 600 Zergs on your account, Nydus Worms will start spawning inside your base. That's why you should spend any crystal excesses on Photon Cannons, placing a tight network in the productive part, as well as on the courtyard. Replenish the shortages in you need, including those on hills, attacked by, e.g., Mutalisks.
Once the counter shows around 1000, Overseers, who can detect Dark Templars, will start appearing. For them not to fall into trouble, send Phoenixes to deal with the Overseers, and later on with Brood Lords as well.
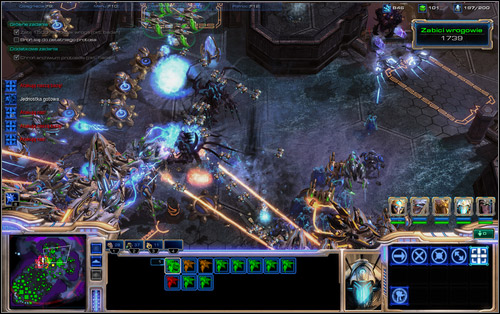
After breaking 1500, the enemy will start using much heavier units. Hybrids will grow in numbers and additionally numerous Ultralisks will appear. Destroying the detectors might increase your chances, but it shouldn't be your priority. Destroy the Overseers when you have an occasion.
From time to time, check if the Carriers aren't low on Interceptors and use the data provided by Observers. Have them watch over the roads like in the beginning, though move them a bit to the side, so that they don't get shot down once Overseers start appearing. Use the cloak ability of Artanis Mothership as well. The target if of course 1750 Zergs.
Blaze of Glory:
The achievement is earned on normal. If you manage to gain it, the Protosses will vanish in a really epic fight. I don't think there's much to add to the above description. Around the Semi-Glorious level, Corruptors will start appearing more often, threatening Phoenixes and Colossuses most of all.
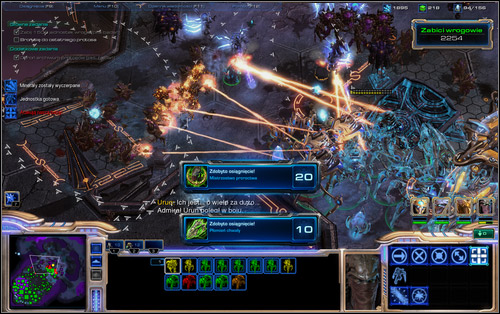
After the counter exceeds 2000, you might go through a small mental breakdown after you see what's going on, but if you made it here while maintaining a high population level, you should be able to reach 2250 Zergs.
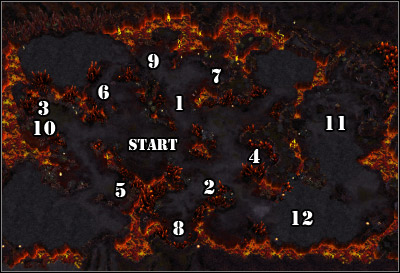
Main objectives:
It's time to invade Char and face Kerrigan. Think everything over before you head out for this mission, as you won't be able to return onboard the Hyperion, exchanging the canteen for trenches.
General Warfield and his men, recruited by Valerian, take heavy damage while attacking the planet. Irrespective of whether on the orbit or on the surface. Raynor decides to enter the action and rescue the survivors.
![[#1] - Gates of Hell - Campaign - Final missions - StarCraft II: Wings of Liberty - Game Guide and Walkthrough](https://game.lhg100.com/Article/UploadFiles/201512/2015121709532588.jpg)
[#1]
The situation isn't pleasant, as you start off surrounded by angry natives. Additionally you don't have enough forces to oppose the Queen of Blades' army, which will be hunting whatever's left of the Dominion forces. If you help them, you will gain not only their gratitude, but also additional troops.
There will be 10 drops which you might rescue, they will systematically land in different parts of the planet. If you can't reach them in time (head out as fast as they appear) the Zergs will rip them to shreds. At first there will be normal Marines [#1], but as you keep on rescuing them, more advanced units and even buildings - a Factory and Starport - will start appearing. You don't need to construct them, though you'll have to wait a bit for both buildings. Note that you don't have to worry about supplies.
[#2]
In the beginning, designate some workers to minerals and strengthen your defence by building a bunker on each side of the base. Train Marines and Marauders. Above all, don't forget about mercenaries and build some additional Turrets later on. You will be systematically attacked (expect e.g. Mutalisks and Ultralisks), so try to get some Tanks in siege mode as fast as possible, which should be the basis of each Terran base defence [#2].
![[#3] - Gates of Hell - Campaign - Final missions - StarCraft II: Wings of Liberty - Game Guide and Walkthrough](https://game.lhg100.com/Article/UploadFiles/201512/2015121709532564.jpg)
[#3]
In the meantime, you will probably want to check out the pods. That will inevitably connect with having to exterminate Zergs on your way, but as I said - the saved Dominion units will create a really considerable army, so I think it's worth the risk.
Apart from the beginning Marines [1], you can gain: Marauders [2], Vultures [3] (with a Factory) [#3], Siege Tanks with Marines [4], Ravens and a Medivac (+ a Starport), [5] and Goliaths, amongst others [6].
![[#4] - Gates of Hell - Campaign - Final missions - StarCraft II: Wings of Liberty - Game Guide and Walkthrough](https://game.lhg100.com/Article/UploadFiles/201512/2015121709532513.jpg)
[#4]
In the four next cases, you will probably have to decide who to rescue, as two pods will land on Char in the same time. Starting with a pack of Banshees [7] and Vikings [8] and ending with a choice between Battlecruisers [9] [#4] and Thors [10].
However it's worth to mention that with a bit of engagement, you can pretty much rescue all of them. Using the guide you will know where the pods are going to land, so you can place two teams there beforehand and intercept them. Of course you must be sure you will be able to break through the Zergs in the area.
![[#5] - Gates of Hell - Campaign - Final missions - StarCraft II: Wings of Liberty - Game Guide and Walkthrough](https://game.lhg100.com/Article/UploadFiles/201512/2015121709532571.jpg)
[#5]
Generally move in a team making use of Medics or Ravens. Everything might come in handy. I'd suggest steering the Siege Tanks manually, with which you can firstly slowly approach the Zergs and weaken them with artillery fire [#5]. Afterwards whatever else you have on them.
![[#6] - Gates of Hell - Campaign - Final missions - StarCraft II: Wings of Liberty - Game Guide and Walkthrough](https://game.lhg100.com/Article/UploadFiles/201512/2015121709532690.jpg)
[#6]
Once your army reaches the assumed size (100), you will witness a scene during which general Warfield will have an emergency landing on the planet. The situation will of course require a rescue mission, but to be honest you don't have to rush. Warfield's units will surely manage against the Zergs incoming from the nearby Nydus Worms [11]. They will in fact become the main target from now. Finish saving the pods and head out to help the general afterwards.
On your way you will come across an infected Terran base [12], which can quickly produce new mutants [#6]. Additionally the whole eastern part of the map is overflowing with Zerg fortifications and their units. Move in a very condensed group [#7], don't split (apart from front attacks) and use the mobile artillery.
![[#7] - Gates of Hell - Campaign - Final missions - StarCraft II: Wings of Liberty - Game Guide and Walkthrough](https://game.lhg100.com/Article/UploadFiles/201512/2015121709532614.jpg)
[#7]

Gates of Hell:
Build a 100 Supply Army, Destroy the 3 Nydus Worms.
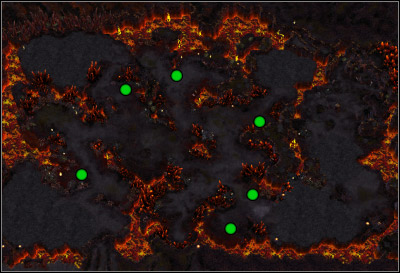
The Big Bang Cannon:
A piece of cake. You will pass by the four Spore Cannons as you leave your base to save the pods. Two others can be found on the way to the infected Terran base, which you will visit either way. The exact locations are marked above (green dots). The Cannons themselves aren't very dangerous, so just attack and destroy them.
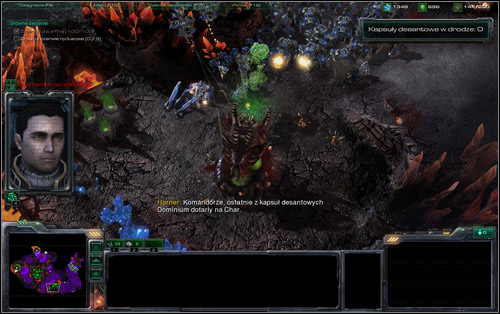
Dominion Roundup:
I assume you've already read the mission's description and you know where and when the pods will land. You have to reach them before the Zergs do and you better head out for them when only you receive proper information.
Considering that it's hard difficulty, you should rather quickly make sure you have a proper defence, as the Zergs will keep attacking with increasing force. You will get the Factory with the third drop, but I'd suggest investing in it earlier on, as vehicles will make dealing with the Zergs blocking the way to the pods easier.
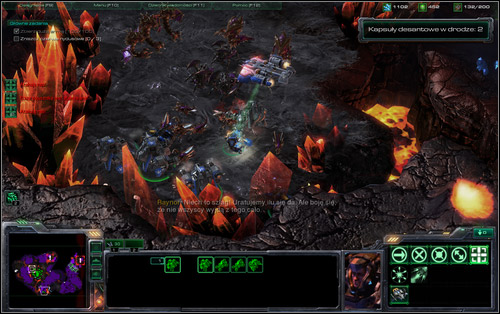
Keep on checking if there are any new mercenaries available, as investing in them under these circumstances will surely pay back. With the fifth one, you will get a Starport. With the seventh, the difficulty will increase.
Just as I've mentioned in the description before, the last four will come in pairs. Additionally when you reach one of them, the Zergs will automatically attack the other one, so the best solution would be creating two separate groups and trying to get to both at the same time. However it's no mystery that such a solution is rather risky, especially on hard. Fortunately, there is also another way.
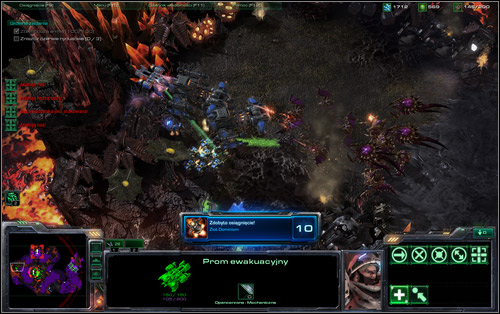
Once you get the Starport, construct two Dropships. After getting the information about the pods, send both transporters with, for example, SCVs, to both destination while trying to avoid enemy units. It shouldn't be too hard, as the area is rather small, but you can save your game before heading out. The "activated" units will of course quickly die from the Zergs' attack, but at least they will count as being saved. Of course you can also try and save a couple of them and take them to your base onboard the Dropships. Remember that the achievement doesn't require you to complete the whole mission.
Main objectives:
Additional objectives:
One of two missions that will appear after Gates of Hell. During the briefing, Tychus will point out the numerous Nydus Worms, while general Warfield sees the main threat in Zerg air units. Choose wise, as it has a colossal influence on how the last mission will look like. You're basically choosing enemies for the final.
I you decide to eliminate the Zerg air force, you will head to an infected station. The plan assumes destroying the coolant towers, which will overload the reactors and end the Mutalisks and others problem.
![[#1] - Shatter the Sky - Campaign - Final missions - StarCraft II: Wings of Liberty - Game Guide and Walkthrough](https://game.lhg100.com/Article/UploadFiles/201512/2015121709532730.jpg)
[#1]
Matt will instantly tell you the coordinates. They towers are on platforms, destroying them will cause the platforms to explode, killing all the Zergs around as well [#1]. It's very important, as you don't need to get rid of the whole swarm and can focus on the tower.
After breaking the tower, you will have 45 seconds to run away. If your units won't make it off the platform, they will turn to dust together with the Zergs. It might sound drastic, but I assure you the mission isn't very difficult. You will also find more resources on the destroyed lands.
![[#2] - Shatter the Sky - Campaign - Final missions - StarCraft II: Wings of Liberty - Game Guide and Walkthrough](https://game.lhg100.com/Article/UploadFiles/201512/2015121709532725.jpg)
[#2]
As for your base, it will be attacked from the west and east side, but the enemies will be really demanding. You will be visited by, e.g., Ultralisks and Brood Lords. The Lords can be especially dangerous, because of their long range [#2]. You will also have to deal with swarms of Mutalisks, so as you see, you need to build a very powerful anti-air defence system. If you lack materials, you can build satellite camps in place of the Zerg centers [1].
![[#3] - Shatter the Sky - Campaign - Final missions - StarCraft II: Wings of Liberty - Game Guide and Walkthrough](https://game.lhg100.com/Article/UploadFiles/201512/2015121709532786.jpg)
[#3]
Definitely the weakest base in the one in the middle [2] and I suppose it will fall into your hands rather quickly. You might however have problems with the other ones. The one in the upper left corner of the map [3] [#3] focuses on ground units, while the one in the south-east [4] has mainly anti-air defence. The most distant base [5] has the most all-around defence. Additionally there are network entrances on each platform and Mutalisks will keep appearing from them from time to time, so keep your eyes open.
![[#4] - Shatter the Sky - Campaign - Final missions - StarCraft II: Wings of Liberty - Game Guide and Walkthrough](https://game.lhg100.com/Article/UploadFiles/201512/2015121709532887.jpg)
[#4]
Of course you should try to adapt your forces to the conditions inside the enemy bases, that is, e.g., send Banshees and Battlecruisers to the upper one, ground units to the western one [#4] and a diverse army to the lowest [#5]. It's a recommended tactic, which will guarantee success. Just remember that our main targets are the towers. If you build an armada of Battlecruisers and some support, you shouldn't have problems.
![[#5] - Shatter the Sky - Campaign - Final missions - StarCraft II: Wings of Liberty - Game Guide and Walkthrough](https://game.lhg100.com/Article/UploadFiles/201512/2015121709532881.jpg)
[#5]
After levelling the second tower, a huge Leviathan will invade the station. The Zerg unit can spawn Mutalisks and uses its rather long tongue quite efficiently as well. Eliminating the monster is optional, but seems rather mandatory, as it will start patrolling the middle of the map. Get ready for the battle [#6] by training really powerful anti-air units, as the Leviathan is a very dangerous and resistant enemy. Send in Battlecruisers, Vikings, Goliaths and generally everything that can attack air units.
![[#6] - Shatter the Sky - Campaign - Final missions - StarCraft II: Wings of Liberty - Game Guide and Walkthrough](https://game.lhg100.com/Article/UploadFiles/201512/2015121709532874.jpg)
[#6]
Shatter the Sky:
Destroy the 4 Coolant Towers, Destroy the Zerg Leviathan.
Demolition Man:
The targeted towers aren't distant and as you have almost a minute to get off the platform, I'm sure you will complete this achievement without even having it in mind.
Speed Too!:
An achievement which can be completed in many various ways, but doesn't necessarily mean it's easy.
The towers are protected by a couple infected platforms. One of them focuses on anti-air defence, the second on ground units. Apart from that, there's a small base nearby you and an all-around base. The suggested solution relies on using air and ground units, but I will also present some more ideas which you can use if you can't make it.
At first you need to build a solid defence, as the Zergs will keep coming from two sides and in high numbers. Build Bunkers, a bunch of Siege Tanks and Vikings. Viking will come in handy against the Brood Lords. In the meantime, make at least two additional Battlecruisers and a Science Vessel (if you have its plans), which will keep repairing the mini-fleet. Invest in a total army as well, building Marines, Diamondbacks and other vehicles, especially focusing on Goliaths - they will play an important role in the south-east Zerg base.
Devastate the nearby tower [1] with the Battlecruisers. You should also destroy the small nest in the west [2]. Even though a couple Battlecruisers would easily handle the base in the upper left corner [3], don't send do it. You can create a road to the tower, but don't destroy it. Damaging them doesn't seem a bad idea, as you'll have an easier task later on, when you return here.
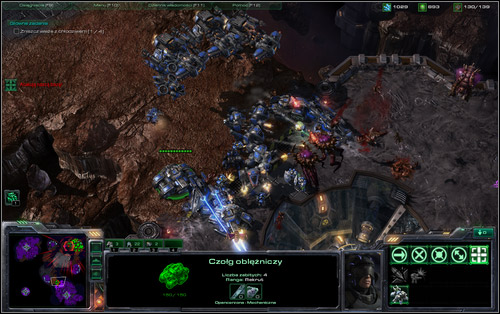
In the meantime, you should create a couple of each vehicle type and infantry. Gather your army and move it together with the Battlecruisers (training some new ones might be a good idea) to the Zerg air base entrance [4]. On your way there, you will bump into some Zergs in the middle part, so look out. Ultimately, begin the invasion.
During the fight, Brood Lords might try to prevent you from accessing the tower, so it would be wise to have Battlecruisers and/or Vikings with you. Don't send them too far however, as there's lots of anti-air devices around. Such units should serve only as support. Goliaths and Marines will deal with the Mutalisks and Corruptors.
After you destroy the platform, the map will be invaded by a Leviathan (it will appear after you destroy each pair of bases), which you probably should leave alone on hard. Even if you do manage to destroy the beast, your forces will be severely decimated, which has no sense. The flying monster will keep an eye on the middle part of the map.
Your ground units however are in a relatively safe place and additionally nearby the lowest base [5]. That will leave you with highest one [3], but some new Battlecruisers should deal with it.
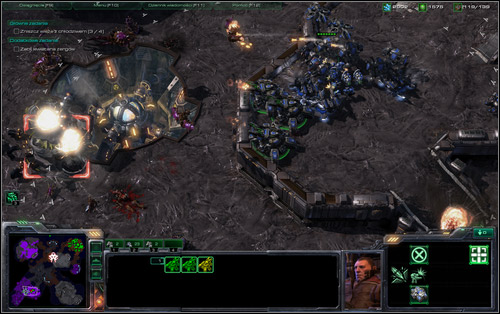
From the destroyed Zerg air base, head towards the next one, remembering that destroying the last one will immediately end the mission. If you want to save some time, destroy the two final ones together.
Another method is building a large fleet of Battlecruisers, as the real targets aren't the bases, but the towers. The anti-air platform is of course a problem here, as it's full of small, suicidal Zergs. You can use the Viking then. There also is a method consisting of building solely Banshees, so it's really up to you.
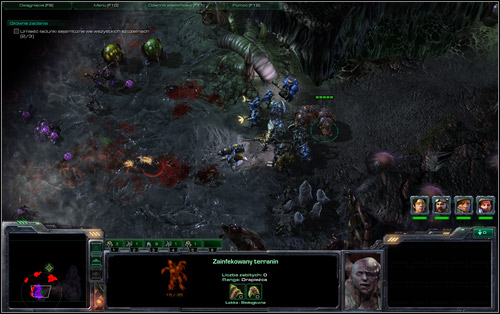
Main objectives:
The mission consists of attacking the Nydus Networks, which is the threat pointed by Tychus. It's definitely a longer mission than the one proposed by Warfield (Shatter the Sky), in which you deal with the air force. In my opinion it is also one of the hardest scenarios in the whole campaign, but as they say - faint heart never won fair lady.
The mission is rather peculiar, as Raynor has taken his team of specialists with him - Swann and Stetmann, who serves as a medic here. The team also includes Tychus. Keep the lab rat behind, but close enough for him to heal his companions (just make him follow them). There will be many occasions for that [#1]. The heroes can't die, but fainting from wounds is a probability. This fact is connected with one of the achievements (details below).
[#1]
Your task consists of planting three explosive charges, which will flood the tunnels. That way you won't have to worry about Nydus Worms during your last fight with Kerrigan.
Raynor has a scanner, so by looking on the map you will be able to tell if there's any danger in the area. You will come across one such point [1] nearby the starting position, where you will also test the penetrating bullets. Such bullets flies towards the target while penetrating through any obstacles in the way, which will be fully presented on the lined up Zergs.
![[#2] - Belly of the Beast, part 1 - Campaign - Final missions - StarCraft II: Wings of Liberty - Game Guide and Walkthrough](https://game.lhg100.com/Article/UploadFiles/201512/2015121709532951.jpg)
[#2]
Eliminate the next enemy group [2] with a precise shot, and head towards the next one [3] once you kill the survivors. Tychus will want to test out his Shredder grenades. Move on while eliminating the defence, consisting mainly of Spine Crawlers and Roaches [4] [#2]. Swann will be the next to show off his craft.
![[#3] - Belly of the Beast, part 1 - Campaign - Final missions - StarCraft II: Wings of Liberty - Game Guide and Walkthrough](https://game.lhg100.com/Article/UploadFiles/201512/2015121709532917.jpg)
[#3]
Your faithful companion will offer using his engineering skills and placing a Turret [#3] by the next Zerg group [5]. It can shoot fire and is very resistant at the same time, so use it as often as you can, as well as the abilities of the other heroes. It's the key to victory in the whole mission. As for Flaming Betty, try to always place your heroes behind it, have the Turret draw the enemies' attention. It's also a great a great decoy for the aliens lurking in some more dangerous places.
![[#4] - Belly of the Beast, part 1 - Campaign - Final missions - StarCraft II: Wings of Liberty - Game Guide and Walkthrough](https://game.lhg100.com/Article/UploadFiles/201512/2015121709532914.jpg)
[#4]
Later on Warfield will connect with you and tell about a group of Marines needing help [6]. The road to them is being protected by a few Spine Crawlers [#4], so act carefully while trying to help them. The soldiers will help you cross the tunnels.
![[#5] - Belly of the Beast, part 1 - Campaign - Final missions - StarCraft II: Wings of Liberty - Game Guide and Walkthrough](https://game.lhg100.com/Article/UploadFiles/201512/2015121709532907.jpg)
[#5]
Look out in location number [7], as that's where Zergs have organized a small ambush [#5] by digging into the ground. Clear one more spot [8] and a row of Nydus Worms will grow out in front of Raynor's team [9] [#6], luckily spitting out weak Broodlings. Use the penetrating bullets or Tychus' grenades to eliminate the worms.
![[#6] - Belly of the Beast, part 1 - Campaign - Final missions - StarCraft II: Wings of Liberty - Game Guide and Walkthrough](https://game.lhg100.com/Article/UploadFiles/201512/2015121709532976.jpg)
[#6]
After planting the charge under the fissure [10], you will have to defend it until it arms (two and a half minutes) [#7]. Zergs will be coming in from three sides, but in spite of the game's advice, I'd suggest placing Swann's Turret closer to the charge. That way it will attract more Zergs. Eliminate the Worms as quick as possible (remember about Raynor's bullets).
![[#7] - Belly of the Beast, part 1 - Campaign - Final missions - StarCraft II: Wings of Liberty - Game Guide and Walkthrough](https://game.lhg100.com/Article/UploadFiles/201512/2015121709532960.jpg)
[#7]
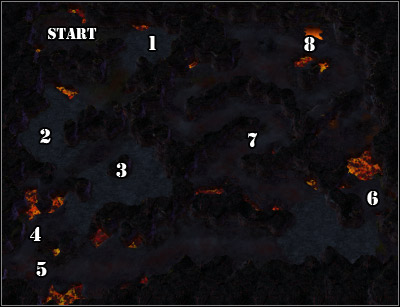
In the second part of the mission, the tunnels are a bit more twisted and mostly filled with infected Terrans. There's going to be a lot of them (you probably haven't seen so many before), but luckily the team is prepared properly.
![[#8] - Belly of the Beast, part 2 - Campaign - Final missions - StarCraft II: Wings of Liberty - Game Guide and Walkthrough](https://game.lhg100.com/Article/UploadFiles/201512/2015121709533042.jpg)
[#8]
You will meet the first infected after just a few steps [1]. Protect yourself with a Turret and kill the dangerous-looking Infestor with a precise shot. Repeat the procedure at [2] [#8], which will lead you to an enormous group of mutated Terrans [3].
![[#9] - Belly of the Beast, part 2 - Campaign - Final missions - StarCraft II: Wings of Liberty - Game Guide and Walkthrough](https://game.lhg100.com/Article/UploadFiles/201512/2015121709533078.jpg)
[#9]
To protect from them, place Flaming Betty in the narrow passage, which will block access to your heroes. Cut them out [#9] and take care of the Spine Crawlers. Afterwards move on and kill the resistant Aberration on your way [4].
![[#10] - Belly of the Beast, part 2 - Campaign - Final missions - StarCraft II: Wings of Liberty - Game Guide and Walkthrough](https://game.lhg100.com/Article/UploadFiles/201512/2015121709533065.jpg)
[#10]
Banelings [5] will come out from the east by the corner - they splash acid when they die and need to be eliminated as fast as possible [#10]. I'd once more suggest using the Turret or Jim's bullets.
Not long from now Warfield will call you again, who has discovered a new group of Dominion Soldiers [6]. They're going through moments of real terror, as they're being systematically attacked by Zergs. The area [#11] is protected by an Infestor and Nydus Worms amongst others, but once you're there you will be also attacked from the west (a trap). Don't panic and eliminate the worms, freeing the Firebats.
![[#11] - Belly of the Beast, part 2 - Campaign - Final missions - StarCraft II: Wings of Liberty - Game Guide and Walkthrough](https://game.lhg100.com/Article/UploadFiles/201512/2015121709533053.jpg)
[#11]
There's a big challenge waiting for you in the further part of the cave, as a few Nydus Worms will appear suddenly [7], and start producing huge numbers of infected Terrans [#12]. You will have problems with moving forward. Step by step (remember about Tychus' grenades), approach the Worms and destroy them using Raynor's precise shot.
Use Swann's Turret as well. As I've mentioned before, it's a great catalyst. It will surely come in handy while fighting off the Ultralisks and Aberrations.
![[#12] - Belly of the Beast, part 2 - Campaign - Final missions - StarCraft II: Wings of Liberty - Game Guide and Walkthrough](https://game.lhg100.com/Article/UploadFiles/201512/2015121709533036.jpg)
[#12]
Once you get rid of them, plant the explosive material [8]. You will have to once more protect it from the natives [#13], this time aided by an Infestor and Ultralisk. At least the last one should be greeted with Raynor's shot. Try to eliminate as many Worms as possible - it's always a bit more peace.
![[#13] - Belly of the Beast, part 2 - Campaign - Final missions - StarCraft II: Wings of Liberty - Game Guide and Walkthrough](https://game.lhg100.com/Article/UploadFiles/201512/2015121709533090.jpg)
[#13]
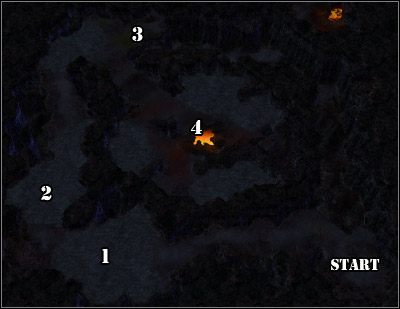
In the third cave, Raynor will detect a big group of aliens on his detectors, but the readings will tell that they are eggs. You will come across the first cocoons while going along the path, in two [1, 2] small groups [#14] of Zergs. A while after you will receive a message about lost Marines [3].
![[#14] - Belly of the Beast, part 3 - Campaign - Final missions - StarCraft II: Wings of Liberty - Game Guide and Walkthrough](https://game.lhg100.com/Article/UploadFiles/201512/2015121709533068.jpg)
[#14]
The terrified infantry is being attacked by an Omegalisk [#15] - an even more powerful version of the Brutalisk, who is luckily focused on breaking through the rock. You of course need to hurry, but of course take care of your safety as well, by eliminating the local Zergs. Remember about your heroes' skills and you surely will be able to rescue the Marines, who might come in handy in just a while.
![[#15] - Belly of the Beast, part 3 - Campaign - Final missions - StarCraft II: Wings of Liberty - Game Guide and Walkthrough](https://game.lhg100.com/Article/UploadFiles/201512/2015121709533063.jpg)
[#15]
The process of planting the explosive [4] will be interrupted by the local Queen. She will start breaking the eggs (there's a lot of them), which will cause a lot of aliens to attack you. Try not to allow her do that by attacking and forcing to defend. The queen will disappear from time to time and show up in a different part of the cave, which will require you to quickly move your units. Destroy every egg on your way while you're at it.
![[#16] - Belly of the Beast, part 3 - Campaign - Final missions - StarCraft II: Wings of Liberty - Game Guide and Walkthrough](https://game.lhg100.com/Article/UploadFiles/201512/2015121709533144.jpg)
[#16]
The Queen [#16] is rather dangerous, so keep an eye on our units. Above all, try to keep the soldiers a accompanying you away from her claws, as they can suffer from them the most. The more units you have, the quicker you will get rid of her.
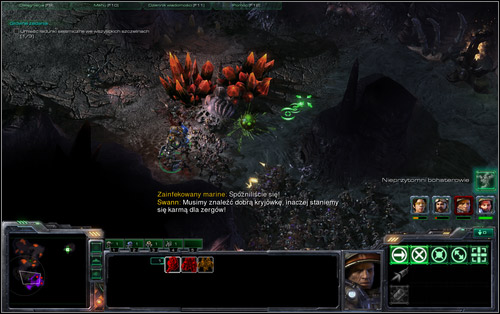
Accordingly to the plan, the three explosions have caused the tunnels to be flooded with lava. It's a problem for Raynor and the company as well, as they need to quickly run and get to the surface. You will have to hurry, as the paths are starting to disappear under magma and Zergs are still roaming the area.
![[#17] - Belly of the Beast, part 4 - Campaign - Final missions - StarCraft II: Wings of Liberty - Game Guide and Walkthrough](https://game.lhg100.com/Article/UploadFiles/201512/2015121709533142.jpg)
[#17]
As only the fourth, rather short stage begins, start running to the exit. There will be in fact only two groups of enemies that will try to stop you [1], [2] [#17] and whether you want it or not, you'll have to face them. In the first case, expect some Nydus Worms and eggs in the area. Later on, beware the Infestor.
![[#18] - Belly of the Beast, part 4 - Campaign - Final missions - StarCraft II: Wings of Liberty - Game Guide and Walkthrough](https://game.lhg100.com/Article/UploadFiles/201512/2015121709533104.jpg)
[#18]
At the last straight, you will also have to face an Aberration [3] [#18], but by then probably nothing will stop you from leaving the unfriendly tunnels [4].
Belly of the Beast:
Plant Seismic Charges at the 3 Fissures, Escape The Cave.
Unbreakable:
The objective is rather obvious. Once your heroes receive enough damage, they don't die, but faint. You of course have to avoid that. Such a situation is especially possible with the charging Banelings (second cave) and while meeting the Queen (third). Details can be found in the mission description.
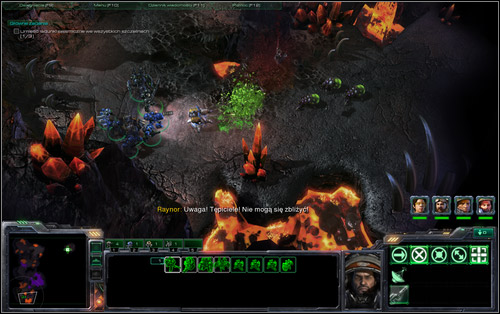
One Shot Fifty Kills!:
A real challenge, which you should try to complete during exploring the cave full of infected Terrans (the second one). The most important spot is marked on the map as [3]. There you will find a whole bunch of mutants, which will rush in your direction after discovering Raynor and his companions.
To gain the achievement, you not only have to shoot the incoming horde (though you might get lucky). In most cases you will be lacking a few, so you should use another method.
The path leading to the infected horde is straight and long. Grab Raynor and place him above the characteristic orange crystals. Tell him to hold this position so he doesn't move.
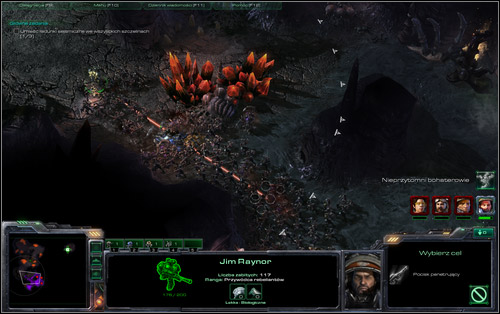
You can send the Marines and Medics away, as they aren't needed in this solution. Do the same with the other heroes, leaving at least one of them in the area. Use him to provoke the infected Terrans, though don't attack them. Run with him between Raynor and the group of enemies, trying to survive for as long as possible (keep on giving the move command). The objective here is to make the Zergs form a dense group. Once the hero faints, they will rush onto Raynor. Let them attack you and shoot right before fainting. That way you have a much bigger chance of shooting 50 than you'd have normally.
Main objectives:
Kerrigan is very near. The Xel'Naga Artifact has been assembled and it can be moved towards the main hives. However before you can use it, it has to charge itself.
Of course Kerrigan has no intentions of letting that happen, just like her minions, who are being attracted by its energy. Your mission is purely defensive - protecting the Xel'Naga artefact from the swarm rushing towards it.
![[#1] - All In - Campaign - Final missions - StarCraft II: Wings of Liberty - Game Guide and Walkthrough](https://game.lhg100.com/Article/UploadFiles/201512/2015121709533263.jpg)
[#1]
Just as Matt suggests, immediately start building Bunkers, as the Zergs will attack very soon with unusual intensity [#1]. Place the fortifications by the hill with the Artifact [1], with which you will block the Zergs from the hill as well as from your base.
Apart from Bunkers and its crews, keep producing new tanks. Place them behind the defence points and don't hesitate to send some to the cliffs by the main road [#2]. From there they will have a perfect shooting position. Keep increasing the defender's numbers, especially tanks. Keep investing as well, buy improvements for the Armory's vehicles and Engineering Bay's infantry, buying new buildings at best.
![[#2] - All In - Campaign - Final missions - StarCraft II: Wings of Liberty - Game Guide and Walkthrough](https://game.lhg100.com/Article/UploadFiles/201512/2015121709533294.jpg)
[#2]
The Artifact itself is a powerful weapon, capable of generating a wave, which will destroy all Zergs in its range [#3]. It's a very useful power that will get you out of trouble many times. After using the wave, you have to wait three and a half minutes for the artefact to charge up again.
![[#3] - All In - Campaign - Final missions - StarCraft II: Wings of Liberty - Game Guide and Walkthrough](https://game.lhg100.com/Article/UploadFiles/201512/2015121709533278.jpg)
[#3]
Apart from regular attacks from the Zergs, the Queen of Blades herself will also invade you base [#4]. You will get a taste of her power quickly, when she picks up a Siege Tank with her will and crushes it to pieces or uses an area attack. Point everything you have at her, as her health is at 1000 points, not counting the armour. You won't be able to kill her completely, as once her health drops to 0 she will teleport back to the base and attack again once regaining strength. Overall you should expect a couple visits from her. The Queen of Blades can be also damaged by using the artefact, so use if you can. Kerrigan can approach from the left or right side.
![[#4] - All In - Campaign - Final missions - StarCraft II: Wings of Liberty - Game Guide and Walkthrough](https://game.lhg100.com/Article/UploadFiles/201512/2015121709533202.jpg)
[#4]
Once the artefact charges to around 43 percent, a swarm of Overlords will appear around the base (also from behind) [#5]. They will try to break through and unload their bloody passengers, which isn't a nice vision. That's why you should start surrounding your base with Turrets from the very beginning (at the edges), they will cut the enemy's plan short.
![[#5] - All In - Campaign - Final missions - StarCraft II: Wings of Liberty - Game Guide and Walkthrough](https://game.lhg100.com/Article/UploadFiles/201512/2015121709533206.jpg)
[#5]
If during the previous mission you've decided to attack the Zerg platform (Shatter the Sky), you can forget about the air attack. You will however have to deal with the Nydus Worms, which will start to regularly appear outside and inside your base.
The Worms should be destroyed as soon as they appear, because if left alone, they can cause a wave of Zergs to flood you in no time. You can of course use the Artifact, but it's not always possible. That's why I'd recommend building a squad of Banshees, which are great against any structures, including biological ones. You can also build some Battlecruisers, which will come in handy one way or another [#6].
![[#6] - All In - Campaign - Final missions - StarCraft II: Wings of Liberty - Game Guide and Walkthrough](https://game.lhg100.com/Article/UploadFiles/201512/2015121709533290.jpg)
[#6]
If you've decided to raid the tunnels (Belly of the Beast), instead of the Worms you will have to worry about constant air raids. Usually it will be a group of a couple Mutalisks, accompanied by a Brood Lord or Corruptor, so they won't be too much of a threat [#7].
![[#7] - All In - Campaign - Final missions - StarCraft II: Wings of Liberty - Game Guide and Walkthrough](https://game.lhg100.com/Article/UploadFiles/201512/2015121709533362.jpg)
[#7]
The problem however is that apart from the systematic raids, your base will be also attacked by other air units, trained in the nearby bases. That will effectively draw your attention, especially considering the Brood Lords visits, as they have a range exceeding that of your Turrets and Bunkers. The Zerg air units will be of course accompanied by land forces.
![[#8] - All In - Campaign - Final missions - StarCraft II: Wings of Liberty - Game Guide and Walkthrough](https://game.lhg100.com/Article/UploadFiles/201512/2015121709533303.jpg)
[#8]
That's why you should build Viking and Banshees, but also Battlecruisers which will eliminate such threats. Additionally, be sure to surround yourself with Turrets in the beginning phase of the mission. Place some units in the middle of the base as well, as with time you will have to deal with spores falling from the sky [#8].
By the end of the mission, once the Artifact is charged above 90 percent, the Zergs will throw all their forces on you. Keep the artefact's attack ready for that occasion.
All In:
The description says it all.
Turn and Burn:
During the final mission you'll be attacked by such an enormous amount of enemies, that you will get this achievement one way or another.
Aces High:
Things get complicated here, as you can use the artefact only once throughout the mission. The circumstances of the mission vary depending on your previous decisions. During All In you may be attacked by Zerg air forces or Nydus Worms.
In the first case the task is more difficult, as after some time you won't even know where to look. The Zergs will start incoming from everywhere. Their groups, forecasted by Matt, will eventually appear also at the back of the base and additionally you will be forced to constantly fight off the nasty Brood Lords.
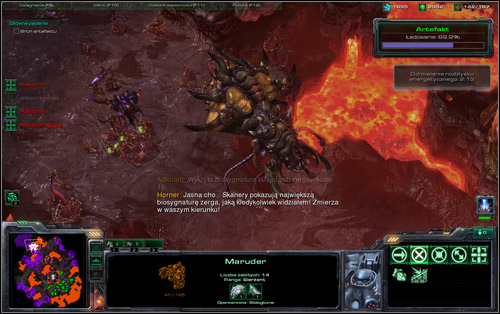
You should focus your defence on Bunkers and Siege Tanks, but try to place Turrets around your base as soon as possible too. Begin producing Vikings and Banshees on a mass scale, which you will use to reduce the enemy's advantage in the air. Battlecruisers can also do, but they are very heavy and you will definitely feel it here.
With time, small airdrops will start landing in your base, they're not dangerous, but can pose a threat if not taken care of. What's worse, a might Leviathan will appear at around 70%. You might have had a taste of this best during Shatter the Sky (if you'd play through it, you'd be fighting Nydus Worms instead units produced by Spires). In the end, it will stop by your base and start morphing Mutalisks and attack if you come close.
Of course you won't have an easy task with the Nydus Worms as well, but in my humble opinion it's an easier way. Focus on producing Banshees - keep sending them to the Worms and replenish any losses. Don't forget about cloaking, through it won't always be as effective because of the many Overlords.
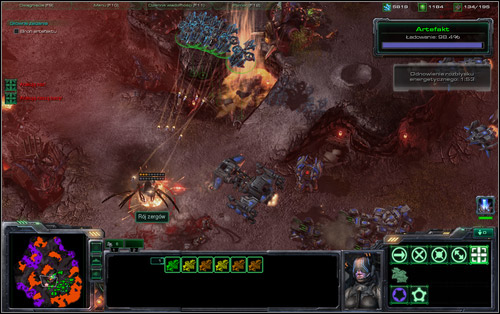
It's also good to have some resistant Battlecruisers as command. You can send them towards a Nydus Worms, which will certainly be appreciated by your units inside the Bunkers. Attack the Worms right after they appear, as otherwise you will fall into trouble. Try to avoid the groups of Hydralisks while attacking with Banshees. Of course make sure to build a network of Bunkers and as much properly placed (for example on cliffs) artillery as possible. The Worms will also appear inside your base.
Generally, you should start upgrading both fortifications by the road to the artefact hill. I'd suggest leaving your one shot until 90%, when the Zergs will start attacking like crazy. In the air force option, you can consider using it when the Leviathan appears. It won't kill him, but drain 1/3 of his life. As I mentioned in the main description, you will be also invaded by Kerrigan and around 40%, a fleet of Overlords will appear.
I'll start off by letting you know that the screenshots attached to the descriptions you can see a suggested formation before going into action and an example screen from the fight itself. A similar pattern has been used in two further challenges, where the overall principles are the same and only the race you're controlling changes.
Round 1
Location 1
Units used: Hellions
Predicted number of units lost: 0
Once the Zerglings approach, use a tactic of retreating and using an area attack (don't attack a single unit).
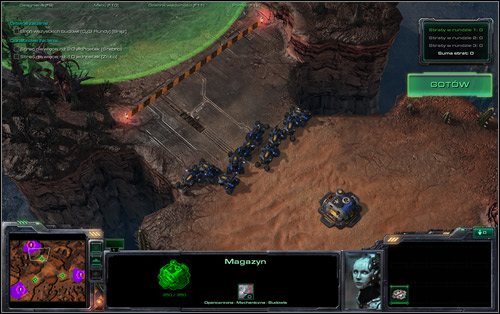
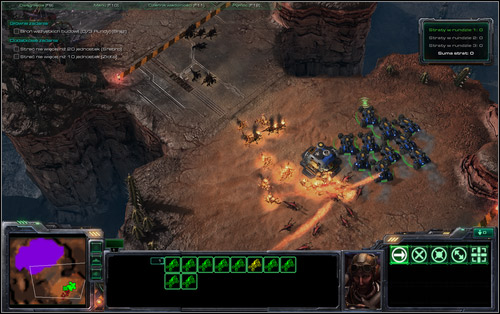
Location 2
Units used: Siege Tank
Predicted number of units lost: 0
The tank placed as shown on the screen will shoot twice. It won't kill all the Banelings, but enough for the warehouse not to get destroyed completely. Alternatively you can just move in front of the warehouse, shoot the Banelings and then let them attack you - you'll also survive.
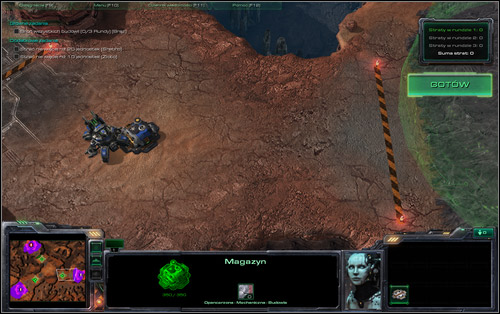
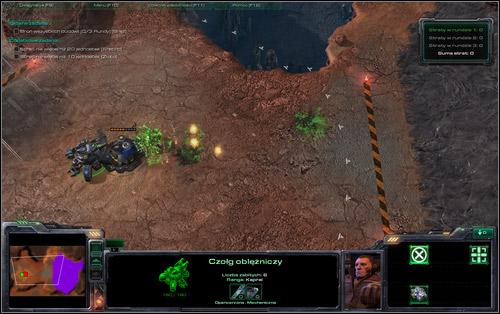
Location 3
Units used: Ghost, Marines, Medivac Dropships
Predicted number of units lost: 0-5
A bit harder here, you can lose a few men. Set the Ghost in cloaking mode right before the green field and be ready for some sniper attacks (use the button shortcut, R). Marines placed in a line will deal with the threat faster. The transporters stationed in front of the soldiers will draw attention, but that's information for perfectionists.
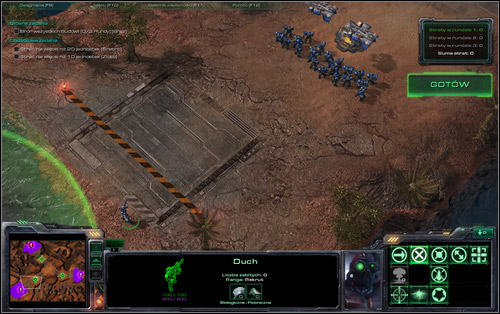
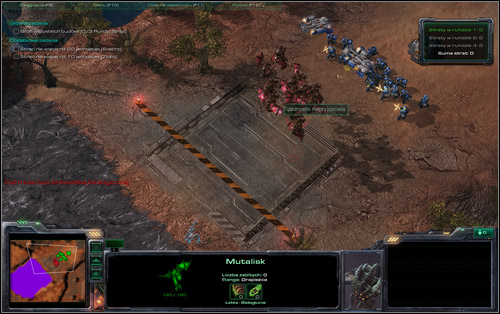
Round 2
Location 1
Units used: Marauders, Medivac Dropships
Predicted number of units lost: 0
Hellions again. Attack and retreat with the Marauders and repeat this until you succeed. It might take a while, so you might want to move round the warehouse to gain some advantage over the Roaches. Medics from the Dropship will surely help if needed.
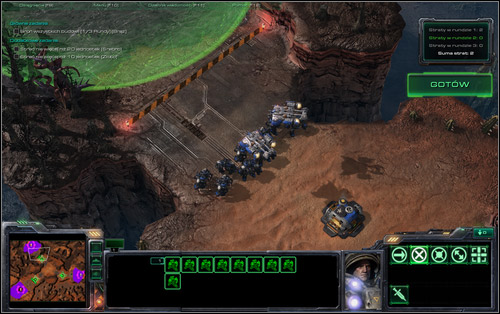

Location 2
Units used: Marines, Ghost
Predicted number of units lost: 0-2
The trick is using the Ghost's special bullets on the charging Ultralisk. It won't destroy, but will surely seriously weaken it. Once it reaches the Marines, start running away with them, around the shooting Ghost and the warehouse. The Ultralisk is a bit quicker, so you have to predict its movements. Try to change to the Ghost sometimes to use the sniper rifle, but don't focus on it too much.
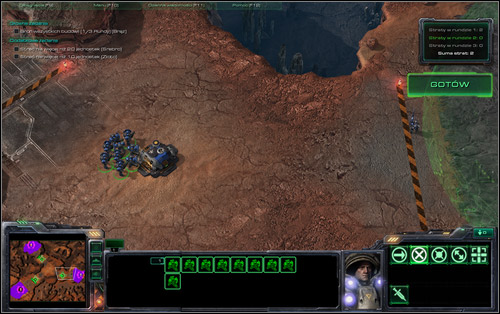
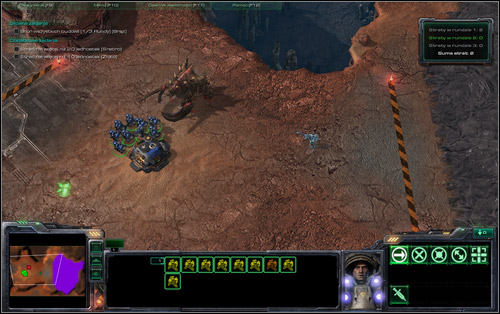
Location 3
Units used: Siege Tanks
Predicted number of units lost: 0-1
Set the tanks in something resembling a straight line. Whether you manage to keep all of them alive or lose one is purely random.
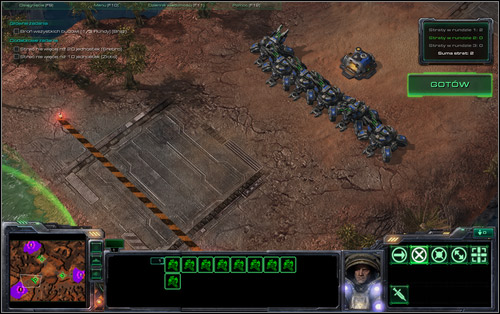
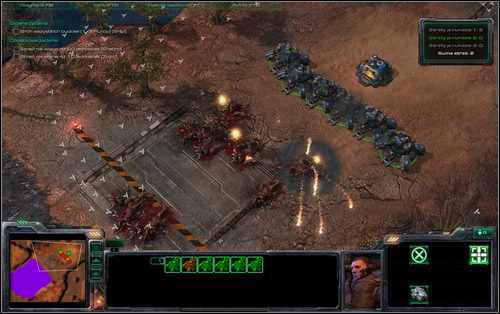
Round 3
Location 1
Units used: Vikings, Hellions
Predicted number of units lost: 0
Place the Vikings right by the orb, thanks to which your units will have enough time to deal with the Brood Lords. Have the Hellions stationed by the warehouse, they will easily burn the Zerglings while not being disturbed by anyone else.
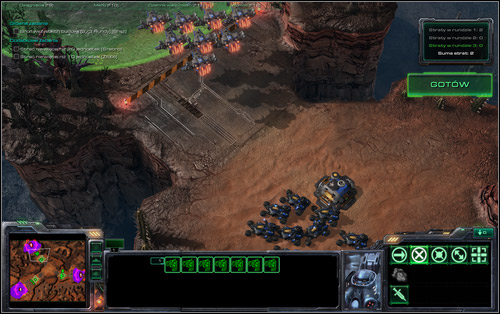
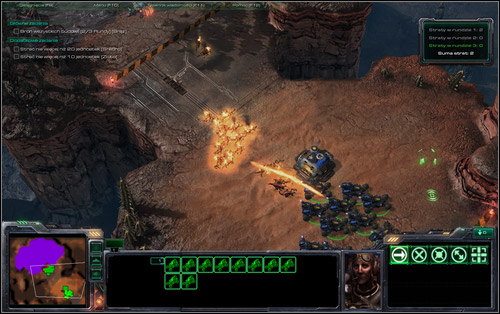
Location 2
Units used: Siege Tanks, Marauders, Ghost
Predicted number of units lost: 0-2
Place the tanks in siege mode and send the Ghost to the border. Marauders should wait somewhere on the side. Firstly shoot the freed Hydralisks and Roaches with the Ghost's precise shots and move the Marauders into action once the survivors get nearby the tanks. Keep an eye on their health and retreat any badly hurt unit.
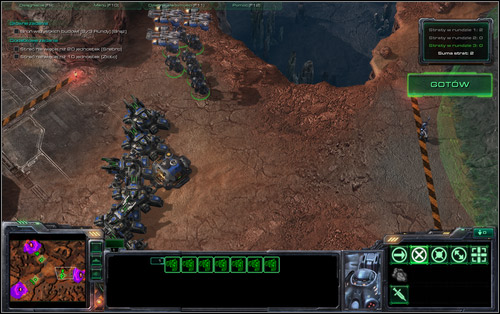
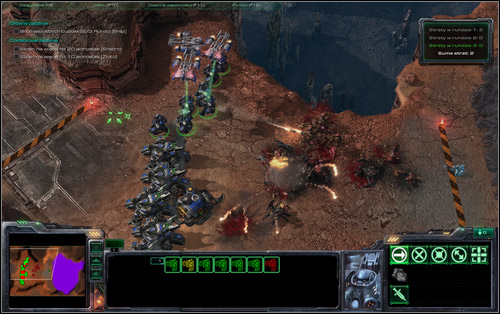
Location 3
Units used: Thors
Predicted number of units lost: 0-1
Assemble a group of Thors and get ready for confronting the Mutalisks. They enemies are difficult in a group, so keep an eye on the first unit to get attacked and retreat it when it gets hot. The Mutalisks will then switch to a different Thor, the health of which you should also look after.
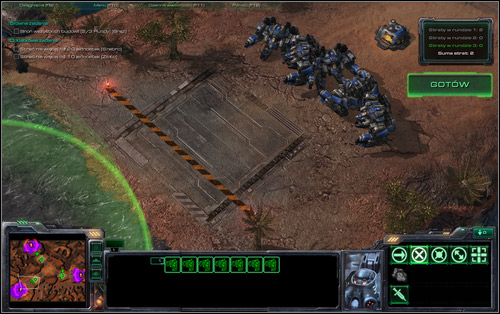
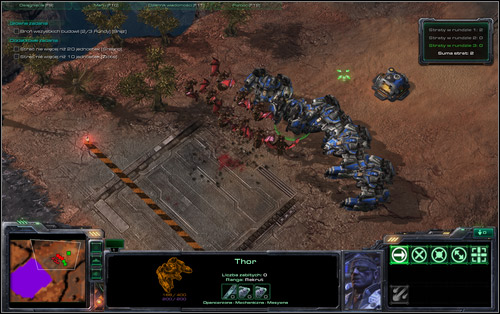
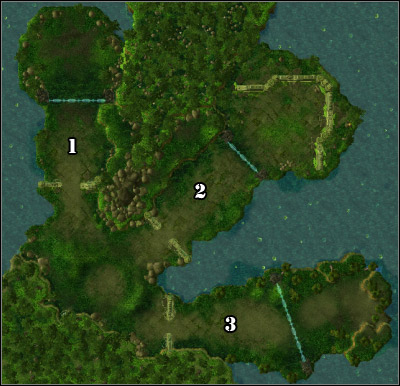
Round 1
Location 1
Units used: Stalkers
Predicted number of units lost: 0-1
Place the Stalkers in a line and they will shoot the enemies almost at once, though they won't be in debt. Keep your eyes for any highly damaged units (orange, red level) and move them to the back, preferably using Blink. Don't teleport them too far though, so they return to the fight on their own. Retreat completely only those who are barely alive (reds).
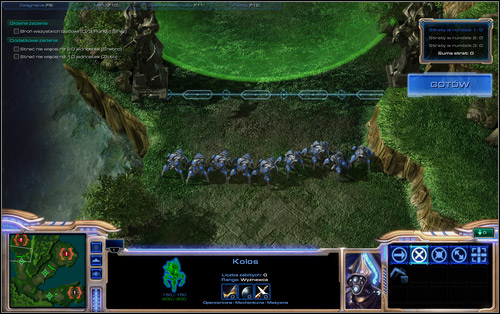
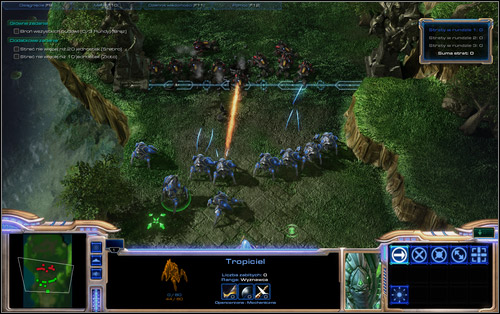
Location 2
Units used: 4 Colossuses, Sentry
Predicted number of units lost: 0
The whole trick is to use the Sentry's force fields (four times) as the Marines are coming in and fortify the path. The Colossuses should then stand far enough to not get hit, but close enough to attack themselves. It won't be hard, I assure you.
If you make a mistake while placing the force field and the Marines will find a gap, you can still win without any losses. Just keep an eye on the attacked Colossus' health and retreat if needed.

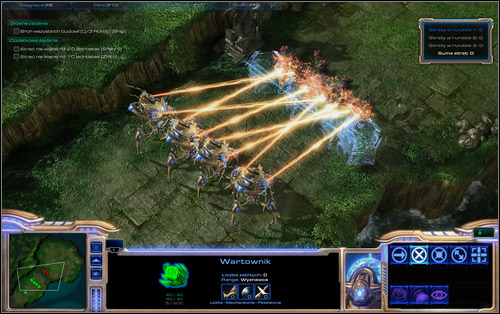
Location 3
Units used: Colossus, Zealots
Predicted number of units lost: 0-3
If this case losing a few units is quite probable. Make sure the Colossus is standing in front of the Zealots and draws the Marauder's rage. Move in the infantry, which will reach the enemies with no problems thanks to the tanking Colossus.
Afterwards it all depends on luck. Try to retreat Zealots which are nearing death and support them with the Colossus. If you can't make it, consider taking one more giant from where you were fighting the Marines.
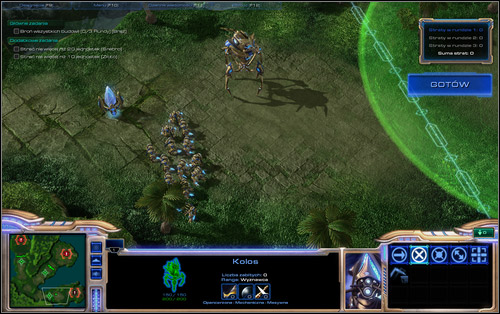
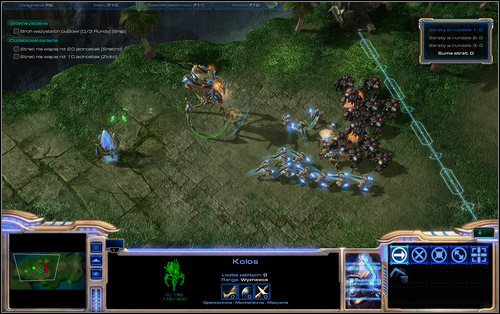
Round 2
Location 1
Units used: Carriers
Predicted number of units lost: 0-1
Fighting the Thors will require you to retreat the damaged Carriers, so that the Terran machines focus on the other ones. If the unit isn't hurt badly, withdraw it a little so that it returns to the fight afterwards. Just like with the Stalkers in the previous round. As you see, mastering this manoeuvre is vital in the challenges. The problem with Carriers is that they're relatively slow, so keep that in mind.

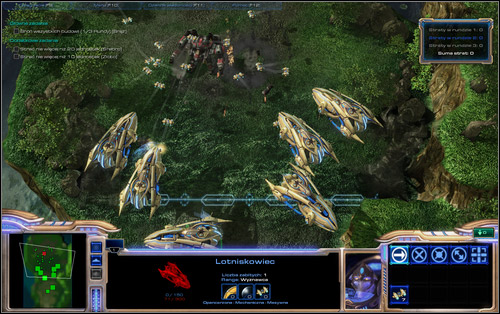
Location 2
Units used: Immortals
Predicted number of units lost: 0-2
Wait for the tanks and move forwards. You'll destroy them with ease, at least until they enter siege mode. When they do, retreat even slightly (physically) damaged units. Immortals without armor are quite mortal indeed.
Optionally you can bring in a Templar, who will aid you with his Psi attacks.
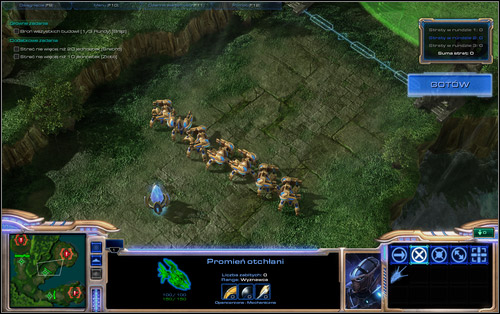
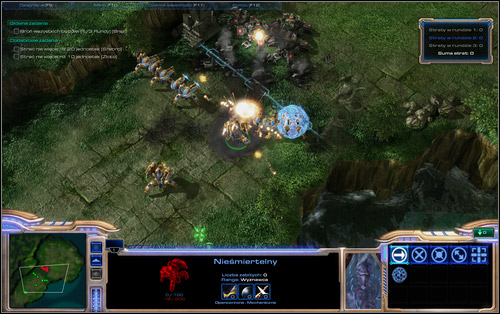
Location 3
Units used: Void Rays, High Templar
Predicted number of units lost: 0-1
The templar can be used in two ways here. You can send him forward and use Feedback on the incoming Battlecruisers or wait for the battle to begin and use Psi Storms on the enemies. Both solutions are similarly effective.
With the Void Rays, attack only a single, chosen target. You will destroy it quicker that way and gain an advantage. The fact that the longer you attack an enemy the larger the damage gets also matter here. Unfortunately you won't do without retreating damaged units, but you've done it so many times before that it should be second nature by now. If you take the Templar (to location 2), things will of course get more difficult, but you can win without any losses nevertheless.
A little hint for hardcore gamers - if the Rays' power goes up with time, why don't you charge them... on yourself?
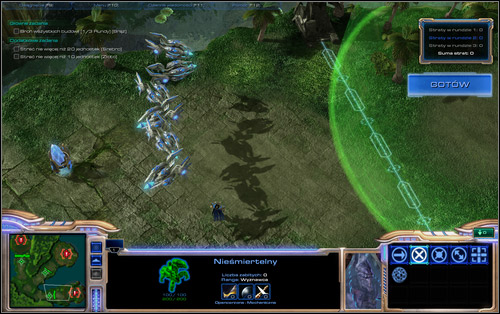
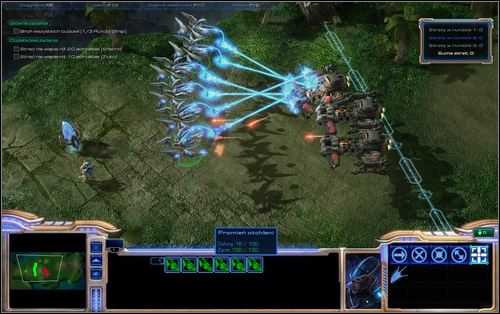
Round 3
Location 1
Units used: Archons, High Templar
Predicted number of units lost: 0
A relatively easy task. Attack the enemy squadron with the Archons and use the Templar's Feedback on the Battlecruiser. Afterwards call in Psi Storms while having in mind your own units.
Archons have just 10 health points, so keep an eye on their armor.
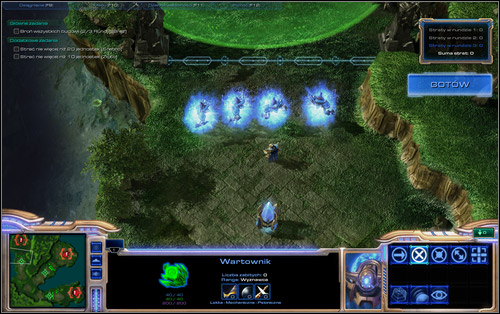
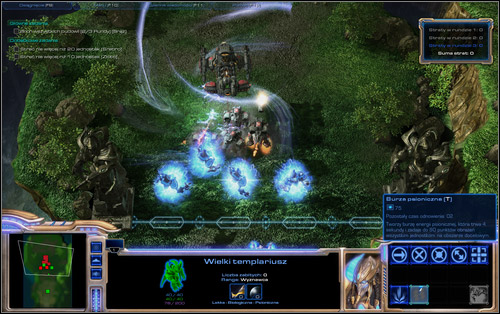
Location 2
Units used: 2 Colossuses, Stalkers, Sentry
Predicted number of units lost: 0
A replay from the Marines challenge. Block the path with the Sentry by placing force fields. The Stalkers set before the Colossuses will be the only ones exposed to danger, so keep an eye on their health.

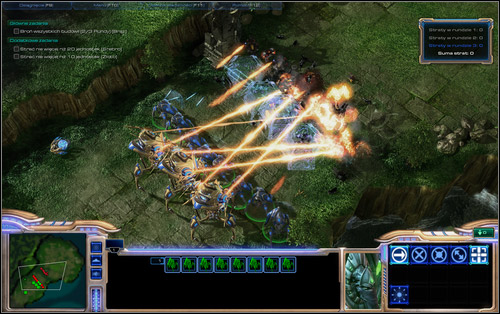
Location 3
Units used: Colossus, Immortals, Phoenixes, Zealots
Predicted number of units lost: 0-4
This is the last test in the whole challenge, so you know how much units you can lose. Generally I'd completely give up on Zealots, which seem weak like Zerglings against the Terran artillery.
Note the Phoenixes' location. They have an interesting ability of picking up units, which can be very useful. Firstly however, let the Tanks meet the Immortals and Colossuses. After a few shots, pick up the four tanks, which will make the task easier for you main forces. Of course you have to keep in mind that once they fall back down (the Graviton Beam lasts for 10 seconds), the enemy units will attack them again.
Keep an eye on the Immortals' health. Once they lose their armour and show the first signs of corrosion, immediately retreat them from the battlefield.
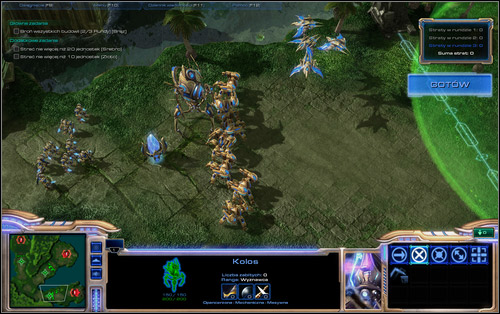
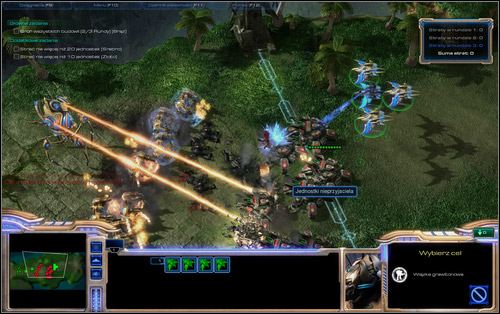
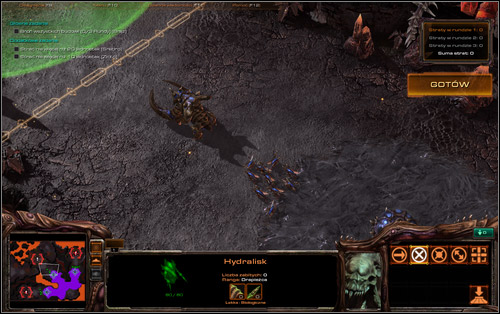
Round 1
Location 1
Units used: 3 Ultralisks, Infestor
Predicted number of units lost: 0
Once the Colossuses start moving in, use the Infestor's Neural Parasite to take control over the closest giant. In the commotion, throw the Ultralisk to battle. If the controlled Colossus will still be alive after the fight, finish him off with the attack command.
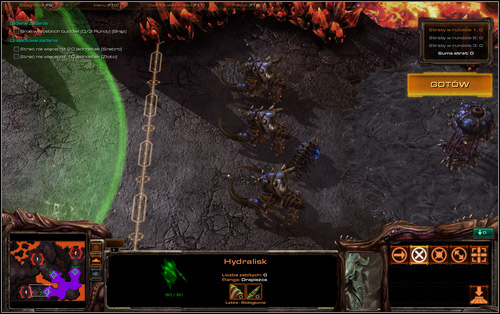
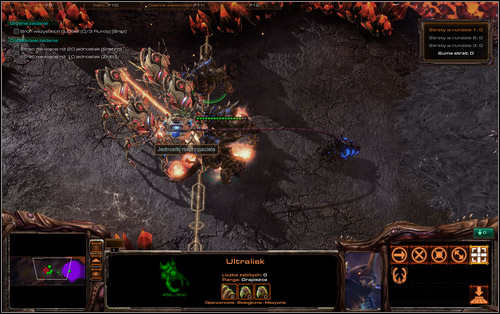
Location 2
Units used: Ultralisk, Zerglings
Predicted number of units lost: 0
The operation is easy to predict. Place the Ultralisk in the front so he draws the Immortal's attention. Once he's busy with attacking your beast, let out the Zerglings on him.
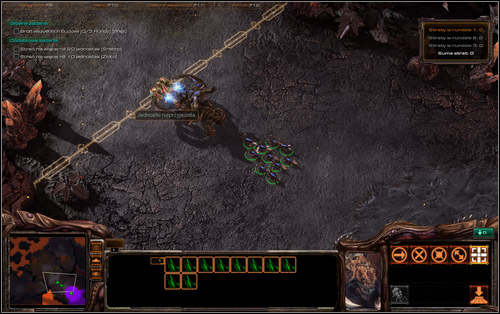
Location 3
Units used: Hydralisks
Predicted number of units lost: 0-3
You can might lose a few units here, but only if you aren't fast enough. Hydralisks are in fact rather fragile creatures, especially when hit y the Void Rays. Luckily they can hide underground, where the beam surely won't reach them.
Practically, you have to click the units which are being attacked by the beams and press R. If you stay calm, zero losses guaranteed.
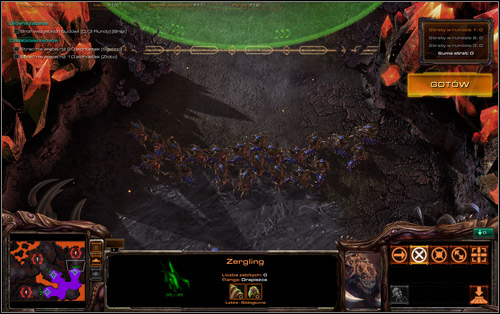
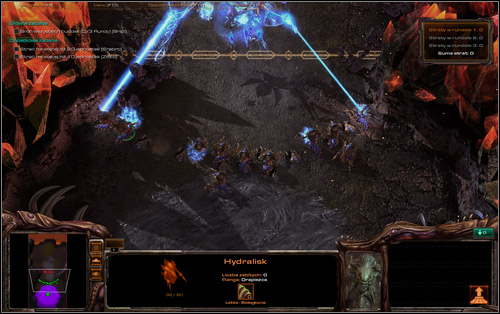
Round 2
Location 1
Units used: Roaches
Predicted number of units lost: 0-2
Avoid the Zealots like fire. Run away from them and attack afterwards over and over again, though you're sure to receive some damage. While running from the Protoss, try to firstly go round the spire and then move to open ground where you will gain an advantage.
A good idea would be to systematically hide... underground. The Roaches regain health very fast there, so a short session underground will leave you with a practically newborn squad.
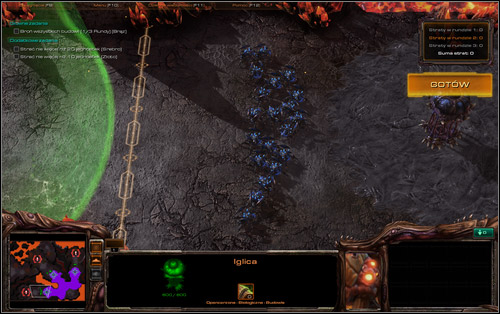
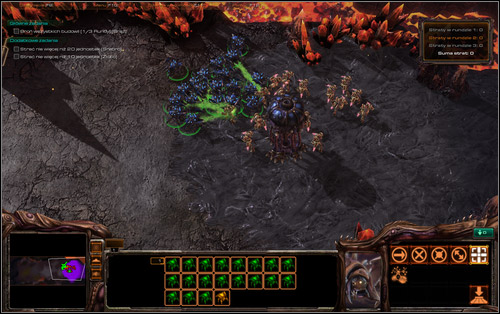
Location 2
Units used: Mutalisks, Infestor
Predicted number of units lost: 0-1
You will once more steal a unit from the charging Protosses. Catch one Void Ray with the Infestor and the rest will focus on him. At least for a while, as the Mutalisks will also receive some damage. Spot out the most damaged ones and move away them away from the battlefield for a small walk. In the end, destroy your Void Ray with a forced attack.
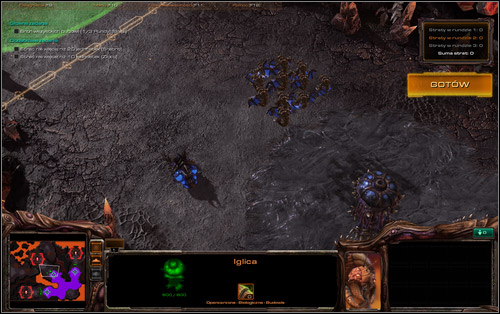
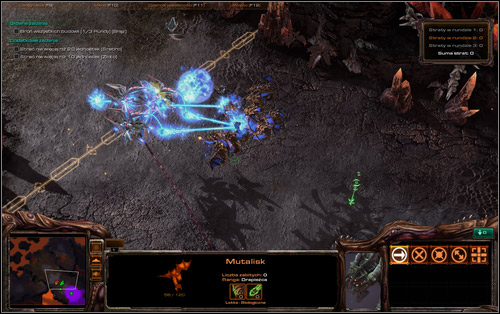
Location 3
Units used: Ultralisks
Predicted number of units lost: 0
Just attack the Stalkers. Try to use the fact, that the Ultralisk's claws cause area damage. Keep an eye over your unit's health and give retreat them if needed, into the ground for example.
Round 3
Location 1
Units used: Ultralisks, 2 Brood Lords
Predicted number of units lost: 0-1
Just as you see on the screen, the Ultralisks are hidden in the ground, waiting for the enemy and the Brood Lords' task is to draw the Stalkers' attacks. Once it happens, jump out with your beasts and slash them to pieces. You might need to retreat one Ultralisk during the fight, but you will complete the mission with no problems nevertheless.
Location 2
Units used: 3 Brood Lords, Roaches, Infestor
Predicted number of units lost: 0-2
In this location you will have to use three different forces. Even though the risk of failing is quite big because of it, I'm sure that you will succeed after a couple attempts. Note that the Roaches are buried on the attached screen.
You can play the Infestor card in various ways. The hardest, but also most effective way is to use the Fungal Growth on the moving Protosses, which will immobilise them for a couple seconds. You can pretty much stop them all (note how condensed their group is), but if you won't make it, there will probably be an Archon left, so take control over it. Attack the immobilised attackers with Brood Lords and Roaches.
After eight seconds you can use the Fungal Growth again (if you have enough energy), or bet on a normal fight. In the second possibility, remember that a buried Roach is a healthy Roach. You can also use a tactic of retreating and attacking over and over again.
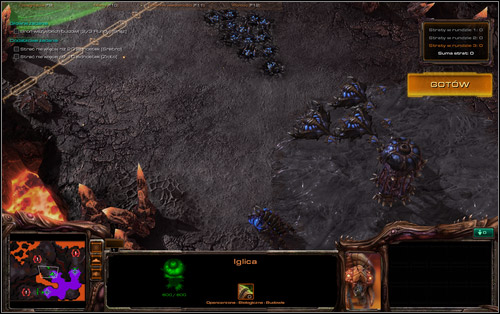
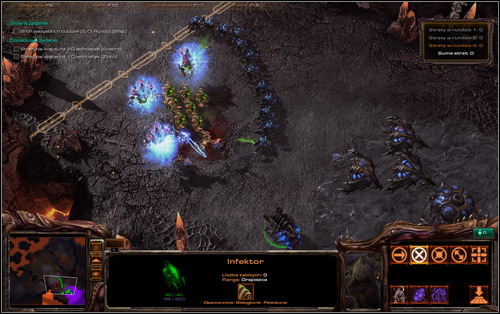
Location 3
Units used: Corruptors
Predicted number of units lost: 0-4
The Corruptors aren't in favour here, which you will probably notice after seeing how fast their health drops. As I've suggested many times before, retreat the weakened units, though close enough for them to return to battle (if they aren't seriously wounded).
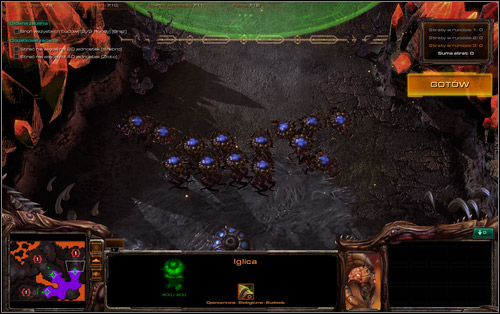
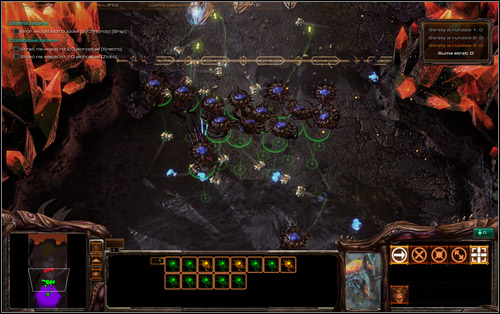
You have Ghosts under your control, which are equipped with seven, essential for completing the task, nuclear missiles. How skillfully you use them will judged by which medal you receive after the time runs out. Apart from that, you have a pack of Ravens with a couple interesting gadgets to choose from. The below pattern is of course only one of many, which is the result of the freedom the player has because of the map structure.
I think the Ghost's abilities are clear. If you enter stealth mode with them after the mission begins, it will stay activated almost until the very end. You can of course come across detector (Overlords, Spore Crawlers), through it won't be such a big problem as you can imagine. The Ghosts can also fight pretty well in a group.
Therefore you will use the Ravens to... eliminate enemies. There's quite a lot of them, so when you gather them and give the command of dropping the Auto-Turrets (they attack ground and air units), which will quickly get rid of each enemy group, increasing the kill counter. Drop them while holding down Shift. Remember about the quite efficient bombs that the Ravens have. Using the Ghosts or Turrets, try to rip the Zerg structures to shreds as well. There's quite a lot of enemies coming out of them, which can be easily eliminated to boost up your score.
![Begin with sending one Ghost to each location marked as [1] and drop down nuclear missiles there (x3) - Covert Ops - Challenges - StarCraft II: Wings of Liberty - Game Guide and Walkthrough](https://game.lhg100.com/Article/UploadFiles/201512/2015121709534361.jpg)
Begin with sending one Ghost to each location marked as [1] and drop down nuclear missiles there (x3). In the meantime, use the Terran specialists and Roaches to eliminate the group of Zergs going along the sides of the starting point [2].
Move the Ghost sent to the left onto the nearby Zerg base [3], where you will probably need two missiles to cause as much damage as possible. Look out for Spine Crawlers, as there will be lots of detectors there. Move the units from the east (following a low path) to your main forces, which should clear the way to location [4]. There's a whole bunch of Zergs there, which will wonderfully burn once you use the sixth missile. Execute it from up high, from the platform in the south, onto which you've dropped a bomb a minute ago.
You will be a few units short o 175 and you can choose to which part of the map you want to head (5). Generally I'd suggest fighting a lot, placing Turrets round the Ravens, which will neutralise the Spine Crawlers and shred many Mutalisks and Roaches on their own. It would be good to get to one of the big groups of Zergs (6), but I think you should reach the gold medal score while hunting the small ones as well.
Don't be afraid of flying with the Ravens, even though the will be attacked by single enemies. Dropping Turrets in strategic points will fully recompense the damage you take. Also keep in mind that if you've been following the guide, you still have one nuclear missile left.
Round 1
Enemies: 14 Zerglings
Move the Templar to the cliff and place Sentries in front of the entrance. Once the Zerglings attack, call forth a Psi Storm in front of them. It will weaken them enough for the Sentries to deal with them.
Number of victims: 14
Round 2
Enemies: 10 Marines
Now you will make use of the Sentries and their force field, which you will use to block the Marines from accessing the platform. You can play through the bonus Zergling round the same way.
Place a wall built of three fields below, with a bit of luck, the blocked enemies won't be even able to see what's shooting them (difference of heights). A good idea would be creating something resembling a through from the force fields (check the screen) and wait for it to be filled with enemies. Afterwards call in a Psi Storm and get rid of the survivors with Sentries.
Number of victims: 24
Round 3
Enemies: 4 Hydralisks, 8 Zerglings
Repeat the force fields strategy. Hydralisks are a bit more resistant, but I'd recommend attacking with Sentries instead of calling in another Storm, to save up some energy.
Number of victims: 36
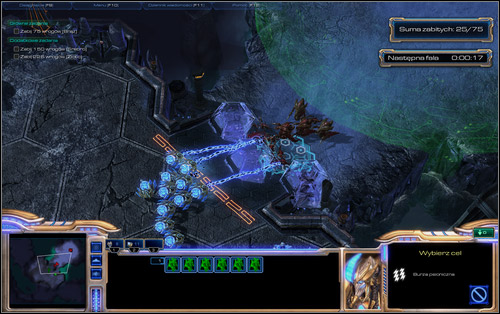
Round 4
Enemies: Marauder, 13 Marines
The same thing one more time. The Marauder will probably survive the storm, but the Sentries' beams will finish the job.
Number of victims: 50
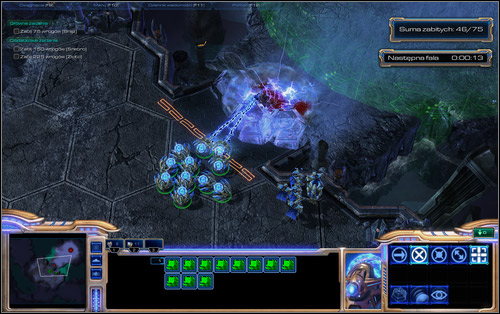
Round 5
Enemies: 1 Roach 8 Banelings, 16 Zerglings
The round which guarantees you a brown medal. Act just like before, but if you're brave enough you might try killing the attacked with just the Sentries, instead of using Psi Storm. Just a little challenge for those more ambitious of you.
To make the future rounds easier, you can sacrifice two Templars (with the least energy) for an Archon and use it in the fight. The further description doesn't include this solution, though such a unit would certainly be very valuable.
Number of victims: 75 (bronze)
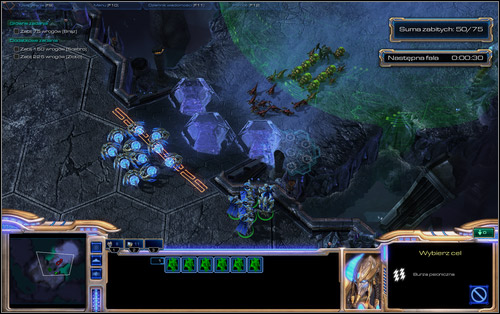
Round 6
Enemies: 3 Marauders, 10 Marines
Another Terran attack and the same method of dealing with them again. Marauders are tough, so you'll need two Storms to eliminate them. Finish the job with Sentries, which can be heavily damaged - your choice.
Look out for the next wave. It will require you to quickly move south off the current location.
Number of victims: 88
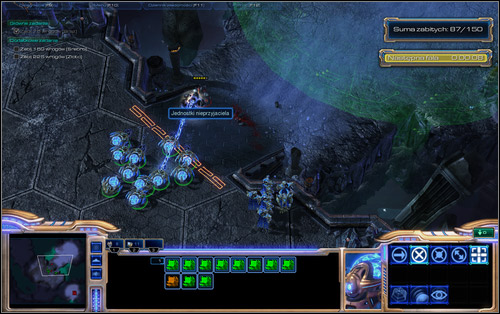
Round 7
Enemies: 23 Zerglings
A change of sides. Place the Sentries on the extended part of the platform and block the poor Zerglings once again. Shape the barrier properly and create something resembling a recess by the platform. You can then use the High Templar again and call in a Storm or let the Sentries take care of it. The third option is to cast a storm on the path, which will weaken the enemies going along there enough. Afterwards all that's left is shooting them, just like in the 1st round.
Number of victims: 111
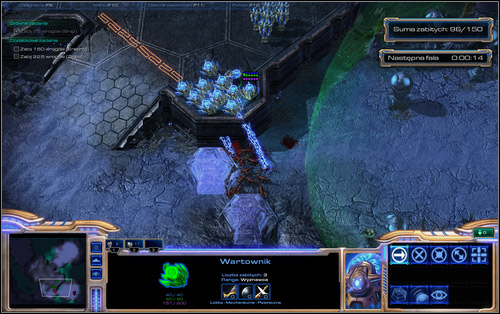
Round 8
Enemies: 6 Zealots, 5 Sentries
You will have to deal with the Protosses for the first time. Treat the couple Zealots and Sentries just like the other waves of enemies, that is barricade with a force field and use Psi Storm. After winning, quickly return to the starting location.
Number of victims: 122
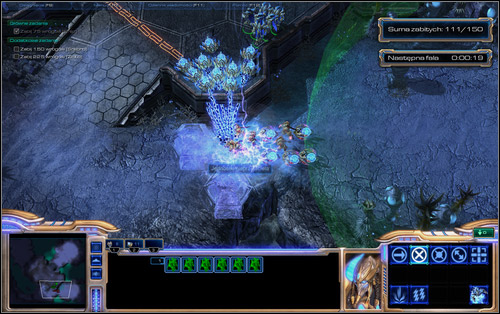
Round 9 and 10
Enemies: 10 Reapers (round 9)
Enemies: 6 Reapers (round 10)
I've decided to describe both waves in one, as they happen one after another. The difficulty goes up considerably, so save the game. A mistake or sluggishness may cost you a lot.
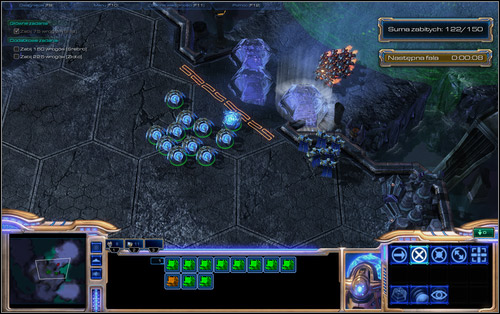
You will stop the northern attack just like usual, by stopping the Terran Reapers with a force field and basing on the force of the Psi Storm. I wouldn't recommend using Sentries themselves, as the Reapers need just a few shots to destroy them. Once the second group is on their way, I'd suggest using Hallucination for the first time during the challenge. Choose someone from the upper shelf, like a Colossus and place it exactly like shown in the screen. Note that the Reapers don't need to follow the passage, but will simply jump onto the platform at the first occasion. After the Colossus draws the enemies' attention, get rid of rests of their intellect with a Psi Storm.
Number of victims: 132, 138
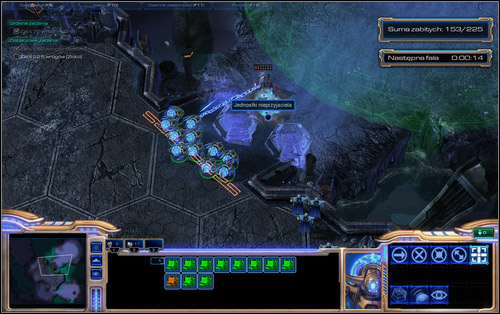
Round 11 and 12
Enemies: 6 Hydralisks, 4 Banelings (round 11)
Enemies: 2 Banshee (round 12)
Two more quick challenges, though not as difficult as last time. Get ready for the first attack by going to the salient cape of the platform in the south, once more using the force field on the incoming Zergs. The Sentries will deal with them in case they approach the platform. Don't worry about the Hydralisks, they won't reach your units on the hill.
After a couple seconds two Banshees will show up in the north, which you should destroy using the Templars' Feedback. A certain silver.
Number of victims: 148, 150 (silver)
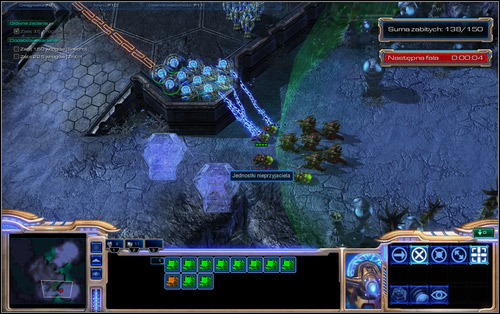
Round 13
Enemies: 4 Stalkers
You begin the march for gold from a fight with four Stalkers. Treat them just like most enemies in this challenge, that is blocking with force fields and finishing with a Psi Storm or two. You will probably need to finish off the barely alive machines with your Sentinels. If you feel a need, you can create a Colossus beforehand, which will relieve you a bit.
Number of victims: 154
Round 14
Enemies: 10 Reapers, 2 Ghosts
Repeat the bait manoeuvre. Provoke the Reapers to attack a hologram and treat them with a Psi Storm. The pair of Ghosts can pose a threat, you could hurt them with a Psi Storm first or send in a hallucinating decoy before attacking with Sentries.
Number of victims: 166
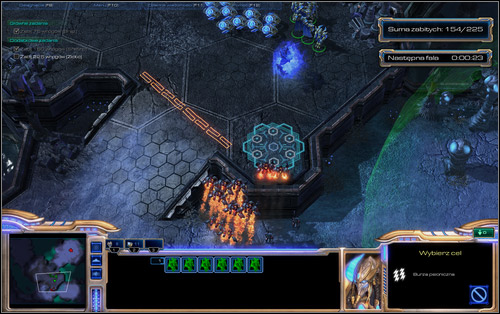
Round 15
Enemies: 6 Mutalisks
The first such serious air attack. Place Sentries or a hologram in the front and activate the Guardian Shield to reduce ranged damage. You can call in a High Templar for help and/or move back the hurt units.
Number of victims: 172
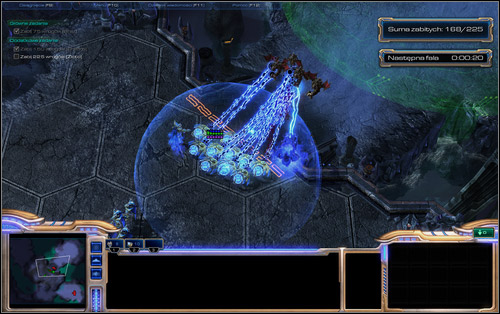
Round 16
Enemies: 2 Vikings, 2 Marauders, 10 Marines
Definitely the hardest round in the whole challenge. You probably won't make it without any losses during the first try, though luck has much to say here as well.
Place the units like in the screen. You can't be too close to the south part of the hill, as the incoming Viking will unveil the terrain to the infantry, which will begin attacking. It's best to stay in the middle and form a ground hallucination. The Vikings will approach it and switch to ground mode to attack it. Send in the Sentries then.
Beforehand you should however stop the enemy ground units (screen), casting two or so Storms onto the blocked Marines and Marauders. As you see, everything requires proper synchronization and the difficulty is quite high because of it. On the other hand, no one said you have to reach hold with everyone on the team.
Number of victims: 186
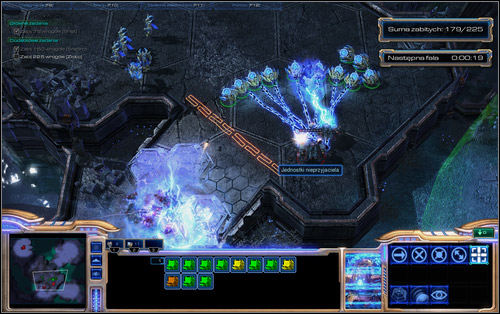
Round 17, 18 and 19
Enemies: 20 Zerglings (17)
Enemies: 6 Roaches (18)
Enemies: Ultralisk (19)
Three consecutive rounds, which will bring you closer to the desired trophy. The challenge will take you to the north-west flank, where Zergs will try to break through the large rock blocking the path.
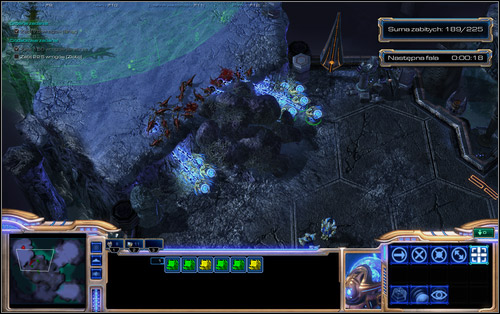
At first the Zerglings will attack, with which you will deal by placing two Sentry groups on the sides of the rock. Once Roaches appear on the horizon, retreat the Sentries and switch to Templars. Kill (or damage as much as you can) the enemy units, without saving up Storms and start morphing into Archons before the Ultralisk arrives. High Templars won't be needed to get the gold anymore and will be far more useful in this might form. You can morph every single one of them, or leave one or two if you want.

The Ultralisk will probably break through the barrier quickly, but you should already have an answer to that, in form of Psi units.
Number of victims: 206; 212; 213
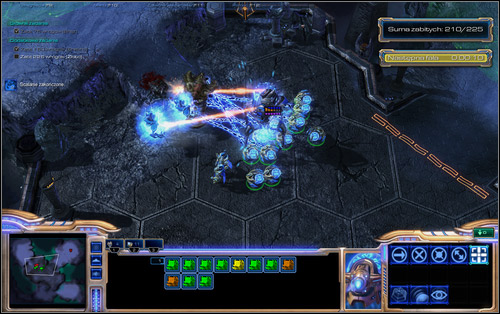
Round 20
Enemies: 10 Banelings
Back to the past. Stop the Banelings with a force field and attack them with Sentries and whatever other ranged units you have under your sleeve. If you have any Templars left, you know what to use them for.
Number of victims: 223
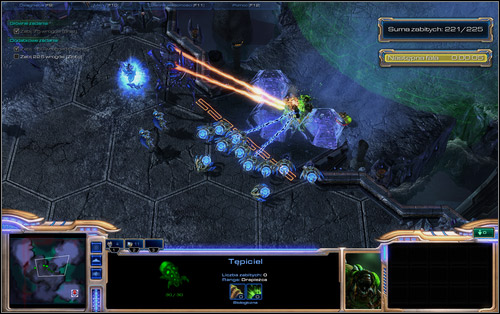
Round 21
Enemies: 2 Siege Tanks
It's probably a reward for dealing with the Reapers and Vikings, as you can just send Sentries to the salient part of the platform and wait for the tanks to appear. The fight won't end there, as more groups of enemies will start appearing, but it won't be very demanding, rather just meant for fun.
Number of victims: 225 (gold)
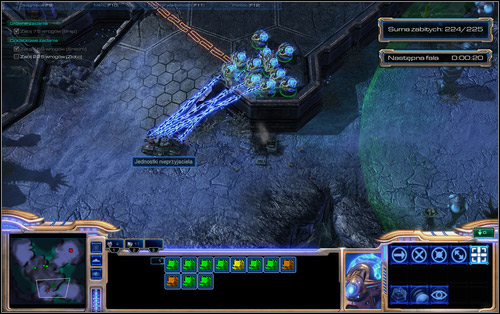

I have to admit I passed this challenge on the first try. It's very easy and the pretty much the only real enemy here is the time.
You begin with Infestor, who will pretty much fill the meter themselves. The area is swarming with powerful machines like Siege Tanks or Colossuses - you just have to take control over them and make them kill for you. Curiously, while the units are under your control, they don't seem suspicious to the enemy, even while their friends are being ripped to pieces. Basically, you can roam the Terran base freely with the dazed units - no one will attack it.
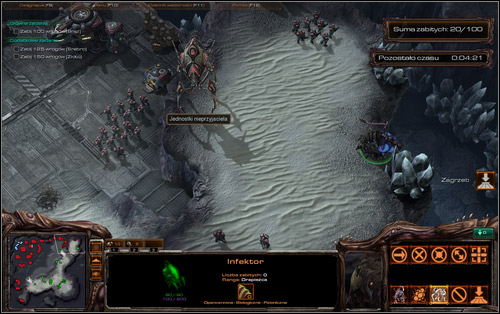
Even though taking over control is the key to success here, note that the Infestors will lose control once you send the unit too far away. If you haven't played with the Zergs before, you'd better test the length of such a connection in free play. You can get rid of the useless units (with, for example, Roaches) using forced attack. It's important, as in order to get the Siege Tank, the Infestor will have to get hit once. If he'd release a unit, it could end badly for him.
Watch for isolated groups of enemies and attack them by approaching while underground. Ultralisks have such an ability as well and moving that way is made easier by the fact that there are no detectors is the enemy base (at least I didn't notice any). You should also not that buildings increase the counter as well.
You do get a sneak peak at the enemy's units layout before beginning the mission, but I've marked those most worthy of taking over on the above map. Those are: Siege Tanks (green colour), Colossuses (orange) and High Templars (blue). Try to reach the Command Center surrounded with many easy to destroy SCVs with their help.
There's no denying this is a rather peculiar and difficult challenge if you're aiming for gold. Additionally, apart from some give you much advice, apart from some general tips, as it above all requires quick unit management. What's more, the option to click on icons (like ability icons) has been disabled for the duration of the challenge. This way you are forced to learn micro management in StarCraft II, that is using button shortcuts.
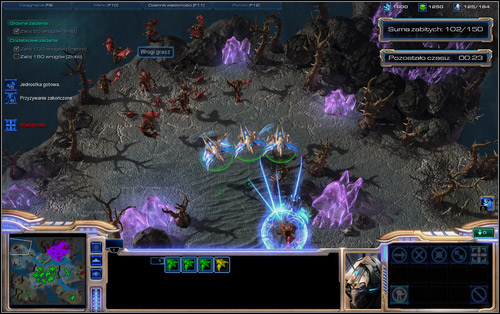
To get the gold medal, you need to ac really fast. You need to command units on five different frontlines, so that they move as much as possible and attack. It's a really hard task, but you'll figure out a pattern eventually. Here's a bunch of tips:
Location 1 - Phoenixes will easily deal with the Mutalisks, but things get worse when it comes to the Hydralisks accompanying them. That's why the first thing you should do after flying to them is picking up the Hydralisks with the Graviton Beam. To boost up the counter a bit, you can do the same with the Zerglings after clearing the area.
Location 2 - Place the Warp Prisms on the edge and visit the base from time to time to produce more units. Mark the Stargates with a double click, which will automatically select all in sight. Investing in Dark Templars gives good results.
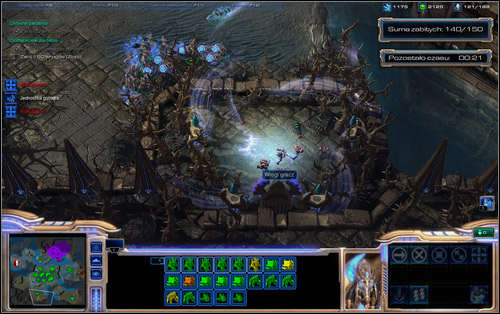
Location 3 - Just mark the Carriers and order them to attack anything in sight. You do however need to look out, as the local Marines will be effective against the little Interceptors, so systematically come back here to order more.
Location 4 - A Stalker farm. Move forward by constantly using Blink and exchange opinions with the Reapers. Eventually you should even reach the location with Carriers.
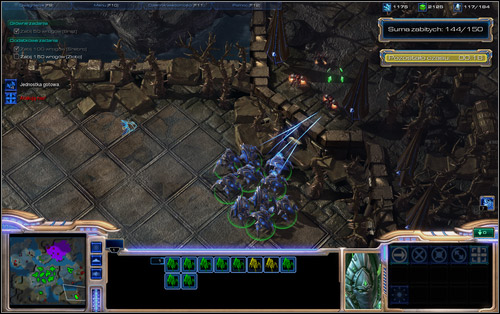
Location 5 - Use Psi Storms all the time and kill the survivors with the other units. Eventually you can sacrifice two or four Templars to create an Archon. In the beginning, it seems a good idea to add a few Stalkers from the Gateways, with which you will definitely conquer the area. Once you approach enemies, turn on the Sentries' barriers. Plan an exact route beforehand.
An extremely difficult mission if you plan on getting the gold medal. The key is above all investing in new workers. You have to constantly (at least to some point) produce new workers and designate them to work. To do that, click on the Command Center and then right click on the crystals or Refinery.
Note that you only have to produce the given units, not keep them. You can use that fact to kill your own units with the attack command, thanks to which you won't need so much Supply Depots. Under no circumstances should you lead to a situation in which you can't produce any units.
Save from time to time. If the challenge isn't going too well, go back to your own saves and try to play through the given fragments better. I didn't make it on the first try as well and I doubt anyone did. The below method is of course only an example.
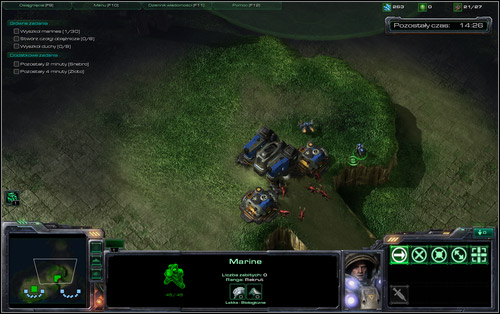
Send the starting SCVs to collect crystals, training two more. Send the third to build a Supply Depot in the place suggested by the game. Keep producing SCVs and sending them to the crystals all the time.
Around 16:20 - you should start building Barracks.
Build another Supply Depot a while after. Once the Barracks are ready, immediately start training Marines. Leave one SCV at the spot to repair the building once the Zerglings appear (15:00). Keep investing in more workers and be sure to have 400 minerals in store one the timer hits the time given below. You should also deal with the Zerglings by then.
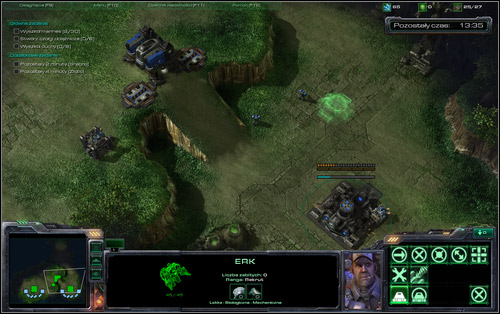
Around 14:00 - place another Command Center below.
Immediately start building a Supply Depot, followed by a Bunker and one more Supply Depot. You can do all that with a single SCV. You should also decide on another Refinery and send in some more gatherers (maximally 3 per each). Keep on training more workers and Marines all the time. Begin a mass production by the newly built Command Center as well.
Send four soldiers to the Bunker and place a SCV beside (for repairs). Secure the cliff with the other Marines, from where they will have a great shooting position.
Around 12:10 - A Zerg attack, consisting of a couple Zerglings and Roaches. By now you should have 2 Refineries, 6 Marines and a third (since 14:00) Supply Depot being built.
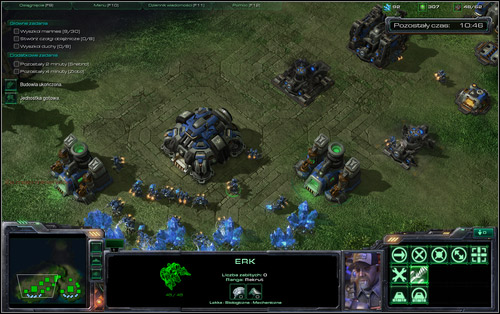
A very fast and important part of the level, requiring a lot of... clicking. During it, you will have to build 2 Refineries (4 in total) and begin building 2 Supply Depots, 2 Barracks, 2 Factories (+ add-ons) and a Ghost Academy. Keep investing in workers and Marines all the time. Before 10:00 you should already have some new buildings, for example new Barracks, which you should immediately start expanding with a Tech Lab. Place a Reactor by the first one.
Around 10:00 - A Roach attack, fought off by 10 Marines.
Before, or right after the Zerg attack, you should definitely start building the fourth Barracks, placing a Reactor by them once more. Save the game, as everything's in your hands from now. Stop buying new SCVs and focus on producing the needed units. Send them towards the Bunker or onto the hill.

You may build some new Supply Depots, but once your populations start to grow dramatically, don't hesitate to kill your own Marines. In case you really need to, kill Ghosts as well. You should probably leave the Tanks alone and research siege mode if you you'll have enough gas (though it's not necessary). With 6 minutes till the end, you will be attacked by, amongst others, 2 Ultralisks. Try to fight them off by using the Ghosts' sniper rifles.
Summing up: the production in this given solution should focus on 4 Barracks (2 Tech Labs and 2 Reactors) and 2 Factories.
This challenge is split into two phases. In the first one, you have to fight off an attack of Zerglings, preparing defensive structures as fast as possible. You will have an identical task later on, when Protoss Zealots will attack.
As for the Zerg invasion, they can be very easily stopped by going down the map and placing Barracks in the middle of the passage. With the two other SCVs, build Supply Depots on both sides, just like the game advised in the previous challenge.

The Barracks surely won't be finished before the Zergs arrive, but that doesn't matter. Repair the damage done by the attackers while waiting for the first Marine to come. Afterwards systematically keep on training new ones, until you deal with all the Zergs.
Afterwards it's time to deal with the Protosses. Begin with building Barracks once more, but his time place them so that they're the leftmost Terran building. There's no way of training a Marine before the first Zealot comes, so this building will receive all his rage.
After you the building's finished, begin placing a Bunker behind it. Repair the attacked Barracks with the SCV and once the first soldier appears, keep running from the Zealot while waiting for the Bunker to be finished. Once you're safe inside it, you can pretty much feel like you've completed Rush Defense.
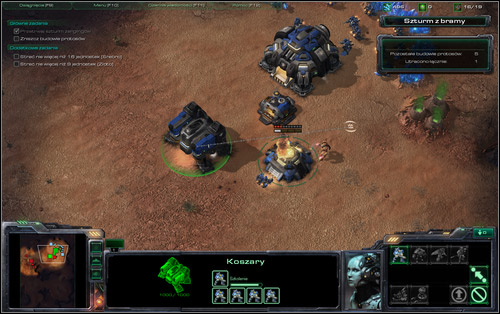
Keep on training new soldiers all the time and repair the damage done by the Protoss with the SCV. If they turn towards the workers, retreat them and resume the repairs. Place new Bunkers to the left of the Barracks, gradually decreasing the distance to the target Protoss structures. This way you might even destroy some of them while shooting from the Bunker. However once you have a bigger army at your disposal, attack with it. Deactivate the Cannon below by destroying the Pylon.


 Smite Game Guide & Walkthrough
 StarCraft II: Heart of the Swarm Game Guide & Walkthrough
 Soul Calibur IV Game Guide & Walkthrough
 South Park: The Stick of Truth Game Guide & WalkthroughStarCraft II: Wings of Liberty Game Guide & Walkthrough