
The guide to Starcraft II: Legacy of the Void most of all contains a very detailed walkthrough for the game. You will learn from it how to easily complete each mission and complete side objectives. The "Achievements" chapter contains advices related to obtaining all achievements in specific missions. The guide was created based on the premiere edition of the game completed on normal difficulty level. It was created mostly for players who have basic knowledge of real time strategy games, but veterans should be satisfied with it as well. In achievement chapters, the challenges that require you to previously complete the campaign are listed at the end.
The guide to Starcraft II: Legacy of the Void contains:
In the chapter focusing on the achievements, the ones that require you to previously complete the game are always listed at the end. The game allows you to select units used during campaign missions. To make the guide more clear, only one name will be used, the default one (first of three versions of a specific unit). For example, if the zealot name will appear in the text, it can be related both to the zealot unit, and its other versions - centurion and sentinel. If completing a mission or obtaining an achievement will require you to create a specific version of the unit, like for example the mothership, it will be marked in the guide or the description will inform you about it. In other situations, you will either have a freedom to choose, or the game will force you to use unit types that are selected for you automatically.
Lukasz "Salantor" Pilarski ()
Read the hints appearing on the loading screens. You can learn many useful things from them, for example, how to quickly switch between units in the marked group. Advices will be usually related to the currently loaded mission, making them even more worth checking.
Listen to the advisors. During the campaign, they will remind you about incoming enemy groups, too weak defenses of the base or additional mission objectives. If you'll listen to them, you will easily complete all missions.
Always complete additional objectives. Most of them will allow you to obtain the solarite which can be used to buy more expensive upgrades of the Spear of Adun. Thanks to other ones you will receive additional units or help of the allies. In other words, the more additional objectives you complete, the easier it will be to complete the campaign. It is especially important during later missions, when every help from allies and any additional solarite will become extremely useful.
Learn the keyboard shortcuts. Not all of them, as there are many, but at least the ones related to skills and constructing most commons buildings, like pylons. Giving stalkers an order to teleport in the middle of enemy group is much more comfortable when you are doing it with the help of the keyboard and not rely only on mouse. TAB key is especially important. It allows you to switch between marked units and buildings. This key will be very useful in missions with heroes or after marking all production buildings using the W key.
Group your units. Gather all production buildings under a single button, so that you will be able to quickly replenish the queue of unit creating. Set buildings with upgrades under another key and make sure they are always busy. Keep your main assault force under one key, the main builder under another one, and specialist unit under other one. Divide your army and buildings in such way that you will have a quick and easy access to all most important units and constructions. In such fast game as Starcraft, every second spent on moving the map, searching for specific units or buildings can decide whether you win or lose.
Explore the maps. Not all additional objectives are marked on the map. There are tasks during which you can obtain additional help or make the game easier, but none of the advisors will inform you about it. Due to that, it is wise to explore the whole map and check what can be found on it. Thanks to that, you can find few interesting and useful things. Sometimes you can also locate an easter egg.
Learn the strengths and weaknesses of races. Terrans are great in defense and they can reduce all damage. Protoss have energy shields and strong but expensive units. Zergs focus on large groups of rather cheap units and on speed of their actions. Additionally, each race and many units have a set of unique attributes and skills which can be very often combined into very effective and hard to counter tactics. Don't be afraid of experimenting, as it can allow you to discover new ways to effectively use unit or skill you are already familiar of.
Don't consider the campaign as a prologue to the online game. You will not have access to units' versions in a regular online game. You will not be able to use some race skills or create some units. The speed of the game will also be much faster, especially if you were playing on the normal difficulty. The level of your opponents will vary as well. It is wise to learn the basic gameplay mechanics, how to play various races and what are the keyboard shortcuts in the campaign, but it is not an effective way to train before playing with human opponents.
First of all, the economy. Train enough workers to fully use all resource fields near the base as fast as possible. Whenever you can, build another base and increase the productivity. Keep attention to the state of the workers and immediately send to work the ones that have no jobs. Avoid unnecessary expenses. If you don't plan to use some unit types, don't invest into their buildings and upgrades. Keep increasing the productivity, even if it means creating 60 and more workers. Such large group will provide you with enough resources to produce even the most expensive units.
Quickly spend the resources. Return to the main base frequently in order to spend the accumulated resources. If you can buy or build something, do it. Saving the resources is recommended only in case of large and expensive units, such as Terran battlecruisers. In other situations, it is better to have a group of marines ready to defend the base or few upgrades under development than few hundreds of minerals and gas waiting to be used.
Build barricades. There are no walls in the game, but pylons and photon cannons can replace them, especially if they are placed in two or three lines. It will block your exit from the base, but during the campaign you will be able to bypass that problem, for example with the ability of the Spear of Adun. Terrans can use supply depots for the same effect. Zergs do not have walls, but usually they won't need them.
Group the buildings. Despite the fact that you can use keyboard shortcuts, it is wise to keep similar production buildings next to each other. There is a chance that a single attack will leave you with no production buildings, but it is definitely easier to train units in four barracks when all four of them are near each other. The distance can be most easily determined using the screen. If you have three barracks and you can see all of them on the screen at once, then they are standing close enough to each other. However, if you don't want to or can't keep all production buildings next to each other, then group them all under one key in order to manage them more easily.
Use varied defense. The turrets have their advantages, but they won't be enough to protect any base. Units can quickly reach place that is endangered, but they can be too far away doing a critical moment. Because of that, it is a good idea to use both methods of protecting the base - position turrets and units in key points. It is also a good idea to keep a small group of units in the back, as reinforcements for the defenders.
Keep attention to the mining. If you are mining too little resources - build a new base. Too little gas - send more workers to the refinery. You used some resource fields - move part of the workers to other bases or build a new one. You cannot allow for a situation when more workers are producing resources than it is needed. By doing so you would be wasting them and you would obtain less resources, which can make the game harder or even lead you to a failure. Keep attention to it and to how many workers have no job. In a perfect situation, all workers are constantly busy.
Keep producing military units. It will be especially important in multiplayer mode, but also during the campaign you will be constantly threatened with loses. It is wise to replenish your units regularly, which will be easier and faster than building a whole army from scratch. Additionally, by constantly creating military units, you will reduce chances that the enemy will have more units than you. It doesn't matter if you have used all supplies. The units in the building queue will not be lost, they will wait for their turn while you will be able to concentrate on other matters.
Scouting is the basis. Send scouts with the mission of finding enemy forces as quickly as possible. Finding the main base is most important, but smaller outposts and groups of units are important as well. If you know where your enemy is, you will plan your defense and the attack direction better. Additionally, the scouts can check what places for base building are already occupied and they can take over neutral buildings scattered through the map.
Concentrate your fire. Unit strength is independent to their health. It means, that even with 1 health point, a unit will be as dangerous as when it has 100 and more health. Because of that, it is better to kill enemies than only hurt them. Whenever it is possible, try to mark targets for your units manually. If you're performing an aggressive movement, select part of your forces after reaching the enemy and manually give them targets. Troops that are using aggressive movement will disperse their fire immediately after meeting the enemy, which in long term can prove to be ineffective. It is better to have one killed and one fully healed ultralisk than two hurt and still able to fight ones.
Concentrate your fire on important targets. What's an important target depends on situation on the battlefield. Sometimes it will be a medivac or a siege tank, other time a mutalisk or ultralisk. When you see enemy army, think about which unit will give you most trouble. It doesn't necessarily have to be large damage, but for example attack with area of effect or slowing down your units. If it is possible, concentrate on these units and then finish up the rest.
Lure enemies into traps. Position some siege tanks on a cliff and use your infantry to lure the enemy into its reach. Bury large group of zerglings in a place which enemy will surely pick to build his base. Use a group of dark templars to attack the back of enemy which will be fighting the rest of your units. Thanks to traps, you will deal great damage to enemy and most of your units will survive.
Don't worry about your losses. Each larger battle will end with greater or smaller weakening of your forces. Some of your units will die due to attack with area of effect, a strong enemy unit, skill or a single zergling who killed her with few quick attacks. Battles in Legacy of the Void are quick, brutal and always bloody and losses are inevitable. Get used to it, you will be always losing some forces. Sooner you learn that, sooner you will be able to focus on effectively managing your forces.
Use skills. Use the TAB key to switch between units in a group and check what skills they have. Try to use them in battle in unconventional way. For example, order your stalkers to teleport in the middle of enemy group, thus dispersing its fire. Don't forget about skills that are available in campaign and cooperation mode, they will many times save you in critical situation. If you can, let your units pick skills on their own. It is hard to pick targets to heal or repair the shields in the middle of a fierce battle, but the units can do it on their own.
Play with no emotions. You will face various people when playing online. You will be able to get along with some of them, with others not so much. Failures due to weak allies and victories thanks to enemy's mistakes will happen. Every time you should keep your emotions in check, even if the other side will lose themselves in anger. Many people are treating the game too serious, which lead to unpleasant situations. It is not worth to make the same mistake.
Remember about other players. No matter if you are playing against one person or with allies, you must remember that most of all everyone wants to have fun. Everyone was starting at some time, everyone makes mistakes and everyone might need help. Respect the fact that other players might be not as advanced or fast as you and help them if they need it.
Train before playing with living humans. Complete the training and then few skirmishes with the artificial intelligence. This will allow you to learn the differences between the multiplayer mode and campaign, especially if you haven't played with other people before. You will learn which units are available in multiplayer mode, on what you should focus during the game, what can be found on maps and so on. Additionally, the constant reminders from the computer and lists of objectives will allow you to learn proper habits when it comes to building base and creating units. Thanks to that, you will also remember at which point of the game you should scout, build barracks or place second base. Finally, you will obtain some experience, and maybe even gain a level in playing as specific race.
Find your favorite game mode. Play few times with human opponents and check which mode you like the most - duels 1 on 1, team matches or maybe cooperation mode missions. It might happen that you prefer the arcade over regular multiplayer mode. There is nothing bad in that.
Be ready for everything. During the online game, you can be attacked by a worker who will make it harder for you to build the base. You can meet a player who specializes in building turrets under enemy base. You can find one who during the tenth minute of the game will be creating first units or placing third base. Due to various units, skills and tactics available in the game, you must be prepared for the fact that each match will be slightly different and any plan developed previously can very quickly stop being useful. You must be ready to adapt to enemy, sometimes even few times during one match.
Train and experiment. Try something new with each game. Train your units differently or change the order of placing buildings. Try creating first soldiers earlier and use them to immediately attack the enemy. Only by experimenting you will be able to develop your abilities and you will avoid regular failures. Enemy who doesn't know what to expect from you has small chances for victory.
In this mode, two players must together complete the objective pointed by the game. Depending on the map, you will have to defend the marked building, destroy a specific number of selected buildings or not let unit X reach point Y. Some of these matches are modified campaign missions, others were only based on them, but none of them is complicated.
In each mission you will find similar elements. Each of them will give you one main objective which you will complete in phases. At the same time you will be attacked by enemy forces, but in most cases the game will first inform you about it. You will start with a main building and a large group of workers and near the first base you will find a place to construct the second one. You will only have to remove the rock blocking it. In addition to the main objective, each mission offers also one additional objective for completing which you will receive additional experience. Each mission in this mode is based on the same rules and will differ only in details.
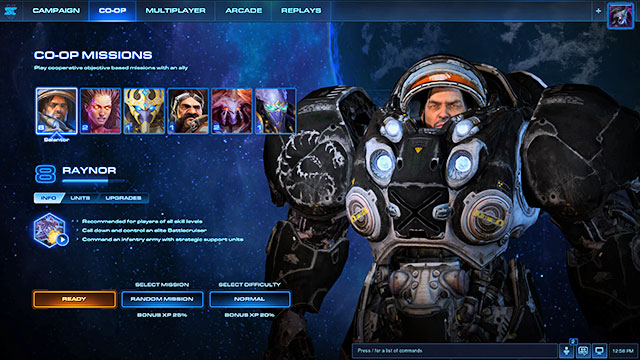
There are two differences between the cooperation mode missions and their campaign counterparts. First of all, in this mode you don't pick your race, only the character and army you control. Each character has a specific set of units, buildings and skills and new ones will be unlocked as the character gains experience levels. The longer you play, the easier it will be to complete missions. Secondly, another player will accompany you during the missions. All maps are constructed in such way that you can complete them alone but it will be much harder. Mostly because many mission objectives will require presence in two or three locations at once - it could be very troublesome for a single person.
You will receive experience points after the game. If you complete all main objectives, you will receive more of it. Losing is also rewarded with experience, but much smaller amounts of it. Due to that, it is more profitable to complete missions on lower difficulty level than lose on higher ones. Additional mission objectives are worth much less experience, only few thousands. They are worth completing, but you shouldn't prioritize them, as in the long run it won't be profitable. You will gain much more for playing on random map. You should do it anyway, as there aren't many of them and after few games you will know all of them very well. The last thing is difficulty level. Difference between the normal and hard is few thousands of experience points, but it requires having a character on high enough level. Character on first experience level has too little units and skills to manage on high difficulty, not to mention the brutal difficulty. When selecting the difficulty level, the game will suggest you an adequate difficulty to the level of your character.
Characters can be divided into ones for beginners and for advanced players. Raynor, Kerrigan and Artanis are closest to the regular versions of their races. Raynor has tanks, bunkers and battlecruisers, he can summon Hyperion and bomb enemies with Banshee. He is also an infantry specialist, he has many its types to choose from. Kerrigan has a vide set of zergs - mutalisks, hydralisks, zerglings, ultralisks - and she is present on the battlefield. She gains new abilities as she levels up. Artanis creates new units very quickly and he has unit types from zealots to tempests. In other words, the first three are the most balanced and easiest to play heroes.
Remaining three characters are more specialized. Swann is a robot specialist. He doesn't create infantry, his factories are cheaper, he has three different turrets and during the mission he attacks enemies with a mining laser that has unlimited range. Zagara focuses on large armies of specialized units that destroy specific targets. She is also present on the battlefield and her skills allow to temporary summon more zergs. Vorazun prefers to act silently with expensive, very powerful units with useful abilities. These characters are full of limitations - Swann doesn't have any infantry, Zagara cannot create hydralisks and so on - but in the hands of an experienced player they can have better results than the other three. Because of that, you should select a character from the first three for the beginning and after some time you should start experimenting with the other three. Play mostly as one character, thanks to that your character will quickly gain new levels.
The presence of the second player on the map in theory changes the game, but in practice it doesn't have to. It all depends on how good the second player is, which character he controls and if you and him are able to get along. It might happen that you will have nothing to do because the second player will complete the whole mission on his own and he will destroy all enemy bases despite the fact that mission objectives don't tell him to do it. It might also happen that you will barely manage to complete the main objective because you and he will be not able to cooperate or you will be forced to act alone. It is especially important on maps where few mission objectives must be completed simultaneously. Due to that, you and the other player should make a plan at the start of the game. If the mission objectives are scattered across the map, share them. If the mission is about protecting an object, decide who will protect which base entrance. Decide where you will gather units for the attack and who will create anti-aircraft units. On the normal difficulty level you don't have to decide about everything, but on high and brutal the lack of communication will surely lead to a failure.
Despite appearances, you don't have to pick characters controlling two various races. Two terrans have similar chance to complete the mission as two zergs or protoss. The difference is mostly in preferences, as some characters are better in attack and others are better in defense. For example, Zagara is a great character for attacking enemy positions with a wave of weak units while Swann with his mining laser and turrets will be much more effective when defending the base.
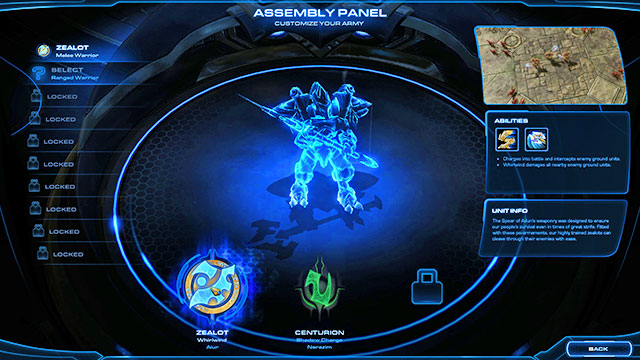
As you progress in the campaign, you will unlock new units and their versions. Each unit has three versions that differ in abilities and usefulness in specific situations. Versions can be freely changed between missions.
All three versions of this unit have the charge ability which allows them to get quickly to enemy. Due to that, the choice of version should depend on the second skill. Zealot can attack even few units around him, which can be useful when fighting large groups of zerg but becomes less useful against large enemies such as ultralisks. Additionally, on the normal difficulty level during many missions, enemy attacks will consist of not more than few enemies, which will reduce the value of this unit even more. It can be useful when storming enemy bases, when there are many enemies, but except for that, its usefulness will be limited. Centurion can prove to be a much better choice. Not only can he jump over own units, which is very useful when controlling large armies, but he can also stun enemies. It doesn't matter if the target is a zergling or ultralisk, the target will be incapable of fighting and defending for 2.5 seconds. A great advantage of this skill is the fact that, when controlling centurions, you don't need to worry so much about selecting targets. During the aggressive march these units will disperse and attack the closest enemies, which mean they will stun more of them than if you were to select targets on your own. Additionally, the stun works on all targets surrounding the attacked ones, so few centurions are able to temporary eliminate large part of enemy forces from combat. Sentinel is a unit useful when collecting resources, as once every 120 seconds it can be resurrected after it is killed. The problem is it has no other useful abilities, so its usefulness on the battlefield will be limited in comparison to other two unit types. Because of that, centurion or zealot will be the best choice, with a small advantage of the first one.
Stalker is great for an army that needs mobility. Not only can he teleport on short distance, but during a jump his shields are partially restored. You can use it to teleport in the middle of a group of enemy units and distract them, to quickly escape in case of danger or to attack from unpredictable directions, like from behind a cliff that is above the base. It deals additional damage to armored units. Dragoon is a typical armored combat unit. It is slow and has slow shooting speed, but it deals high damage and is resistant. In addition to that, it has slightly larger range than stalker. Very useful when you need a mobile fire platform and you don't need any additional skills, especially active ones. It also deals additional damage to armored units. Adept is a unit for players who like to contrive. His special skill sends a ghost. It can be controlled and enemies touched by it receive more damage for few seconds. It is best to use it during a battle with large groups of enemies since ghosts are small and they can have trouble with touching single units. In addition to that, after 10 seconds adept teleports to the place where the ghost finished his movement, allowing the unit to move from place to place without worrying about being killed by the enemy. Ghost can be also cancelled, which allows using him as a scout. In difference to previous units, this unit deals additional damage to enemies with light armor. Each of these versions is good and which to choose depends on your needs and favorite tactic.
All units of this group have permanent camouflage and cannot be attacked if there is no detector nearby. They also cannot attack air targets. Dark templar can attack up to five enemies at once by jumping between them. This makes him a great unit to fight against large enemy groups - for example against zergs, especially smaller ones. The attack works against buildings as well, so this unit is very useful when attacking bases. Good unit when you need a fast warrior whom you don't want to give detailed orders about who and when he must attack. Avenger works similarly to sentinel. The only difference is that he doesn't appear in the same place, but he returns to the dark shrine. In addition to that, he can be respawned once every 60 seconds, not 120. Good if you constantly lack resources, but in difference to the dark templar his combat effectiveness is smaller. Blood hunter is a very interesting unit whose ability removes any enemy units and buildings from the battle for 10 seconds. The problem is, during these 10 seconds no one can attack them. No other abilities will work on them as well. Because of that, this ability seems to be useful, but only when you need to retreat from the battlefield or temporarily deactivate selected unit from the battle. It can be effective when ultralisks or other expensive and strong enemy units become the target. Blood hunters can be useful if you know how to use their abilities. Dark templars will be effective when you need unit that focuses only on combat. Avenger can be used when you don't want to constantly rebuild your armies or you always lack resources.
The choice in this category depends on your tactics. Sentry is used for regenerating the shields of your units and he can create a shield that reduces damage received by allied forces. Energizer increases the movement and attack speed of allied units and, after positioning, can be used as pylon. This means that with the warp gates you can create new units near him, for example at the back of enemy base or next to the army which moment ago were decimated in a large battle. Havoc is the only unit of this type that cannot attack. He increases the range of allied attacks and increases the damage received by enemies. He can also create a field that slows down enemies. Sentry should be selected when survival of your units is more important than destruction of enemies. Energizer is useful both during combat and when regenerating destroyed armies. Havoc is used mostly for offensive. Select a unit type that suits your tactic the most.
All units of this category deal additional damage to armored targets and all their basic attacks can be used only on land targets. Immortal is a more defensive units than others. He can create a barrier which will absorb part of the damage received by the unit and which lasts for 10 seconds. Annihilator has an additional turret which deals much more damage to land and air targets. The turret can be used while moving. Vanguard can attack few units at once, even from far distance. Selecting a unit type from this category depends on your preferences. Immortal will be good if you need a resistant unit that can receive large amount of damage. Annihilator should be chosen when you need large firepower and the possibility to attack both land and air targets. Vanguard is limited by the lack of possibility to attack flying targets, but he can quickly eliminate large groups of weaker land units.
All units of this category deal additional damage to enemies with light armors. Phoenix can immobilize and ascend up to two land units of the enemy. This can make the battle much easier for the rest of your units who will not be interrupted by the immobilized targets. Additionally, thanks to this ability phoenix is able to attack land units despite the fact that in theory he can attack only flying ones. This unit needs some time to regenerate, but 10 phoenixes are able to temporarily exclude 20 enemy land units from battle, which is very many. Additionally, this unit is very good in aerial battle. Corsair can attack only flying units, but his ability makes it impossible for enemy units to attack, forcing them to change position. It's not as effective as phoenix's skill, but in difference to it, it can stop turrets and other buildings which phoenix is not able to lift. Mirage can lift land units like phoenix and additionally it becomes invulnerable for 2 seconds after it receives damage. It can lift only one land unit, but can withstand a battle much longer than phoenix. Corsair is good only if you need a unit that can fight ships. Phoenix will be good when you need a unit that is able to attack both unit types and that is able to temporarily exclude enemy infantry from battle. Mirage is like phoenix, but not effective in holding enemy forces and more resistant in battle.
High Templar has a set of useful abilities. He can deal much greater damage to units that use energy. He can create a psionic storm which will hurt enemies and restore the shields of your allies. He can also be transformed into archon together with another high templar. The archon has great strength, powerful shield, the ability to attack both land and aerial targets and he deals more damage to biological targets. Dark archon is able to attack land and aerial targets, but his main role is to force enemies to attack each other or to take control over them. He can target any unit, including enemy workers and the most dangerous units such as ultralisks and battlecruisers. Ascendant requires a bit of practice since he has two abilities. First one deals great damage to a single target, the second generates an orb that hurts bypassed targets. He can also regenerate his energy for the health of allied units. High templar is good as a strictly offensive unit, tasked mostly with dealing large damage on specific territory. Ascendant is similar, but his abilities require you to pick his targets more precisely and he cannot be transformed into archon. Dark archon is very useful if you want to manipulate enemy units and enlarge your army at enemy's price. He is especially useful later in the campaign, when the enemy will have larger number of stronger units. In general, all three units from this category are very useful and selection should depend on your preferences.
Void ray increases your range and firepower when attacking single target, he can attack enemies on land and in air. Destroyer can attack few targets at once and the number of simultaneous shots increases as you attack the same target. The choice between them should depend on whether you prefer to kill one target faster and then take down the next one or to hurt many opponents at once. Both units are very strong, so it should all depend on your preferences. If you need a flying support unit, then you should select the arbiter. He makes all nearby units invisible and he can summon allied units from any part of the map. Thanks to that, you can quickly send reinforcements to where they are needed. In addition to that, he can temporarily exclude enemy units from the battle, making them at the same time invulnerable to any attacks or skills.
Carrier is able to attack land and aerial targets. Fighter jets this unit creates aren't very strong, but in group they are a strong enemy, mostly because enemy flying units can focus on them instead on carrier or on units that accompany him. In addition to that, if the fighters are destroyed, the ship can create new ones for free. It also has repair drones which will heal allied mechanic units when the ship stops. It can be used for example to heal other ships. Tempest is a good choice when you need a strong long-range unit. Its attacks deal massive damage and since it is a flying unit, not all enemies are able to attack it. Mothership is both an offensive and supportive unit. It has high resistance and strong shield, it can stun enemies on large territories and it has a lance that attacks in straight line. It can also teleport. However, its offensive abilities are smaller than of two remaining ships and only one ship of that type can be controlled on the battlefield. If you need a medium firepower and you want to repair other units between battles, then pick the carrier. Tempest is a good choice when you need high power and reach. Mothership is a supportive unit with nice battle capabilities, but they aren't as impressive as in case of two other units.
Colossus is able to move through cliffs and his attack wounds few units at once. However, it can attack only aerial targets and is considered as a flying unit. It means that he can be attacked both by zealot and phoenix. Reaver cannot move through cliffs, but he produces grenades for free. These grenades deal damage on a specific area and are effective against buildings. Wrathwalker is the opposite of colossus. It doesn't attack few, but one target at once and it deals additional damage to buildings. It can attack both land and flying units and it can attack while moving, which is especially useful when retreating. It cal also move through cliffs and is considered as a flying unit. Reaver is good during battles with large enemy groups and buildings, when you need large firepower. The choice between wrathwalker and colossus depends on what you need. If you want to attack land and aerial targets dealing high damage, pick the first one. If attacking only infantry, but few at once, is enough, then select the second one. The advantage of both units is the ability to climb on cliffs. Thanks to that, many infantry units cannot reach and attack them. Sadly, reaver doesn't have such ability.
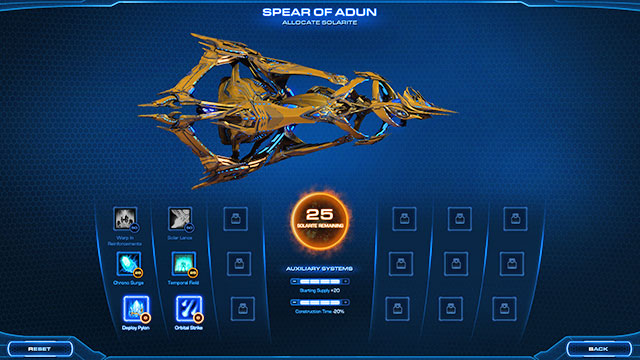
Artanis' flagship has eighteen abilities split into six groups and three systems. Changing ability and upgrading the system costs solarite which is obtained during the campaign. Two skills are passive, other four are active and among the latter you can find both combat and support ones.
There is no way to buy all most expensive skills. There is not enough solarite to gain during the campaign, even if you complete all side objectives. Because of that, you must select the abilities depending on the task. It is also not profitable to buy the most expensive abilities and ignore the other ones, mostly due to the great differences in costs. Cheaper abilities can also prove to be more useful than the expensive ones.
Cost: 0 solarite
Energy cost: 75
Reload time: 60 seconds
Creates pylons in any place you see where a building can be placed. This skill can be useful in various ways. It can be used in the base when you lack supplies. It can be used on the battlefield when you want to move additional units. It can be used in a strategic location so that you can easily move additional forces there if needed. It can be also used in place where you want to immediately place new buildings and the regular summoning of a pylon takes too much time. It can fill the gaps in building's powering. It can distract the enemies, for example during the escape. In theory, the possibilities are limitless and depend only on your imagination. This skill can be useful in each mission.
Cost: 25 solarite
Energy cost: 75
Reload time: 60 seconds
For 20 seconds, selected building is researching or creating units 1000% faster. Application is obvious - use it on forge to develop better shields faster, on stargate to build the carrier faster, on nexus to quickly train the workers. This ability is useful during majority of the missions.
Cost: 50 solarite
Energy cost: 75
Reload time: 60 seconds
Upgraded version of the deploy pylon which, in addition to the building, summons also 2 melee fighters and two ranged fighters. Has the exact same application as the previous skill, but it also reinforces your army. Thanks to that, it is more suitable to distract the enemy and to secure important locations. If you have the possibility to buy both of them, it is better to select the more expensive one. However, later in the game its price might prove to be too high.
Cost: 0 solarite
Energy cost: 50
Reload time: 60 seconds
Five missiles drop from the sky on the part of the map you see. They deal higher damage to armored targets. Very useful due to high precision, effective against large groups, resistant units and fortifications. It is wise to use it also as a defense measure in case of the lack of your own army. You won't win the war with it, but many times it will save your life. Worth taking.
Cost: 25 solarite
Energy cost: 50
Reload time: 60 seconds
Creates three fields that slow down the heroes and completely stop all other units for 20 seconds. Stopped units can be attacked and skills work on them. In addition to that, each new unit that will enter the field will be stopped as well. Very useful during larger battles, attacks on enemy bases and when defending your own positions. Limits the numbers of enemy forces and increases the survival rate of your own units. Worth buying, especially if you are interested in two other offensive skills. The only disadvantage of this weapon is that, in difference to other two, it requires your units to be nearby to work. Otherwise, after 20 seconds since immobilizing, the enemy will still be a threat to you, while attacked by orbital strike or solar lance he will probably no longer be any threat.
Cost: 50 solarite
Energy cost: 50
Reload time: 60 seconds
A better version of the orbital strike. Only three charges, but much greater area of range and damage. A priceless ability when protecting the base, attacking resistant targets and enemy groups. Buy it when you can and the orbital strike is too weak for you.
Cost: 0 solarite
Passive skill.
Allows the Nexus to attack. It can be useful on higher difficulty levels and in critical situations, when your defense lines are broken, but most of the time the enemy shouldn't get close to the nexus. It is better to select something more useful.
Cost: 25 solarite
Passive skill.
Refineries doesn't need probes to obtain gas. It allows you to spare 6, 9, sometimes even more probes. The saves won't be big, but will allow you to recruit few additional units. Additionally, protoss buildings don't require the presence of a worker, so you can order to build the refinery and immediately forget about it, which will spare you some micromanagement. This ability is much better than the previous one and because of that it is worth buying.
Cost: 50 solarite
Passive skill.
Stargates and robotic facilities can use the warp technology and teleport units instead of producing them. It takes less time. Worth buying if you're using the warp gates and you prefer to summon units instead of building them. This ability will allow you to teleport all available units, making transportation of the army much easier. Don't buy this skill if you prefer traditional building.
Cost: 0 solarite
Energy cost: 25
Reload time: 60 seconds
Teleports a group of units near the main nexus. Teleported units receive a shield that is active for 20 seconds. Useful in two situations - when you quickly need a defense of the main base and when the return of your army to the base will take too long. This ability is especially useful during missions when you need to destroy few objects scattered through the map. You start in the base, you go in one direction of the map while destroying everything in your way, then you return, replenish your forces and go in the other direction. This ability can be used in many ways, it is very useful.
Cost: 50 solarite
Energy cost: 50
Reload time: 180 seconds
All allied units and buildings receive shield with 200 resistance points that is active for 20 seconds. This ability is very useful both during the defense and the attack, but it reveals its full potential during missions when you have allies, for example during the Salvation. It will not only allow you to strengthen your army, but your allies as well. It might be crucial during harder battles. Worth picking if the mass teleportation using the mass recall doesn't interest you.
Cost: 100 solarite
Energy cost: 0
Reload time: 180 seconds
Fenix deals massive damage in the place where it lands. For 30 seconds it will attack all enemy infantry units it will face and it will be using abilities. It will disappear once the time ends or it dies. It is a quite useful ability that summons a very strong unit, able to fight for long time, kill many enemies, focus attention on it and even single handedly change the outcome of the bottle. However, Fenix is not able to attack aerial targets and it cannot be controlled. It might be a good defense of the base or a backup for a hard attack, but the stronger and larger the enemy army, the less useful this ability is, even despite the fact that it is able to instantly regenerate its damaged shield. In general, it is a very good, strong and resistant unit, which can be used in many ways, but its greatest disadvantage is its price. You can buy this ability if two others don't suit you, but make sure that you will be using it frequently. Otherwise, invest the solarite into something more useful.
Cost: 0 solarite
Passive skill.
Units receive movement speed and attack bonus in the range of the pylons and for 15 seconds after leaving the range. It is useless in missions that require mobility and attacking. In missions that focus on defense it is more than useful - especially since it works on all units, including allies. All you need to do is construct a pylon nearby. Take it blindly.
Cost: 50 solarite
Passive skill.
Before dying, unit becomes invincible for 5 seconds. After using, the ability must reload for 60 seconds. Counts separately for each your unit and, sadly, doesn't work on your allies. In theory a very useful ability, in practice it is hard to use it effectively. Usually, units are grouped in tight groups during the game. The more of them, the harder it is to find a specific one in the crowd, not to mention making sure that it will be evacuated. In addition to that, battles are usually quick, chaotic and full of graphic effects which additionally make it harder to find specific units. The fact that a unit will survive thanks to this skill will be mostly a matter of luck. It also doesn't work on allies, which makes it less useful than the previous one. In other words, it is hard to determine the worth of this skill, which means you can resign from buying it. Unless you really want your units to survive, but it is hard to tell whether you will notice any difference.
Cost: 100 solarite
Passive skill.
Spear of Adun repairs units and buildings. Up to 3 units and/or buildings can be repaired simultaneously. The basic disadvantage of this ability is the exclusion of some units, such as high templars and two of three types of zealots. This ability also becomes much less useful if you're using carriers and their repair drones. In many other situations it can prove to be very useful, especially since you have no other way to repair your mechanic units and buildings. It isn't mandatory, but might be useful during many situations. Sadly, it is very expensive, so if you don't need it very much, then pick something else.
Cost: 0 solarite
Energy cost: 0
Reload time: 300 seconds
For 15 seconds, an energy beam coming from the Spear of Adun hits the ground. It deals high damage, two times greater to armored targets. If the target is destroyed, the beam will automatically find another one. It has long reload time, but is very effective in eliminating large groups of units, resistant enemies and fortifications. Worth taking, especially if you cannot afford other skills.
Cost: 50 solarite
Energy cost: 0
Reload time: 300 seconds
All enemy units and buildings on the map become inactive for 20 seconds. During that time they can be attacked. One of the best abilities in the game, it can be useful in every circumstances - when attacking, escaping, defending the base, assaulting an important target. Especially useful during missions with allies. Definitely worth buying.
Cost: 100 solarite
Energy cost: 0
Reload time: 300 seconds
Throws 200 missiles on the marked territory for 15 seconds. A single bullet doesn't deal high damage, but it's the numbers that count. It is also better suited for attacking armored targets. Excellent against targets that cannot move, such as fortifications or to be used in narrow passages. Sadly, it is an expensive ability which will block access for you to many other ones. You can buy it if you really don't know what to do with the solarite you gathered, but in general it is better to buy one of two other abilities. Purifier beam might be weaker as a strictly offensive skill, but he can also deal great damage and is much, much cheaper.
Cost: 5 solarite per point, up to 20.
Increases the starting supplies. 5 points seems like not much, but it allows building five workers or two zealots without the need of placing another pylon and with 20 point you can save even 400 minerals, which equals eight zealots or nexus. It can be useful, but you don't have to necessarily increase it to maximum level, especially if other skills and systems are available.
Cost: 5 solarite per point, up to 20.
Speeds up building's construction. This system is very useful during defensive missions that require you to quickly construct and rebuilt turrets. It is slightly less useful during other missions. Especially the ones without time limit, as sooner or later you will construct all buildings you need in them. Worth buying when you're trying to set a new time record of completing a level.
Cost: 5 solarite per point, up to 20.
A mandatory system for every commander. Increases survival rate of units and reduces the consumption of shield batteries. Especially useful in missions that focus on defense, as enemy attacks become more frequent and stronger.
Main objectives:
Side objectives:
Reward for completing main objectives:
Reward for completing side objectives:
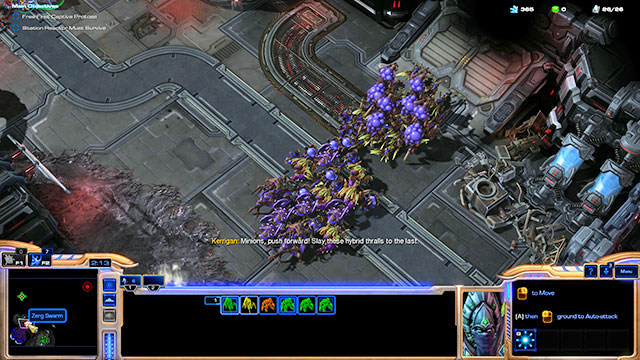
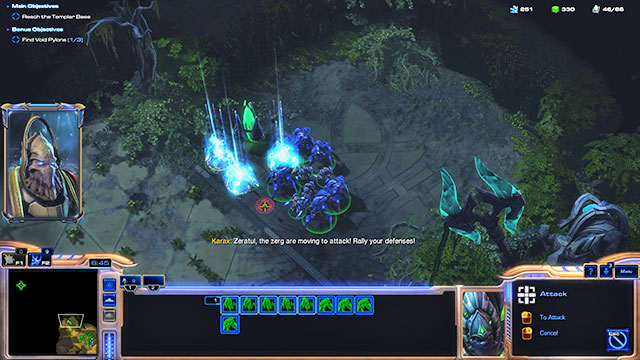
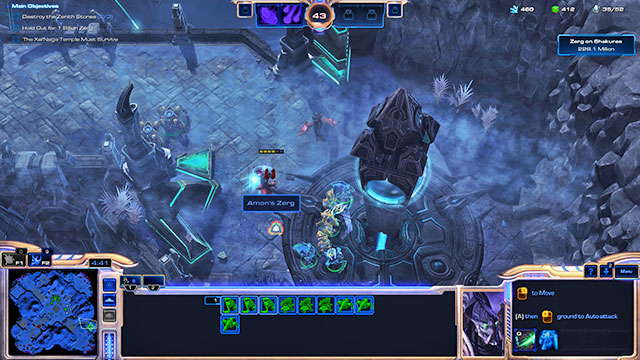
You start with a small base and army but with large supply of resources that allow you to develop quickly. After thirty seconds Kerrigan [1] base will also appear on the map. It is much larger and heavily guarded, so you better not come close to it. First, focus on improving the base and army. You have five units, but you need at least ten, preferably five zealots and five stalkers.
Zerg will attack in regular time intervals and they will move through the path visible on the minimap. Reactor [2] is their target and they will destroy everything on their way. Don't try to stop them as their forces are much larger than yours. During their march you can either remain in the base or continue completing the main objective. The only thing that is important is to not fight them. Attacking the zerg base at this point is pointless, especially since it will not get you closer to completing the mission.
The only time when an attack on the zerg army is recommended is when you want to gain some time for completing the mission. By attacking zergs you will make it easier for terrans to defend themselves. The longer terrans are defending themselves, the more time you will have to complete the mission. In that situation you should attack only the back units. Assaulting the whole zerg army, especially frontally, will expose you to high losses and in long term will prove to be unprofitable.
When creating the army, wait for Kerrigan to start preparing for the second attack. Thanks to that, you will repel terran's attack from the north. The attack will be weak, but if previously you have sent all your armies outside the base, you won't be able to defend yourself. Once you get rid of terrans, build two photon cannons in that place. Position them in such a way that they will support each other. Attacks will repeat from time to time and become stronger, it is wise to add new turrets later.

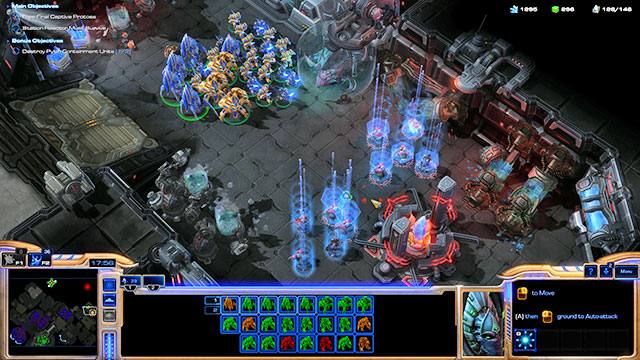
Gather the army and go north-west. You will face weak fortifications and small terran groups. With a large army you will get through them easily. On the way to the first group of imprisoned protoss you will find resource containers [3] guarded by a small group of terran infantry.
![The first group of the imprisoned protoss [4] is guarded by few terran units - Mission 1 - Dark Whispers - Campaign - Whispers of Oblivion - StarCraft II: Legacy of the Void - Game Guide and Walkthrough](https://game.lhg100.com/Article/UploadFiles/201512/2015121709520990.jpg)
The first group of the imprisoned protoss [4] is guarded by few terran units. Get rid of them and attack the building. After a short conversation the freed zealots will join your army.
Near the first imprisoned group [4] you will find the first pylon containment unit [5] with which the enemy will gather small reinforcements. Kill all enemy units and destroy the building. A group of units will appear at the claimed pylon and will join you immediately. You can use the building to summon other reinforcements with the warp gates. Gather also the nearby containers with resources.
Keep improving the base during all that time and train additional units. You can choose more advanced ones, such as dark templars or colossuses, but you can also focus on cheaper ones like zealots and stalkers. The mission is constructed in such way that you can complete it with no expensive or advanced units - the choice is only up to you. Spend some resourced on weapons and armor upgrades, it will make completing the mission much easier.

Keep attention to where the zerg forces are. If between you and point [6] there are terran buildings, wait for the zerg to destroy them. While waiting, you can focus on improving the base and the army. If there are no more terrans, then get to point [6]. There you will find the bridge control. After destroying it, you will unlock a shortcut which will allow you to greatly limit the risk of meeting with zerg.
Gather the army and move east. The second group of the imprisoned protoss [7] is guarded by terran base and some units. Focus on the defenders, then destroy the building and free the protoss. You will additionally gain a place to set second base if the resources in the first one are drained.
Go north. Gather another resource containers [8][9] that are protected by small terran groups. They will be stronger than the previous ones, mostly due to the new, stronger units, but still too weak to win against a large protoss army. A while further [10] you will find enemy fortifications. Go north from there and you will reach the second pylon containment unit [11] and a large group of opponents. You will barely get there and the terrans will call for reinforcements. Kill everyone and destroy the building to obtain backup.
Check where the zerg are. If they have cleaned the passage north, gather the reinforcements from the base and move ahead. If not, then wait until they do it. The last group of the imprisoned protoss [12] are guarded by bunkers and strong terran units supported by hybrids, so be prepared for a rather hard battle. Focus your actions on hybrids and after destroying them take care of the remaining enemies. Once you're done, free the protoss. The mission will end.
Main objectives:
Side objectives:
Reward for completing main objectives:
Reward for completing side objectives:
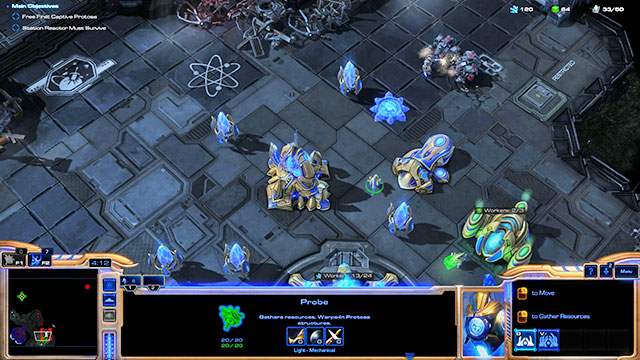
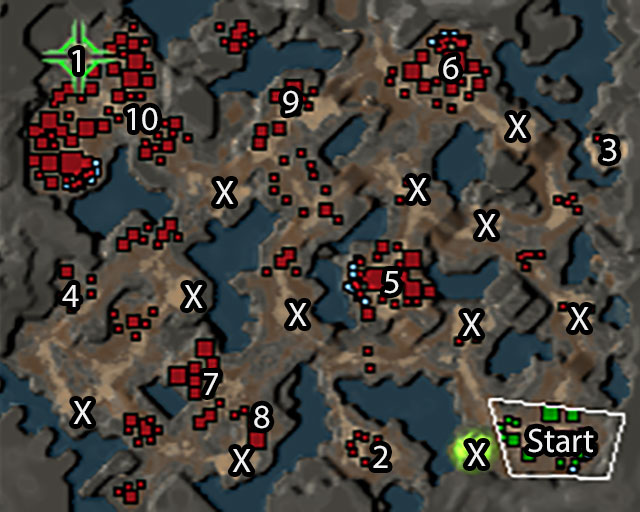
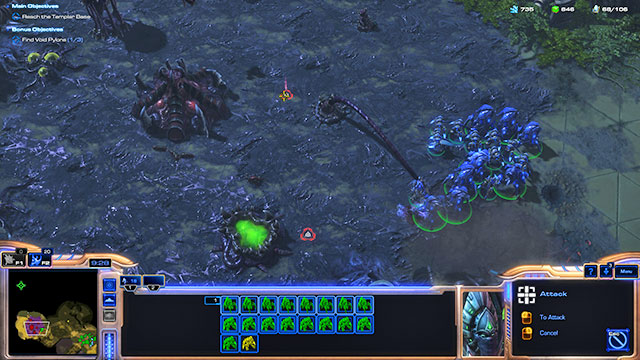
You start with a small base, modest army and a complete lack of gas sources. The latter will appear regularly in [X] locations marked by the game in the quantity from one to few hundred pieces. Sometimes gas will appear in one place, other times in few places at once. Most of it will be guarded by enemies. If enemy units are not to be found in the location, then it means sooner or later they will appear there. Enemy cannot collect the gas, so you don't need to hurry with obtaining it. Resources that are thrown once will be waiting for you to collect them. What's important - only land units are able to gather the gas. You can combine them with the aerial ones, but the latter will be acting only as support.
Limitations in the gas supplies can seem to be troublesome, but due to the lack of time limit for completing the mission, you don't have to worry too much about that. Focus on upgrading the base and mining resources while creating a small army. When an eruption occurs, send the army for the gas and destroy all enemies on your way. Gather the gas, return to the base, use the resources you collected for improving. Repeat until you gather strong enough army to attack the temple[1]. Enemy attacks will be rare and weak, so your army will take two roles - of the attacking group and a mobile defense of the base. This will save you the trouble of placing turrets. You can place few photon cannons at both entrances to the base, but during most of the time they won't have who to face. If you worry about the safety of your base, leave few units there, for example 10 stalkers and zealots. They should deal with most dangers.
The further away from the base you are, the greater the enemy strength will be. But if you have focused on upgrading the base and gathering gas whenever you had the chance, you will be able to destroy any enemy group no matter what size is it. Just remember that your army should consist of at least few units able to attack aerial targets, you will be facing them from time to time.
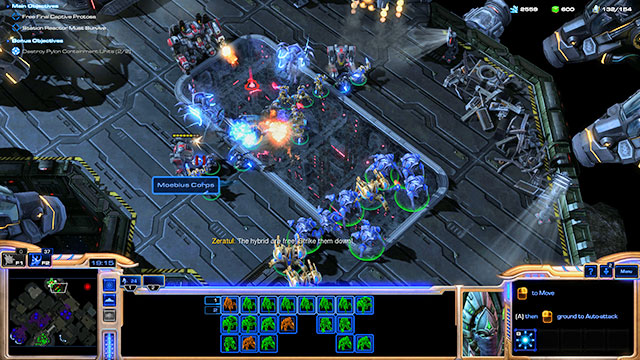
![Around the sixth minute you will receive information about 3 rock formations [2-4] scattered through the mission territory - Mission 2 - Ghosts in the Fog - Campaign - Whispers of Oblivion - StarCraft II: Legacy of the Void - Game Guide and Walkthrough](https://game.lhg100.com/Article/UploadFiles/201512/2015121709521002.jpg)
Around the sixth minute you will receive information about 3 rock formations [2-4] scattered through the mission territory. They are protected by small enemy groups, including few sentries. After destroying them, you will be receiving gas supplies. The supplies will be small and not frequent, but regular. It is a good idea to collect the one closest to the base in first order and the remaining ones can be collected while clearing the map of enemy bases and units. The formation on the east [3] is behind a cliff and will require you to use stalkers or aerial units.
You will find many Tal'Darim outposts on the map. They consist of turrets and small unit groups. You will also find single bases of various strengths [5-9] and the main one protecting the entrance to the temple [1]. In some bases ([5][6]) the enemy is mining resources, other ([7-9] consist only of production buildings. The further away from your main base, the defense of these bases will be stronger. But it will not be strong enough to be a problem for your armies. If you are be gathering all of the gas available on the map and mine as many minerals as possible, you will always have an army that is stronger than anything the enemy can use to attack you.
![The main enemy base [10] will welcome you with solid fortifications and large number of scattered units - Mission 2 - Ghosts in the Fog - Campaign - Whispers of Oblivion - StarCraft II: Legacy of the Void - Game Guide and Walkthrough](https://game.lhg100.com/Article/UploadFiles/201512/2015121709521162.jpg)
The main enemy base [10] will welcome you with solid fortifications and large number of scattered units. The turrets can be found both at the entrance and deeper inside. You can take care of them, but the mission requires you only to destroy the entrance to the temple. You can destroy the fortifications at the entrance, ignore the production buildings, make your way to the temple and destroy its entrance.
In this mission you have access to almost all protoss units, so it would be a good idea to mix cheap zealots and stalkers with dark templars, colossuses and carriers. Thanks to that you will create an army capable of dealing with any threat. Don't forget also about regularly upgrading weapons and armor of your army. The mission can be completed while having only one base, but in case of depleting the resources in the main base you can gather resources in points [5] and [9]. Don't worry about the gas, its sources on the map are unlimited.
Main objectives:
Side objectives:
Reward for completing main objectives:
Reward for completing side objectives:
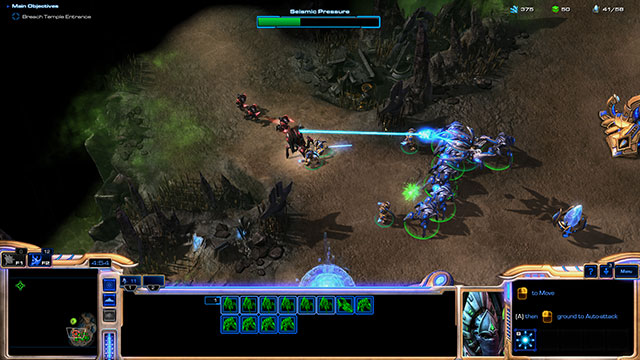
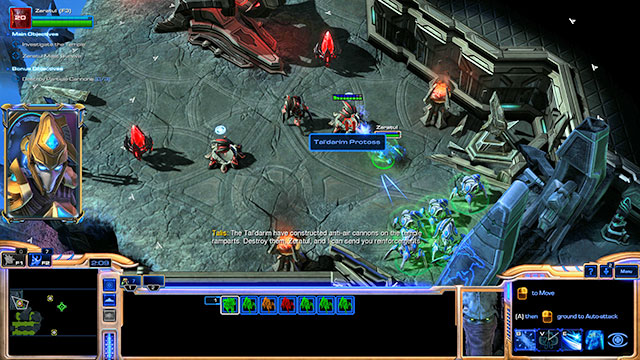
You start with Zeratul and six stalkers. Go east. After a while you will face small group of enemies [1]. Destroy the zealots, wait for the barrier to drop and get rid of the remaining enemy units. If you don't want to wait, teleport to the other side.
![Teleport through the cliff and destroy the enemy turret [2] - Mission 3 - Evil Awoken - Campaign - Whispers of Oblivion - StarCraft II: Legacy of the Void - Game Guide and Walkthrough](https://game.lhg100.com/Article/UploadFiles/201512/2015121709521111.jpg)
Teleport through the cliff and destroy the enemy turret [2]. Don't forget about using the void armor to increase the survival chances of your units. However, it isn't mandatory, as the building will fall very quickly if you attack it with all your units.
![Behind the next cliff you will face immortal enemy unit [3] - Mission 3 - Evil Awoken - Campaign - Whispers of Oblivion - StarCraft II: Legacy of the Void - Game Guide and Walkthrough](https://game.lhg100.com/Article/UploadFiles/201512/2015121709521166.jpg)
Behind the next cliff you will face immortal enemy unit [3]. You can kill it with Zeratul's shadow strike or simply throw everything you've got on it. Get rid of other enemy units as well.
Move ahead. After a while you will face the first particle cannon protected by turrets and single enemy units [4]. Use Zeratul's help to first eliminate the turrets, then units, and finally the cannon. You will receive reinforcements for that.
Behind another cliff you will have to fight photon cannons and one hybrid. Focus on the hybrid, leave the turrets for the dessert.
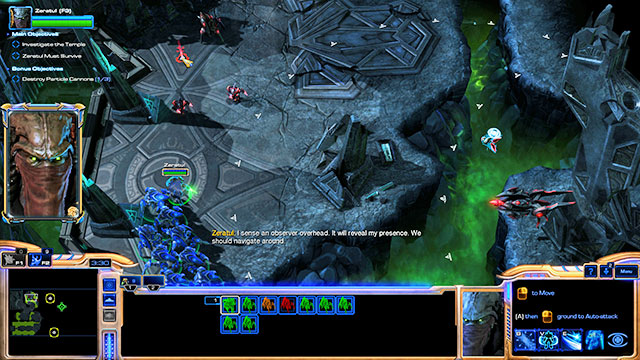
Move forward. You will face three enemy groups with gradually increasing strength [6-8]. Among them you will find zealots, hybrids, turrets and pylons to which the enemy will teleport his reinforcements. The territory is patrolled by detectors and void rays which will attack when you enter into the detector's range with any of your unit. To avoid it, click on Zeratul. With his help you will see the range of the detectors. Try to avoid walking into it when going further. If you succeed, the enemies will ignore you. In addition to that, you should allow your units to regenerate the shields after each battle. If you are be attacked by a void ray, focus all your forces on it. During the battle with other groups, in first order eliminate the most dangerous targets, such as hybrids. Remember about using Zeratul's abilities as well.
![A slightly further you will have to face another group of enemies and you will find the second particle cannon [9] - Mission 3 - Evil Awoken - Campaign - Whispers of Oblivion - StarCraft II: Legacy of the Void - Game Guide and Walkthrough](https://game.lhg100.com/Article/UploadFiles/201512/2015121709521220.jpg)
A slightly further you will have to face another group of enemies and you will find the second particle cannon [9]. In difference to the previous one and the groups you had to face, the defenses of this one are very weak. After destroying it, let your units rest. You can keep the received high templars or immediately transform them into an archon - it depends on your preferences. Move the army to the place marked by the game [10] after regenerating the shields.
Destroy the enemy units after the cutscene and go through the open passage. You will find other enemy units, including one colossus who you should destroy first. Keep going ahead through the only available path [11] until you reach the third particle cannon [12]. The building is behind the cliff, so teleport to the other side, get rid of the turrets and then of the units. You will receive help of another high templars.
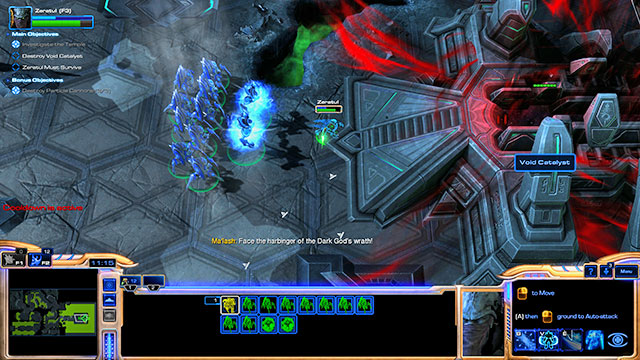
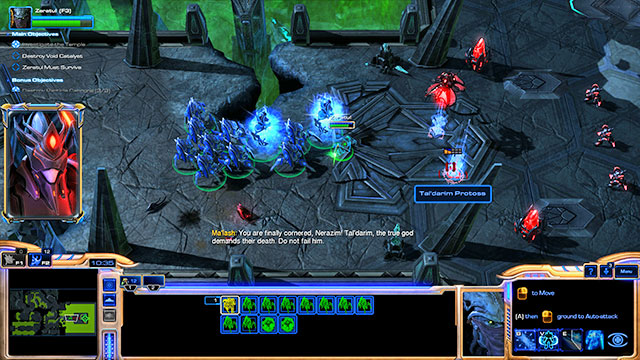
Keep going. You will face enemy fortifications and hybrid, then some pylons. Enemy will use them to gather reinforcements. First eliminate the units, then the buildings. Let your units regenerate shields after each battle and then move ahead. You will finally reach Ma'lash. He will summon a hybrid, luckily just one. Kill it and destroy the void catalyst [13].
You must escape from the temple after the cutscene. You will have a little less than five minutes to do it and your army will be decimated. The path to the exit is simple but full of enemies. You can fight them, but it will cost you precious seconds. It is more practical to avoid battles. Walk ahead until you will be attacked by the enemy. When that happens, order all your units to teleport in the direction where you are escaping. Most of enemies will not be able to attack or catch you, especially since during the escape you will find many cliffs blocking the way. Keep constantly moving and teleport as often as possible. If you do everything right, you are able to reach the exit in two minutes without losing any unit. If the escape is troublesome for you, you can leave one of the stalkers as bait. It will not survive long, but it will be enough to allow other units to escape. Once you reach the exit, the mission will be completed.
Location: Aiur
Main objectives:
Side objectives:
Reward for completing main objectives:
Reward for completing side objectives:
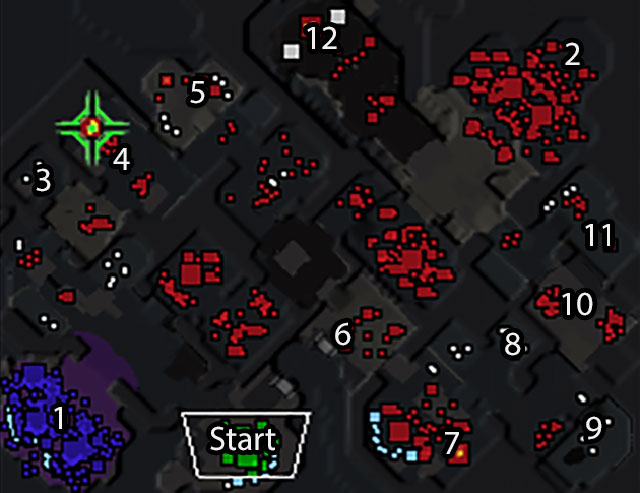
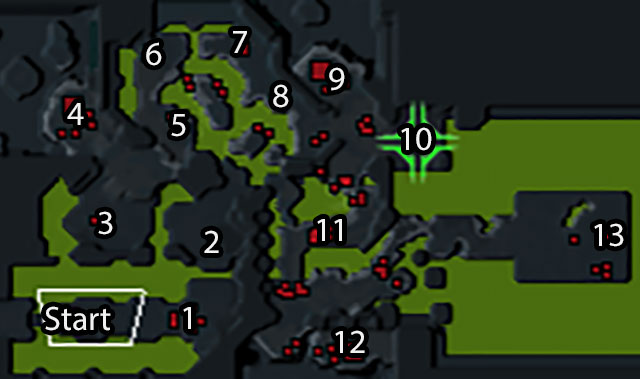
![You start in the [Start] point with a numerous and varied army - Mission 1 - For Aiur! - Campaign - Legacy of the Void - StarCraft II: Legacy of the Void - Game Guide and Walkthrough](https://game.lhg100.com/Article/UploadFiles/201512/2015121709521302.jpg)
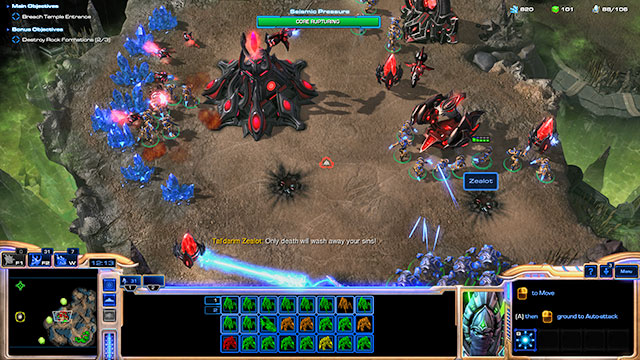
You start in the [Start] point with a numerous and varied army. Gather it with the F2 key and then use aggressive movement to go towards the zerg fortifications [1]. Focus on the large units and the fortifications, then on hydralisks and zerglings. After a battle lasting few seconds which you are not able to lose, move ahead. On the way [2] you will receive the help of a group of colossuses. With their help destroying buildings and large groups of weak units will become much easier. Add them to your strike team and destroy the next fortifications [3][4].
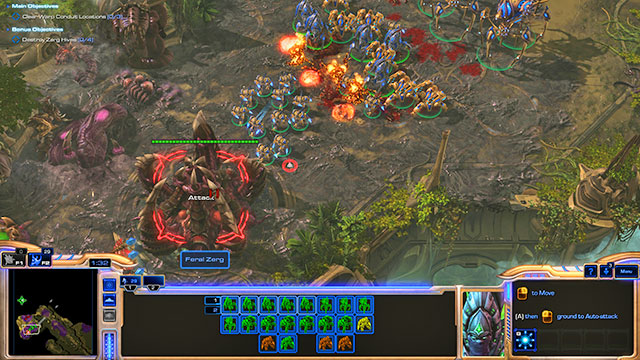
You will reach a bridge. On the left side you will find zerg fortifications and the first hive (H1). You should still have plenty of units, so attack and destroy the building. Get rid of the remaining constructions and enemy units. Once you're done, you will receive reinforcements. You will receive them for destroying the remaining hives as well.
Gather the troops and go north. You will reach other enemy fortifications [5] and the first warp conduit [W1]. Get rid of its defenses and, once the area is secure, clean the building. You will receive reinforcements after a short while. Gather the army and go through the bridge north.
![Turn left at the next fortifications [6] - Mission 1 - For Aiur! - Campaign - Legacy of the Void - StarCraft II: Legacy of the Void - Game Guide and Walkthrough](https://game.lhg100.com/Article/UploadFiles/201512/2015121709521393.jpg)
Turn left at the next fortifications [6]. You will find the second hive [H2]. Destroy it. On the right from the defenses you will find a crashed Mothership and a group of protoss fighting zerg [7]. Eliminate the zerg and the survivors will join your army.
![Go south, pass the bridge and destroy another group of zerg [8] - Mission 1 - For Aiur! - Campaign - Legacy of the Void - StarCraft II: Legacy of the Void - Game Guide and Walkthrough](https://game.lhg100.com/Article/UploadFiles/201512/2015121709521375.jpg)
Go south, pass the bridge and destroy another group of zerg [8]. On the right side you will find the third hive [H3]. The second warp conduit [W2] can be found on the left from the bridge. Its defenses are slightly stronger than the previous one, but you still shouldn't have special trouble with it. Destroy the enemy, wait for reinforcements, gather the army and go south through a bridge which will appear after a short while. Zerg defense will become stronger, as the protoss commander will notice.
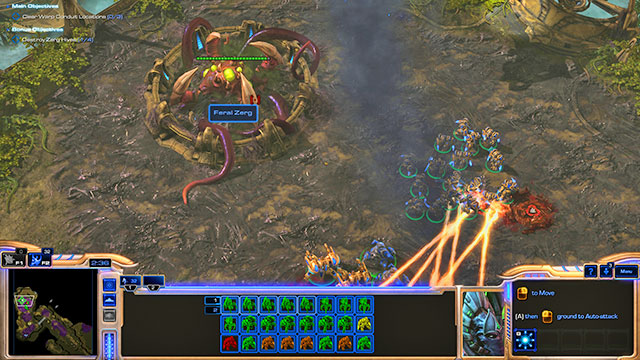
![Keep walking south after defeating the zerg [9] and destroy the fourth hive [H4] - Mission 1 - For Aiur! - Campaign - Legacy of the Void - StarCraft II: Legacy of the Void - Game Guide and Walkthrough](https://game.lhg100.com/Article/UploadFiles/201512/2015121709521430.jpg)
Keep walking south after defeating the zerg [9] and destroy the fourth hive [H4]. Return to the location of the previous battle [9] and go north from there. You will face two enemy groups [10][W3] separated with a piece of empty territory. Defense here will be very strong and it will consist of many infantry units, mutalisks and nydus worms which can call for reinforcements. But if you managed your army efficiently, you should have army strong enough to easily defeat zerg. Three hybrids which will appear between [10] and [W3] once you get there shouldn't threaten you as well, similarly to three others which will appear in [10] after getting rid of the zerg. If you managed to keep all colossus units alive, fighting hybrids will be very easy. No matter the situation, concentrate fire on a single opponent and start attacking the next one only after the previous one is dead.
The last warp conduit [W3] doesn't need to be cleaned. Eliminate all its defenders and kill the hybrids and the mission will be considered as completed.
Location: Aiur
Main objectives:
Side objectives:
Reward for completing main objectives:
Reward for completing side objectives:
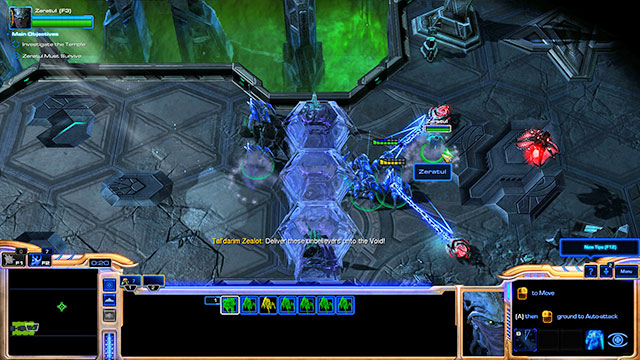
This mission is divided into three parts. First you will be controlling three stalker units. Move in the direction pointed by the game. You will have few skirmishes with zerglings and mutalisks, but you shouldn't have bigger trouble with defeating them. Complete orders received from the game until you reach an abandoned base [1].
After the cutscene and changing the map, you will gain control of the base [1]. It is small, but it should be enough for starters. Build additional pylon to restore the power in the inactive buildings. Quickly start gathering gas and don't forget about constructing additional pylons - you have very small number of command points.
Improve your forces. In addition to additional probes, train few zealots. Gather your army and go through the only available path. A void pylon can be found in the [V1] point. Once you walk to it, you will receive reinforcements.
Additional resources can be found nearby. You will find plenty of them on the whole map, so keep attention to your surroundings. Next ones can be found for example by walking through the path north from [X]. During the journey for the resources you should receive information about a zerg attack. Return to the base and repel the attack. Keep creating new zealots and stalkers all that time. Once you have about 18 units, go west. You will find other resources [2] with few buried zerg guarding it. A while further [3] you will find a small and weakly guarded enemy construction. Destroy it.
Slightly north [V2] you will find resources and another void pylon. Keep creating new units during the battle. Once the area is clear, bring the reinforcements and walk ahead.
![A second, much bigger enemy base can be found north [4] - Mission 2 - The Growing Shadow - Campaign - Legacy of the Void - StarCraft II: Legacy of the Void - Game Guide and Walkthrough](https://game.lhg100.com/Article/UploadFiles/201512/2015121709521554.jpg)
A second, much bigger enemy base can be found north [4]. If you have collected units from both void pylons and you were constantly producing new zealots and stalkers, you should be able to storm the base. However, if you need additional resources and soldiers, on the right [V3], behind the cliff, you will find the third void pylon.
![Go to the place marked by the game [5] - Mission 2 - The Growing Shadow - Campaign - Legacy of the Void - StarCraft II: Legacy of the Void - Game Guide and Walkthrough](https://game.lhg100.com/Article/UploadFiles/201512/2015121709521513.jpg)
Go to the place marked by the game [5]. The base will be empty except for few enemy zealots. Kill them. Now you will watch a short scene.
Once the cutscene is over and the map will change again, you will control Zeratul and four stalkers. Keep waking ahead, teleporting through obstacles and defeating small enemy groups on your way. The path is straight, so you will definitely not get lost. Few times you will see battles between protoss. After a moment the battle will be stopped and the enemies will attack you instead. Each time you should wait for the enemies to bleed out and attack them only once they turn against you. This will make each battle easier. Don't forget about using Zeratul's skills as well. Most of the battles will be easy, you will face a larger group only once you get near Artanis [6]. Despite that, the group shouldn't be a big threat to you. Once you reach Artanis, the mission will end successfully.
Location: Aiur
Main objectives:
Side objectives:
Reward for completing main objectives:
Reward for completing side objectives:
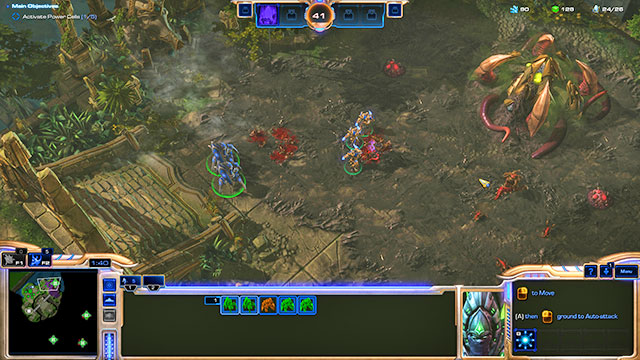
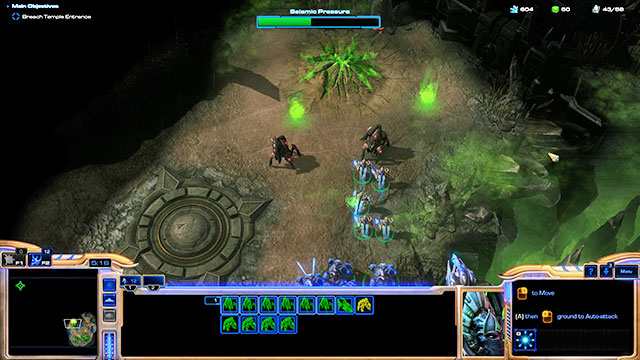
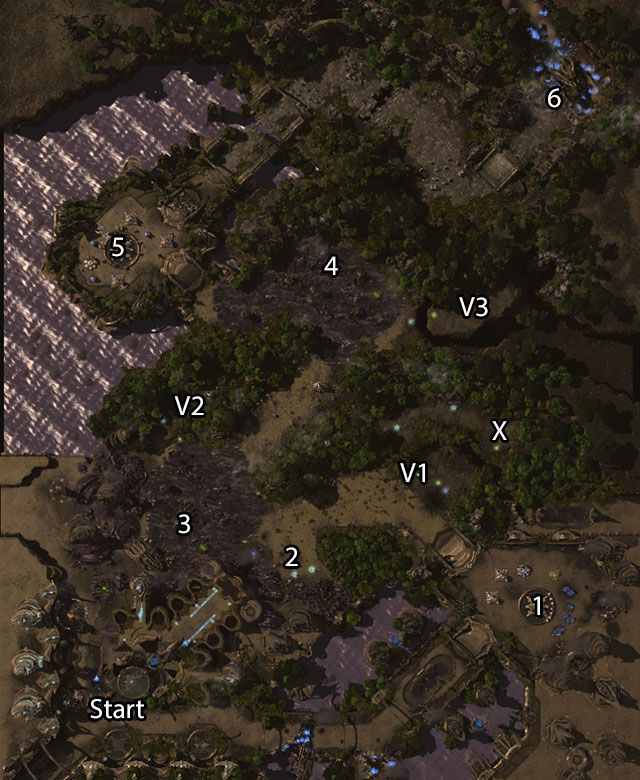
You start with a small base and few units. Your objective is to activate all power cells [P1-P5] scattered through the map. You will be able to do it with the help of Spear of Adun's abilities. Use the deploy pylon in the eastern part of the base just after the mission starts. This will power up the buildings that can be found there. Now start building few zealots. Send the increased army to two closest power cells [P1][P2]. In the [P1] point you will face a weak zerg resistance.
Return to the base. Once activated power cells cannot be turned off, so don't move your defenses outside the starting point. Produce more workers. However, don't build new warp gates since you will receive them for free very soon. Once you increase the size of your army to around 15 units, go left. In the [W1-W3] points you will find three inactive warp gates which require you to only build a pylon. Build it by using a worker or the deploy pylon ability. You can place two photon cannons nearby for safety, but the buildings are positioned aside, in a place that isn't frequently visited by the enemy. Chances that it will be attacked are very small. You will find some additional resources here. There aren't many of them on the map, but there is enough to make your task easier.
Small groups of enemies can be found on the map - both protoss and zerg. You will face units and fortifications, in most cases they will be weak. Their main bases [BP][BZ] are positioned in remote locations. Attacking them isn't required for completing the mission. However, be ready for enemy attacks occurring from time to time. Keep improving your military by investing both in zealots and stalkers. Use warp gates to recruit them as close to the main forces as possible.
![Four nydus worms will appear near [P1] and [P2] after activating the third power cell - Mission 3 - The Spear of Adun - Campaign - Legacy of the Void - StarCraft II: Legacy of the Void - Game Guide and Walkthrough](https://game.lhg100.com/Article/UploadFiles/201512/2015121709521526.jpg)
Four nydus worms will appear near [P1] and [P2] after activating the third power cell. These enemies are creating zerg units. However, there won't be many of these units, so even a weak defense should take care of them. Eliminate the sources of the enemies before you continue the main objective.
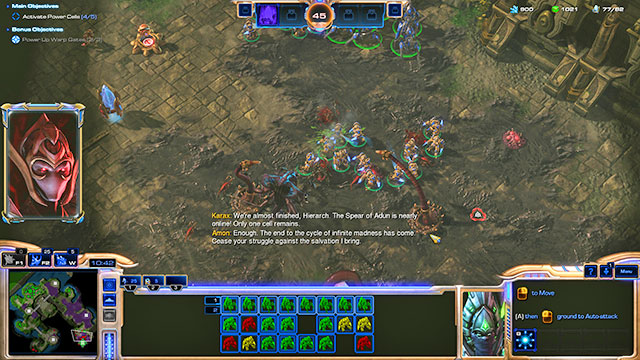
Another group of nydus worms, this time six of them, will appear when you activate the fourth power cell. In order to avoid fighting them, create a strong army consisting of more than 50 units and then send it to the power cell. Select [P3] or [P4], leaving the [P5] as the last one. Clean the area, activate the power cell and go immediately towards the [P5]. The place is strongly protected, you will find a hybrid among the enemies, but with large enough army you should manage to win. Of course, you must also have a strongly protected base that will be able to survive the attack of nydus worms. Add few photon cannons and keep few units nearby just in case.
The mission will be considered as completed immediately after you activate the fifth power cell, even if not all nydus worms were killed.
Location: Shakuras
Main objectives:
Side objectives:
Reward for completing main objectives:
Reward for completing side objectives:
You start with a nicely developed base, small group of workers and four dark templars. There is a warp conduit [W] above the base. It will be attacked by the void thrasher [1] few seconds after the mission starts. After shooting at it from the orbit, attack it with dark templars. Void thrasher is a strong unit, but it will be showing you the place which it is going to attack. Keep attention to where are your units and immediately remove them from the dangerous area while attacking the thrasher. It should drop dead after a short battle.
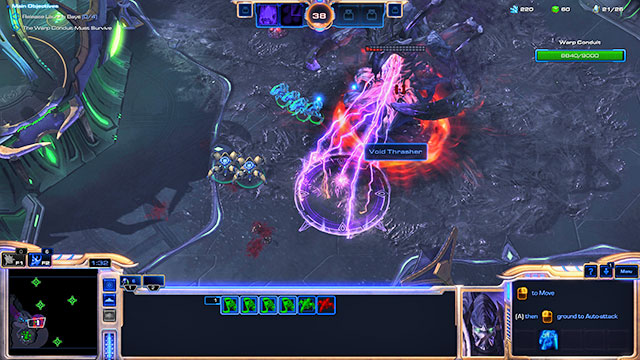
If you're afraid that the dark templars alone might prove to be not enough, recruit few units immediately after the mission starts. They should be ready when the thrasher arrives.
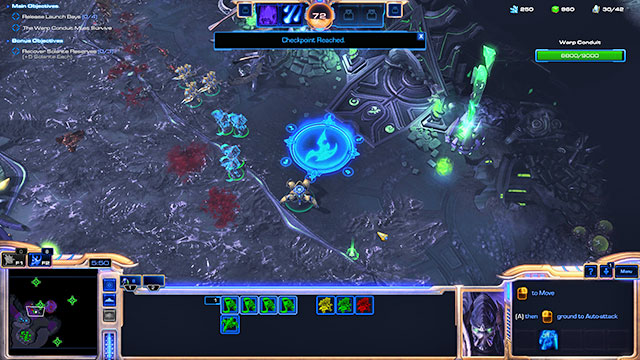
Focus on developing the base once the threat is eliminated. Create more workers, increase your army size. Vary the unit types you use, creating dark templars, stalkers and zealots. Temporarily keep them all at the entrance to the base so that they will repel occasional enemy attacks. Once you gather around 20 units, go north. In the meantime you should receive information about solarite resources [S1-S3] available on the map. The closest one is near the base [S1]. Additional resources can be found nearby as well.
The second [2] and all other void thrashers will appear no matter whether you will be cleaning the launch bays or you leave them alone. Due to that, it might happen that you will fight the last thrasher while the main objective isn't even started. Don't worry about that, as the mission doesn't have any time limit. As long as the warp conduit survives, you can take as much time as you want.
The order in which you clean the launch bays [3-6] depends only on you, but it is a good idea to do it in the order in which the void thrashers appear. Thanks to that, you won't have to wander through the whole map in order to destroy them. Additionally, when going to [4] you can get rid of zerg base in the [Z1] point. The base isn't large or well protected, so you don't need to send large forces against it. 15 units of different type should be enough. The zerg base [Z1] is not the only on the map. A second, much larger and better protected can be found in the eastern part of the map [Z2], but you don't have to destroy it. In addition to that, there are single groups of units and fortifications on the map, with which a large army should have no trouble dealing.
![Once you destroy the smaller zerg base, you will have an easy access to the second stock of solarite [S2] and to the second launch bay [4] - Mission 4 - Amons Reach - Campaign - Legacy of the Void - StarCraft II: Legacy of the Void - Game Guide and Walkthrough](https://game.lhg100.com/Article/UploadFiles/201512/2015121709521632.jpg)
Once you destroy the smaller zerg base, you will have an easy access to the second stock of solarite [S2] and to the second launch bay [4]. If the thrasher hasn't appeared yet, leave most of your forces there and take the rest back to protect your base. Let the remaining forces get rid of the defense buildings and detectors whose presence might make the battle with the monster harder.
All that time, keep developing the base and creating new units. Enemy attacks will be rare and your building abilities limited, so just create melee and ranged units in similar numbers. When going at thrashers, remember about dividing your forces into smaller groups. The monsters have attacks with area of effect and it will be harder to evacuate large groups from the attack area. Going with too large army at once is an easy way to lose many units.
The strength of the thrashers and their support will be much greater in the eastern part of the map [8][9]. The last one [9] will be accompanied by a large group of zerg and defense buildings. You can avoid facing him if you will rush completing the mission - it will simply be late to appear. You can also send a large group of units there earlier, it will get rid of the zerg and wait for the thrasher. However, in that case it would be more practical to clean the launch bay and retreat. The mission ends once all four launch bays are working. It doesn't matter whether you kill all thrashers or not. You can ignore the two last monsters or clean the launch bays before they manage to appear.
Location: Shakuras
Main objectives:
Side objectives:
Reward for completing main objectives:
Reward for completing side objectives:
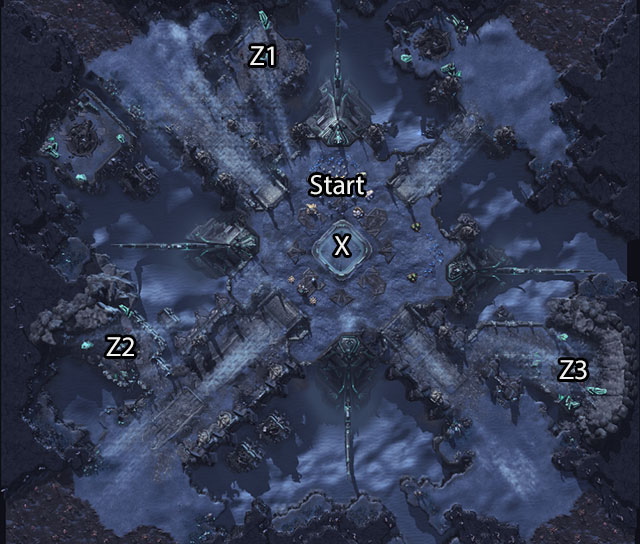
A simple defensive mission. You have a well developed base, place to set another one and a modest army. Immediately start training new workers and send the army to destroy the zenith stones [Z1-Z3]. In theory these buildings are supposed to wound your soldiers, but they will be doing it very rarely. Nearby zerg might be more troublesome. Whenever you see zerg near the building, first get rid of them and then of the construction.
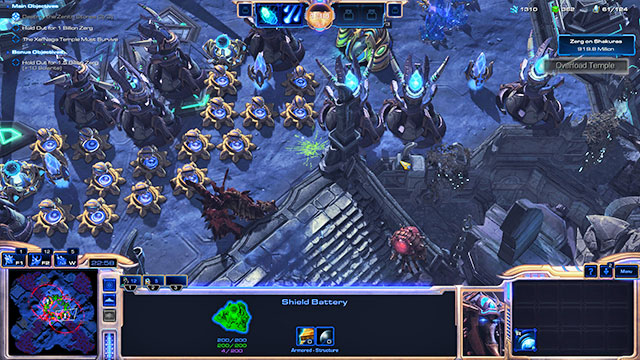
Start improving your defenses while destroying the buildings. First create a small group of melee and ranged fighting units which you will move to endangered positions. At the same time, place pylons on the top of each stairs and start building turrets. You must block all entrances, so the pylons must be positioned slightly behind or on the sides of turrets. In addition to photon cannons and khaydarin monoliths, you will also need shield batteries to automatically regenerate turret's shields. There should be more photon cannons than anything else, and the monoliths should be the second in quantity. You should build a wall of cannons, thus blocking access to other defense lines and the base. Monoliths should be positioned on the most advanced positions, at the side of the stairs. Their range is very high, allowing them to attack the stairs and thus making the battle easier for photon cannons. They will also eliminate aerial enemy units which have too long reach. It is also wise to position them behind the photon cannons, so that both turret types will be able to attack simultaneously. Shield batteries should be placed in such ways that a single one will be able to load few turrets at once.
The rest of the mission will be about constant defending. Block all entrances. Build turrets but don't forget about training units as well. The attacks will come from all four corners of the map, so sometimes you must reinforce some sides. Use resources on new buildings and upgrades of the already existing ones, build your army with what will remain. You will receive the additional objective around 22 minute and it can be completed around 30 minute. With strong enough fortifications you will be able to survive even much longer.
As you progress in the mission, the enemy attacks will become stronger. At first, enemy positions will be located only in the corners of the map, but then they will get closer to the stairs. Zergling attacks soon will be accompanied by hydralisks and ultralisks and later in the mission you will also face many aerial units and hybrids. At first the attacks will come from single directions, but expect simultaneous assaults even on all entrances at once after a while. There will be too much enemies to even think about counterattacking, so don't even think about leaving an open entrance to the temple. Don't forget to position few turrets around the temple or place a strong patrol group there, as the enemy will be using alighting.
You can also position few melee fighting units in front of the wall. They will focus the first zerg assault on them. Stalkers can prove to be very useful here due to their ability to teleport on short distance. Centurions will stun enemy units, allowing the turrets to quickly finish them up, and dark templars will be jumping between them, making their elimination faster. With the warp gates you will be able to teleport your units to the location of the destroyed buildings if rebuilding them will be impossible at that time, so it is wise to place even six such buildings. Don't forget about using Spear of Adun's abilities as well.
The mission ends once you reach the required objectives and once you will press the temple reload button. Reload can be done at any time, even when all the defense lines have fallen and the enemies will start destroying your base. Because of that, wait with the decision for as long as you need, even if you will no longer have anything to protect yourself.
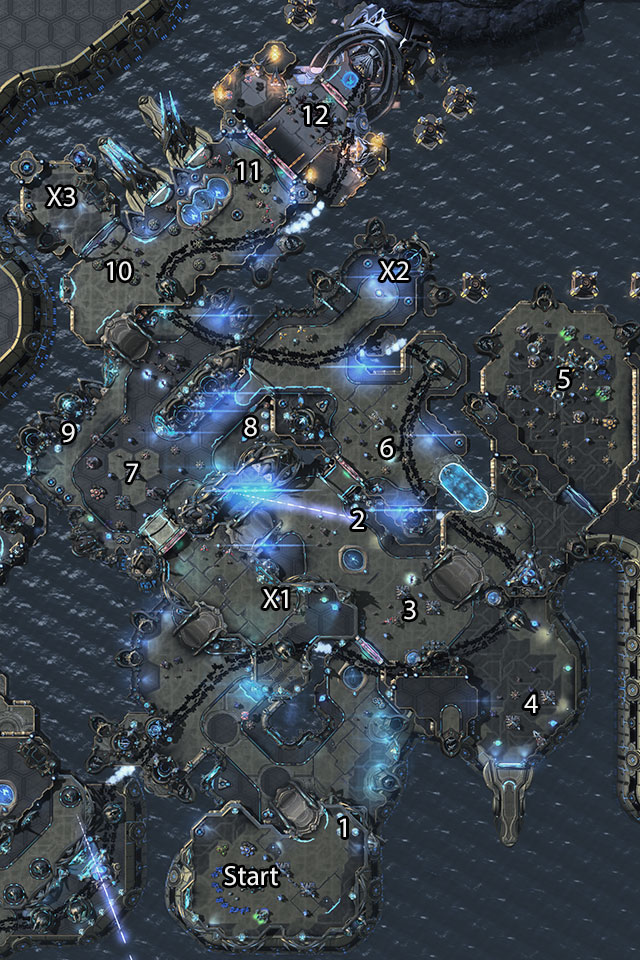
Location: Glacius
Main objectives:
Side objectives:
Reward for completing main objectives:
Reward for completing side objectives:
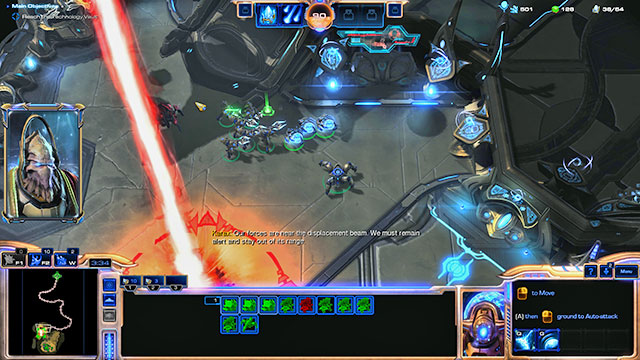
You start in the southern part of the map. You will have a well developed base and a very small army. After a while, the path of Tal'Darim laser will appear on the map. It will reach the technology vault after about 20 minutes of the game. It is enough time to complete all objectives. Check the minimap frequently to see where the beam is currently. It is important during the march, especially with large groups of units.
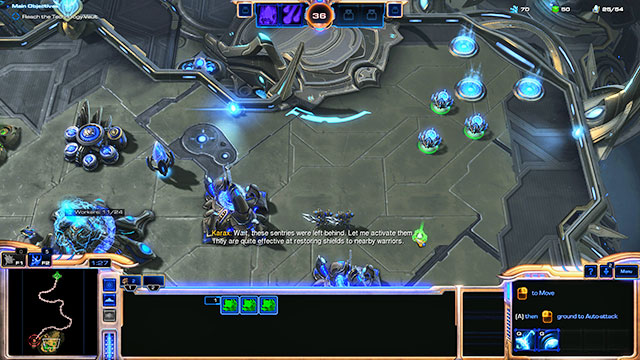
Produce the workers and create few additional units. After about 90 seconds from the start of the mission you will receive information about sentry units held near the base. Walk to them and they will join you [1]. Few other groups are scattered across the map. You will find them while you make your way to the technology vault. You will also find containers with additional resources while exploring the map.
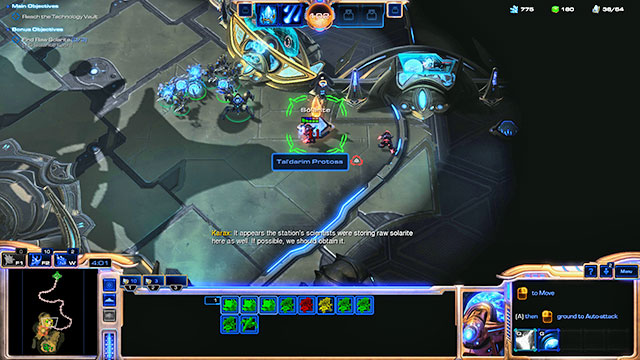
First, focus on developing the base. You have plenty of time, so build additional warp gates and train around 20 melee and ranged fighting units. Don't forget about placing few photon cannons at the base entrance. Once you gather a strong assault team, go north, while watching out for the ray moving through the map. You will face small enemy groups which your army should easily deal with. In the [X1] point you will find the first solarite container.
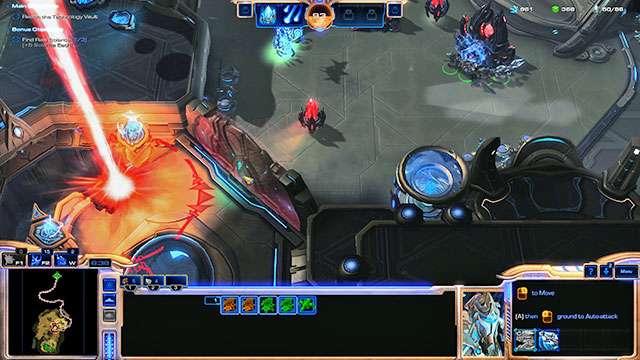
Go north while at the same time improving the base and creating new units. Gather another sentry [2] group. South [3] from that place you will find enemy base. Gather the reinforcements and destroy it. After destroying the pylon that is most advanced south, you will open a previously blocked shortcut.
Another, much bigger enemy base can be found north [5], but you won't have time or need to attack it. You can instead send the army to the east in order to destroy a smaller enemy outpost [4] and to collect few resource containers.
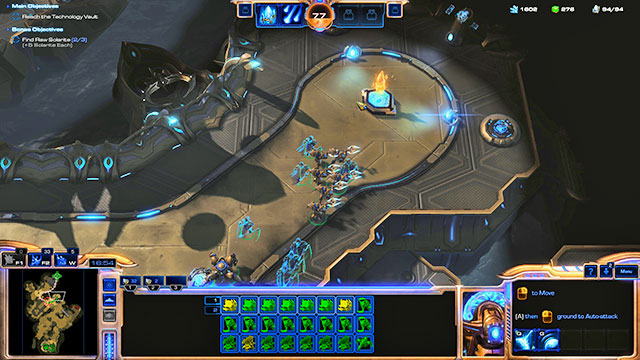
Summon another group of units from the base and go north. Behind the bridge you will find weak enemy fortifications [6] and a pylon that blocks another shortcut. Slightly further north there is another solarite container [X2].
Keep producing new units and keep them ready to march. If you have the deploy pylon ability, you can combine it with warp gates in order to summon units to the position of your main army. It will allow you to spare the time needed for the reinforcements to reach the main forces.
![Go south and destroy another enemy base [7] - Mission 6 - Forbidden Weapon - Campaign - Legacy of the Void - StarCraft II: Legacy of the Void - Game Guide and Walkthrough](https://game.lhg100.com/Article/UploadFiles/201512/2015121709521818.jpg)
Go south and destroy another enemy base [7]. Open the next shortcut and free another two sentry groups [8][9]. Summon the reinforcements from the base and go ahead. On the north [10] in addition to enemy units you will have to fight defense systems of the facility which consists of differently looking photon cannons. They will be powered by war prisms which will also summon enemy reinforcements. The presence of the turrets and additional units will not change the fact that enemy defenses will prove to be very weak. Once you destroy the enemy, go left and collect the last solarite container [X3].
![Two enemy fortifications [11][12] are ahead of you - Mission 6 - Forbidden Weapon - Campaign - Legacy of the Void - StarCraft II: Legacy of the Void - Game Guide and Walkthrough](https://game.lhg100.com/Article/UploadFiles/201512/2015121709521851.jpg)
Two enemy fortifications [11][12] are ahead of you. The greatest problem in the first one will be the shield batteries repairing enemy shields. Try to lure enemy units outside its reach and concentrate all your units on a single building while destroying the constructions. You can leave the shield batteries for the end. If you have a very large army, you can simply perform a frontal attack instead. Enemy units are so weak that they will not be able to withstand it.
Don't forget to destroy the pylon powering the battery up. As for the second fortifications [12], there will be more shield batteries and less enemy units, so the battle should be much shorter. Destroy the pylon powering the battery up and enter the technology vault.
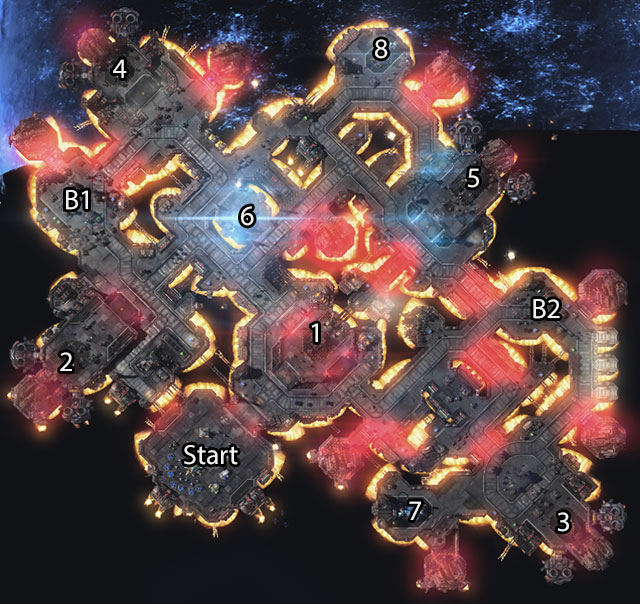
Location: Korhal
Main objectives:
Side objectives:
Reward for completing main objectives:
Reward for completing side objectives:
![Gather all your troops and send them towards the first sky shield stabilizer [1] just after the mission starts - Mission 7 - Sky Shield - Campaign - Legacy of the Void - StarCraft II: Legacy of the Void - Game Guide and Walkthrough](https://game.lhg100.com/Article/UploadFiles/201512/2015121709521909.jpg)
Gather all your troops and send them towards the first sky shield stabilizer [1] just after the mission starts. The defenses will be very weak, you should eliminate it quickly. Securing each building will provide you with 5 minutes of additional time for completing the mission. At the start of the mission, the time limit is 10 minutes. It means that you have 30 minutes in total to secure all five buildings (10 base minutes and a total of 20 minutes for four stabilizers), but only if you will do it in regular time intervals. Once secured, a stabilizer cannot be lost, so don't waste time on building any fortifications around it and don't leave units to protect it. Raynor men will appear after securing the first stabilizer. They will place a listening tower which will inform you about the incoming attacks. At the next stabilizers Raynor will be building towers and/or bunkers with crew.
Create more workers and few additional units in the base. The mission has a time limit, but it isn't so short for you to rush building the offensive. The map is swarming with enemies, but they are scattered in small groups. A large army will defeat them faster than you can notice. You will also find many resource containers on the map. While going towards the next stabilizers, look around and explore the side paths. This will allow you to build the army faster, and thus complete the mission quicker.
![You will receive information about three EMP scramblers after gathering an army of around 15 units and moving them towards the next stabilizer ([2] or [3]) - Mission 7 - Sky Shield - Campaign - Legacy of the Void - StarCraft II: Legacy of the Void - Game Guide and Walkthrough](https://game.lhg100.com/Article/UploadFiles/201512/2015121709521911.jpg)
You will receive information about three EMP scramblers after gathering an army of around 15 units and moving them towards the next stabilizer ([2] or [3]). These buildings are destroying shields of nearby units. However, they are not resistant nor too well guarded, so you don't need to hurry with destroying them. When you do start attacking them, first get rid of the units supporting them and then take care of the buildings. It will be faster and cheaper as you will lose more units while destroying the building and ignoring its defenses than other way around.
![In addition to the mission objectives and small enemy groups and fortifications, you will find two enemy bases [B1][B2] on the map - Mission 7 - Sky Shield - Campaign - Legacy of the Void - StarCraft II: Legacy of the Void - Game Guide and Walkthrough](https://game.lhg100.com/Article/UploadFiles/201512/2015121709521929.jpg)
In addition to the mission objectives and small enemy groups and fortifications, you will find two enemy bases [B1][B2] on the map. Destroying them is not required, but when you do it Raynor will build his bases there. The ally will start producing new units and attacking the enemy, which will make completing the mission much easier. Because of that, it is a good idea to secure the stabilizer [7], then destroy the [B1] enemy base, retreat, secure the stabilizer [8] and destroy the second base [B2]. Thanks to that, destroying the EMP scramblers and securing the two remaining stabilizers will be a piece of cake.
Enemy defense will become stronger after securing the second stabilizer. Infantry units will be reinforced with siege tanks, bunkers and aerial units. Because of that, your each next attack should be stronger than the previous one. It is best to create a new army whenever you send another one to battle. Position the new army in the entrance to the base and they will additionally serve as the defense. Base defense doesn't need to be large nor very varied because enemy attacks will be rare, weak and focusing always on the main entrance to your base. Just remember to have at least few stalkers or photon cannons nearby in case of an aerial attack.
No matter how much time remains, the mission will end when you secure the last stabilizer. You can use that for your advantage - keep gathering the army until around 5 minutes remain and start attacking only after that. This will allow you to calmly defeat the enemy and secure the building and to create a good enough army for completing that objective.
As for the base development, you can focus on whatever units you prefer. The enemy will have many infantry units, aerial support and buildings, so it is a good idea to train many melee fighting units accompanied by ranged fighting units. It is best to mix large numbers of zealots with few dark templars and support them with stalkers. Such army should deal with any threat.
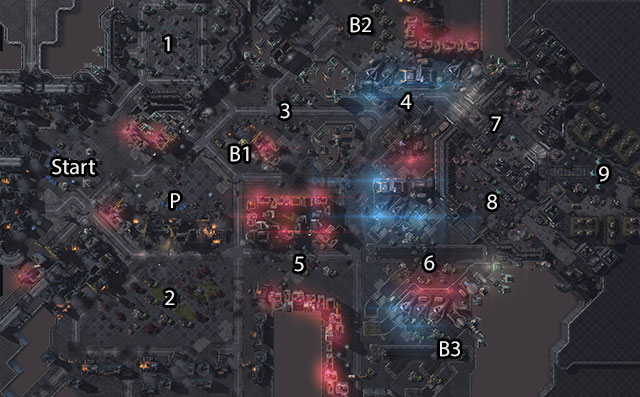
Location: Korhal
Main objectives:
Side objectives:
Reward for completing main objectives:
Reward for completing side objectives:
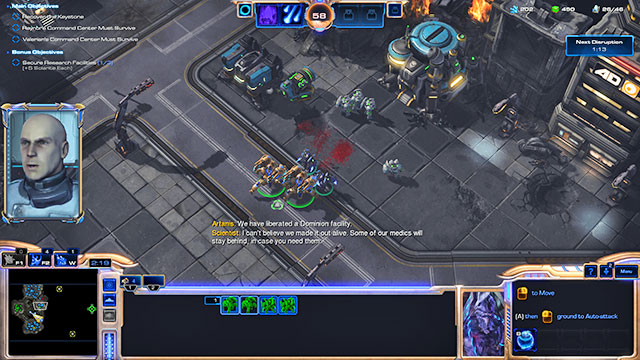
You start with a weakly developed base. Luckily, your allies [1][2] are strong enough to easily repel attacks of enemy terran. Raynor will call to you as first and you will learn Valerian's position after the first minute of the game. Despite what Valerian will say, for now he will not need your help. Train few zealots and send all your army towards the first research facility [B1]. Get rid of all enemies that are attacking it. Get back here whenever your infantry will need healing.
Keystone will be activated for the first time when the mission counter shows 3:30. At that point all terrans on the map, including enemy ones, will become inactive. You will also receive information from which side hybrids are coming. Based on that you can determine which allied base will be attacked as the hybrids are always attacking in straight line.
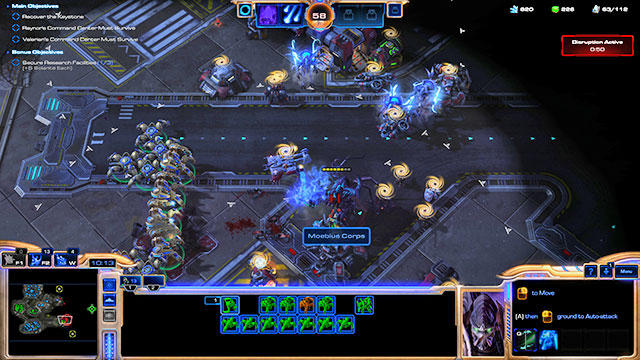
Despite what your advisors will tell you, you don't need to choose between attacking the enemy and protecting the allies. Simply gather your army and go against hybrids instead of standing in one place. Destroy all units and buildings of the enemy on your way. When the hybrid will get close to your units, ignore the terran and throw everything you got on them. Go back to the work of destruction once the hybrid is dead. Be prepared that the terrans will wake up after a moment. In that case, retreat and let the allies continue their battle.
The only attacks on your base will come through the central road, right from the [B1] facility. The target of the attack will be either the main base or the second one which you can build in [P]. Terran attacks will occur only between the activations of the keystone, so it is a good idea to collect whole army in [B1] point, wait for the activation of the keystone, attack, destroy whatever you can and then return to the research station. As the frontline moves, terran attacks will become smaller, so later in the mission you will not have to worry about defense.
![Every time you clean the enemy outposts ([3-6], your allies will start building their defense positions there - Mission 8 - Brothers in Arms - Campaign - Legacy of the Void - StarCraft II: Legacy of the Void - Game Guide and Walkthrough](https://game.lhg100.com/Article/UploadFiles/201512/2015121709522088.jpg)
Every time you clean the enemy outposts ([3-6], your allies will start building their defense positions there. Their defenses will consist of bunkers and siege tanks. Allies' positions will be guarded enough for you not to worry about helping them during terran attacks, at least since all their fortifications are completed. But you must take them in consideration when the keystone is active, as the hybrids that are attacking you can destroy the outposts on their way to the bases of your allies [1][2]. In addition to that, it is worth using all allied outposts as a place to create new units. Build a pylon nearby and gather all units directly to the battlefield instead of forcing them to a long march from the main base.
The moment when you take over and secure the positions [3][5] is always a great occasion to save the researchers from [B2] and [B3]. The allies will be so close that in case of trouble you can quickly retreat to them. Don't forget about gathering the resource containers scattered across the map while exploring. Taking over [4][6] positions will be slightly harder, but easy enough for your allies to do it on their own.
![The main enemy base has two entrances [7][8] which will be attacked separately by your allies - Mission 8 - Brothers in Arms - Campaign - Legacy of the Void - StarCraft II: Legacy of the Void - Game Guide and Walkthrough](https://game.lhg100.com/Article/UploadFiles/201512/2015121709522076.jpg)
The main enemy base has two entrances [7][8] which will be attacked separately by your allies. You can strike at them on your own, sparing your allies the effort, but you can also wait for Raynor and Valerian to start destroying them. It will take a bit more time, mostly due to the hybrids that can be found there. It is more practical to attack one of the entrances when the keystone is active, destroy whatever you can, move to the second one, repeat the destruction, then retreat and let the terrans finish the job. Thanks to that, during the attack on the keystone [9] you will be able to count on terran reinforcements. It is important, since the artifact is protected by hybrids - every aid will be helpful in the battle.
If you don't feel like waiting so long and destroying all enemy buildings, you can wait until the keystone activates, attack one of the base entrances and then immediately move at the artifact. The mission ends automatically when you destroy the building that is holding it, so you don't have to kill all hybrids protecting it.
During this mission you have access to immortal units, it is wise to use them as protection for stalkers. Your army should consist of large number of zealots which will focus the attacks of hybrids and dark templars who will be tasked with dealing high damage to hybrids. You will need stalkers for destroying single enemy flying units which you will face from time to time. On the normal difficulty level you can complete the game having one base. On higher difficulties building another one is a necessity.
Location: Ulnar
Main objectives:
Side objectives:
Reward for completing main objectives:
Reward for completing side objectives:
You start with a small base, but basically you can start producing units immediately. Near the [1] there is a place for another base which you should build later in the mission. Five celestial locks [1L-5L] are scattered through the map but three of them are close to your base. They should be your main target during the early phase of the mission.
The mission doesn't have any time limit, so start with calmly improving your base. You will need some melee fighting and ranged units. Enemy attacks will be rare and not strong, so you can resign from creating turrets and protect yourself only with units. Gather around 20 units of different type and go conquer the first celestial lock [1L][2L] or [3L]. It doesn't matter which one you pick as long as it is near the base. Once you reach it, you will discover it isn't well guarded. Stand next to the building after killing all enemies. A progress bar will appear. A moment later the building will belong to you. You will recognize it by the change of the color from red to green.
In difference to many previous missions, celestial locks can be reclaimed by the enemy. All he needs to do is stand next to them when there are no buildings or units that belong to you. Because of that, you must prepare defense. You can choose - placing pylons and few photon cannons there or only pylons in order to quickly teleport units. The first solution is better. Few well positioned turrets will be able to repel most of the attacks, and in case of trouble you can send reinforcements through the pylon. An optimal number of photon cannons are eight, four per road. Position them in such way that they will support each other. You should also build one or two shield batteries for them so that they will be able to withstand more in battle.
You can also create a rapid reaction unit just in case and position it between the claimed celestial locks (points [4] and [5] depending on which buildings you have taken over. From both these places you will have quick access to three buildings). Send such group, consisting of ten and more stalkers, to the attacked celestial locks in order to help the defenders. If you combine all three methods, the enemy shouldn't be able to reclaim the buildings.
In addition to single unit groups and fortifications, the enemy has two bases - protoss [2] and terran [3]. Both bases are definitely too strong for you to destroy them. There is no need to do it anyway, as the enemy attacks won't be too dangerous. You must only create proper defenses of the base and celestial locks. The latter will be the priority for the enemy and you should focus on it.
Improve the base and create second one [1] as well. Gather resources, upgrade your units and improve the size of your army. Claim the second celestial lock once you secure the first one. Its defense will be slightly stronger, similarly to the next ones, but you will destroy it with a large enough army. Don't leave the buildings unprotected, unless you want to lose them. Around the fifth minute you will receive information about the titanic warp prism which will patrol the northeastern part of the map (points [6][7][8]). Ignore it for now.
A mistake when attacking the defenses of the titanic war prism - too little units able to attack aerial targets.
Focus on building the army after taking over and securing three celestial locks. Gather more than 40 units of different type. You will mostly need shooting units that are able to attack aerial targets and you will need flying phoenixes. Go towards the point [6], wait for the titanic warp prism and attack it. Focus on the defenders of the ship, mostly very large void rays and scouts. Ignore the titanic warp prism for now, it won't hurt you. Destroy the defenses and focus on the main target. If it escapes, wait for it to return to point [6] and attack it again. Don't chase it, as it will stop above one of the platforms on the north part of the map and there it will have land backup. You will probably not have more infantry units than aerial ones, so the chase will have no sense at all anyway. Wait for the ship to return and get rid of it.
Take over the last celestial locks after destroying the titanic warp prism. The mission will end when you will take over the last of them. If during the battle you have lost one of the buildings, don't worry. This will matter only for the achievements you unlock. In theory you can lose and reclaim the celestial locks infinitely, or at least until the resources on the map depletes.
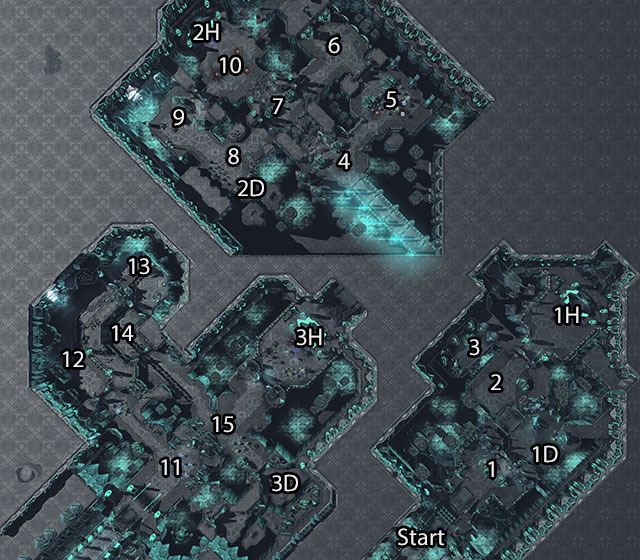
Location: Ulnar
Main objectives:
Side objectives:
Reward for completing main objectives:
Reward for completing side objectives:
The mission is divided into three parts. You will have control of two heroes. Artanis is able to perform a combat slide, he can cheat death for one minute, heal himself and Kerrigan, immediately regenerate shield and he can regain durability. Kerrigan is able to deal high damage to single targets, her attacks wound few enemies at once and she can summon a large group of banelings. Kerrigan's abilities require energy, Artanis' abilities require only time to regenerate. Remember that you can switch between the characters with the TAB key and about the keyboard shortcuts to their abilities. It is important, as during this mission you won't have access to Spear of Adun's abilities.
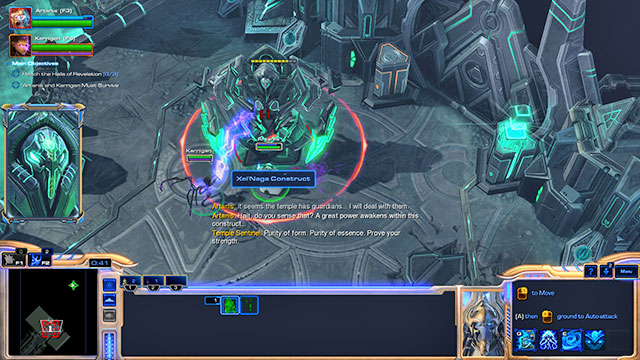
Walk ahead. In point [1] you will have to fight with a small group of enemies and then with a large temple guard. His attacks will be strong and not always signalized before they occur, so remember about Artanis' healing ability. If you won't be fast enough or you're not able to heal the hero, let him die and regain all health points and shield with the resurgence skill. Remember to let Artanis rest and regenerate the ability after each time he cheats death.

After the door will open, go forth. On the right [1D] you will find the first Xel'Naga device.
Go on ahead. First you will face hybrid [2] and then a large construct that summons smaller ones. Defeat all enemies and wait for the door to open. They will remain locked, so use the lightning dash ability to move Artanis to the other side of the cliff [3]. Go back and help Kerrigan in battle against another large construct. Stand in the [1H] location pointed by the game.
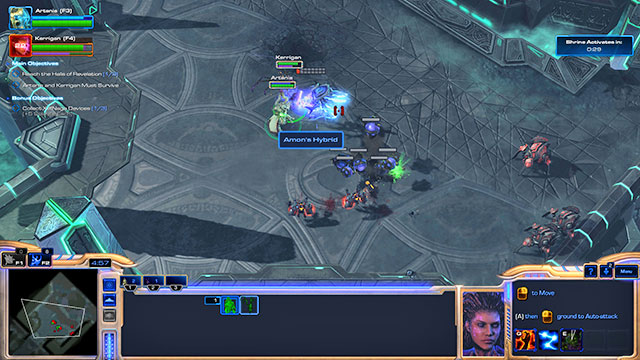
You will be attacked after the cutscene. Get rid of all enemies - first of terrans and protoss, then of hybrid. Destroy the aerial units before they are able to unload the infantry. Another cutscene will appear after a long battle.
Go forward after the map change. Many battles await you in this part of the mission, so be ready to quickly change targets and use abilities. Watch out for the laser beam [4] and destroy the nearby enemies after it disappears. A group of protoss will be large and supported by hybrids, so remember about summoning the banelings and about Artanis' healing ability.
Go right [5] after the battle. You will find protoss fighting large and small constructs. Wait for the constructs to get rid of protoss and then destroy them. There are many enemies, so watch out. Go further forward. In the next room [6] you will face a large group of terran. Repeat the massacre in [4] and go ahead. In [7] you will face hybrid, in [8] another terran. Nearby you will find the second Xel'Naga device [2D]. Go to the [9]. Wait for terrans and construct to finish the battle between them and then finish of the survivor. Wait behind another door [10] for the lasers to be turned off and prepare for battle against large groups of protoss, terran and hydras. Enemy will be coming at you in waves, giving you a short time to catch some breath. Stand in the marked location [2H] after the massacre.
After another cutscene and map change you will have six and a half minute to reach the last Hall of Revelations [3H]. First you will have to fight hybrids [11], then large groups of terran and protoss. Keep going forward, defeating enemy forces in points [12][13] and [14] and watching out for the orbital laser. In [15] you will battle another large enemy group and in [3D] you will find the last Xel'Naga device.
![You will reach [3H] - Mission 10 - The Infinite Cycle - Campaign - Legacy of the Void - StarCraft II: Legacy of the Void - Game Guide and Walkthrough](https://game.lhg100.com/Article/UploadFiles/201512/2015121709522133.jpg)
You will reach [3H]. There you will find protoss, terran and few hybrids. Start with protoss or terran, then the second of these races and leave the first hybrid for the end. After killing it, another will attack you, and then the third one. Heal your characters between each battle. Don't forget about summoning the banelings and heroes' combat abilities. Each next hybrid is stronger than the previous one, so throw everything you got at it.
Stand in the place pointed by the game once the battle ends. You will watch few scenes and a short movie cutscene after which the mission will officially end.
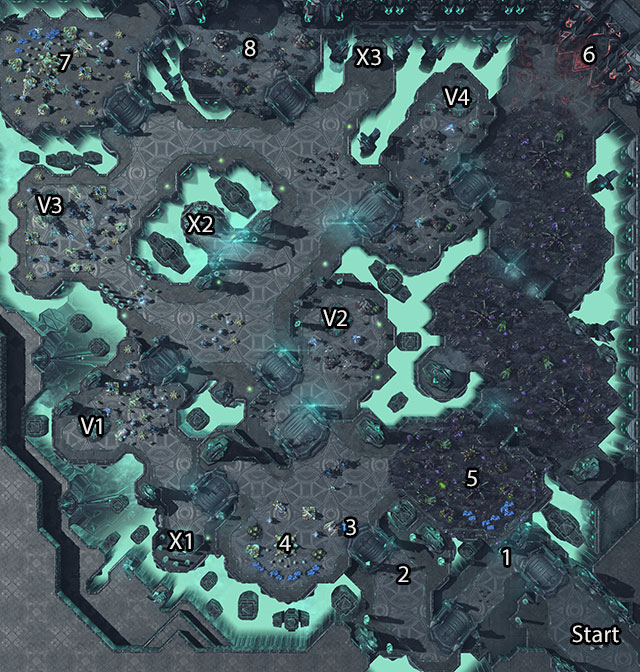
Location: Ulnar
Main objectives:
Side objectives:
Reward for completing main objectives:
Reward for completing side objectives:
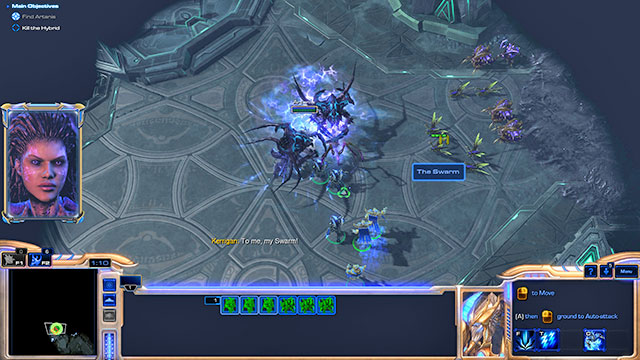
You start in the southeastern part of the map. You have access to three zealots and three high templars. Go ahead and follow the instructions given by the game. Use the psionic storm when fighting the first group of enemies [1] and use feedback to get rid of spectre when fighting the second group [2]. Stand at the top of the stairs [3]. You will see Artanis and Kerrigan fighting a hybrid. Help them.
You gain control of the base [4] after the cutscene. Your objective is to destroy the void crystals [V1-V4] scattered across the map. Small groups of zerg attacking from the main base [5] will help you in this mission. The zerg have also four other smaller bases, but these ones will be destroyed by the enemies coming from the portal [6]. Among forces coming from the portal are too strong and the portal will generate a cloud on the conquered territories. After walking into the cloud your units will receive damage. Because of that, sending help to zerg is pointless, you better focus on destroying the void crystals.
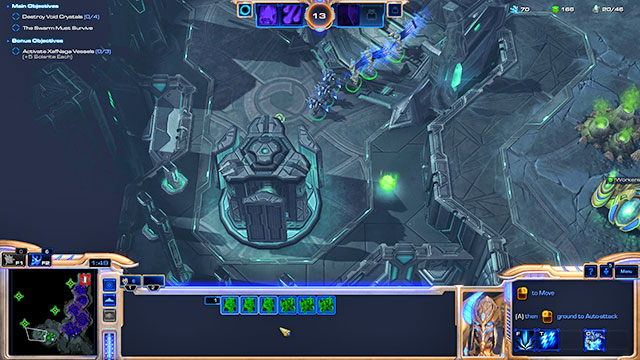
Produce additional workers using the resources you have at the start. Gather the army and go west. Activate the first Xel'Naga vessel in point [X1]. You will find two others [X2][X3] while completing the main mission objective. You will also have a chance to collect some resource containers.
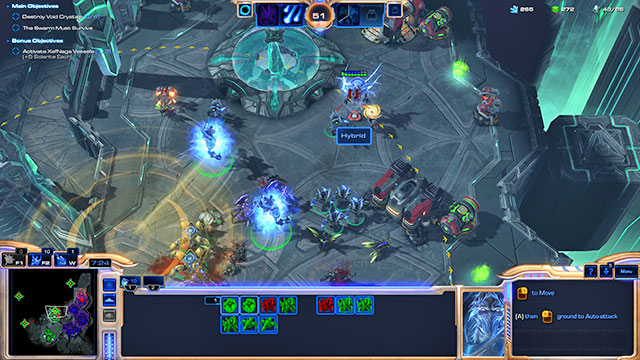
Produce another high templar and few zealots so that you have a total of 10 or more of them. If you want, you can combine four templars into two archons. Go with the whole army to destroy the first void crystal. You can choose from the [V1] standing on the sidelines or the [V2] attacked by zerg. The defenses of the target consist of few turrets, protoss or terran units and one hybrid. If needed, use Spear of Adun's abilities.
Focus on improving the base after destroying both crystals. You need more zealots and stalkers. Dark templars will come in handy as well. You will be attacked from time to time by the enemy, but similarly as during the previous missions the enemy will be a small threat to you. You will be warned about the attacks beforehand. If you want, you can set few photon cannons at the entrances to the base, but it is not mandatory.
Gather around 40 units of various type. It is a good idea to upgrade their weapon, armor and shields. Once you gathered the army, first attack the second Xel'Naga vessel [X2]. Then, together with zerg or alone, destroy the third void crystal [V3]. The base that protects it is only slightly stronger than the previous one, so you shouldn't have trouble with it. You should also have no trouble with small groups of enemies and fortifications scattered across the map. There is even a chance that you will not find them because first they will be destroyed by zerg.
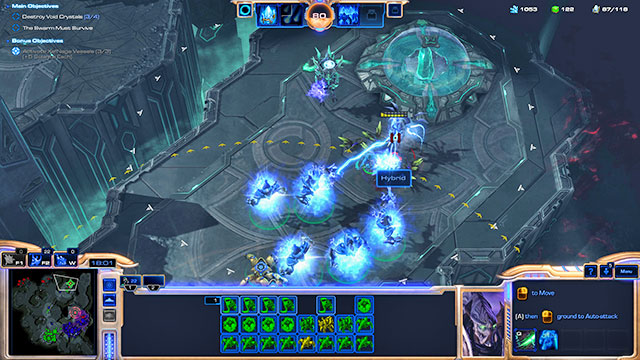
Go east. Bypass the enemy bases [7][8]. They are too heavily guarded and you don't have time to get rid of them. Activate the last Xel'Naga vessel and then together with zerg attack the fourth void crystal [V4]. First you will find terran base and hybrids. Get through them. The crystal itself is protected by other hybrids, stronger than the ones you met previously. Destroy them and then focus your fire on the building.
Zerg must survive. It means that when the last void crystal is destroyed, at least one hive and some units must survive. If you don't care about achievements, you can wait and gather your forces at the price of zerg bases which will be destroyed by Amon. Amon needs around 25 minutes to destroy all zerg, so you can safely assume that you must complete the mission in less than around 24 minutes.
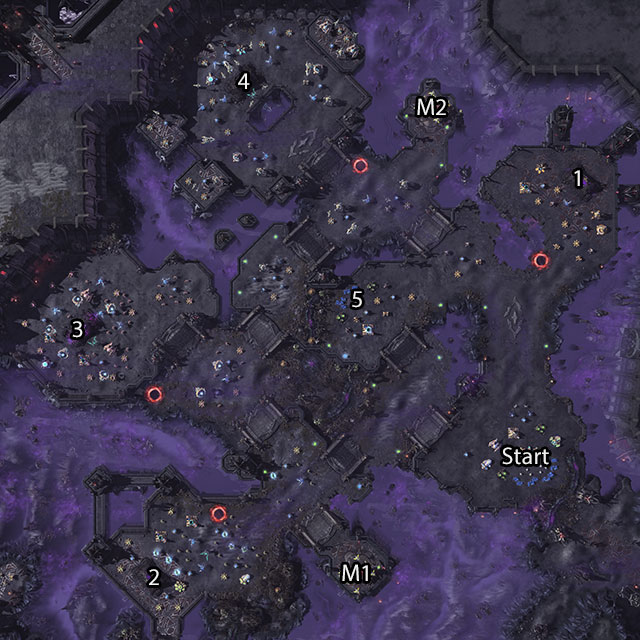
Location: Slayn
Main objectives:
Side objectives:
Reward for completing main objectives:
Reward for completing side objectives:
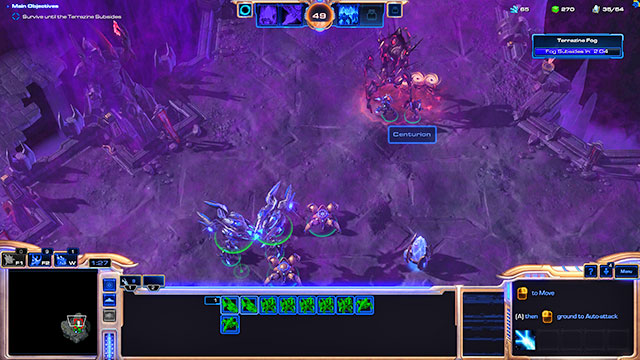
You start one minute before the terrazine fog rises. Use the starting resources to train few additional zealots, use the rest to create workers. Gather your whole army at the northern base entrance and wait for the fog to appear. Enemies walking from it will belong to every race and unit type, but they will be weaker and less resistant, so fighting them should be easier. Defend yourself for the next two and a half minute. At the same time, create new workers and develop the base.
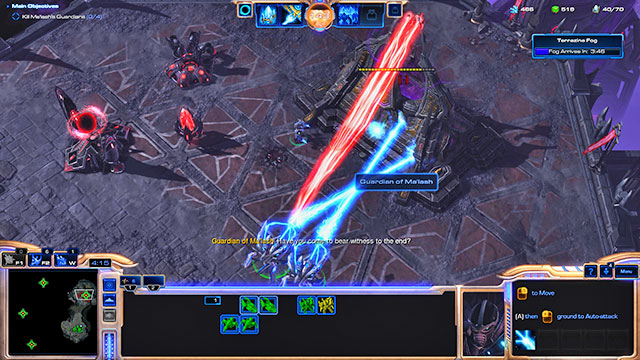
Gather the army and go north once the fog drops. You have four and half minute to reach protoss base and kill the first Ma'lash's guardian [1]. Both the base and the guardian will be easy to defeat, mostly thanks to the void rays available since this mission. Once you get rid of the enemy, finish destroying his base and retreat back. Don't forget about gathering all resource containers which you will find on your way. There will be plenty of them on the whole map. During the breaks between the fog, you will be rarely attacked and the game will inform you about it beforehand, so you can base your defenses only on units.
This mission can be completed in few ways, but one of the most effective ones is focusing on void rays. You will need some infantry units and vehicles (zealots, stalkers, immortals etc.) for protecting the base and as many upgraded void rays as possible. When the fog is raised, you must split your army between both entrances and you use them to repel everything that attacks you. Once the fog drops, you gather all void rays and you move to destroy the targets. In this way you won't be able to gather the resource containers scattered through the map, but with large number of ships you will destroy everything on your path - especially after you will upgrade the weapon and armor of your units. This tactic requires at least 10 void rays which aren't cheap, but it will allow you to kill even two guardians during single trip. If you decided to use this tactic, then keep producing new ships. 20 void rays is a force that can easily destroy all enemy bases in this mission.
![Before the fog raises for the second time, you will receive information about two motherships [M1][M2] - Mission 12 - Steps of the Rite - Campaign - Legacy of the Void - StarCraft II: Legacy of the Void - Game Guide and Walkthrough](https://game.lhg100.com/Article/UploadFiles/201512/2015121709522356.jpg)
Before the fog raises for the second time, you will receive information about two motherships [M1][M2]. It is wise to destroy them for additional solarite. Both ships have light defense consisting of lesser ships, so it is wise to attack them with a varied army of land and aerial units. The motherships aren't hard opponents despite their abilities. The only trouble can be caused by high resistance and strong shields that require longer and more intensive fire.
The order in which you kill the guardians [1-4] doesn't matter too much. However, the more far away from the base, the defense will be stronger - single hybrids will join the turrets and gradually more advanced protoss units. You don't need to destroy other buildings in enemy bases. Killing the guardian and his support will be enough, you can retreat immediately after that. After killing the fourth one the mission will be immediately considered as completed. You don't need to use the second location [5] for building the base since the resource production in the first one should be sufficient for completing the mission.
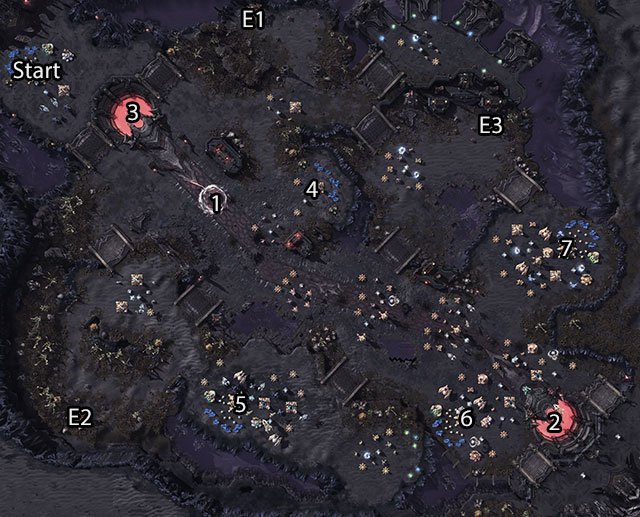
Location: Slayn
Main objectives:
Side objectives:
Reward for completing main objectives:
Reward for completing side objectives:
![Malash and Alarak are dueling [1] - Mission 13 - RakShir - Campaign - Legacy of the Void - StarCraft II: Legacy of the Void - Game Guide and Walkthrough](https://game.lhg100.com/Article/UploadFiles/201512/2015121709522416.jpg)
Ma'lash and Alarak are dueling [1]. Their strength is matched, so they need help of other protoss. If protoss units will appear near the fighters, then the duel will be pushed and it will keep pushing in one direction for as long as other units will accompany the fighters. Ma'lash will be supported by Tal'Darim, you will be the backup of Alarak. The more units, the duel will be pushed faster. Your objective is to push the duel to the point [2] and make it impossible for it to get back to point [3]. Both points are divided with almost whole map, which means that in case of trouble you will usually have enough time to gather your forces and react.
Due to the specific nature of the duel, the mission can be divided into two parts. During the first one there are no units near the fighters and you can focus on other matters. During the second, Tal'Darim units appear next to the fighters and you are sending your army in order to get rid of them. The duel can be held infinitely, which allows you to calmly complete all additional objectives and obtain achievements.
Focus on creating workers and single units at the beginning of the mission. The forces you begin with will be enough to push Alarak to the place where you can build second base [4] and to destroy Tal'Darims units which will try to help Ma'lash. Once you push the duel more or less to point [4], leave Alarak for a while and destroy the protoss base. Place a pylon there using skill or send one probe there to do it. This will allow you to teleport units closer to the battle.
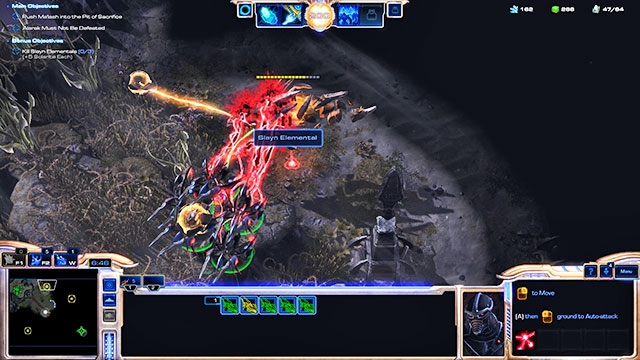
Once you make sure that Alarak is safe, you can go hunting. Three slayn elementals [E1-E3] can be found on the map. They are aerial units, so send adequate forces against them. They will return fire once attacked, but they aren't very strong. High resistance is their greatest advantage, so without strong units the battle will be long.
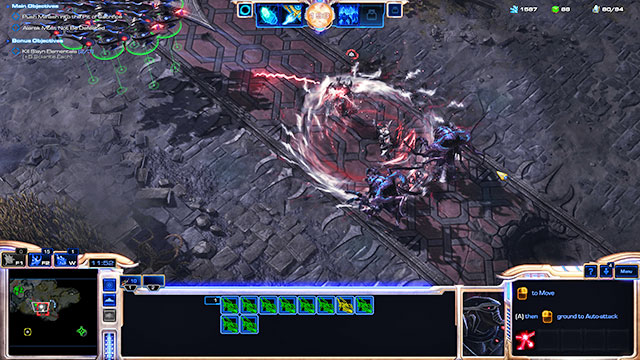
Your base will be occasionally attacked by small protoss groups. The enemy has four bases [4-7], so expect both entrances to your base to be attacked. It is a wise idea to fortify these entrances. In addition to that, expect the hybrids to appear regularly, they will be supporting Ma'lash.
![This mission can be completed in few ways, but the best one is to first eliminate all three slayn elementals and then set a base in point [4] - Mission 13 - RakShir - Campaign - Legacy of the Void - StarCraft II: Legacy of the Void - Game Guide and Walkthrough](https://game.lhg100.com/Article/UploadFiles/201512/2015121709522460.jpg)
This mission can be completed in few ways, but the best one is to first eliminate all three slayn elementals and then set a base in point [4]. Or you can build other buildings around the previously built pylon. Then you must help Alarak, keeping the duel near the advanced base. All that time just calmly collect resources, improve the size and equipment of your army and destroy single enemy groups that will attack your base or help Ma'lash. After gathering an army of more than 50 units of whatever type you want (it must consist of units able to attack both land and aerial targets. Except of that, you can pick whatever you want) you must help Alarak in pushing the duel. On the way you will face fortifications and units of the enemy, but with large army you will easily get through.
Help Alarak until you reach the Pit of Sacrifice. Remain close to him and destroy all enemy units trying to interrupt you. During the same time, create new forces in both bases so that you can call for reinforcements when needed. The mission will end when Alarak will reach the Pit of Sacrifice. It doesn't matter how many enemy buildings will survive, so you don't have to completely destroy enemy bases. In fact, you don't even need to attack them as long as you won't be attacked.
There are some resource containers on the map which you can collect while hunting for slayn elementals.
Location: Revanscar
Main objectives:
Side objectives:
Reward for completing main objectives:
Reward for completing side objectives:
This mission has puzzle elements. Your base is on a platform. The platform is small, so you will have to administrate the space wisely. The platform is on a rail and it can be moved using the panel in the upper right corner of the screen, just under the resource state. The panel will be unavailable for the first 3 minutes of the game. Moving the platform is very important, as the resources in the starting point will deplete very quickly and you will have to exploit the other four [1-4]. In addition to that, there are many resource containers on the map, they will make completing the mission much easier. You will also find minerals hanging in the air, all you need to do is fly to them [5-7].
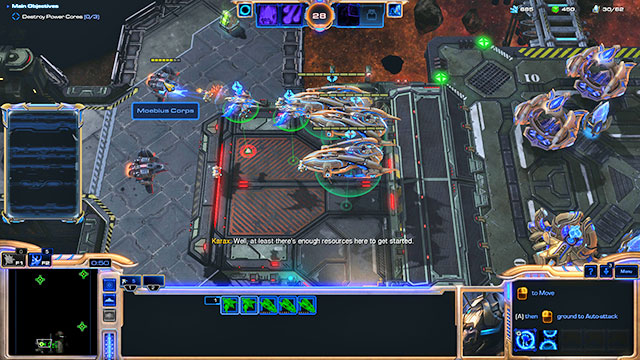
First, send one worker in order to gather all nearby containers. The others should mine the resources and quickly start exploring the gas sources. Send units to the left where they will find a small group of terran. Get rid of them.
Due to the limited space, you will have to build pylons on abandoned platforms where they will be easy targets for enemy ships. You can build turrets near them, but since they have small durability, it will not be profitable in long term. You can't depend on infantry, as their mobility will be limited on this map. Because of that, it is wise to focus only on building the fleet. When having to choose between void rays and carriers, focus on the latter. They are expensive and creating them takes long, but in larger group they will provide you with victory. You can support them with a small group of phoenixes, but these units, in difference to other two, cannot attack land targets.
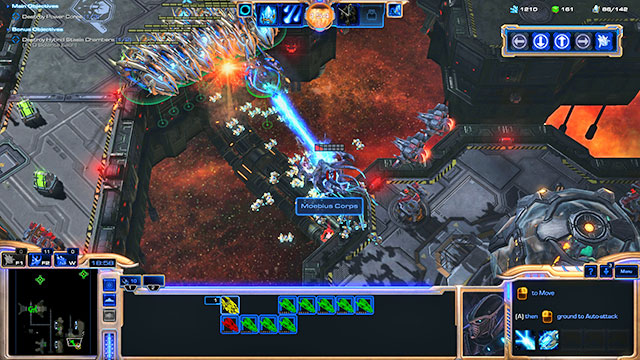
Calmly gather resources in the starting location, build units and try to upgrade them. Due to the high cost of building the army, don't create more than 3 stargates. Gather all your forces near the platform, so that they will be able to protect it in case of enemy attack. Around the sixth minute of the game you will receive information about 2 hybrid stasis chambers [H1][H2] which must be destroyed. Wait for the enemy to attack the platform, repel the attack and then go towards [H1]. Both buildings are guarded by terran units, turrets and hybrids, so prepare for a hard battle.
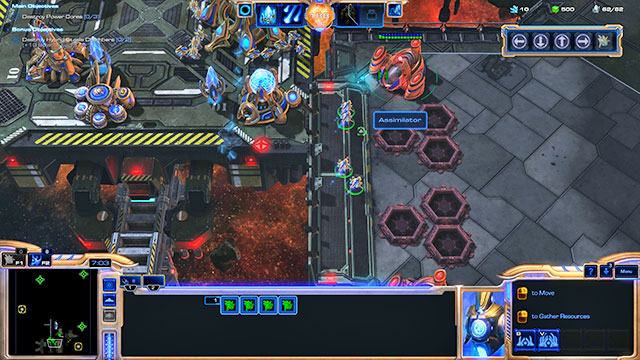
Once you use all resources in the starting location, send your army to clean another one. First it will be point [1], then [2], [3] and finally [4], but if you prefer, the order can be [1][3][2][4]. There are enemies on each platform, so first get rid of all of them and then move the base. When gathering workers, move them to the center of the platform. The command rally all probes available in the panel has a disadvantage due to which the units can stand at the edge of the platform. After moving it some of them can be left behind and you will have to return for them.
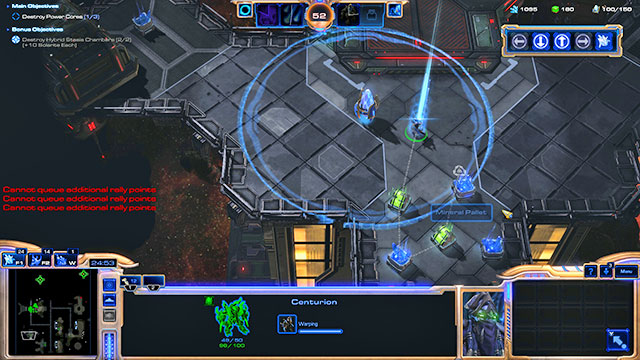
You will uncover many resource containers while clearing the platforms. The containers can be taken only by land units. There is a simple solution to that. You must build one warp gate in the base. You will also need the deploy pylon ability. Clean the platform using the fleet, place a pylon on it, produce zealot and use him to gather all containers. You will pay the cost of training a unit, but the profit will be much greater than the cost. This method is also much less troublesome than constantly moving the platform with the base.
Deploy pylon can be also used if you don't want to focus only on building aerial units. Build a large base on the platform in the starting point. It should consist of turrets, warp gates, stargates and other buildings. You can additionally build few photon cannons on the moving platform, but it is to be used only for moving through the map and gathering resources. Create a small fleet. Whenever you will have to move the platform, send the fleet ahead. Destroy few enemy units, summon the pylon and create needed infantry units around it. Clean the area, summon the platform with the base and start mining. The advantage of this solution is cheaper and more varied army. Additionally, all power cores can be reached through the land, so these units will definitely be useful. The disadvantage is the necessity to disperse the base, as not all needed buildings will fit the moving platform. It will make defending the base much harder.
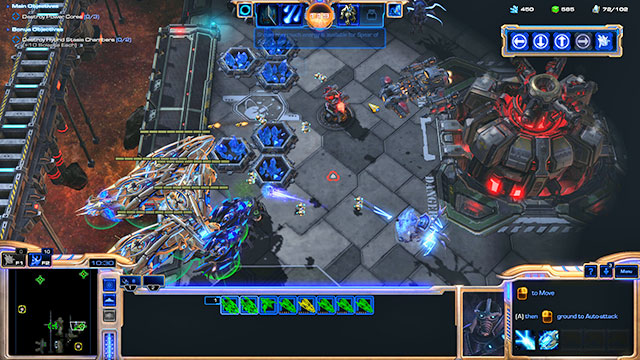
Once you gather large army, start attacking the power cores. Each of these buildings has defenses. The first [C1] is protected by hybrids and high level terran units.
Next power cores ([C2][C3]) are protected by terran bases. You don't have to destroy them, the main objective doesn't require that from you. So, if you want to complete the mission quickly, gather the army in point [2] and destroy the first power core [C1]. Then move the army to the platform with the base and the moving platform to point [8]. Destroy the enemy forces found there and go north. Keep getting through terran positions until you reach the second power core [C2]. From there go west, clean the position [4] and attack the third power core [C3]. West from it you will find a small base, but you can ignore it. Another option is destroying the second power core, returning to the platform with the base and moving it to point [4]. This will allow you to bypass some terran forces and complete the mission faster. Don't forget about first sending the fleet to get rid of at least some of enemy units.
The mission will end successfully after destroying the third building.
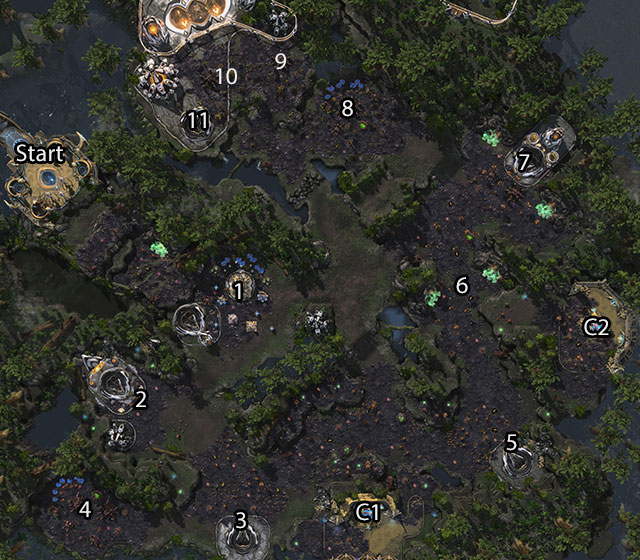
Location: Endion
Main objectives:
Side objectives:
Reward for completing main objectives:
Reward for completing side objectives:
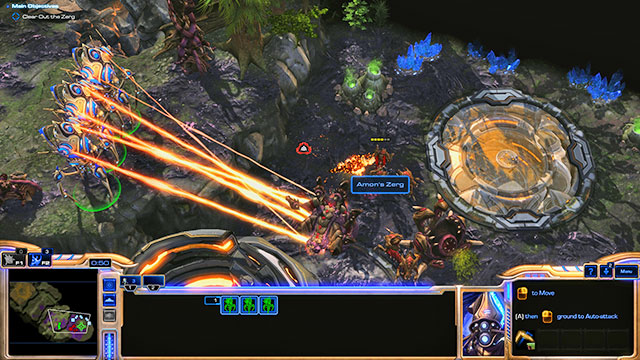
You start with three colossus units. Move them to the right and destroy everything on your way. Thanks to the cliffs, most zerg will not be able to hurt you. Reach the location pointed by the game and clean it for your future base. Watch out for nydus worms, thanks to them you will have to fight a small group of hydralisk.
After the cutscene and map change, you will gain control of a small base. Create new workers and few zealots. Go south with such army and clean the area of first stasis lock [2]. You will still have colossus units, so most of the enemies will not posses serious threat to you. You will find some additional resources on the cliffs, you must send colossus units in order to obtain it. Go back to the base and create some additional units.
![Around 3:30 of the mission time, the megalith will start moving towards the first stasis lock [2] - Mission 15 - Unsealing the Past - Campaign - Legacy of the Void - StarCraft II: Legacy of the Void - Game Guide and Walkthrough](https://game.lhg100.com/Article/UploadFiles/201512/2015121709522698.jpg)
Around 3:30 of the mission time, the megalith will start moving towards the first stasis lock [2]. Luckily, the path is clear, you don't need to worry about zerg. After reaching the stasis lock, the megalith will hid underground and will be invincible for some time. This will give you time to clean the way to next objects. Leave few units in the base as defense and sent the rest south. Get through weak zerg fortifications and you will reach the second stasis lock [3]. Clean its surroundings and don't forget about resource containers. You can go west and destroy the enemy base [4], but you can also simply wait for the coming of megalith. Keep expanding and upgrading the army. It is a good idea to build few new colossuses and support them with units that are able to attack aerial targets, for example with stalkers. Add some zealots for protection and most zerg on the map will stand no chance against you. You can also ignore additional land forces and focus on building the carriers. Carriers and colossuses are more than enough to complete the mission.
Around 8 minute you will learn about two power core housings [C1][C2]. One of them can be found east from point [3]. It is on your way to the next mission objective, so seize the opportunity. The second building is located slightly further to the northeast, but also close to the route between mission objectives. Both objects have light defenses, so your army shouldn't have trouble with them.
Don't forget about base defenses while you're destroying enemy units and collecting the resource containers. You can use newly created units for protection, but you can also build few turrets at both entrances. Enemy attacks will be rare, but strong enough to deal some serious damage.
Turn your army east after destroying the first power core housing [C1], towards the third stasis lock [5]. Make sure that the path between [3] and [5] is clean, otherwise you will risk megalith to receive heavy damage. There will be many enemy units and buildings here, but they will be highly scattered and due to that not very strong. After clearing the [5] surroundings you can immediately focus on the second power core housing [C2] which is nearby.
![By going north from [5] you will find few entrances to caves through which zerg will be calling reinforcements [6] - Mission 15 - Unsealing the Past - Campaign - Legacy of the Void - StarCraft II: Legacy of the Void - Game Guide and Walkthrough](https://game.lhg100.com/Article/UploadFiles/201512/2015121709522680.jpg)
By going north from [5] you will find few entrances to caves through which zerg will be calling reinforcements [6]. Get rid of enemy forces and then bury the cave. Another two can be found at the fourth stasis lock [7] with a well protected zerg base. As usually, get there before megalith and clean the area of enemies.
Gather the army in point [7]. Create as many units as you can and upgrade them, otherwise you will have some hard times. Wait for the megalith counter to reach the half and then go towards [8]. There you will find a heavily fortified zerg base and another two bases [9][10] west from it. The hardship is due to the large number of zerg and the nydus worms which will appear soon after your attack and will create even more enemy units. Knowing that, simply keep destroying each base. If needed, use Spear of Adun's ability. If it will prove to be not enough, retreat and call reinforcements from the base. Remember to constantly build new units. In case of trouble, the megalith doesn't need to reach [11] with full health. Once it reaches the destination, the mission will be completed.
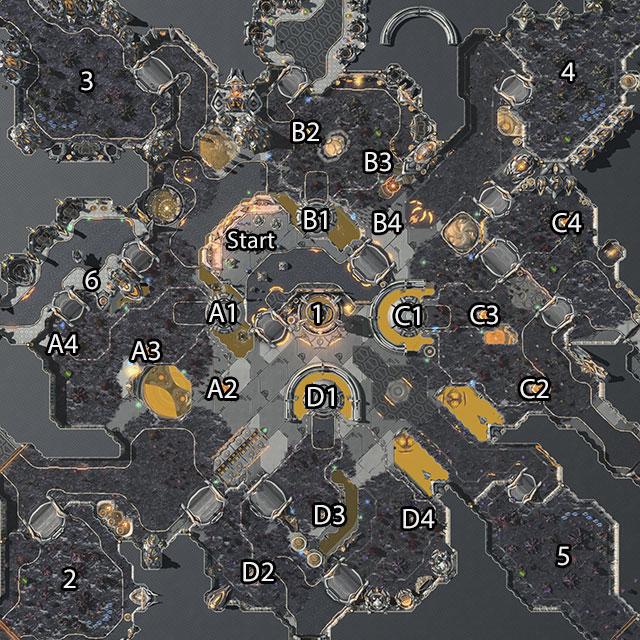
Location: Endion
Main objectives:
Side objectives:
Reward for completing main objectives:
Reward for completing side objectives:
With a proper approach, this mission becomes very easy. Your objective is to destroy 12 null circuits. These objects are grouped in sets of three (marked on the map with letters A-D and numbers 2-4) and are assigned to one of four warehouses [A1-D1]. Each warehouse will open once proper null circuits are destroyed. After opening, a large group of protoss will appear on the map. They will destroy one of the zerg bases (2-5) and then leave the map. In other words, in order to complete the mission you must perform twelve precise attacks on marked objects. You must also defend the purifier core matrix [1] but it can be found next to your base, so both these locations can be protected at once.
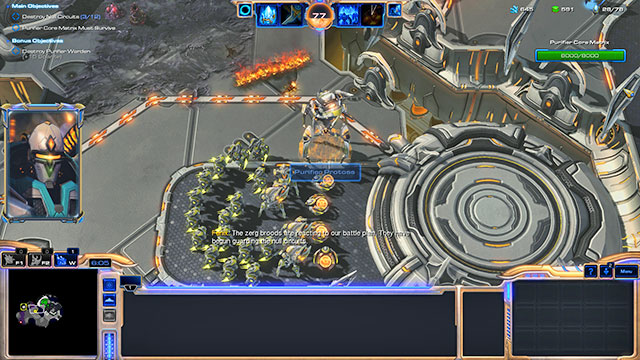
So, how to complete this mission easily? Simply focus on aerial forces. Start with producing new workers. Quickly start gathering gas from all three sources and build 2 stargates. Later you can add one more. Construct all needed buildings and start producing void rays or carriers. Or both, if you don't want to use one-type army. Gather all your forces north from the core matrix, in the passage leading to the eastern part of your base. Thanks to that, you will be able to quickly react to enemies who will attack you from time to time. Gather about 10 ships and then move them west, destroying all null circuits [A2-A4] you can find there. Keep moving towards the buildings, destroying only units and fortifications which will give you some trouble. Just after destroying all three targets, allied units will appear on the map and take care of all zerg. All that's left for you is to gather all resource containers (if you have units that are able to do it).
![On the west of the map you will also find the purifier warden [6] - Mission 16 - Purification - Campaign - Legacy of the Void - StarCraft II: Legacy of the Void - Game Guide and Walkthrough](https://game.lhg100.com/Article/UploadFiles/201512/2015121709522781.jpg)
On the west of the map you will also find the purifier warden [6]. It is a flying unit which has a very strong attack, large number of hit points and a group of supporting units which are healing it. In order to destroy it, you will need a large group of units able to destroy aerial targets, for example 10 carriers. Get close to the enemy, get rid of its backup and then concentrate your fire on the main target. Use Spear of Adun's abilities as well, they will prove to be very useful.
Get back to the base after getting rid of warden. Create new units and send the existing ones to defend. Upgrade the shields, weapon and armors to maximum, build also some turrets at the purifier core matrix because the enemy will send hybrids against it. You need 15 carriers to easily complete the mission. Once you gather the fleet, do the same as in case of first three null circuits and simply destroy them one after another. Each time the defenses will be stronger, but your large fleet should get through it with no bigger trouble. After destroying each set of three, retreat to the base to gather reinforcements and replenish the shields. Keep also attention to enemy attacks, they may force you to stop the attack.
If you don't want to use only the fleet which cannot gather resource containers, try mixed army. Let the colossus be the base of your army and support them with stalkers and zealots as living shields. Similarly as in case of fleets, don't worry about irrelevant units and buildings and concentrate on destroying the null circuits. The mission will end soon after you destroy the last one.
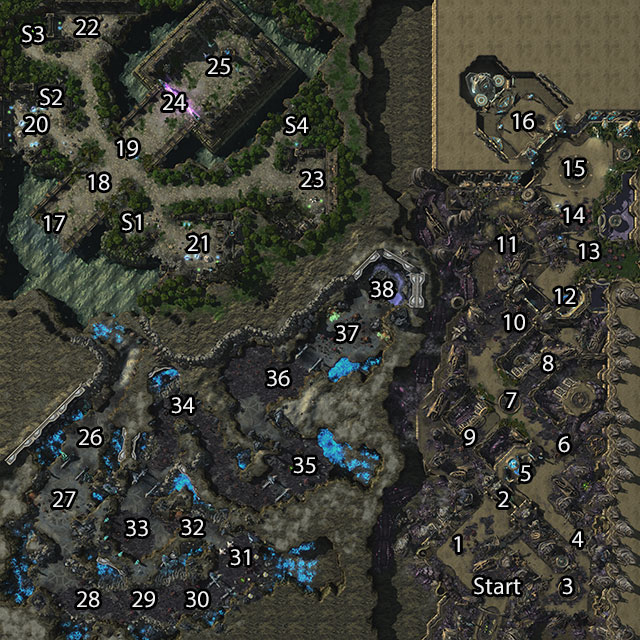
Location: Aiur
Main objectives:
Side objectives:
Reward for completing main objectives:
Reward for completing side objectives:
A long mission divided into three parts during which you will control six different heroes and units that will support them. Be ready to frequently switch between them with the TAB button and to often use skills with the numerical shortcuts. Without that, the mission will be much harder.
First you will control Alarak and Vorazun. Alarak can hurt and push the enemies, jump towards them dealing high damage and each enemy killed will regenerate his shield and hit points. Vorazun can teleport on short distance and immediately attack enemies that are close to each other, just like a dark templar. Additionally, she is permanently invisible and while undetected she regenerates her shield faster. Alarak's role is to gather the attention of enemies and hurt them with his abilities, while at the same time invisible Vorazun will be freely killing all zerg that are nearby. Don't forget about concentrating the efforts of your heroes on the most dangerous targets, such as ultralisks, and about retreating when the battle becomes too hard. Vorazun is not able to heal, so try to avoid getting into the range of detectors.
![First you will have to participate in two battles - in the starting location and a bit further [1] - Mission 17 - Templars Return - Campaign - Legacy of the Void - StarCraft II: Legacy of the Void - Game Guide and Walkthrough](https://game.lhg100.com/Article/UploadFiles/201512/2015121709522771.jpg)
First you will have to participate in two battles - in the starting location and a bit further [1]. They won't be hard as both your characters are very strong and their abilities don't require energy. Among the enemies there will be overlords, but it's not a problem since Alarak's destruction wave can also hurt aerial targets. Get rid of both enemy groups and walk to the door [2].
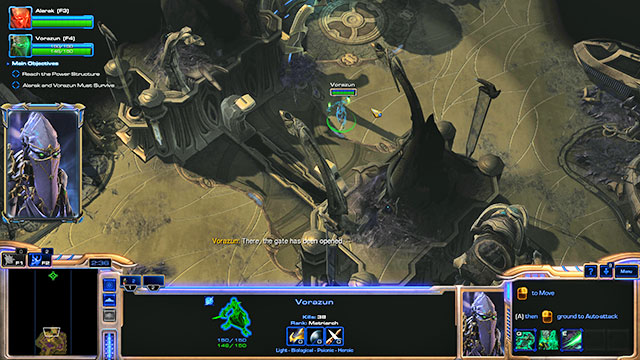
Teleport Vorazun to the passage on the right and go ahead. Teleport next to the detector in point [3] and keep going further north. You will have to make few other jumps combined with killing nearby zerg [4]. Enemies aren't hard and the only thing that will slow you down is the time needed for Vorazun's skills to regenerate. After a short march you will reach a door. Stand in the pointed location [5] and it will open.
![Two other enemy groups [6][7] are ahead of you, this time slightly stronger than the previous ones, so dont forget about using abilities - Mission 17 - Templars Return - Campaign - Legacy of the Void - StarCraft II: Legacy of the Void - Game Guide and Walkthrough](https://game.lhg100.com/Article/UploadFiles/201512/2015121709522724.jpg)
Two other enemy groups [6][7] are ahead of you, this time slightly stronger than the previous ones, so don't forget about using abilities. Once you get rid of enemies in [7], take care of nydus worms in [8] and [9] to get rid of enemy reinforcements constantly coming at you. Their protection consists of buildings and a bunch of zerg units, so you shouldn't have bigger trouble with eliminating them.
![Another nydus worms and a large group of enemies, including ultralisk and detectors, can be found under the second door [10] - Mission 17 - Templars Return - Campaign - Legacy of the Void - StarCraft II: Legacy of the Void - Game Guide and Walkthrough](https://game.lhg100.com/Article/UploadFiles/201512/2015121709522806.jpg)
Another nydus worms and a large group of enemies, including ultralisk and detectors, can be found under the second door [10]. On the left from the door you will find a passage. Teleport Vorazun there. There are many flying zerg units whom you will have to fight and detectors. The detectors are moving across a fixed route, so spend some time to learn it. Once you will know when the enemy units will move, go as Vorazun north. Use the gaps between the enemy detection fields, teleport to the cliffs and through the obstacles [11]. In case of trouble you can be detected, but only for few seconds, otherwise your shield will deplete quickly and then your hit points will drop as well. Reach the location pointed by the game and open the second door [12].
Two other large zerg groups [13][14] are ahead of you. Don't let them surround you and remember about using abilities with area of effect. You can also lure some enemies from the second door, kill them and quickly return and finish of the rest. You will reach another closed door. Behind them you will find the first power structure [16]. Stand as Alarak in the place marked by the game [15]. You must protect it for another minute.
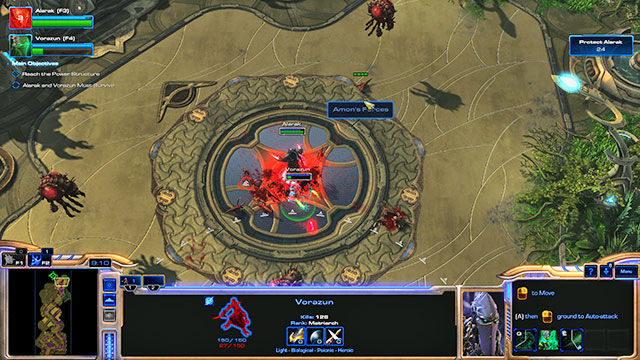
This part of the mission can be completed in two ways. You can stand next to Alarak and let Vorazun kill zerg on their own or turn off the auto use of the shadow fury ability and point the attack targets on your own. Both tactics will be similarly good, as Alarak will be attacked by infantry units, and each killed zerg will replenish his shield and resistance. In both cases you can, but don't have to watch out for detectors. There are too little enemies and they are too focused on Alarak to seriously threaten Vorazun. After a minute of battle the gate with the power structure will be destroyed.
The map and characters will change. Now you will control Karax and Fenix. Fenix is able to jump on enemies, attack all targets around him and immediately regenerate damaged shield. All his abilities can be used automatically, so you can leave him to himself. Karax is able to take over any mechanic unit of enemy, summon photon cannon and activate nearby buildings. In that case he works like pylon which additionally speeds up the construction of units. With the help of both characters you will have to gather a small army without which you will not be able to kill the hybrids protecting the second power structure.
![Move both characters [17] at the first enemy group [18] and take over the enemy immortal unit - Mission 17 - Templars Return - Campaign - Legacy of the Void - StarCraft II: Legacy of the Void - Game Guide and Walkthrough](https://game.lhg100.com/Article/UploadFiles/201512/2015121709522844.jpg)
Move both characters [17] at the first enemy group [18] and take over the enemy immortal unit. Kill the zealots. Slightly further [19] you will face a larger group of enemies, this time archons. Summon photon cannon against them. The Fenix will finish up the work of destruction.
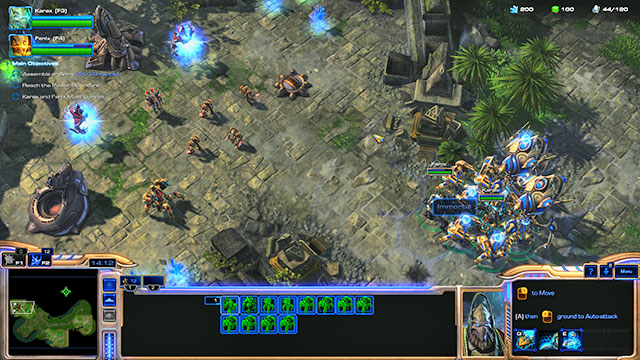
Now you must gather army to fight hybrids. There are four protoss bases [20-23] on the map. In them you will find units and buildings to take over and resources to produce new units. Other resources can be found in points [S1-S4]. Small enemy groups can be found on paths leading to the bases, including immortals and colossus. Let your units take care of zealots and other infantry units while Karax will focus on taking over machines and creating photon cannons. Optionally he can focus on taking over enemy photon cannons, it can be done in point [20].
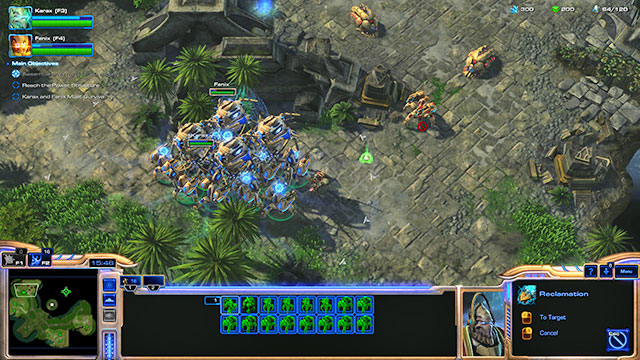
While creating the army, with the additional resources you can immediately create immortals or you can wait until you will be able to produce colossus. To do it, you must take over the robotic support bay at [23]. Next to it you will find a colossus ready to be taken over by Karax. In [22] you will find two reavers. In order to take them over, lure other enemy units away and destroy them when they are separated from the reavers. Then send Karax to take them over. You can take over one, but if you will allow your character to be slightly hurt, you can take over both. It is worth it, as you won't be able to build reavers. Don't attack as a group unless you want to seriously hurt your units or even lose few of them.
![After gathering an army (it doesnt matter what units you have, only their number), let Karax open the gate [24] - Mission 17 - Templars Return - Campaign - Legacy of the Void - StarCraft II: Legacy of the Void - Game Guide and Walkthrough](https://game.lhg100.com/Article/UploadFiles/201512/2015121709522938.jpg)
After gathering an army (it doesn't matter what units you have, only their number), let Karax open the gate [24]. On the other side you will find five hybrids - three at the start and two summoned. Focus on the largest one and destroy it, then take care of the other ones. Don't forget about summoning the turret. Once you kill all enemies, Karax will destroy the power structure.
The map will change after another scene. Now you will control Artanis and a small group of support units. Artanis has the same abilities as in The Infinite Cycle, but you will mostly use his healing ability. This time you must hurry, as you are chased by a psionic energy which will hurt your units if they will get close to it. The location of the energy will be marked on the map.
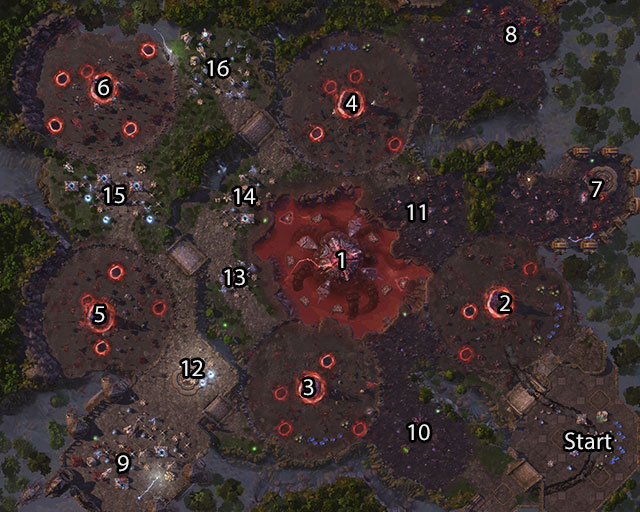
Walk ahead. After a moment you will face a group of zerg [27]. Kill all enemies, heal your units and go ahead. Now you will have to face three very large zerg groups [28-30]. During the battle you will definitely lose few zealots. Regularly heal your units and don't forget about Artanis' combat abilities. A while further you will find zerg attacked by allied units [31]. Destroy all the buildings together and the allied units will join you.
Gather the army and move ahead. You will face another zerg [32][33] but this battles will be much easier than the previous ones. You might have some trouble with marching through the tunnel [34] full of zerg turrets. You will be constantly forced to fight and your zealots will have no time to regenerate their shields. You must use Artanis' healing ability wisely to avoid losing too many units. If the psionic energy chasing you is far away, give your army a moment to rest.
![At the end of the tunnel, you will find another zerg base in point [35] - Mission 17 - Templars Return - Campaign - Legacy of the Void - StarCraft II: Legacy of the Void - Game Guide and Walkthrough](https://game.lhg100.com/Article/UploadFiles/201512/2015121709522923.jpg)
At the end of the tunnel, you will find another zerg base in point [35]. This time it will be attacked by a group of dark templars. Similarly as previously, help them in destroying the buildings and they will join you.
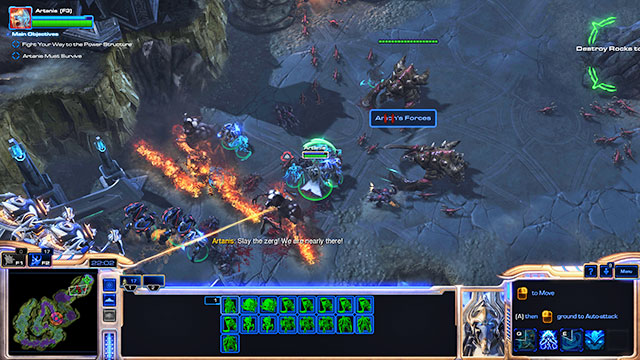
Gather the army, heal your units and go ahead. In [36] you will face a large group of zerg units and fortifications. Get the attention of the units, step back and kill them outside the reach of turrets. Send few other units in order to destroy the nydus worms while destroying the fortifications. Another nydus worms with a large group of zerg can be found further [37]. Concentrate on killing the ultralisks and later get rid of the smaller units. Don't forget about burying the entrances to the tunnels.
Once you reach the last power structure [38], a cutscene will start and after that the mission will end.
Location: Aiur
Main objectives:
Side objectives:
Reward for completing main objectives:
Reward for completing side objectives:
You start with a small base in the southeastern part of the map. The enemy will have crushing advantage over you in terms of numbers and quality of units. In addition to that, he has access to units of all races. You will be attacked by zerg, terran and protoss. There are also few hybrids on the map - the further away from your base, the more of them and they are harder to defeat. In other words, in point [8] you will find one hybrid, but in [9], [13] and [16] few of them. Enemy attacks will occur more frequently and they will be stronger than in previous missions, forcing you to focus more attention on defense. You will be informed about some attacks beforehand, but not about all of them, so be sure that both entrances to the base are constantly guarded.
Your objective in this mission is destroying 5 void shards [2-5] which will be regularly creating new units for Amon [1]. In addition to that, the mere presence of your units near them will hurt your forces. After destroying each of these buildings, the remaining ones will become more resistant and stronger, able to immobilize and even destroy your units. In other words, each try of destroying the void shards will be harder than the previous one. You can ignore Amon [1] since you won't be able to do anything to him anyway.
First, focus on developing the base. Place pylons and photon cannons with support of units at both entrances. Destroy the second gas assimilator and make sure that you mine as many resources as possible. Start producing units. Similarly as in few previous missions, it is easier to win with aerial forces, but you don't have to limit yourself only to them.
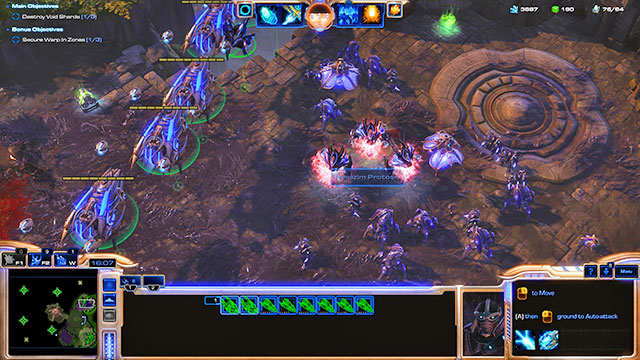
Expand your base and army till the 9 minute of the game when you will receive additional objective. You will find large enemy forces and many buildings in three locations [7-9] marked by the game. Get rid of them and your allies will appear there. They will build bases and from time to time they will send you help in form of groups of units. Allied armies will automatically pick their targets and attack both void shards and other enemy bases. The mere presence of them will make the mission much easier. You will receive information about each attack anyway, so if needed, you can react.
You don't need to destroy all enemy buildings. Getting rid of the ones most advanced towards the edge of the map (right edge for [7] and [8], left for [9]) will be enough. After doing it, the allies will land and take care of the rest of nearby enemies on their own.
In order to complete the mission stress-freely, start with improving the base and its defenses. Once you receive additional objective, gather an assault squad and go towards the point [7]. You will fight the void shard in point [2] on your way. You can either destroy the building and go ahead or bypass it from the right side. But in the second case you will need aerial units since the infantry will be constantly threatened by enemy attacks. Clear the point [7] and wait for the allied forces to arrive. Use their help to attack and destroy the void shard in point [4] and then clear the area for the allied base in [8]. If you have focused on building aerial forces, you can ignore [4] and immediately after clearing the [7] fly towards [8]. Thanks to that, you will get help of two allies. This help will make clearing [2] and [4] much easier. Keep improving the base and watch out for enemy attacks all that time. Your strike force cannot consist of all your units. At least few of them must remain in the base.

You will have to make a choice after destroying two void shards - attack the northern or southern side of the map. Both possibilities have their advantages and disadvantages, but it is better to start with south. On the map, in addition to the void shards, you will find few enemy bases of different strength [10-16]. Two biggest bases ([15][16]) are defending the void shard at point [6]. So, by attacking the northern side you will face the strongest enemy resistance. It will be definitely easier to attack from south, destroy the void shard in point [3] and then get rid of the enemy base in [9]. Thanks to that you will gain help of the last ally who will make destroying the void shard at point [5] much easier.
Further part of the mission depends on you. Your allies will be attacking the void shards, but only if they won't find any enemies on their way. In that case they will first concentrate on enemy units and buildings, losing many units of their own. You can ignore the allies and destroy the void shard in [5] on your own, then the enemy base in [15] and finally the void shard in [6]. You can also destroy the enemy bases in points [12-16], giving your allies a free road to the void shards. The second option is more time consuming, but it will allow you to use the allied forces as a cannon fodder. The last two void shards will have plenty of health points and weapon able to easily destroy each your unit, even the strongest one. The presence of the allies will allow more of your units to survive and the destruction of the void shard will take less time thanks to them.
No matter what you choose, the mission will end after destroying the fifth building.
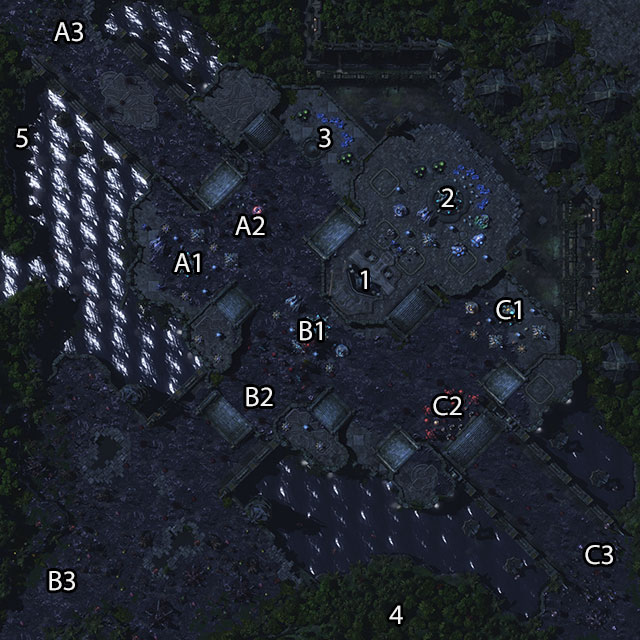
Location: Aiur
Main objectives:
Side objectives:
Reward for completing main objectives:
Reward for completing side objectives:
A defensive mission. You must protect the keystone [1] until it reaches 100% combat ready. In practice it means that you must defend it for 30 minutes and few seconds. Until then you can lose most of your base, all units and all allies. If the keystone survives, you will win no matter the situation on the map. Especially since the enemies will almost surely ignore your main base and focus their efforts on destroying the artifact.
Your main base [2] is located next to the keystone. On the left from it you can build another one [3]. In addition to that, you will find few of your pylons and photon cannons around the artifact. There will be three bases of your allies as well. Each of them will protect one of the three roads leading to the keystone (base [A1] will protect the point [A2] from the enemies from [A3] and so on). The allies will be creating units and placing defense buildings, but their bases will not be upgraded, even when the enemy will start increasing the size of forces sent at them. Without your help, allied bases will be destroyed sooner or later, so your main task is to support them in the defense. Be prepared for the fact that allied heroes will die during first few attacks. The AI doesn't know how to control them and it will not notice that a hero is at the verge of dying. Vorazun from [A2] will survive the longest, but only because she will be invisible for enemies.
You can complete this mission in two ways. The first one is repeating the tactic from the Last Stand mission - building turrets in points [A2][B2][C2]. In difference to the other mission, each road to the base will have at least light defense and you will not have to worry about an aerial strikes near the keystone. Blocking the paths to the artifact should be enough. However, this tactic has two serious disadvantages. First of all, very quickly the enemy will start sending large groups of enemies at you, including siege units. So, you will either have to build khaydarin monolith or send against them few of your own units. Secondly, from time to time from [4] and [5] some protoss units will fly, including carriers and tempests. They will be flying straight towards the keystone, so there is a chance that they will be moving outside the range of your turrets. In theory you can build plenty of turrets and surround the keystone from all sides, but sooner or later you will discover that the enemy is attacking from too many places for the buildings alone to be able to stop him. Enemy fleets will also attack from points [A3][B3][C3], but in that case your allies will be able to take care of them.
Because of that, it is better to use a mixed tactic. Place few photon cannons, khaydarin monoliths and shield batteries in points [A2][B2][C2]. Build a wall of them, but leave a small passage for units. Pylons of your allies cannot be used by you, so you will have to build everything from scratch. Enforce the defense with more than a dozen of land units. It would be good if at least some of them will be able to attack land and aerial targets. Gather all newly created units in [1], this will allow you to quickly send them to most endangered positions. The game will inform you about the most dangerous attacks, so you will always know beforehand where to send the army. If you are using the warp gates and other buildings that use the warp technology, immediately teleport the military to the weakly protected positions. Additionally, gather your fleet in point [B1]. This fleet will be tasked with eliminating enemy ships flying from points [4] and [5]. You will be informed before they will appear. The fleet should consist only of ships used for destroying other ships. But if you don't want to constantly move it, you can immediately split it and send to most endangered positions. If you want to build ships used for attacking land targets - void rays, carriers and so on - send them with the rest of your forces to point [1] or teleport them to the fortification line, let them help in defending the paths to the keystone.
Keep rebuilding the destroyed turrets and add new ones. Upgrade weapon and armor of your units as well. You have access only to two resource sources, so saving is not an option. Don't worry when you or your ally will be losing buildings and units, instead replenish the losses immediately. It will be important later in the mission, when the enemy will attack from two or even three directions at once.
Due to the battle taking place on the orbit, you will be regularly losing access to active abilities. Both passive ones will be constantly available. You will lose the first ability around tenth minute of the game, second about 15 minute, another about 20 minute and finally the last after the 26 minute. You will not be able to regain them, which will become especially painful at the end of the mission.
Don't counterattack. The enemy has production buildings in [A3][B3][C3], but even without them he will be constantly attacking you with large groups of units. Additionally, these buildings are protected by turrets, and in [C3] there is a brutalisk which has great probability of destroying all units that are attacking him. Later in the game the enemy will be attacking so frequently and with so large forces that you will not have neither time nor possibility to response with an attack.
Enemy attacks will become stronger as the mission progress. Zealots and zergling will be quickly joined by better units, including ultralisk and reavers. From the sky not only phoenixes will attack, but carriers, tempests, and at the end motherships as well. You must prepare not only for strong, but also for very large attacks, consisting of 50 and more units. Your allies will definitely not be able to repel them on their own. They will be creating new units, but definitely too slow and too little.
All positions of allies will have their weaknesses. Alarak base from [B1] is the most advanced one of them all. If the defense in point [B2] gets destroyed, then Alarak's base will probably not survive too long. On the other side, the enemy will first focus on it and only then he will move at the keystone, giving you some time to prepare the defenses. Two other bases [A1][C1] are positioned remotely, which means that after breaking the line of defense in [A2] and [C2] the enemy will immediately attack the keystone. So if you have to choose, most of all defend the defense lines of Vorazun and Karax.
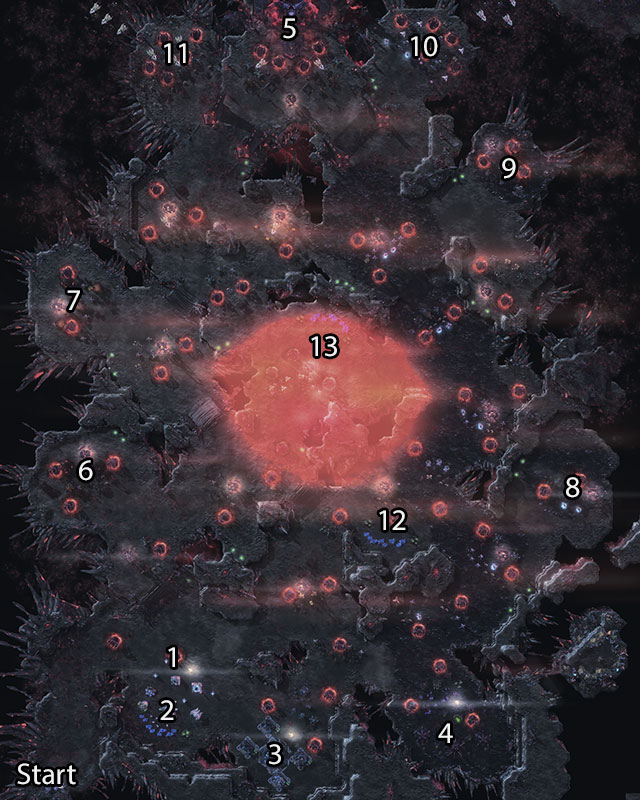
Location: Void
Main objectives:
Side objectives:
Reward for completing main objectives:
Reward for completing side objectives:
You start in the southwestern part of the map. You are in the void's energy's area of influence, it will gradually weaken your units. Luckily, all forces available at the start of the mission are mechanic, so thanks to the reconstruction beam active ability they will be constantly healed. The only thing you cannot regenerate is shields. At least you can't do it for now.
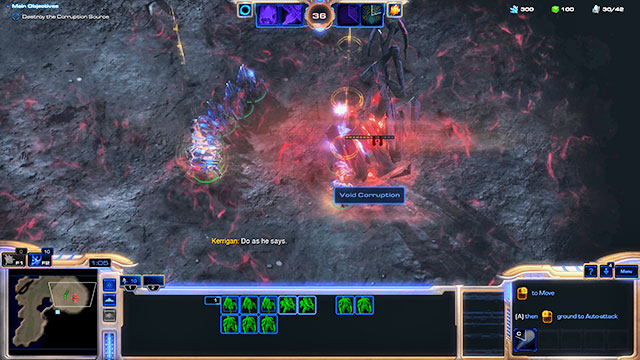
Go forward. You will participate in a short battle with single enemy units and you will have few buildings to destroy. Destroy the construction [1] marked by the game. You can lose few units during the operation, but don't worry, you will replenish them soon.
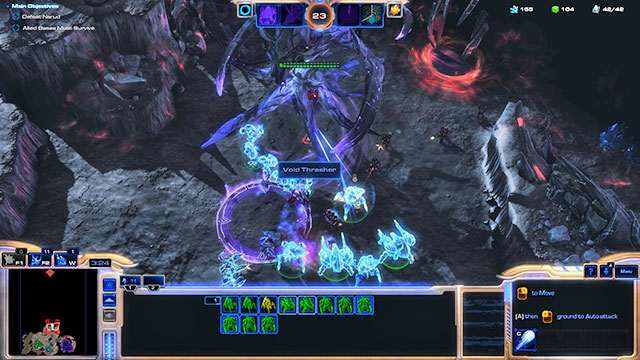
After destroying the building and watching a cutscene the map will change. From now you will control your own base [2]. East from you there are terran [3] and zerg [4] positions. You and your allies are supposed to defeat Narud [5]. The mission's construction is very similar to Brothers in Arms. Together with allies you will be gradually cleaning the map of enemy forces and you will build advanced outposts until you will reach the other end of the map where your target can be found. Luckily, this time your allies won't be immobilized by the keystone. Instead of that, a void thrasher [5] will appear on the map every few minutes. It will march on your or your enemies' base. You and your allies must kill him before he will reach the destination. The game will inform you about when the thrasher will appear, in which direction it will go and where he currently is, so you will always have time to prepare for his coming.
The map is divided into three paths. Kerrigan will attack the right one and Raynor the central one. Your objective will be to both clean the left one and support allied forces. If their bases are destroyed, you will lose the mission.
You will face various-sized Narud's forces while cleaning the map. They will consist of units of all races. However, the constructions marked as void corruption will be much more important. Destroying them will clean the territory of the aura that hurts your units and buildings. The aura isn't too destructive, but similarly as at the beginning of the mission, its presence will make it impossible for you to regenerate the shields of your units. On the map you will also find many resource containers, they should help you in completing the mission.
Your base will be regularly attacked, but you don't need to sacrifice many assets to defend it. The mission is constructed in such way that as you progress the enemies will be more away from your base and they will lose the possibility to attack it. Due to that, don't build turrets, focus only on creating and upgrading units. Except for the void thrashers which you will kill far from the base anyway, the defensive buildings won't be useful for you.
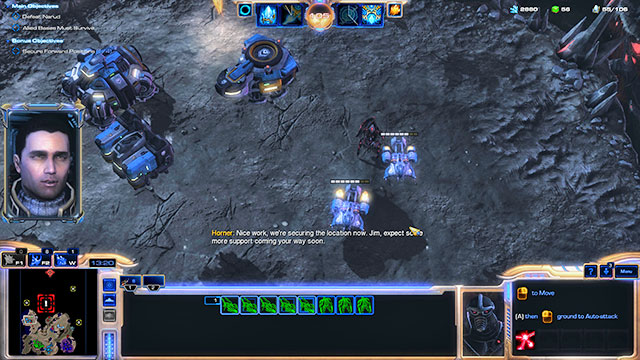
During the mission you will receive information about four places in which the allies can build additional bases. Terran can build it on the west [6][7] and zerg on the east of the map [8][9]. In all these places you will face slightly more enemy units and buildings than usually and after destroying them allied units and buildings will take their place. In difference to the outposts build in the cleaned areas of the map, these four bases will be producing new units, thus making completing the mission easier.
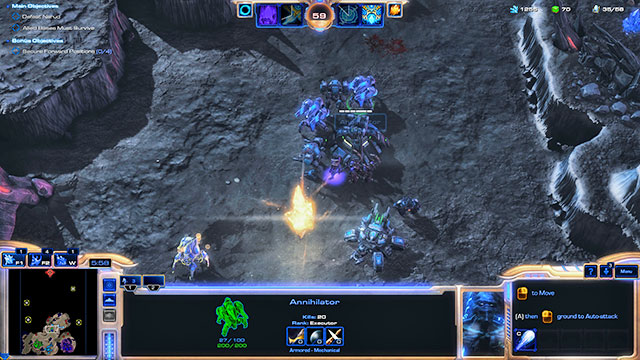
At the start of the mission your allies will have trouble with repelling enemy attacks. Especially the thrasher who will appear just after the second part of the mission starts. You must help them by destroying the void corruptions and nearby buildings. Allies will place their own fortifications in such places. Not in all of them, usually in every second one, but often enough to secure further parts of the map. The strength of the fortification will be varied, but high enough to repel most of the regular enemy attacks. Only thrashers can pose a serious threat.
![In order to defeat Narud, it will be best to clean the whole map, including the buildings in points [10] and [11] - Mission 1 - Into the Void - Epilogue - Into the Void - StarCraft II: Legacy of the Void - Game Guide and Walkthrough](https://game.lhg100.com/Article/UploadFiles/201512/2015121709523174.jpg)
In order to defeat Narud, it will be best to clean the whole map, including the buildings in points [10] and [11]. Thanks to that your allies will be able to focus only on defeating the large enemy. Before attacking, gather as large army as the supplies will allow you to. In case of trouble with resources, you can build up to two additional bases in points [12] and [13]. Wait until your ally will start attacking Narud's position and then send your own forces. First get rid of enemy units and buildings, then focus on the large enemy. Don't forget about getting rid of void corruption first, so that your units will be not receiving damage. Killing Narud will prove to be time consuming, as he has many hit points. He will be attacking your units, but only few of them at once, so you can solve that problem with large enough army. Your allies will be there as well and they can get attention of Narud or deal damage to him. The battle will prove to be short and pretty easy if you will hit the enemy with your whole army.
After killing Narud the mission will be completed successfully. You don't need to clear the whole map to do it, but every destroyed enemy building and a new allied base will make doing it much easier. If you prefer, you can aid your allies only at the beginning of the mission and then focus only on getting to Narud and killing him. This will make the mission much harder, but the game will still consider it as completed once you kill the main target.
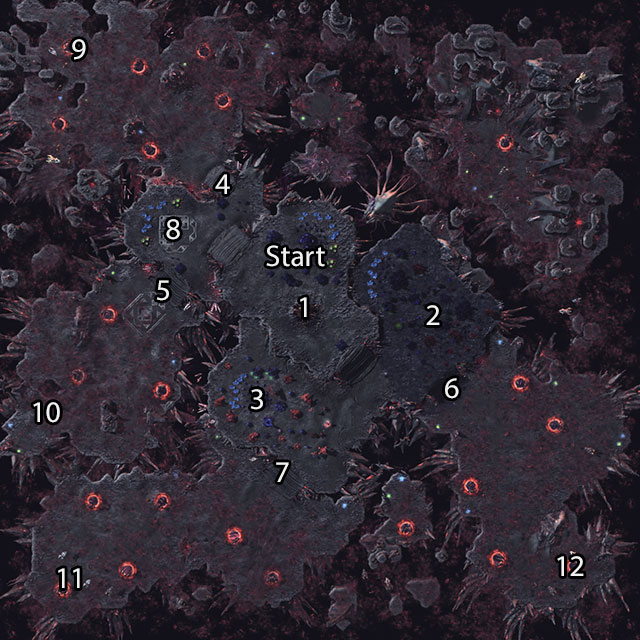
Location: Void
Main objectives:
Side objectives:
Reward for completing main objectives:
Reward for completing side objectives:
Use Kerrigan's attacks to kill all void thrashers in the first part of the mission. After a cutscene the map will change.
In this mission you will control terran forces. The zerg had built a base on the east [2] and protoss on the south [3]. Your common objective is to protect Kerrigan [1]. She has many health points and is able to protect herself, but using her in battle will stop the counter visible in the upper right corner of the screen. This means that the more often you use Kerrigan to repel enemy attacks, the longer the mission will take.
At the start of the mission you will be informed that your allies will not survive without help and it will quickly prove to be true. The enemy will be attacking very frequently with large groups and from time to time he will perform a massive attacks that will be hard to repel. Void thrashers who will have to be destroyed by Kerrigan will regularly appear on the map as well. Because of the hard situation, it will not be profitable to leave the territory marked by three bases. Don't even think about gathering the resources scattered across the map. Not only your units will get hurt, but you will also quickly find buildings and units of the enemy. In order to gather resource containers you would have to send a larger group of units, and these units will be much more needed to protect the bases.
You can complete this mission in few ways. The best option will be doing what terran do the best, which is focusing on the defense. Four entrances lead to Kerrigan - two on the west [4][5], one on the east [6] and one on the south [7]. You must build strong fortifications in all of them and defend them until the transfer ends. On the normal difficulty level the enemies will use only these paths, making the defending much easier.
![At both western entrances [4][5] you will find one bunker and infantry - Mission 2 - The Essence of Eternity - Epilogue - Into the Void - StarCraft II: Legacy of the Void - Game Guide and Walkthrough](https://game.lhg100.com/Article/UploadFiles/201512/2015121709523190.jpg)
At both western entrances [4][5] you will find one bunker and infantry. The upper one is additionally protected by the siege tank. Build additional bunkers at both of them (one will be enough at the beginning, then you can add another one) and fill them with full crews. Both places should be protected by two siege tanks. In both there should also be one SCV in order to quickly repair the damage. It is best to give him order to patrol the area behind the bunker. When the aerial units will become trouble, add one or two anti-aircraft turrets. Quickly start mining resources in point [8], you will need them soon.
![The western entrance [7] will be protected by protoss units and turrets, but there will be definitely not enough of them - Mission 2 - The Essence of Eternity - Epilogue - Into the Void - StarCraft II: Legacy of the Void - Game Guide and Walkthrough](https://game.lhg100.com/Article/UploadFiles/201512/2015121709523255.jpg)
The western entrance [7] will be protected by protoss units and turrets, but there will be definitely not enough of them. Build four bunkers there and fill them with infantry. Place few siege tanks behind the buildings and give one of the SCV an order to patrol the area. If one SCV will prove to be not enough, send another one. The same goes for the western fortifications [4][7]. The bunkers can be positioned in two ways - either next to photon cannons, thanks to what terran and protoss will support each other with fire, or slightly behind the photon cannons, thanks to what the terran will fight once the first line of protoss will fall. Select a method which you will decide is better. In case of trouble with flying units, build more anti-aircraft turrets.
![The main problem on the east [8] will be creep that makes it impossible to construct buildings - Mission 2 - The Essence of Eternity - Epilogue - Into the Void - StarCraft II: Legacy of the Void - Game Guide and Walkthrough](https://game.lhg100.com/Article/UploadFiles/201512/2015121709523265.jpg)
The main problem on the east [8] will be creep that makes it impossible to construct buildings. Luckily, you will not need them, as all you need to send there is few siege tanks. Place them and observe as they eliminate enemies from long distance. You can also support them with one SCV in order to quickly repair any damage. However, it is not mandatory, as terran mechanic units, in difference to the buildings, will slowly regain their durability on their own. In addition to that, the tanks in the zerg base should be rarely attacked due to the cover of buildings and zerg units. Thanks to that, their repair will be needed rarely, in best case never.
Dividing your forces into four remote frontlines means large costs. Most of all, be ready to build many supply depots. These buildings will not be constructed fast, but their total cost will quickly prove to be painful to your wallet. In addition to that, placing buildings and turrets and training the infantry and siege tanks will cost you plenty of resources. Due to that, you must very quickly place the second base [8] and mine as many resources and gas as you can.
You must also remember about regularly checking the frontlines. You must rebuild bunkers and turrets and send new tanks into most dangerous locations. The task of placing new bunkers and turrets will become the burden of the SCV available at the fortifications. Don't send new ones, let the rest focus on gathering resources. Later in the game you can also start building thors which will be effective in combat against enemy land and aerial units. Instead of thors you can also use the battlecruisers if you prefer aerial units. Keep upgrading the weapon and armor of your units and buildings. You should use all your supplies. If you decide that you need more of resources, get rid of some of SCV. But don't overdo it, as you will still need many resources. You can also use the supply depots as defensive walls, this will prove to be very effective when combined with siege tanks. If the situation becomes very dire, use Kerrigan's help.
The rest of the mission will not differ from other defensive missions. The enemy will not use elaborate tactics or try to attack from unexpected directions. Except for the appearances of void thrashers, the attacks will come always from the same four directions [9-12] and they will only differ in number of opponents. Keep attention to the state of your fortifications, rebuild the destroyed ones and construct new buildings. Make sure that you have siege tanks positioned everywhere and that the bunkers are full of infantry and you will surely win. Definitely don't try to create your defenses only on units, especially on aerial units. Due to the number and strength of enemy attacks, it will be simply not profitable. Terrans are race focused on defense, it is wise to use that fact for your advantage.
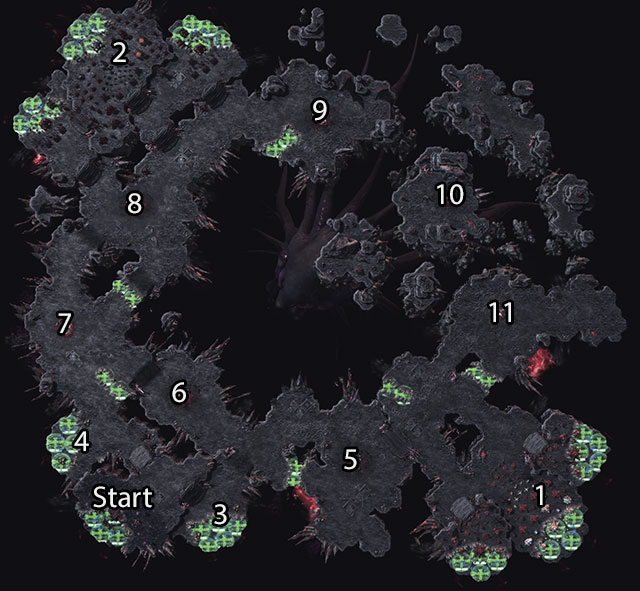
Location: Void
Main objectives:
Side objectives:
Reward for completing main objectives:
Reward for completing side objectives:
A very hard mission unless you play it in proper way. This time you will control zerg. Protoss can be found on the east [1] and terran on north [2]. Next to your positions you will find place for two bases [3][4] and it would be a good idea to use them as fast as possible. In addition to that, there are seven places [5-11] on the map in which Amon will create his army. These constructions are resistant and cannot be fully destroyed. They will regenerate after few minutes and will resume creating enemy units.
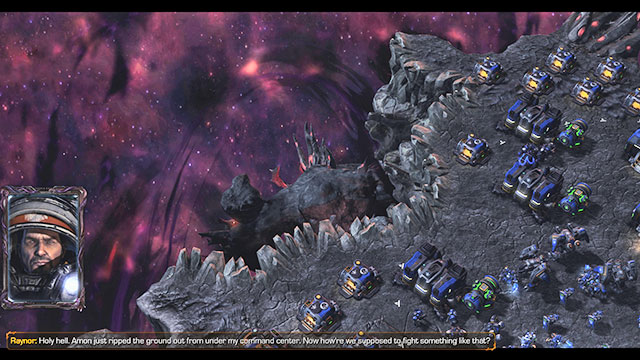 Raynor's base after Amon's attack. In the place of the gap there were previously Command Center, mineral depots and refineries.
Notice the green fields on the mission map. These places will be destroyed by Amon as the mission progress. All units and buildings that can be found there will be automatically destroyed, the resources irreversibly lost and a gap will appear instead of the ground. Nine of these places contains resource fields in all three starting locations, the rest are scattered across the map. What does it mean? Despite appearances, not much. Most of all, base territories will be attacked by Amon very rarely. It means that you must mine all resources from the main base before the fifteenth minute, build smaller ones in points [3] and [4] and when you will receive information about incoming attack, you must retreat all your workers and overlords outside the endangered territory. You will probably complete the mission before the second attack will occur. You might have a trouble due to the fact that you will lose the first lair due to the attack. This might block you access to some units and buildings. However, there is a simple solution to that - don't spend the resources on upgrading the first lair, build another hatchery in the starting base or in one of the smaller ones and upgrade only them.
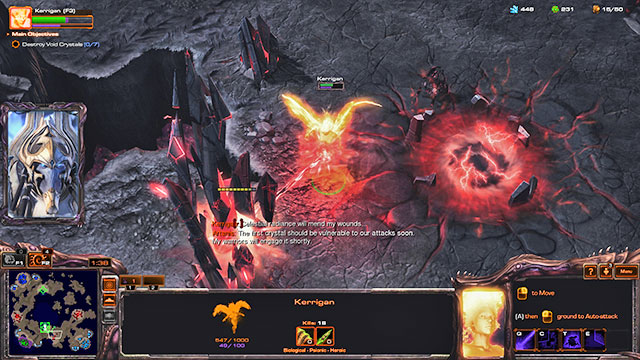
How to easily complete this mission? Most of all, you must destroy the void chasms. These buildings will regenerate themselves, but there are only few of them on the map and after destroying they will not create new units. The lack of void chasms means the lack of attacks on yours and your allies' bases, which will allow you to save some resources otherwise used on defense. Void chasms can create large amounts of various units, so the faster you get rid of them, the better for you.
Secondly, you must remember about using Kerrigan. She has a set of useful abilities, including healing of nearby units and an attack that works on whole map. Additionally, she has large number of hit points, so she will prove to be very useful when fighting enemy turrets. Whenever you will go to battle, take Kerrigan with you and let her attack enemies and heal your units. Thanks to this one ability you can win most battles.
Thirdly, you must destroy enemy turrets. They will appear on the map just after you will start attacking the void chasms or void crystals. Some of them attack only one target, other has area of attack, but all of them have large firepower and resistance. You must attack them with your whole army, healing your forces as frequently as it is possible. During the battle, order your whole army to attack the turret, switch to Kerrigan with the TAB key and use the C shortcut whenever the ability is ready to be used. Thanks to that, you will save most of your units from death.
Fourthly, you must keep creating and upgrading your army. Gather all hatcheries and their upgraded versions under one key and regularly transform all larvae into units. Collect as many resources as you're able to and spend them on weapon and armor upgrades. The enemy is very strong in this mission, so you must quickly reduce the distance in power between you and him.
Fifthly, you must produce the mutalisks. The mission can be completed in few ways, but the mutalisks are the most optimal unit. They fly, so they can quickly reach any location you need them to while avoiding the gaps created by Amon. Their speed allows them to quickly escape if they have some trouble. Thanks to their attacks hurting few enemies at once they can quickly destroy enemy armies, and if there are more of them they should easily get rid of void chasms and turrets. Additionally, thanks to the fact that they are flying, they can attack the void crystals more frequently. Zerg have many useful units, but in this mission it is best to focus on mutalisks. Preferably with the weapon and armor upgraded to maximum.
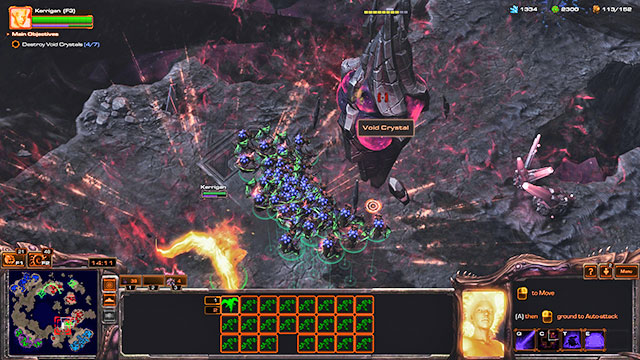
How to complete the main objective, destruction of the void crystals? First wait until you receive information about the void crystal vulnerable to attacks. Gather your mutalisks and Kerrigan and go in that direction. If you will find active void chasms on your way, destroy them. If you will find turrets - bypass them, you will take care of them later. Get near the void crystal and start attacking the building. When the turrets will appear nearby, leave the crystal and focus on the new objects. Let all your units attack single turret while Kerrigan will heal them regularly. Once all the turrets are down, get back to destroying the crystal. If you can, attack the same crystal as your allies. Destroy all turrets on your way back to the base, so that they won't interrupt you later. During the same time, train new mutalisks in the base and upgrade them. Remember also about Amon's attack from the fifteenth minute.
This time you will not have to send backup to your allies. Their bases are large and well fortified and unit production is high. The allies will not be able to destroy the crystals on their own, but they will regularly send groups of units in their direction. It is wise to use their help. The game will inform you about which void crystal is vulnerable to attacks and when the allies will go to destroy it you will learn the route through which the crystal will be moving. You will be also informed about which void chasms are active. All you need to do is observe the minimap.
There are only three differences between the beginning and the later part of the mission. First, Amon will summon more of varied turrets. Second, more void chasms will appear, and the active ones will create more units. Third, more territories will be destroyed by Amon. During the whole time you must only create and upgrade mutalisks, destroy the void chasms and turrets and finally attack the void crystals with Kerrigan's help. Thanks to this tactic you can complete the mission in less than 20 minutes.
Dark Whispers. Requires you to complete the mission on any difficulty level.
Massive Aggressive. Destroy 30 zerg units during the mission. This achievement requires some preparations as both the zerg base and all of their attack groups are large and very dangerous. It is best to obtain this achievement before freeing the last group of imprisoned protoss [12] as then you will have the largest army. Gather your forces next to zerg marching route, wait for the enemy to pass next to you and then attack them from behind, killing as many units as possible. If you have a strong army, you might be able to repel the enemy attack. If not, you will greatly weaken Kerrigan forces. To be sure that you killed 30 enemy units, break two groups of zerg forces. Another tactic is attacking the back of zerg army when it will be occupied with fighting terran, for example while storming their last, best fortified base. Zerg from the back are dangerous, but they will be easier target than the whole army. Thanks to that, you will have lesser losses and you will be able to repeat the operation during the next zerg attacks. No matter how many zerg you will kill, you will make it easier for terran to defend themselves, and thus you will gain some additional time to complete the mission and obtain the achievement. If the zerg are far from the reactor, use the available time for creating stronger, more advanced units, which will make it easier to defeat enemy army.
World of Warpcraft. Destroy 6 terran units when they will teleport to the battlefield on normal difficulty level. A troublesome mission, as both pylon containment units [5][11] to which the terrans will teleport are protected. In other words, you will have to ignore the defenders and attack the appearing units, which will greatly increase the losses of your army and will require a good army management from you (dividing into smaller groups, pointing the attack targets manually and so on). In addition to that, you must kill them during the teleportation, which takes few seconds, otherwise you will not receive the achievement. Another way is building so big army that both the defenders and the teleporting units will be killed instantly. Remember that you have two chances to gain this achievement as there are two pylon containment units on the map. You can kill three terran units at the first one and another three at the second one. This will make obtaining the achievement much easier. To make obtaining the achievement even more easier, save the game before getting close to the pylon containment units.
Ghosts in the Fog. Requires you to complete the mission on any difficulty level.
Gassed Up. Gather 3500 units of gas from the eruption sites. Very simple objective, especially since the mission doesn't have any time limit. All you need to do is gradually clear the map of enemy forces and gather the resources appearing from time to time. The enemies aren't collecting the gas, so sooner or later it will all get into your hands. The gas will appear infinitely, so the only thing that can stop you from completing this task is your own patience.
Nixed Nexus. Destroy all nexuses while playing on the normal difficulty level. This achievement can be obtained similarly to the above one. Keep cleaning the map and improving your forces. Before completing the main objective, destroy enemy bases in points [2] and [3]. During the attack on the main enemy base in point [7] don't march straight at the temple, but get rid of other enemy buildings instead. Destroy three enemy nexuses in this way.
Evil Awoken. Requires you to complete the mission on any difficulty level.
Blade of Skahuras. Kill 20 units using Zeratul's shadow strike ability. A very easy task, which can be completed easily at the start of the mission, in front of the void catalyst, or during the escape if you get rid of stalkers and will be escaping only as Zeratul. During the mission you will have many occasions to use the shadow strike, so a lack of targets will not be the problem. Many of opponents will be standing in groups, calmly waiting for you to eliminate them one after another. You must only remember that the ability needs few seconds of break before you can use it again. Due to that, give Zeratul a moment to rest after each battle.
One With The Shadows. When playing on normal difficulty level, none of your units can die before destroying the void catalyst. A troublesome achievement, since during the mission you will face many hard opponents, including hybrids. Due to that, you must take breaks regularly, allowing your units to regenerate the shields to maximum. Use Zeratul's abilities and always focus your fire on the most dangerous opponents. Move and fight carefully, don't waste your units, complete the side objective and save the game regularly.
For Aiur! Requires you to complete the mission on any difficulty level.
Shadow of the Colossus. Kill 120 zerg using the colossus units. In other words, keep these units alive and use them in each battle. Due to the number of opponents on the map and the reach of colossus units, you will get this achievement easily.
In Living Khala. Lose less than 100 units on normal difficulty level. Simply send your whole army to each battle. On this difficulty level the enemy is too weak for your losses to be greater than 100 units when performing massive strikes.
Oblivion Avaits! You must complete the mission in less than 10 minutes on high difficulty level. It is possible if you ignore the side mission objectives, units and buildings that don't threaten you and you will spend as little time as possible at reorganizing your forces. You can complete side objectives but you must do it quickly and be picky about them. If you ignore all the hives, you can reach [10] in 5 minutes. It means that you can destroy two, maybe even three hives and still manage to get the mission done in 10 minutes, but if you try to destroy four targets, then you will almost certainly not fit into time limit. Keeping all colossus units alive is important as well. Without them fighting hybrids will be hard, or even impossible to win. Stalkers are also important since without them you will not be able to destroy aerial units. During the mission stalker units must concentrate on enemy aerials and colossuses on ultralisks and fortifications, so that the most dangerous enemy units will deal as little damage to you as possible.
The Growing Shadow. Requires you to complete the mission on any difficulty level.
Ready to Serve. Train a total of 20 zealots or stalkers. Another simple task. Improve your economy so that you will have a constant income of minerals and gas and regularly give order to train new units. Until the end of the mission you should gather even twice more units than you need for the achievement. Just remember that there is or condition in this task. Training 10 units of each type will not provide you with the achievement. Units found during the mission also do not count.
Resourceful. Gather all resource and gas packages that can be found on the map on normal difficulty level. Very easy achievement, you must simply explore the whole map thoroughly, including all side passages. The resources aren't hidden very well, so by exploring each path you will find them all.
We Move Unseen. You must destroy one hatchery or lair in six minutes since taking over the base on high difficulty level. The hardship of this task has two sources. First, you will not know with what forces you will reach the base. It is possible that you will lose some unit on your way. Second, some time will pass before you will be able to create additional troops. You can use reinforcements provided by the void pylon, but it might still prove to be not enough. So, in order to obtain this achievement you must watch out for your units during the first part of the mission and after taking over the base you must immediately build the pylon that will restore the power to its western part, produce few zealots, gather units from the void pylon and carefully attack the closest zerg base [3]. All that time you must produce new units in order to quickly replace the losses and enforce your attack. The time is of essence, but it is better to attack after five minutes with a large group of units than after three minutes with a small army that will be defeated.
Spear of Adun. Requires you to complete the mission on any difficulty level.
Warp Tour. Use warp gates to summon 5 units to the battlefield in less than 10 seconds. This achievement requires you to find all warp gates available on the map and use them all at once, for example for summoning a group of zealots. The only trouble might be reaching them and then defending them, since the production itself will only require some supply of minerals and eventually gas.
Sprinter Cell. Activate all batteries in less than 15 minutes on normal difficulty level. This achievement doesn't require any additional effort from you, as if you manage your resources wisely you can complete the mission in around 11 minutes. It is important to take over all three warp gates, gather as many resources as it is possible and ignore enemy forces which aren't attacking the base or aren't close to the power cells. Thanks to that, you will have a large army and enough time to activate all power cells in the required time. Another tactic is take over all warp gates and two closest power cells, focus on developing the army and economy, gather 60, 70 units and then take over all remaining power cells one after another while ignoring the nydus worm appearing near the base. A bit risky, but with large enough army absolutely maintainable.
Adun Toridas. Destroy all enemy buildings while playing on high difficulty level. In theory a hard mission, since the enemy has two bases, but in practice it requires only time, since the mission doesn't rush you. You can calmly gather your forces, fortify yourself and then perform a massive attack on first and then on second enemy base. The order doesn't matter, so first choose the race which you will consider as more dangerous. Always attack with the largest army and make sure that the base is well protected. Additionally take over neutral resources and all three warp gates so that you will create a large enough army faster.
Amon's Reach. Requires you to complete the mission on any difficulty level.
Close Call. During this mission don't let the health of warp conduit drop below 2000 points. Despite appearances, it is an easy task. All you need to do is destroy every void thrasher immediately as he appears on the map. Additionally, the warp conduit is a very resistant building that is able to survive a long assault. You must only avoid situation when two void thrashers will attack the warp conduit simultaneously, as in that case the durability of the building will drop very quickly.
Jump the Gun. Clean all launch bays before the last, fifth void thrasher appears while playing on the normal difficulty level. This enemy will appear exactly during the twenty minute of the game. It means that you have twenty minutes to complete the whole mission. Ignore the solarite, focus on creating new units and send combat groups towards the launch bays as quickly as possible. Don't attack zerg which you don't need to destroy. You can also ignore the previous void thrashers. Not all of them, as in that case you can easily lose the warp conduit, but two of the four that will appear before the twenty minute can be ignored. The time saved in that way should be used for cleaning the launch bays.
A Royal Thrashing. You must complete the mission on high difficulty level without killing the void thrashers. The hardship in obtaining this achievement lies in the fact that each thrasher shortens the time for completing the mission. While one can be survived, two are a problem, and with three the resistance of the warp conduit will fall down rapidly. Due to that, you cannot complete the mission with a large army, but you must use a trick instead. For example, use the dark templars. They are invisible, so if you manage to avoid detectors you can clear the launch bays without causing alarm among zerg. You will need a strong economy, the defense able to withstand attacks, large number of dark templars and a good coordination so that you will reach the launch bays without being noticed. Another method is creating a massive army and ignoring unimportant targets on your way to the launch bays, but this method requires time which you can run out of very quickly.
Last Stand. Requires you to complete the mission on any difficulty level.
Rush Hour. Destroy all zenith stones in 10 minutes since the start of the mission. The objective is very easy to obtain. You must simply gather all your units at the start of the mission and move then to each zenith stone one after another. There won't be many enemy forces on the map and your units will prove to be strong enough to destroy all the buildings. You must only remember to produce additional units while destroying the stones, so that the next buildings will be destroyed faster and the potential loses quickly replenished.
Global Swarming. Take down 1.8 billion zerg from Shakuras on normal difficulty level. In theory a hard objective, it will prove to be very easy if you will use the resources mined around the temple to build as many defensive buildings as possible. If you will change your base into a stronghold protected from each side by photon cannons and khaydarin monoliths supported by shield batteries, you can reach even 2 billion zerg. The mission will end just after you give order to detonate the temple, so if your defense lines are broken, wait till the last moment and give the order then. You can also create few units, but large number of turrets should manage without them.
Anvil of Will. Gather 2.2 billion zerg on the Shakuras on high difficulty level. Similarly as above, except that it is a good idea to train as many units as possible in addition to the turrets. Your base must become an impenetrable fortress, which means the necessity of using each fragment of the territory to place a building and creating an army filling the maximum unit limit. Rebuild each destroyed building immediately, refill each killed unit with another one. You must also gather as many resources as it is possible and you must have all possible upgrades developed.
Forbidden Weapon. Requires you to complete the mission on any difficulty level.
Danger Zone. Don't let the Tal'Darim laser destroy any of your units. Very simple, you must simply avoid the beam. Its route is shown on the minimap and the speed is small, so all it takes is a bit of attention to get this achievement.
Pull the Plug. Destroy 6 Tal'Darim Gateways or Warp Gates on normal difficulty level. A simple task, all you need to do is destroy enemy bases in points [3][4] and [7].
Unrestricted Access. Complete the mission in 11 minutes on high difficulty level. The key to completing this mission is the solar lance ability. You can also use the deploy pylon. Create more workers and one or two additional zealots after the mission starts. Repel the first enemy attack and keep improving your army. You will need few dragoons in addition to the infantry. Add sentries to them and move north. Northwest from [X1] you will find a barrier and a pylon powering it up. In usual circumstances you would have to walk through the whole map to reach it, but now you can simply destroy it using the solar lance. Use the ability on the barrier and set the pylon as the ending point. The lance will destroy the building and deactivate the barrier.
Destroy the units on the other side, gather sentries from [9] and move ahead. At this point you should have around 40 and more units and in the base you should have at least four gateways producing new ones. Once you will be near [10] you will receive information about incoming warp prisms. Stop on their way and destroy as many as you can. Left from [10] you can also create a Pylon that will allow you to quickly summon additional units. Get through [10] and [11]. Split your forces in such way that the dragoons will destroy the warp prisms and the infantry will attack the infantry. Without the warp prisms the enemy will not receive reinforcements and his turrets will stop working. If you ignore the warp prisms, your army will be decimated. In [11] in first order focus on enemy units and turrets. If you had great losses, don't worry, you're close to the end. Use solar lance in [12] to get rid of most enemies. You can also point the rays in such way that the pylons powering the barrier will be destroyed immediately. If you do that, you can immediately move towards the destination point. It isn't important how many of your units will reach it. One unit is enough to complete the mission and obtain the achievement.
Sky Shield. Requires you to complete the mission on any difficulty level.
All the Time in the World. Don't let the clock to drop below 4 minutes. Very easy considering securing the sky shield stabilizers and the possibility of receiving help from Raynor. Simply watch the time and don't wait too long with securing the mission objectives.
No Time for Games. Secure two sky shield stabilizers in less than three minutes when playing on normal difficulty level. Another simple achievement. At the beginning of the mission focus on expanding the base, create about 15 units and attack the first stabilizer [1]. Immediately after that move on another one ([2] or [3]). Its defense will be weak and you should easily defeat it.
Plat Trick. While playing on high difficulty level, secure three sky shield stabilizers in less than 80 seconds. As above, but slightly harder. Act similarly as above, but create a larger army (30 varied units) and attack sky shield stabilizers [1][2] and [4] one after another. Ignore the base [B1] and leave the EMP scramblers [6] alone. Thanks to that you should manage with securing all three objects. To make sure that you will receive the achievement, divide your army into two parts and clean the [6] area beforehand. Attack [1] with the first army and them move it to [4]. At the same time let the second army attack and secure [2]. If you have coordinated your attacks well, you should fit in the time limit.
Brothers in Arms. Requires you to complete the mission on any difficulty level.
Mental Breakdown. Destroy 80 or more enemy units during the stun caused by keystone. A very simple task. Don't help your allies in their battle with enemy terran. Instead, improve your army. When you will be reaching the end of time, gather the army in a place that will be attacked by hybrids. However, don't stand in one place but start the attack. Destroy enemy units until the hybrid appears nearby. Focus on it, destroy it and get back to killing the enemies until another hybrid will appear. Repeat every time when the keystone will be active. What makes this easier is the fact that after killing all hybrids you will always have few seconds of peace during which you can focus on destroying enemy units and buildings. Due to the necessity of attacking only during specific moments, the operation might make the mission time much longer.
For the Alliance. Don't let your allies lose more than 5 buildings on normal difficulty level. A very easy task. All you need to do is not let hybrids get near the bases of your allies [3-6]. This includes the frontline bases as well, as the game counts all allied buildings, no matter where they were built and what are they. Your allies are able to easily fight enemy terran and not allow their bases to be attacked, but they are helpless against hybrids. At least on normal difficulty level, because on higher ones your help will be needed also in battles with terran. They will send large attacks which from time to time will be able to destroy some allied build, like for example a bunker. So, if you have cleaned one of the places for the ally to build the outpost, wait for him to build the bunkers and position his siege tanks. Thanks to that the chance for him to lose a building during enemy attack will drop rapidly.
Disruptor Junction. Destroy 55 enemy buildings while the Keystone is active on high difficulty level. Use the same tactic as with Mental Breakdown, but this time on buildings. A larger number of hybrids make the job harder, at the beginning killing them will take you more time than destroying the enemy buildings. However, further in the mission this should change. At least until you attack further enemy positions, where you will find single hybrids as well. Kill them before you start destroying buildings. You should also wait with attacking the main enemy base [7-9] until the keystone is active. Once the activation happens, quickly get rid of all hybrids and destroy as many buildings as you can. Once it is done, retreat and wait for another activation of the artifact.
Temple of Unification. Requires you to complete the mission on any difficulty level.
Templar of Doom. Destroy the titanic warp prism in less than 10 minutes. In other words, you must destroy this ship before the mission's time counter shows 15 minutes. When you receive the quest, for now leave the unclaimed celestial locks, make sure that the taken over ones have good defenses and focus on creating the army. Quickly gather large enough forces able to destroy the ship and its defenses, wait for it in point [9], quickly destroy the defense units and then the ship itself. If the time is essence for you, ignore the defense units, but in that case you will lose many units and will probably not destroy the main target. You can also place a pylon, few photon cannons and shield batteries at the ambush location. The buildings will serve as a support for your army.
Locked Down Tight. When playing on normal difficulty, take over celestial lock in six minutes and don't lose it till the end of the mission. A simple task. Take over the nearest celestial lock [1L][2L] or [3L] and provide it with strong enough defenses so that it won't be taken over till the end of the mission. In other words, provide it with similar defenses as other celestial locks, just larger and react whenever you receive information that it is attacked.
I Am to Misbehave. Destroy both enemy bases on high difficulty. In theory a hard task, but actually it is only time consuming because the mission has no time limit. Simply gather large enough army and first destroy one and then another enemy base.
The Infinite Cycle. Requires you to complete the mission on any difficulty level.
Hero of the Storm. Deal 7500 damage using Artanis' lightning dash. Another simple challenge, just use this ability often during battle. Use it mostly against large constructs, hybrids and large groups of terran or protoss units.
Bane of Their Existence. Kill 20 units using summoned banelings on normal difficulty level. A very simply challenge, simply summon and use banelings when fighting terran and protoss.
The Bigger They Are. Destroy the hybrid Behemoth on high difficulty level in less than 12 minutes. To get this achievement you must destroy the last opponent on the map, the one that attacks the third and last Hall of Revelation. In other words, you must immediately get through all three parts of the mission, effectively use skills and basic attacks of your heroes and stop as rarely as possible. You must also ignore the Xel'Naga devices since conquering them will take precious seconds. You can obtain additional seconds in the third and last part of the mission if you fight enemies only if it is necessary, but in that case there is a large probability that they will follow you to the battle with the hybrid. During the last battle you can also ignore the other hybrids and first attack the largest one. However, it is important that both your heroes will have all abilities ready to use. Bury the enemy under banelings, use Kerrigan's and Artanis' offensive abilities and focus your basic attacks on him. This will probably be enough to take him down before the time runs out. You must watch out for other hybrids and use Artanis' healing abilities at right time.
Harbinger of Oblivion. Requires you to complete the mission on any difficulty level.
Stormcaller. Destroy 15 units using the psionic storm ability of high templar unit. A very simple challenge, all you need to do is use the ability few times at the beginning of the mission, before reaching Artanis, and few times later, for example while attacking one of the void crystals.
Hive Five. Kerrigan cannot lose more than three hives during the game on normal difficulty level. In theory a hard one, in practice the challenge requires only some good planning. Ignore the Xel'Naga vessels, focus on creating workers and improving the base, use the gathered resources to create a large army consisting of from 40 to 50 units and destroy all void crystals one after another. It is best to help zerg, as it will allow you to speed up the destruction and thus protect more hives.
Solo Operative, Right? Secure and turn off 2 void crystals with no help from Kerrigan while playing on high difficulty level. Only two abilities will be useful in this mission, orbital strike and deploy Fenix. Create more workers after obtaining control of the base and start producing units. Kerrigan will attack the crystal in point [V2] but she will not get through enemy defenses. Don't help her. Once you gather large enough forces, consisting of 20 and more units, attack the [V1] point. Clear the area and return to base. Do it before Kerrigan will manage to secure [V2]. Keep producing more units, especially archons and dragoons because you will have to fight many aerial units. Don't build the turrets, let your units take care of defense.
Gather your army until only two Kerrigan's bases remain. Gather the army in point [V1] and get from there to the stairs leading to [V4]. Destroy some enemy fortifications on your way. Make sure that you can afford both abilities and then walk upstairs. Bomb the enemy buildings using the orbital strike, summon Fenix and get through to the mission target. The enemy will have a massive army, but with the help of your hero you should be able to defeat it. After destroying the second building you will immediately receive the achievement, so don't worry if you will fail the mission. It won't matter.
Steps of the Rite. Requires you to complete the mission on any difficulty level.
Guerrillas in the Mist. Kill one of the guardians while the terrazine fog is active. Gather your army near one of the bases while eliminating the mission targets and wait for the fog to be active. Once that happens, attack the base and kill the guardian. This requires you to split your forces, so make sure that you have left strong enough defenses in the base.
Rise and Shrine. Complete the mission on normal difficulty level before the terrazine fog raises four times. In other words, you must complete the mission in less than 22 minutes. It is best to combine this achievement with the previous one - attack the mission objectives while the terrazine fog is active. This will allow you to save precious minutes.
The Rite Stuff. Complete the mission on high difficulty level without destroying Tal'Darim forces. All of them, including additional motherships. In theory a hard objective, it is actually much simpler than one could think. To complete you need chrono surge, orbital strike, reconstruction beam, mass recall and time stop abilities.
Create the maximum number of workers at the start of the mission. Start producing void rays. Don't build any defensive buildings, your defense should consist only of void rays - they will be enough. Gather resources and produce void rays during first wave of Amon's attacks. Keep them at the northern entrance, that is from where the enemies will come.
When the terrazine fog drops, immediately move the void rays to the southern edge of the map, straight south from the main base. Once you reach the edge of the map, move left until you get behind point [2]. Fly towards enemy base and destroy the guardian that can be found there. You can lose a ship or two. Before attacking, give your units two orders using the SHIFT key. First order will be to attack the target, the second order will be to move west. Thanks to that, after destroying the target the units will retreat. If you will not do it, there is a chance that they will make damage that will make it impossible to get the achievement.
Go left from point [2] and then north. Keep flying near the edge of the map. Once you reach [3], use time stop. Attack the second mission objective using the fact that enemy units are stopped. If you will have enough energy, use orbital strike as well. When the target will fall, use mass recall on the surviving void rays.
Build another ships and pylons in the base. If you can, use chrono surge to speed up the production. When the terrazine fog will rise again, protect only using the void rays. Move them between the base entrances, destroying all enemies on your way. At this point you should have around 20 ships. When the terrazine fog will drop again, fly right. Once you have the edge of the map on the right, move north, towards the [1]. Stop right from it and repeat the operation from [2] - use the SHIFT key to give order to attack the target and then retreat. More or less at this point you will receive information about an attack of enemy fleet. Don't defend yourself. Stop the production of the units. If any void ray remains there, send him to the lower right corner of the map. It is about making sure that none of your units or buildings will attack the incoming fleet. Leave the probes at the work. However, you will not need anymore resources.
Send your void rays fleet to the north. Bypass the second mothership [M2] from the north and fly towards [4]. When you will see enemy units, use time stop. Give again the order to destroy the target and retreat. If you have done everything correctly, according to the final statistics the total number of killed enemies will be only larger by 4 than the number of killed Amon's phantoms.
Rak'Shir. Requires you to complete the mission on any difficulty level.
'Shir Determination. 25 and more units must support Alarak at once. Very easy, simply play according to the walkthrough and gather massive army before you help Alarak push the duel to the Pit of Sacrifice.
Rak'Star. Destroy 3 Tal'Darim nexuses while playing on normal difficulty level. To do it, you must destroy enemy bases in points [5][6] and [7]. Push the battle towards the stairs leading to base [5] after gathering the army. Make sure that Alarak is safe and then attack the base. You don't need to destroy it all, getting rid of the nexus and, just in case, the workers, will be enough. Once you're done, return to Alarak, get rid of enemy units if they appeared nearby and push the battle to the base [6]. You can start with this base or the one at [7] - they are near each other. Focus on nexuses and workers again. If you will notice that Alarak has trouble, retreat, help him and then get back to destroying the bases. With a large army consisting of about 50 units destroying enemy bases shouldn't take you much time.
Flawless Victory. Don't let Alarak be forced to fall back on high difficulty level. A very hard challenge, it requires your forces to be constantly near Alarak and to destroy enemy units. It means that every unit you will create must be sent to help Alarak and he must keep pushing forward. However, there is a much better way to obtain this achievement. You can start positioning your forces not next to or behind Alarak, but in front of him, on the path leading to [2] through which Tal'Darim will send their forces. Thanks to that, Alarak will not move forward nor will he retreat, so the conditions to receive this award will be met. Your task will be to constantly enforce the defenses and to destroy all enemy units that will try to get close to Alarak. At some point you will decide that your army is strong enough. Once that happens, leave some forces at the defense point and use the rest to clean the path to [2]. Once it is clear, send your whole army to help Alarak and push the battle to the location [2].
Templar's Charge. Requires you to complete the mission on any difficulty level.
Friends in High Places. Destroy at least 120 enemy units using the carriers. In other words, you must complete the whole mission using carriers, if need be with the help of void rays. Don't forget about upgrading the units.
Ultimate Answer. Gather 42 resource containers on normal difficulty level. In order to do it, you will need at least one land unit. You must also remember about the containers floating in the air. Check the whole map and clear it of resources and you will surely get this achievement.
Tropophobic. Complete the mission on high difficulty level without moving the platform more than four times. Totally obtainable. You are able to reach most locations on the map in only four moves. You must only decide whether you want to finish the journey in the eastern part of the map (top, top, right, bottom) or western (top, left, top, top). The first option will limit your access to the upper part of the map since there is no land connection from point [2] to point [8] and further. The only disadvantage of the second option is the lack of land access to [2], but since the mission encourages you to use ships, this shouldn't be a big problem. In other words, it is better to send the platform to the left using one of two available routes.
When moving left you will have a choice - either up, left, up, up or up, up, up, left. From these two options, it is better to select the first one. By moving only up you will lose land access to one of the platforms (north from [5]) while by picking the route left and then up you will gather more resources.
Unsealing the Past. Requires you to complete the mission on any difficulty level.
Pest Control. Bury the entrances to zerg caves sooner than 40 seconds after zerg will start crawling from it. In other words, you must bury the caves in points [6] and [7] just after you find them.
Brood War. Destroy all zerg buildings while playing on normal difficulty level. Very easy, you must simply destroy all buildings on megalith's path. Aerial units supported by colossus will be perfect for the job. You must only remember about the enemy base in point [4] and about enemy buildings near the two power core housings [C1][C2]. Both these places can be cleared of enemies while the megalith will be working on the next stasis locks.
Termination Protocols. Destroy all zerg lairs before the megalith will reach the fourth stasis lock on hard difficulty level. This achievement requires you to destroy two buildings in point [4] and one building per each point [7-10]. The only trouble is that you must simultaneously control two armies. The first will be destroying the lairs while the second one will protect the megalith. In addition to that, you must act partially against the mission objective, allowing the enemies to attack the megalith. The megalith is slow and to attack it must stop in one place. It also regenerates health after visiting each stasis lock. So, it is profitable for you when it is fighting the zerg attacking it, as each such battle gives you few additional seconds for obtaining the achievement.
Start the mission with building the second assimilator and stargate. Construct destroyers as soon as you can. Use the forces you have at the start to help megalith reach the first stasis lock [2]. Gather destroyers at the entrances to the base so that they will serve as its protection. Just when you gather around 5 of them, send them south to point [4] and destroy both lairs. During this time the megalith should move to the second stasis lock [3], so protect it during the journey. Keep producing the destroyers, you can also create the second stargate. Upgrade the weapon and armor of flying units. Create few stalkers as well and send them to the megalith. It would be good if three starting colossuses would still be available.
When the megalith will start leaving the second stasis lock you should have more than 10 destroyers. Send them north, to the lairs [8-10]. Destroy them starting with the eastern one. In case of trouble, help yourself with abilities. At the same time colossus and stalkers are tasked with protecting the megalith. Destroy the turrets, ultralisks and all other resistant targets with which the megalith can have biggest trouble. Leave the smaller units alone, they will only slow down the unit you are defending. You must be very careful as the megalith is a fragile unit and it will be quickly destroyed if attacked from all sides at once.
When the megalith will reach the third stasis lock [5], all three lairs on the north should be destroyed. Add the destroyers to the main army protecting the megalith. Wait for the unit to go north, to the fourth stasis lock [7] and provide it with protection. This part of the mission is similar to the "regular" version, but with one difference - when you will be near the fourth stasis lock, you must quickly destroy the last lair, even if the megalith will be seriously hurt then. The journey to the fifth one will be easy.
All that time you must remember about defending the base. The destroyers are using many resources, you should also have a large stock of minerals. Create many zealots and photon cannons supported by shield batteries for protecting the eastern entrance, as you will be attacked only there during the later part of the mission.
Purification. Requires you to complete the mission on any difficulty level.
Don't Taze Me Cybros. Don't let the purifier core matrix lose its entire shield. In other words, build turrets around it and keep nearby a small group of units as support.
Power Overwhelming. Activate two purifiers group in less than 60 seconds between them while playing on normal difficulty level. Select two purifiers groups. Destroy two related null circuits per each group. Then split the army, position both groups near the two remaining null circuits and attack them simultaneously. At the same time clear the area of enemies, so that lesser armies will be able to destroy both null circuits. Considering the closeness of the base and the weakness of enemy forces, the achievement is best to be obtained on circuits from sets [A] and [B].
Monster Hunter. Kill five hybrid Behemoths in less than 15 minutes on hard difficulty level. This challenge requires some contriving from you. You must have access to the mothership. Select chrono surge, reconstruction beam, deploy Fenix and orbital assimilation as skills. As for other two, purifier beam and orbital strike will be enough. Shield recharge must be at maximum level. Start the mission with building the stargate and creating probes. Always produce at least one. Move all your units under the purifier core matrix and build the pylon in the selected location. Use chrono surge as fast as you can to create maximum number of probes. Quickly building refineries on two other gas sources is important as well. Now you need only the fleet beacon. Once you place all buildings, gather 1000 minerals and 1000 gas and start building the mothership. Invest the remaining resources into forge and into turrets near the purifier core matrix and on the eastern side of the base. When you can, use chrono surge to speed up building the mothership.
Send completed ship towards the null circuits from set A. Remember about using the teleportation frequently, this will allow you to save precious seconds and remember about that the mothership is attacking while it is moving. One attack will be enough to destroy most units, two to destroy turret. Kill only units and buildings that can threaten you, ignore the rest. Focus on destroying the null circuits.
Move north after destroying set A. Save the game before that and save the game also after the next battles. Allies summoned by you will kill the first hybrid. Bypass the [6] and fly straight at zerg base in [3]. Near the entrance you will find the second hybrid. Carefully attack it, summon Fenix in case of trouble.
Fly immediately east after the battle. Ignore the null circuits from set B and fly towards the base [4]. In the meantime, watch out for the defense of purifier core matrix. You can also upgrade the shields of your units, this will be very useful for the mothership. Kill the third hybrid in the base [4]. If the mothership was heavily damaged, wait few moments for the reconstruction beam to repair some of the damage.
Now fly southwest, towards the core matrix [1]. Turn south from there and destroy all null circuits from set D. You can also ignore them and fly from [1] to the base [5] where in the entrance you will find the fourth hybrid. The last one will attack the purifier core matrix [1] during the 13 minute of the game. If you have done everything correctly, before the fifteenth minute you should have killed all five required hybrids - one or two killed by the allies and three or four killed by the mothership. The only thing remaining to do is to complete the mission, the mothership will be more than enough to do it.
Teplar's Return. Requires you to complete the mission on any difficulty level.
Outrunner. Don't let the psionic energy chasing you kill any of your units during the third part of the mission. A very simple objective, you must only keep going forward and not stopping. Or you can stop but only for short breaks when the energy is far away behind.
Master Control. Take over at least 15 enemy units using Karax's ability while playing on normal difficulty level. Move using the whole army in the second part of the mission. Whenever you notice the enemy, give zealots and archons order to attack it. At the same time let Karax use his abilities. If the enemy has two units that can be taken over, retreat after taking the first one and wait for Karax's ability to regenerate.
Silent but Deadly. Don't let Vorazun receive any damage when playing on high difficulty level. Walk into the detector's range as rarely as possible and let Alarak carry the burden of most battles. Optionally you can lure the enemies outside the detector's range where Vorazun will be able to fight without worrying about being hurt.
The Host. Requires you to complete the mission on any difficulty level.
Thanks for the Assist. Destroy any void shard with the help of one of allies. A very simple task. You must simply attack the void shard at the same time when one of your allies will do it and together destroy it. Allied army doesn't need to survive the attack, the sole fact of destroying the building matters.
Disenchanted. Destroy 2 void shards on normal difficulty in such way that no more than 150 seconds pass between destroying one and another. A rather simple challenge, but it will require some preparations from you. First you must create large enough army, preferably consisting of more than 50 units. Then pick two void shards. If there is an enemy base between them, destroy it in first order. If the access to it is blocked by void shards, then better select other targets. Get rid of the barricade between the crystals and then attack the first one. Move on the second one immediately after destroying the first one. Use abilities like time stop so that as little units are destroyed in the first attack as possible. Or you can use offensive abilities like purifier beam to destroy both crystals as fast as you can.
Hostbusters. Complete the mission in less than 24 minutes on high difficulty level. A very hard challenge that requires perfect micromanagement and carefully picking your targets. Most of all, ignore the additional objective. You will lose access to reinforcements, but you will gain few precious minutes. In addition to that, you will most of all need the time stop ability. Add shield overcharge and guardian shell to it. You should also take the solar lance, it will be useful for protecting the base, and the orbital assimilator which will make the micromanagement easier. Chrono surge will be useful as well.
First build the second assimilator and spend the rest of the resources on probes. You must quickly gather the gas needed for building the stargate because void rays will be your basic unit in this mission. Create a new worker whenever you can. If one is currently in queue, spent the resources on stargate or void ray. You must quickly construct few units of this type while all the time gathering more and more resources. Build only one unit of a specific type at once, so that you can spare the resources on other things. If you can, build the fleet beacon and then one carrier unit. Its fighters will serve as a decoy for enemy mines and its ability will allow you to repair your own units. Build also the second and then the third stargate in order to build new units faster. You can protect the base using the newly created fleet or you can add the forge and few photon cannons supported by shield batteries. All these things you must do simultaneously and in the most effective way. It means that you will play this mission at least few times. Witch each new attempt think about what you did wrong and try to improve your result next time. Build the first stargate faster, build the second base faster, develop unit upgrades faster. Remember about using the keyboard shortcuts, they will allow you to save precious seconds.
Gather your whole army and go at the closest void crystal [2]. If you can, use the time stop, this will allow you to avoid receiving damage by your units. Build a nexus next to the resource sources immediately after destroying the crystal and start gathering the gas from all three depots. Create probes, don't forget about pylons as well. In the meantime, start upgrading the weapon of flying units. Later in the mission you will need it.
Till the twelve minute you should have few carriers and three times larger group of void rays. Move your whole army at the next void crystal [4]. First get rid of its defenses, then focus on the building. The next target on the list will be the void crystal in point [3]. For now it is not a good idea to move west as there you would have to participate in a long battle with protoss and hybrids - you don't have time for that. The third in order will be the building from point [5] and then [6]. Spare the time stop for the last battle, this will allow you to ignore the defense of the crystal and focus only on it. You should attack it with a group of around 25 units, mostly of upgraded void rays. If you did not managed to produce so many - start the mission from zero and change the order of your actions. When the third crystal is destroyed, you must produce units in three or four stargates and gather resources in two bases. With economy prepared in such way you will not manage to create a strong enough fleet fast enough.
During the mission you must constantly use the abilities. Chrono surge will allow you to produce units and upgrades faster, time stop will be very helpful when attacking the crystals, guardian shell should be used when your army will be attacked by larger enemy forces and solar lance will prove to be useful while defending the base. Obtaining the achievement without regularly using the abilities will be much harder, maybe even impossible.
Salvation. Requires you to complete the mission on any difficulty level.
Daelaams to the Slaughter. Destroy or remove from the battle 20 ships of the Golden Armada using the Spear of Adun's abilities. In other words, you must use the abilities on ships attacking from points [4] and [5] and you must do it as fast as possible since from the tenth minute forward you will be losing Spear of Adun's active abilities. It doesn't matter what type of skills you will use, so pick the ones you consider the best or most useful.
Fully Khalabrated. Don't lose any allied nexus while playing on normal difficulty level. How hard this challenge will be depends on your tactic. If you have managed your defense lines wisely and you are constantly creating new units while making sure that all allies have your support, you will surely hold them. Alarak's base [B1] might give you some trouble but only because it is standing on enemy's way. Vozarun's [A1] base can be destroyed by the fleets attacking from [5]. Karax's base [C1] has the greatest chances for surviving as it is located in a place which will be bypassed by the enemies most of the time.
Creep Sea Fishing. Kill the brutalisk on high difficulty level. The target can be found north from point [B3] and he can be challenging even for a large army. If you want to kill him, you must do it fast, by sending at him as many units as you can and by using all available Spear of Adun's abilities. In other words, it will be best to do it before the fifteenth minute of the mission. Later the task will become even harder, mostly due to the loss of Spear of Adun's abilities and more constant and stronger enemy's attacks. At that point you will simply not have who to send to kill the brutalisk.
Into the Void. Requires you to complete the mission on any difficulty level.
This House is Clean. Destroy all void corruptions. A rather simple task. Simply clean the whole map of enemy buildings and units before attacking Amon.
Swift Execution. Complete the mission before the sixth void thrasher appears on the normal difficulty level. Assuming that the first part of the mission will take you about one and a half of minute, you will have to kill Narud before the thirtieth minute of the game. It means that you will have partially or completely ignore the side mission objective. Additionally, you won't be able to keep helping your allies all the time. You should help them only at the start, until they build one or two advanced outposts. Rest of the time you should focus on your part of the map and keep going ahead, destroying all enemy units and buildings on your way. It would be best if you reached Narud not later than in twentieth minute of the mission. Thanks to that, you will have enough time to defeat him before the sixth thrasher appears.
Forward to Victory. You cannot destroy more than 3 void corruptions while playing on high difficulty level. This challenge is mostly time consuming. Construct the second stargate after building the base. Gather as much gas as possible. Don't build any units except for destroyers. Use them to defend your base and the bases of your allies which will be regularly attacked. Don't leave the starting area of these three bases, you won't have any reason to do it. You can place a line of photon cannons in your base for defensive purposes, you will have too many minerals anyway. You can also upgrade the weapon of aerial units, but it is not required. Defend yourself and create new destroyers until you deplete both refineries. Use all accumulated gas to build new ships. You should have around 20 of them. Gather the fleet and send them to the left side of the map. Stick to its left edge and send the fleet up. Ignore the enemy units in [6] and [7], even if they will attack you. Stop once you're above [7]. Now turn your fleet towards Narud [5]. When the first enemy units start attacking you, use time stop. Fly towards Narud and attack him with the fleet. Use solar lance and guardian shell to make the mission easier. You will lose some units, but if you have used all gas on creating destroyers, the fleet should be strong enough to kill Narud.
The Essence of Eternity. Requires you to complete the mission on any difficulty level.
Xel'Naga Lifeguard. During the mission Kerrigan's health cannot drop below 1500 hit points. A very simple task. Attack the void thrashers immediately as they appear and don't let the enemy forces get through your fortifications. If you do it, Kerrigan will complete the mission almost unharmed.
Praise the Sun! Use Kerrigan to kill at least 60 units on normal difficulty level. Wait for the enemy to gather forces to attack on your base or base of one of your allies. Select Kerrigan, press the SHIFT key and then mark all enemy units one after another. After less than two dozens of seconds they all should be dead. Repeat the operation few times and you will definitely obtain the achievement.
Purity of Purpose. Kerrigan cannot kill more than 15 units on high difficulty level. In other words, you can use her powers only to kill the void thrashers, which will make defending yourself from enemy attacks much harder. Optionally you can use her to kill single hard targets, such as ultralisks, but only in exceptional situations, so that you won't accidentally exceed the limit.
Amon's Fall. Requires you to complete the mission on any difficulty level.
Extinction Event. Kill at least 375 units with Kerrigan's help. A simple task. All you need to do is let Kerrigan participate in the battles with your main forces all the time. You can check the number of units she killed by clicking on her character. If you decide that the number is too small, you can send her on a lone raid against enemy positions. You must only watch out for turrets. A good way is to use her last ability which has the reach of the whole map. In this way your account will always increase by few kills.
Dodge This. Don't lose any unit when Amon is destroying an area on normal difficulty level. Very simple, all you need to do is check on the mission map which areas Amon will destroy and avoid them.
Triple Tap. Destroy 3 void crystals on high difficulty level. More than 60 seconds cannot pass between each destruction. The trouble with this objective is that sometimes there will be only one void crystal on the map, other times there will be even five of them at once. So, it might happen that for a long time you will have only one or two targets to destroy and you will not be able to complete the challenge. However, you will quickly learn that except for that random factor, the objective is very simple to achieve.
You should complete this task methodically. Start with expanding your base and placing two additional hatcheries at the nearby resource sources. Train mutalisks and upgrade them. Destroy all void chasms and all turrets which can be found near the base. Wait. You must hold on until three void crystals appear on the map close to each other. Two of them can be on one side of the map and the last one on the other side, for example near Amon. It won't matter that much, this is why you have trained mutalisks. Be ready for the fact that they might have to fly some time above an abyss which will hurt them. Don't worry about that, they will be healed once they land.
When a group of crystals that suits you appear on the map, check if you can take care of them. The distance and the fact whether they will be still in the air is important. If the circumstances favor you, decide about the order of attack, save the game and hit the crystals with everything you've got. If you can, use Kerrigan's help, mostly her healing ability. If not, simply focus on attacking the crystal, trying to avoid the attacks of nearby turrets. Fully upgraded mutalisks are able to survive a lot and they have high attack power, especially if you have fully used the supply limit.
While attacking the crystals, keep attention to where they are and when will they disappear. If you have plenty of time and/or the distance is small, first destroy Amon's turrets and then the crystals. If the void crystals are far from each other or one of them will soon hide under the island, ignore the turrets and focus on destroying the crystals. Thanks to the weapon and armor upgrades, the mutalisks should deal with the objective, even despite that many of them will die. If you wasn't fast enough, simply load the game from before the attack and try other tactic. If you have gotten a favorable set of void crystals, sooner or later you will manage to destroy it fast enough.
Legacy of the Void requires a low-end PC. 2 GB of minimum and 4 GB of recommended RAM memory is not much today. The required processor is available on the marked since 5 years and the graphic card since much longer. The recommended computer requires few year younger parts, but they are still in reach of an average gamer. A hardware that can be hardly called modern is needed to fully enjoy the game.
Legacy of the Void works most of the time fluently in 1920x1080 resolution and graphics set on high. The game slowed down during some campaign missions due to the large number of scripts activated at the same time or when there were more than 200 units fighting at once on the screen. Smaller troubles were also observed in online mode caused by players with slower connection or in game modes that encouraged building large armies. On ultra level the slowdowns become much more plain, but they still weren't big enough to make the game uncomfortable.
The game requires you to register on the Battle.net platform, but it also allows to play the game alone, with no other people. The game requires you to activate the service, but it allows partially continuing the single player game even after the connection to the servers were lost. In online mode the game offers cooperation mode, battles with AI, battles for up to 8 players in team and all against all modes, ranking mode and large set of minigames created by users. The game requires keyboard and mouse to be controlled.
Singleplayer: Yes
Offline cooperation (split screen/hot seat): No
Multiplayer: Up to 2 players in cooperation mode, up to 8 players in team and all-against-all mode and up to 12 in various minigames available through the Battle.net.
The guide was created on a PC of below specification:
OS: Windows 7 SP1
Processor: AMD Athlon II X3460 3.40 GHz
RAM memory: 16 GB
GPU: AMD Radeon HD 6700
GPU memory: 1 GB
The game worked with no trouble in 1920x1080 resolution and graphics set on high level, both in full screen and windowed mode. In both cases the game allowed using the ALT-TAB shortcut and later returning to the game with no quality drops or errors. The only trouble occurred during large battles with more than 200 various units participating at once and during highly scripted campaign scenarios.
OS: The game works with no trouble on all operating systems from the Windows family since the XP above, both in 32 and 64 bit versions
Internet connection during game: Required for single player and multiplayer. It is possible to partially play single player mode after losing the connection.
Internet activation required: Yes, through Battle.net
Controllers: Keyboard and mouse
Achievements: Yes, hundreds on Battle.net
OS: Windows XP / Windows Vista / Windows 7 / Windows 8
Processor: Intel Core 2 Duo or AMD Athlon 64 X2 5600+
RAM memory: 2 GB
GPU: NVIDIA GeForce 7600 GT or ATI Radeon HD 2600 XT or Intel HD Graphics 3000 or better
HDD space required: 15 GB
GPU memory required: 256 MB
OS: Windows 7 / Windows 8 / Windows 10 64-bit
Processor: At least Intel Core i5 or AMD FX series processor
RAM memory: 4 GB
GPU: NVIDIA GeForce GTX 650 or AMD Radeon HD 7790 or better
HDD space required: 19 GB
GPU memory required: 1 GB
Playing on a laptop is possible.


 Sniper: Ghost Warrior Game Guide & Walkthrough
 Street Fighter IV Game Guide & Walkthrough
 S.T.A.L.K.E.R.: Call of Pripyat Game Guide & WalkthroughSilent Hill: Homecoming Game Guide & Walkthrough
 StarCraft II: Heart of the Swarm Game Guide & Walkthrough