
The Starcraft II: Heart of the Swarm guide contains the description of completion of all twenty missions in the single player mode, alongside with verified methods of unlocking of all achievements connected with them.
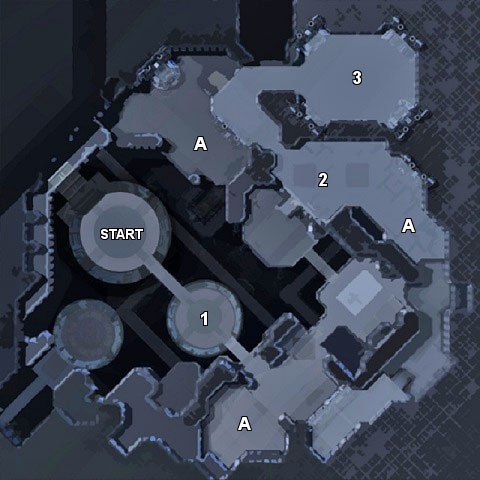
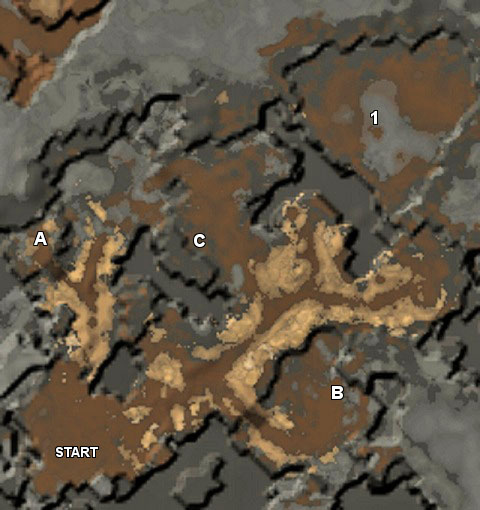
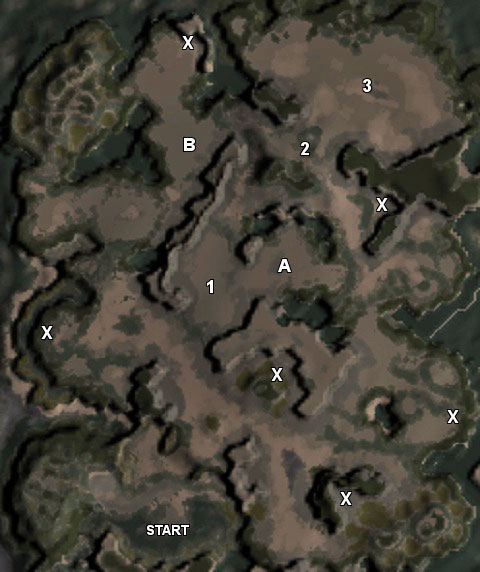
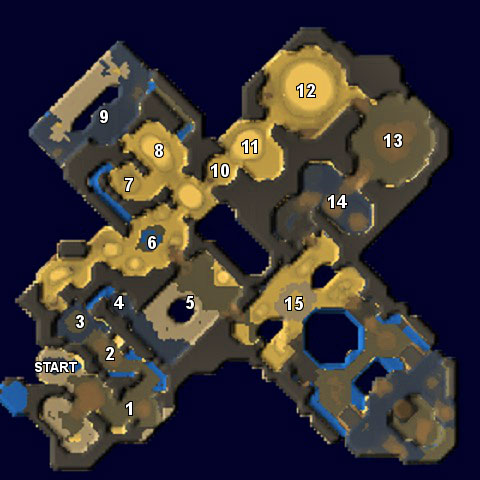
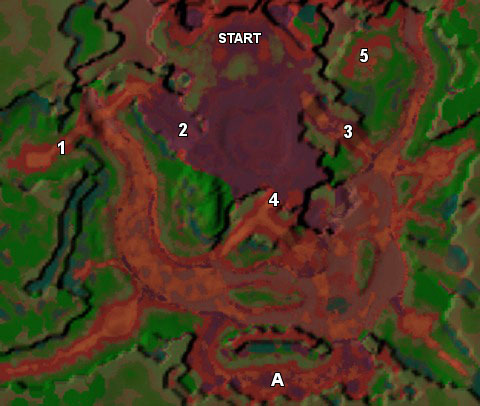
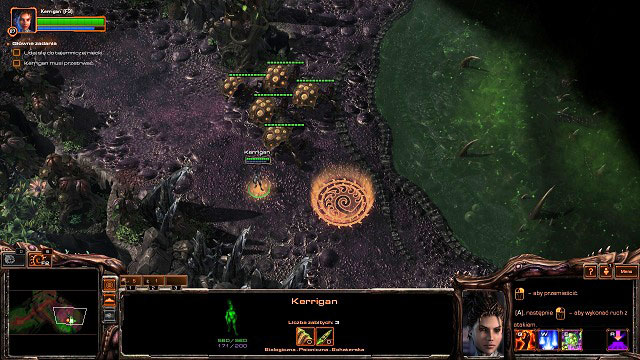
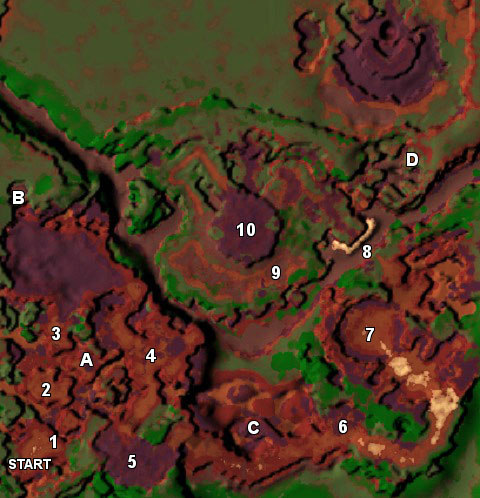
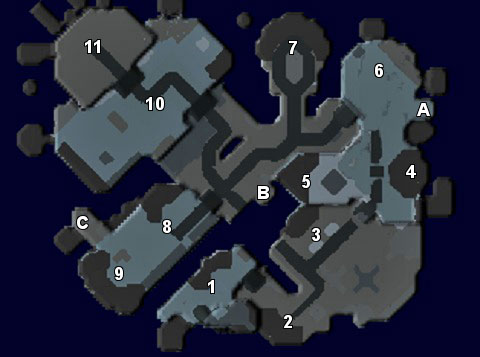
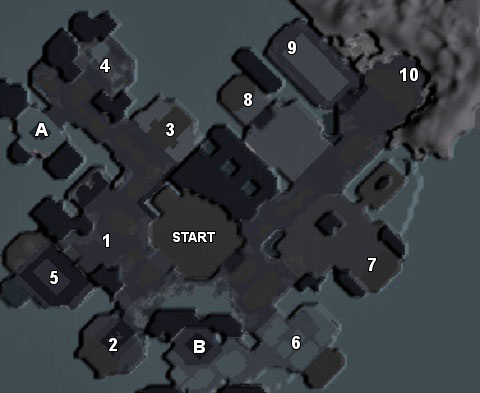
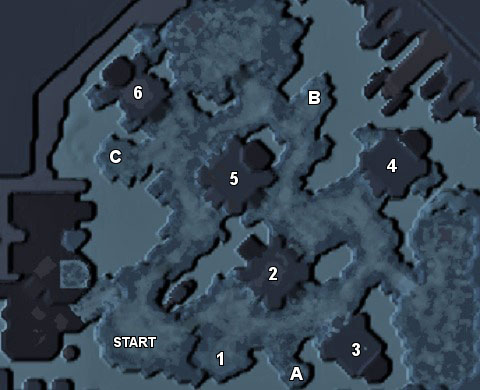
Every mission comes with an enclosed map which helps get a deeper insight into the key areas of every mission. Places that are strategically important for each mission, have been marked with consecutive numbers. Letters, on the other hand, signify additional missions or items connected with some of the achievements. All of the markings have been explained in the description of an individual mission.
Slawomir "Asmodeusz" Michniewski
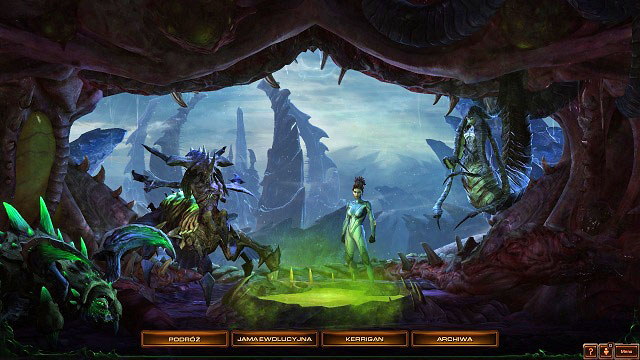
Like in Wings of Liberty, also in Heart of the Swarm you will be able to access your base from which to explore the area. Onboard of the base, you will be able to develop your units and heroes. Additional information, concerning the units available to you and to the enemy, as well as the Zerg technology tree , can be Accessed by pressing "F12" key during the mission.
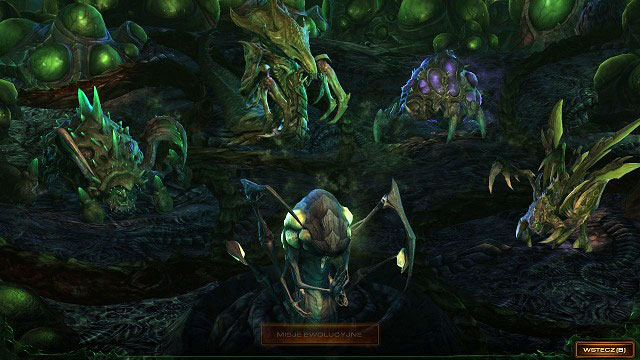
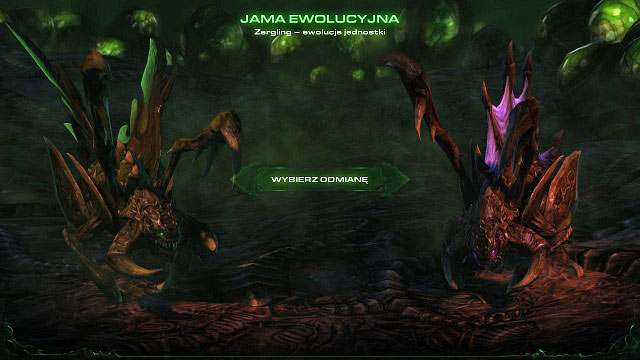
Relatively early in the campaign mode, you will unlock the Zerg spaceship Leviathan, onboard of which, you will find a number of interesting locations. The first one to discuss here is the evolution chamber that allows you to pick one mutation available for each unit which, in turn, will completely alter the unit's capabilities. For example, Zerglings may use :the reinforced carapace that gives additional health points, adrenaline rage that increases the frequency of delivering an attack, or increased metabolism which allows for quicker relocation of units around the map. Apart from minor exceptions, (zerglings, mutalisks), I leave it for you to decide about the choice of capabilities, as it has no considerable bearing on the strategy.

Apart from that, after you complete certain missions, you will be given the opportunity to choose the right path of evolution for your charges. This can also be activated while in the evolution chamber, by pressing the Evolution Missions button. This will transfer you onto the surface of planets, where you will be learn about the superiority of one unit over another. Again, the choice you make has no bearing on the strategies described in this guide. It simply gives you the opportunity to work out your own solutions which may be even more effective.
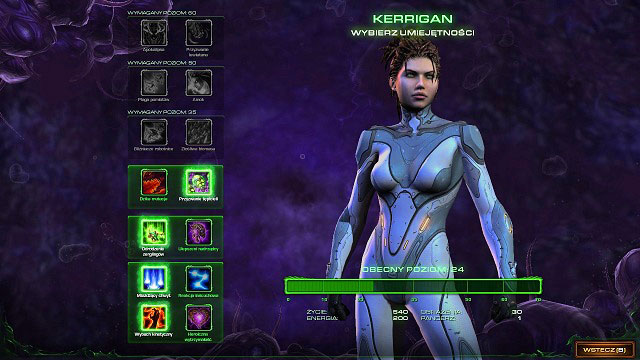
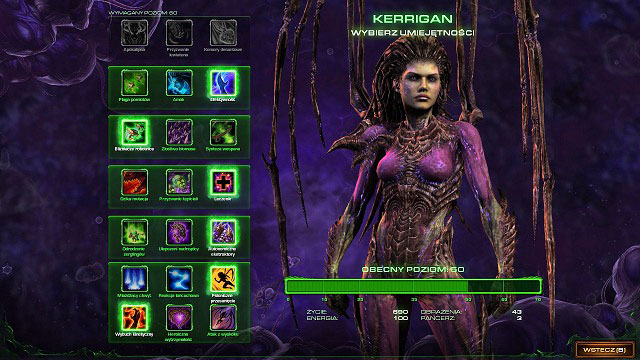
In the course of completing missions, also your character will be gaining strength. The Kerrigan tab, which is available while you are onboard of Leviathan,, you will be able to chose individual special abilities before you start the actual mission. It is a good idea to experiment with those a bit, it is possible that you will define your favorite combination this way. In case you have any problems completing a mission, or obtaining an achievement, some mission shave an ability specified, which will make things easier.
The below table lists missions available in the Heart of the Swarm alongside with the rewards obtained for the completion of that specific mission. The numbers in the brackets specify Kerrigan's level that you will be awarded upon the completion of the main mission and of the side missions- there is 70 in total (1 introductory and 69 missions).
Campaign / mission
New unit
Evolution mission
Kerrigan's levels
Umoji missions
Lab Rat
Zergling
Back in the saddle
Rendezvous
Swarm Queen
Char
Domination
Baneling
7 (5+2)
Fire in the Sky
Zergling
3 (0+3)
Old Soldiers
Aberration
Baneling
2 (0+2)
Kaldir
Harvest of Screams
Roach
7 (5+2)
Shoot the Messenger
Hydralisk
3 (0+3)
Enemy Within
Roach
1 (0+1)
Zerus
Waking the Ancient
Mutalisk
3 (0+3)
The Crucible
Swarm Host
11 (10+1)
Supreme
Hydralisk
9 (5+4)
Skygeirr Missions
Infested
Infestor
3 (0+3)
Hand of Darkness
Mutalisk
2 (0+2)
Phantoms of the Void
Ultralisk
7 (4+3)
Space Missions
With Friends Like These...
Conviction
Swarm Host
11 (9+2)
Final missions
Planetfall
Ultralisk
Death from Above
The Reckoning
Primary objectives:
Select a drone
Mutate a hatchery
Mine for minerals (300)
Mutate an overlord
Mutate a brooding pool
Mutate Zerglings (6 units)
Destroy gas turrets (3)
Destroy the exterminator
Secondary objectives:
Free zerglings from the enclosures (3)
Reward for the main objectives:
New Unit: Zergling
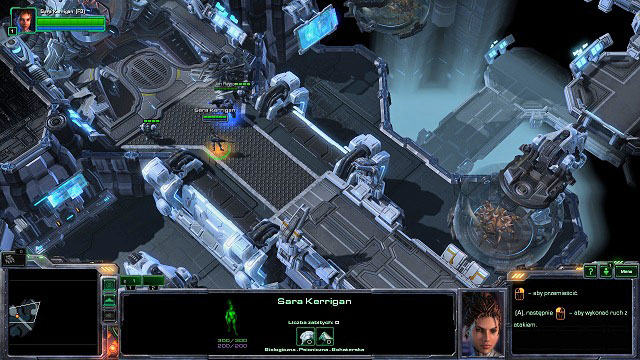
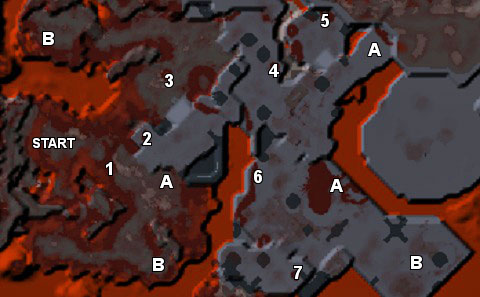
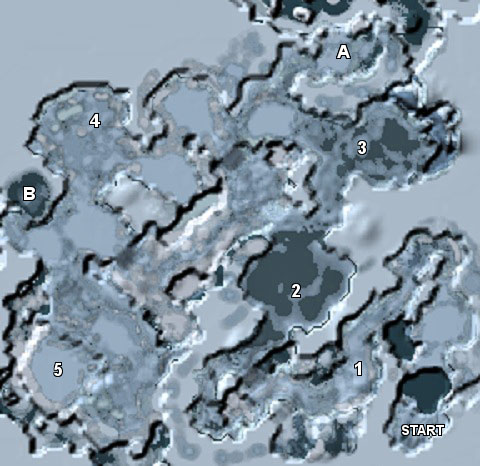
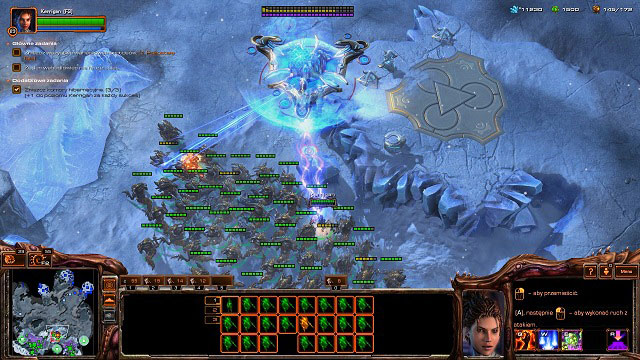
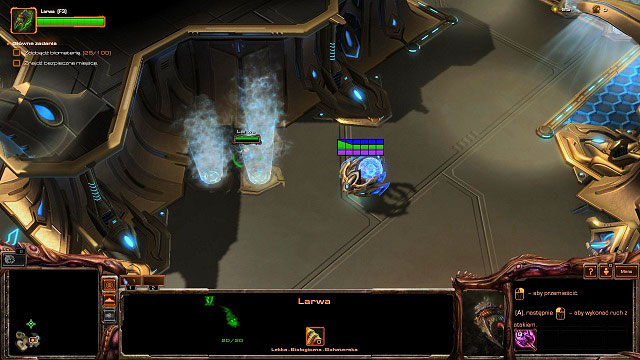
The initial mission of the Heart of the Swarm campaign is a tutorial of a kind that allows you to brush up on the basics of how to control units and build bases. You need to mutate the only drone at your disposal into a hatchery. After you are done here, you will receive another six zergs that you should immediately dispatch to mining for some minerals - you need to collect 300 units, in order to complete this mission. This is enough to mutate a larva into an overlord, and mutate a brooding pool. The final task is to create at least six zerglings - I recommend that you use up all of the resources available to you to create your first army.
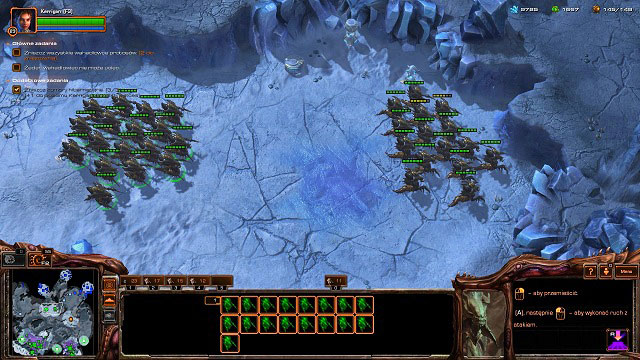
It's the time for the newly created units to prove their value in the battlefield. The first enemy group [1] consists of five Sentry Bots. Since the robots are not too big, it is a good idea to divide your army into two groups and order each of them to attack a different target - thanks to this you will be able to eliminate the enemies without sustaining too heavy losses. Those players, who are a bit more lazy, may issue the command to attack and press onto the ground; this way zergs will finish out the enemy themselves. Regardless of the strategy you chose, you will be granted reinforcements after killing the robots. If your loses are too high, you can create new ones in your base.
In the meantime, you will receive your first secondary objective: you need to free zerglings from enclosures. In order to avoid loses, you should eliminate the Sentry Bots first, and then destroy the generator - additional units will soon come in handy during the encounter with the exterminator. In the lab, there are three enclosures that have been marked as [A] on the map.
![In point [2] your further passage will be cut off by a cloud of poison gas - Lab Rat - Umoji missions - StarCraft II: Heart of the Swarm - Game Guide and Walkthrough](https://game.lhg100.com/Article/UploadFiles/201512/2015121709512905.jpg)
In point [2] your further passage will be cut off by a cloud of poison gas. In order to get further, you will have to destroy three gas turrets - only then the door opens and you can proceed. Again, you can put zerglings into smaller groups and launch an attack on all three at once: if you attack as a one big group, most zerglings will not be able to reach the target and you will sustain unnecessary losses.
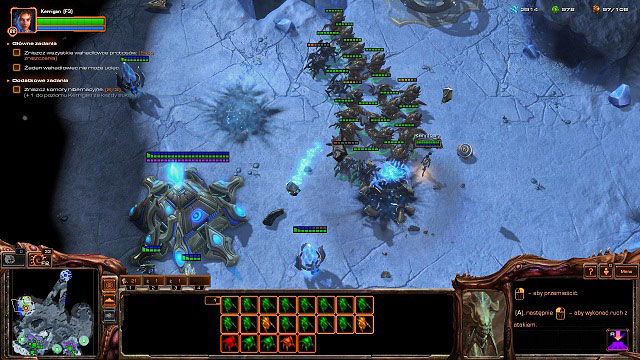
![After you gather the entire party, you will be up for the last challenge in this mission - destruction of the exterminator [3] - Lab Rat - Umoji missions - StarCraft II: Heart of the Swarm - Game Guide and Walkthrough](https://game.lhg100.com/Article/UploadFiles/201512/2015121709512962.jpg)
After you gather the entire party, you will be up for the last challenge in this mission - destruction of the exterminator [3]. It's a good idea to divide the units into three groups - with two smaller groups attacking the Sentry Bots, and the larger one attacking the boss straight away. After you destroy the exterminator. After you eliminate the guards, you can well strike, with the remaining groups, at the exterminator - it is the last enemy whose killing will complete the mission.
Lab Rat:
This achievement will be granted automatically after you complete the mission.
Mighty Mouse:
It is enough to destroy 35 Sentry Bots during the mission. The achievement can be very easily unlocked while performing the secondary mission, concerning the liberation of zerglings from the enclosures. The generators are guarded by Sentry Bots, so you can not only get additional units, but also you will be able to destroy some additional bots. In case of any difficulties in unlocking the achievement, you can wait for the factories in the lab to deploy some additional machines for you to waste.
Rat Race:
You need to complete the mission within 10 minutes on the normal difficulty level. While performing the last objective in the tutorial (mutate zerglings) you should mutate as many as you can, as every additional one will make it easier to unlock the achievement. You should, then, go to the southern enclosure [A], that the zerglings are kept in - it is weakly guarded, thanks to which you will gain new units quickly. You should now press directly towards the exterminator : remember to put your units into smaller groups to handle the Sentry Bots and gas turrets quickly.
Primary Objectives:
Gain access to the door to the lower level
Guard the door
Escape from the lower level
Guard the shuttle's engines
Reach the spaceport
Destroy "the Archangel"
Kerrigan must survive
Just like in the case of the "Lab Rat", the beginning of the second mission also serves as a tutorial. This time you will acquaint yourself with the operation of your units' special abilities. Go straight ahead. In [1] you will need to use the kinetic blast in order to eliminate the marauder; the marine reinforcements can be disposed of with a regular machine gun.
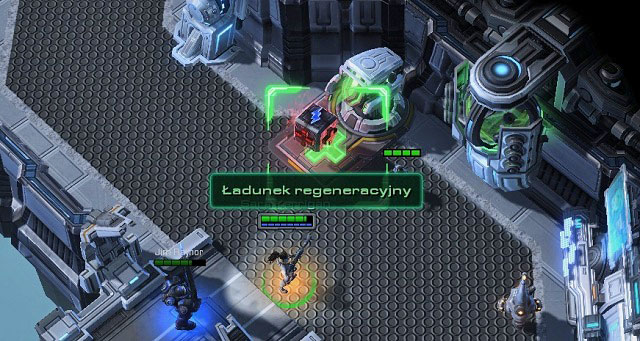
Further on, you will encounter another enemy group. They should be no challenge to you. Once you reach point [2], you will be able to replenish your health with regeneration pack.

Right behind the corner, you will encounter another group of enemies. You will receive another ability, a crushing grip, which you will have the opportunity to put to test now. On your way[4] towards the exit, you will encounter several landing capsules that are full of Dominium troops - defeating them should be a child's play. In the point visible on the mini-map [5] you ill be able to replenish your health again.

After you unlock the way to the lab's lower level, there is another skirmish waiting for you. This time around, it is going to be against zerglings. It is enough to retreat into the room and let the ally finish the job for you. , while you perform the crushing grip to block off as many of the enemy units as possible. After a while, you will reach the lab's lower level.
This time, you're going to have to race against time. You only have several minutes to escape the lab, so you should hurry. On your way out, you will encounter the troops of Dominium fighting against zergs - while attacking them, try to maintain balance between the two parties at all times, and then eliminate the remnants. During these battles, the crushing grip will come in handy. After you reach [6] you will be able to replenish your health.
![Point [7] is your objective now, where you will find another regeneration pack and a control point that opens the way further - Back in the Saddle - Umoji missions - StarCraft II: Heart of the Swarm - Game Guide and Walkthrough](https://game.lhg100.com/Article/UploadFiles/201512/2015121709513061.jpg)
Point [7] is your objective now, where you will find another regeneration pack and a control point that opens the way further. A bit ahead [8] you will encounter an ultralisk trying to bring down the barrier between him and Kerrigan. You can serve him with kinetic blast , and collect a nearby regeneration pack. In [9] you can replenish your health again. Then, you will have to destroy the barrier ahead. Right before the control point [10] you will find the last pile of debris, and a regeneration pack.
![After you defeat the soldiers at the next control point [11] and replenish your health, it will turn out that there are considerable Dominium forces in your way - Back in the Saddle - Umoji missions - StarCraft II: Heart of the Swarm - Game Guide and Walkthrough](https://game.lhg100.com/Article/UploadFiles/201512/2015121709513002.jpg)
After you defeat the soldiers at the next control point [11] and replenish your health, it will turn out that there are considerable Dominium forces in your way. By using the nearby console, you will be able to utilize one of two options: you can set the zergs in the cages on your enemies (possible battle against aliens), or let gas into the area (this will not eliminate mechanical equipment). Regardless of which option you chose, you will have to kill out the remnants in the area [12]. After you reach [13], the whole setup will move to the shuttle's board.
In this part of the mission, you will have to protect the engines from Dominium troops. There is nothing more challenging than that: the airborne enemies (especially the ones that carry reinforcements into the battlefield) can be eliminated with kinetic blast. These that are already are on the ground, can be dealt with by means of the crushing grip. You do not need to get sting on your health, as you have access to regeneration packs at all times.
![After you land, you are up for a short walk towards the last control point [13] - Back in the Saddle - Umoji missions - StarCraft II: Heart of the Swarm - Game Guide and Walkthrough](https://game.lhg100.com/Article/UploadFiles/201512/2015121709513044.jpg)
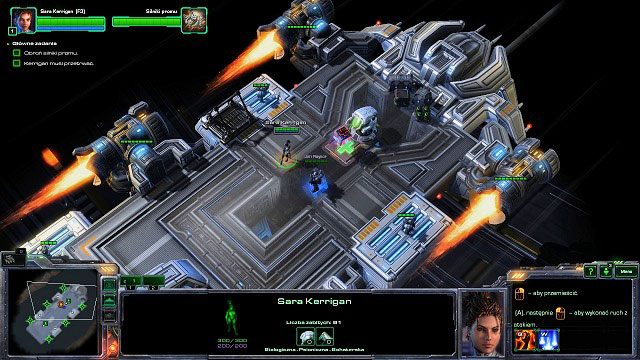
After you land, you are up for a short walk towards the last control point [13]. Then, the last battle of this mission will start - your enemy here is a giant robot, the Archangel. It has several attacks at its disposal, but every one of them can be avoided without taking damage. The attacks are signaled with the red circles appearing on the ground, and they are aimed directly at Kerrigan, or somewhere around the platform. In both cases, it is enough to position yourself outside of the circle to avoid getting hit. The Archangel moves around the platform, and takes on the form of a fighter plane. That is when it performs several bombing raids: this time, you will have to avoid arrows appearing on the ground. In the meantime, you will also be attacked by Dominium units - fortunately, the Archangel's attacks also wound its allies. In the extreme, you can make use of the regeneration packs on the platform.
Back in the Saddle:
This achievement unlocks automatically after you finish the mission.
Full Throttle:
Do not let Dominium destroy the shuttle engines. It is quite easy a thing to do - you need to remember at all times to use Kerrigan's special abilities, and especially the kinetic blast. In the first place, you need to use it to destroy the medical shuttles that keep supplying the enemy units to the battlefield, and banshees. The crushing grip is excellent when used against Vikings, unloaded marines and siege tanks.
Brutal Legend:
Do not let the Archangel inflict any damage on you on the normal difficulty level. This is easy to do, especially that every one of its attacks is signaled in advance. While fighting this enemy, you should, above all, remember to avoid taking damage; inflicting damage is a secondary matter . To damage the enemy, you should use mainly the kinetic blast.
Primary objective:
Hold on until reinforcements arrive
Destroy Drakken pulse cannons
Secondary objective:
Save the captive swarm queens (3)
Reward for completing the primary objective:
New unit: Swarm Queen
You should start the mission by transforming several larvae into drones and building a spawning pool. Them after you drive off the first wave of Terrans, you need to mutate several Spine Crawlers around the right hand entrance to the base - thus, they will become your temporary defense, while Kerrigan and zerglings are occupied with the exploration of the map. Ultimately, you should have three drones at your disposal, mining for minerals at each one of the fields. You should also transform several overlords (between three and five, depending on how well you manage your zergs during battles) and put the rest of your resources into zerglings. As soon as you receive information about the captive queens, you can go to the north-western portion of the map.
![On your way to [A] you will encounter minor Dominium forces - Rendez-vous - Umoji missions - StarCraft II: Heart of the Swarm - Game Guide and Walkthrough](https://game.lhg100.com/Article/UploadFiles/201512/2015121709513167.jpg)
On your way to [A] you will encounter minor Dominium forces. I recommend that you use the kinetic blast to handle scorchers and damage bunkers. Even if you are not going to attack the building itself, one well-aimed shot is enough to put it on fire - after several dozen of seconds, everything left of the fortifications, will be the smoldering embers. The only thing left to do, after you reach the queen's hideout [A], is defeat the forces firing at it and enlist the new units on your roster. You can now retreat into your headquarters.
It is the time now, to create new units and upgrade the existing ones. To do that, you are going to need an extractor - you can locate it directly over the vespan deposit. Now send three drones its way. After you mine for sufficient amounts of resources, you can improve the armor and the attack strength of your units. In the meantime, you should also create several swarm queens, that will serve as a means of reinforcements against airborne units, and help heal the wounded units. Having created a well-balanced team (Kerrigan, five swarm queens and a swarm of zerglings should be enough), you can set out for [B]. The location is not that well-protected, so you will soon be joined by another group of zerglings.
![So reinforced, you can go for [C], where you will have to free the last one of the queens - Rendez-vous - Umoji missions - StarCraft II: Heart of the Swarm - Game Guide and Walkthrough](https://game.lhg100.com/Article/UploadFiles/201512/2015121709513128.jpg)
So reinforced, you can go for [C], where you will have to free the last one of the queens . At this moment, you can return to the base to reinforce the defenses and get new units. You can also strike the Terran base to the north of this location [s3], and destroy it. Since one of the achievements to be gained in this mission requires destroying fifteen Dominium buildings, you can save the game and try your luck with the human fortifications. Regardless of what you decide on, after the countdown finishes, Naktul reinforcements will arrive, and you will be tasked with another objective.
This is the last one of the challenges for you to face in this mission. You need to destroy a large Drakken pulse cannon in [1]. Since you have received Naktul reinforcements consisting of a large swarm of zerglings and swarm queens, this is not going to be too difficult. The only thing left to do here is select the units you have just received, and launch an attack on the Terran main base (click the order to attack and click onto the ground near the cannon). Within several minutes, the fortification will be burned to cinders, which completes the mission.
Rendez-vous:
You receive this achievement automatically after you complete the mission.
First Strike:
You need to destroy 15 Dominium buildings before the mission completion. It is not too complicated a task , as long as you build a well-balanced army (with both zerglings and swarm queens), and make a proper use of Kerrigan's abilities: kinetic blast should be used primarily for damaging bunkers and eliminating scorchers. After you eliminate all threats, you can go on with destroying the remaining structures.
Zerg saves the Queen:
On the normal difficulty level, you need to save all swarm queens before Naktul reinforcements arrive. Locations where the queens are kept have been marked on the map with [A], [B] and [C], and the walkthrough describes the way of liberating them.
Primary Objectives:
Collect 100 eggs
Zagara cannot collect 100 eggs
Destroy Zagara's headquarters
Secondary Objectives:
Destroy infested command centers (2)
Reward for the Primary Objective:
New Unit: Baneling
+5 to Kerrigan's level
Reward for the Secondary Objectives:
+2 to Kerrigan's level

Before you start the mission, you should visit the evolution chamber onboard Leviathan, and pick one of the available zergling mutations. I recommend that you pick option fast metabolism, thanks to which you will be able to cover the map faster and send additional units to the main task force.
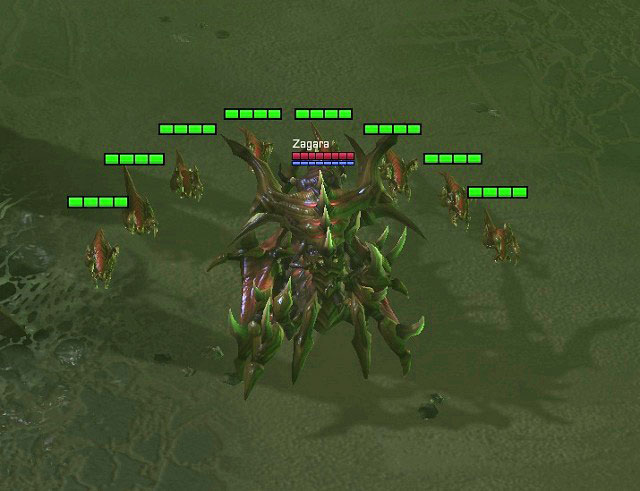
Your first step, after the mission loads, should be creating new drones and overlords - every mineral deposit should have three miners working at it. Soon, you will meet your enemy - Zagara, guarded by several zerglings. You need to intercept it as soon as possible: the creepy-crawly can be best eliminated with the kinetic blast and the zerglings with the crushing grip. Unfortunately, Zagara retreats and will soon be ready to launch another attack. It is the bug that you, above all, need to prevent from collecting eggs in this mission.
In the meantime, you should be busy developing your base. Soon, you are going to need a permanent zergling source to replenish losses endured throughout the battles with Zagara's troops. At the same time, you should start exploring the map and collect the eggs using Kerrigan's help. You should first go to the center of the map [1] and destroy the zerg structures there. You can also blow up the infested command center [A] - it's one of the two Terran structures that need to be destroyed to fulfill the secondary objective. The second structure is located to the north of the first one [B].
If you seize control over this area, you will be able to leave some of your units here and kill the enemy without any problems each time it appears. This will allow you to explore the rest of the map freely. I recommend that you leave several queens here accompanied by a big swarm of zerglings. The rest of the units may accompany Kerrigan at collecting the eggs.

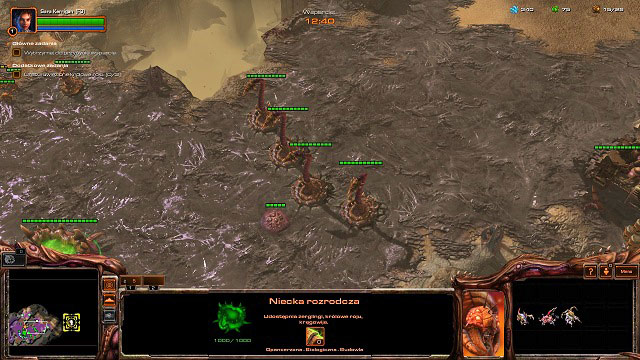
Since you have already stopped Zagara's advancement, you can now fulfill the secondary objective required to unlock several achievements. poached eggs requires that you visit all of the baneling nests on the map [X]. Still, if you have played aggressively since the very beginning of the mission, and overtook [2] quickly, you should receive No egg for you automatically after you complete the mission. If you run out of minerals, you can clear the area marked as [minerals] and build another hatchery there. The only thing left to do now is collect the 100 eggs and bring about mass hatching of banelings.

It is now the time for the most pleasant part in the mission. Choose the new units and direct them towards Zagara's base. Now, admire the beauty of the explosion. After you destroy all the buildings, the mission will end in a success.
Domination:
You will obtain this achievement automatically after the mission's end.
Poached eggs:
Before you collect 100 eggs, you will have to bring about the hatching in the nests of all six banelings. All locations that are necessary to visit, have been marked on the map as (X).
No egg for you:
While playing on the normal difficulty level, you cannot let Zagara seize even one egg. If you have acted accordingly with the guide and blocked off area [2], which is the only way out of the enemy's base, you should have no problems achieving that.
Primary Objectives:
Destroy Gorgon's cruisers (7)
Wake banshees' nests (7)
Secondary Objectives:
Find zerg biomatter (3)
Reward for the completion of the primary objectives:
Evolution mission: Zergling
Reward for the completion of the secondary objectives:
+3 to Kerrigan's level
Just like usually, start the mission by allotting drones to mineral fields, building of the vespan extractor, and manning it with miners. The enemy will send against you a gorgon cruiser at the beginning of the mission. Don't panic though and keep on improving your base. The most important unit for you in this mission will be your swarm queens, so you should start producing them as early into the mission s possible. Apart from that, you should also mutate your evolution chamber and improve your units. Only after gorgon cruiser approaches the base, can you start working on your new biomass tumor, and activate banshee's nest [1].

Your first target is a small Dominium manufacturing base, located to the south of you. There are barracks and a factory there, whose destruction will allow you to proceed to the east. If you are going to unlock all of the achievements, you can collect zerg biomatter [A] on your way, and destroy orbital command center [B].
Another Terran base is located to the north of your starting point. In the meantime, you can make use of the new tumors and bring biomass to nest [2] and [3], but do not activate them yet. You can do it at the last moment, which will buy you more time to perform the secondary objectives. Before you launch an attack on the north-western Dominium position, you should make sure to have at least 6-7 swarm queens at your disposal, plus a small group of zerglings. Now, with the help of Kerrigan's powers, you can start damaging bunkers and destroying siege tanks, and order the remaining zergs finish off the survivors. Destroying the orbital command [B] should be no challenge at all.
Continue to expand the biomass now. As the tumor can produce only one offspring, you need to use the queens' help to create a few additional cells. You should also produce more troops - to complete the mission successfully, you are going to need at least, 15 big worms. Once you take over points [4] and [5], you can harvest the nearby zerg biomatter [A].
It's almost the end of the mission. Go south towards the centre of the map - you need to watch out for gorgon cruisers flying overhead! It is enough to just avoid the crosshair underneath the cruiser to make it. Bring biomass to the nest [6] and slowly to nest [7], without activating them yet.

You are up for the most difficult battle in the entire mission - you need to attack terran main base. It is inside the base that the orbital command centers is located. With 15 swarm queens at your disposal, and using Kerrigan's kinetic blast, you should experience no difficulties in destroying the fortifications, as well as your main target [B]. Now you only need to collect the third zerg biomatter [A] and activate the last remaining banshee nest [7].
Fire in the Sky:
You will receive this achievement automatically after you finish the mission.
Red Alert:
Do not let the gorgon cruiser kill five of your units. To achieve that, it is necessary to clear all of your units out of the cruiser's way, and blow it up before it reaches your drones. Since it takes several minutes for the cruiser to reach your drones, I recommend that you activate the banshee nests right before it attacks the hives.
Conquer and Command:
Destroy 3 orbital command centers while playing in the normal difficulty mode. To win some time, you should destroy the gorgon cruiser right before it reaches the hives, In the meantime, it is going to be necessary not only to expand your forces, but also to eliminate all Terrans. The location of all orbital command centers has been marked on the map [B].
Primary objectives:
Destroy enemy units before the nuclear attack
Make your way to the Centre of Tactical Operations
Secondary objectives:
Destroy research facilities (2)
Reward for the completion of the primary objectives:
New unit: Aberration
Evolution mission: Baneling
Reward for the completion of the secondary objectives:
+2 to Kerrigan's level
Before you start, you should play the zergling evolution mission first (you can initiate it while in the evolution chamber).The unit type you pick does not really matter; personally, I used raptor strain which not only moves quickly around the map, but also inflicts more damage and it can launch onto the opponent, thus cutting the distance quickly. What the swarming strain lacks in quality, it makes up for in numbers and it mutates instantaneously, which proves useful when it comes to nest protection.
You start the mission with a swarm of zerglings and banelings at your disposal. Your task: inflict as much damage to the Terrans as possible. You should focus now on destroying all fortifications and unit-creation buildings that you can possibly reach before the nuclear blast. Especially, you should make sure that locations [1] [2] [3] are also disabled - that is why baneling attacks should focus mainly on the barracks and factories, as well as on Terran heaviest units.
When the rain of warheads stops, you should take over the hive cluster. Nu definitely need to create new drones and initiate mass mining of vespan. Your basic assault unit will be, from now on, the aberration, but they require huge amounts of the gas. You can collect the remaining units and clear areas [1] and [2] of the remaining buildings. Then you should launch an attack on [4], as you will receive another flock of aberrations after you dispose of the Terrans. You can also take the bridge to the west and destroy the first research facility [A].
![Your next goal is to take over the area [3], where there are rich mineral deposits - Old Soldiers - Char missions - StarCraft II: Heart of the Swarm - Game Guide and Walkthrough](https://game.lhg100.com/Article/UploadFiles/201512/2015121709513401.jpg)
Your next goal is to take over the area [3], where there are rich mineral deposits. You need to be careful, because Terrans are going to perform another nuclear explosion during the battle. It is enough to retreat for a moment to avoid further losses. After you secure the area, Zagara will send several drones around, which you can transform into a hatchery, and start mining for the minerals.

You should create at least, 15-20 aberrations and around 30 zerglings; also several swarm queens will come in handy as an anti-aircraft defense. After you collect your forces, you can destroy another (the northern one) research facility [B] and strike in the very middle of Terran base [5]. It is enough to disable production buildings and enemy fortifications here.
![After you heal your units, and replenish losses, you can launch the final assault on the Tactical Operation Center [6] - Old Soldiers - Char missions - StarCraft II: Heart of the Swarm - Game Guide and Walkthrough](https://game.lhg100.com/Article/UploadFiles/201512/2015121709513542.jpg)
After you heal your units, and replenish losses, you can launch the final assault on the Tactical Operation Center [6]. The building itself is quite heavily guarded, but the reinforcements you have just received should have no problems dealing with all of the defenders. After you destroy the center, the mission will complete.
Old Soldiers:
You will receive this achievement right after the mission completes.
Zergkrieg:
Destroy 20 enemy buildings before the first nuclear strike. Using the troops, you should strike locations [1] [2] and [3], where there are the largest groups of buildings. It is a good idea to take manual control of the swarm and make use of zerglings to kill enemy units. The banelings, on the other hand, should be used for blowing buildings up. If you do not manage to do that in time, you can keep replaying the mission again until you succeed.
Recalled down the thunder:
Complete the mission on the normal difficulty level within 20 minutes. In this case, a lot depends on the first attack. If you manage to destroy most units and buildings in [1], [2], [3], you will be able to reach [4] easily, where you will be granted additional aberrations. With your forces reinforced, you will be able to go for [5] and [6] directly.
If you do not feel up to it, while attempting to acquire this achievement, you can ignore the research facilities. Still, there is plenty of time and there should be no problems completing the mission according to the guide, which should allow you to gain this achievement.
Primary objectives:
Gain the ursadon matron's essence
Retrieve the lost tribe
Destroy the psionic communication spire (3)
Secondary objectives:
Kill the ursadon matrons (2)
Rewards for the completion of the primary objectives:
New unit: Roach
+5 to Kerrigan's level
Rewards for the completion of the secondary objectives:
+2 to Kerrigan's level
After you gain control over Kerrigan and zergs, you will be able to go one way only, which is to the north. On your way, you will encounter several ursadons and frozen roaches, which you will be able to enlist with your army. Once you reach [1], a flash freeze storm will start - all of your units will be trapped in ice as a result. Also the ursadon matron will arrive. Fortunately, the storm is not going to last too long and soon you will be able to take control of your units again to defeat the attacking animals. After you assimilate the matron's essence, you will be immune to the effects of the flash freeze storm.
![After you reach [2], you will finds the remains of the Nafash - In Cold Blood - Kaldir missions - StarCraft II: Heart of the Swarm - Game Guide and Walkthrough](https://game.lhg100.com/Article/UploadFiles/201512/2015121709513514.jpg)
After you reach [2], you will finds the remains of the Nafash. Order Kerrigan to go into the designated area and the nearby units will join. Now you can develop your base. Start by creating drones, roaches and zerglings - soon they will come in handy in fighting the Protos. It is a good idea to deploy several additional Spine Crawlers to protect the base against possible assaults.
![It's the time to go north now, towards [3] - In Cold Blood - Kaldir missions - StarCraft II: Heart of the Swarm - Game Guide and Walkthrough](https://game.lhg100.com/Article/UploadFiles/201512/2015121709513516.jpg)
It's the time to go north now, towards [3]. You will encounter a big party of the Protos there. I suggest that you slowly retreat towards your base, before another flash freeze storm starts, which will freeze the enemy units - now you can easily deal with them. By taking advantage of the storm, you can also disable the enemy's defense systems. First of all, you need to aim at the pylons (they are the power supply for all of the structures) and then the rest of the buildings. Without fully operational pylons, even turrets will pose no threat after they unfreeze. After you secure the area, you will receive an additional hatchery here - it can be used to increase the resource output.
![Another target is located in [4] - In Cold Blood - Kaldir missions - StarCraft II: Heart of the Swarm - Game Guide and Walkthrough](https://game.lhg100.com/Article/UploadFiles/201512/2015121709513563.jpg)
Another target is located in [4]. Before you attack it, I recommend that you increase your army to around 20 roaches and 30 zerglings. The best moment to start the attack itself, is when the flash freeze storm starts, thanks to which you will have no problems dealing with the Protos and their defense systems (again, aim at the pylons and archonts). Once the blizzard stops, you will be able to destroy the remaining structures.
![In the meantime, you can deal with the ursadon matron to the north [A], thanks to which Kerrigan will reach another experience level and your army will gain another roaches - In Cold Blood - Kaldir missions - StarCraft II: Heart of the Swarm - Game Guide and Walkthrough](https://game.lhg100.com/Article/UploadFiles/201512/2015121709513515.jpg)
In the meantime, you can deal with the ursadon matron to the north [A], thanks to which Kerrigan will reach another experience level and your army will gain another roaches. This will also increase the range of vision for your units during the flash freeze storm. Another one is at the western rim of the map and its position was also marked on the map [B].
![After you complete secondary objectives, you should replenish your losses (20-30 roaches, 30-50 zerglings) and get prepared for the final onslaught in [5] - In Cold Blood - Kaldir missions - StarCraft II: Heart of the Swarm - Game Guide and Walkthrough](https://game.lhg100.com/Article/UploadFiles/201512/2015121709513623.jpg)
After you complete secondary objectives, you should replenish your losses (20-30 roaches, 30-50 zerglings) and get prepared for the final onslaught in [5]. Launch the attack once another flash freeze storm starts. You can do either of the following now: you can destroy the Protos base gradually, a building after another - that's when you should focus on the pylons, archonts and giants or, attack quickly the last spire(that's what has been presented in the above picture). As soon as the storm starts, you need to launch the attack at the structure, and destroy it before the Protos can start defending it. After you destroy the third one, the mission will end in success.
Harvest of Screams:
You receive this achievement automatically after the completion of the mission.
Ice Breaker:
Destroy 20 unfrozen enemy buildings. It is enough to launch attack on the Protos bases during flash freeze storms and destroy pylons and enemy forces only. Then, you need to wait for the storm to end to start destroying the remaining buildings.
Storm Chaser:
Complete the mission within 15 minutes on the normal difficulty level. It can be a bit tricky to try and get this achievement simultaneously with the Ice Breaker. It is best to save the game right before launching an attack on [4], and then, after you gain the achievement, load it again and go directly for the spire. In [5], you should ignore destroying the Protos fortifications and focus an the destruction of the main target only.
Primary Objectives:
Destroy all of the Protos shuttles (8 waves)
No shuttle may escape
Secondary Objectives:
Destroy hibernation chambers (3)
Reward for the completion of the Primary Objectives:
New unit: Hydralisk
Reward for the completion of the Secondary Objective:
+3 to Kerrigan's level
![Start the mission by collecting several frozen Hydralisk located at the only visible Protos transmission channel [X1] - Shoot the Messenger - Kaldir missions - StarCraft II: Heart of the Swarm - Game Guide and Walkthrough](https://game.lhg100.com/Article/UploadFiles/201512/2015121709513657.jpg)
Start the mission by collecting several frozen Hydralisk located at the only visible Protos transmission channel [X1]. After you collect them, you should move them northwards and put them directly on the shuttle's route (the route is marked on the minimap with arrows, possible starting points have been marked as [S]). At the same time, you need to keep expanding your base: you are going to need 2 vespan extractors (one of them is already there) and a large group of drones. It is necessary that you create overlords, as you will bump into unit limitation several times. In the meantime your forces should shoot down the first one of the shuttles.
You can now focus on the creation of army and completing the secondary objectives. You Reed at east, 20 Hydralisk and 5 roaches in the main assault group, and an additional of 10-15 hydralisk as a back-up - you can leave them behind at the base for defense. In the meantime, you should start the exploration of the map. In [K] locations you will find hibernation chambers - destroying each one of them will increase Kerrigan's experience. You will run into one such location in [A], on your way to [1]. After you reach [1], and defeat a small group of the Protos, you will receive another hatchery - you should start mining here for minerals straight away.
Remember that you should keep destroying Protos shuttles! The eastern portion of the map and [B] are your next destination points. After you destroy the hibernation chamber you will be able to wake up the frozen zerg units. Go now to [X3]. There is one of the Protos portals here. Destroying its defense will allow you to intercept a shuttle being dispatched. The Protos should soon change the starting point for the shuttles; it is also possible that they will reroute the shuttles. Fortunately, on every such occasion you will be able to see the shuttles' route. You can easily destroy it then, using the main assault team or the base's defenses.

After you restore your forces, the time for the exploration of the western portion of the map will come. Not only is there the last one of the hibernation chambers [C]b but also one of the nexus [2] that belongs to the protos. Destroying it will bring you one step closer to gaining the extreme nexism achievement. After you have dealt with the Protos forces, and all of the nearby buildings, you can destroy the rest of the shuttles (this time around, they will be probably taking off from a different location) and gather your forces to deal the final blow.
![Point [3] is protected way better than the other outposts that you have so far encountered - Shoot the Messenger - Kaldir missions - StarCraft II: Heart of the Swarm - Game Guide and Walkthrough](https://game.lhg100.com/Article/UploadFiles/201512/2015121709513795.jpg)
Point [3] is protected way better than the other outposts that you have so far encountered. Not only does it have turrets connected to multiple pylons, but also a few archonts are stationed here. Fortunately, if you have been reinforcing your assault team on a regular basis, and you use Kerrigan's psychical powers, you should have no major problems defeating the defense. The only thing left now to do is the destruction of the second nexus, and the extreme nexism achievement is as good as yours. There is one more main building of the Protos - it is located in [4]. This location, however, has defense systems much more potent than the previous two, that is why attacking it is not advisable (if you still want to try it, you should amas around 35-40 hydralisk and 10-15 roaches).
Again, at this point, you have two options. You can launch an attack on the docks directly and destroy it before further shuttles take off (you are going to need a big amount of units: at least 50 hydralisk and 20 roaches) or, wait for the moment in which they have already taken off and shoot them down while they are airborne. In the latter case, you are going to need three groups of hydralisk of at least 15 units each, to make sure that they none of them gets away. The last wave consists of three shuttles and the mothership with the nearby units onboard. That is why it should be your primary target! The method you chose is entirely up to you and it depends on how many units you have at your disposal.
Shoot the messenger:
This achievement is awarded automatically after the completion of the mission.
Warp In Peace:
Make sure none of the shuttles starts the transmission. That is why you should keep your line of defense somewhere in the middle of the map, and have several hydralisk at your disposal. This will make it possible to attack multiple shuttles simultaneously. Starting locations have been marked on the map as [S], and the transmission gates as [X1], [X2] and [X3].
Extreme Nexism:
Destroy 2 nexus while playing at the normal difficulty level. The buildings are located in [2], [3] and [4], out of which only two need to be destroyed. The list of requirements to be met to perform this is given in the guide itself.
Primary Objectives:
Get biomatter(100)
Find a safe hideout
Transform into tribe mother
Kill the Protos
Destroy hyperdrive
Escape the stagnant quadrant
Destroy evacuation
Niadra must survive
Secondary Objectives:
Infest the giant ursadon
Reward for the completion of the Primary Objectives:
Evolution mission: Roach
Reward for the completion of the Secondary Objectives:
+1 to Kerrigan's level
The scenario is just like the one for an Alien movie, only this time around you are the vermin. You need to collect biomater in the amounts sufficient to transform a larva into a swarm queen. Before you do that, however, you are going to outwit the guards [1]; you avoid the zealot by using the vermin infestation, and the guard by hiding behind the vapor from the ventilation system. As soon as the Protos walks by, you can proceed along your path.
![To make your way beyond [2] you are going to need to defeat the zealots with the infested ursadon - Enemy Within - Kaldir missions - StarCraft II: Heart of the Swarm - Game Guide and Walkthrough](https://game.lhg100.com/Article/UploadFiles/201512/2015121709513812.jpg)
To make your way beyond [2] you are going to need to defeat the zealots with the infested ursadon. As you take advantage of his strengths, you need to eliminate all the nearby Protos units. After you are done, you can leave the body and take the nearby corridor [3]. It will take you to a hideout [4[ where your larva will be able to transform into a new tribe queen - Niadra.

Your new creation is capable of not only creating new units, but also of using infestation and collecting biomatter. Start by transforming zerglings - create them in maximum permissible quantities. Now you can destroy the door in your way. In the next location[5] you will encounter the Protoss guardians and a large quantity of animals. You can kill the Protoss with zerglings and turn the animals into biomatter - you can keep using the infestation over and over again. Whenever you lose zerglings, you should create new ones to supplant the casualties.
![In [6] you will encounter several Protos reinforcements - Enemy Within - Kaldir missions - StarCraft II: Heart of the Swarm - Game Guide and Walkthrough](https://game.lhg100.com/Article/UploadFiles/201512/2015121709513893.jpg)
In [6] you will encounter several Protos reinforcements. Fortunately, the zerglings at your disposal will have no problems dealing with them - now you only have to destroy the door blocking the entrance to the tunnel. Since Niadra is too big to fit in, it is going to be necessary to smash the power field generator at the end of the tunnel [7].
![You will encounter the next obstacle in point [8] - Enemy Within - Kaldir missions - StarCraft II: Heart of the Swarm - Game Guide and Walkthrough](https://game.lhg100.com/Article/UploadFiles/201512/2015121709513864.jpg)
You will encounter the next obstacle in point [8]. After you defeat the Protos here and collect biomatter, you will have to make use of the nearby tunnel again and send zerglings to destroy the generator [9]. After the passage opens, Niadra will be able to destroy the hyperdrive. Now you quickly need to get through the Protos forces and make your way to [10].
![In the next room [11], you will run into several zealots and animals that can be turned into biomatter - Enemy Within - Kaldir missions - StarCraft II: Heart of the Swarm - Game Guide and Walkthrough](https://game.lhg100.com/Article/UploadFiles/201512/2015121709513857.jpg)
In the next room [11], you will run into several zealots and animals that can be turned into biomatter. You should have now plenty of it to transform again - this will give you access roaches and will increase the number of creatures you can command at one time. In rooms [12] and [13] the Protos will be trying to kill out all the animals to prevent their growing. Fortunately, each time a given group is going to unfreeze, you are alarmed to it with red markers - the only thing you have to do is put a group of zergs next to such a group while Niadra is collecting biomatter. After you devour all animals in this location, you will be able to transform again.
![In [14] there are Protos forces killing animals - Enemy Within - Kaldir missions - StarCraft II: Heart of the Swarm - Game Guide and Walkthrough](https://game.lhg100.com/Article/UploadFiles/201512/2015121709513973.jpg)
In [14] there are Protos forces killing animals. The most important one in here is the ursadon, because he will join your army after he is infested, which will raise Kerrigan's experience level. This is where you need to save the game. After you enter [15], a race with time will begin - you need to destroy all of the capsules before they are launched into the outer space. You command your forces simultaneously with Niadra, where the troops keep destroying the capsules, and Nadra creates new units. I recommend that you create a mixture of roaches, hydralisk and zerglings in equal proportions. You need to direct your troops over from one capsule to another, while proceeding at the same time towards the bridge. After you destroy all of the structures, and eliminate all Protos soldiers, the mission will conclude.
Enemy Within:
This achievement awards automatically after you complete the mission.
Biomass Effect:
Collect 450 units of biomatter. Use infestation on every animal you encounter. In [12] [13] [14] will be trying to kill all of the specimen they keep. That is why you should devour the ones attacked by zealots.

Failure to Launch:
Do not allow the time remaining to take off, for any of the capsules, to drop below 20 seconds while playing at the normal difficulty level. It is enough to run from one capsule to another. There is plenty enough time to destroy them and deal with the Protos in your way. If your army is well balanced (1/3 roaches, 1/3 hydralisks and 1/3 zerglings) You should have no problems here. In case of any problems, you can always load the game over again.
Primary Objectives:
Feed the Ancient (7)
Brakk can't destroy 7 units of Quillgor matter
Kill Brakk
Secondary Objective:
Absorb the primal essence (3)
Reward for the completion of the Primary Objectives:
New unit: Mutalisk
Reward for the completion of the Secondary Objective:
+3 to Kerrigan's level
Start the mission as usual - by building up your base: create as many drones as you can, send some of them over to mine for vespan. There is a new unit that you are going to have access to - the mutalisk. This creature is what will form the hard core of your army - you should keep creating new flying units at all time. When it comes to troops, you will well do with a small group of hydralisk and zerglings (10 and 20 units respectively should be enough). They will be protecting the drones as mutalisks are exploring the map.
![Once you secure for yourself a constant influx of new units, you can turn to Quilgors [A] - Waking the Ancient - Zerus missions - StarCraft II: Heart of the Swarm - Game Guide and Walkthrough](https://game.lhg100.com/Article/UploadFiles/201512/2015121709513949.jpg)
Once you secure for yourself a constant influx of new units, you can turn to Quilgors [A]. you will encounter the first group at the beginning of the mission - you only have go there, kill the animals and order a drone to go there and gather the meat. Remember to protect the defenseless zerg at all times. After the drone is done, it will automatically take the meat to the Ancient one [X].
![You will receive the whereabouts of further Quilgor [A] - Waking the Ancient - Zerus missions - StarCraft II: Heart of the Swarm - Game Guide and Walkthrough](https://game.lhg100.com/Article/UploadFiles/201512/2015121709513903.jpg)
You will receive the whereabouts of further Quilgor [A]. Your task now is to gather the meat from all six animals and protect the carcass from Brakk's soldiers. I recommend that you leave small defense group in the base (you can also create spine crawlers) and Kerrigan accompanied by hydralisks and zerglings should start gathering meat. Mutalisks can focus on the map exploration and countering Brakk's attacks.
In order to complete the secondary objective you need to harvest the primordial essence. It is located in three heavily guarded locations [B] - you will have to send mutalisks to each one of them and have Kerrigan pick up the collectible then. In the meantime, you can also complete the mission necessary for the Rude Awakening achievement. Originally, the hives start the game in locations marked as [C], but they are self-propelled and it is possible that you will have to comb through the entire map to find them.
Before you collect the last hunk of meat, you should restore your army and save the game. You are going to need at least, 20-30 mutalisk, 30 zerglings and 10-20 hydralisk. You will be attacked by Brakk - just send your entire army against him and watch your army defeat the primal zerg. . In case of any problems, you can use your kinetic blast against the enemy - this inflicts enormous damage and you can use it exceptionally frequently. Brakk's death means the end of this mission.
Waking the Ancient:
This achievement is awarded automatically after the completion of the mission.
A game of Drones:
You can't afford more than 3 drones. That is why you will have to protect the base and the drone at all times while it is occupied with collecting meat. You can leave several spine crawlers and swarm queens (they will come in handy when needed to heal mutalisks) and zerglings at the base. The remaining forces should accompany Kerrigan and protect the collector.
Rude Awakening:
Destroy 4 primal hives at the normal difficulty level. The hives' original position has been marked on the map as [C]. Not only are they self propelled, but they also are heavily protected by ancient zerglings, and can attack airborne units. Still, I recommend that you make use of a large group of mutalisks (of at least 20-25 units) and return to the base to heal the wounds after you destroy each one of the hives.
Primary Objectives:
Reach the secret brooding pool
Kerrigan must survive
The Kerigan chrysalis must survive
Secondary Objectives:
Kill tyranozon
Reward for the completion of the Primary Objectives:
New unit: Swarm Host
+10 to Kerrigan's level
Reward for the completion of the Secondary Objective:
+1 to Kerrigan's level
Right at the beginning of the mission, you will have a group of swarm hosts. These units attack only when they are buried in the ground - that is why you should bury them in the designated spot [1]. After you fend the enemy off, you can go to the control point [2] to initiate Kerrigan's transformation.
You are now in command of a cluster of hives. I recommend that you deploy the units in [2] and [3]. It is best to put five of them in each area, where they will be accompanied by a group of 10 zerglings positioned right next to the swarm hosts (they will attack the enemy after they cut through the locust). You should also deploy hydralisks there, 15 at each side. It is also a good idea to have a few swarm queens (to heal the swarm) and a group of around 15 mutalisks to protect the chrysalis from possible aerial attacks, and to block the passage in [4].

For the protection of the base, you should use all means available to you. Soon after the mission starts, you will be granted the possibility of creating primal locust - you can use it each time when a larger group of primal zergs arrives. Apart from that, you can build a second base in [5], but it is going to be constantly exposed to enemy attacks.
![In the meantime, you can send the mutalisks to complete the secondary objective in [A] - The Crucible - Zerus missions - StarCraft II: Heart of the Swarm - Game Guide and Walkthrough](https://game.lhg100.com/Article/UploadFiles/201512/2015121709514193.jpg)
In the meantime, you can send the mutalisks to complete the secondary objective in [A]. The tyranozon is very much immune to attacks and that is why it is possible that you will have to launch several raids. If your mutalisks lose most of their health points, you can withdraw them from the battlefield, and wait for them to heal. When it comes to this, a mutation available onboard the Leviathan is very helpful. The mutation allows them to heal almost instantaneously once they are outside of the battlefield.
Towards the end of the transformation process, the attacks will increase in frequency. The enemy will constantly be trying to destroy the stony barrier [4] and will be sending big amounts of airborne units. I recommend that you save up one creation of the primal locust for the last several dozens of Kerrigan's transformation process.
The Crucible:
This achievement is awarded automatically after the completion of the mission.
Epic Meal:
Kill 75 enemy units by creating the primal locust. It is enough to call for the reinforcements each time a larger primal zerg group approaches your base.
Can't touch this Chrysalis:
The Kerrigan Chrysalis cant' take any damage while you are playing at the normal difficulty level. What's useful to achieve this is mutalisks that protect the queen from aerial attacks, and block the passage [4]. I recommend that you save your game every several minutes and pay special attention to primal zerg airborne units. Especially throughout the last five minutes of the game, when they will launch a massive attack on your base.
Primary Objectives:
Kill the primal zerg tribe chiefs (3)
Kill Zurvan
Kerrigan must survive
Secondary Objectives:
Find xel'naga relics (4)
Reward for the completion of the Primary Objectives:
Evolution mission: Hydralisk
+5 to Kerrigan's level
Reward for the completion of the Secondary Objective:
+4 to Kerrigan's level
This time around, you are in control of the new, better Kerrigan. In [1], you will be able to make use of the first one of the -newly acquired abilities: dash. The ability is for both dealing damage to single targets and to moving quickly around the battlefield. You will learn how to use it right in the next location, you will learn the psionic shift - an attack that at the same time moves your character into another location. It's perfect for the elimination of larger group of enemies. After you jump over to the next isle, you will encounter the xel'naga relic [A] - acquiring it will increase Kerrigan's level by one.
![After you make it to point [3], you will have to eliminate a group of hydralisk - it is sufficient to use the psionic shift several times - Supreme - Zerus missions - StarCraft II: Heart of the Swarm - Game Guide and Walkthrough](https://game.lhg100.com/Article/UploadFiles/201512/2015121709514260.jpg)
After you make it to point [3], you will have to eliminate a group of hydralisk - it is sufficient to use the psionic shift several times. As a reward, you will receive another ability: healing. Thanks to the low cost of its using, you can regularly use it to heal your troops. You will also be joined by additional roaches; they will come in handy during the next boss battles. As you proceed to the north, you will reach an islet with another xel'naga relic on it [B]. It is sufficient to jump over to it with lightning strike and kill all the zergs with the psionic shift.
![I recommend that before you enter [4], you save your game - Supreme - Zerus missions - StarCraft II: Heart of the Swarm - Game Guide and Walkthrough](https://game.lhg100.com/Article/UploadFiles/201512/2015121709514235.jpg)
I recommend that before you enter [4], you save your game. This is where you will encounter the first boss Yagdra. It is a worm that moves underground and appears on the battlefield to spit acid projectiles your way. They are relatively easy to avoid - it is sufficient to move away from the "crosshair" and you will take no damage. Yagdra can also belch out acid - you avoid this attack by moving towards the side of the worm. Apart from that, each time the worm disappears underground, it leaves one big, or a cluster of small eggs. You need to keep destroying them regularly or otherwise additional enemies will hatch. Yagdra itself should be attacked with roaches, lightning strike and Kerrigan's regular attacks. After several rounds the monster should fall dead.
You should go now to the south. In [5] you will find a large cluster of zerg eggs. You should destroy them as quickly as you can because soon new enemies will hatch out. The small eggs can be smashed with psionic shift , whereas the large ones with the attacks of your swarm. As you proceed to the east, you will reach [C], where there is another xel'naga relic, protected by three zerg eggs. That's a simple thing - you simply smash the eggs and pick up the item. In [6] you will be attacked by several waves of zergs - thanks to Kerrigan's healing ability, there should be no problems dealing with them.
![After you reach [7], another boss battle will begin - Supreme - Zerus missions - StarCraft II: Heart of the Swarm - Game Guide and Walkthrough](https://game.lhg100.com/Article/UploadFiles/201512/2015121709514237.jpg)
After you reach [7], another boss battle will begin. This time around it's Kraith - a monster capable of shooting hundreds of spikes your way and charging at you to squeeze you. The latter also summons zerglings - you can eliminate them either with psionic shift , or with your charges. Kraith itself is not too tough and cannot withstand attacks. After several repetitions of attack-evasion tactics the creature should die.
![In [8] there is a bridge - Supreme - Zerus missions - StarCraft II: Heart of the Swarm - Game Guide and Walkthrough](https://game.lhg100.com/Article/UploadFiles/201512/2015121709514362.jpg)
In [8] there is a bridge. After you walk over it, you will enter the Sylvan territory. Here you will be endlessly nagged at by banelings. You can keep running over them, and thus making them explode, or keep destroying them with psionic shift. After you walk over the bridge, you should take the path to the right, to the east. There are several platforms with the enemy on them, and the last one of the xel'naga relics. Now you can go to [9] and cut your way through to reach [10].
![In [10] there is a third boss waiting - Sylvan - Supreme - Zerus missions - StarCraft II: Heart of the Swarm - Game Guide and Walkthrough](https://game.lhg100.com/Article/UploadFiles/201512/2015121709514384.jpg)
In [10] there is a third boss waiting - Sylvan. Your enemy will be constantly sending hordes of banelings against you - it is a perfect location to gain your Endangered Species achievement. The task you are facing is exceptionally easy to perform. You detonate, or kill the banelings (it is a good idea to use psionic shift here) here) and wound the boss. From time to time you will also have to avoid a puddle of acid and heal your units. Still, the battle itself is a child's play and should end within a minute.
After you win, you will be automatically transferred to a different arena - this time around you will match up against the Ancient one, i.e. Zurvan. The battle may bear resemblance to a battle with one of the bosses in Diablo 3 for some players. You move sideways to avoid talon attacks (all blows are perfectly marked so they can be easily avoided) and wound the enemy in between the attacks. Zurvan's strongest attack, lightning belching, needs to be avoided by retreating out of its area of effectiveness, as it deals a lot of damage. Once Zurvan starts abusing this attack, you can incessantly attack him with lightning strike to decrease the amount of his health points as quickly as possible. As soon as the Ancient falls to the ground, the mission will complete.
Supreme:
This achievement is awarded automatically after you complete the mission.
Endangered Species:
While controlling Kerrigan, kill 500 enemy units. The easiest way to achieve this is while fighting Sylvan - it creates innumerable banelings. It is enough to keep using psionic shift and checking (by clicking on Kerrigan) the bodycount.
Queen of the Jungle:
Complete the mission at the normal difficulty level in a such a way, that Kerrigan's health points do not drop below 100. You need to play it safe and keep using Kerrigan's ability to heal. Thanks to this, your health points should not drop below 300, which is way above 100.
Primary Objectives :
Infect the garrisons (3)
Destroy Dominium outpost
At least 1 infector must survive
Destroy the entrance to the lab
Secondary Objectives:
Take over the research facilities(3)
Reward for the completion of the main Objectives:
New unit: Infector
Reward for the completion of the Secondary Objectives:
+3 to Kerrigan's level
You start the mission by controlling your new acquisition - an Infector. Your first task: take advantage of fungal growth to kill marines[1]. After you get rid of them, you can deploy your units around the control point . A virofag will arrive, and it will take over all nearby garrisons. From now on, they will be producing infested Terrans and sending them against the enemy.
![In [2] you will encounter a hostile banshee - take it over with parasitic domination - Infested - Skygeirr Missions - StarCraft II: Heart of the Swarm - Game Guide and Walkthrough](https://game.lhg100.com/Article/UploadFiles/201512/2015121709514475.jpg)
In [2] you will encounter a hostile banshee - take it over with parasitic domination. You can also acquire a nearby marauder using the same ability of the infectors. After you destroy the bunker and kill out the enemy, you will be able to take over the nearby garrisons.
![On your way to [3], you will encounter Terran rattlesnakes - Infested - Skygeirr Missions - StarCraft II: Heart of the Swarm - Game Guide and Walkthrough](https://game.lhg100.com/Article/UploadFiles/201512/2015121709514405.jpg)
On your way to [3], you will encounter Terran rattlesnakes. I recommend that you dominate them, as they will come in handy while launching a raid on the small Dominium outpost located right next to the mineral deposits. Now you can move infectors to [3] and take over the last group of garrisons. Terrans will release a gas, which will temporarily stop the creation of infected marines. Fortunately enough, you will get a fully operational base, which you will be able to use while fighting with zergs.

Now you can start the development process: three drones for each mineral deposit and an extractor. I recommend that you create a small group of mutalisks as soon as possible (around 10) and leave them in the area between [1] and [3] - they will serve as a means of defense in case of a Terran attack. Once you deplete the gas deposit, the infected will strike again. You can accompany them with your infectors and Kerrigan, and take over the enemy units as well as garrisons located in [4] and [5].
![As you proceed on your way to the north, you will reach the first research facility [A] - Infested - Skygeirr Missions - StarCraft II: Heart of the Swarm - Game Guide and Walkthrough](https://game.lhg100.com/Article/UploadFiles/201512/2015121709514453.jpg)
As you proceed on your way to the north, you will reach the first research facility [A]. Make use of tumors that have appeared alongside virofags next to the infected garrisons. You will have to supply it with biomass. Apart from that, in [6] you will encounter another Dominium base - it is enough to destroy all of the buildings and you will be able to mutate a new hatchery here and increase your profits.
![Another garrison that you should take over is located to the north of the second Terran base [7] - Infested - Skygeirr Missions - StarCraft II: Heart of the Swarm - Game Guide and Walkthrough](https://game.lhg100.com/Article/UploadFiles/201512/2015121709514440.jpg)
Another garrison that you should take over is located to the north of the second Terran base [7]. During the assault, Dominion will make use of nuclear weapons - you should retreat from here to avoid sustaining losses. Once the radioactive dust falls, you can re-launch your assault and take over the garrison. Also remember about the development of biomass wit the tumors - your task is now the research facility in the center of the mp [B].
![Once the infected attack again, you will be able to strike at [8] and [9] - Infested - Skygeirr Missions - StarCraft II: Heart of the Swarm - Game Guide and Walkthrough](https://game.lhg100.com/Article/UploadFiles/201512/2015121709514583.jpg)
Once the infected attack again, you will be able to strike at [8] and [9]. A zombie wave will devour the defenders, and you will be able to infect several banshees and garrisons. Now you only have to go a bit further north and take over the last one of the research facilities [C]. The entrance to the facility is defended by thors - a perfect target for your infectors, and an excellent acquisition for the hive.
![Your last task is to attack the Terran headquarters [10] and enter the lab [11] - Infested - Skygeirr Missions - StarCraft II: Heart of the Swarm - Game Guide and Walkthrough](https://game.lhg100.com/Article/UploadFiles/201512/2015121709514503.jpg)
Your last task is to attack the Terran headquarters [10] and enter the lab [11]. Wait until the gas deposits deplete and the zombie wave attacks again. It is enough to keep directly behind them with the Terran infected units and destroy all resistance like siege tanks or bunkers. The mission objective is protected by the planetary fortress, but with the help of mutalisks and Kerrigan's abilities you can destroy it without major problems. Now you only need to open the entrance to the lab.
Just Getting Inside:
You will receive this achievement automatically after the completion of the mission. .
Master of Puppets:
Kill 60 enemies with a an infected Terran unit. After you take over the terran units with infectors, you only have to make use of them in every possible skirmish. Banshee, thors or marauders are excellent for this end.

Spreading the Disease:
Infect all garrisons without losing a single virofag at the normal difficulty level. It is sufficient to make use of this guide to reach all garrisons. It is best to protect virofags with mutalisks - they move swiftly around the map, and 10 units is enough to repel any attack.
Primary Objectives:
Kill all hybrids (8)
Do not let hybrids suck life out of Kerrigan
Secondary Objectives:
Save brutalisks (2)
Reward for the completion of the Primary Objectives:
Evolution mission: Mutalisk
Reward for the completion of the Secondary Objectives:
+2 to Kerrigan's level
Before you start this mission, while you are still onboard Leviathan, you should set appropriate abilities for Kerrigan. I recommend picking kinetic explosion, psionic shift, autonomous extractors, healing, twin drones, effectiveness.
Right at the beginning of this mission, you will be attacked by a hybrid. Start the transformation of all available larvae into drones, and then collect the units at your disposal and go for the enemy [1]. During the battle, you should be making a constant use of healing and kinetic blast, which will keep larger zergs alive. Only zerglings may fall victim to the hybrid's attacks, but you are not going to need them anymore.
You can now take to the development of your base. Transform drones (remember that Kerrigan's ability enables you to produce two drones from one larva) build the missing extractor (again, Kerrigan's ability means that you do not have to allot collectors here) and two evolution chambers, a colony of roaches and a hydralisk cavern. In the meantime, you can also create several overlords. Once the buildings are ready, create additional roaches (10 units should be enough) and your army is ready to fight.
![Your next target is [2] - Hand of Darkness - Skygeirr Missions - StarCraft II: Heart of the Swarm - Game Guide and Walkthrough](https://game.lhg100.com/Article/UploadFiles/201512/2015121709514694.jpg)
Your next target is [2]. If you have done fast enough with the unit production the hybrid should still be there in the cell - smash the prison and attack the enemy. You need to apply the same strategy here as in the previous location - kinetic blast, and healing should ensure you with an easy victory. You can now heal our units and build additional roaches. You should also remember about making use of both evolution chambers to enhance both the offensive and defensive abilities of the zergs.

After you recreate your army, (12 roaches plus Kerrigan) the remaining units may be left behind as a temporary defense for the base. (4 roaches and 4-8 hydralisks should be enough). You set out towards [3], where there is a small Dominium outpost - it is a perfect place to start your second base. Another destination is [4] . On your way, you will encounter the first one of the captive brutalisks [A]. Set him free, thanks to which you army will gain a strong ally. Now you can strike at the hybrid's prison [4] and kill the enemy.
Now you can retreat to your base and replenish your forces. If you have used healing frequently enough, your loses should be minimal. You should have an army of around 16 roaches, 8 hydralisks and a brutalisk. Additionally, you should create 6 additional roaches and 6 hydralisks as a new defense for the base. Also remember to improve on the offensive and defensive qualities of your units! It is the time now to eliminate the threat from the west. You need to launch an attack on the mining and production Terran base in [5]. Use Kerrigan's psionic shift to kill the hordes of incoming marines, and the psionic blast to destroy tanks. If you keep healing your units during the battle, the losses should be minimal. After you destroy the Dominium base, return to the hive cluster to replenish your charges.
It is now the high time that you destroy another hybrid. Go towards [6] and keep destroying all enemy units that you encounter. Make use of the healing ability to keep your army alive. It pays off to start each attack with Kerrigan's charge attacks, since she is the most immune to damage and keeps the focus of the battle away from the more vulnerable units. After you destroy all the fortifications, and heal your army, you should open the prison and kill the hybrid. You can then go a bit to the west and set another brutalisk free.
![Another hybrid can be found in [7] - Hand of Darkness - Skygeirr Missions - StarCraft II: Heart of the Swarm - Game Guide and Walkthrough](https://game.lhg100.com/Article/UploadFiles/201512/2015121709514761.jpg)
Another hybrid can be found in [7]. On your way there, you will have to destroy several buildings, but that should be no problem to you. The hybrid will fall as quickly as the previous ones. You can go for [8] straight away and destroy yet another prison, alongside with the enemy inside. Just like previously, you will have to cut your way through a Terran base - your army will deal with it in no time at all.
![If you are bent on gaining the Shattered Command achievement, you will have to attack a heavily guarded Terran outpost in [9] - Hand of Darkness - Skygeirr Missions - StarCraft II: Heart of the Swarm - Game Guide and Walkthrough](https://game.lhg100.com/Article/UploadFiles/201512/2015121709514780.jpg)
If you are bent on gaining the Shattered Command achievement, you will have to attack a heavily guarded Terran outpost in [9]. Do not be too stingy with your troops, it's nearly the end. Of the mission. Remember to have Kerrigan keep driving the enemy away from the rest of the units and heal the wounded. You can also make use of all mineral in your stock to create additional forces.
![Now you need to launch an assault on the remaining two hybrids [10] - Hand of Darkness - Skygeirr Missions - StarCraft II: Heart of the Swarm - Game Guide and Walkthrough](https://game.lhg100.com/Article/UploadFiles/201512/2015121709514746.jpg)
Now you need to launch an assault on the remaining two hybrids [10]. Before you do though, it is a good idea to make sure that you have 15-20 hydralisks, 15-20 roaches and Kerrigan, of course. This time around, you do not need to be that much careful about your troops. Focus all of the attack on the enemy and when it falls, take to the other one. Remember that you need to keep healing your units at all times in order to prolong their fighting time, and about using the kinetic blast against the hybrids. After a short but heated battle, zergs will be the only ones standing.
Hand of darkness:
This achievement is awarded automatically after the completion of the mission.
Shattered Command:
Destroy 2 command centers They are located in [5] and [6] where the second one is protected by very strong Dominium forces. If you have acted in accordance with the guide acquiring this achievement should not be a problem to you.
Power Underwhelming:
Destroy three prisons where the hybrids are kept at the normal difficulty level before the hybrids are released. To acquire this achievement you need to hurry. It is very useful to have Kerrigan's psionic shift handle the enemy units and kinetic blast to destroy the prisons and hybrids, and healing to keep your army alive. There are 8 hybrids on the map in total - it is plenty enough to acquire this achievement. Even if you fail to destroy the second hybrid, in time, the newly-produced units should be able to handle it with the following targets.
Primary Objectives:
Destroy the Protos base
Deactivate the temple (5)
Kerrigan must survive
Secondary Objectives:
Destroy xel'naga crystals (3)
Reward for the completion of the primary objectives:
New unit: Ultralisk
+4 to Kerrigan's level
Reward for the completion of the secondary objectives:
+3 to Kerrigan's level
Before you start, you should choose from Kerrigan's special abilities. I recommend that you pick the same ones as used for the previous mission - passive abilities will be especially useful here.
You start the mission with a small force of zergs and two characters: Kerrigan and Stukov. Set out directly to the Protos base - it is poorly guarded and the additional abilities that the characters are equipped with, will allow you to raze it to the ground in no time at all.
After you seize the bridgehead Narud will attack Kerrigan - you will be only able to control Stukov for now. You start the game by creating drones and building two extractors. Your basic unit now are roaches now, reinforced by hydralisks and ultralisks. That is why you need to mutate at least two evolution chambers, a colony of roaches and a hydralisk cavern.
![Since time is of essence here, you will only have to go to the temple [2] with only 2 ultralisks at your disposal - Phantoms of the Void - Skygeirr Missions - StarCraft II: Heart of the Swarm - Game Guide and Walkthrough](https://game.lhg100.com/Article/UploadFiles/201512/2015121709514803.jpg)
Since time is of essence here, you will only have to go to the temple [2] with only 2 ultralisks at your disposal. On your way there, you can rid the mineral field of the Protos presence and send here a drone as quickly as possible, to start a new hatchery. Go to the temple straight away [2], get rid of the enemy forces and position Stukov on the control point. You will have to repel the incoming enemy forces - fortunately enough, your character can still make use of his abilities. I recommend that you retreat with your forces towards Stukov, so he can hit the hybrid with his corrosive spray.
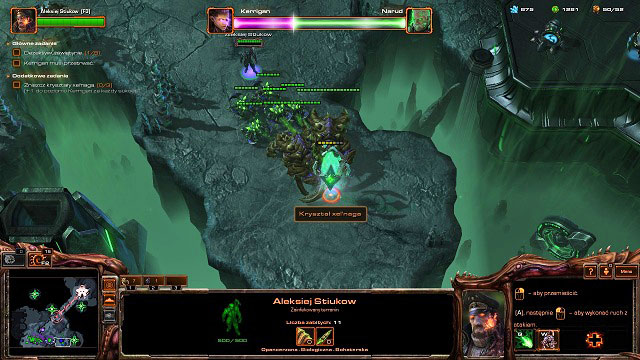
You should now return to the base and increase your army. On your way there, you can also destroy several xel' naga crystals, which will increase Kerrigan's experience level by one. To the force of 2 ultralisks and five roaches, you should now add another 7 roaches and 8 hydralisks. You also should remember about improving on their offensive and defensive capabilities, as well as leaving some units at the base for defense (8 hydralisks and 8 roaches should be enough).
![As soon as you are ready, you can set out for the next xel' naga temple [3] - Phantoms of the Void - Skygeirr Missions - StarCraft II: Heart of the Swarm - Game Guide and Walkthrough](https://game.lhg100.com/Article/UploadFiles/201512/2015121709514819.jpg)
As soon as you are ready, you can set out for the next xel' naga temple [3]. What you do here is basically the same as in the case of the previous one: you eliminate the Protos forces , position Stukov on the control point and protect him for as long as he deactivates the building. After you wait for a while ,, until your units regain health, you can launch an assault on [4]. Again, you will be up for some resistance here, but your units will eventually handle the enemy. You will be attacked by two hybrids at once - it is a perfect moment for you to obtain the The Phantoms Menaced achievement. All you have to do is keep using the corrosive splash against the enemy, and attack them with the remaining forces.
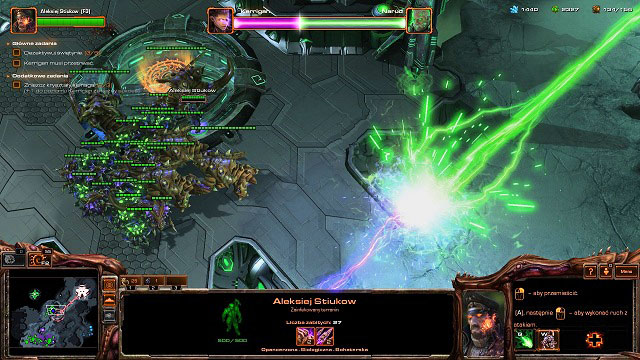
It is also a good idea to start producing ultralisks around now - all in all, you should have 5 of them in your army. You should also improve on zerg talons - this will increase the damage dealt to the enemy by your biggest creatures. It is time now for you to move your forces to [5]. On your way, you can destroy the northern xel'naga crystal [B]. The temple is very easy to seize and you should be able to deactivate it very soon. Again, you will be attacked by two hybrids, but the encounter should not be damaging to your forces.
![After you replenish the units, (you should pay attention especially to your hydralisks) you can destroy the last remaining xel'naga crystal [C], and go for the temple - Phantoms of the Void - Skygeirr Missions - StarCraft II: Heart of the Swarm - Game Guide and Walkthrough](https://game.lhg100.com/Article/UploadFiles/201512/2015121709514938.jpg)
After you replenish the units, (you should pay attention especially to your hydralisks) you can destroy the last remaining xel'naga crystal [C], and go for the temple. This one is the best guarded of all, and additionally, you will be attacked by three hybrids after you deactivate it. Still, thanks to the mixture of hydralisks, roaches and ultralisks at your disposal, you can raze every Protos to the ground. After you deactivate the temple, the mission will end in a success.
Phantoms of the Void:
This achievement will be awarded automatically after the completion of the mission.
Stukov strikes back:
Do not let Stukov die during the mission. To achieve that, you only need to make sure that he is accompanied by a large group of roaches, hydralisks and several ultralisks. Make a frequent use of the corrosive spray and summoning of infected Terrans to thwart every attempt at Stukov's life.
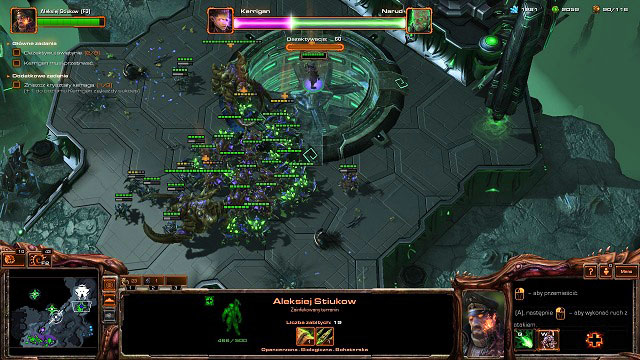
The Phantoms Menaced:
Kill 2 hybrids within 20 seconds at the normal difficulty level. Starting with the third temple, you will be attacked by two hybrids at once. It is enough to use the corrosive splash against them and order all of your forces to attack them. There is plenty of time.
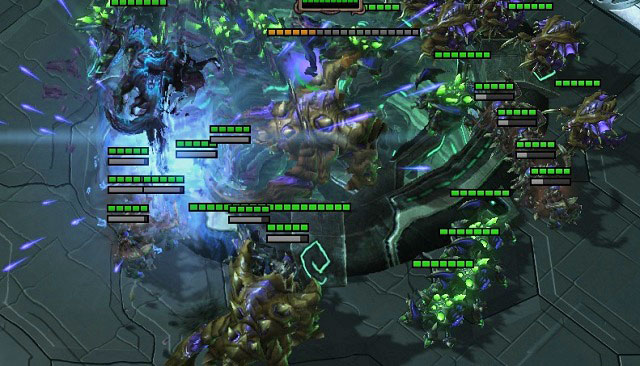
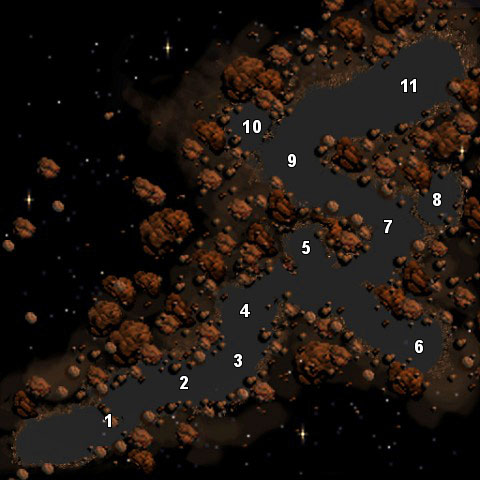
Primary Objectives:
Destroy Mira's fleet
Destroy the mercenary space station
"Hyperion" Must survive
Secondary Objectives:
Collect mineral clusters (3)
Destroy the large pirate ship
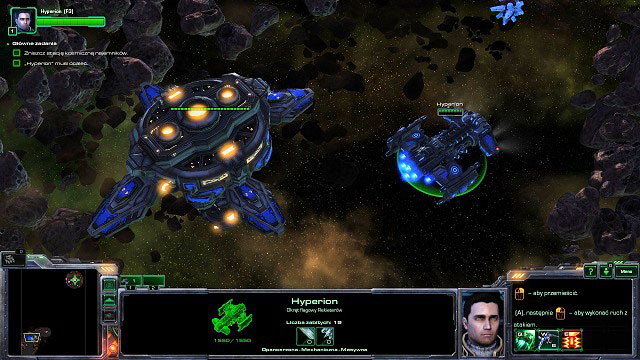
This time around, you are in control of "Hyperion" - a spaceship. The beginning of the mission is there for you to learn about the ship's capabilities. In [1] you will have to use the jump ability, in [2] air raid, and the Yamato cannon in [3]. After you reach [4] and eliminate all of the enemies, you will receive your own space station for regular production of war units.
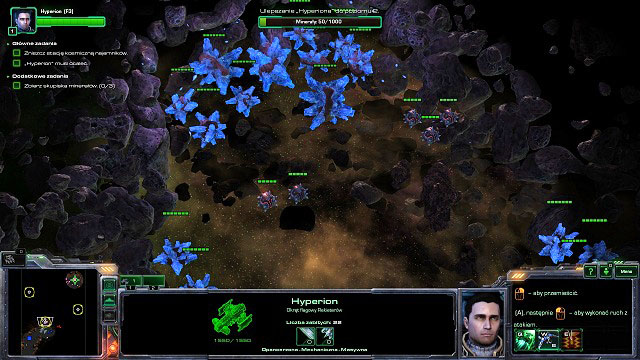
From now on, you can start collecting minerals for the improvements implemented to "Hyperion". In [5] you will encounter large deposits of these, but it is protected by magnetic mines. You should, at all times, keep avoiding them - for that purpose, you can use the jump that will transfer your ship far away from them. After you collect the minerals you can continue your journey.
![In [6] you will encounter kel-morian pirates aboard their flagship - With Friends Like These... - Space missions - StarCraft II: Heart of the Swarm - Game Guide and Walkthrough](https://game.lhg100.com/Article/UploadFiles/201512/2015121709515020.jpg)
In [6] you will encounter kel-morian pirates aboard their flagship. Once you destroy the opponent, you will receive a generator of electrical field, which is capable of rendering immobile all enemy units around "Hyperion".
![The vicinities of [7] are patrolled by a large group of Mira's battle ships and a cruiser - With Friends Like These... - Space missions - StarCraft II: Heart of the Swarm - Game Guide and Walkthrough](https://game.lhg100.com/Article/UploadFiles/201512/2015121709515045.jpg)
The vicinities of [7] are patrolled by a large group of Mira's battle ships and a cruiser. There is also an enemy space station here that keeps producing new units. Destroying it will allow your units start your own outpost and produce additional battleships.
![After you reach [8] and avoid the mines, you will be able to collect minerals from another field, and improve your ship - With Friends Like These... - Space missions - StarCraft II: Heart of the Swarm - Game Guide and Walkthrough](https://game.lhg100.com/Article/UploadFiles/201512/2015121709515048.jpg)
After you reach [8] and avoid the mines, you will be able to collect minerals from another field, and improve your ship. Then, you can proceed to [9] where there is a large enemy group. It is additionally protected by magnetic mines - you will have to use all of the capabilities of your ship to get out of this mess in one piece. It is best to wait for the moment in which Yamato is ready, and destroy one group, and retreat while destroying the pursuit ships. Repeat.
![You can now collect the minerals in [10] and go directly to the Mira's space station - With Friends Like These... - Space missions - StarCraft II: Heart of the Swarm - Game Guide and Walkthrough](https://game.lhg100.com/Article/UploadFiles/201512/2015121709515055.jpg)
You can now collect the minerals in [10] and go directly to the Mira's space station. It is necessary here to cut your way through systematically by making use of "Hyperion's" all capabilities. Once you reach the station, you need to make sure you do not get hit by magnetic mines launched at you from the station - again, the capability of jumping will come in handy here.
With Friends Like These...:
You receive this achievement automatically after the completion of the mission.
Mined Craft:
Collect all of the minerals available in this mission with "Hyperion" You not only need to collect all mineral clusters, but also the single nuggets floating in the space.
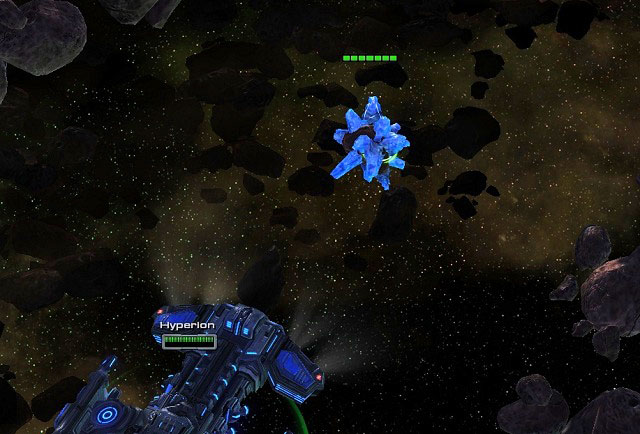
Space Ace:
Do not allow any magnetic mine hit 'Hyperion" at the normal difficulty level. It is enough to direct the spaceship in such a manner, as to avoid the red beams that show you the mine's pathway. In case of any problems, you can perform a quick jump into the hyperspace. Note! The battleships of our allies can activate mines that currently are out of your sight, so you should be ready to perform the jump at all times.
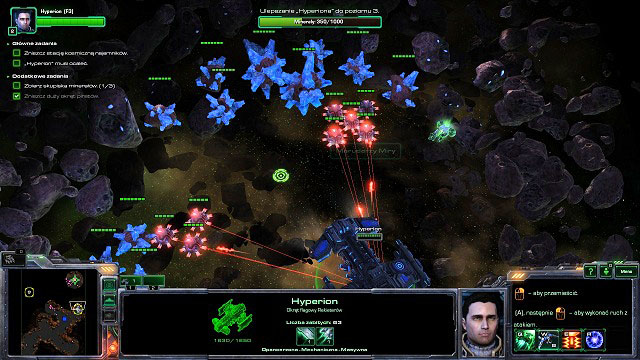
Primary objectives:
Kerrigan must survive
Rescue Jima
Protect Kerrigan
Secondary Objectives:
Find the secret files (2)
Reward for the completion of the Primary Objectives:
Evolution mission: Swarm host
+9 to Kerrigan's level
Reward for the completion of the Secondary Objectives:
+2 to Kerrigan's level
Before you start the mission, you should pick the abilities for Kerrigan. The most important are going to be: kinetic blast, psionic shift, healing an effectiveness. You can now go to Jim's rescue.
There's only one path leading up to Raynor and it is guarded by groups of Terrans. In the first corridor [1], during the fight, you will receive reinforcements. Another ones will arrive in corridors [2] and [3]. After you reach [4], you will have to put Kerrigan into the control point.
You will have to fight several skirmishes here, with the enemies coming out of the side corridors. Unfortunately, temporarily you will lose control over Kerrigan but it is enough to send to fight all of your units and kill out the Terran groups, and the door will be open for you. You can also make use of the abilities of your infectors and take control over the enemy siege tanks and the thor.
![As you continue on your path, you will bump into secret files [A] - collecting them will increase Kerrigan's experience level - Conviction - Space missions - StarCraft II: Heart of the Swarm - Game Guide and Walkthrough](https://game.lhg100.com/Article/UploadFiles/201512/2015121709515164.jpg)
As you continue on your path, you will bump into secret files [A] - collecting them will increase Kerrigan's experience level. In the next room [5], you will have the opportunity to mutate virofags, thanks to which you will be able to cut through the enemy defense quite easily.
![The infected will also help you in [6] - you will be able to cut through another Dominium blockade easily - Conviction - Space missions - StarCraft II: Heart of the Swarm - Game Guide and Walkthrough](https://game.lhg100.com/Article/UploadFiles/201512/2015121709515134.jpg)
The infected will also help you in [6] - you will be able to cut through another Dominium blockade easily. In [7] you will have to stop thor from destroying the connector. You only have to order your army to attack, and take care of the machine personally - one psionic shift and a kinetic blast should solve the problem. After you secure the area, you should make your way to the prison level.
There's of course a race with time involved here. You have 5 minutes to set Jim free, but thanks to your quite formidable army and the abilities, you will be able to make it before the explosion. In [8] after you eliminate Dominium forces, you will have to destroy the gate in your way.
![On your way, in one of the corridor's branches, there are further files [B] - Conviction - Space missions - StarCraft II: Heart of the Swarm - Game Guide and Walkthrough](https://game.lhg100.com/Article/UploadFiles/201512/2015121709515236.jpg)
On your way, in one of the corridor's branches, there are further files [B]. Then, there is a gate [9] and the last point of defense for Dominium [10] You will receive further reinforcements here, so the battle should be a mere routine. After you secure the last one of the chambers, the mission will conclude.
Conviction:
This achievement is awarded automatically after the completion of the mission.
Staying Alive:
Do not allow Kerrigan's health points drop below 50%. It is enough to keep making use of the healing ability and avoid one-man fights with the outnumbering Dominium forces.
Saturday Night Fever:
Reach the prison level with Kerrigan within 8 minutes at the normal difficulty level. Kerrigan's abilities will allow you to cut through any Terran group. You should not wait for too long in ne location; you can also heal your troops while marching.
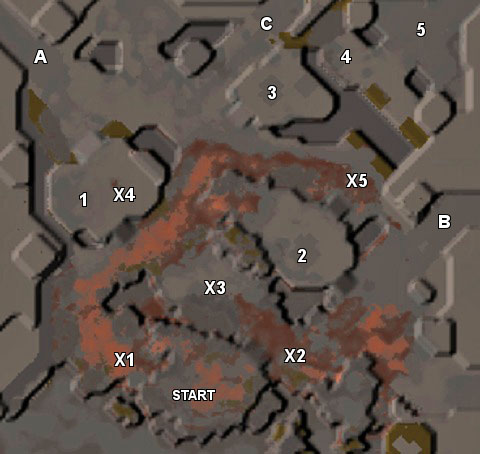
Primary Objectives:
Protect the bile launcher (5)
You cannot lose the 3 bile launchers (3)
Destroy Dominium bases (2)
Secondary Objectives:
Destroy the gates of Augustgrad (3)
Reward for the completion of the Primary Objectives:
Evolution mission: Ultralisk
Before you start, pick Kerrigan's abilities. What you need is: kinetic blast, psionic shift, autonomous extractors, healing, twin drones, effectiveness and apocalypse. Of course, you can experiment with different abilities, but this is one of the most effective combinations that you can create. Not only does it allow you to fight the enemy, but also to increase the longevity of your forces, thanks to healing, and to increase the speed that the minerals and the gas are mined with.
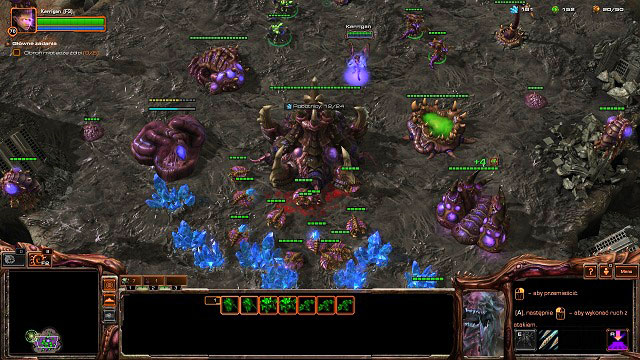
The mission starts with the typical base development. You create drones, build extractors. The hardcore of your army is going to consist of hydralisks and roaches; you need to build the right buildings. It is necessary that you also build an additional evolution chamber. I also recommend that you create a group of 10-15 mutalisks for the bile launcher's protection.
![The first one of the throwers is going to land in [X1] - Planetfall - The finale - StarCraft II: Heart of the Swarm - Game Guide and Walkthrough](https://game.lhg100.com/Article/UploadFiles/201512/2015121709515277.jpg)
The first one of the throwers is going to land in [X1]. You can also move your army there and wait for the creature to arrive, while developing your base. After you repel the Terran attack, you can move your forces to [X2] and wait for the next thrower - it is enough to leave 6 hydralisks and 6 roaches here, and Kerrigan will be able to keep exploring the map.
You set out to the west. In [1] you will encounter a Dominium base that is protecting a considerable deposit of minerals. You can eliminate it quickly (Kerrigan, 6 hydralisks and 6 roaches will deal with it without any problems) and build your next outpost here. A bit further to the north, there is the first one of the three gates of Augustgrad [A]. destroying it will be a step towards the Death Start achievement.
![In the meantime, you should secure another landing site [X3] - Planetfall - The finale - StarCraft II: Heart of the Swarm - Game Guide and Walkthrough](https://game.lhg100.com/Article/UploadFiles/201512/2015121709515375.jpg)
In the meantime, you should secure another landing site [X3]. You can move some of your troops here from [X1] and [X2] and leave the 15 mutalisks you created earlier, as a reserve. You should gather some more units and launch an attack on the Terran base [2]. You need to be careful here, as there is a planetary fortress here that is capable of wounding the ground units. After you clear the area, also here you can start a new hatchery.
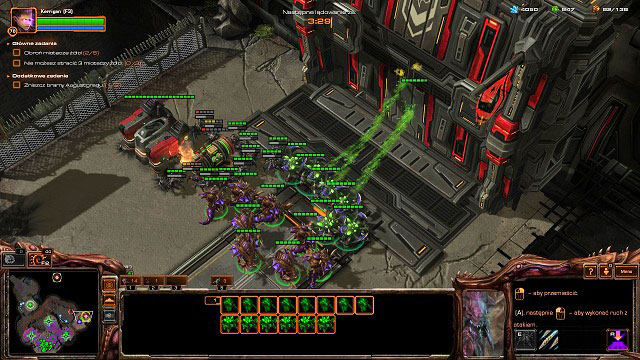
It is the time now to destroy another gate of Augustgrad. You need to reach [B] and destroy all the Terran units and fortifications on your way. Since the defense is very poor, the entire operation should take no longer than a minute and a half.
![You can now go to [X4] - the area should be cleared already, so the only thing to do here is leave several units and go to [C] - the last gate of Augustgrad - Planetfall - The finale - StarCraft II: Heart of the Swarm - Game Guide and Walkthrough](https://game.lhg100.com/Article/UploadFiles/201512/2015121709515367.jpg)
You can now go to [X4] - the area should be cleared already, so the only thing to do here is leave several units and go to [C] - the last gate of Augustgrad. Since there is quite a number of anti aircraft turrets here, the ground attack is going to be the best option. After you set the way open for the rest of your forces, you will be able to retreat and focus on protecting the bile launchers. The last one will land in [X5]. In the meantime, you can destroy the terran out post in [3] (if you haven't yet).
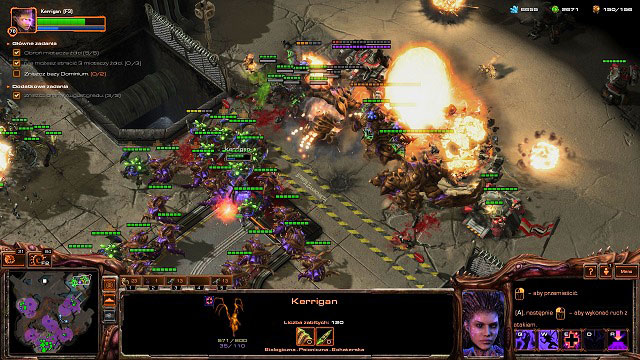
The bile launchers will destroy the orbital cannon. Now there is a new objective for you - you need to destroy two Dominium bases in [4] and [5], in the corner of the map. It is enough for all of the units on the map (you will receive additional reinforcements from Leviathan) to launch an attack. It also is a perfect situation to make use of your strongest abilities like apocalypse. With 15 hydralisks, 15 roaches and several ultralisks, you should be able to annihilate all Terrans and finish the mission.
Planetfall:
This achievement is awarded automatically after the completion of the mission.
Fully Operational:
Do not lose even one bile launcher. The most important thing in here is to have a group of quick response here. The thrower [X1] is going to be attacked several times - a group of 15 mutalisks should be able to handle any enemy. At the thrower [X2] you can leave the abovementioned 6 hydralisks and 6 roaches - they will hold until the end of the mission. Positions [X3] and especially [X4] are the domain of your army and mutalisks. [X5] is the easiest to protect because, after the thrower is deployed, the mission is practically over.
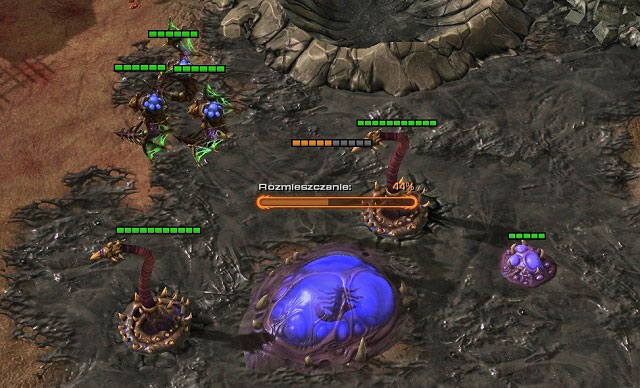
Death Start:
Destroy 3 gates of Augustgard at the normal difficulty level, before the last thrower lands. To achieve that, you need to hurry Fortunately, all gates, save [C] are quite poorly defended, and Kerrigan (using the powers mentioned at the beginning) and a group of hydralisks and roaches should have no problems dealing with them. To launch an attack on [3], you are going to need much more force, including ultralisks (you will receive several units of his type while defending the [X3] and [X4] throwers).
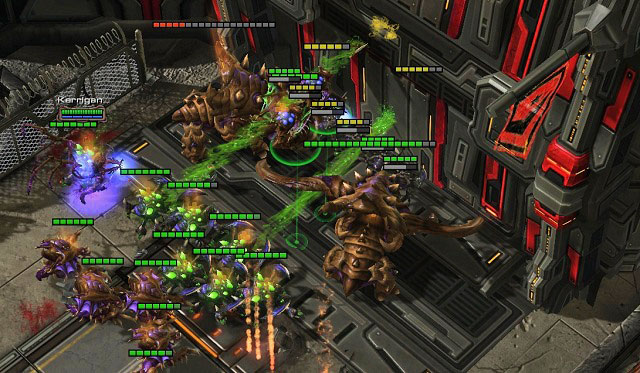
Primary Objectives:
Destroy the power supply connector
Destroy the psionic destroyer
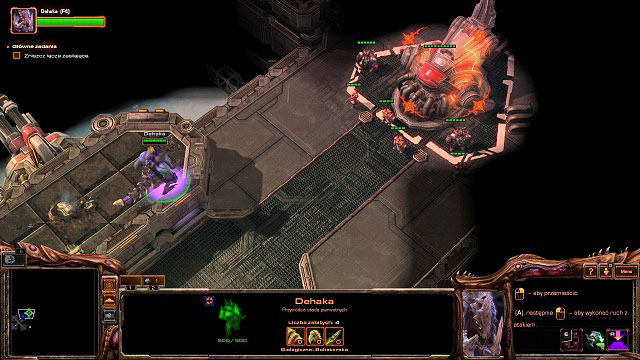
The selection of Kerrigan's special abilities remains the same as for the previous mission: kinetic blast, psionic shift, autonomous extractors, healing, twin drones, effectiveness and apocalypse.
You start the mission as Dehaka and your objective is to reach and damage the power supply connector for the psionic destroyer. As you proceed towards [X1] you will have the opportunity to use your character's special abilities to cross over cliffs and quick healing.. After you destroy the connector, the destroyer's field will retract, which will allow Kerrigan to infiltrate Dominium grounds.

You need to act quickly. You only have several minutes to deal as much damage to the Dominium forces as possible. Start with selecting all the larvae and transforming them into drones. Now, I suggest that you collect all the original units and Kerrigan, and launch an assault on [1]. Focus here on destroying siege tanks and bunkers. Once you disable the defense, you can go back to your base and create as many zerglings as you can. The created units need to be dispatched to [1] where they will help Kerrigan destroy the remaining Terran structures.
![Move to [2] as quickly as you can, where there is the Dominium base protecting a mineral deposit - Death from Above - The finale - StarCraft II: Heart of the Swarm - Game Guide and Walkthrough](https://game.lhg100.com/Article/UploadFiles/201512/2015121709515434.jpg)
Move to [2] as quickly as you can, where there is the Dominium base protecting a mineral deposit. With the help of zerglings you should be able to defeat the defense and destroy all the structures without any problem. After you seize the area, it is a good idea to create a hatchery here. Now you can get prepared to launch the attack on[3]. Mutate extractors, three evolution chambers, a hydralisk cavern and a colony of roaches. You also need to create more drones to cover all mineral deposits.

Zerglings are no longer going to be of any use to you. That is why you can dispatch them for a suicide mission to [4]. They should be followed by Kerrigan and. As soon as the opportunity arises, you should initiate apocalypse. If you aim it against the Terran defense, not only will it destroy most of the enemy units, but also damage some of the structures. The damaged buildings should be finished out with kinetic blast and regular attacks. 30 seconds before the end of the countdown, retreat to your base with the remaining units. If you were quick and effective enough when it comes to the destroying of the Dominium bases, you should be awarded the Terran Up the Sky achievement.

The field generator will go online again; it is the time for the next sabotage. This time around, you can control Dehaka and develop your hive clusters at the same time. . I recommend that you improve on the units and produce entire groups of hydralisks and roaches 920 units each). You can also consider evolving the den to a hive and building a cavern for hydralisks (they will come in handy for quick destruction of enemy structures).
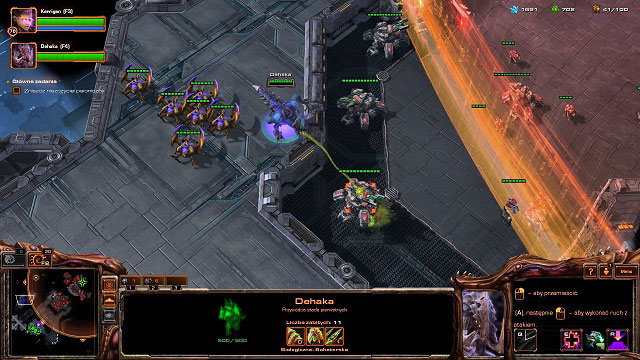
Return to Dehaka now. This time he is helped by a group of roaches. Additionally, you received a new special ability - pull, which allows you to pull an enemy unit towards you. Use this ability on the nearest siege tank. Grab the incoming enemies and keep healing the wounded units, as you make your way through to the connector [X2], and then damage it. This will allow Kerrigan to take the initiative again.
![Once you make sure that you have around 20 roaches and 20 hydralisks, strike on [3] - Death from Above - The finale - StarCraft II: Heart of the Swarm - Game Guide and Walkthrough](https://game.lhg100.com/Article/UploadFiles/201512/2015121709515513.jpg)
Once you make sure that you have around 20 roaches and 20 hydralisks, strike on [3]. If you make a wise use of Kerrigan's abilities, you should sustain no losses here. Depending on how much time you have left, you can try and weaken locations [4] and [5], or retreat, replenish your forces, and wait for Dehaka's next move.
Your character has a new ability at his disposal now; create spawns, which creates two clones of his. Using the new ability, and healing, make your way towards deeper into the fortification towards the last one of the connectors [X3]. In case you encounter a larger group of humans, I recommend that you pull them one by one with your ability. Soon you will reach the connector and you will be able to deactivate it. The psionic destroyer will be no threat after that happens.
![It is the time now to launch the final attack on Terran positions in [4] and the psionic destroyer itself [5] - Death from Above - The finale - StarCraft II: Heart of the Swarm - Game Guide and Walkthrough](https://game.lhg100.com/Article/UploadFiles/201512/2015121709515564.jpg)
It is the time now to launch the final attack on Terran positions in [4] and the psionic destroyer itself [5]. With the 20 hydralisks, 20 roaches and 5, or more, ultralisks this should be no problem to you. Additionally, you will be joined by Dehaka accompanied by a group of ancient zergs - you can include them into the assault team. Destroy everything in your path, disable the psionic destroyer and bask in the light of your victory. There is only one mission left ahead of you in the Heart of the Swarm campaign.
Siege:
This achievement is awarded automatically after the completion of the mission. .
Terran up the Sky:
Destroy 20 enemy structures before the psionic destroyer's field reactivates. The trick is that you make use of Kerrigan's all abilities. Since you do not have an army that is ready to use yet, you need to make do with the assigned units. Destroying the enemy's defense (bunkers and siege tanks) with kinetic blast, killing troops with psionic shift and healing the units that you originally got is the key to success. I recommend that you also focus on disabling the defense, where you leave the demolition job to zerglings. After you destroy [1] and [2], you should start with [3]. Just to make sure. Apocalypse is capable of destroying AA turrets, enemy units and damaging larger structures. The damaged buildings should then be destroyed with Kerrigan's attacks or kinetic blast. There is little time, but that's enough.

Apex Predator:
Do not let Dehaka die during the mission at the normal difficulty level. Keep creating clones and healing. In case of a battle with larger forces, you can use the pulling ability in order to isolate single units. The task is simple as long as you charge right into the enemy forces.
Primary Objectives:
Destroy the palace gates
"Hyperion" must survive
Secondary Objectives:
Clear the entrenchments (3)
Again, you should chose a standard set of Kerrigan's abilities: kinetic blast, psionic shift , autonomous extractors, healing, twin drones, effectiveness and apocalypse.
Start the game by developing your base. Mutate extractors, transform larvae into drones, build three evolution chambers, a hydralisk cavern, a colony of roaches and improve your den to a hive - you are going to need it to build a hydralisk cavern. In the meantime, you will receive "Hyperion" as a means of reinforcement. As of now, you can ignore it and focus on your base. Once you are done with the buildings, you can take to the production of units. - 15 roaches and 15 hydralisks for a good start.
![As you wait for the new units, you can collect your forces and go for [1] - The Reckoning - The finale - StarCraft II: Heart of the Swarm - Game Guide and Walkthrough](https://game.lhg100.com/Article/UploadFiles/201512/2015121709515622.jpg)
As you wait for the new units, you can collect your forces and go for [1]. There is a small Dominium base there, which can be destroyed without any problems. You can locate a hatchery here and start mining for minerals and vespan. You should also remove the outpost in [2]. Now, you definitely should improve your base's defenses with the units mentioned in the previous paragraph.
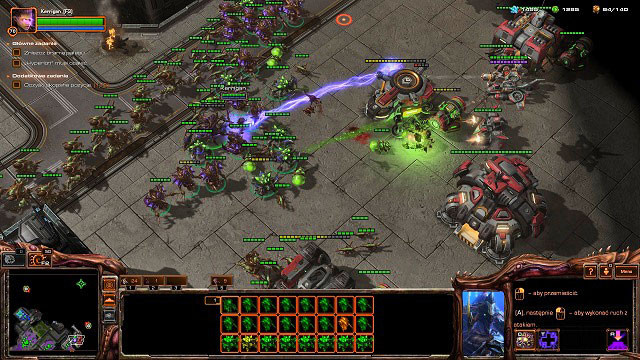
I recommend that at this moment you dispatch at least 10 hydralisks to Raynor's base. To serve as a second line of fire, and as a protection for "Hyperion" against Dominium attacks. After you collect the troops, you can continue to the right side. Your target now is [X1] where there are Dominium entrenchments that prevent zerglings from proceeding. Once you open the way for Zagara's forces, you can accompany them at attacking the Terran base in [3]. Your last task in this portion of the map will be to attack the base in [4] and destroying the generator, which will allow you to keep sending reinforcements regularly towards the enemy lines.

You also need to pay attention to Raynor's troops' actions. Typically, after he launches an attack, Mengsk will send a retaliation group against him. The first one of such groups is "Heaven's Fury". I recommend that you cut through [4] as quickly as you can, and seize Dominium troops before they damage Hyperion. The hydralisks that you left earlier at Raynor's can be used to obstruct the progression of Mengsk's forces.
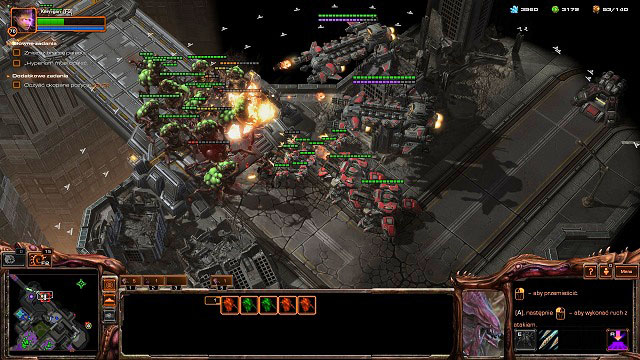
Remember to produce new hydralisks and roaches at all times.! After they join your army, along with the units left at Raynor's, you can attack the outpost in [6]. Your next target is going to be the entrenched Dominium forces in [X2] - one quick attack will eliminate them from further fight and will allow Stukov's forces to reach Augustgrad. During your offensive, you can be attacked by the Alpha squadron - another elite force from Dominium. It consists of battle cruisers and that is why they will require attention from hydralisks and Kerrigan.

It is now time to replenish your forces. You are going to need at least 30 hydralisks, 20 roaches and 5 ultralisks. Attack the base in [7] and the blockade in [X3]. A successful assault will let Dehaka's forces into the city - it is almost the end of the battle. You need to replenish your forces and get ready to attack Mengsk.

30 hydralisks, 30 roaches and 10-15 ultralisks are enough to pave your way inside the palace. In the meantime, you can be attacked by a giant battle robot - Odin. If it doesn't counter-attack, you may be sure of its presence at Dominiums last point of defense [8]. Order all your forces to attack and destroy all Terrans in your way.
![The last target - the palace gates [9] - The Reckoning - The finale - StarCraft II: Heart of the Swarm - Game Guide and Walkthrough](https://game.lhg100.com/Article/UploadFiles/201512/2015121709515792.jpg)
The last target - the palace gates [9]. It is defended by two indestructible turrets, but your numbers will allow you to reach inside and complete the mission anyways.
The Reckoning:
This achievement is awarded automatically after the completion of the mission.
Swarm Guardian:
Complete the mission in such a way, that Hyperion does not take any damage. Before you start your first offensive, you should sent a small batch of your forces to Raynor. 10 -15 hydralisks is enough to drive the first attack away. The second one is much stronger and you need more forces. It is possible to seize the Dominium assault team using the main army of yours. Hyperion may be attacked by three different types of units: Heaven's Fury (the airborne units), Alpha squadron (siege tanks and battle cruisers) and Odin (an improved version of Thor)
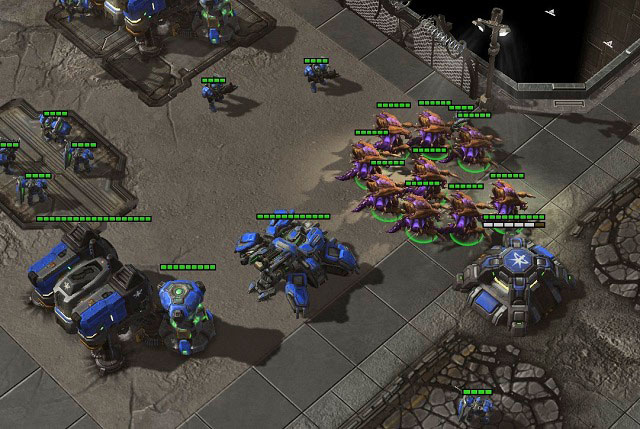
Zerg Rush:
Complete the mission within 25 minutes at the normal difficulty level. You simply need to hurry. The description provided above allows you to finish the mission in about 20 minutes. What is most important, is the big clusters of hydralisks and roaches that are eventually going to be reinforced with 10-15 ultralisks.


 Sniper Elite III: Afrika Game Guide & Walkthrough
 StarCraft II: Wings of Liberty Game Guide & Walkthrough
 Still Life 2 Game Guide & Walkthrough
 Spore Game Guide & Walkthrough
 Secret Files 3: The Archimedes Code Game Guide & Walkthrough